
This tutorial is to show you how to install the German Audio Specialties E30 Cabriolet Subwoofer and Amp Rack.
Be warned, this is a very advanced installation, and will require metal cutting, upholstery, and wiring skills.
Quick disclaimer: ALL of this is your responsibility. Any damage that has resulted from installing or attempting to install this product is not in any way the liability of German Audio Specialties. We expect this guide to serve as a set of instructions for an advanced and qualified technician.
If you break it, it is your fault!
We have done our absolute best to provide a product that will perform beyond your expectations while not altering your vehicle in any way that would be remotely unsafe...but proceeding with this installation is entirely your decision and responsibility.
Disclaimer done except for one last statement: your purchasing a subwoofer box and/or amp rack from German Audio Specialties absolves us of any responsibility.
Now, let me complain about your choice in vehicles.
This subwoofer system sounds fantastic. That means a deep, loud, clean, good-sounding subwoofer system that focuses the bass energy into your cabin, as do all of our designs.
This subwoofer system is unlike anything else on the market.
Unfortunately, the complexity of the installation means there is a lot of work required on your end. I cannot stress highly enough: this car is a bitch. Most professionals would expect at least $500 to take on a project of this scope.
Our goal with this tutorial is to show you how to produce a high level of workmanship in your own car. We hope you appreciate our efforts. We have put no less than 30 hours into creating this document to help you complete this project. We aim to simplify this complex procedure to make this a "DIY Project" you can be proud of.
A quick overview of what you will be doing:
-Cut several precise holes
-Install "Sound Damping" materials
-Install the "Port System"
-Upholster bare metal
-Run wires and connect to the factory wiring
-Connect and mount amp(s) and rack
-Install your choice of "deck" in your dash
To install this box and/or amp rack, you'll need a few things:
Metal Cutting stuff:
-Tinsnips. (I use Snap-On "Avation Style" models DAL9A and DAR9A).
-Pneumatic saw. (I use the Porter Cable PTX5).
-Cordless reciprocating saw with metal cutting blade, such as the 18V Porter Cable. There is a link later on.
-Optionally, you may wish to consider a 4 1/2'' hole saw (good luck finding that) and you may wish to use a roughly 1 1/2'' hole saw. More on that later.
Sound damping material: You will need enough to competely cover most of the inside of the chamber behind the seat. If you are willing, cover every bit. We used "Peel and Seal" roofing patch on this installation but we do not recommend it. We do recommend a high-quality butyl rubber aluminum coated sheet damping material, possibly a product that rhymes with "Wino Splat". The better a job you do at both sealing and controlling resonances inside this chamber, the better. Please measure the area to be covered and obtain accordingly.
Cabling:
-Audio: One, two, or three pair of RCA cables.
-Speaker: 12' 16-18 ga wire, cut into four 3' lengths.
-Roughly 6' of 14-16 ga wire.
-3' 16 ga primary wire (blue is most commonly used).
-18 feet of 4 gauge power cable.
-4 feet of 4 gauge ground cable.
-Appropriate fuse holder and fuse. Generally we use AGU, but ANL is preferred. If you decide to use a second battery in the back of the vehicle, you may wish to run 2 4ga power wires and 2 fuse holders, or larger wire. This is massive overkill for most installations, but if that is the goal, have at it.
Optionally, subwoofer level control cable.
Terminals:
You will need an assortment of butt connectors in 16ga and and ring terminals in 4 ga sizes for battery and ground connection, possibly connectors for your amplifier. You need to know what you need based on your equipment, that is all on you.
Tools:
You need an assortment of sockets, screwdrivers, drills - general "DIY car enthusiast" stuff should do. If this is your first attempt at a major project, maybe you might want to consider something else, or hire a pro.
We HIGHLY recommend you buy a top quality crimper rather than the chintzy stamped steel one. We recommend the Channellock crimper: http://www.channellock.com/Category.aspx?zcid=125
You may also want wire strippers. Crimpers can strip wire, but not as easily as wire strippers. If you choose to solder your connections, have at it. You already know how to do that, right?
Read through this guide carefully. If you have found nothing left off this list of materials, tools and supplies, you have not read carefully enough. Yes, this is a test. Do it well or hire a professional.
Before anything else, you need to prep your car:
-Strip trunk, including carpet and paneling.
-Remove radio and all the trim in the car (including left under-dash panel)
-Remove door sills and kick panels, left and right
-Remove rear seat, top and bottom
You should not have to remove the glovebox or the rear side panels.
For the airbag guys: you might as well pull that stupid metal brace, it makes the job easier.
Please understand throughout this guide that our goal is to show how we did it. Do keep in mind that this is not the only way to do this, but we feel this to be the best. Obviously, you need to follow the cutting guidelines very closely to duplicate what we did, but you can simply cut 8" round holes if you choose. Our aim was to retain chassis strength. This does require fairly precise metal cutting skills. Expect this to be "cut and fit" - where you make small incremental cuts until it fits. We will get to that part later in the tutorial. Read through the entire tutorial before starting, do some thinking about your own level of fabrication and cutting skills and decide if you are capable of handling this level of installation. We currently do not have a list of people who have accomplished this installation, but we expect to have a nationwide netweork on G.A.S product installers available at some point.
Let's start off with running the wires. Take your pick, but I say run the power wire first. We'll be running signal wires up the left and power wires up the right, thus the need to remove the door sills. You should try to run the wires in the factory harnesses whenever possible. In your case, there is no channel for a harness on the right side of the car, so this makes it a little tougher.
We did not take pictures of this process, as it is up to your own discretion how you choose to run the wires in your car. Commonly, we drill a hole under the battery tray to run the power wire through and then route it along the edge between the floor pan and the carpet. If you choose this route, use a grommet to protect the wire as it passes through the firewall.
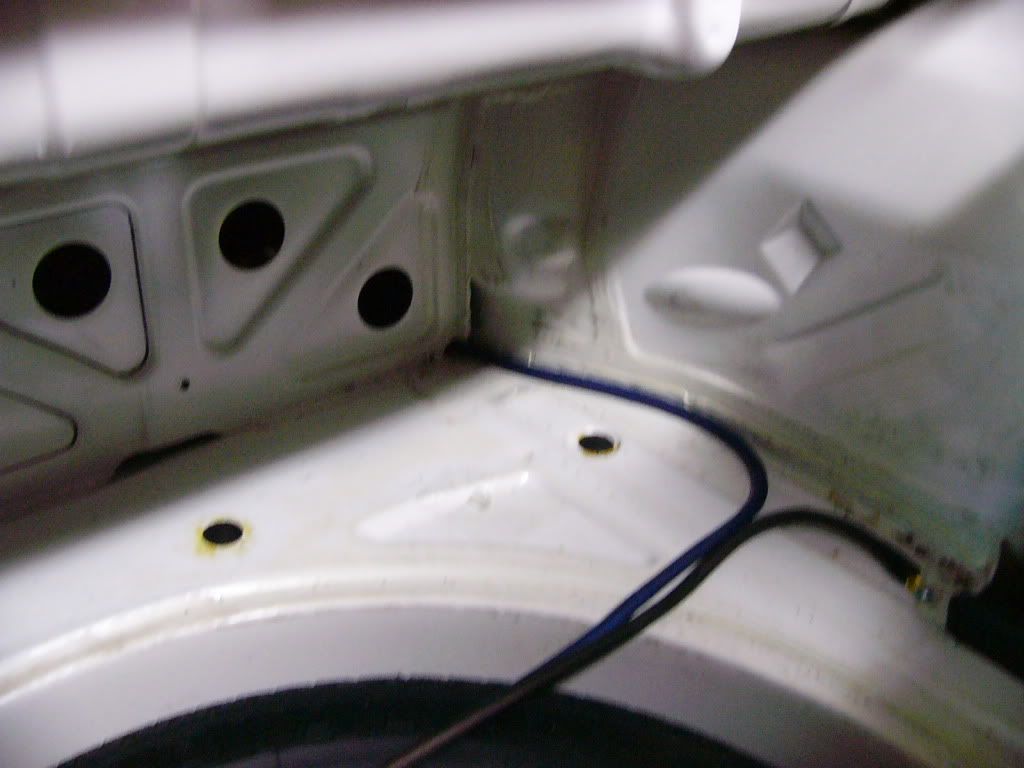
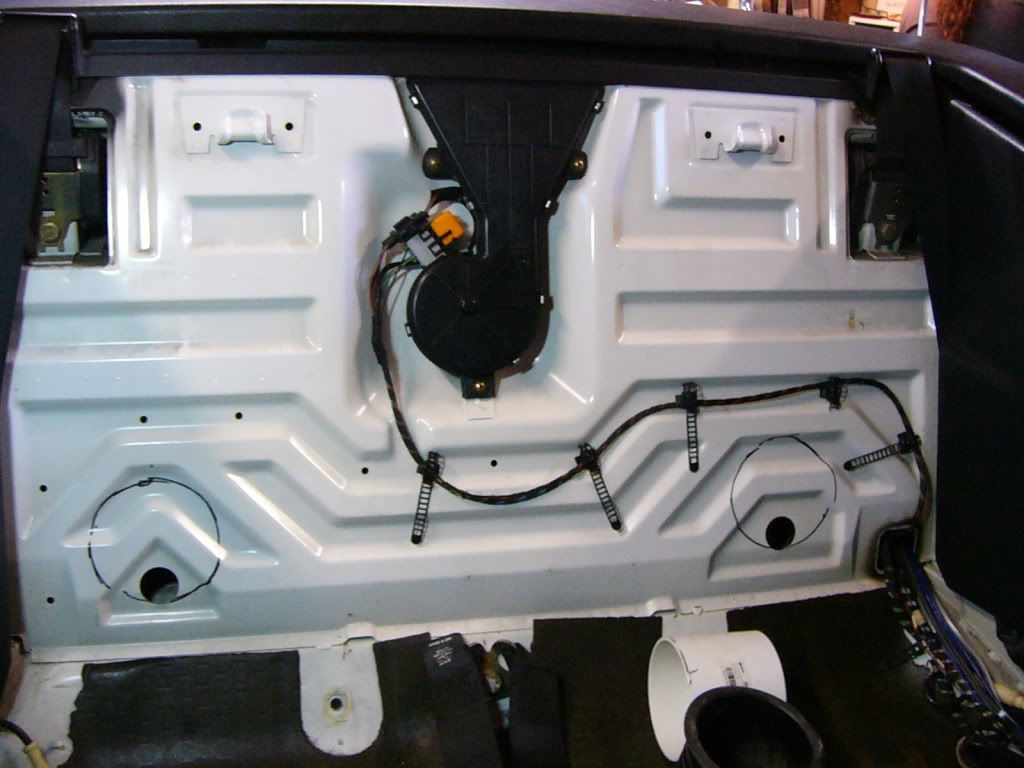
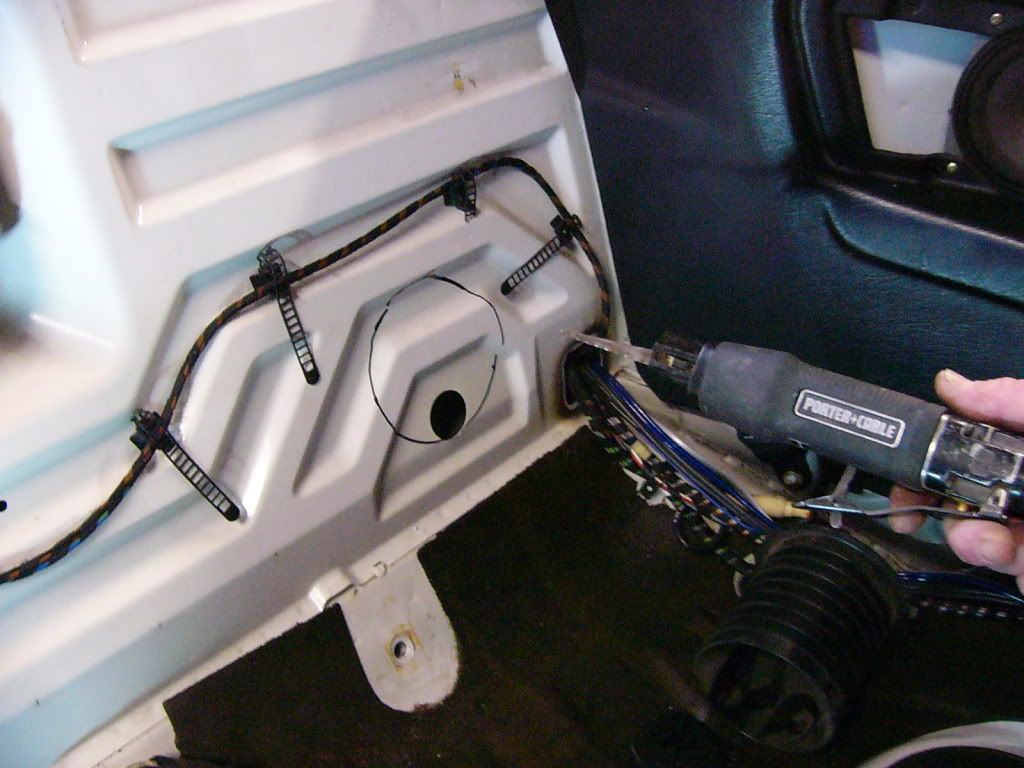
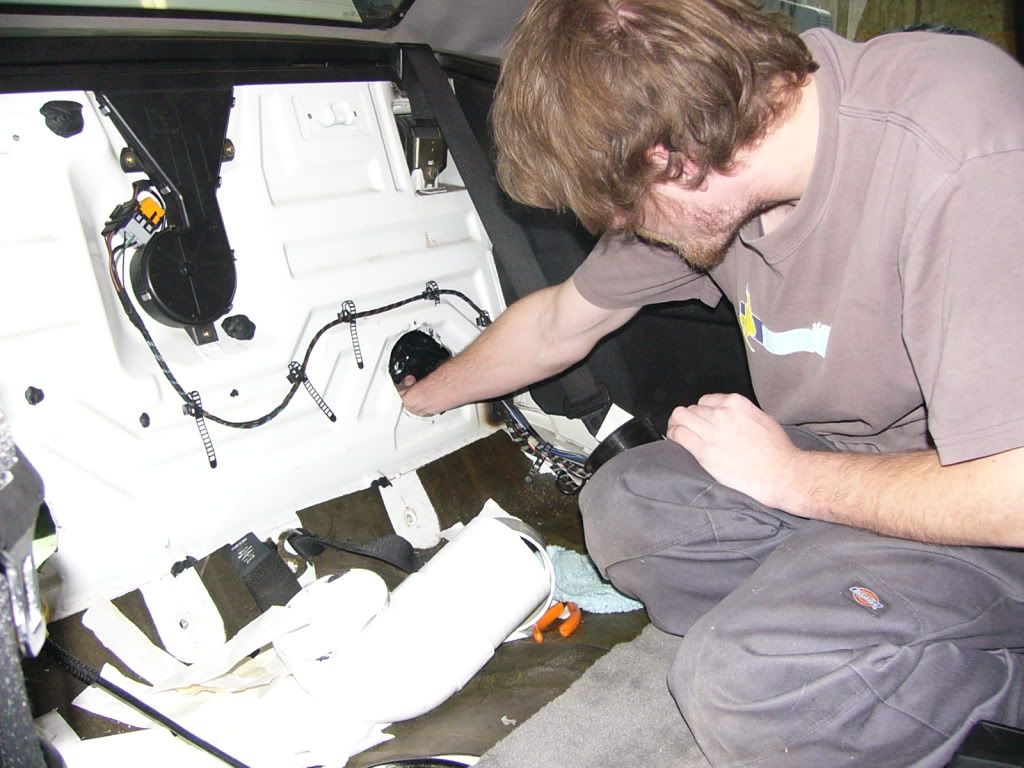
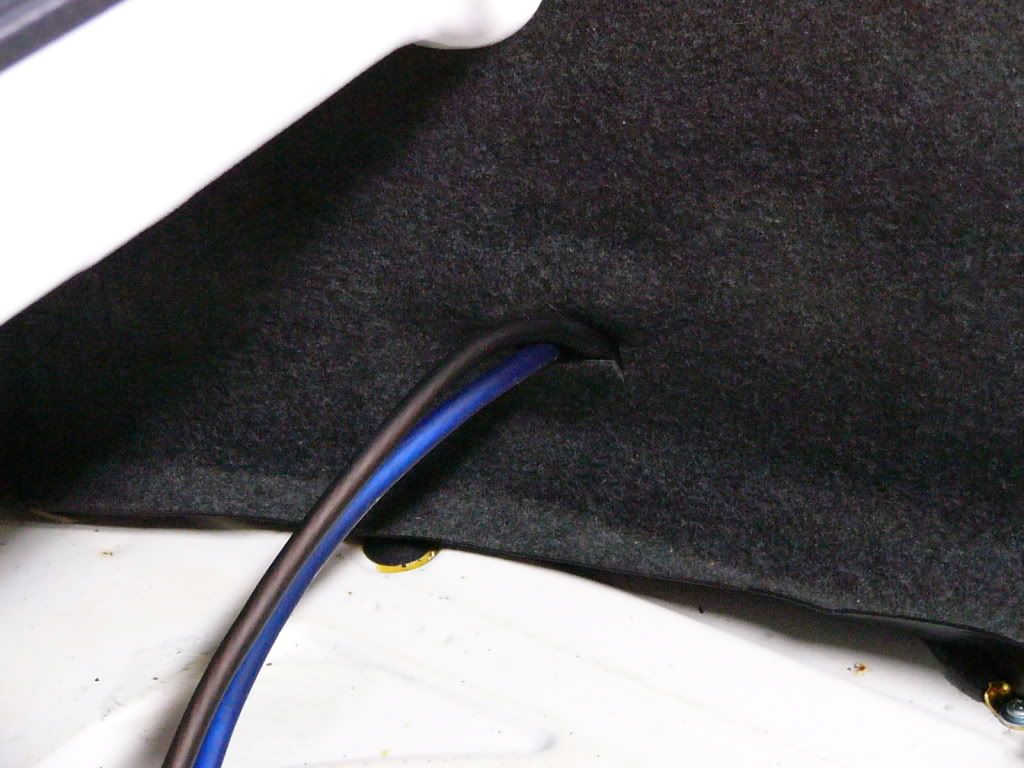
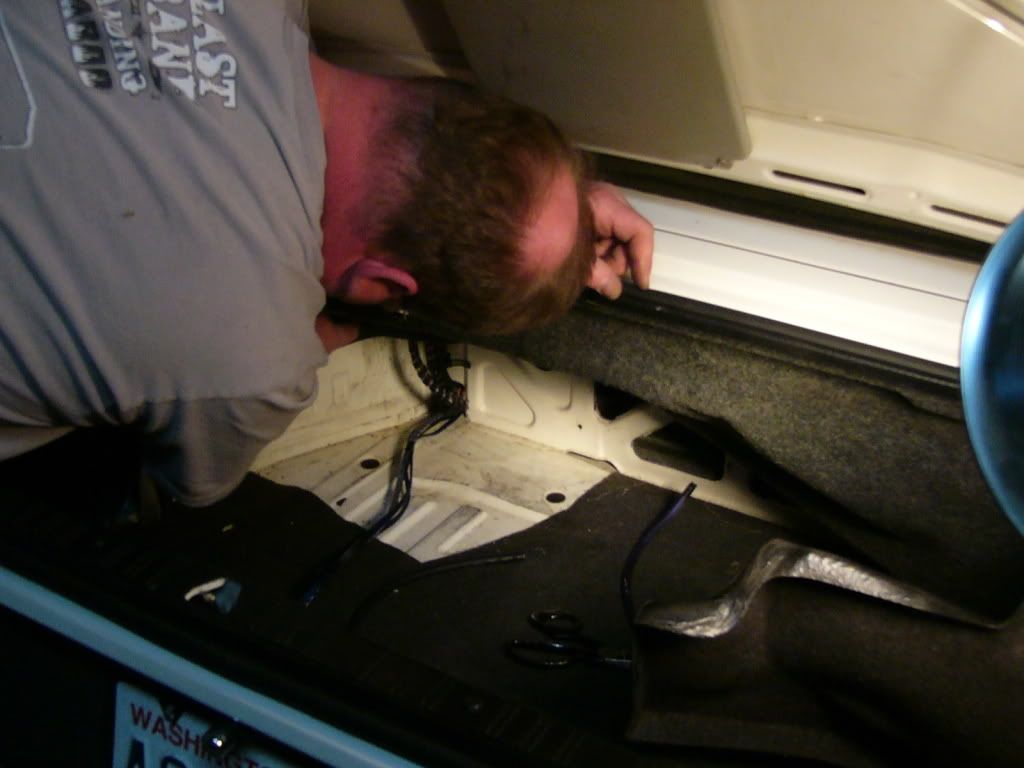
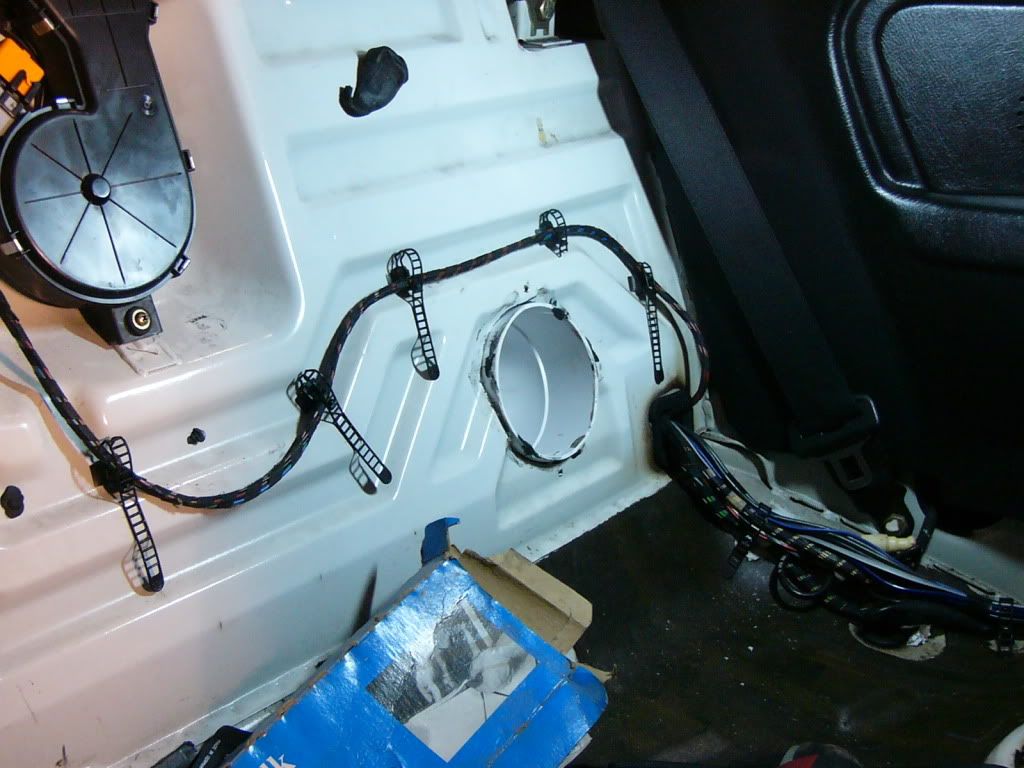
In the back, we run the power wire between a gap in the side wall and the seat back. You can see how we route it along the fender well in this picture:
The wire should end up like this in the trunk (this is obviously both power and ground):
And of course, make your ground point now.
I cannot stress enough how important a proper ground point is. I wish we had better pictures of this process, but it was very difficult for us to photograph. This connection is the single most important connection in your entire system. It is absolutely imperative that you scrape the metal shiny clean, making sure to get through any paint, primer, and coating that may be on the metal. We use a variety of methods to clean the metal, ranging from razor blade to carbide burr grinder. Whatever you use, make sure the metal is absolutely clean. Connect the ring terminal to the chassis with either a 1/2'' (large head type is ideal) #10 Philips screw, or ideally a nut and bolt with washers to maximize the connection to the chassis. It doesn't need to be huge, but make sure you make your ground point on the floor of the car (not a side well, and nothing that has been spot welded). If you're worried about corrosion issues or rust, squirt a little spray paint on your ground point, but make certain it is a metal-to-metal connection.
Now, let's run your signal cables. This guide is predicated upon the idea that you have a premium sound system from the factory installed in your vehicle. If it does not, please contact us for further instructions.
Let us make something clear here: you need to use "common sense" when running your wires. We have chosen to NOT provide pictures, but rather a detailed written description. If this guide fails to give a clear understanding of how to proceed, please consult a professional.
First thing to do is to lay out your three sets of RCAs. You should easily be able to reach through the deck opening to grab the wires.
We prefer to run 3 pairs of RCA cables. If you need to run other cables from the front to the back (Subwoofer Level Control for example) now is the time to do this. After you have the 3 pairs of RCAs and sub level control cable laid out, wrap a band of tape around the bundle every (aprox) 8" to secure the wires neatly. Choose your sub level control location at this point, before you wrap the cables, as you do not want to end up re-wrapping the cables or trying to relocate anything.
We recommend you start running the wires inside the dash. Start by running the bundle over the steering column, from the left towards the radio.
You will want to run the cables over the metal dash brace that is visible through the radio opening on the left. You need to run your cables there to minimise the chance of interfering with the heater controls.
No matter how you run them, make certian that the wires cannot interefer with any of the controls of the vehicle or heater system.
You will want to adjust the length of the RCA cables in such a way that approximately 4" protrude from the radio opening. Keep all slack towards the rear of the car. Make certain that you can put the subwoofer level control where you want it.
Now, route the wires along the factory route, following the stock amplifier harness. That means you will want to either use "wire ties" to keep the wires in place or use the factory wire retainers. Follow that wire route for the RCA cables all the way to the trunk, including through the grommets and wire channel leading through to the trunk. Please make certain to re-install the factory grommets after you are done adjusting lengths and position of the wires.
You will want to make sure all the cables are tucked neatly into the route, so as not to get pinched or abraided. A screw through a wire may destroy your equipment, be very careful of how you route them.
After the power, ground, and signal cables are in place, now you can begin the speaker wiring. You will need to cut and expend all 4 pair of speaker wires and the remote wire. Should you choose to install one of our "amp racks", you will also want to extend the power adn ground of the fatory amplifier.
For an overview of how to connect your wires, refer to our "$500 Stereo" thread, located here: http://www.r3vlimited.com/board/showthread.php?t=231107
You may wish to connect the deck at this point, now that all of the wiring is in the trunk. We would wait until the job is nearly complete...but it feels good to have something fully finished. Your call, we say wait.
Now it is time to cut some metal.
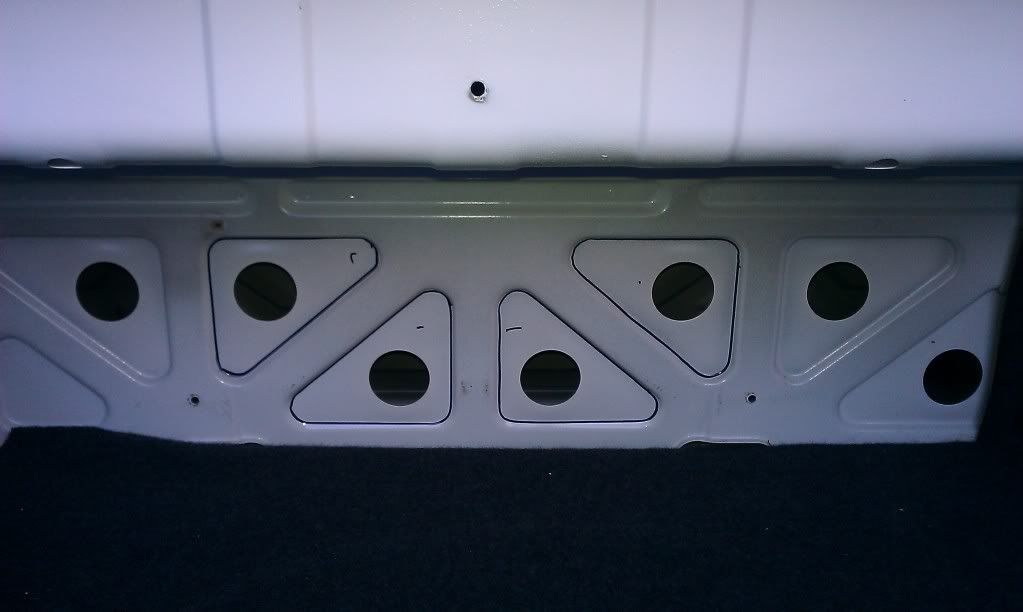
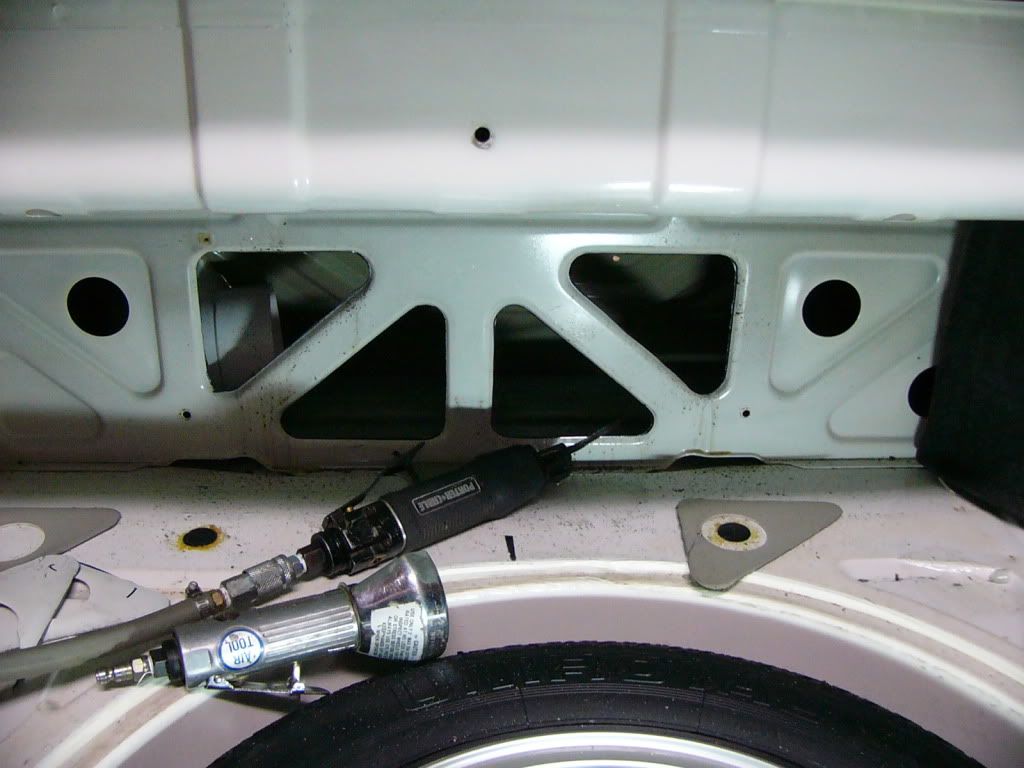
First, trace the outline of the triangles you see on the back wall, facing the trunk interior. Along these lines is where you will be cutting. Only cut the four triangles in the middle.
Cut out the four triangles with an air saw, starting the cut from the holes in the middle. This is the most challenging part of the install, and cutting oil (like Rapid Tap) is necessary.
Cutting oil application:
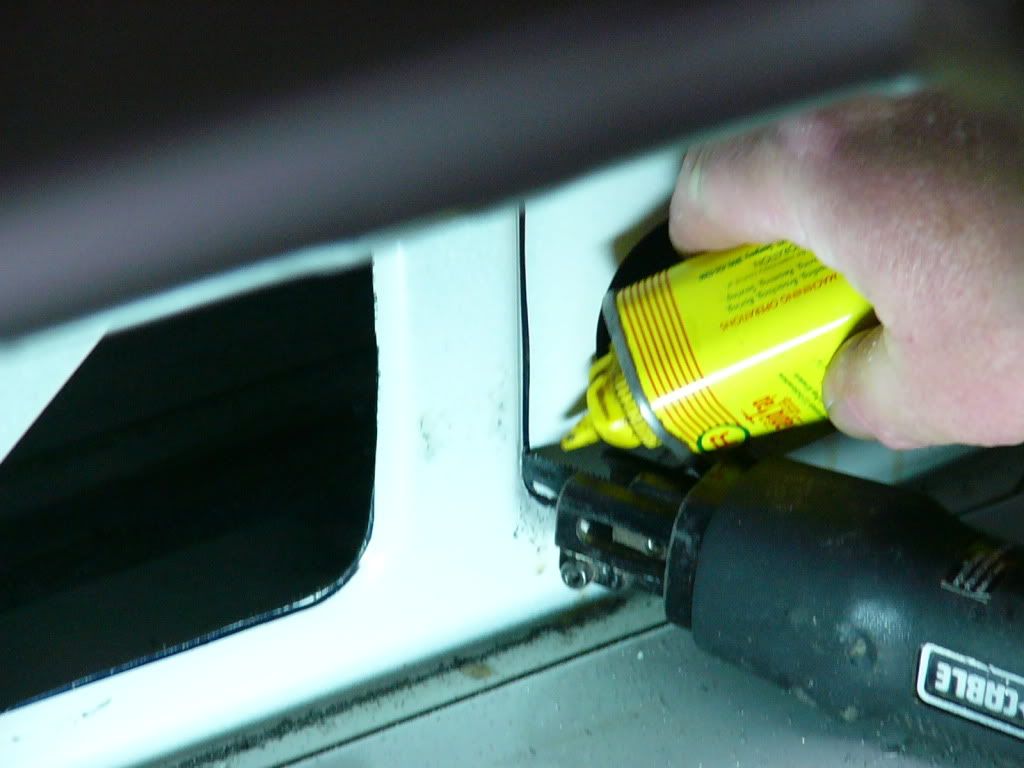
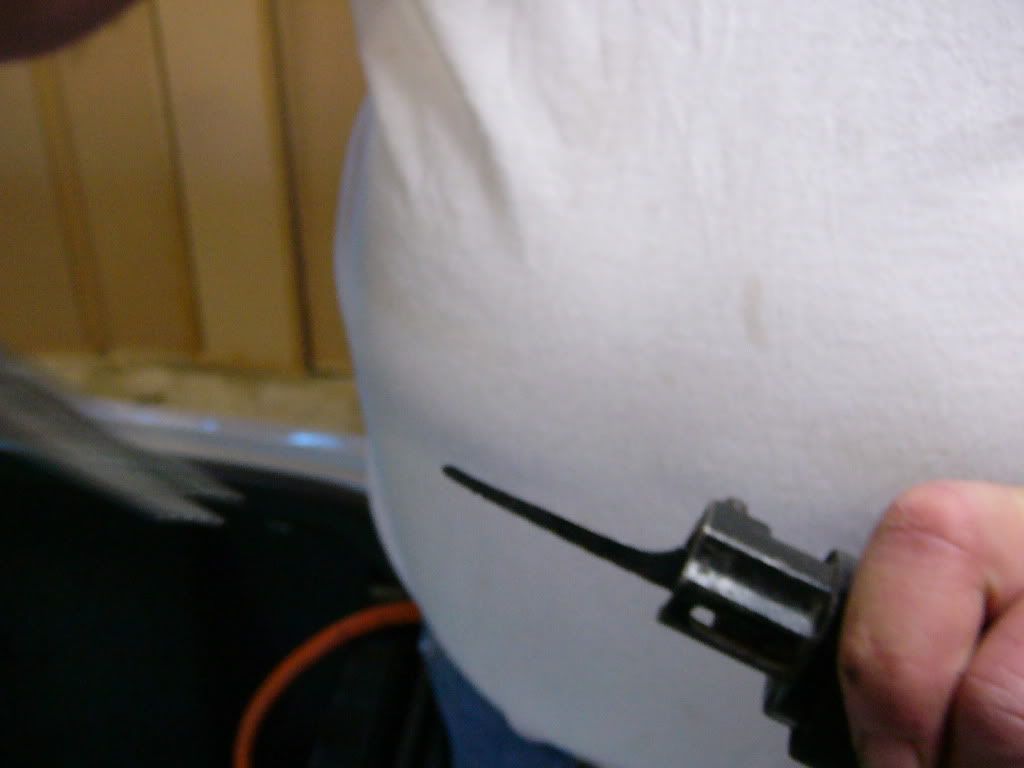
If you bend your airsaw blade, you can straighten it with a pair of pliers.


Your trunk wall should look like this when you're done:
NOTE: We have developed an easier way to cut these holes, but AFAIK, we took no pictures at all. What we did was use a 1 1/4"ish hole saw and a small battery powered (Porter Cable 18V) "reciprocating saw" with a metal cutting blade. We cut round holes in each corner of the triangles and cut between them using the reciprocating saw. This was by far the easiest method we have found. You may want take the car to someone with a plasma cutter and get a estimate on what they would charge to save you this tedious step.
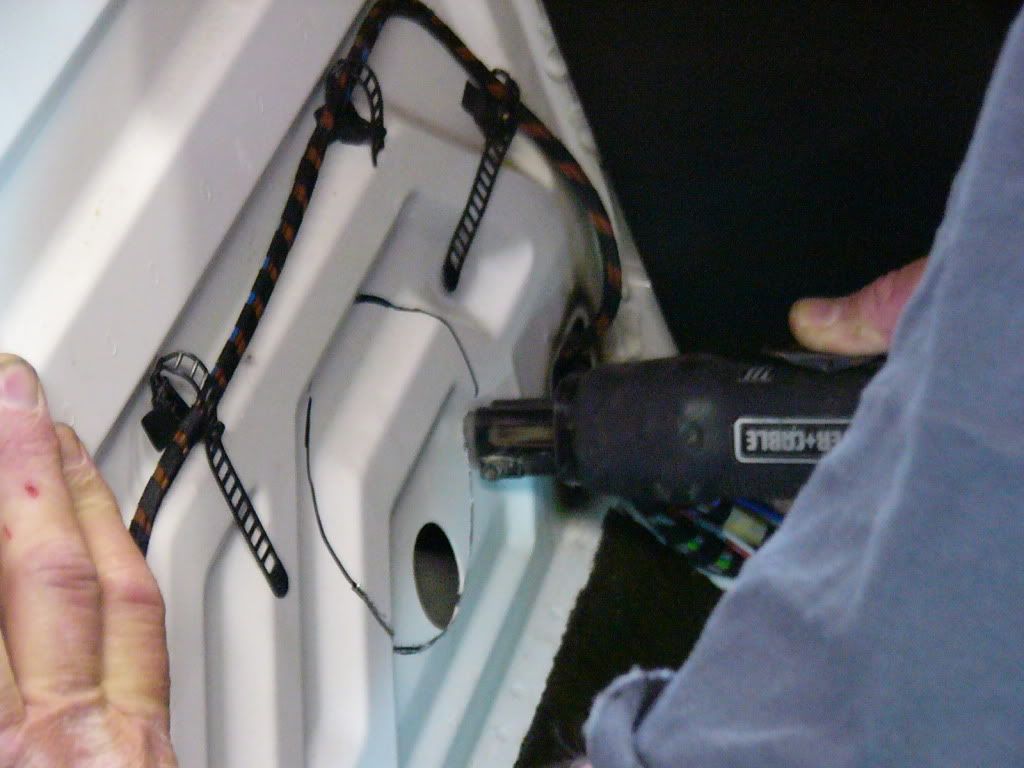
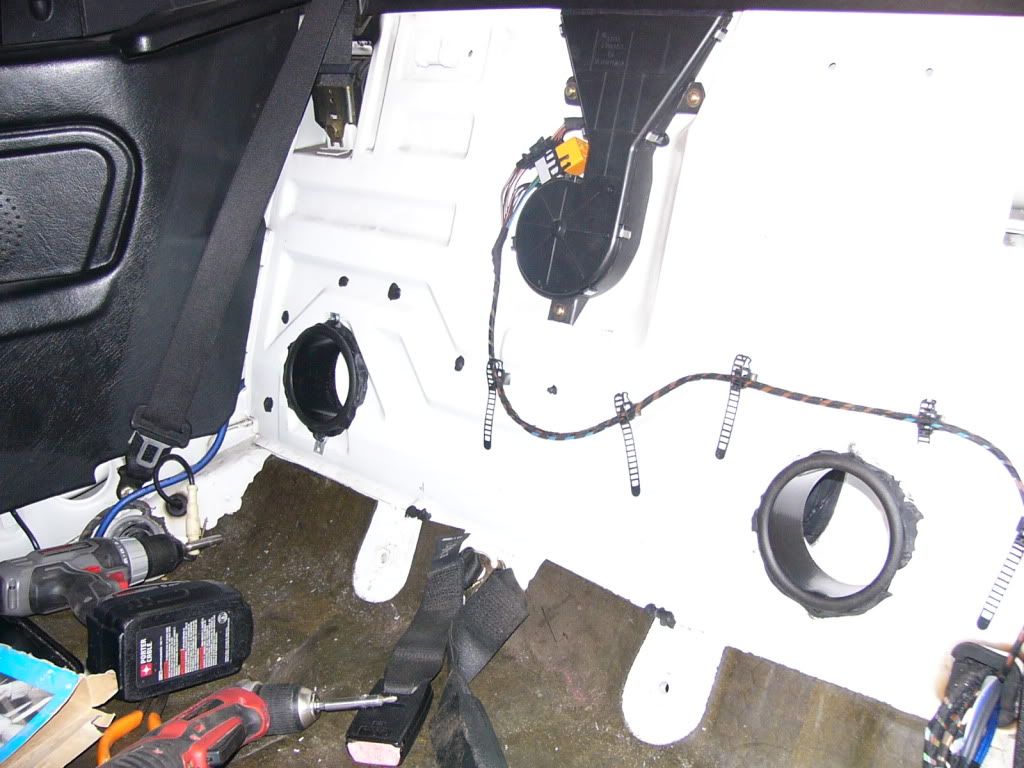
The next step is to cut the wall behind the back seat:
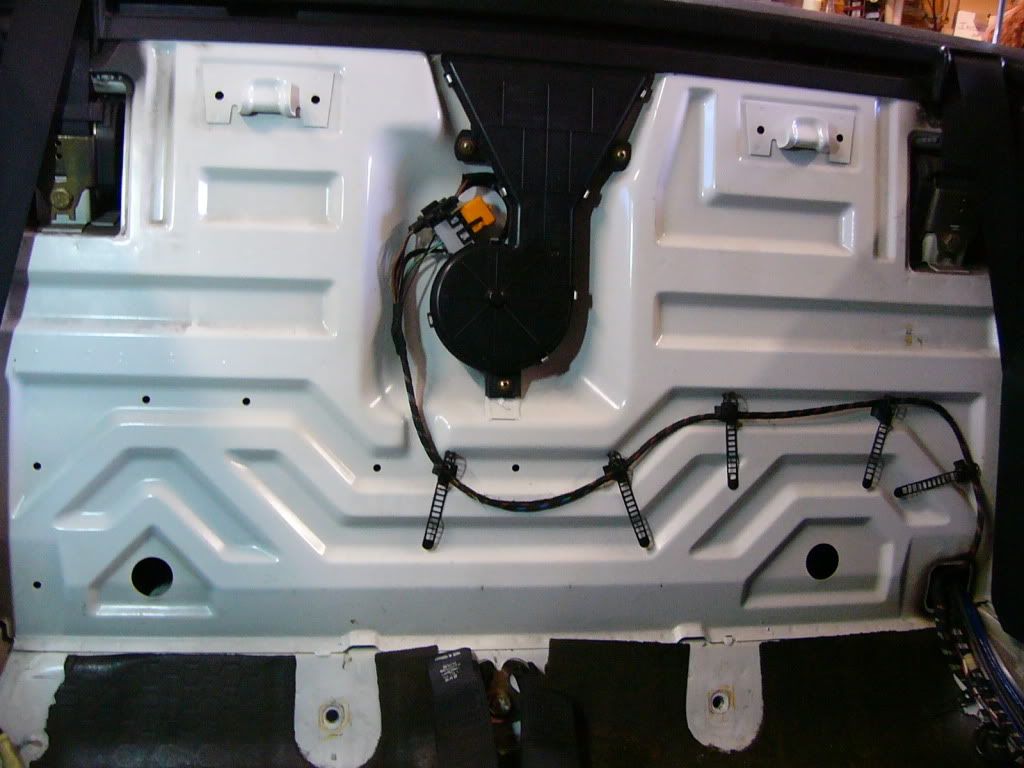
Start by taking the port tube and tracing its outline with a permanent marker. Position the tube so the existing holes are at the very bottom of the hole you trace.
The locations shown here are not the optimum place, but we have no pictures at all of the correct locations. Feel free to experiment, but only an inch or two inboard or outboard. We were able to get the holes equidistant from the side panels while using the existing holes as a starting point.
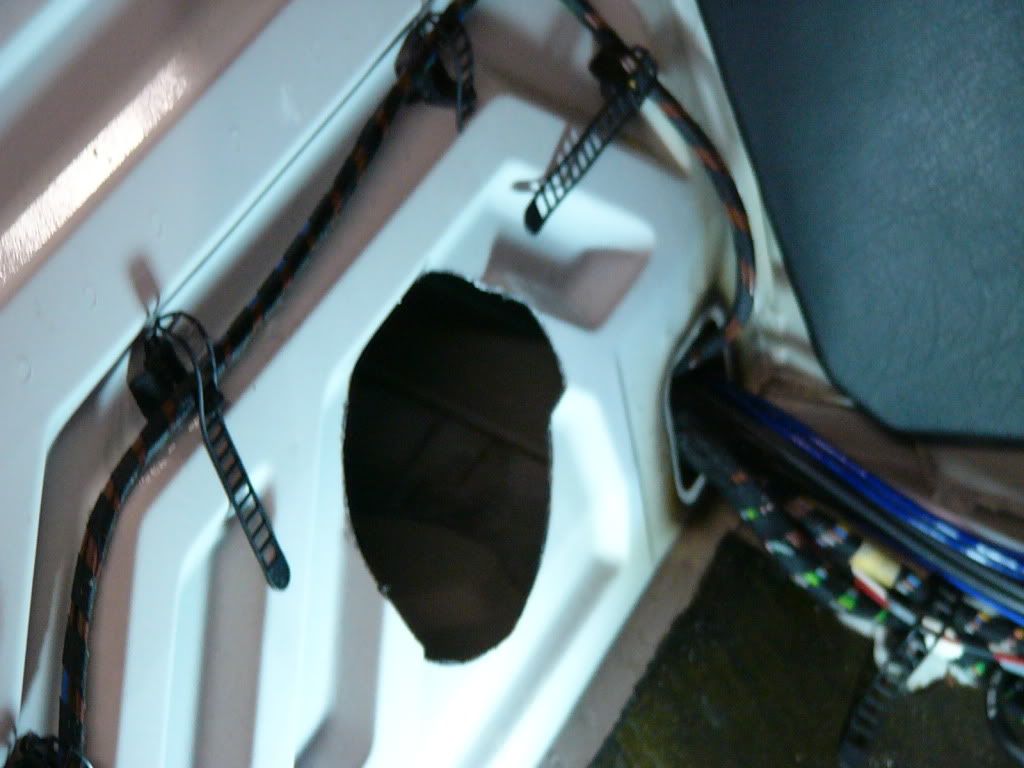
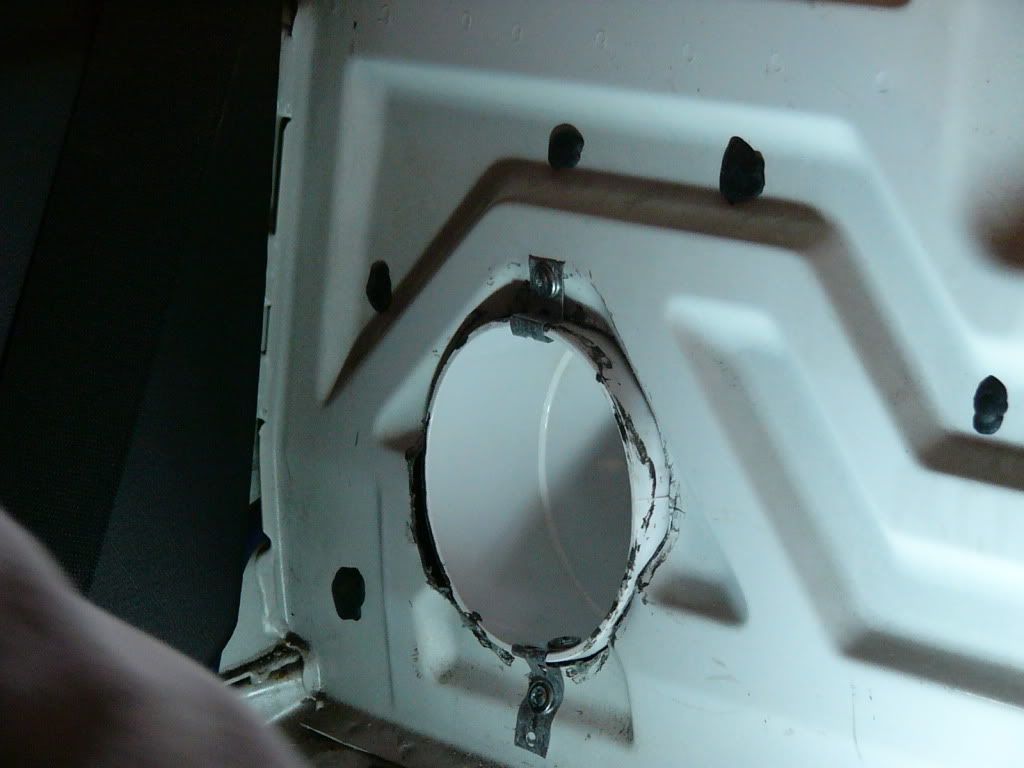
It should look like this when you're done.
Using the same technique as before, cut out the circles.
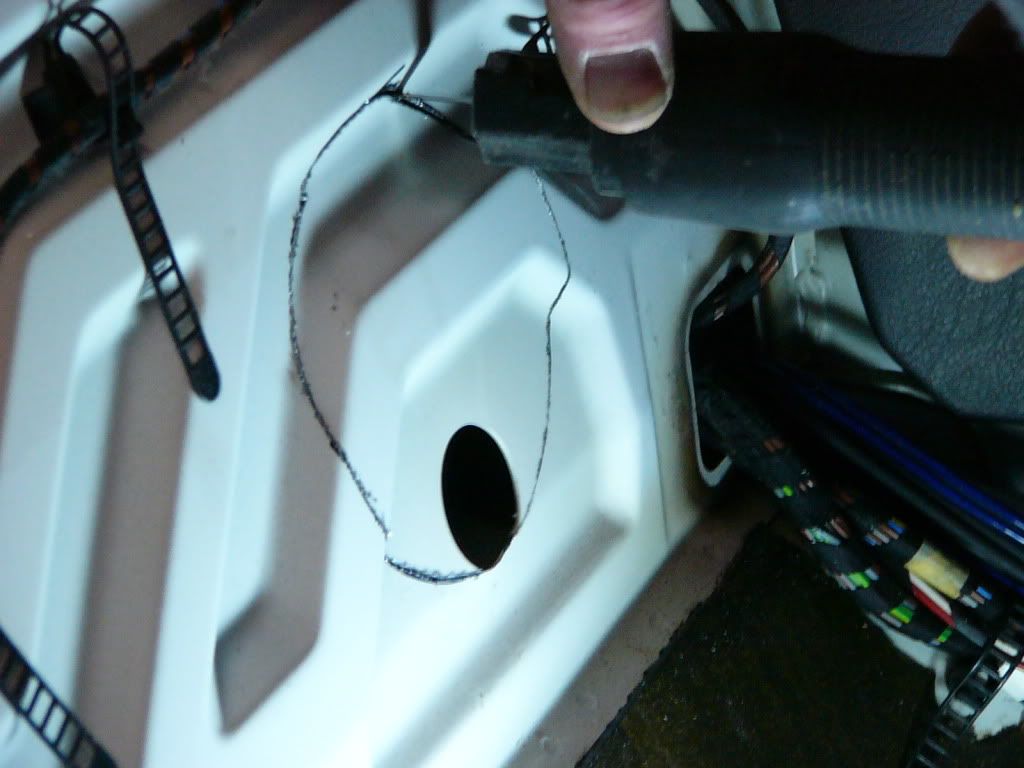
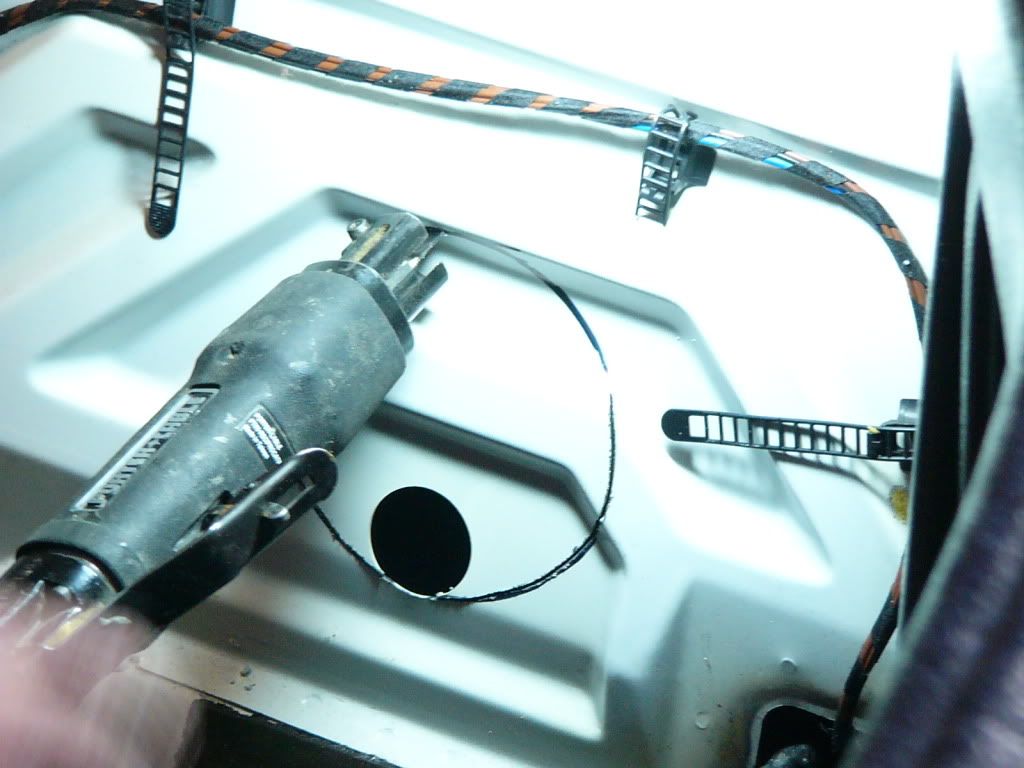
You should now have two round holes in your back wall.
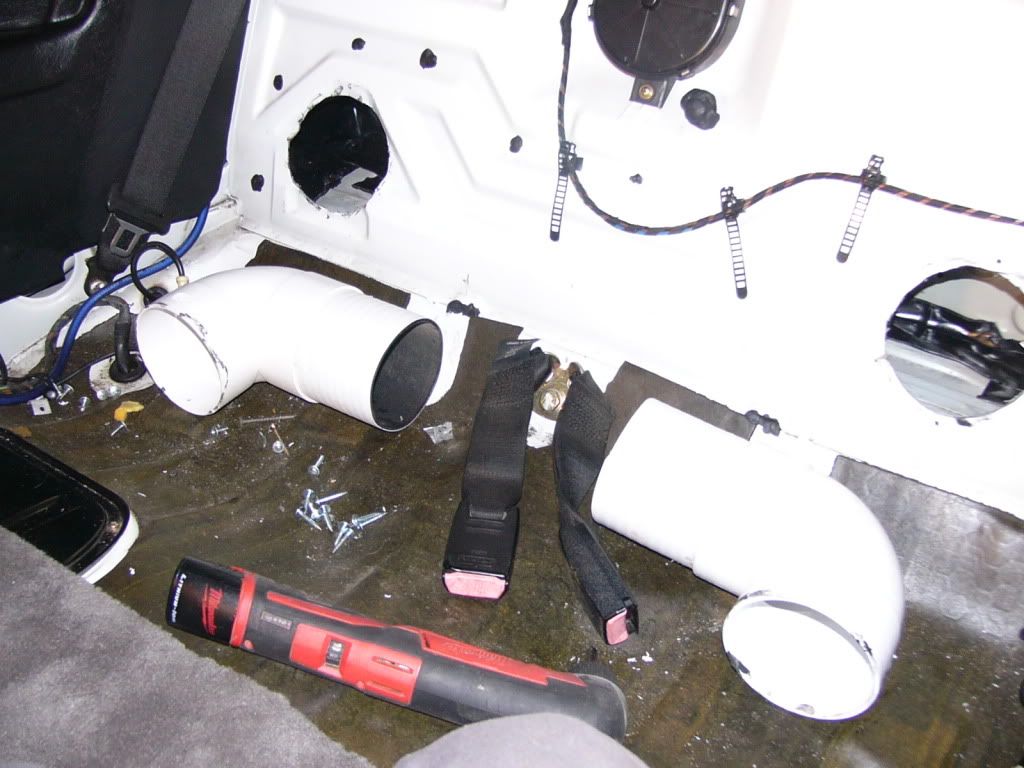
Make sure you can get your port tubes all the way in for a "test fit". They are diffucult to get in and may require rotating and wiggling around to get fully in the holes, but this is crucial to proper installation. You do not want to have to adjust the holes after the next step.
The next step very tedious, however it is absolutely necessary for good sound and clarity. You will be sealing the edges, corners, top and bottom, and any holes from the chamber you just cut holes in both sides of. Every hole other than what you cut should be sealed. Take your time and be thorough! If you have the time and patience, please cover every square inch of metal with at least one layer of material.
Let us explain why this step is so important. This step is the crux of getting all the performance you paid for. The subwoofer system in this application uses theat cavity as an actual part of the speaker. The modifications we outline cause that chamber to become an actual tuned part of the subwoofer. That is what makes this installation so difficult to do, and also why it performs so well.
We did this with Peel and Seal. It sucks. Ultimately a pain to work with in this area, but it suits the purpose fine. It required some heating with a heat gun first to become more pliable and really stick. Removing the paper backing on the roofing stuff is surely an efficient frustration generator. What you use is up to you, however after this we would suggest a true butyl-rubber sound deadener material with a foil backing. This permanent backing will make life much easier while forming the material to the angles in the chamber.
Start by cleaning. We used heavy duty "Simple Green" and rags, then heated the area to make certian it was dry. Please follow the manufacturer guidelines of whatever sound damping material you choose for surface preparation and application.
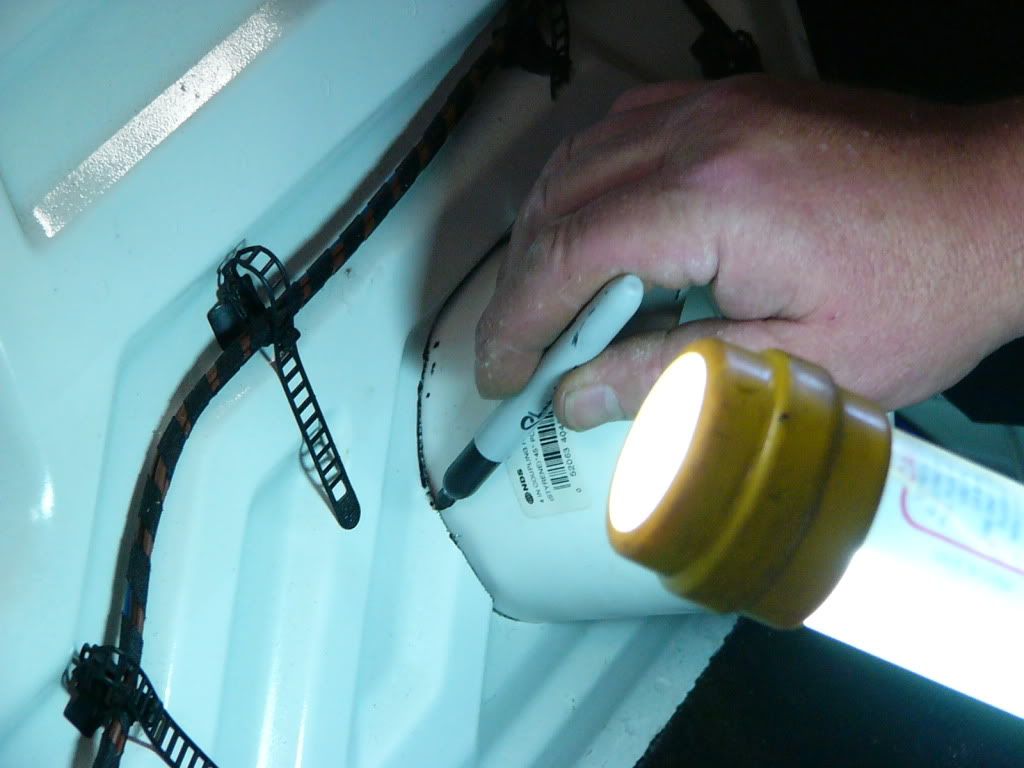
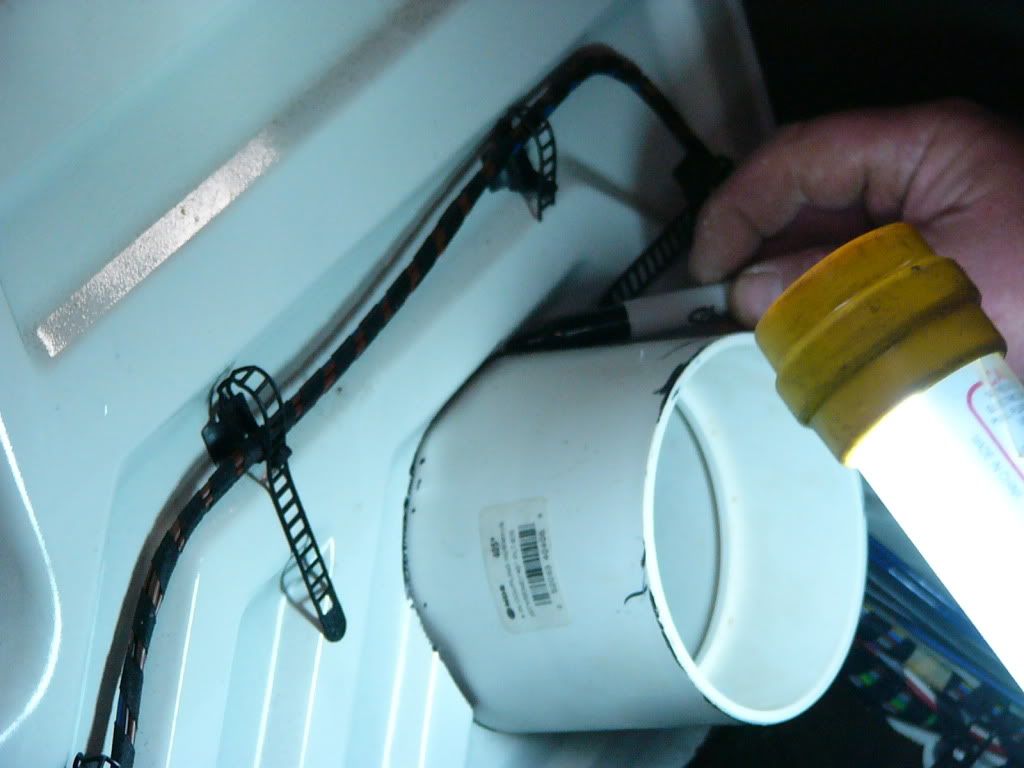
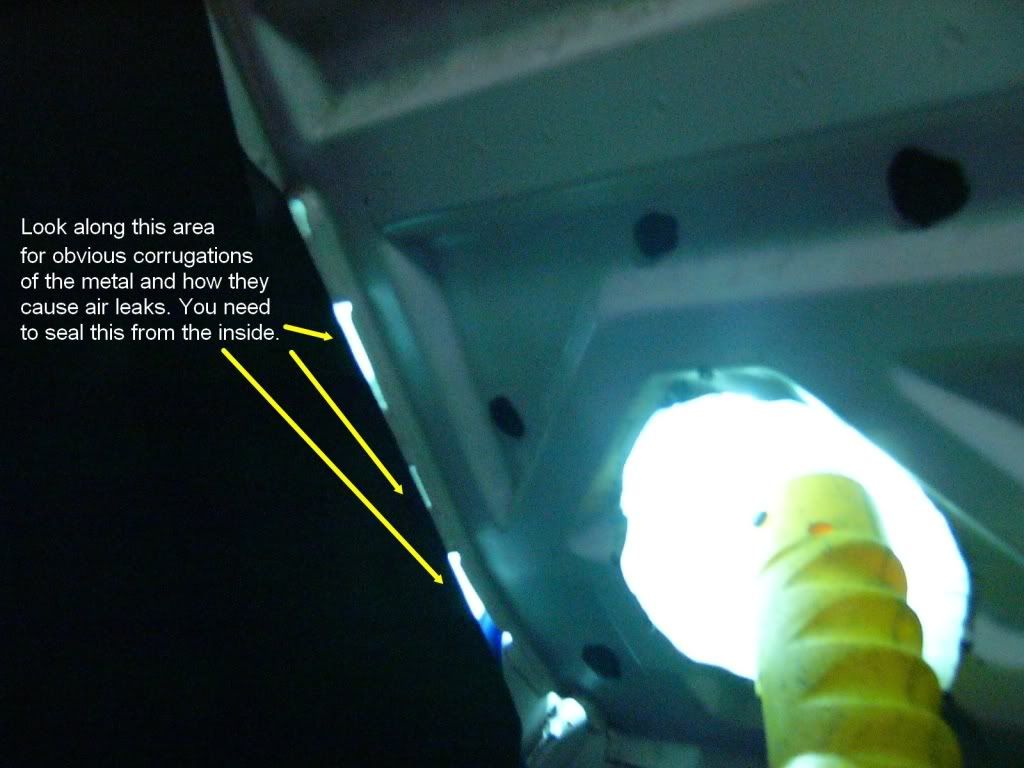
To seal the leaks, cut strips of whatever material you choose and lay them over the holes. You'll have to get pretty deep in the chamber. Using a flashlight, look for obvious leaks. There are several long oval holes along the very top, and a couple where the roof of that chamber meets the front wall, near the middle. Feel around in the chamber for any corrugations, a lot will be difficult or impossible to see.
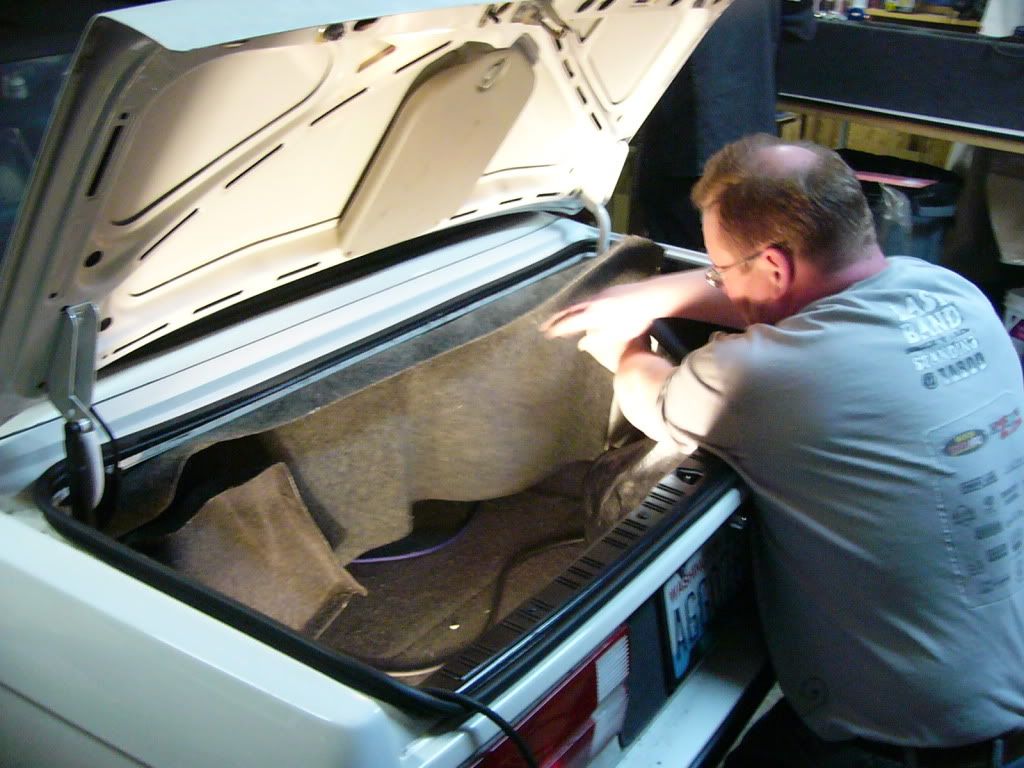
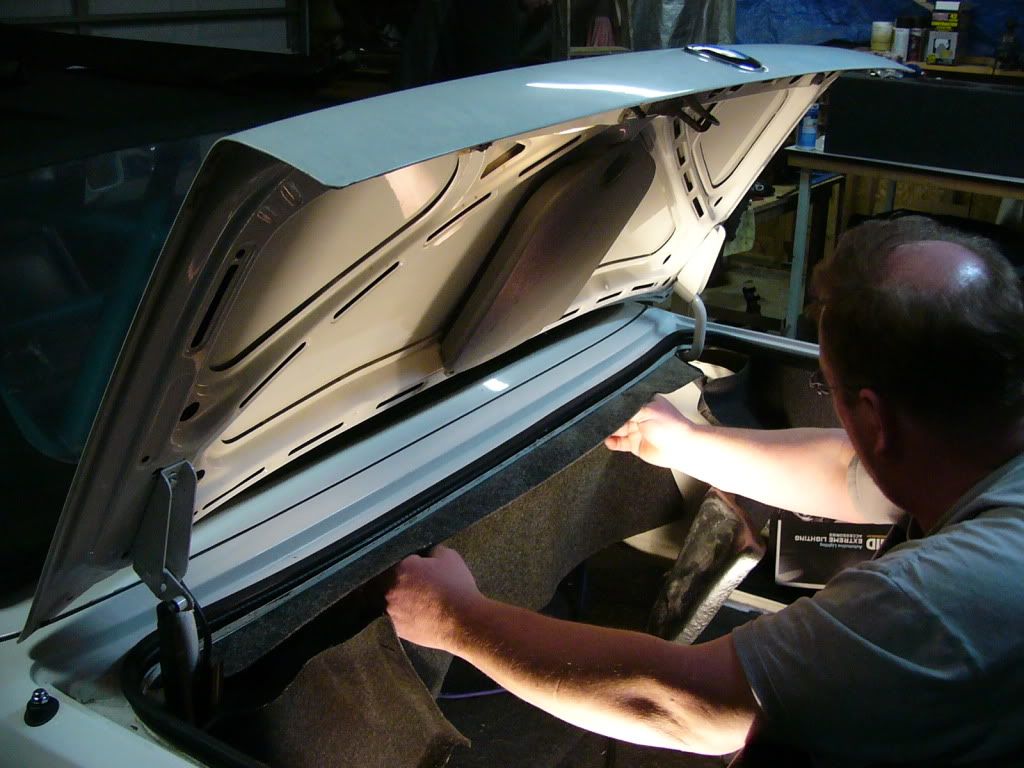
Now that the wires are run and the chamber of horror is sealed, lets upholster the underside of the top compartment.
First, you will need to remove the cable that prevents the top from being opened while the trunk is open. Be very careful at this point, you can easily damage your paint by opening hte top while the trunk is open.
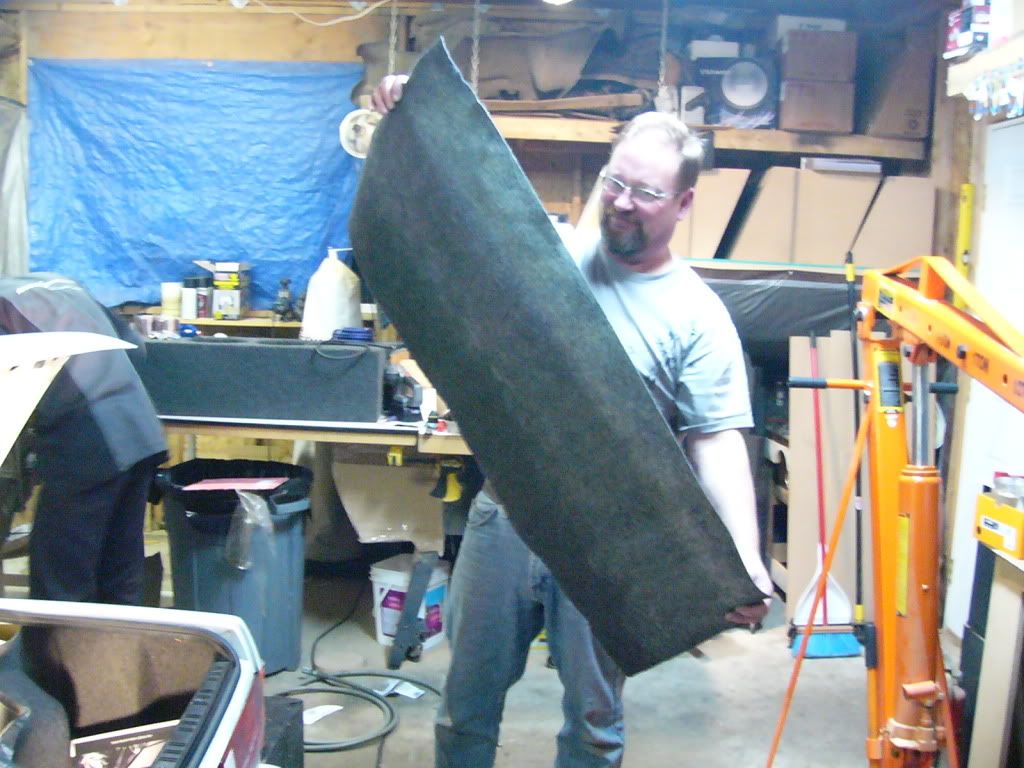
First, clean the trunk carefully. Second, lay the carpet we provided you on a flat surface and apply spray glue to the entire surface of the back (ugly side) of the carpet. Use long even strokes to get proper coverage.
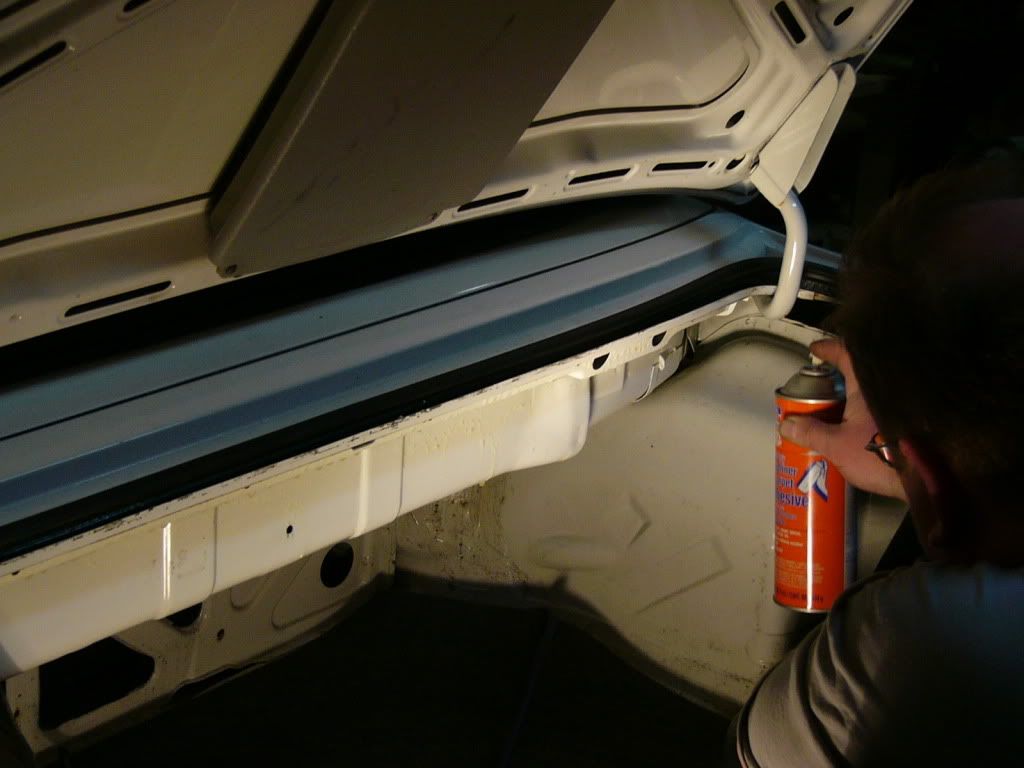
Second, remove the trunk seal along the back edge and around the rear corners.
Spray glue on the entire area from the very edge of the trunk seal down to the underside of the top storage area, approximately 18" "down" from the trunk seal. Yes, that means you will be spraying glue on the underside of that top storage...please be careful! It is imparative that you cover every little area that needs to be upholstered EXCEPT the cable for the top safety. Do not get any glue on that cable!
Here are a few pictures of that process:
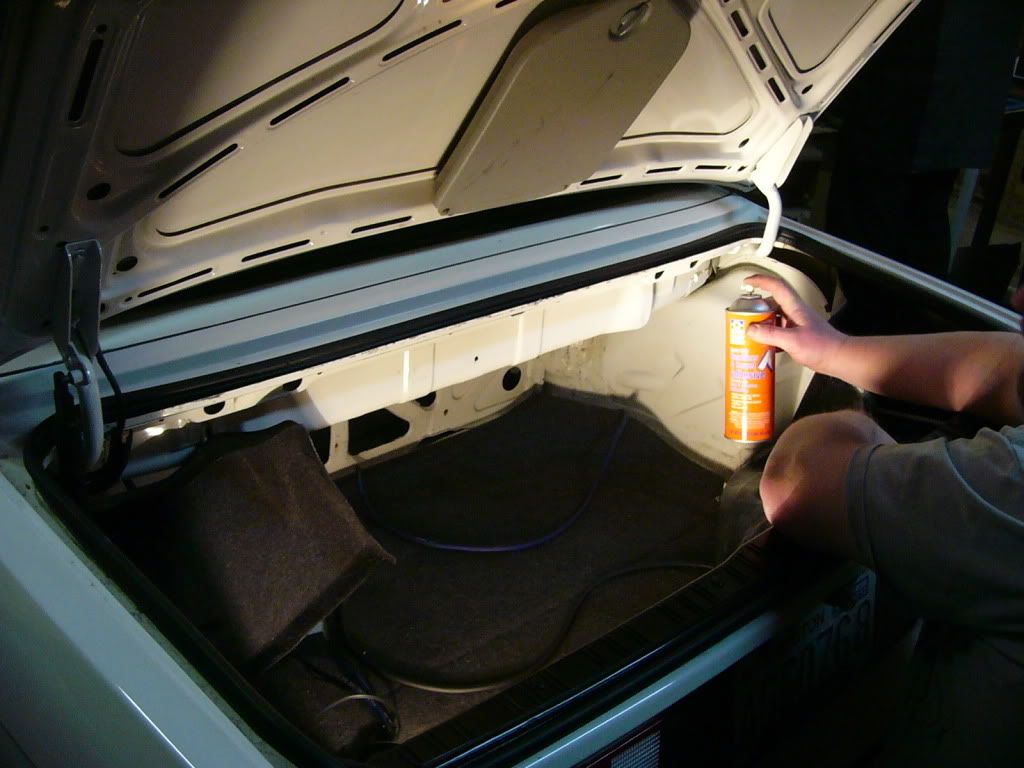
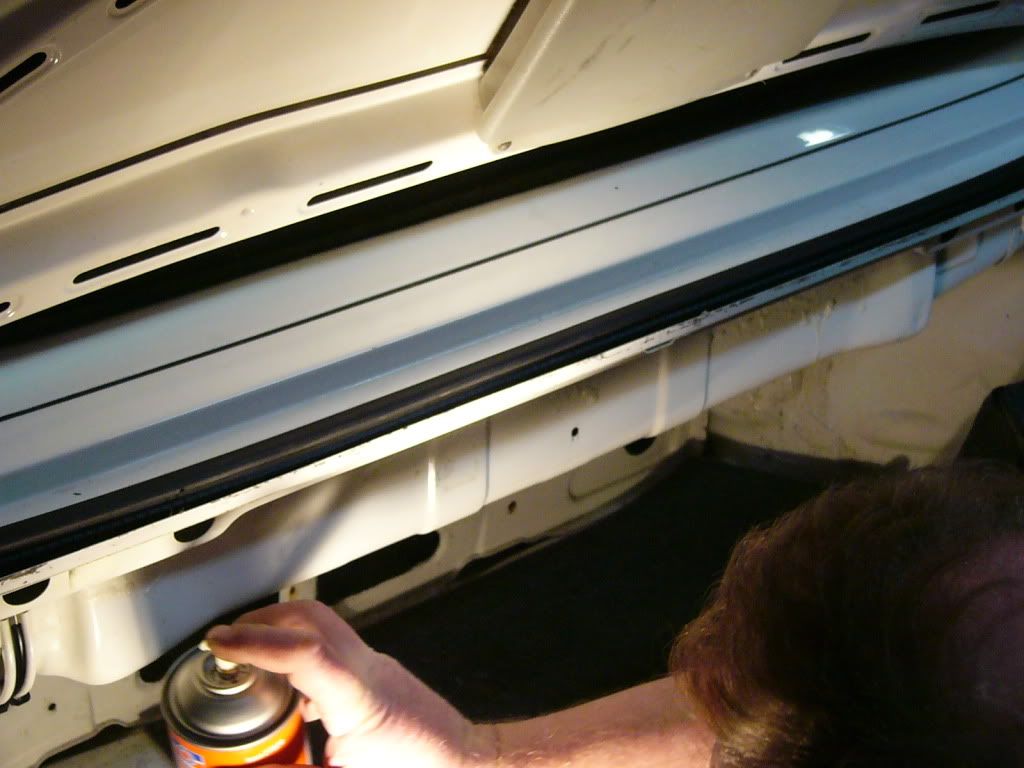
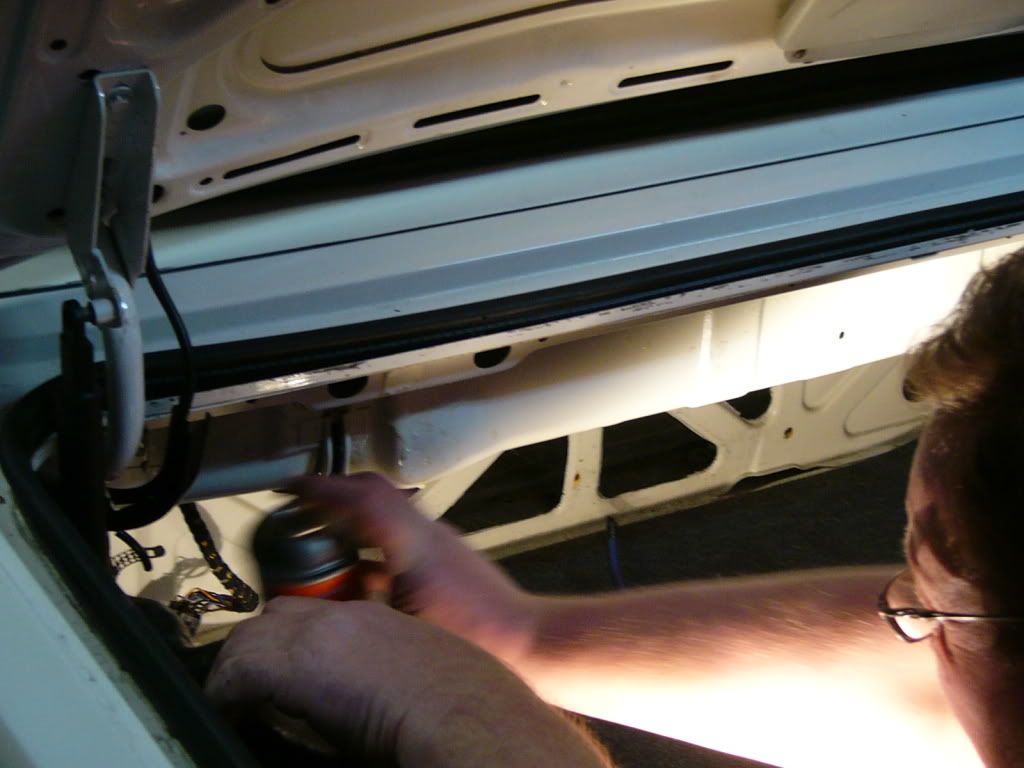
Get way back in the corners too, remember where your trunk liner ends:
Time to wait for that glue to dry. Let it dry for about 3 to 10 minutes depending on the weather. Read the instructions on the can. You want it to be slightly tacky at the wettest.
Next, grab that piece of carpet you already glued and carefully apply it starting in the middle near the trunk seal. Make certain it is centered or it will not cover the entire area.
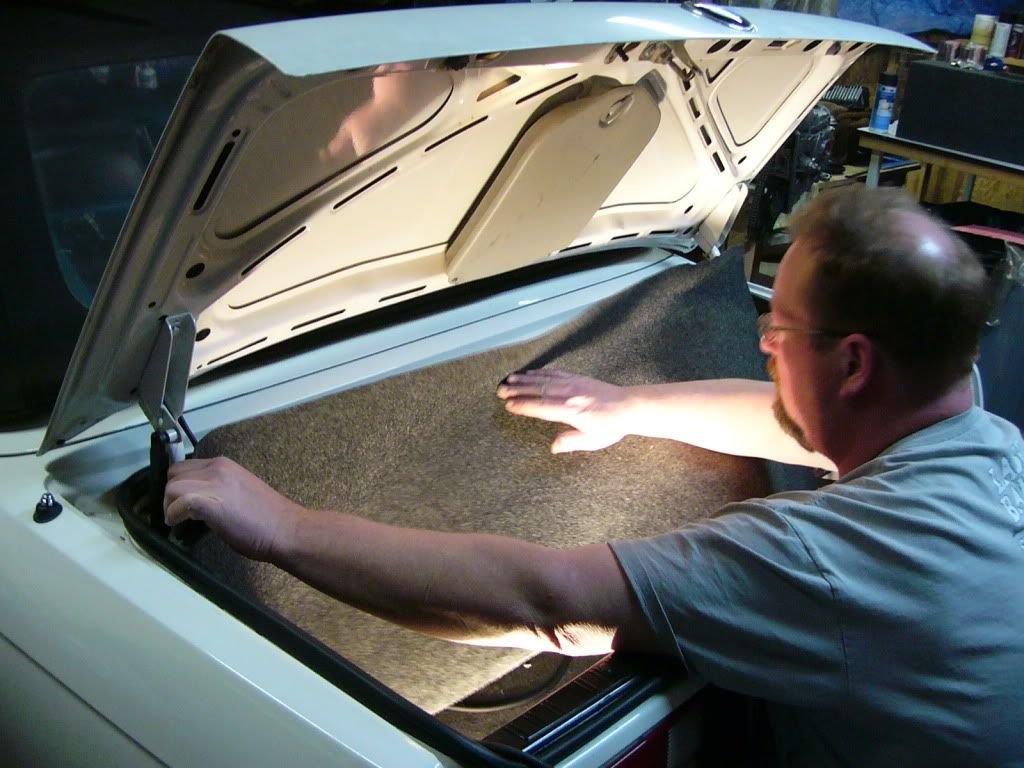
Starting in the middle at the top, press it in place with your hands. Try and get it perfectly smooth from the top down and the center out. You will be trimming it before you are done, so make sure it overlaps the entire area top be covered:
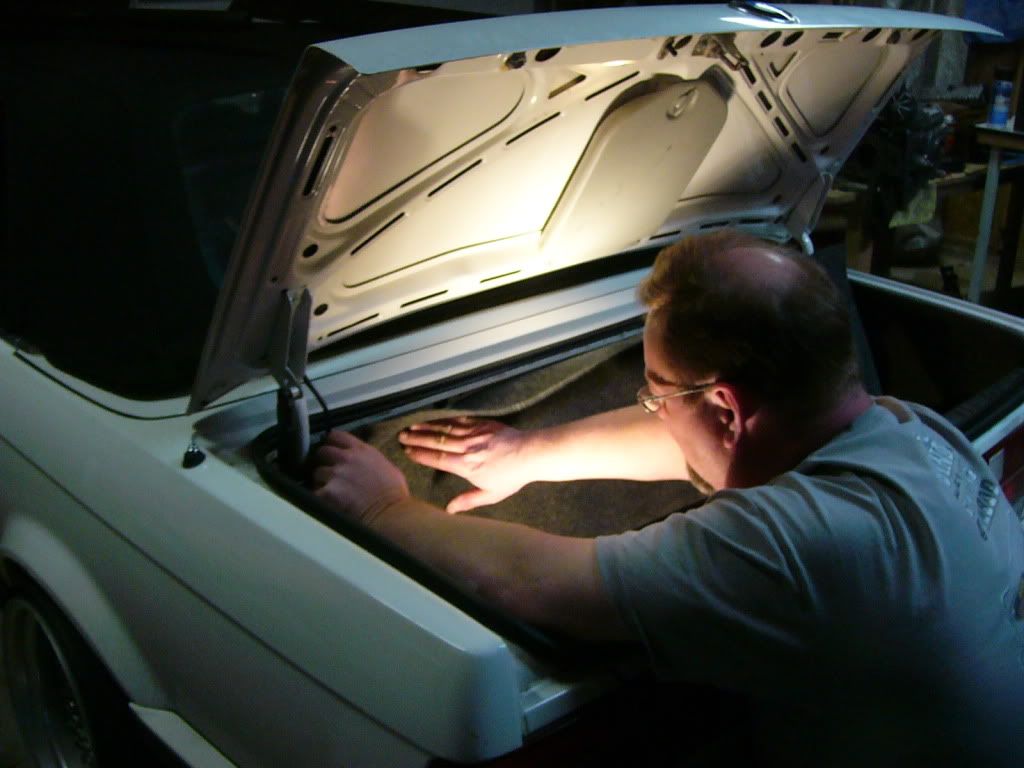
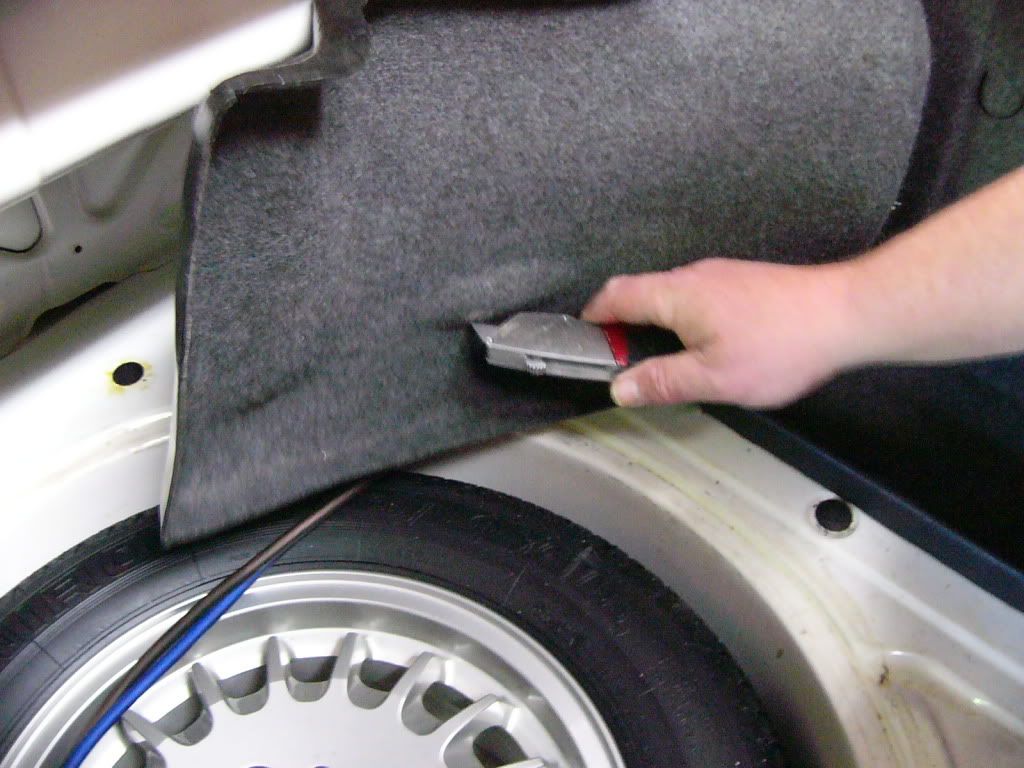
Now that you have the entire area covered, you need to trim it to shape. When you do this, be aware of the trunk seal and how it fits. You want the carpeted area to cover all of the metal right up to the trunk seal. Now, using a scissors or razor knife, trim the top edge:
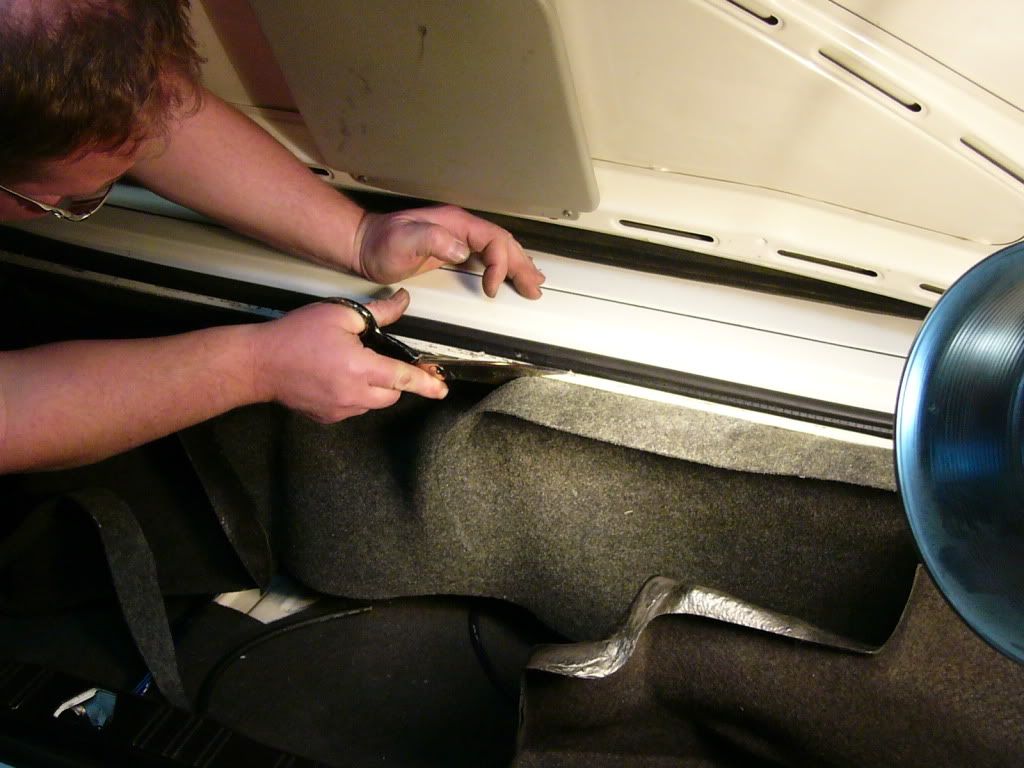
Continue trimming the carpet and fitting the trunk seal
When you are done, it should look like this:
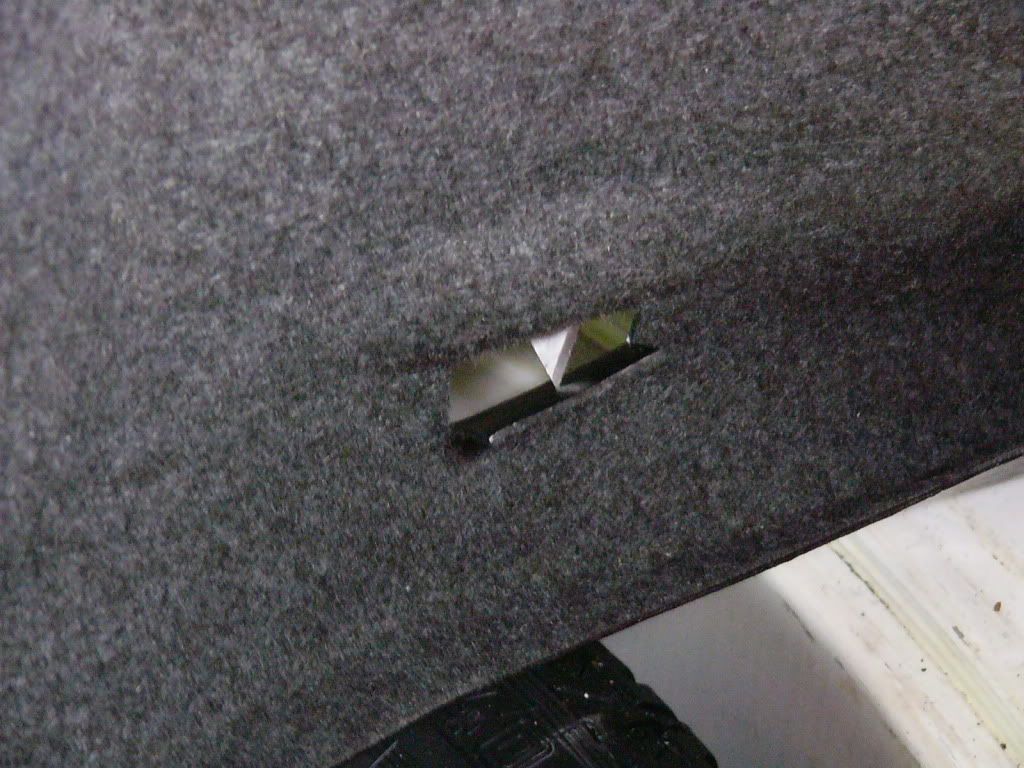
A few things to watch for: First, just before you cover the safety cable, cut a small hole in the carpet to allow the cable to come through. You also want to make sure the carpet covers all the way to the side walls. This carpet "seams" gracefully, so you can patch it...but you want it perfect the first time.
If you are satisfied with how the upholstery looks, make sure your trunk seal is properly reinstalled and reconnect the trunk lid safety cable.
This is a good time to install the wire that turns on the light in the amp rack. Please refer to this thread for further instructions: http://www.r3vlimited.com/board/showthread.php?t=220989
So now we have the wires ran, the holes cut and the sound deadning applied, right? Lets start some reassembly.
In order to allow the box to fit tightly against the front wall of the trunk, the side panels need to be cut in the corners. Look where the trunk liner meets the top and bottom of the front wall of the trunk and cut a small slit to allow the box to fit tightly without distorting the side panels.
You will also need to cut a small "H" made to pass the amp power wires through. This location is roughly 10" back from the front wall. Here are a few pictures of the amp wire pass through (look for on a bump in the liner):
Now that you have the right panel ready to install, go ahead!
Get the power wires in place and reassemble that right panel.
Carefully locate the RCA and speaker wires on the left side of the left panel in such a fashion that the box will not crush them when it is screwed in place and reinstall the left side panel.
Time for the nest step: install the woofers. Drill a small hole, just big enough to acomodate your speaker wires, on the left side of the box. Depending on your choice of wofers and amplifier, you may need to run 2 pairs, please be clear on what you need before proceeding.
Drill the hole, run the wire, seal the hole with a dab of silicone connect the woofers and mount them in the box. Test them however you can to make sure they work properly and are "in phase". Make sure theer is roughly 3' of wire hanging out of the left side of the box.
Now that you have a sealed chamber and the trunk liners have been slit, it is time to fasten the box itself to the rear panel. Does it make sense so far why this tutorial is so involved?
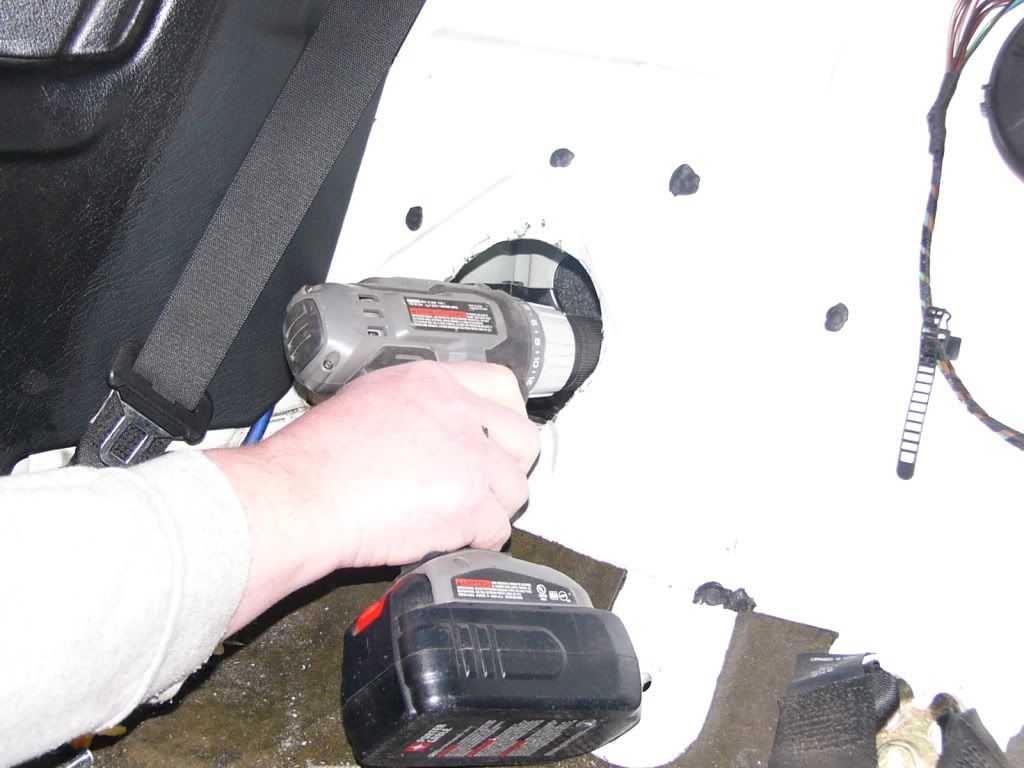
Using two bit holders or a single long magnetic bit holder on a drill will extend it enough to sink two screws on each side of the box. There are already two pre drilled holes on the rer wall that can be used, but you will want to drill 2 more, so a total of 4 screws is all that is needed to secure the box. Feel free to use more, but do not screw into the woofers!
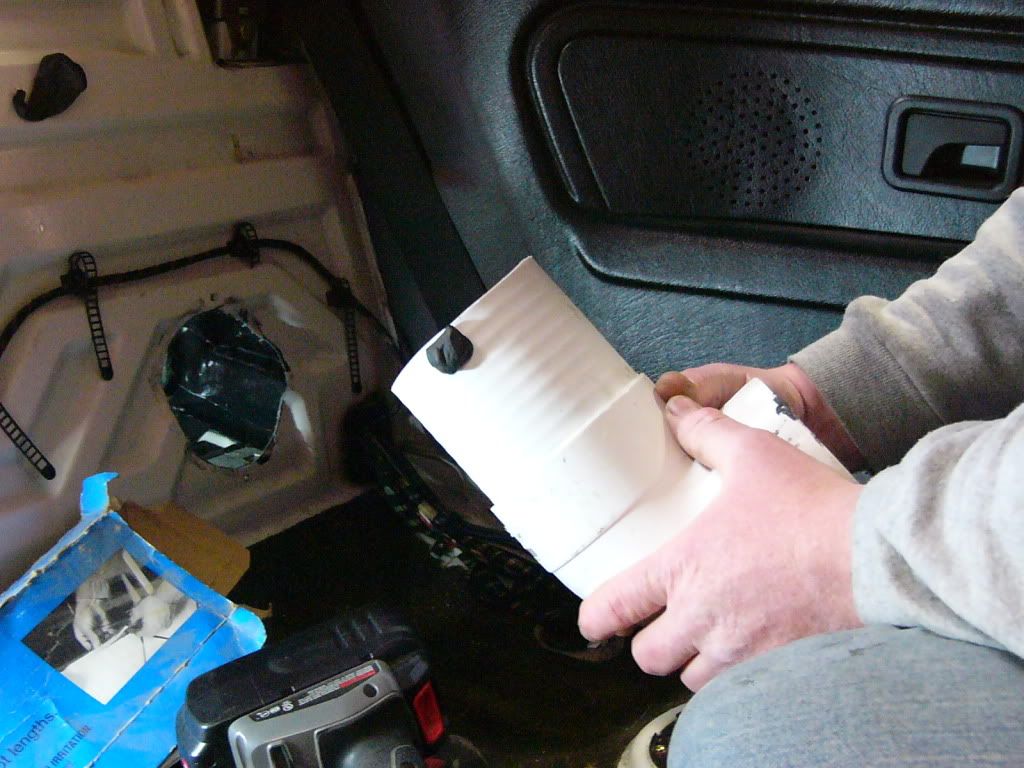
The box should now be in place: the port tubes may be installed.
Before popping them through, add a little ball of strip caulk on the end of each tube. This will secure the end on the floor of the chamber and eliminate rattles that may be caused by the vibrations.
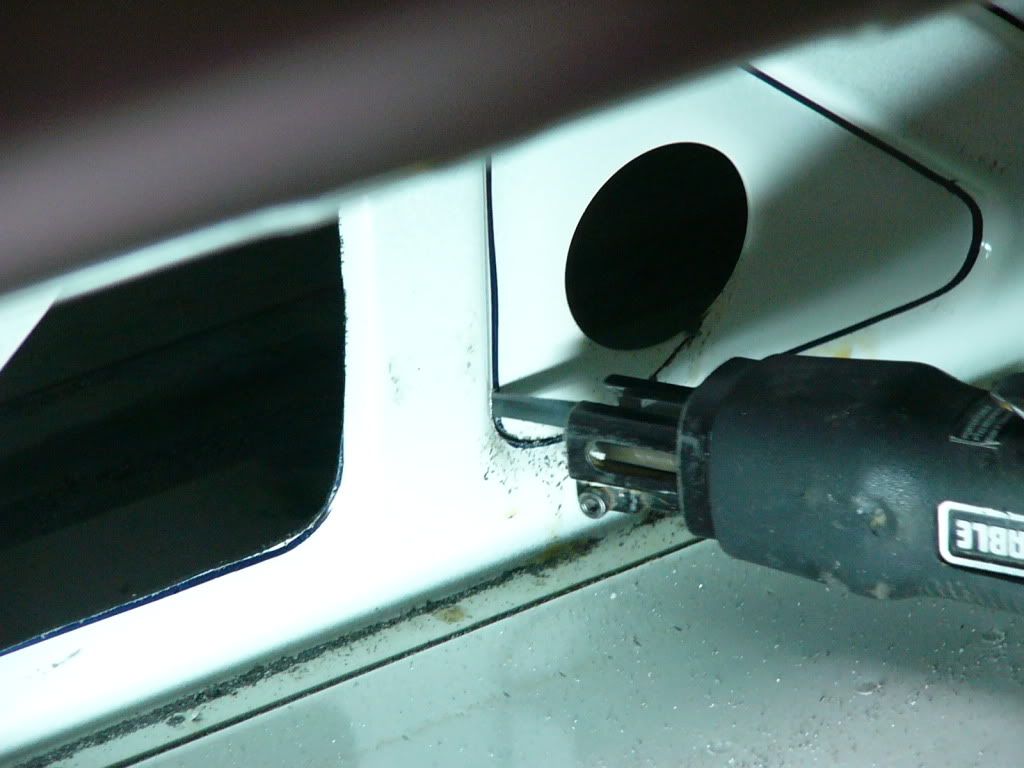
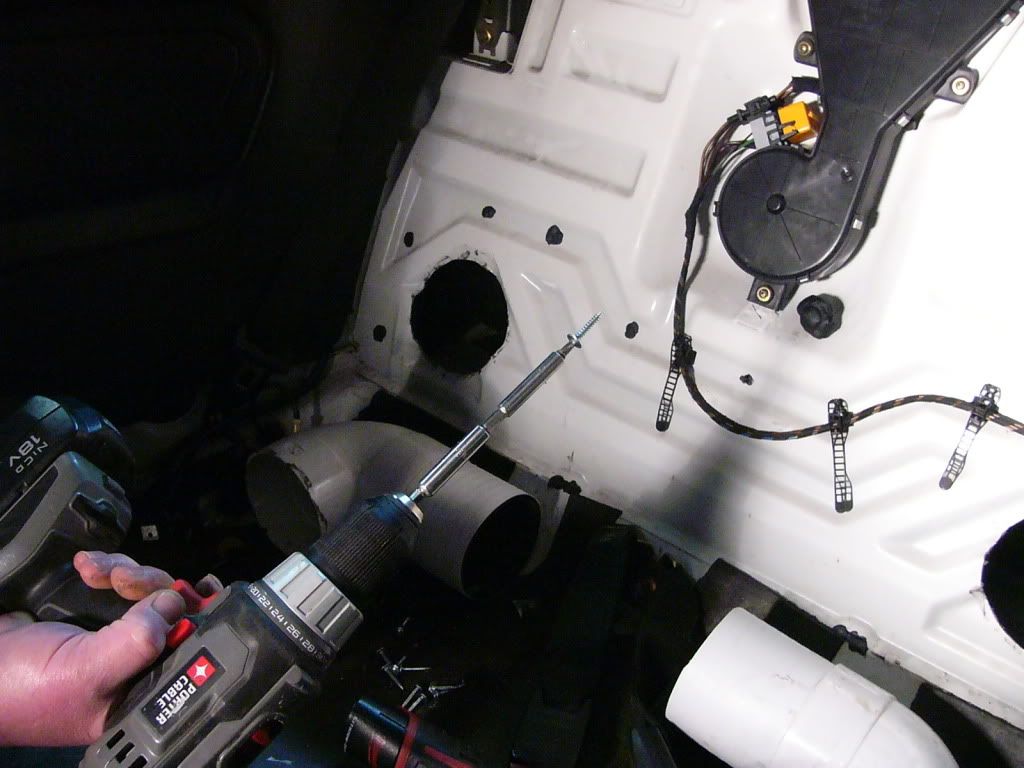
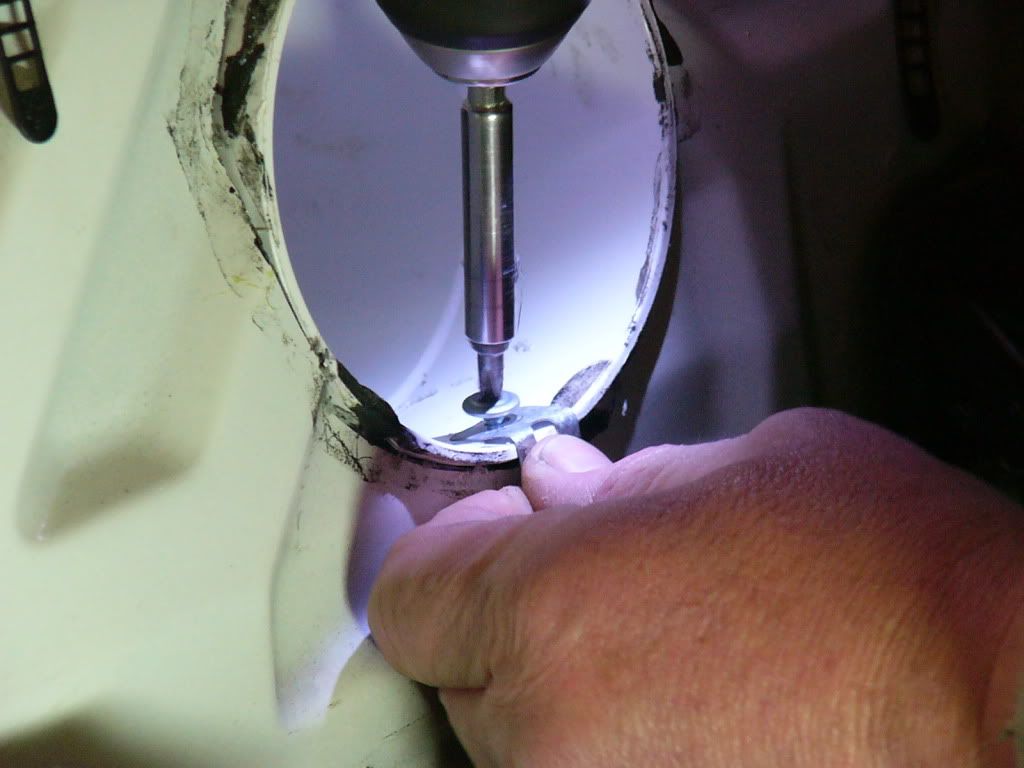
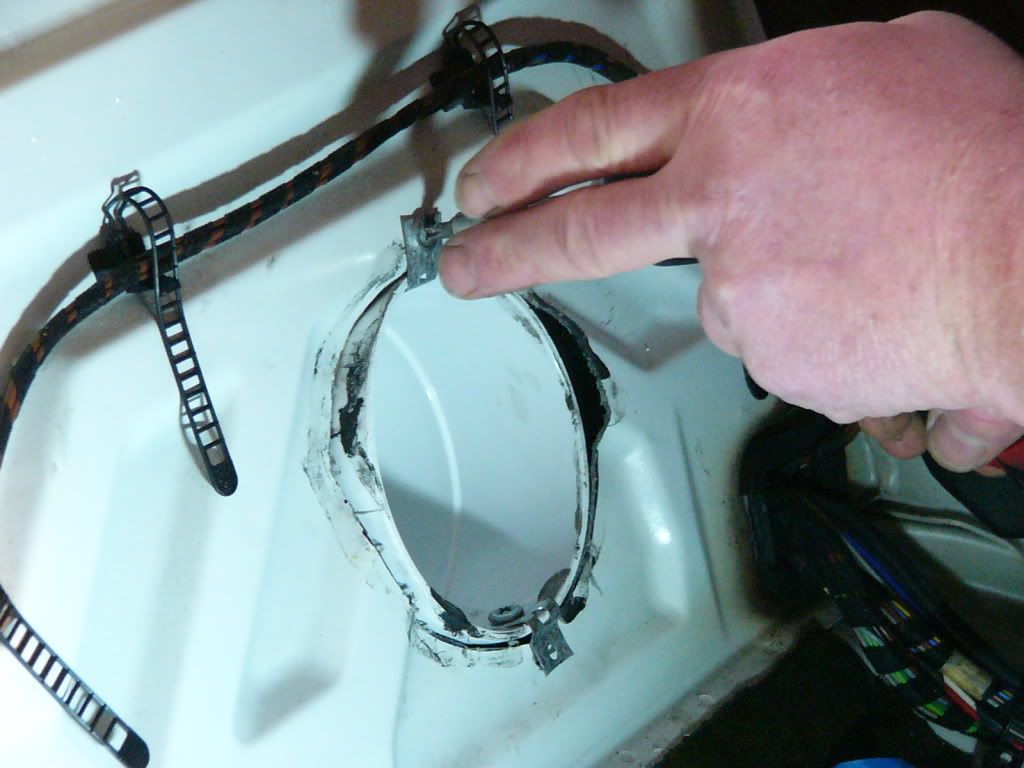
Slide the port tubes through their holes and align it so it is nearly flush with the face of the wall. Drill a pilot hole in the top and bottom of the elbow for screws. Locate them just inboard enough that they will not crack the port and will be inside the chamber when flush.
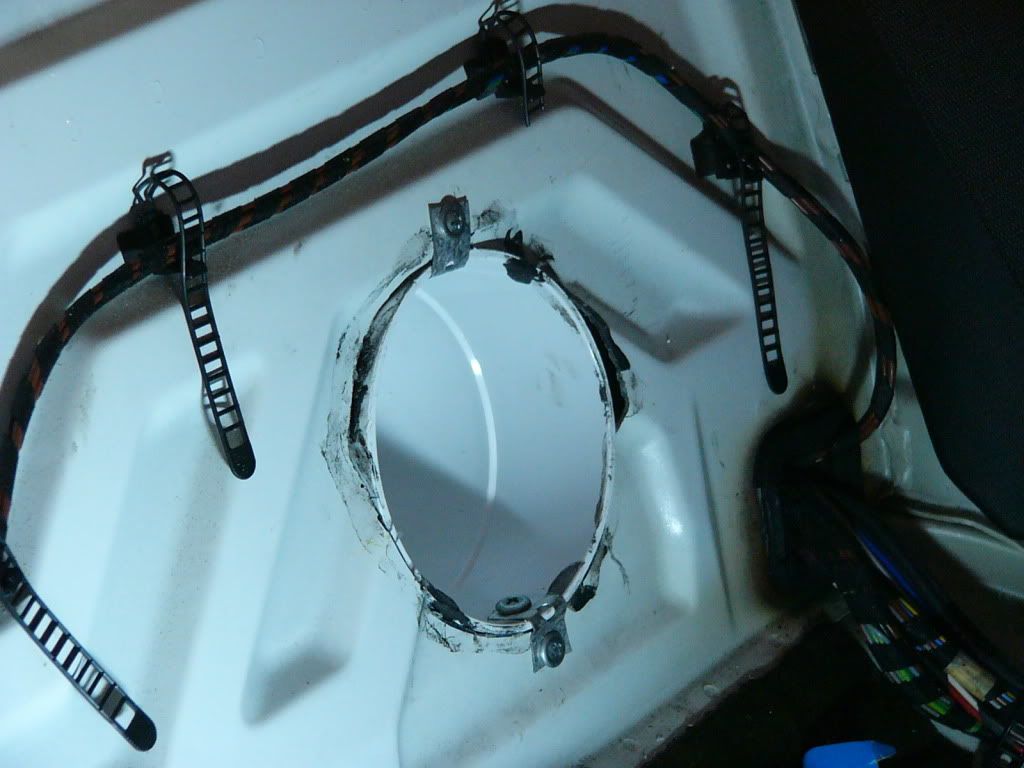
The holes in the sheet metal are there already from mock up installs in this picture. You need to make brackets to mount the tubes.
We cut small strips of metal to bend and make brackets. All four going on:

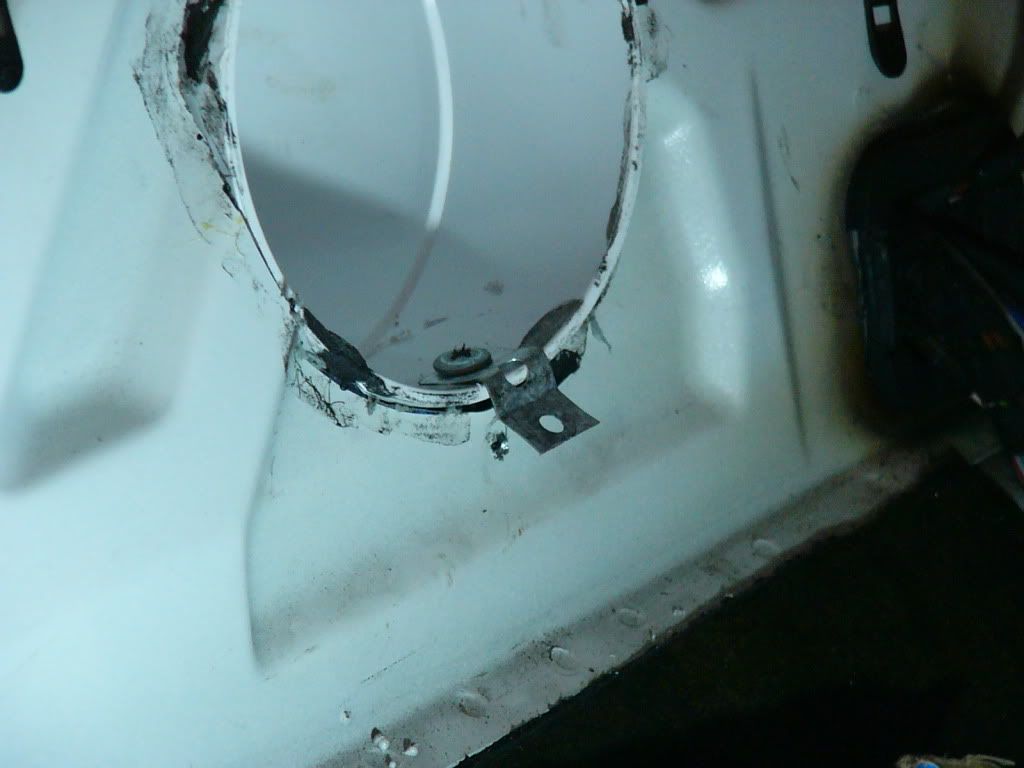
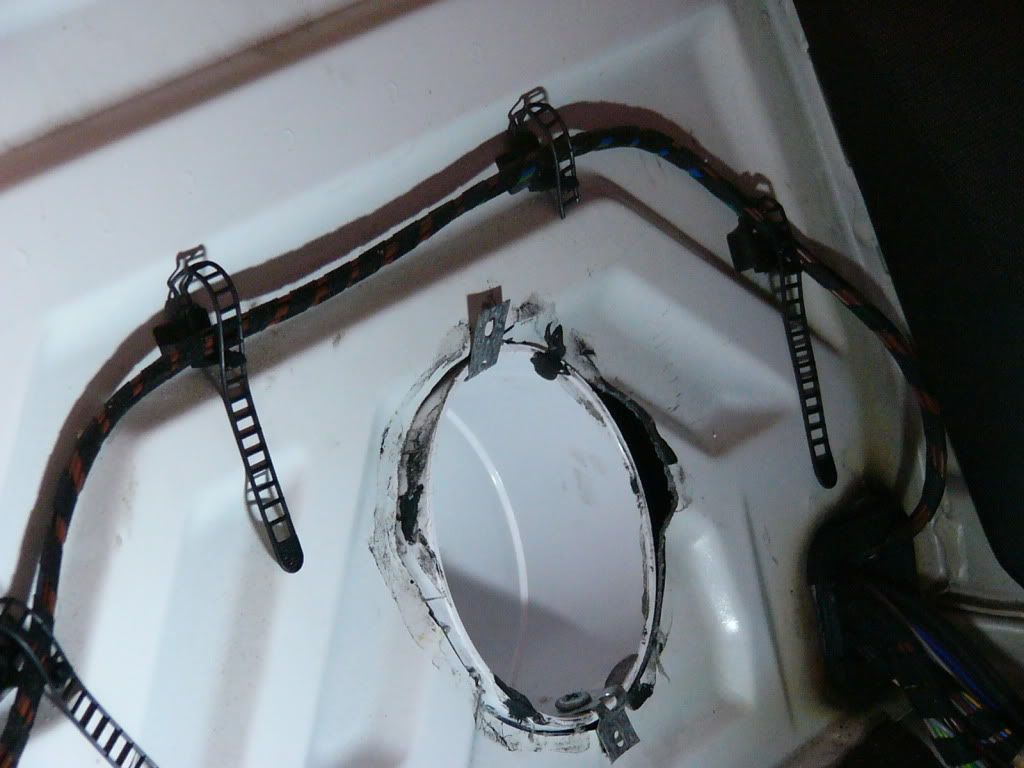
Now to seal the tubes to the car, use 3M brand "Strip Caulk", (available at most all Auto Body Shop supply stores) like shown here on both sides:

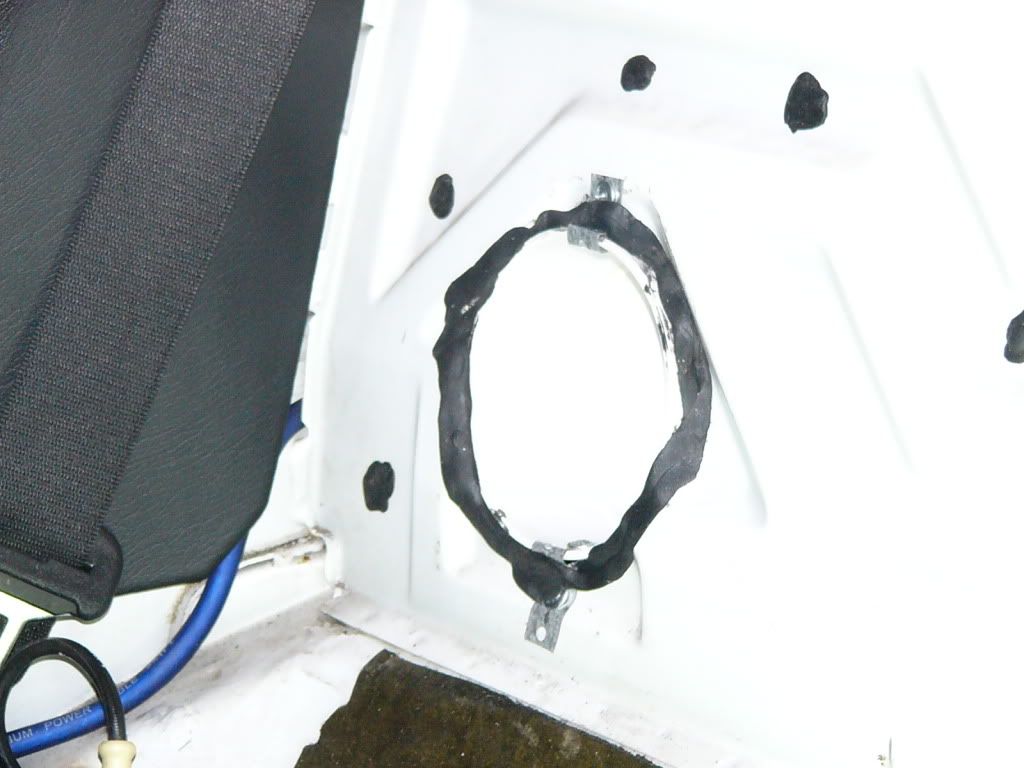
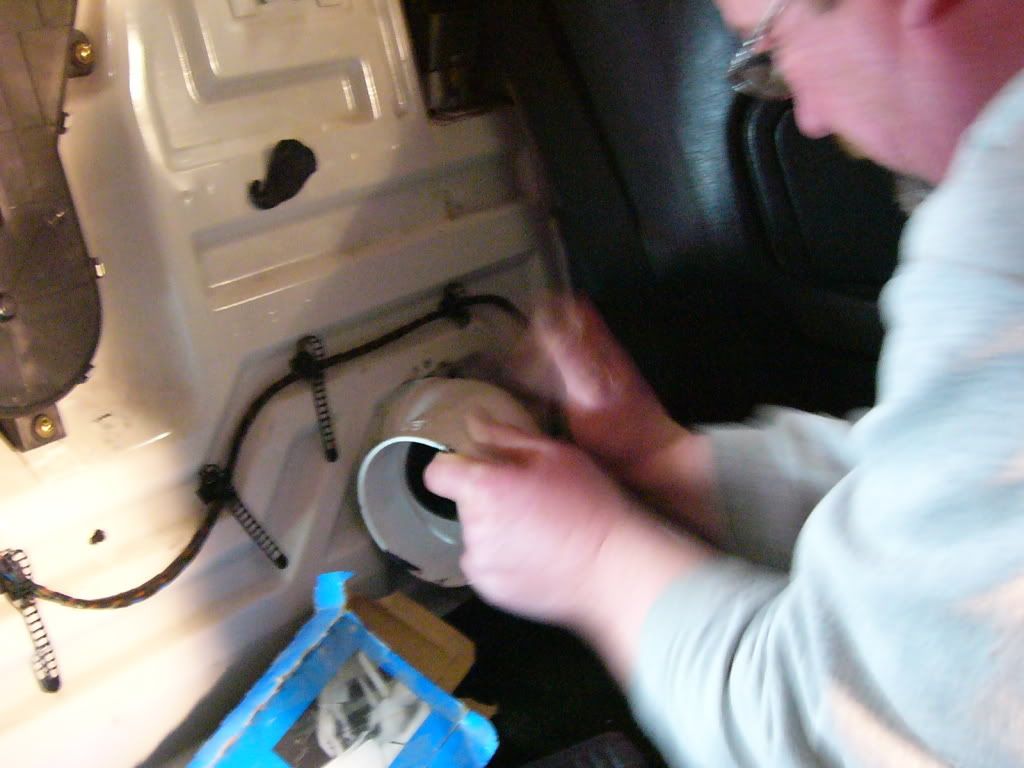
Finishing touches with the port tubes! Install the port tube we have supplied you. It should be a tight fit!
So now your subwoofer itself is installed, your 4 pairs of speaker wires, subwoofer wires, RCAs, sub level controller, power wires for the fans in the amp rack and turn on wire for the light strip are all finished.
Install your amplifier(s) leaving plenty of extra wire. All speaker, audio and power wires must be run along the top of the box should you decide to install one of our amp racks.
More to follow! This has been a tremendous amount of writing, hope it makes clear what you need to do and how to do it. We sincerely hope you enjoy your new subwoofer system!
Luke Fisher, Justin Bresee and Nigel Fisher,
German Audio Specialties
Be warned, this is a very advanced installation, and will require metal cutting, upholstery, and wiring skills.
Quick disclaimer: ALL of this is your responsibility. Any damage that has resulted from installing or attempting to install this product is not in any way the liability of German Audio Specialties. We expect this guide to serve as a set of instructions for an advanced and qualified technician.
If you break it, it is your fault!
We have done our absolute best to provide a product that will perform beyond your expectations while not altering your vehicle in any way that would be remotely unsafe...but proceeding with this installation is entirely your decision and responsibility.
Disclaimer done except for one last statement: your purchasing a subwoofer box and/or amp rack from German Audio Specialties absolves us of any responsibility.
Now, let me complain about your choice in vehicles.
This subwoofer system sounds fantastic. That means a deep, loud, clean, good-sounding subwoofer system that focuses the bass energy into your cabin, as do all of our designs.
This subwoofer system is unlike anything else on the market.
Unfortunately, the complexity of the installation means there is a lot of work required on your end. I cannot stress highly enough: this car is a bitch. Most professionals would expect at least $500 to take on a project of this scope.
Our goal with this tutorial is to show you how to produce a high level of workmanship in your own car. We hope you appreciate our efforts. We have put no less than 30 hours into creating this document to help you complete this project. We aim to simplify this complex procedure to make this a "DIY Project" you can be proud of.
A quick overview of what you will be doing:
-Cut several precise holes
-Install "Sound Damping" materials
-Install the "Port System"
-Upholster bare metal
-Run wires and connect to the factory wiring
-Connect and mount amp(s) and rack
-Install your choice of "deck" in your dash
To install this box and/or amp rack, you'll need a few things:
Metal Cutting stuff:
-Tinsnips. (I use Snap-On "Avation Style" models DAL9A and DAR9A).
-Pneumatic saw. (I use the Porter Cable PTX5).
-Cordless reciprocating saw with metal cutting blade, such as the 18V Porter Cable. There is a link later on.
-Optionally, you may wish to consider a 4 1/2'' hole saw (good luck finding that) and you may wish to use a roughly 1 1/2'' hole saw. More on that later.
Sound damping material: You will need enough to competely cover most of the inside of the chamber behind the seat. If you are willing, cover every bit. We used "Peel and Seal" roofing patch on this installation but we do not recommend it. We do recommend a high-quality butyl rubber aluminum coated sheet damping material, possibly a product that rhymes with "Wino Splat". The better a job you do at both sealing and controlling resonances inside this chamber, the better. Please measure the area to be covered and obtain accordingly.
Cabling:
-Audio: One, two, or three pair of RCA cables.
-Speaker: 12' 16-18 ga wire, cut into four 3' lengths.
-Roughly 6' of 14-16 ga wire.
-3' 16 ga primary wire (blue is most commonly used).
-18 feet of 4 gauge power cable.
-4 feet of 4 gauge ground cable.
-Appropriate fuse holder and fuse. Generally we use AGU, but ANL is preferred. If you decide to use a second battery in the back of the vehicle, you may wish to run 2 4ga power wires and 2 fuse holders, or larger wire. This is massive overkill for most installations, but if that is the goal, have at it.
Optionally, subwoofer level control cable.
Terminals:
You will need an assortment of butt connectors in 16ga and and ring terminals in 4 ga sizes for battery and ground connection, possibly connectors for your amplifier. You need to know what you need based on your equipment, that is all on you.
Tools:
You need an assortment of sockets, screwdrivers, drills - general "DIY car enthusiast" stuff should do. If this is your first attempt at a major project, maybe you might want to consider something else, or hire a pro.
We HIGHLY recommend you buy a top quality crimper rather than the chintzy stamped steel one. We recommend the Channellock crimper: http://www.channellock.com/Category.aspx?zcid=125
You may also want wire strippers. Crimpers can strip wire, but not as easily as wire strippers. If you choose to solder your connections, have at it. You already know how to do that, right?
Read through this guide carefully. If you have found nothing left off this list of materials, tools and supplies, you have not read carefully enough. Yes, this is a test. Do it well or hire a professional.
Before anything else, you need to prep your car:
-Strip trunk, including carpet and paneling.
-Remove radio and all the trim in the car (including left under-dash panel)
-Remove door sills and kick panels, left and right
-Remove rear seat, top and bottom
You should not have to remove the glovebox or the rear side panels.
For the airbag guys: you might as well pull that stupid metal brace, it makes the job easier.
Please understand throughout this guide that our goal is to show how we did it. Do keep in mind that this is not the only way to do this, but we feel this to be the best. Obviously, you need to follow the cutting guidelines very closely to duplicate what we did, but you can simply cut 8" round holes if you choose. Our aim was to retain chassis strength. This does require fairly precise metal cutting skills. Expect this to be "cut and fit" - where you make small incremental cuts until it fits. We will get to that part later in the tutorial. Read through the entire tutorial before starting, do some thinking about your own level of fabrication and cutting skills and decide if you are capable of handling this level of installation. We currently do not have a list of people who have accomplished this installation, but we expect to have a nationwide netweork on G.A.S product installers available at some point.
Let's start off with running the wires. Take your pick, but I say run the power wire first. We'll be running signal wires up the left and power wires up the right, thus the need to remove the door sills. You should try to run the wires in the factory harnesses whenever possible. In your case, there is no channel for a harness on the right side of the car, so this makes it a little tougher.
We did not take pictures of this process, as it is up to your own discretion how you choose to run the wires in your car. Commonly, we drill a hole under the battery tray to run the power wire through and then route it along the edge between the floor pan and the carpet. If you choose this route, use a grommet to protect the wire as it passes through the firewall.
In the back, we run the power wire between a gap in the side wall and the seat back. You can see how we route it along the fender well in this picture:
The wire should end up like this in the trunk (this is obviously both power and ground):
And of course, make your ground point now.
I cannot stress enough how important a proper ground point is. I wish we had better pictures of this process, but it was very difficult for us to photograph. This connection is the single most important connection in your entire system. It is absolutely imperative that you scrape the metal shiny clean, making sure to get through any paint, primer, and coating that may be on the metal. We use a variety of methods to clean the metal, ranging from razor blade to carbide burr grinder. Whatever you use, make sure the metal is absolutely clean. Connect the ring terminal to the chassis with either a 1/2'' (large head type is ideal) #10 Philips screw, or ideally a nut and bolt with washers to maximize the connection to the chassis. It doesn't need to be huge, but make sure you make your ground point on the floor of the car (not a side well, and nothing that has been spot welded). If you're worried about corrosion issues or rust, squirt a little spray paint on your ground point, but make certain it is a metal-to-metal connection.
Now, let's run your signal cables. This guide is predicated upon the idea that you have a premium sound system from the factory installed in your vehicle. If it does not, please contact us for further instructions.
Let us make something clear here: you need to use "common sense" when running your wires. We have chosen to NOT provide pictures, but rather a detailed written description. If this guide fails to give a clear understanding of how to proceed, please consult a professional.
First thing to do is to lay out your three sets of RCAs. You should easily be able to reach through the deck opening to grab the wires.
We prefer to run 3 pairs of RCA cables. If you need to run other cables from the front to the back (Subwoofer Level Control for example) now is the time to do this. After you have the 3 pairs of RCAs and sub level control cable laid out, wrap a band of tape around the bundle every (aprox) 8" to secure the wires neatly. Choose your sub level control location at this point, before you wrap the cables, as you do not want to end up re-wrapping the cables or trying to relocate anything.
We recommend you start running the wires inside the dash. Start by running the bundle over the steering column, from the left towards the radio.
You will want to run the cables over the metal dash brace that is visible through the radio opening on the left. You need to run your cables there to minimise the chance of interfering with the heater controls.
No matter how you run them, make certian that the wires cannot interefer with any of the controls of the vehicle or heater system.
You will want to adjust the length of the RCA cables in such a way that approximately 4" protrude from the radio opening. Keep all slack towards the rear of the car. Make certain that you can put the subwoofer level control where you want it.
Now, route the wires along the factory route, following the stock amplifier harness. That means you will want to either use "wire ties" to keep the wires in place or use the factory wire retainers. Follow that wire route for the RCA cables all the way to the trunk, including through the grommets and wire channel leading through to the trunk. Please make certain to re-install the factory grommets after you are done adjusting lengths and position of the wires.
You will want to make sure all the cables are tucked neatly into the route, so as not to get pinched or abraided. A screw through a wire may destroy your equipment, be very careful of how you route them.
After the power, ground, and signal cables are in place, now you can begin the speaker wiring. You will need to cut and expend all 4 pair of speaker wires and the remote wire. Should you choose to install one of our "amp racks", you will also want to extend the power adn ground of the fatory amplifier.
For an overview of how to connect your wires, refer to our "$500 Stereo" thread, located here: http://www.r3vlimited.com/board/showthread.php?t=231107
You may wish to connect the deck at this point, now that all of the wiring is in the trunk. We would wait until the job is nearly complete...but it feels good to have something fully finished. Your call, we say wait.
Now it is time to cut some metal.
First, trace the outline of the triangles you see on the back wall, facing the trunk interior. Along these lines is where you will be cutting. Only cut the four triangles in the middle.
Cut out the four triangles with an air saw, starting the cut from the holes in the middle. This is the most challenging part of the install, and cutting oil (like Rapid Tap) is necessary.
Cutting oil application:
If you bend your airsaw blade, you can straighten it with a pair of pliers.
Your trunk wall should look like this when you're done:
NOTE: We have developed an easier way to cut these holes, but AFAIK, we took no pictures at all. What we did was use a 1 1/4"ish hole saw and a small battery powered (Porter Cable 18V) "reciprocating saw" with a metal cutting blade. We cut round holes in each corner of the triangles and cut between them using the reciprocating saw. This was by far the easiest method we have found. You may want take the car to someone with a plasma cutter and get a estimate on what they would charge to save you this tedious step.
The next step is to cut the wall behind the back seat:
Start by taking the port tube and tracing its outline with a permanent marker. Position the tube so the existing holes are at the very bottom of the hole you trace.
The locations shown here are not the optimum place, but we have no pictures at all of the correct locations. Feel free to experiment, but only an inch or two inboard or outboard. We were able to get the holes equidistant from the side panels while using the existing holes as a starting point.
It should look like this when you're done.
Using the same technique as before, cut out the circles.
You should now have two round holes in your back wall.
Make sure you can get your port tubes all the way in for a "test fit". They are diffucult to get in and may require rotating and wiggling around to get fully in the holes, but this is crucial to proper installation. You do not want to have to adjust the holes after the next step.
The next step very tedious, however it is absolutely necessary for good sound and clarity. You will be sealing the edges, corners, top and bottom, and any holes from the chamber you just cut holes in both sides of. Every hole other than what you cut should be sealed. Take your time and be thorough! If you have the time and patience, please cover every square inch of metal with at least one layer of material.
Let us explain why this step is so important. This step is the crux of getting all the performance you paid for. The subwoofer system in this application uses theat cavity as an actual part of the speaker. The modifications we outline cause that chamber to become an actual tuned part of the subwoofer. That is what makes this installation so difficult to do, and also why it performs so well.
We did this with Peel and Seal. It sucks. Ultimately a pain to work with in this area, but it suits the purpose fine. It required some heating with a heat gun first to become more pliable and really stick. Removing the paper backing on the roofing stuff is surely an efficient frustration generator. What you use is up to you, however after this we would suggest a true butyl-rubber sound deadener material with a foil backing. This permanent backing will make life much easier while forming the material to the angles in the chamber.
Start by cleaning. We used heavy duty "Simple Green" and rags, then heated the area to make certian it was dry. Please follow the manufacturer guidelines of whatever sound damping material you choose for surface preparation and application.
To seal the leaks, cut strips of whatever material you choose and lay them over the holes. You'll have to get pretty deep in the chamber. Using a flashlight, look for obvious leaks. There are several long oval holes along the very top, and a couple where the roof of that chamber meets the front wall, near the middle. Feel around in the chamber for any corrugations, a lot will be difficult or impossible to see.
Now that the wires are run and the chamber of horror is sealed, lets upholster the underside of the top compartment.
First, you will need to remove the cable that prevents the top from being opened while the trunk is open. Be very careful at this point, you can easily damage your paint by opening hte top while the trunk is open.
First, clean the trunk carefully. Second, lay the carpet we provided you on a flat surface and apply spray glue to the entire surface of the back (ugly side) of the carpet. Use long even strokes to get proper coverage.
Second, remove the trunk seal along the back edge and around the rear corners.
Spray glue on the entire area from the very edge of the trunk seal down to the underside of the top storage area, approximately 18" "down" from the trunk seal. Yes, that means you will be spraying glue on the underside of that top storage...please be careful! It is imparative that you cover every little area that needs to be upholstered EXCEPT the cable for the top safety. Do not get any glue on that cable!
Here are a few pictures of that process:
Get way back in the corners too, remember where your trunk liner ends:
Time to wait for that glue to dry. Let it dry for about 3 to 10 minutes depending on the weather. Read the instructions on the can. You want it to be slightly tacky at the wettest.
Next, grab that piece of carpet you already glued and carefully apply it starting in the middle near the trunk seal. Make certain it is centered or it will not cover the entire area.
Starting in the middle at the top, press it in place with your hands. Try and get it perfectly smooth from the top down and the center out. You will be trimming it before you are done, so make sure it overlaps the entire area top be covered:
Now that you have the entire area covered, you need to trim it to shape. When you do this, be aware of the trunk seal and how it fits. You want the carpeted area to cover all of the metal right up to the trunk seal. Now, using a scissors or razor knife, trim the top edge:
Continue trimming the carpet and fitting the trunk seal
When you are done, it should look like this:
A few things to watch for: First, just before you cover the safety cable, cut a small hole in the carpet to allow the cable to come through. You also want to make sure the carpet covers all the way to the side walls. This carpet "seams" gracefully, so you can patch it...but you want it perfect the first time.
If you are satisfied with how the upholstery looks, make sure your trunk seal is properly reinstalled and reconnect the trunk lid safety cable.
This is a good time to install the wire that turns on the light in the amp rack. Please refer to this thread for further instructions: http://www.r3vlimited.com/board/showthread.php?t=220989
So now we have the wires ran, the holes cut and the sound deadning applied, right? Lets start some reassembly.
In order to allow the box to fit tightly against the front wall of the trunk, the side panels need to be cut in the corners. Look where the trunk liner meets the top and bottom of the front wall of the trunk and cut a small slit to allow the box to fit tightly without distorting the side panels.
You will also need to cut a small "H" made to pass the amp power wires through. This location is roughly 10" back from the front wall. Here are a few pictures of the amp wire pass through (look for on a bump in the liner):
Now that you have the right panel ready to install, go ahead!
Get the power wires in place and reassemble that right panel.
Carefully locate the RCA and speaker wires on the left side of the left panel in such a fashion that the box will not crush them when it is screwed in place and reinstall the left side panel.
Time for the nest step: install the woofers. Drill a small hole, just big enough to acomodate your speaker wires, on the left side of the box. Depending on your choice of wofers and amplifier, you may need to run 2 pairs, please be clear on what you need before proceeding.
Drill the hole, run the wire, seal the hole with a dab of silicone connect the woofers and mount them in the box. Test them however you can to make sure they work properly and are "in phase". Make sure theer is roughly 3' of wire hanging out of the left side of the box.
Now that you have a sealed chamber and the trunk liners have been slit, it is time to fasten the box itself to the rear panel. Does it make sense so far why this tutorial is so involved?
Using two bit holders or a single long magnetic bit holder on a drill will extend it enough to sink two screws on each side of the box. There are already two pre drilled holes on the rer wall that can be used, but you will want to drill 2 more, so a total of 4 screws is all that is needed to secure the box. Feel free to use more, but do not screw into the woofers!
The box should now be in place: the port tubes may be installed.
Before popping them through, add a little ball of strip caulk on the end of each tube. This will secure the end on the floor of the chamber and eliminate rattles that may be caused by the vibrations.
Slide the port tubes through their holes and align it so it is nearly flush with the face of the wall. Drill a pilot hole in the top and bottom of the elbow for screws. Locate them just inboard enough that they will not crack the port and will be inside the chamber when flush.
The holes in the sheet metal are there already from mock up installs in this picture. You need to make brackets to mount the tubes.
We cut small strips of metal to bend and make brackets. All four going on:
Now to seal the tubes to the car, use 3M brand "Strip Caulk", (available at most all Auto Body Shop supply stores) like shown here on both sides:
Finishing touches with the port tubes! Install the port tube we have supplied you. It should be a tight fit!
So now your subwoofer itself is installed, your 4 pairs of speaker wires, subwoofer wires, RCAs, sub level controller, power wires for the fans in the amp rack and turn on wire for the light strip are all finished.
Install your amplifier(s) leaving plenty of extra wire. All speaker, audio and power wires must be run along the top of the box should you decide to install one of our amp racks.
More to follow! This has been a tremendous amount of writing, hope it makes clear what you need to do and how to do it. We sincerely hope you enjoy your new subwoofer system!
Luke Fisher, Justin Bresee and Nigel Fisher,
German Audio Specialties


Comment