
Good eye! I think the PO installed separates in the rear panels as well as the front. I can take pics of the back panels since I've got everything taken apart now. I didn't pay much attention to it, but it came out pretty good. Maybe that's why I thought it was a stock M-Tech II interior mod!
-
-
Wow...what a save!
Got sound yet?
Closing SOON!"LAST CHANCE FOR G.A.S." DEAL IS ON NOW
Luke AT germanaudiospecialties DOT com or text 425-761-6450, or for quickest answers, call me at the shop 360-669-0398
Thanks for 10 years of fun!Comment
-
Thanks! It did come out good, actually better than I thought it was going to. All the bends and shapes match perfectly. Got lucky there.
Thanks Luke! No sound yet unfortunately. I have very limited time to work on it, no garage and a 1-year-old to keep entertained and away from self destructing activities. :D All I did since these pictures were taken is cleaning out all the crap the welding left behind. Next is going to be covering the chamber with dinamat, then finishing running the cables and the box is going in.
I'm trying to do a little work whenever I have the opportunity so slowly I can finish this install. I will take pictures and post updates though if anybody's interested.Comment
-
Update
The subwoofer install is back on track.
A quick download of the past 4 months:
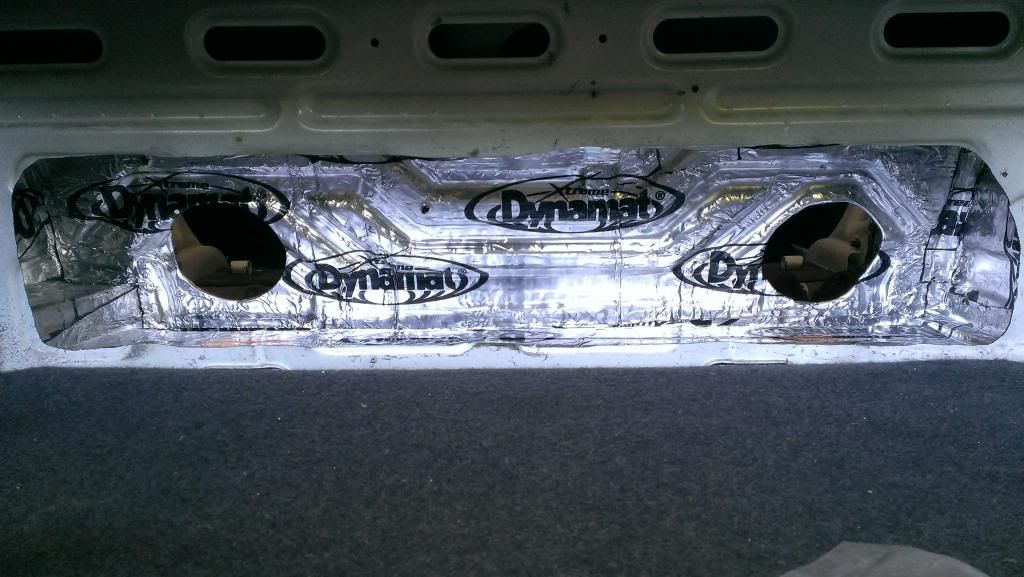
- finished dynamating the chamber
- painted the patch white
- installed the BOX
- fried my amp the very first time I turned it on
- lost my father in an accident
- spent a month in europe taking care of my mom
- worked my ass off for another month
- had my amp fixed
- fried my amp for the second time I turned it on
- fixed my amp
- installed the amp this morning and drooled all over the seat and carpet in the car. it's not even dialed in yet and the port tubes are still missing but it sounds G R E A T!
Pics and details to come later.Comment
-
Keep up the good work man. Someone I knew RIP had posted in their office "drive and determination lead to success". Tis true and inspiring.Never argue with stupid people, they will drag you down to their level and beat you with experience. -Mark TwainComment
-
My condolences for losing your dad, I hope he didn't suffer.
Glad to see you are still working on the audio project!
Comment
-
-
Details and pics:
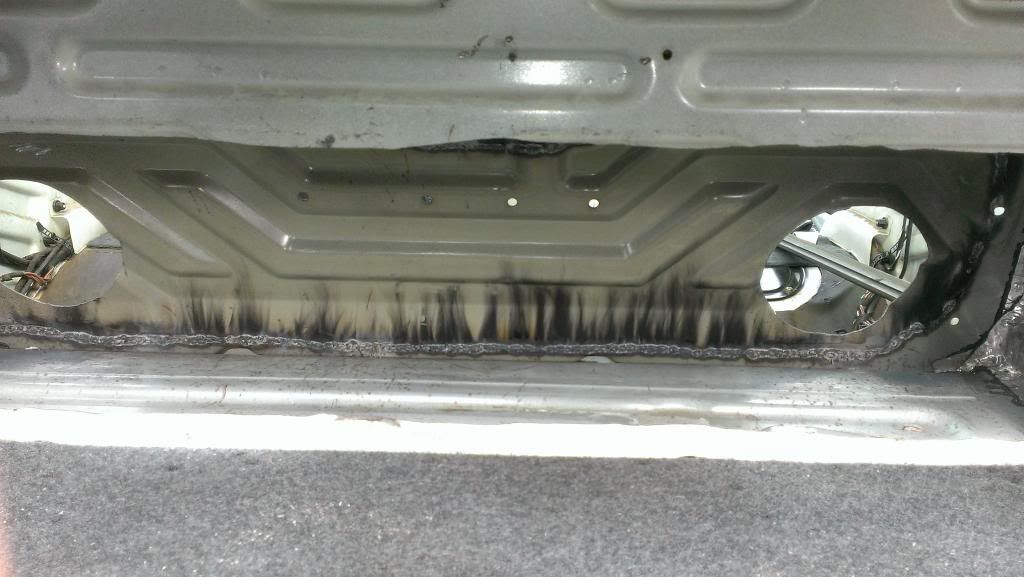
Here's a picture of the inside of the chamber. Looks like I had some fire going on in there....
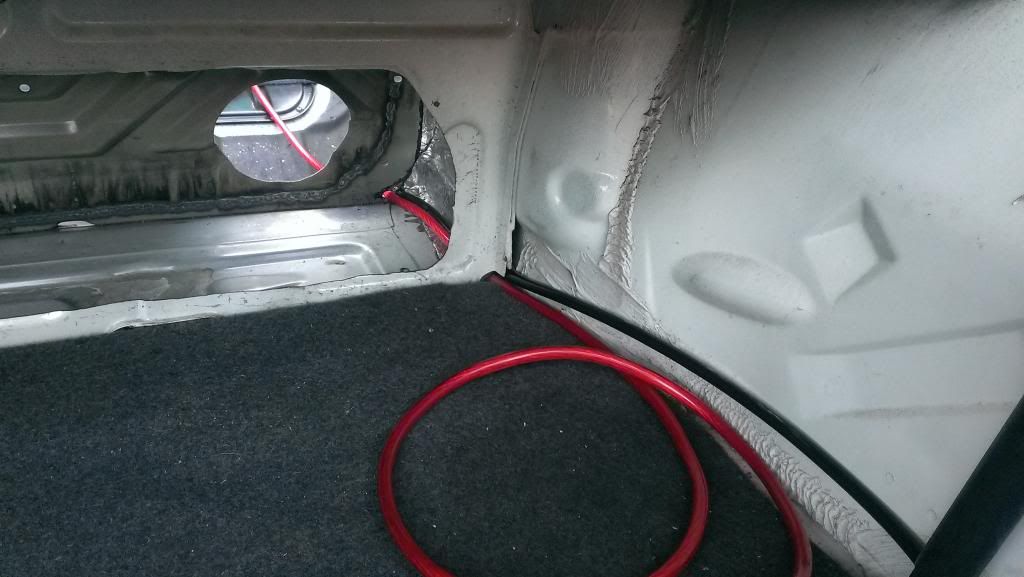
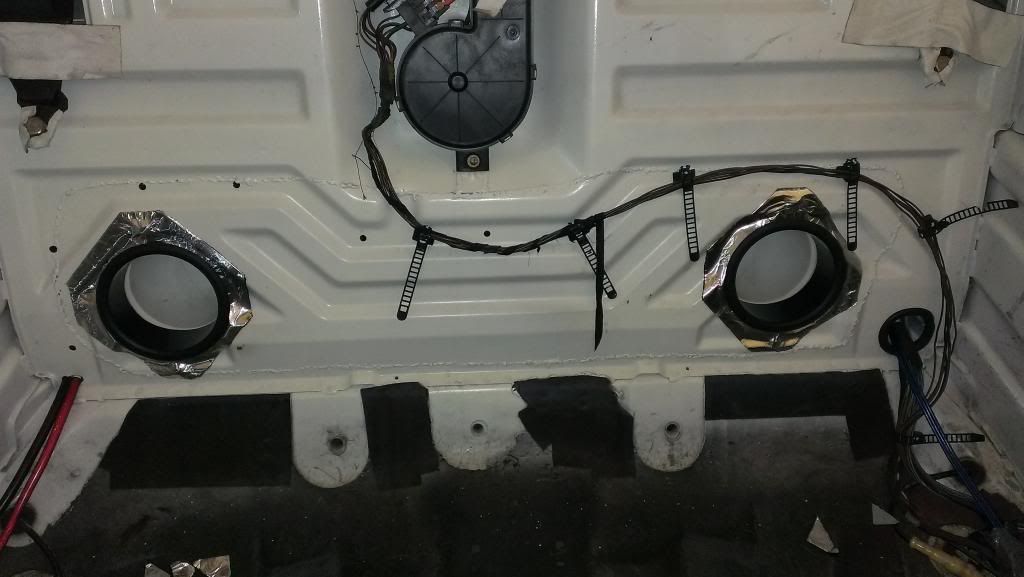
I drilled some holes on the panel to fish the cables through. There's a factory ground just outside the picture at the bottom left corner. I think the rear power window motor is grounded there. I decided to use that one instead of making my own ground.
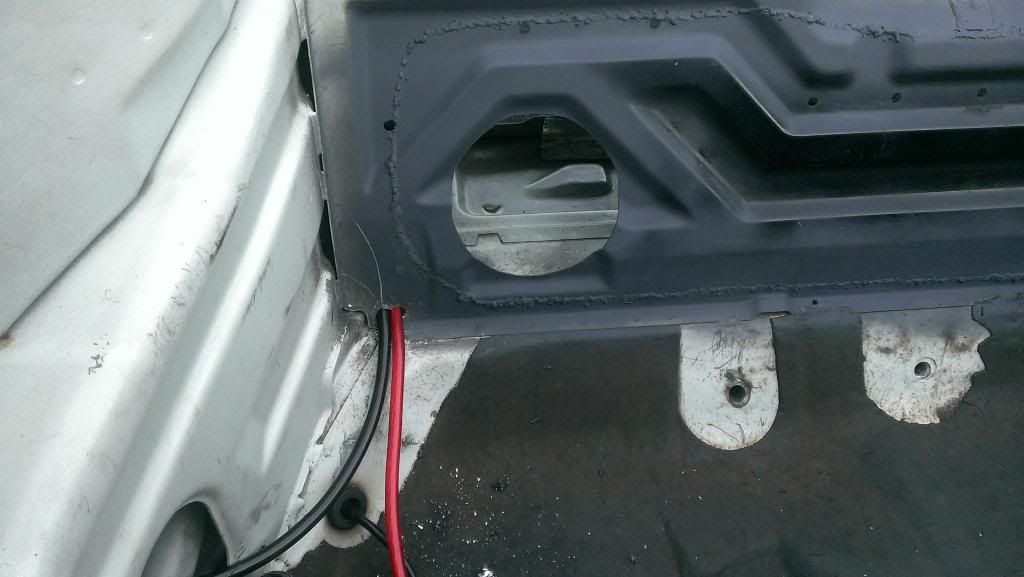
On the other side I just used the existing hole in the corner for the cables.
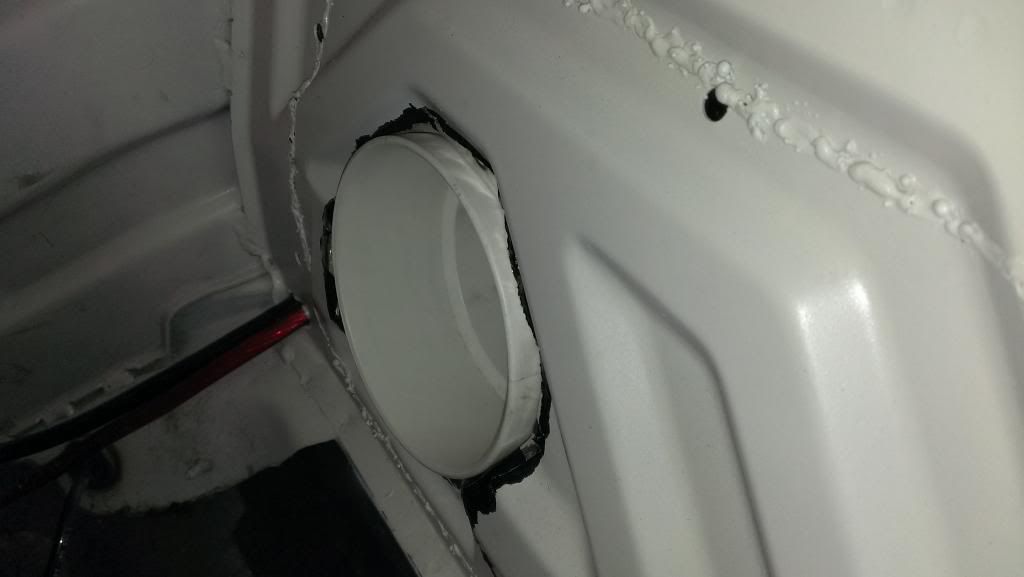
And the patch painted white. No one can tell that it's not the way it cam from the factory.... yeah right?
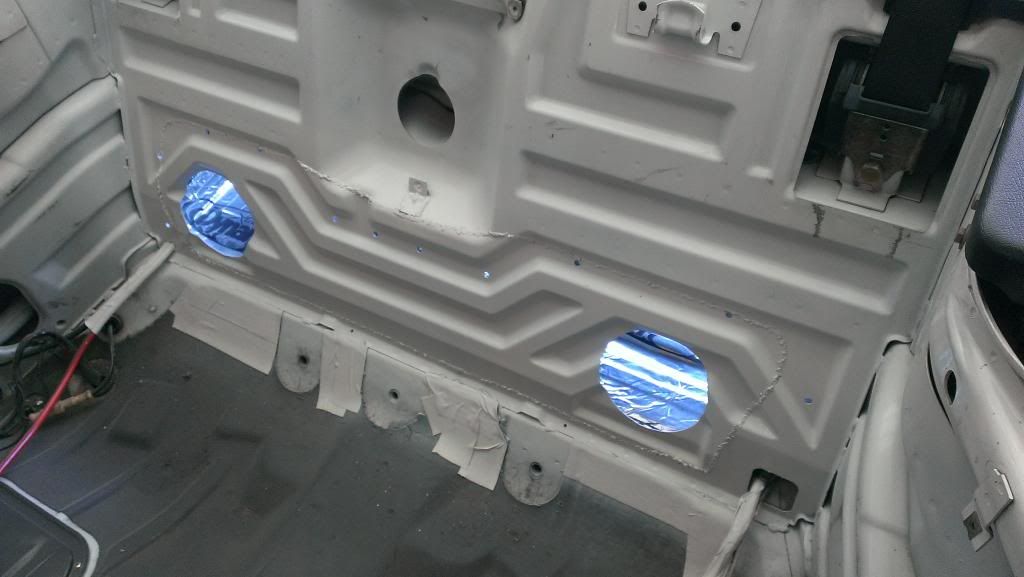
Dynamat is done. It was hard to install with the back wide open. I can't even imagine how f*cked up it is to do with only 4 of the small triangles cut out! Feel sorry for you, guys, with nice untouched and unmolested panels!
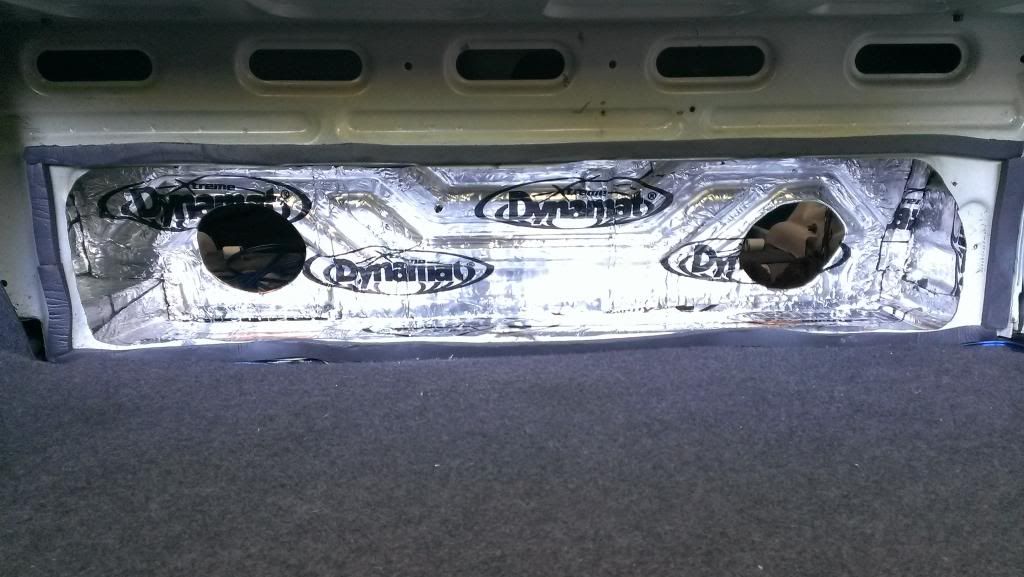
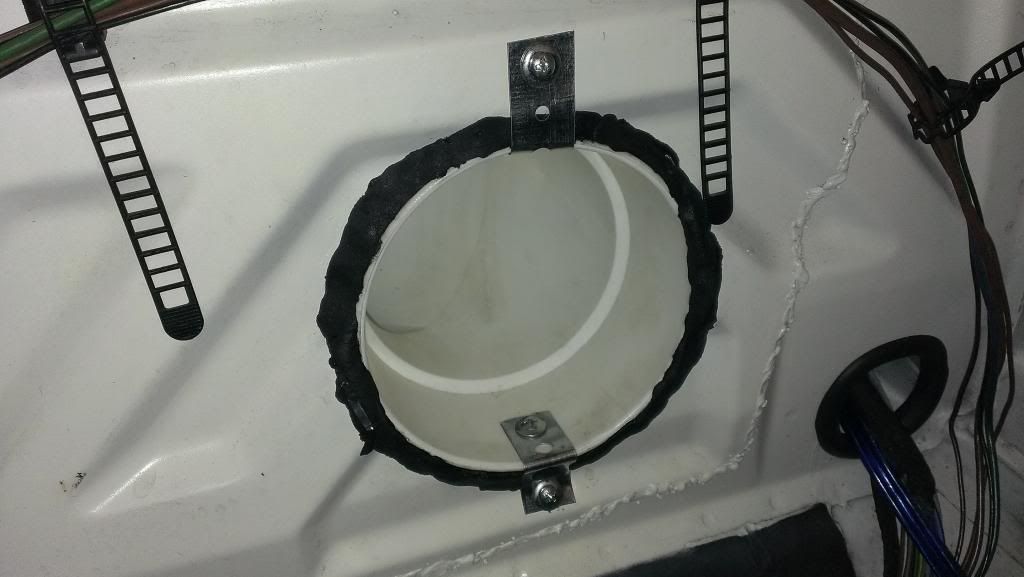
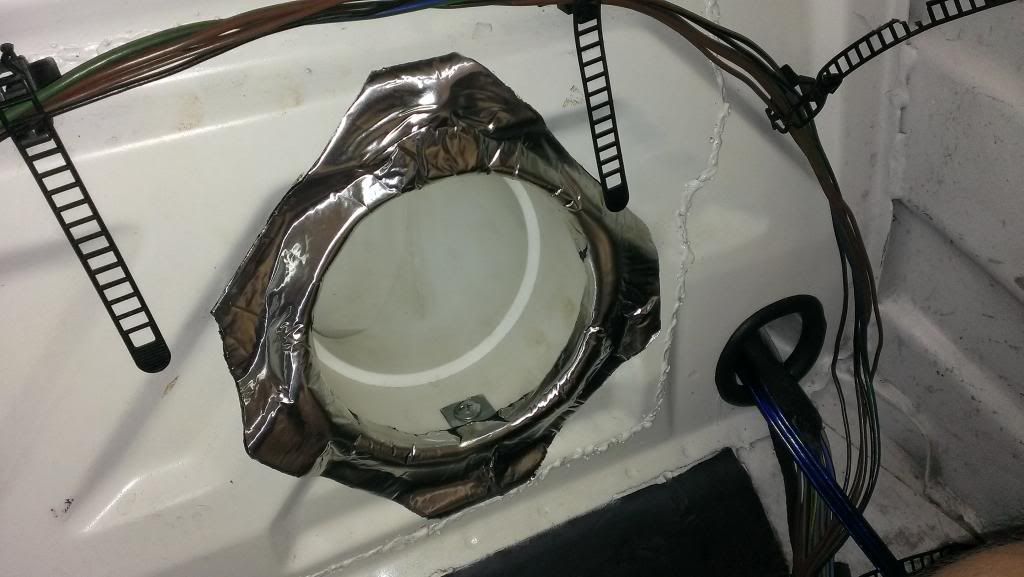
Now here comes a little trick! I didn't have much left of the rear panel and it didn't look like it was gonna seal the box all around. The metal had too many waves. I decided to use some foam on it to improve the situation. It is just regular self sticking foam seal that you can buy at a hardware store.
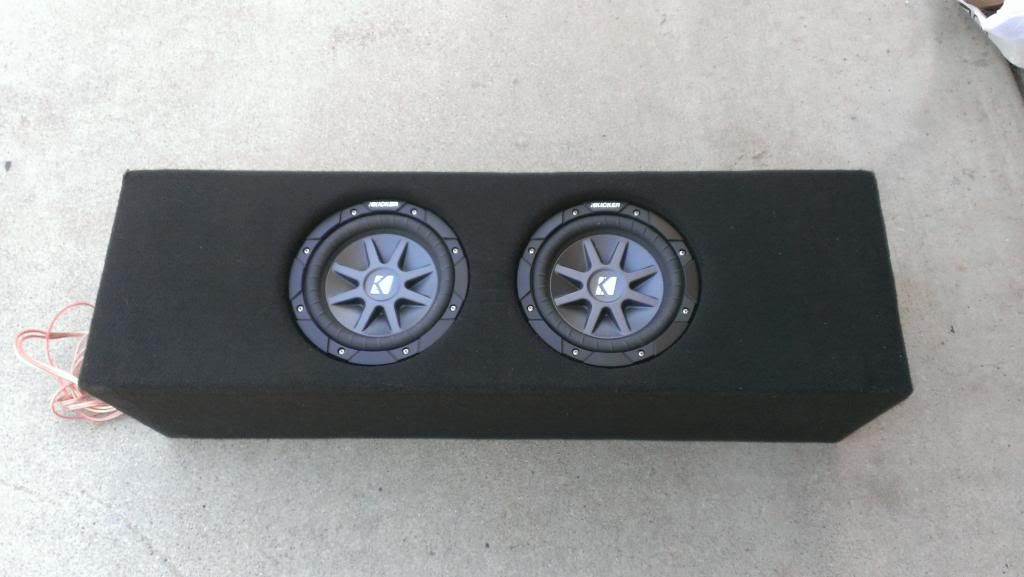
Here's the box all ready to go to move some air!
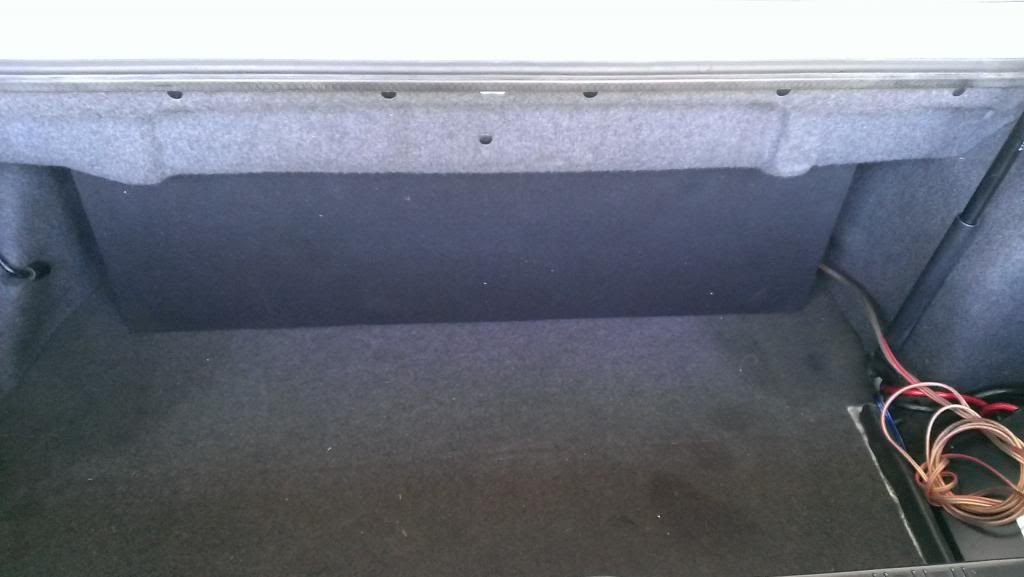
It was a pain in the @ss to push this in. I know the top cover's supposed to be removed and a grey "carpet" should have been glued there but I wanted to keep the original if there was a way. Now it's so snug I don't even need to secure it with the screws. I'll need a dynamite to get it out of there.
Here's how I hooked up the wires to test it.
I turned the head unit on with everything turned down to minimum. I was very slowly raising the volume but after a few seconds I smelt smoke so I shut down the head unit and quickly pulled the fuse. There was smoke coming out of the trunk..... yay!
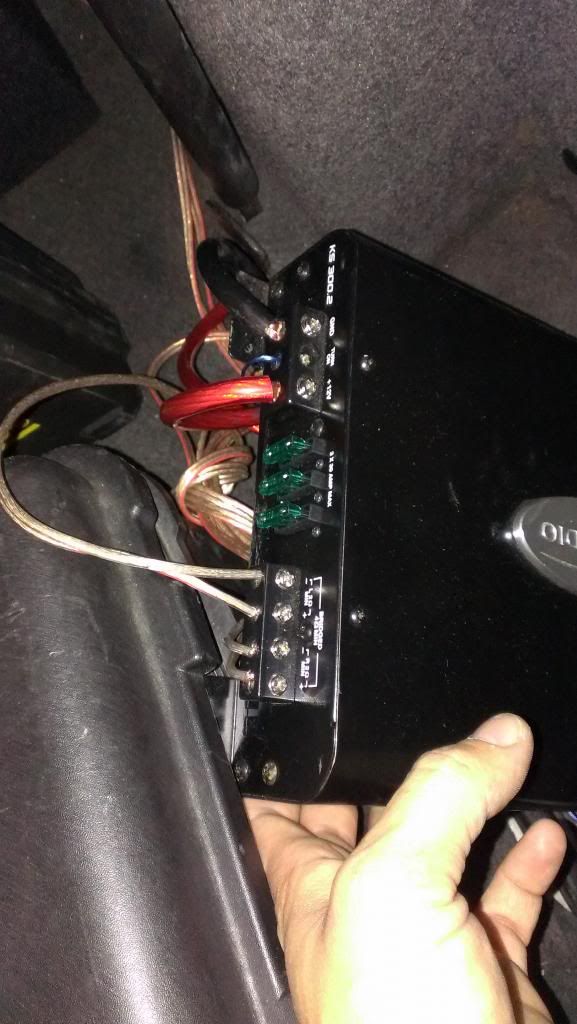
Here's the amp turned into a smoke machine
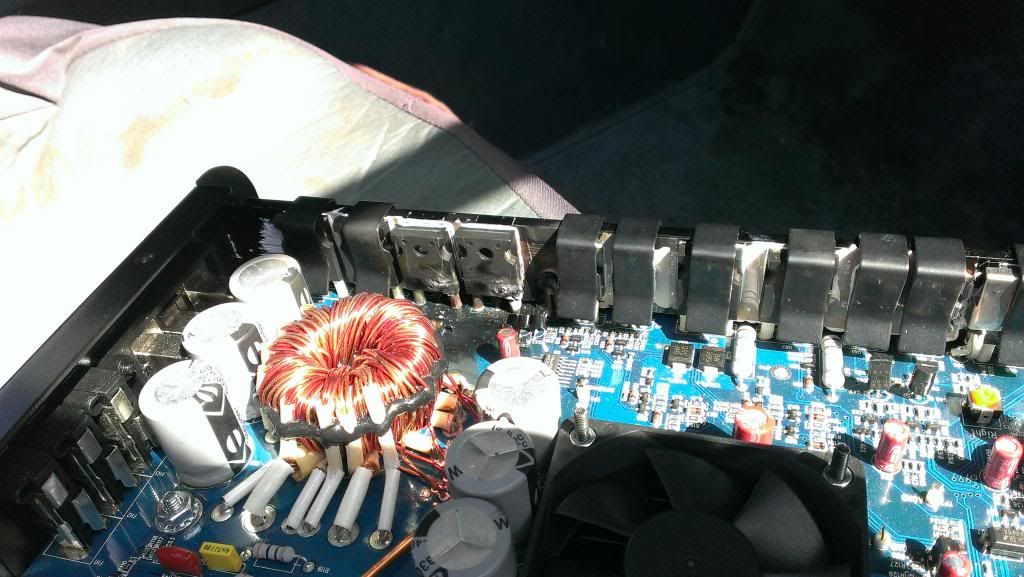
After desoldering the mosfets and cleaning off the gunk it left behind you can see the damage to the circuit board. Luckily it was connected on the other side of the board and there was no connection on the upper side so I didn't need to run trace wires.
After quite a bit of reading up online trying to figure out how the amp works and what could the problem be I gave up and started hunting for somebody local who can repair this guy for me. My biggest problem was that I had no clue what made this amp blow up. I connected everything right, power was good and there was no short anywhere.
I've found a guy who does this kind of work at home. We met and he had a nice repair station set up. Looked professional so I trusted him. He was referred to me by a electronic parts store.
I asked him to test the amp to make sure it works right and i gave him brand new mosfets to change all 4 of them to make sure they all good and have the same characteristics (only 2 out of 4 blew). He told me it will take him 2-3 days to fix it. Well.... it took him weeks. When I finally got the amp back I asked him what was wrong with it and if he tested it. He said he had to replace another part so he had to charge $60 instead of $40 we agreed on. Also he told me he tested the amp with a signal generator and it was nicely amplifying it so it's working right.
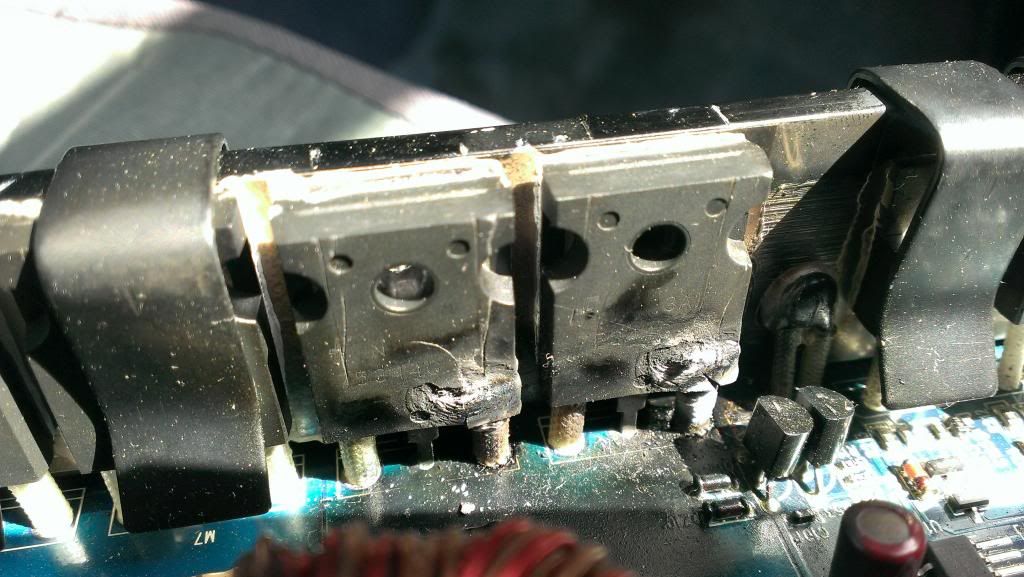
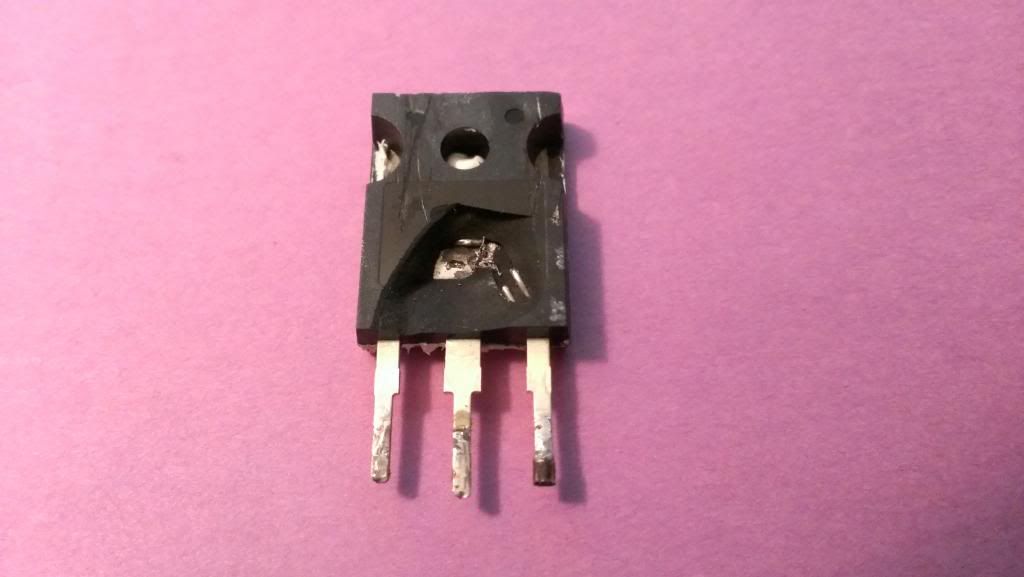
I took it home, hooked it up and this time only power was connected. Nothing else to rule out any shorts I might have had before. Jumped the +12V to the turn on lead and was ready to disconnect the amp is something goes wrong again. After 2-3 seconds I heard a hard POP and powered down the amp immediately. This time there was no smoke but I knew the test didn't go well. I opened up the amp and found this:
I checked the power again with a bulb to make sure there's no voltage drop when there's a bigger power draw and it was fine. The guy simply didn't fix my amp nor tested it. He just installed the new mosfets I gave him and called it a day. Even that took him weeks! Live and learn!
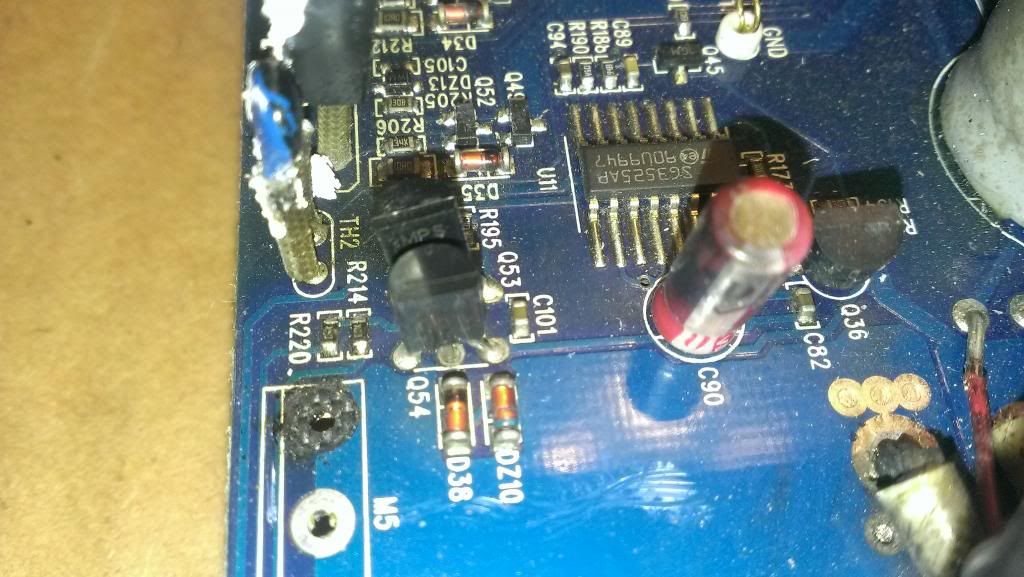
Then I decided to trust no one and try to figure out the problem myself. I started measuring things around and discovered that the mosfet that died wasn't getting 12V from the driver circuit. Only little over 10. That explains why only that one blew up. probably the other one died after this one gave up and had to work extra hard to make up for the damaged mosfet. That made that one blow up as well. Turns out a small SMD resistor got damaged the first time around and it changed its resistance significantly. That caused the low voltage.
Here's a picture of the resistors on the good side:
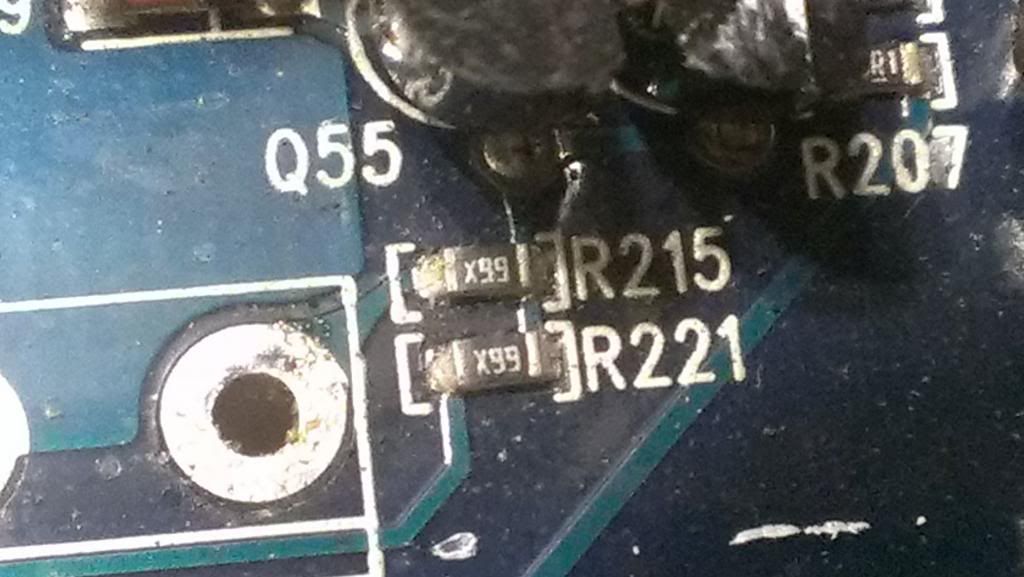
And here's the bad side:
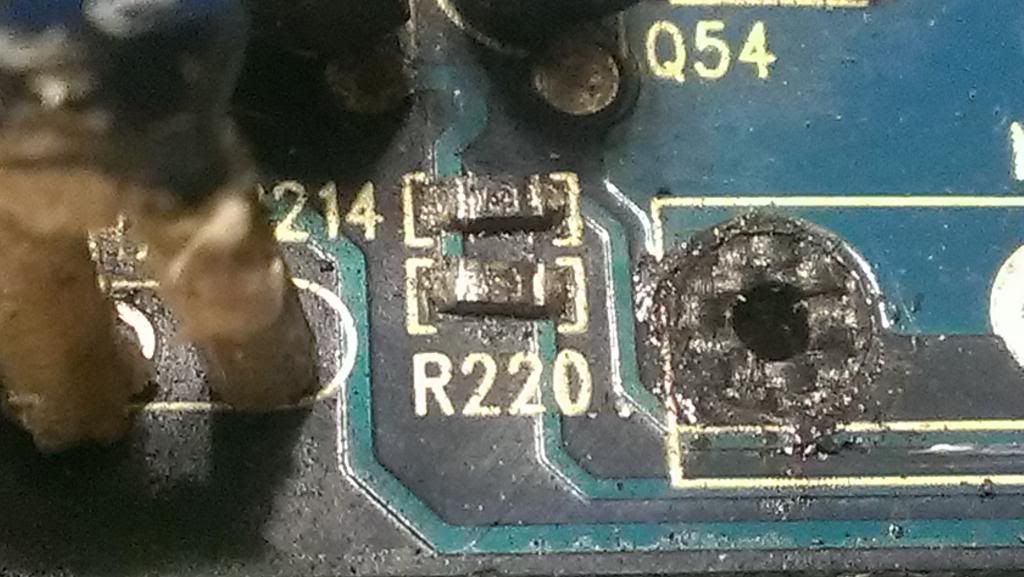
The bottom one was damaged significantly but the top one was going bad as well so I replaced them both last night.
After putting it back together I hooked it up to a 12v power source to test if it did the trick and I got a green light on the amp. I left it on for about 30 seconds and there was no smoke, no pop, just a solid green light and a very soft fan noise. Nothing was getting hot which made me halfway happy. I was still afraid of hooking it up in the car.
This morning I gave it a try but went step by step to make sure all was good. First only power hooked up, nothing else. Triple checked the voltage. Jumped the 12v over to the turn on lead and got green light. Then I triple checked the speaker wires. 2 ohms on both, no signs of short. Hooked up the RCA cable and the amp remote cable (or whatever it's called). Head unit turned on the amp and got solid green again. Finally I hooked up the sub and powered up the head unit again. Slowly I turned the knob and there was sound coming from the rear! Nice, clean, deep rumble! And then I gave myself a tap on the shoulder. :-D
I still need to clean up the cables, install the port tubes, mount the amp and put the rear back together. I did crank it up a bit today and there is nothing rattling whatsoever! There is nice strong bass in the cabin but it doesn't get out of the car. If you step out of it you can still hear it but for the most part it is sealed inside which I like a lot! Also I can barely hear the sub in the trunk. 90% or more of the kick goes into the cabin.
I still don't know for sure what caused the amp to spit smoke in the first place. I bought it used from a reputable local R3V member and there is no doubt in my mind that he sold it in working condition. The only thing I can think of is that something got inside through a vent hole and shorted out the circuit that made it blow up for the first time. I had the amp just sitting in my car for weeks so it is possible. The good thing is that it's working properly now and I can finally finish this project. I hope I didn't just jinx it now......! Last edited by treff-7; 07-22-2013, 10:11 PM.
Comment
-
This DIY thread is epic! Great work! I love the, "if you can't get it done right, do it yourself" attitude.
My condolences on the loss of your father, I've come to embrace mine more and more the older I get.Comment
-
Some more update:
So I had time to work on this a little more. I needed to install the port tubes. Those were the only things missing to complete the install of the holy subwoofer of E30 convertibles.
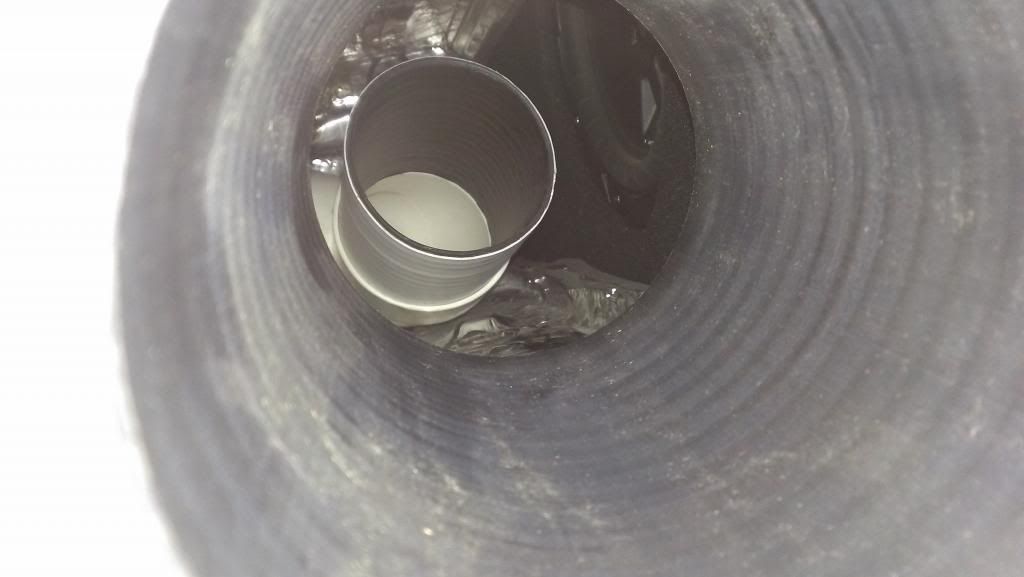
Here's the first tube inserted:
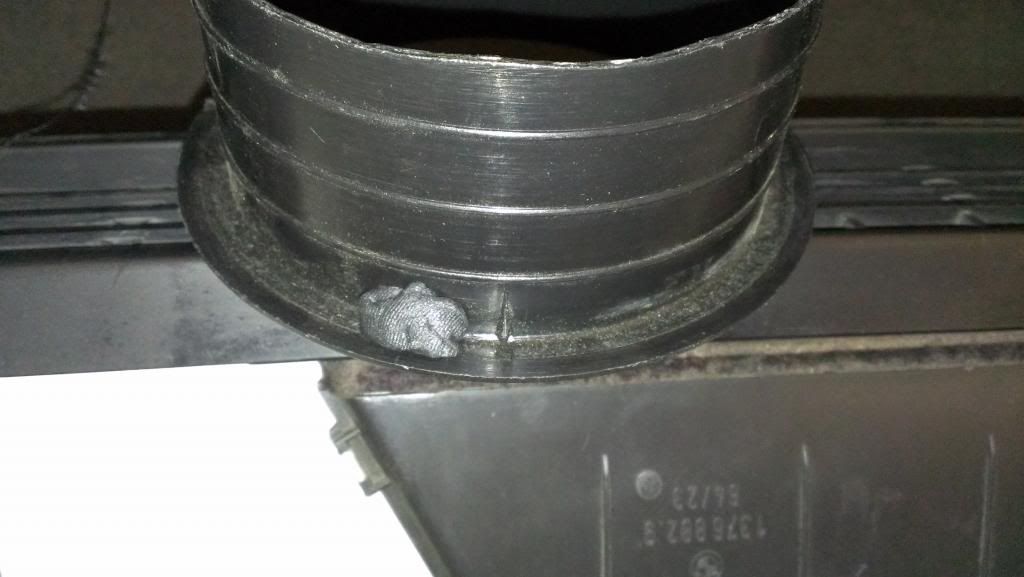
First I tried to put it in the way Luke explained in his thread but it didn't look right. The end of the tube was facing down too much so I had to turn it to make the end flush with the metal. It ended up looking like this inside:
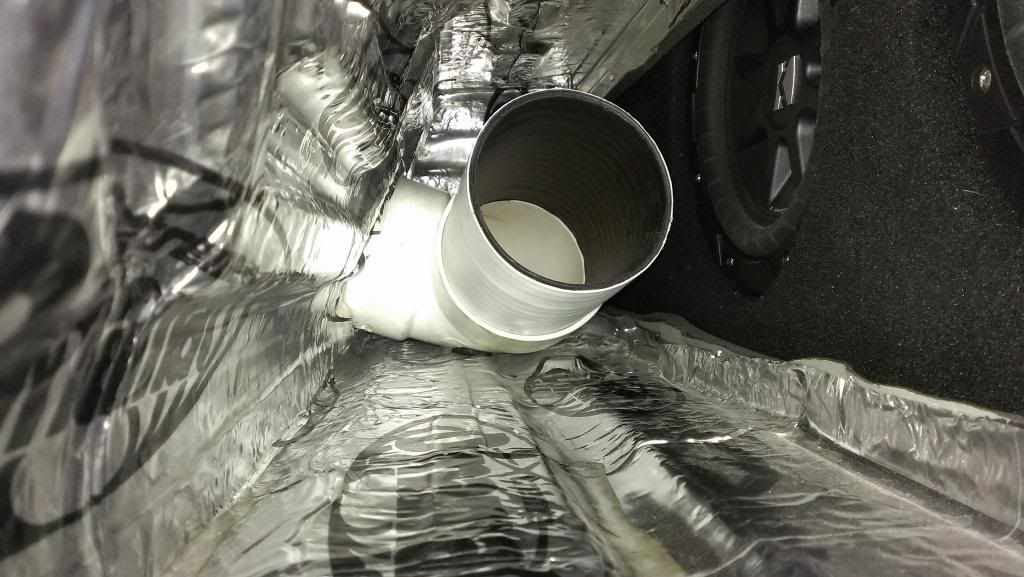
Note where I put the little ball of black chewing gum to prevent it from rattling. It's barely visible but it's right under the elbow.
Also if you look carefully you will notice that by the speaker the foam strip I used actually goes across in front of the speaker leaving an unsealed part above it where the air can escape. I just noticed this looking at the picture. I will need to address this later. The subwoofer is not screwed in so I can remove it without ripping out the tubes.
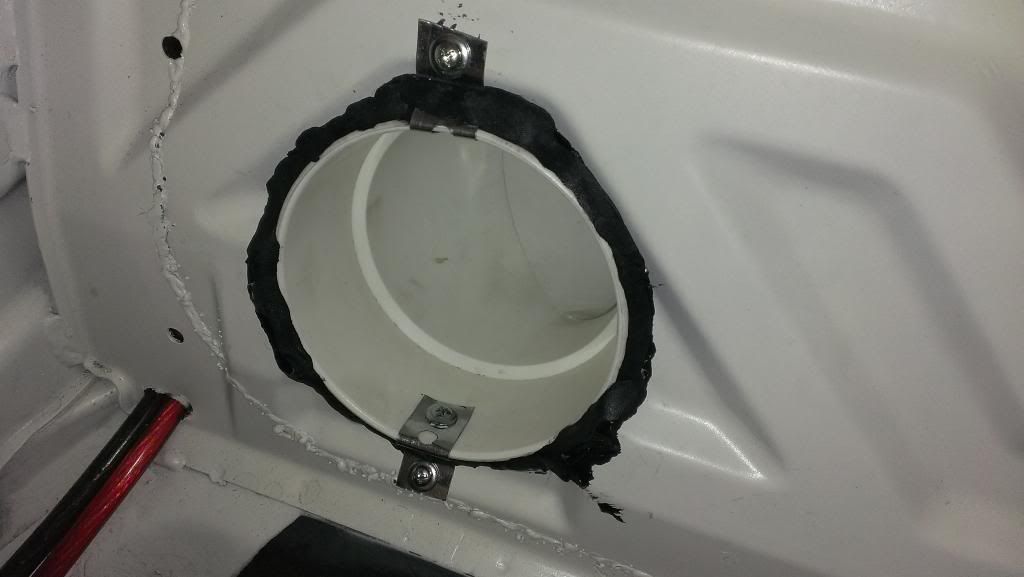
Here's the tube secured:
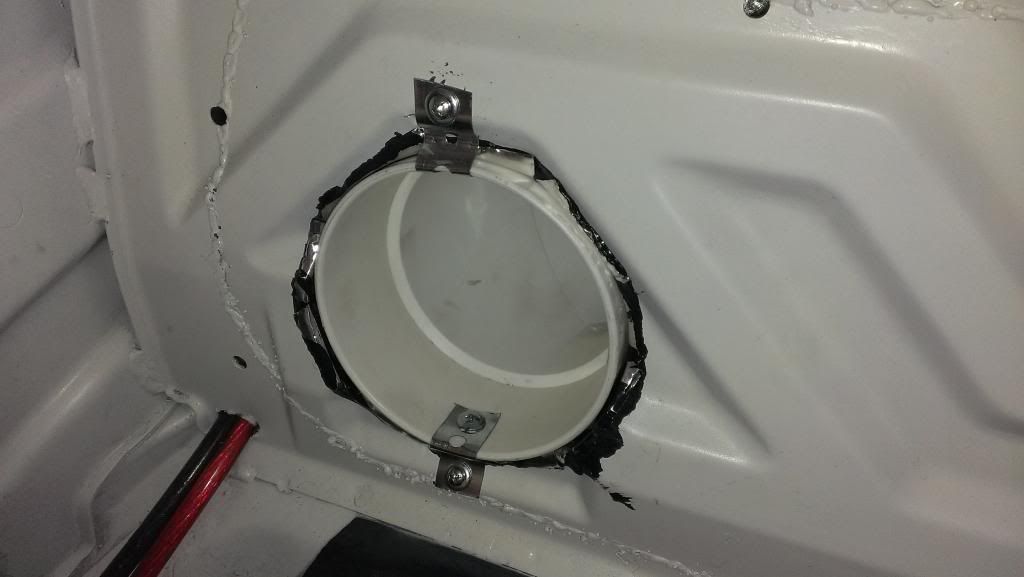
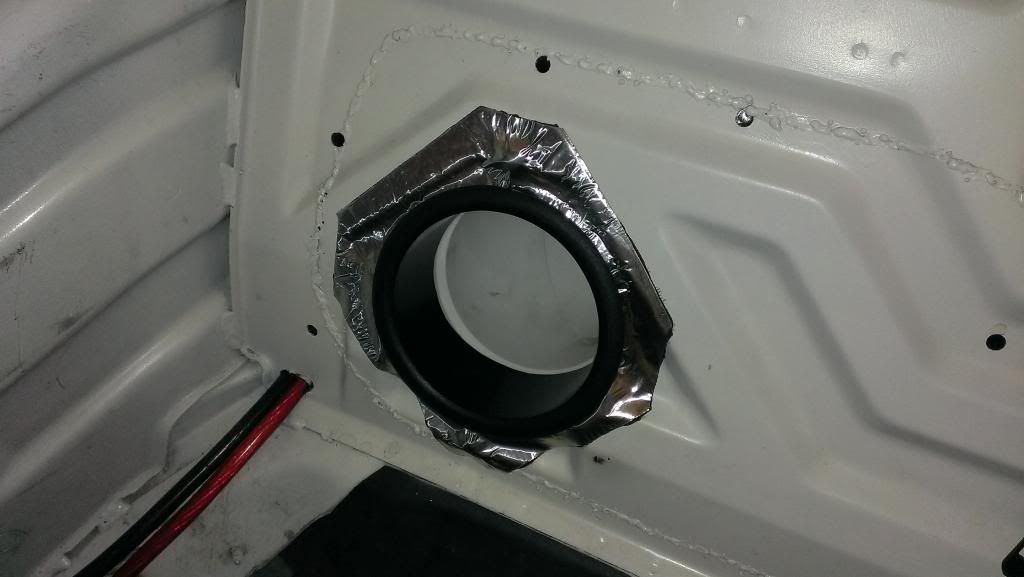
And sealed. Turns out it would have been smarter to seal it first under the plummer's tape because this way it doesn't seal perfectly but it's not a deal breaker. There will be another seal going on top of this.
And here it is:
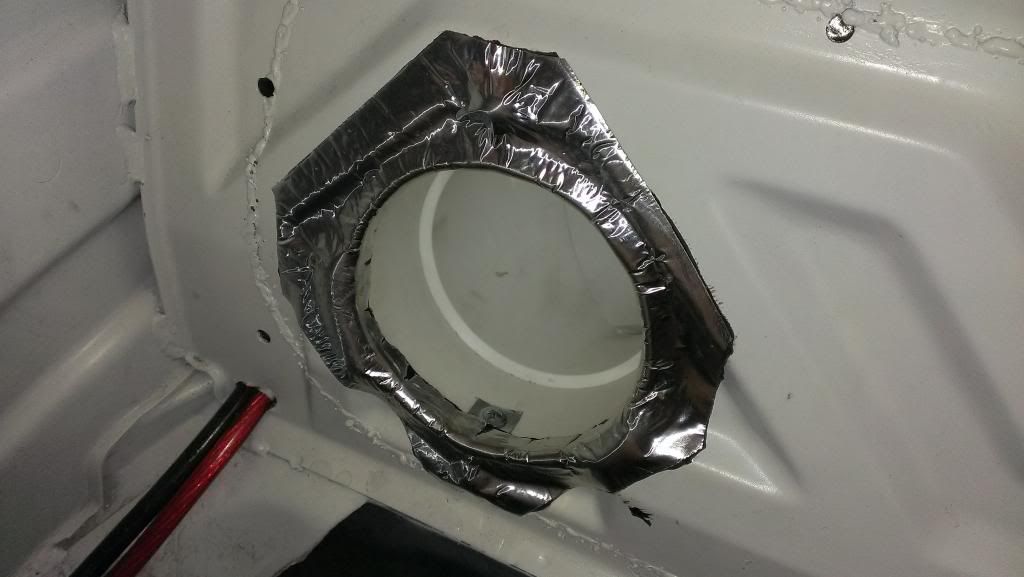
I turned the square piece 45 degrees to cover the plummer's tape completely and create a perfect seal. And cut off the corners to make it a bit more pretty.
The black beauty cover wasn't snug enough so I put 3 balls of gum under the rim to secure it in place:
And it's done:
On the other side I sealed under the tape first:
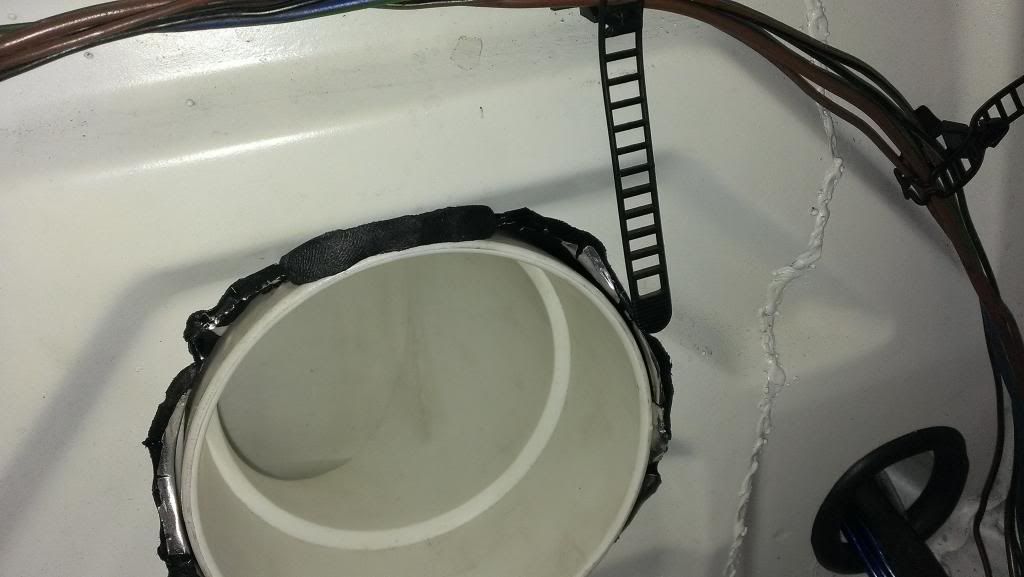
The inside:
Sealed and secured:
And all done!
It sounds absolutely awesome! I wish there was a way to record it and show you guys! On the freeway at 70 mph with the top down and windows up it gives you decent bass but with the windows down it's a hopeless battle unless you have the tubes extended all the way to your ear drums. There's just too much wind blowing away the sound waives and it's too loud as well. I didn't try to crank it up all the way and see if it can be loud enough to be able to enjoy music with the windows down.
The other thing I like a lot is that if you have the top up the boom is not loud at all outside but sounds very good inside. It doesn't shake the windows on the cars within 3 lanes around you. All because the sound is channeled in the cabin and it doesn't use a trillion watt subwoofer in the truck to penetrate through everything between you and the trunk.
I still don't have the rear seats in so I will report back how much it changes the way it sounds.Comment
-
One more thing! I can pull out the spare wheel without a problem. The stud in the middle doesn't need to be removed.Comment
-
Just a quick report after using the box for a few months:
I got around putting the rear seat back and the experience is pretty forgettable now. I'm no audiophile by any means but even for me the bass became uninteresting. The details are gone and it just simply sounds boring now. I don't want to port the seat (yet) so for now I use it with the back part removed. I maybe have more than 1 passenger once a year so it's not a big loss for me. It's only an aesthetic shortfall.Comment


Comment