
Hey E30 Enthusiasts, I just picked up a used M42 for my '91 318iS project. I'll be doing a bit of work on it before I drop it into the car, so I thought i'd document the journey and create some 'How-To's' to help others out.
This is my first attempt at a How To (first attempt at a forum post even...) so bear with me!
One of the first things I wanted to do to this engine was to remove the valve cover to replace the gasket, and paint the valve cover while I was at it. As soon as I started loosening the valve cover bolts, there were a handful right off the bat that were not tight like the others. at all.
The M42 engine is notorious for having weak valve cover threads, so after a few valve cover removals/installs and bolt torquing, these threads like to turn into butter.
Before we begin:
There are many ways to repair bolt threads. There are many guides out there that involve using Heli-Coil to overbore the thread, insert around the bolt and tighten away. These are priced anywhere as low as ~$13. Many of the threads on my head were "fixed" using helicoils. These obviously did not hold up to the test of time, and ultimately loosened and helped lead to the valve cover leak. Plus anytime you remove the bolts, you need to replace them anyway..
*Disclaimer* I am sure there are many out there who have used helicoil or other methods and have gotten away just fine, more power to you! I'm just very picky when I do fixes so this is the method I chose as a 'set it and forget it'
Since this is a guide to do this the right* way (see disclaimer above), I am using (and very highly recommend using) the Time-Sert thread repair kit.
The price difference is quite obvious, but in this case you very much get what you pay for ($75 compared to ~$13..). Here is a link to the kit I purchased on Amazon. This kit includes all the necessary bits, and 5 time-sert 'threads'.
The M42 uses M6x1.0 bolt thread for the valve cover bolts.
Lets Begin!
Here are the contents of the kit
 20200519_223446 by Cam M, on Flickr
This is what the threads 'repaired' with helicoil looked like. You can see the lack of threads in the hole, and the helicoil.. attached...partially..? to the bolt..
 20200519_224200 by Cam M, on Flickr
Oh well. We're going to do this right, with the end-all-be-all fix!
Step One - Drilling:
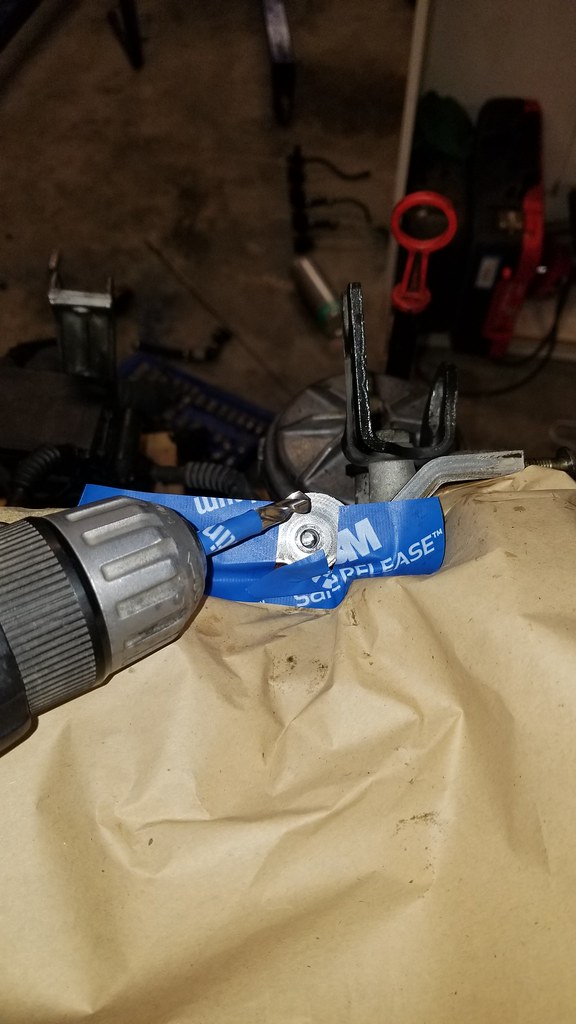
Assuming that you already have the valve cover removed, first thing will be to clean the area around the thread you want to repair. Use some sort of degreaser to get the oil and grim off of the surrounding metal, so you can mask off and tape around it to prevent metal shards from getting into your head.I used masking tape and paper.
 20200519_224625 by Cam M, on Flickr
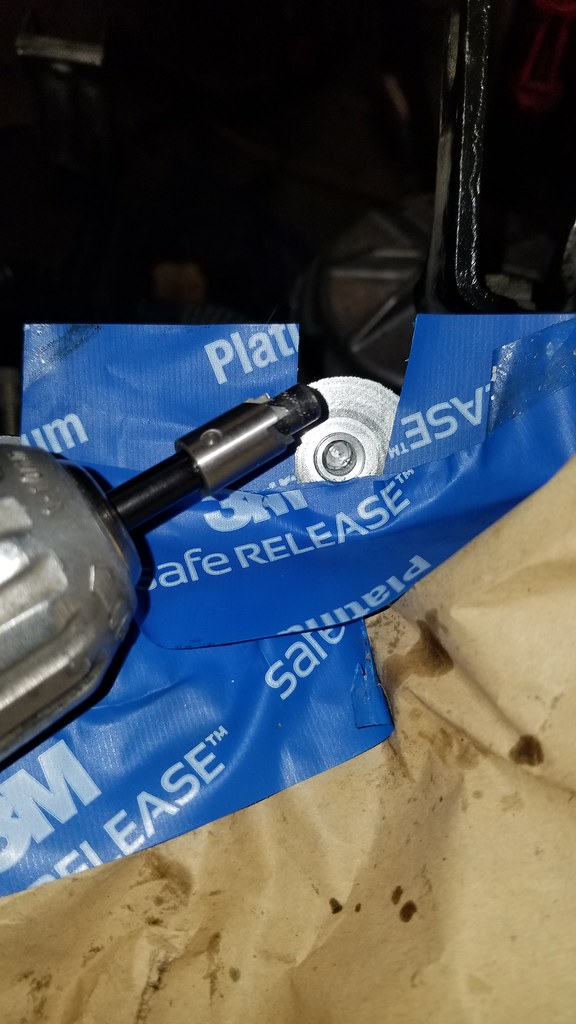
Next you will want to measure how deep the existing thread hole is. I used what was close to me, a zip tie.. (hey it worked!) Mark where it meets the head surface, use this measurement to mask off the drill bit so you know when to stop drilling.
 20200519_224734 by Cam M, on Flickr
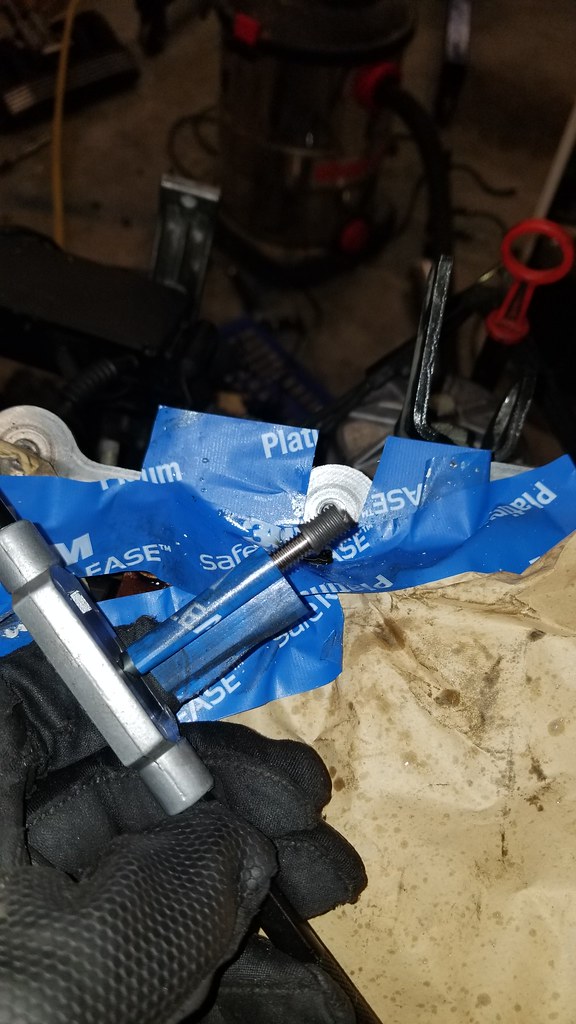
After that, grab the drill bit that came in your Time-Sert kit. You will want to use a power drill for this. Mask off the part of the bit using your measurement to know when to stop drilling
 20200519_224918 by Cam M, on Flickr
Attach the bit to your drill.
 20200519_230009 by Cam M, on Flickr
Begin to drill out the existing thread hole. BE SURE to hold the bit completely parallel with the existing hole. It will mostly help you stay in line as you are drilling, but be sure to not go in at an angle.
(Yes it's nerve wracking!)
Vacuum up the metal shavings to prevent getting in the engine.
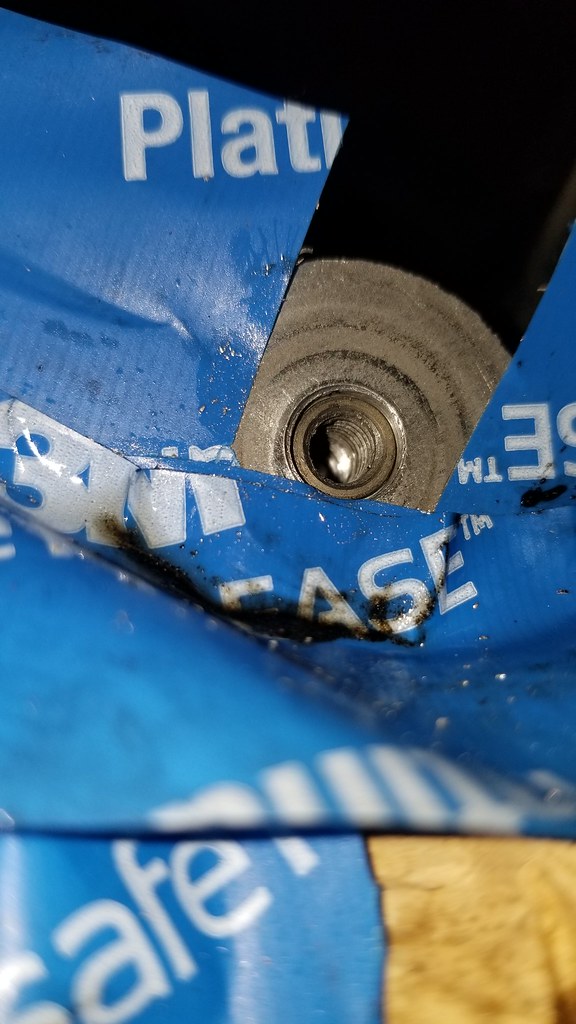
Here is the thread drilled out:
 20200519_230502 by Cam M, on Flickr
Step Two - Countersinking
After drilling out the old threads (or lack there of..) you will need to countersink the a lip that the Time-Sert will seat into.
Grab the countersink bit that came with the kit, and attach it to your drill.
 20200519_230839 by Cam M, on Flickr
This part is a lot less nerve wracking to drill, as the guide fits perfectly into your newly drilled hole, and the bit will only let you go so far before it stops drilling!
Begin to countersink the hole, go slowly with your drill until it reaches the 'stop' on the bit. Give it a few more rotations to make sure.
Vacuum up all metal shards.
 20200519_230842 by Cam M, on Flickr
Step Three - Tapping New Threads
After countersinking, you will now tap new threads into the drilled hole.
For this part, you will want to use a 'tap wrench', I already had this that came in an existing Tap and Die set I have.
 20200519_231104 by Cam M, on Flickr
Apply oil to the tap (I used 3 in 1) to keep it lubricated. Begin tapping the new threads.
It is VERY important to be perfectly straight when tapping the threads it is nerve wracking.
Vacuum and clean up the shavings
 20200519_231631 by Cam M, on Flickr
Step Four - Insert the Time-Sert!
Now it is time to insert the Time-Sert for nice new threads for your valve cover bolts!
Grab the last remaining tool from the kit, it looks like a skinnier version of the thread tap bit.
Insert this installation bit onto the same Tap Wrench used in the previous step.
Thread on one of the Time-Sert's included with the kit
*NOTE* Time-Serts have a very intuitive design. When you screw one on to your installation bit, it will only thread on about 2/3's of the way!
The last few threads are left partially unfinished, so as you tighten it into the head, it will finish creating the last threads on the time-sert AS WELL AS push material into the head material to ultimately lock the timesert into place where it will not back out. Pretty cool design!
(It is a bit confusing to explain, you can watch a video here)
 20200519_231831 by Cam M, on Flickr
Using your 'measurement device', mark where your installation bit so you don't screw in too far.
Start screwing the Time-Sert into place!
Once the Time-Sert seats upon the countersunk hole you created, you will feel it start to get harder to turn. This is where the bit is finishing the last few threads and pushing material into the head aluminum to lock it into place.
 20200519_231856 by Cam M, on Flickr
It will start to get easier to turn, indicating that the installation bit has gone all the way through the time-sert.
 20200519_231919 by Cam M, on Flickr
You are now done! unscrew the installation bit to reveal your freshly installed Time-Sert
 20200519_232019 by Cam M, on Flickr
Now rinse and repeat for any and all threads that are damaged!
You may need to order more time-serts as there are only 5 in that kit.. More can be found here on Amazon.
After you finish, your valve cover bolt threads will be solid and there will be nothing more to worry about, no matter how many future valve cover removals.
Hopefully this helps you, and persuaded you against helicoil!
This is my first attempt at a How To (first attempt at a forum post even...) so bear with me!
One of the first things I wanted to do to this engine was to remove the valve cover to replace the gasket, and paint the valve cover while I was at it. As soon as I started loosening the valve cover bolts, there were a handful right off the bat that were not tight like the others. at all.
The M42 engine is notorious for having weak valve cover threads, so after a few valve cover removals/installs and bolt torquing, these threads like to turn into butter.
Before we begin:
There are many ways to repair bolt threads. There are many guides out there that involve using Heli-Coil to overbore the thread, insert around the bolt and tighten away. These are priced anywhere as low as ~$13. Many of the threads on my head were "fixed" using helicoils. These obviously did not hold up to the test of time, and ultimately loosened and helped lead to the valve cover leak. Plus anytime you remove the bolts, you need to replace them anyway..
*Disclaimer* I am sure there are many out there who have used helicoil or other methods and have gotten away just fine, more power to you! I'm just very picky when I do fixes so this is the method I chose as a 'set it and forget it'
Since this is a guide to do this the right* way (see disclaimer above), I am using (and very highly recommend using) the Time-Sert thread repair kit.
The price difference is quite obvious, but in this case you very much get what you pay for ($75 compared to ~$13..). Here is a link to the kit I purchased on Amazon. This kit includes all the necessary bits, and 5 time-sert 'threads'.
The M42 uses M6x1.0 bolt thread for the valve cover bolts.
Lets Begin!
Here are the contents of the kit
20200519_223446 by Cam M, on FlickrThis is what the threads 'repaired' with helicoil looked like. You can see the lack of threads in the hole, and the helicoil.. attached...partially..? to the bolt..
20200519_224200 by Cam M, on FlickrOh well. We're going to do this right, with the end-all-be-all fix!
Step One - Drilling:
Assuming that you already have the valve cover removed, first thing will be to clean the area around the thread you want to repair. Use some sort of degreaser to get the oil and grim off of the surrounding metal, so you can mask off and tape around it to prevent metal shards from getting into your head.I used masking tape and paper.
20200519_224625 by Cam M, on FlickrNext you will want to measure how deep the existing thread hole is. I used what was close to me, a zip tie.. (hey it worked!) Mark where it meets the head surface, use this measurement to mask off the drill bit so you know when to stop drilling.
20200519_224734 by Cam M, on FlickrAfter that, grab the drill bit that came in your Time-Sert kit. You will want to use a power drill for this. Mask off the part of the bit using your measurement to know when to stop drilling
20200519_224918 by Cam M, on FlickrAttach the bit to your drill.
20200519_230009 by Cam M, on FlickrBegin to drill out the existing thread hole. BE SURE to hold the bit completely parallel with the existing hole. It will mostly help you stay in line as you are drilling, but be sure to not go in at an angle.
(Yes it's nerve wracking!)
Vacuum up the metal shavings to prevent getting in the engine.
Here is the thread drilled out:
20200519_230502 by Cam M, on FlickrStep Two - Countersinking
After drilling out the old threads (or lack there of..) you will need to countersink the a lip that the Time-Sert will seat into.
Grab the countersink bit that came with the kit, and attach it to your drill.
20200519_230839 by Cam M, on FlickrThis part is a lot less nerve wracking to drill, as the guide fits perfectly into your newly drilled hole, and the bit will only let you go so far before it stops drilling!
Begin to countersink the hole, go slowly with your drill until it reaches the 'stop' on the bit. Give it a few more rotations to make sure.
Vacuum up all metal shards.
20200519_230842 by Cam M, on FlickrStep Three - Tapping New Threads
After countersinking, you will now tap new threads into the drilled hole.
For this part, you will want to use a 'tap wrench', I already had this that came in an existing Tap and Die set I have.
20200519_231104 by Cam M, on FlickrApply oil to the tap (I used 3 in 1) to keep it lubricated. Begin tapping the new threads.
It is VERY important to be perfectly straight when tapping the threads it is nerve wracking.
Vacuum and clean up the shavings
20200519_231631 by Cam M, on FlickrStep Four - Insert the Time-Sert!
Now it is time to insert the Time-Sert for nice new threads for your valve cover bolts!
Grab the last remaining tool from the kit, it looks like a skinnier version of the thread tap bit.
Insert this installation bit onto the same Tap Wrench used in the previous step.
Thread on one of the Time-Sert's included with the kit
*NOTE* Time-Serts have a very intuitive design. When you screw one on to your installation bit, it will only thread on about 2/3's of the way!
The last few threads are left partially unfinished, so as you tighten it into the head, it will finish creating the last threads on the time-sert AS WELL AS push material into the head material to ultimately lock the timesert into place where it will not back out. Pretty cool design!
(It is a bit confusing to explain, you can watch a video here)
20200519_231831 by Cam M, on FlickrUsing your 'measurement device', mark where your installation bit so you don't screw in too far.
Start screwing the Time-Sert into place!
Once the Time-Sert seats upon the countersunk hole you created, you will feel it start to get harder to turn. This is where the bit is finishing the last few threads and pushing material into the head aluminum to lock it into place.
20200519_231856 by Cam M, on FlickrIt will start to get easier to turn, indicating that the installation bit has gone all the way through the time-sert.
20200519_231919 by Cam M, on FlickrYou are now done! unscrew the installation bit to reveal your freshly installed Time-Sert
20200519_232019 by Cam M, on FlickrNow rinse and repeat for any and all threads that are damaged!
You may need to order more time-serts as there are only 5 in that kit.. More can be found here on Amazon.
After you finish, your valve cover bolt threads will be solid and there will be nothing more to worry about, no matter how many future valve cover removals.
Hopefully this helps you, and persuaded you against helicoil!

Comment