

I have been working on this build for a few months now and have taken lots of pictures so thought I would share them up here and keep a bit of a build journal.
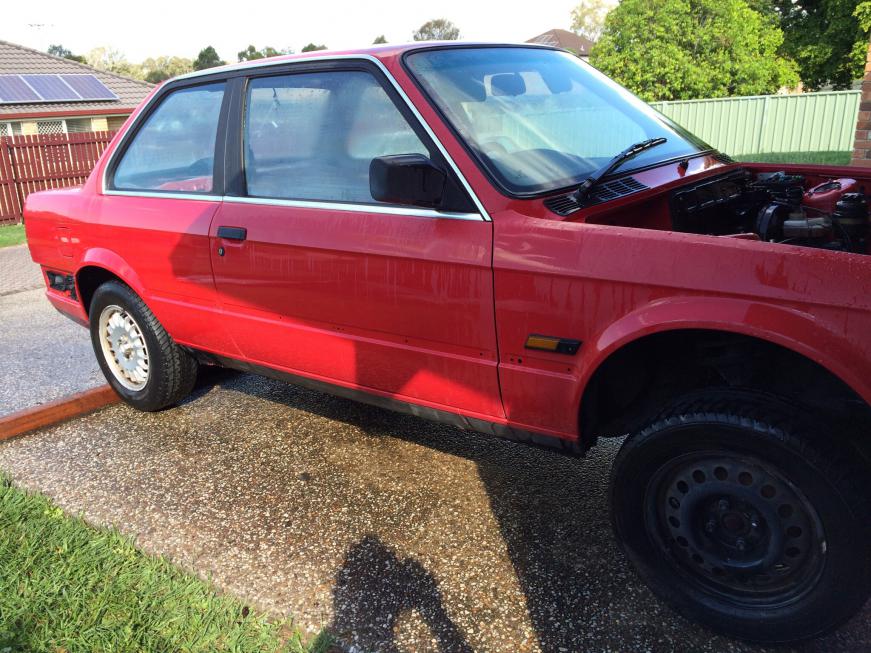
I picked up this 318i from a guy who works on BMWS and had this one sitting in a vacant block next to where he lives. It was pretty well a bare shell with no bars, no engine, and no interior other than a very cracked dash and instrument cluster. But it was very straight, with minimal rust. I then picked up a 325i coupe that had a m20 with a blown head gasket but pretty well all the interior, a rear bar, and popout windows. This thing \/ \/ was riddled with rust though.

Hopefully some will get some enjoyment out of the build journal like I have enjoyed building it to this point.
Needed to just make a start so thought I'd start in the engine bay. That didn't last for too long though as I started to think bigger engines.
Ideas and desires started to change along the way. I was originally going to put a M30B35 in it but then thought nah, just whack a M60B40 in it if your going to go to that much trouble.
I ended up selling the donor M30B35 car and made a bit of money on it which enabled me to get the M60B40 engine.
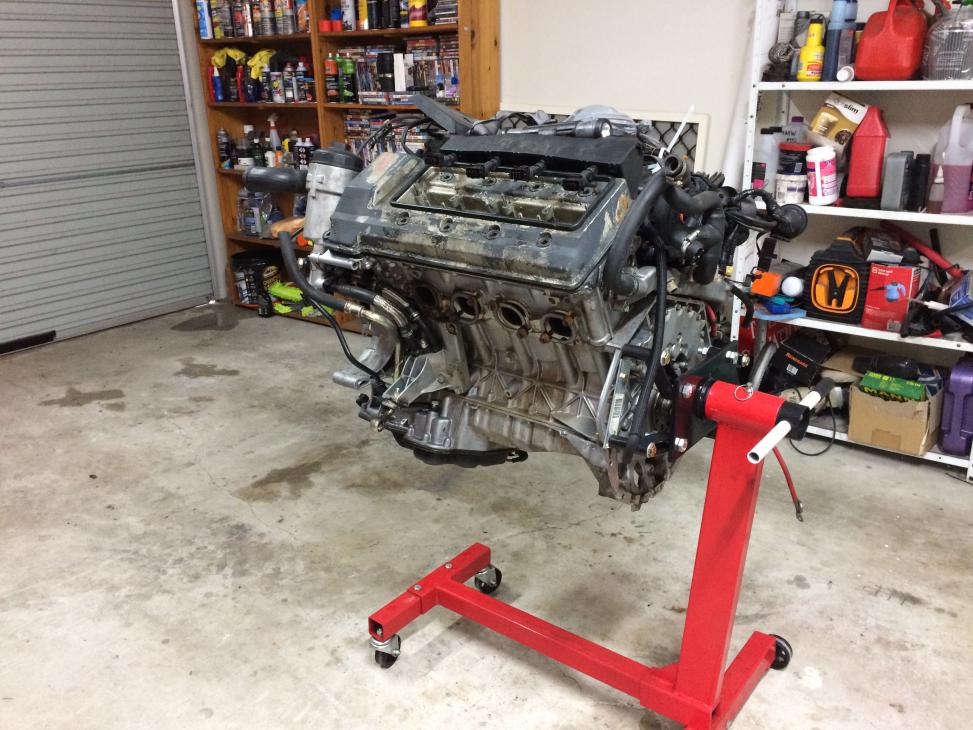
The M60B40 was very dirty when I got it. Many years of grime built up on it.
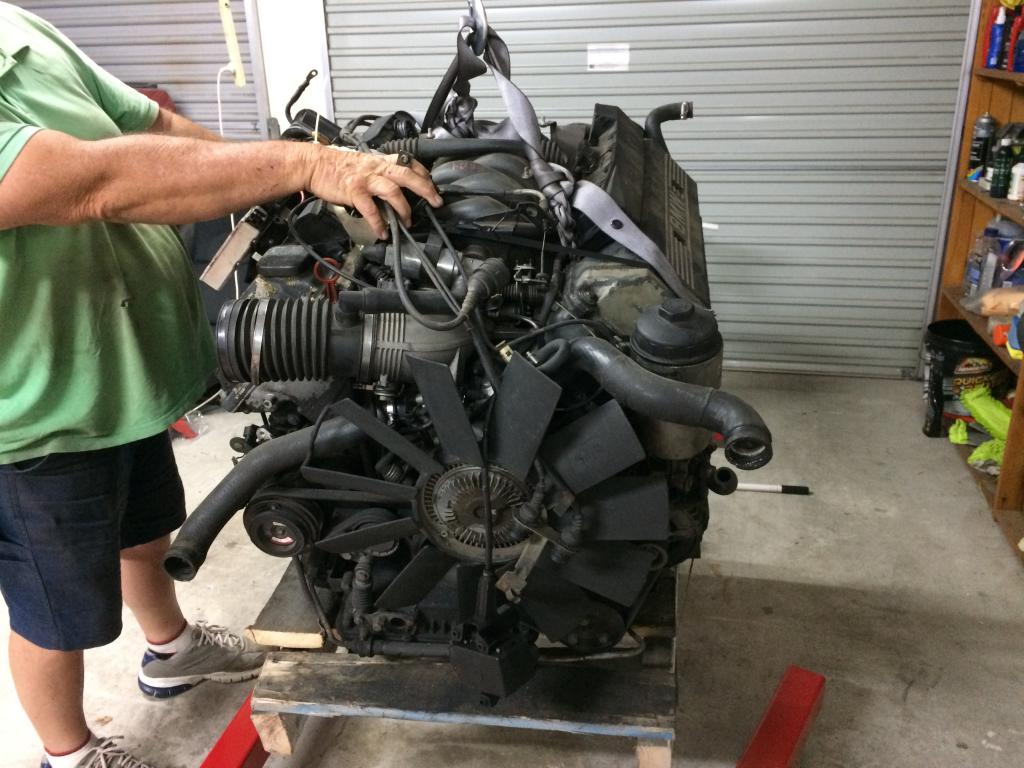
I cleaned it up a bit with the jet wash.
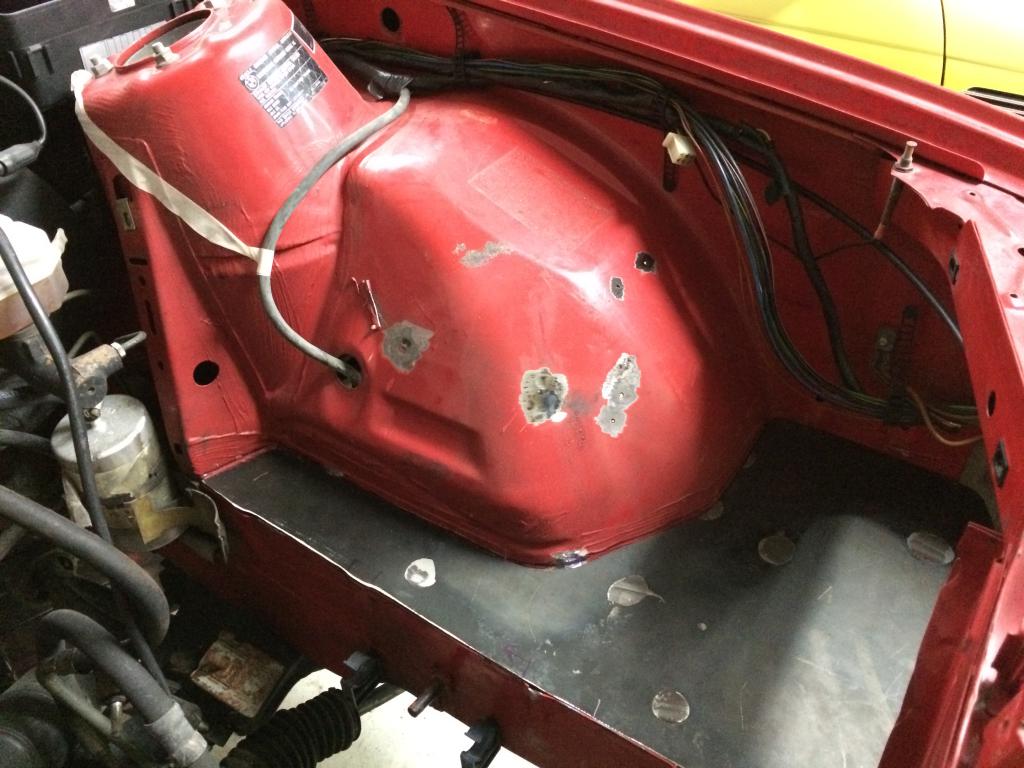
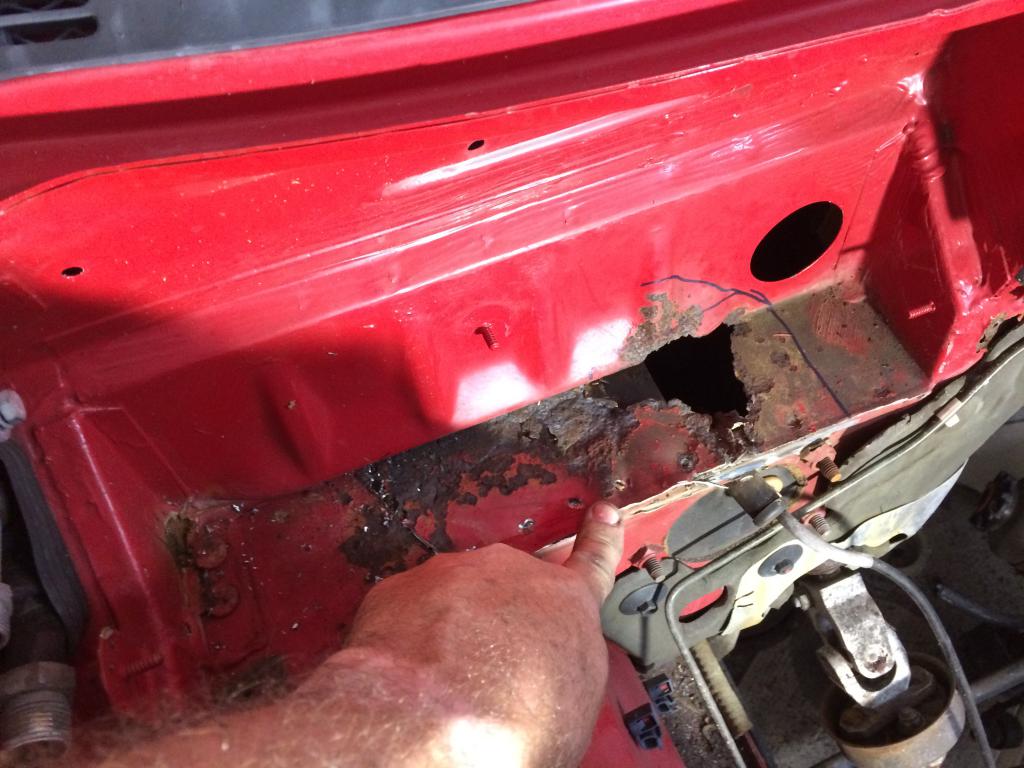
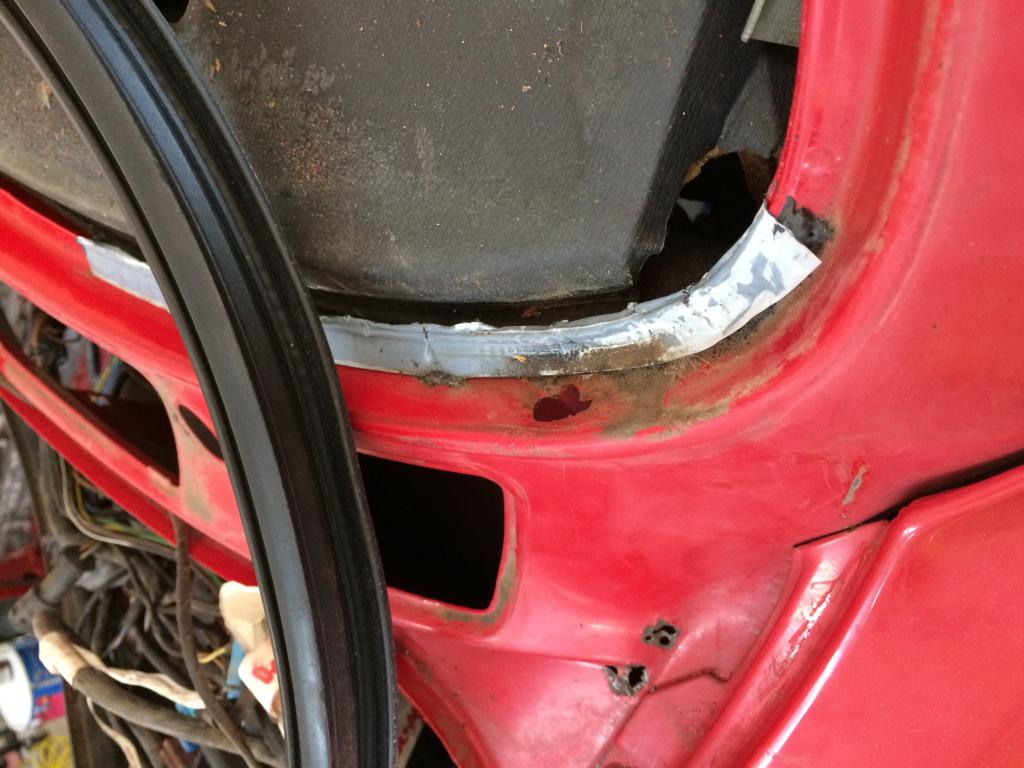
Bit of rust in the normal places. The rest of the car is really good though.

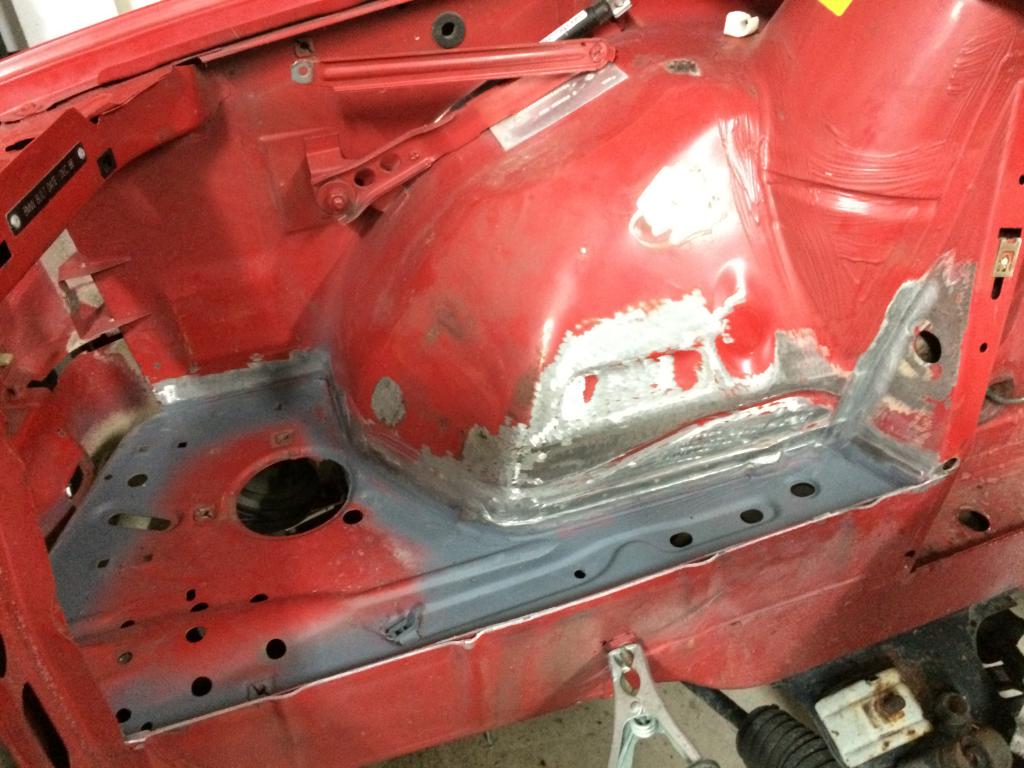
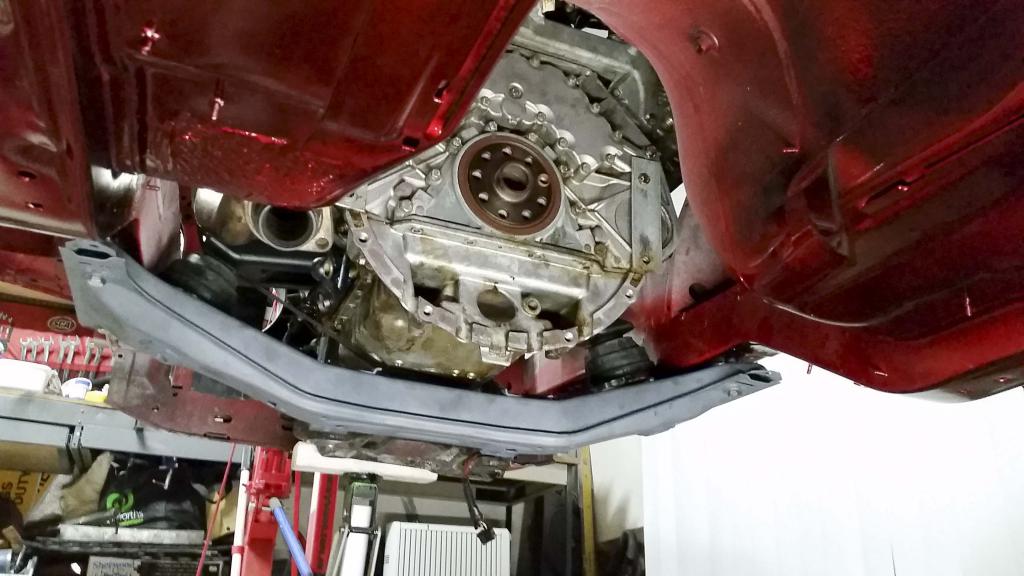
Engine brackets and mounts arrived so time to test fit the engine and work out where to beat the firewall in.
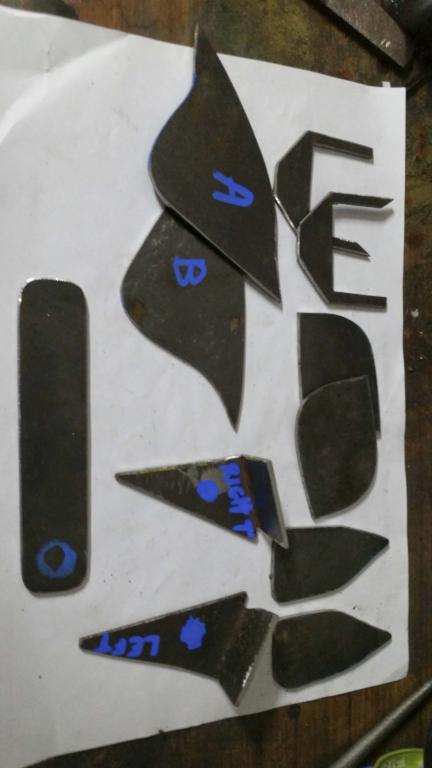
Cleaned all the front crossmember and Diff carrier up and etch primed them just to stop surface rust forming on them as I still had to weld all the strengthening bits on them which I made myself.
Took a lot of wire wheel work to get the crossmember cleaned up.
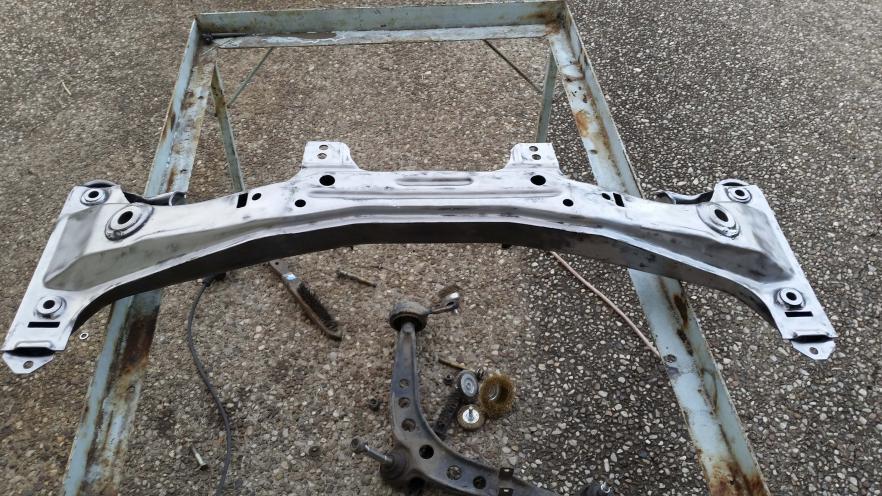

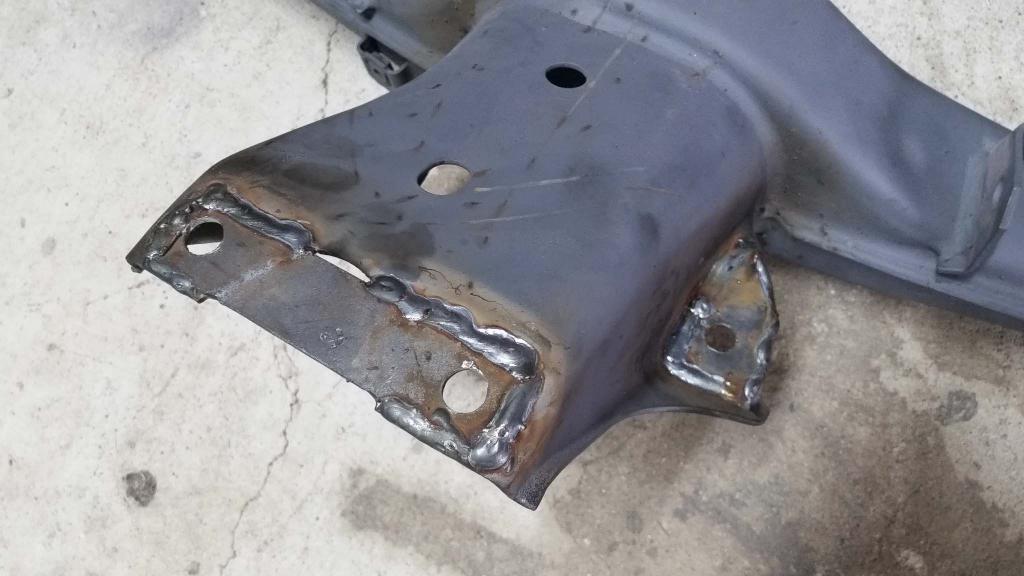
I will clean all the welds up and make them look pretty.
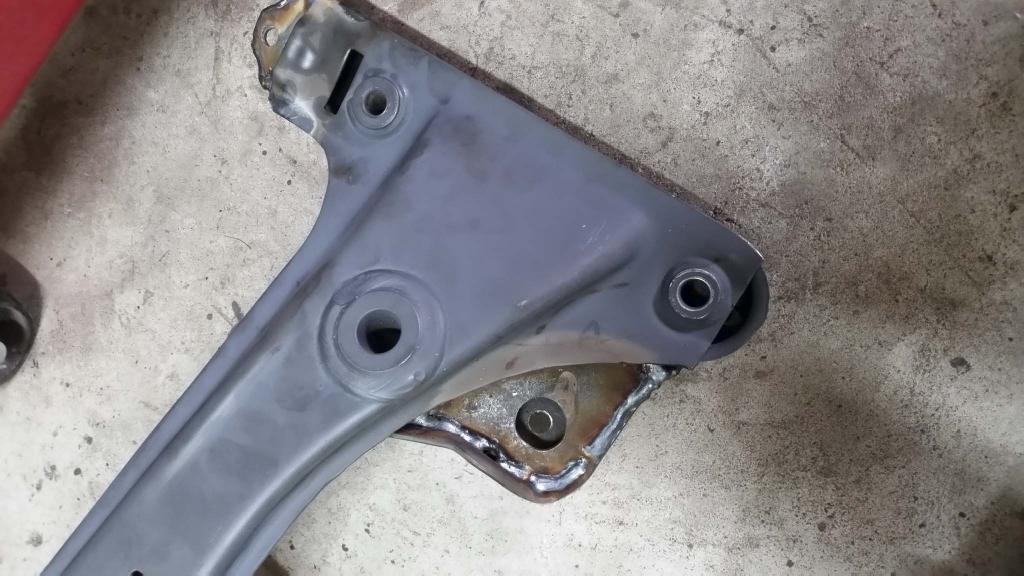
In hinesight I could have made this strengthening plate a bit wider but I still think it is plenty strong enough.
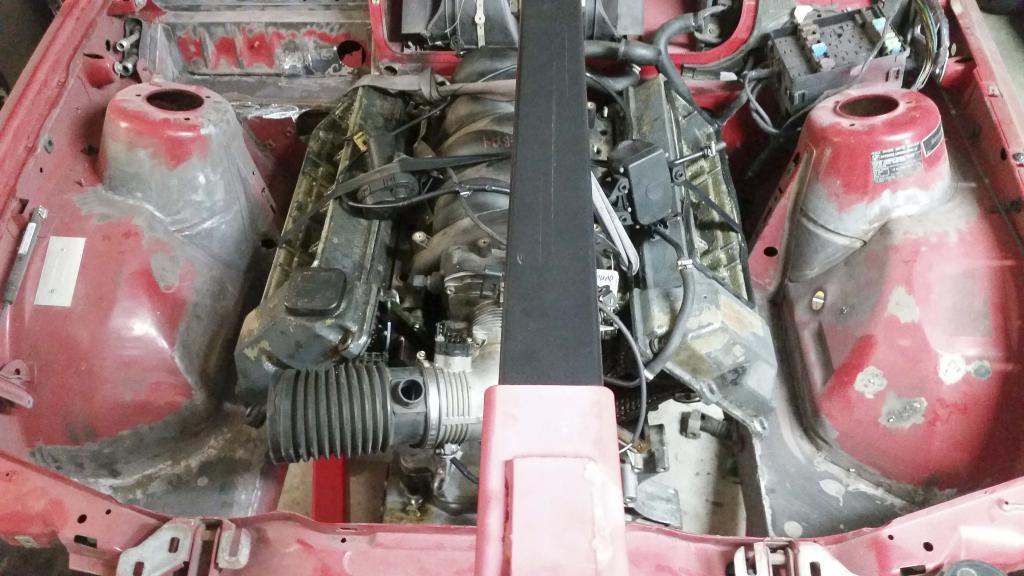
So after the first trial fit of the engine I had to take it out and do some more beating of the firewall and leading edge of the tunnel as my engine sits a bit higher.
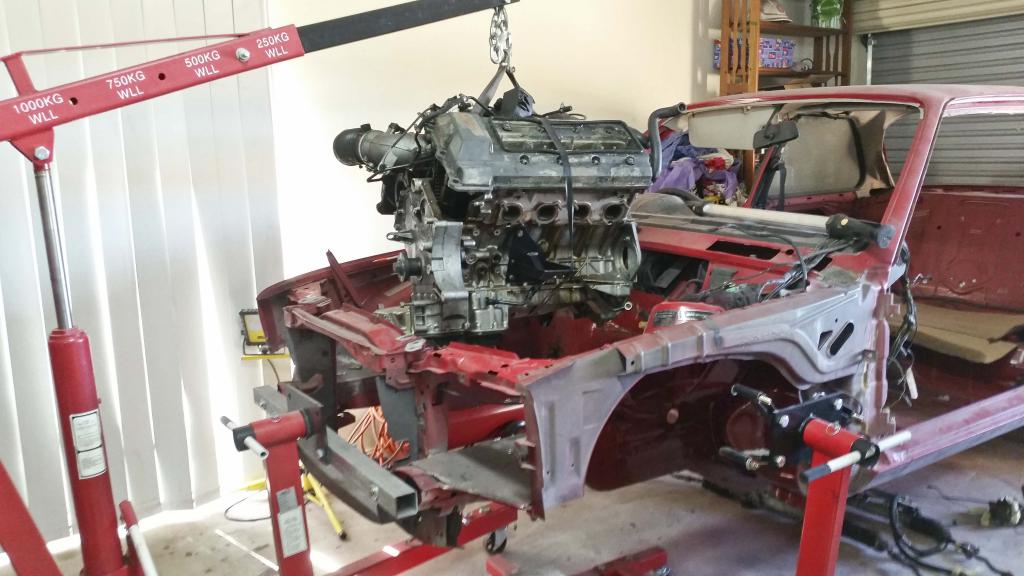
I needed to massage the firewall up higher than in this picture to allow for the water pipe outlet that runs across the back of the engine to clear.

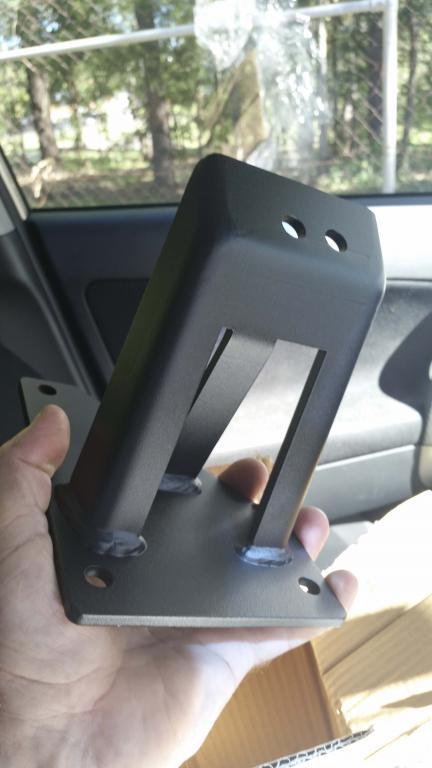
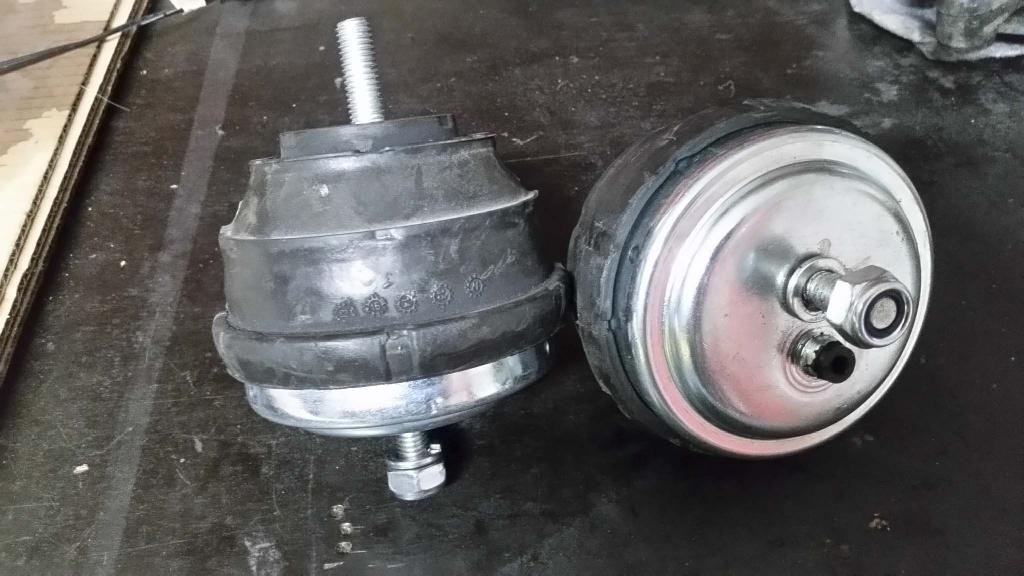
My engine sits up a bit higher due to the engine mounts I'm using which are e39 525TDS motor mounts (part number: 22111094248). They are 3cm higher and give the needed clearance for the bigger e36 steering rack I'm putting in. These aren't available here in Australia so had to order them from the UK. Of course you can probably use some from Garagistic that are the same height but I deliberately chose to use rubber mounts here for the engine and gearbox as I didn't want too much drivetrain vibration/harshness. I'm using poly stuff everywhere else though.
e39 525TDS motor mounts
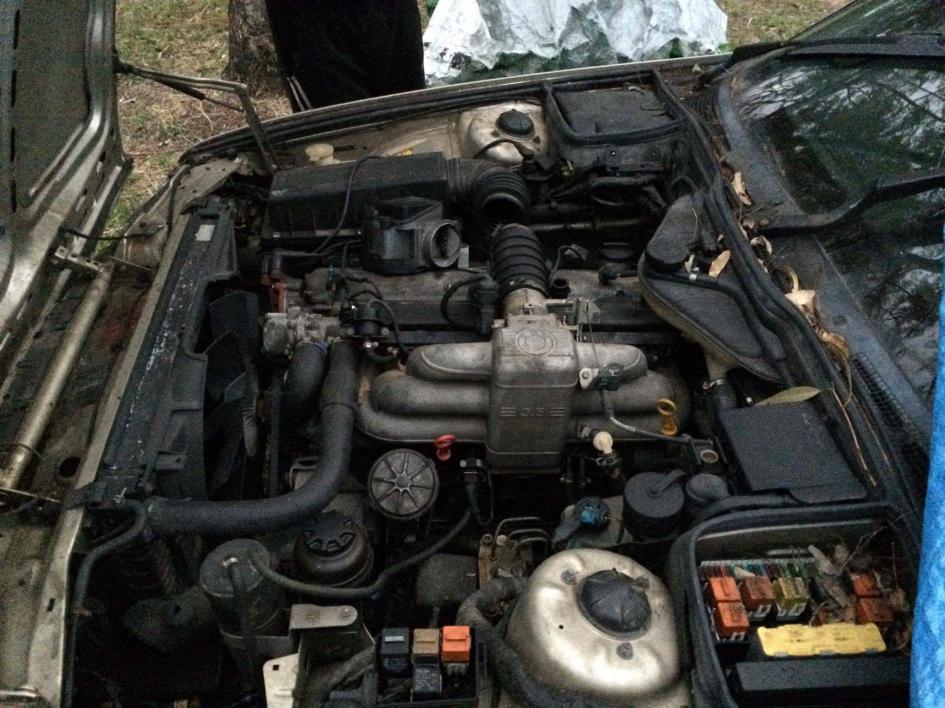
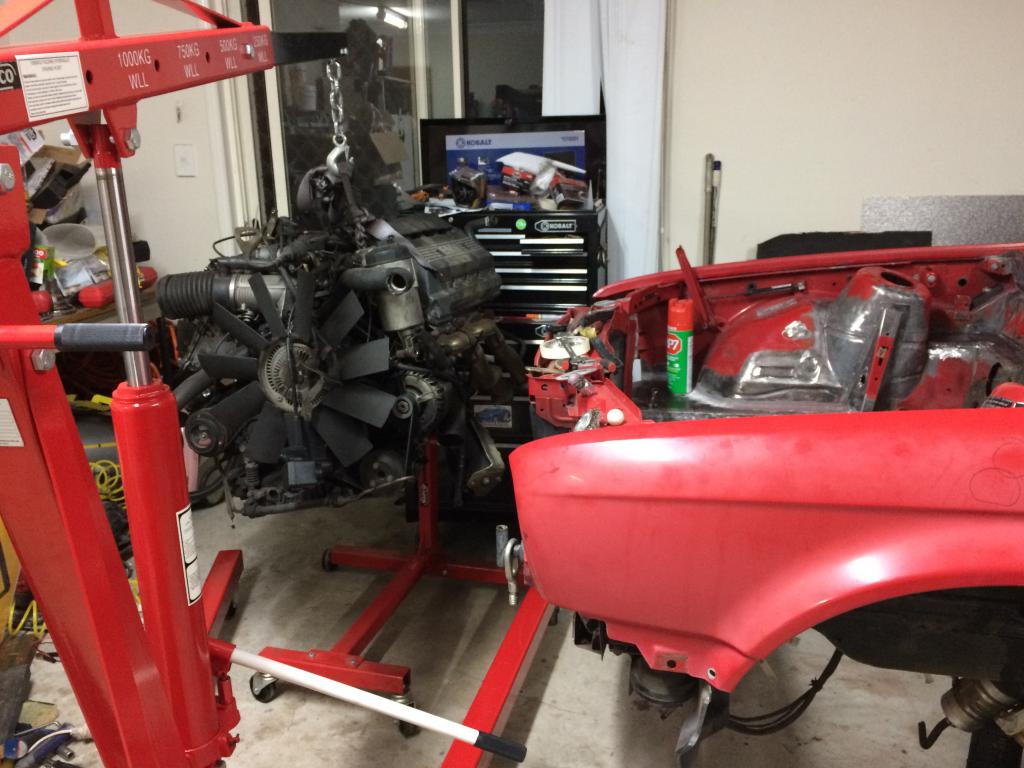
And its in.
Not for long though, still have to finish all the engine bay shave, and rebuild the engine, but more on that later.
Well I decided to leave the engine rebuild for a while, and there are a few things I need to think about for the engine bay, so while I was waiting for some more parts to arrive for suspension and drivetrain, and to save up some more money, I decided to start on the underside of the shell.
I knew this was going to be a huge undertaking and painful, so I determined in my mind to attack it and keep going until it was finished. Just over 40 hours later it was done.
To do this job I decided I needed to put the shell on a rotisserie. I ended up making one out of two $80 engine stands.
Now to start on that body deadener
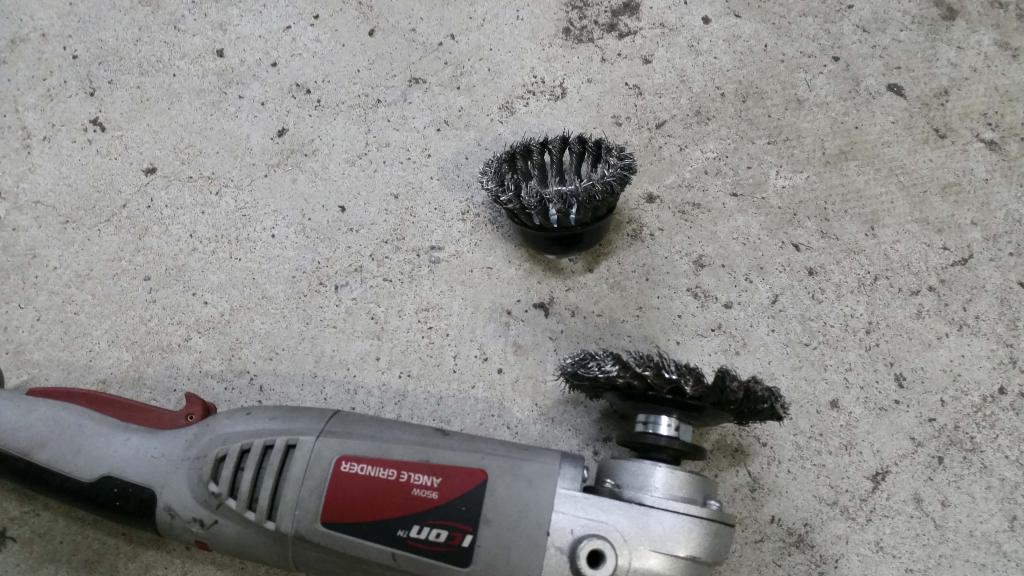
I found the best way to get this off was with an angle grinder with a big coarse wire wheel on it. It is one messy job and not for the light hearted!

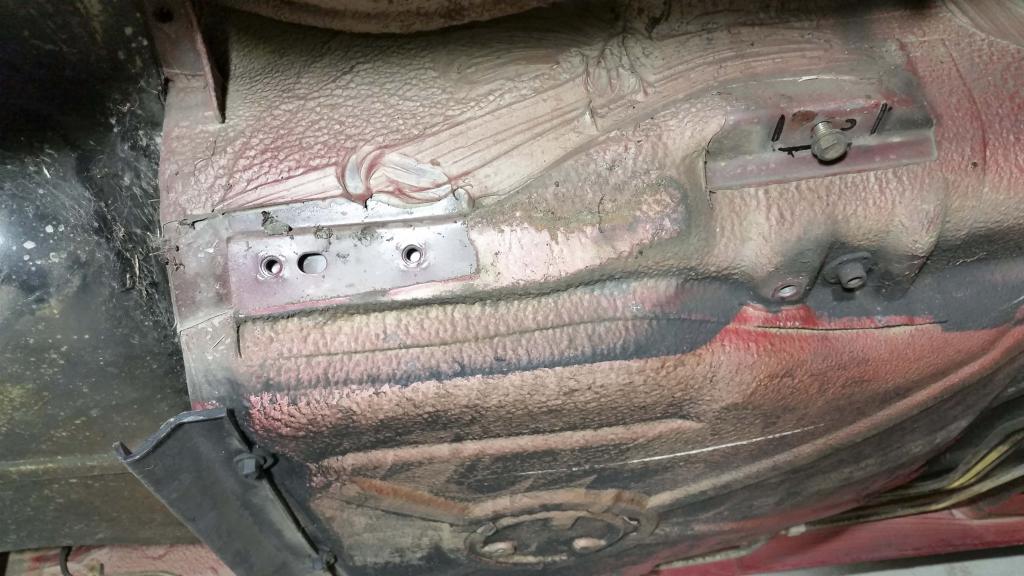
So thick some of this stuff.
I picked up this 318i from a guy who works on BMWS and had this one sitting in a vacant block next to where he lives. It was pretty well a bare shell with no bars, no engine, and no interior other than a very cracked dash and instrument cluster. But it was very straight, with minimal rust. I then picked up a 325i coupe that had a m20 with a blown head gasket but pretty well all the interior, a rear bar, and popout windows. This thing \/ \/ was riddled with rust though.
Hopefully some will get some enjoyment out of the build journal like I have enjoyed building it to this point.
Needed to just make a start so thought I'd start in the engine bay. That didn't last for too long though as I started to think bigger engines.
Ideas and desires started to change along the way. I was originally going to put a M30B35 in it but then thought nah, just whack a M60B40 in it if your going to go to that much trouble.
I ended up selling the donor M30B35 car and made a bit of money on it which enabled me to get the M60B40 engine.
The M60B40 was very dirty when I got it. Many years of grime built up on it.
I cleaned it up a bit with the jet wash.
Bit of rust in the normal places. The rest of the car is really good though.
Engine brackets and mounts arrived so time to test fit the engine and work out where to beat the firewall in.
Cleaned all the front crossmember and Diff carrier up and etch primed them just to stop surface rust forming on them as I still had to weld all the strengthening bits on them which I made myself.
Took a lot of wire wheel work to get the crossmember cleaned up.
I will clean all the welds up and make them look pretty.
In hinesight I could have made this strengthening plate a bit wider but I still think it is plenty strong enough.
So after the first trial fit of the engine I had to take it out and do some more beating of the firewall and leading edge of the tunnel as my engine sits a bit higher.
I needed to massage the firewall up higher than in this picture to allow for the water pipe outlet that runs across the back of the engine to clear.
My engine sits up a bit higher due to the engine mounts I'm using which are e39 525TDS motor mounts (part number: 22111094248). They are 3cm higher and give the needed clearance for the bigger e36 steering rack I'm putting in. These aren't available here in Australia so had to order them from the UK. Of course you can probably use some from Garagistic that are the same height but I deliberately chose to use rubber mounts here for the engine and gearbox as I didn't want too much drivetrain vibration/harshness. I'm using poly stuff everywhere else though.
e39 525TDS motor mounts
And its in.
Not for long though, still have to finish all the engine bay shave, and rebuild the engine, but more on that later.
Well I decided to leave the engine rebuild for a while, and there are a few things I need to think about for the engine bay, so while I was waiting for some more parts to arrive for suspension and drivetrain, and to save up some more money, I decided to start on the underside of the shell.
I knew this was going to be a huge undertaking and painful, so I determined in my mind to attack it and keep going until it was finished. Just over 40 hours later it was done.
To do this job I decided I needed to put the shell on a rotisserie. I ended up making one out of two $80 engine stands.
Now to start on that body deadener
I found the best way to get this off was with an angle grinder with a big coarse wire wheel on it. It is one messy job and not for the light hearted!
So thick some of this stuff.


Comment