
Cheap e36 m3 Strut Solution
Alrighty, r3v boys and girls, here's another friebie from Aptyp camp.
Parts Needed:
1. Blown e36 m3 strut housings. Good news, these can be had free.
2. Strut inserts: e30 iX, Corrado, or z28 Camaro (I'll put up Bilstein part numbers)
Tools Needed:
1. Pipe Cutter
2. Measuring tools: tape, ruler, level, marker, and etc.
I'll do it in pictures with explanations of what's happening.
1. Magic Tool $22 at Home Depot
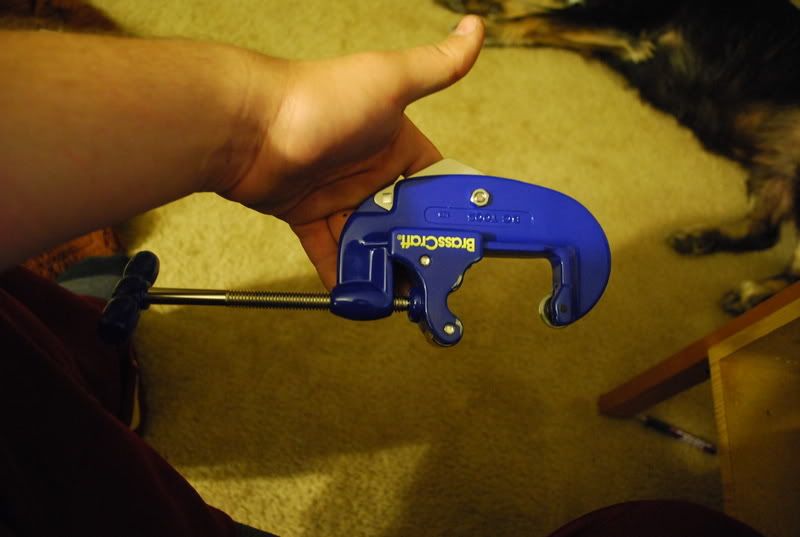
you need this tool to cut down struts and spacers.
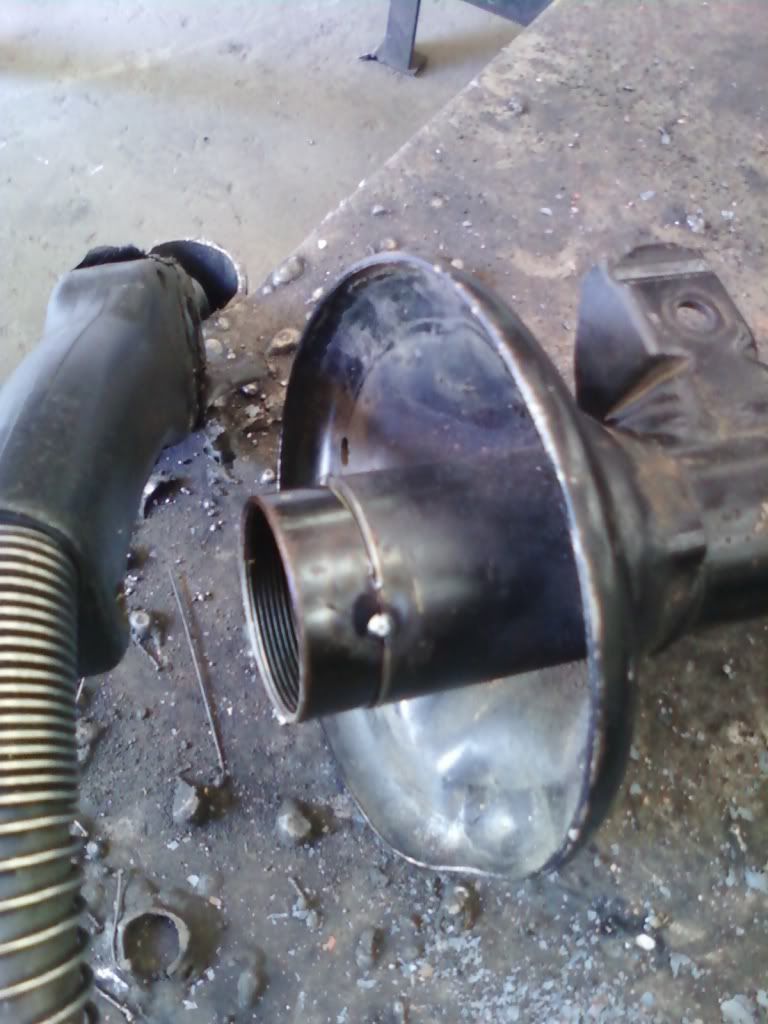
2. Pieces
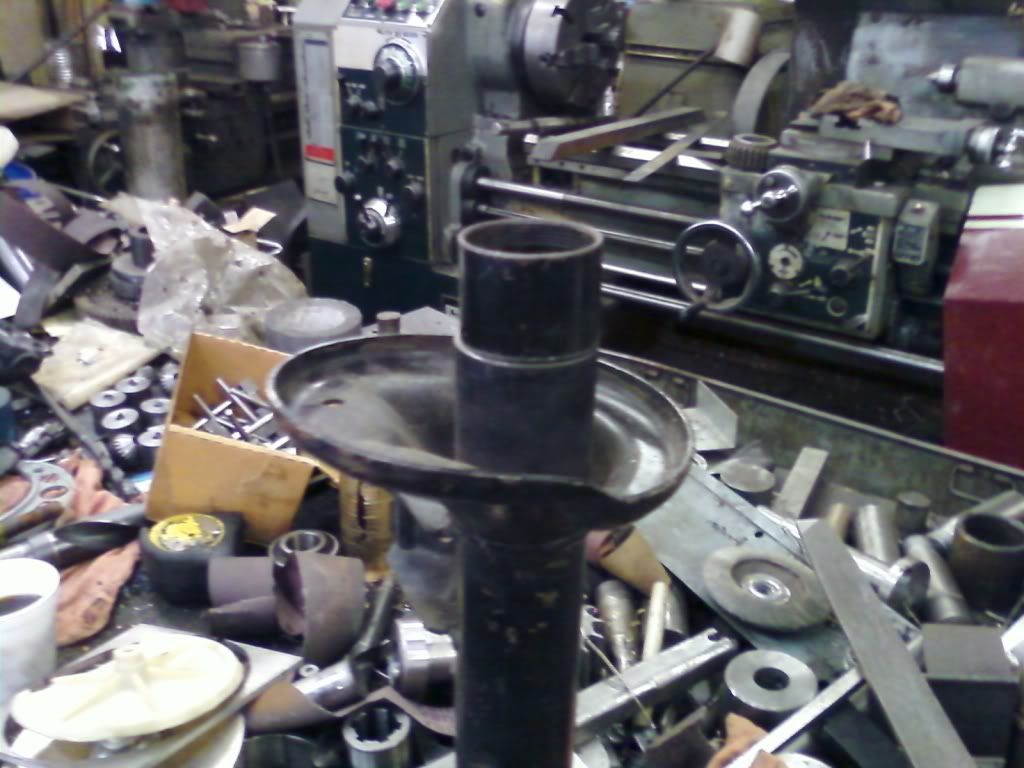
With pipe cutter, you cut off top of e36 m3 strut, and remove insert with all of the fluid. That's that for the bottom piece. on the top you see threaded top portion of e30 strut housing. Notice that threaded piece is at least 1.5" in height. It's that height to give you enough room to later machine it down to correct size.
3. Machining Spacer
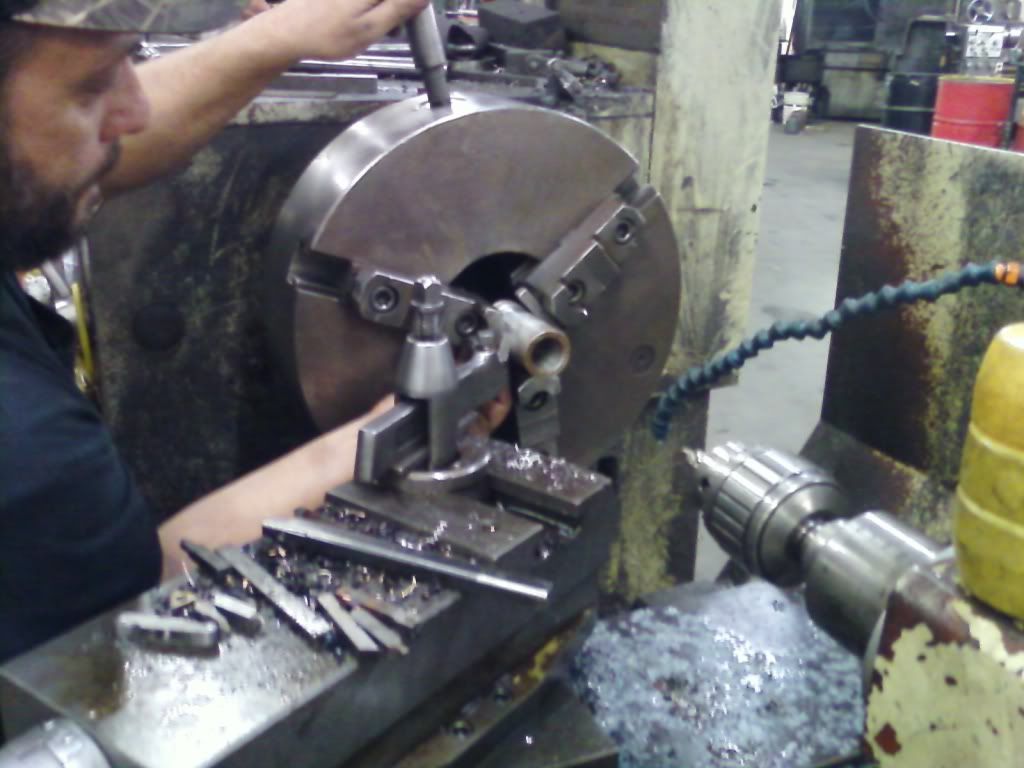
Machine shop can cut you perfect spacers on a lathe. My spacers are 2.75" in height and seats were machined to seat Bilsteins in perfectly.
4. Machining Threaded Top
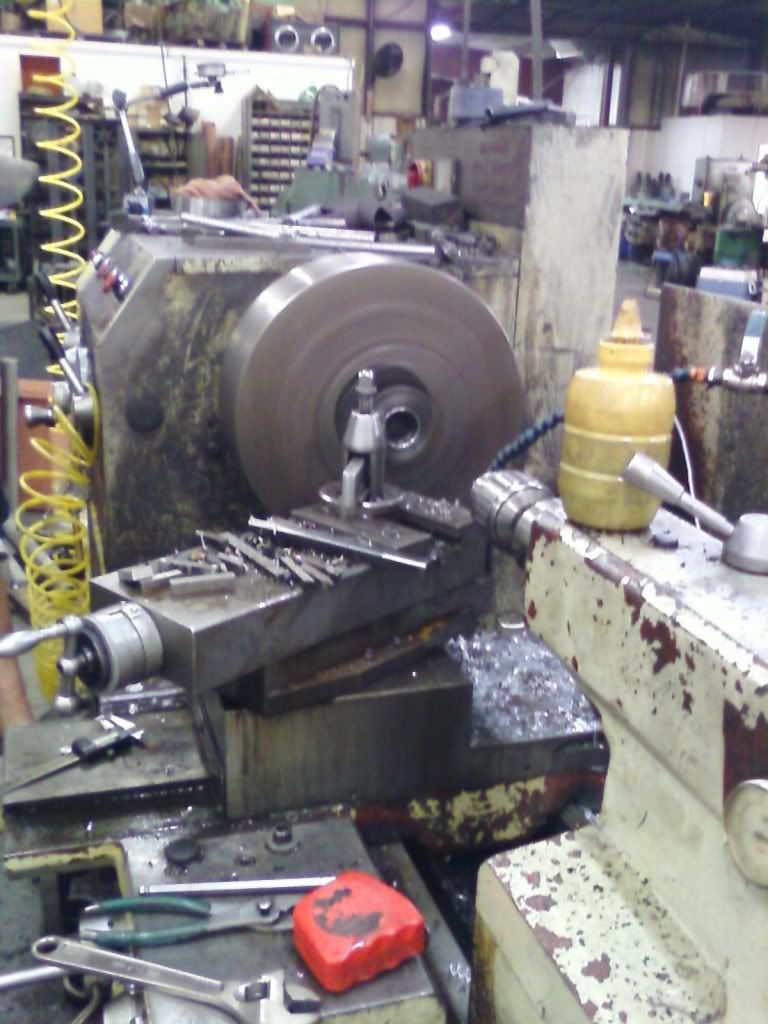
Place spacer inside of the strut, put strut in, and threaded top on. When strut nut is threaded in all the way, you should have 1mm clearance between strut housing and threaded top. Make sure strut is threaded in all the way, and that nut sits inside of the strut's lip, as that alone is 1mm. Make sure to machine each side individually. By this I mean you measure and cut right side strut and mark it so, then measure everything for the left side and cut. Not for a second think that you calculations for the right strut can automatically apply to your left strut.
5. Welding
Tack
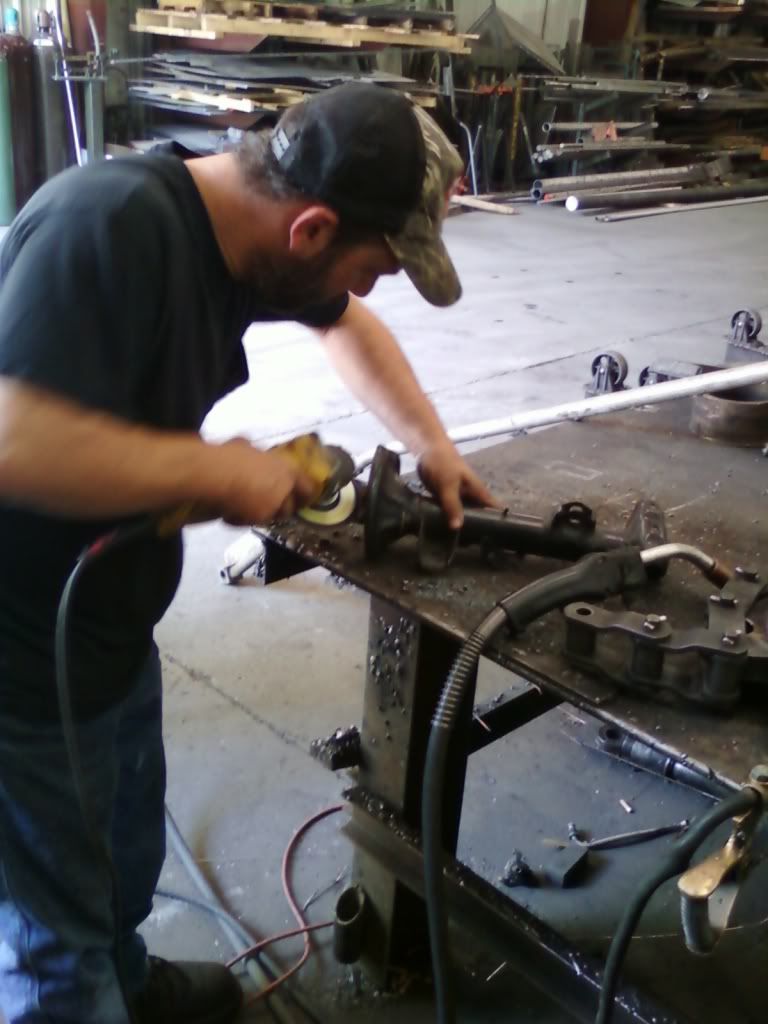
Remove paint around welded are, breeze to do after it's tacked.
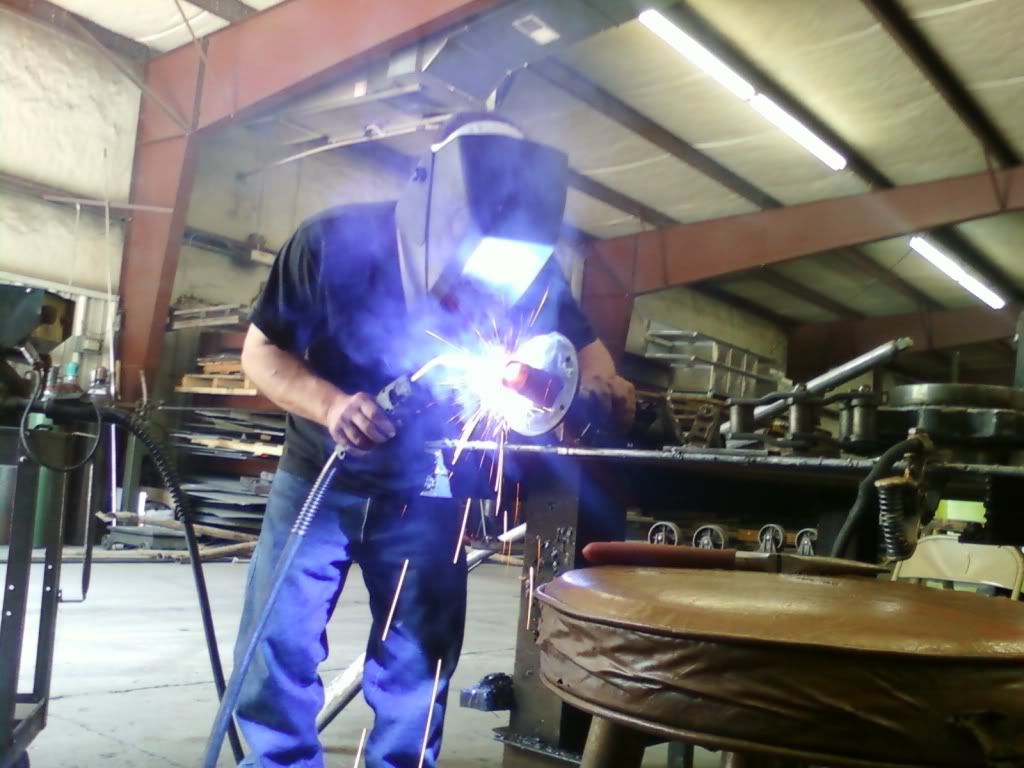
Weld
Piece of advice, make sure you weld with e30 strut nut threaded in to assure top threads not to warp from heat.
After everything cools off, assemble your struts.
Huge thanks to Earnies Machine Shop. This entire process took them just a little bit over an hour. If you come prepared and everything ready, and measured and precut at home, you could easily have this done in under an hour. They surely did me a favor, but even if charged full amount, I'd still be saving nearly $400 from buying brand new e36 m3 struts. Not to mention, whenever I want to, I can by e30 IX, Corrado, or Camaro strut inserts and have everything bolted right back in in no time, saving you shit ton of money in the future, and allowing you e30 m3 sway bar links . Good stuf here.
6. Assembled
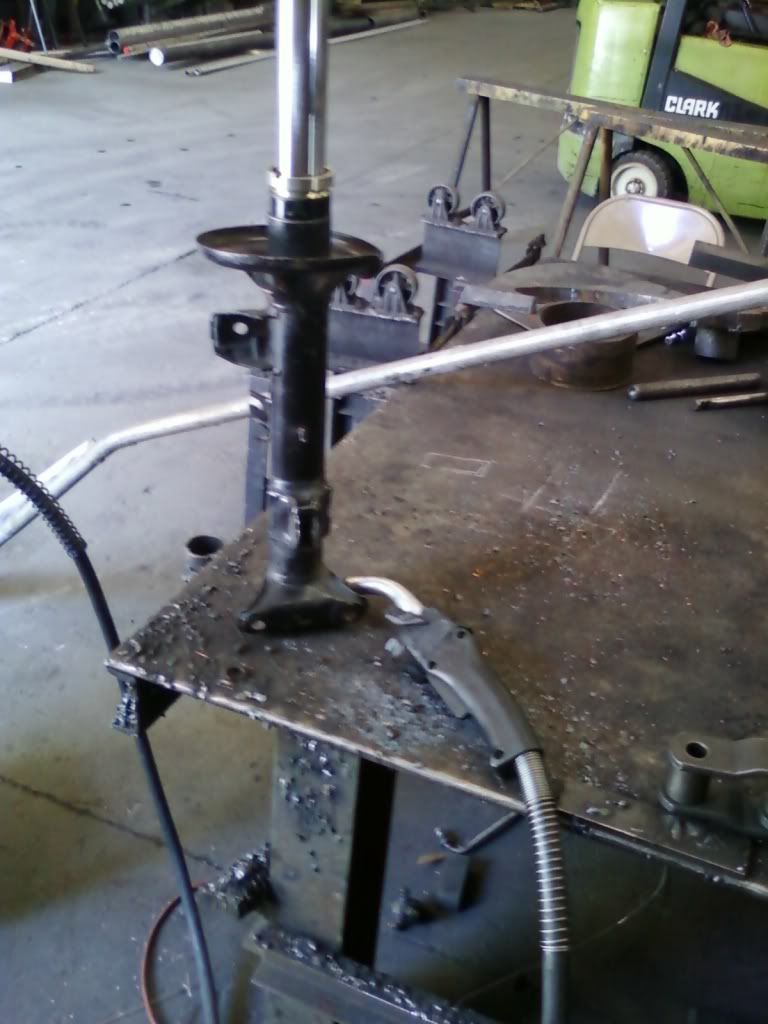
And that's that.
Result:
1. You've saved at least $300 from buying new e36 m3 bilsteins or Konis.
2. Because of 2.75" spacer, you're giving your Bilsteing Sport 1/4" more travel room. It makes a huge difference in allowing your shocks to last longer.
3. Makes future replacement that much more affordable.
Hope you enjoy and be able to use this and come support my e30/DIY/Project site, Torque-Bound, and as always I'll continue being loyal r3ver and answer all questions that come my way that I have answers for.
Alrighty, r3v boys and girls, here's another friebie from Aptyp camp.
Parts Needed:
1. Blown e36 m3 strut housings. Good news, these can be had free.
2. Strut inserts: e30 iX, Corrado, or z28 Camaro (I'll put up Bilstein part numbers)
Tools Needed:
1. Pipe Cutter
2. Measuring tools: tape, ruler, level, marker, and etc.
I'll do it in pictures with explanations of what's happening.
1. Magic Tool $22 at Home Depot
you need this tool to cut down struts and spacers.
2. Pieces
With pipe cutter, you cut off top of e36 m3 strut, and remove insert with all of the fluid. That's that for the bottom piece. on the top you see threaded top portion of e30 strut housing. Notice that threaded piece is at least 1.5" in height. It's that height to give you enough room to later machine it down to correct size.
3. Machining Spacer
Machine shop can cut you perfect spacers on a lathe. My spacers are 2.75" in height and seats were machined to seat Bilsteins in perfectly.
4. Machining Threaded Top
Place spacer inside of the strut, put strut in, and threaded top on. When strut nut is threaded in all the way, you should have 1mm clearance between strut housing and threaded top. Make sure strut is threaded in all the way, and that nut sits inside of the strut's lip, as that alone is 1mm. Make sure to machine each side individually. By this I mean you measure and cut right side strut and mark it so, then measure everything for the left side and cut. Not for a second think that you calculations for the right strut can automatically apply to your left strut.
5. Welding
Tack
Remove paint around welded are, breeze to do after it's tacked.
Weld
Piece of advice, make sure you weld with e30 strut nut threaded in to assure top threads not to warp from heat.
After everything cools off, assemble your struts.
Huge thanks to Earnies Machine Shop. This entire process took them just a little bit over an hour. If you come prepared and everything ready, and measured and precut at home, you could easily have this done in under an hour. They surely did me a favor, but even if charged full amount, I'd still be saving nearly $400 from buying brand new e36 m3 struts. Not to mention, whenever I want to, I can by e30 IX, Corrado, or Camaro strut inserts and have everything bolted right back in in no time, saving you shit ton of money in the future, and allowing you e30 m3 sway bar links
. Good stuf here.6. Assembled
And that's that.
Result:
1. You've saved at least $300 from buying new e36 m3 bilsteins or Konis.
2. Because of 2.75" spacer, you're giving your Bilsteing Sport 1/4" more travel room. It makes a huge difference in allowing your shocks to last longer.
3. Makes future replacement that much more affordable.
Hope you enjoy and be able to use this and come support my e30/DIY/Project site, Torque-Bound, and as always I'll continue being loyal r3ver and answer all questions that come my way that I have answers for.


Comment