Announcement

Collapse
No announcement yet.

SLC: 1989 Zinno coupe. Superlight, Super Functional *6spd swap inside*

Collapse
X
 
  • Filter
  • Time
  • Show
Clear All
new posts

    #76
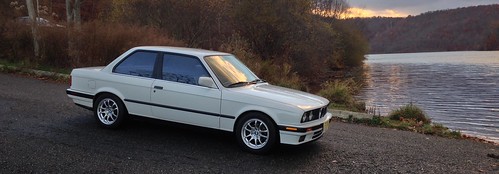
    put my front end back on today. not very pretty but the interior is priority right now. shifter parts should all be here and ready to go this week so i'm going to be doing that as well as working on scuffing the interior for paint. my guys at alacrity machine are trimming my shifter joint and building a bushing for it, since my UUC DSSR wasn't compatible with my original shifter joint. basically my modified joint will be similar to the late late model ones like this, but stronger and with a better bushing (probably UHMW or bronze, depending on what works better when they do the machining.)

    shift joint that i need to be similar to:


    current shift joint that's getting modified:


    aaaand front end pics:


    1989 Coupe build thread: http://www.r3vlimited.com/board/showthread.php?t=312012
    IG: @mitchlikesbikes

    Comment


      #77
      i admire your work

      Comment


        #78
        sorry.. double post

        Comment


          #79
          Sub'd. Love the roll bar setup.

          Comment


            #80
            Shes coming along nicely! Me and you got the same idea for a car a stripped down Lightweight because racecar dd lol. What do you plan on using for a flooring? I plan on getting these Vac aluminum floor pans but my dad thinks its the worst idea. What do you think?


            1989 325is l 1984 euro 320i l 1970 2002 Racecar
            1991 318i 4dr slick top


            Euro spec 320i/Alpina B6 3.5 project(the never ending saga)
            Vintage race car revival (2002 content)
            Mtech 2 turbo restoration
            Brilliantrot slick top "build"

            Comment


              #81
              Originally posted by ThatOneEuroE30 View Post
              Shes coming along nicely! Me and you got the same idea for a car a stripped down Lightweight because racecar dd lol. What do you plan on using for a flooring? I plan on getting these Vac aluminum floor pans but my dad thinks its the worst idea. What do you think?

              http://store.vacmotorsports.com/vac-...-kit-p333.aspx
              planning on just bedlining the floors and rocking it like that. but i have fairly big feet that help negate the height lost with the carpet out. if it turns out that i want some extra height on the floor i think i'm just gonna make my own little aluminum plate. i don't see the point in buying those VAC ones, they're way too expensive for what they are and diamond plate aluminum is trashy haha. also if i build my own i can integrate a dead pedal since i need one of those anyway.

              i was thinking i might build something like this but extend one side so it doubles as a dead pedal. then i'd attach it to the floor with some threaded rivet inserts.


              1989 Coupe build thread: http://www.r3vlimited.com/board/showthread.php?t=312012
              IG: @mitchlikesbikes

              Comment


                #82
                Originally posted by mitchlikesbikes View Post
                planning on just bedlining the floors and rocking it like that. but i have fairly big feet that help negate the height lost with the carpet out. if it turns out that i want some extra height on the floor i think i'm just gonna make my own little aluminum plate. i don't see the point in buying those VAC ones, they're way too expensive for what they are and diamond plate aluminum is trashy haha. also if i build my own i can integrate a dead pedal since i need one of those anyway.

                i was thinking i might build something like this but extend one side so it doubles as a dead pedal. then i'd attach it to the floor with some threaded rivet inserts.


                I like the vac ones just cause there pre made and I'm already tired of doing fab work haha. Idk why but I like the vac ones.


                1989 325is l 1984 euro 320i l 1970 2002 Racecar
                1991 318i 4dr slick top


                Euro spec 320i/Alpina B6 3.5 project(the never ending saga)
                Vintage race car revival (2002 content)
                Mtech 2 turbo restoration
                Brilliantrot slick top "build"

                Comment


                  #83
                  Nice build with good attention to details. I like the bit about using dry ice to get the sound deadening off the floors and trunk. Having also used the air chisel, would you do that instead, if you had to do it all over again?

                  Comment


                    #84
                    Originally posted by bavarianbrawler View Post
                    Nice build with good attention to details. I like the bit about using dry ice to get the sound deadening off the floors and trunk. Having also used the air chisel, would you do that instead, if you had to do it all over again?
                    i would probably use more of a combination of both. the air chisel was awesome but i got a little carried away in spots and messed the floor up. also the trunk is mostly flat and the pieces came out in large chunks. on the interior stuff it flaked apart a lot more and i think the dry ice helped from leaving a ridiculous amount of residue when it was all said and done.


                    quick little update: shifter parts are all here. just need to tweak a couple things then i can put it all back together. also ordered battery stuff today.

                    odyssey 680 battery, and a pacific customs battery box:)(sorry for no embedded pic, the company apparently won't let me do that even though i just bought their damn box)

                    Steel Battery Box For Odyssey 680 Batteries To Mount Battery With Terminals Pointing Upward from Pacific Customs Unlimited your best source for Street, Off Road, Sandrail, Dune Buggy, Manx, Rock Crawler, Volksrod, or Mud Buggy VW Parts.


                    planning on mounting it in basically the stock location with the original tray thing. seems easiest/best that way.
                    Last edited by mitchlikesbikes; 05-08-2014, 12:31 AM.

                    1989 Coupe build thread: http://www.r3vlimited.com/board/showthread.php?t=312012
                    IG: @mitchlikesbikes

                    Comment


                      #85
                      got all my battery stuff so i made a trip to the hardware store and started mounting the box up to the stock tray. things worked out pretty well. i don't have any pictures of it mocked up since i was in a hurry to pull things back apart for blasting/paint.

                      here's the box:


                      here's the battery in the box next to the old battery for comparison:


                      also got my shifter back in finally. this was probably one of the hardest things i've done since i got the car. there's no room to work with in the tunnel with the driveshaft in the way, and the pins only fit when they're perfectly aligned so i had to basically line all of the pins up by touch. the selector rod joint seriously took 2+ hours of wiggling. i finally got it to go by using the tip of a golf tee first (the tapered tip helped line everything up), then followed through behind the tee with the real pin. after that everything went smoothly for the most part. however i have literally a gnat's ass of clearance between my selector rod and my driveshaft with the z4 2.5 lever. options for more clearance are:

                      1. new slightly shorter lever (maybe a z3 one instead)
                      2. shave the driveshaft
                      3. shave the selector rod

                      option 3 is most appealing at the moment because i like the feel of the z4 lever so far and the driveshaft might go out of balance if i mess with it. the selector rod is already super beefy so shaving a little bit off the bottom of it probably wouldn't hurt it much.

                      here are some pictures of my clearance issues. i can slide a piece of paper through in neutral but i haven't checked clearance through the gears and even in neutral even a little bit of vibration would cause contact.


                      i also noticed while under the car that my reverse switch wiring had broken out of its clip and was just about worn through from rubbing on the driveshaft. i spliced in a bit of repair wiring and then wrapped it with some split loom. then i used some zip ties to hold it up out of harm's way.


                      oh and here's one more picture to show the grime i'm up against under the car. once the inside is painted i can pull the shift boot into place and the bottom will finally be sealed well enough to go nuts under it with some degreaser and the hose. (i couldn't previously because of all the rust holes and pulled drain plugs and what not). can't wait for that.


                      *****EDIT*****

                      after looking at the shift lever comparison photo it appears that a z3 lever isn't any shorter than mine on the underside so it doesn't look like that's an option for my clearance issues. oh well, guess i'll shave the selector rod.

                      here's the photo. i have the z4 2.5 lever which is tied with the z3 1.9 for the shortest length below the ball (which means a longer throw than all these other levers, but still significantly shorter than the stock lever)


                      1989 Coupe build thread: http://www.r3vlimited.com/board/showthread.php?t=312012
                      IG: @mitchlikesbikes

                      Comment


                        #86
                        slowly working my way down my list. today's progress:

                        worked on my "DIY Euro trim". i filled my marker light holes and have since sanded them. they need one more layer of filler then i think i can sand and paint.


                        i also painted my seat brackets, headlight trim rings, and coil bracket flat black


                        i started poking around in the trunk and obviously found more cancer. the oem jack bracket was all nasty underneath, and a nickel sized patch on the valance near the battery tray turned out to be much worse. i decided to drill the spot welds and open things up to really clean it out and load it up with some por15. i will panel bond and possibly tack weld everthing back together then reseal with undercoating. on the jack patch i think i'm just going to clean it up as well as i can, por15 it, and call it a day.


                        oh and my wiring is masked up and ready for paint. just need to finish scuffing and cleaning then mask a few more things before i can paint the interior.


                        1989 Coupe build thread: http://www.r3vlimited.com/board/showthread.php?t=312012
                        IG: @mitchlikesbikes

                        Comment


                          #87
                          its getting there, Keep up the good work!

                          Comment


                            #88
                            Updates?

                            image (10) by serdar.gurhan, on Flickr
                            PM me for custom shift knobs and stickers!
                            Originally posted by marshallnoise
                            You ain't done working on a car unless you are bleeding.

                            Comment


                              #89
                              Originally posted by serdar255 View Post
                              Updates?

                              currently working on finishing up the filler on the marker lights and prepping the interior for paint. scuffing the interior sucks and doesn't look special so i haven't taken any pictures of that. however i did work on something else that i had planned on doing on the car:


                              i really just need to clean up the holes and then transfer them to the valance itself since the spacing between the bumper and the valance was more than the holesaw could span.


                              also still debating options on wheel/tire setup. my budget is pretty limited (around $1000 for everything) and i can't find any wheels i like locally. i considered doing azenis on my bottlecaps but honestly the bottlecaps are just so dinky and i hate it. right now i am leaning toward some 16 x 8 mtechnica turbo rep wheels and some potenza re11 tires in 225/50/16. would be within budget, but i'm not stoked on running lame replica wheels. the struggle continues onward

                              1989 Coupe build thread: http://www.r3vlimited.com/board/showthread.php?t=312012
                              IG: @mitchlikesbikes

                              Comment


                                #90
                                Originally posted by mitchlikesbikes View Post
                                currently working on finishing up the filler on the marker lights and prepping the interior for paint. scuffing the interior sucks and doesn't look special so i haven't taken any pictures of that. however i did work on something else that i had planned on doing on the car:


                                i really just need to clean up the holes and then transfer them to the valance itself since the spacing between the bumper and the valance was more than the holesaw could span.


                                also still debating options on wheel/tire setup. my budget is pretty limited (around $1000 for everything) and i can't find any wheels i like locally. i considered doing azenis on my bottlecaps but honestly the bottlecaps are just so dinky and i hate it. right now i am leaning toward some 16 x 8 mtechnica turbo rep wheels and some potenza re11 tires in 225/50/16. would be within budget, but i'm not stoked on running lame replica wheels. the struggle continues onward
                                15x8 TRM C1 on BFG Rivals boom!
                                That's my next set up or RS3s

                                And what are those holes for?

                                image (10) by serdar.gurhan, on Flickr
                                PM me for custom shift knobs and stickers!
                                Originally posted by marshallnoise
                                You ain't done working on a car unless you are bleeding.

                                Comment

                                Working...
                                X