
Spun rod bearings, Thinking about going S62.
-
-
You're a mad manOriginally posted by Eric View Post
Originally posted by SpasticDwarf;n6449866Comment
-
Dang that sucks. S62 would be awesomesigpic
24v swappedComment
-
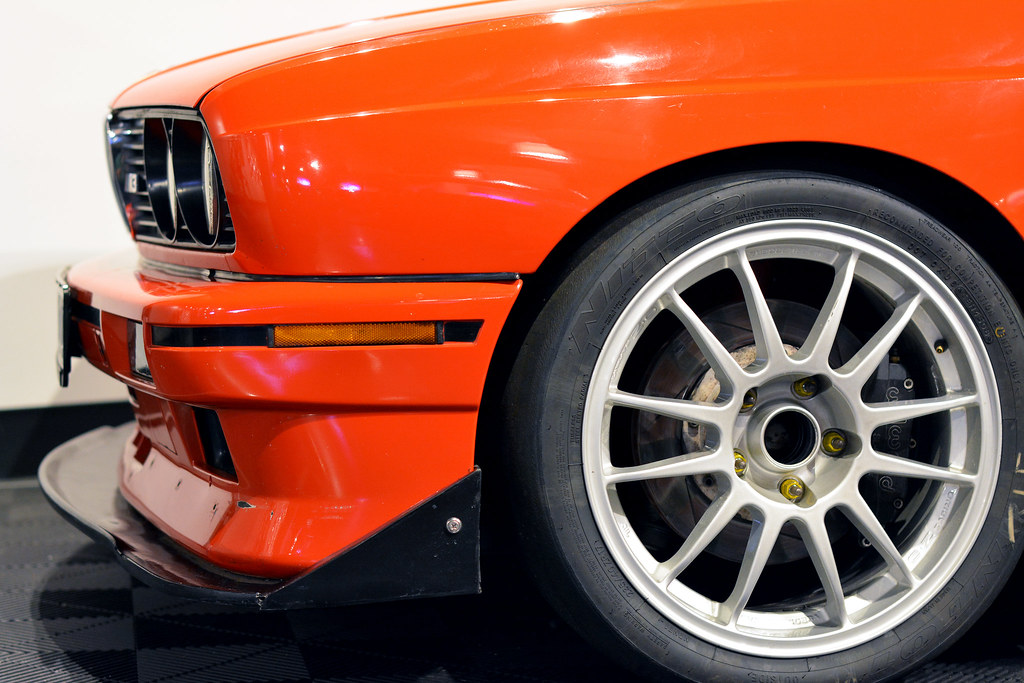
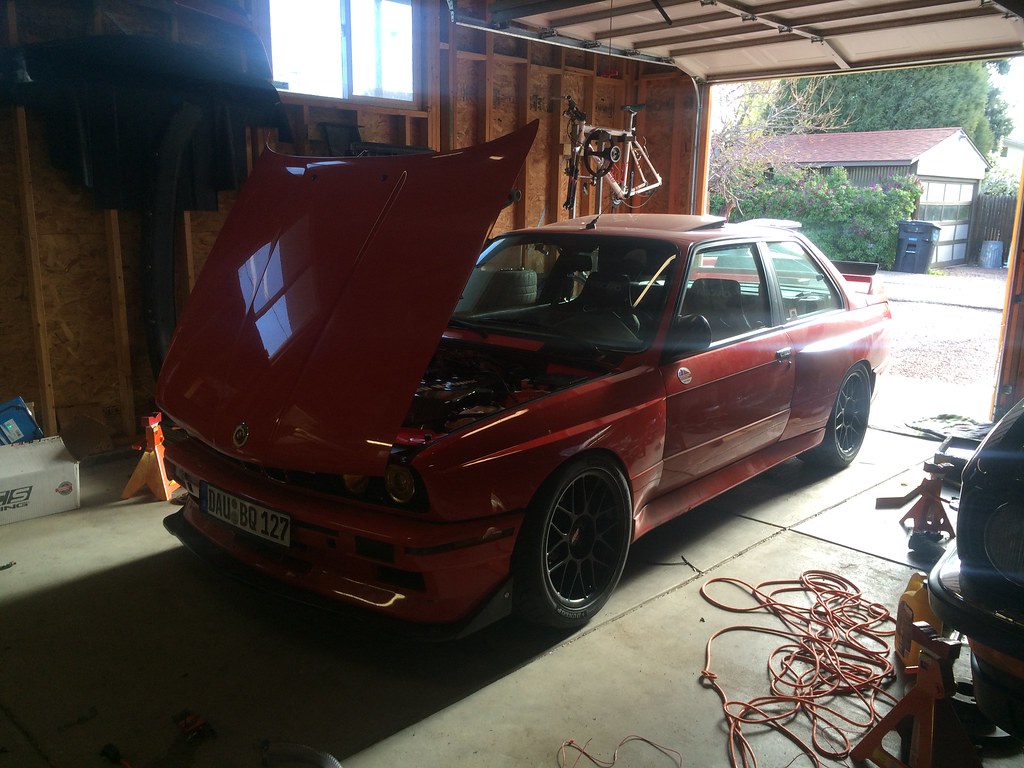
Since the M3 has been a museum piece for a while, I took the oportunity to put it on display! Our BMW CCA chapter coordinated with Johnny Martin's Car Central here in Colorado Springs to display a bunch of BMW's in their club/lounge/venue (not too sure what they are to be honest). Last week I dropped the M3 off, and noticed how down right dingey it had gotten from sitting in the garage for a year! So today I did a quick detial, clay bar then Klasse polish and Klasse sealant. I'm by far not the best detailer, but I was able to get rid of most of the oxidization and the car doesn't feel like sand paper anymore.
In good company
 M3 5 by ericandshovin, on Flickr
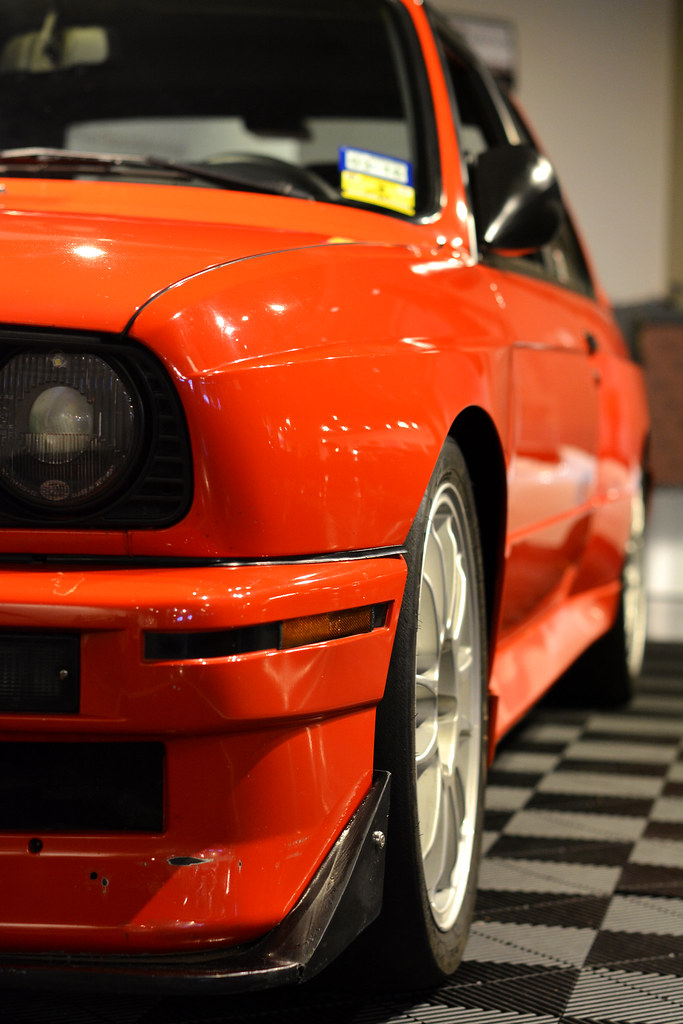
You can see some swirl marks on the fender, but it's better than the dullness before.
 M3 4 by ericandshovin, on Flickr
Best shot I took
 M3 1 by ericandshovin, on Flickr
from the back
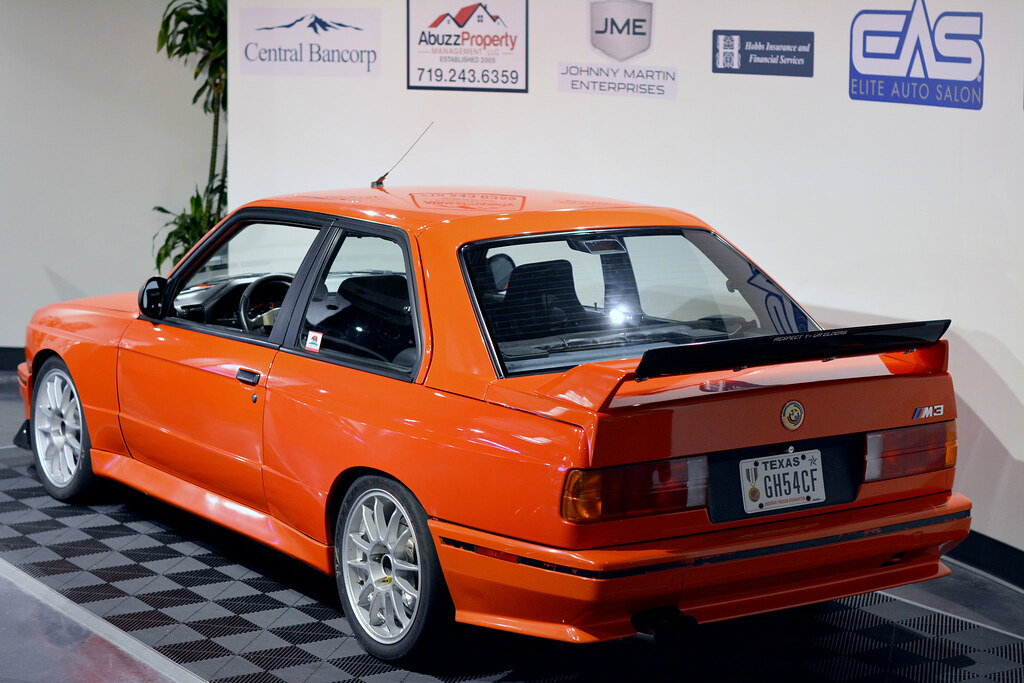 M3 2 by ericandshovin, on Flickr
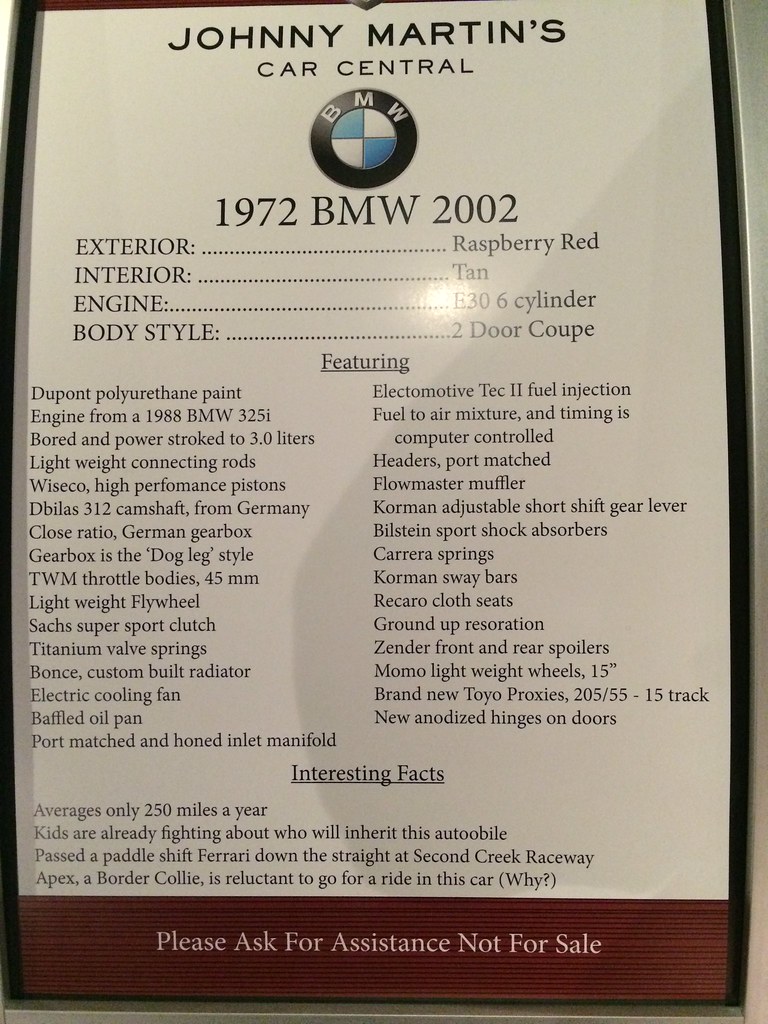
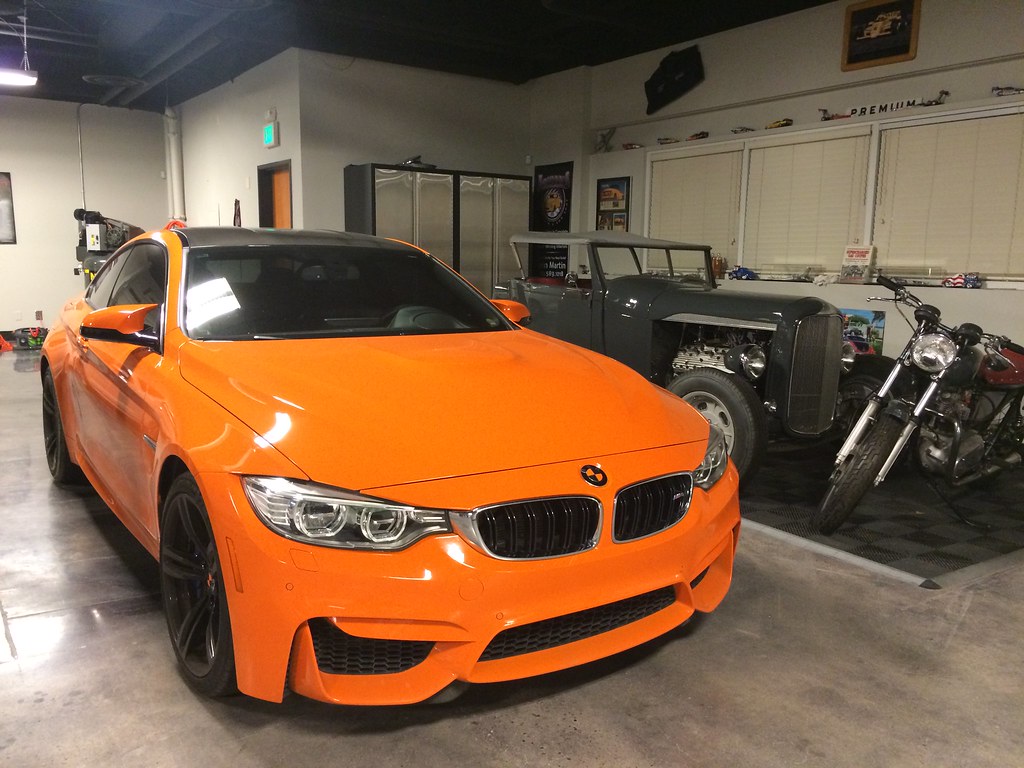
Some other hardware on display... A great 2002 with ITB 3.0L M20! A very orange M3, and an Alpina B7 with barely 9,000 miles on it. The supercharger routing on the alpina was impressive. (sorry these are cell phone shots)
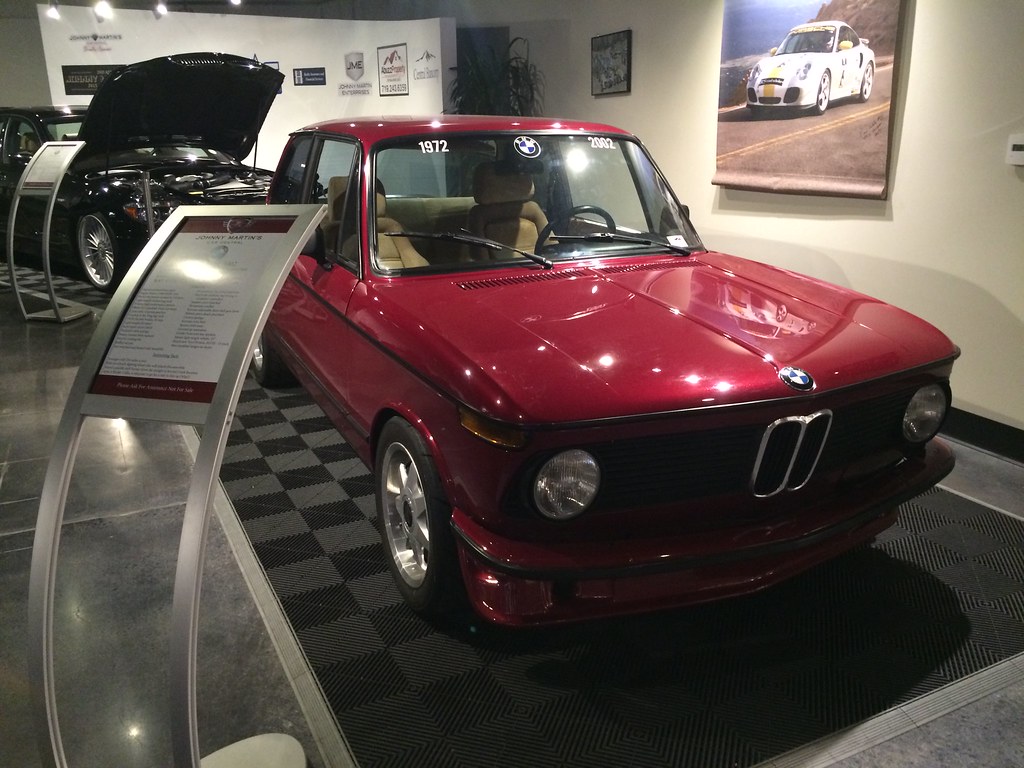 Untitled by ericandshovin, on Flickr
 Untitled by ericandshovin, on Flickr
 Untitled by ericandshovin, on Flickr
Comment
-
"Bored and power stroked to 3.0 liters" :giggle:Comment
-
-
I've had some very slow movement on getting the M3 back in action, but it's nothing worth posting about yet... I'll probably vomit out a mega post when parts start arriving!
In the mean time, I've been incredibly fortunate to have good friends who let me go fast in their cars!
Eugene let me drive his very very well set up E36 M3 at an auto-x.
I could never turn down the opportunity to drive an S54 Mcoupe at speed. I was actually fastest BMW at this event, neat!
Alex graciously let me drive the Mcoupe again at Laguna Seca last week. Like we have found in video's before, we are very close in overall lap times, but he is faster in some area's and I'm faster in others. This time though, he was doing the "data analysis" class and we got to actually see where we were gaining/loosing speed. and AIM Solo is definitely something I want to have onboard from now on!
Hopefully some proper E30 progress will be coming along soon!Comment
-
Well now... I must preface this post by declaring how retarded I feel after the last few day working on the car. I think you'll understand why.
18 months ago I heard a faint knocking from the engine bay. I had previously done a bunch of work to the car, so I was listening intently for anything out of the ordinary. Over the winter of 2014/15 I had:
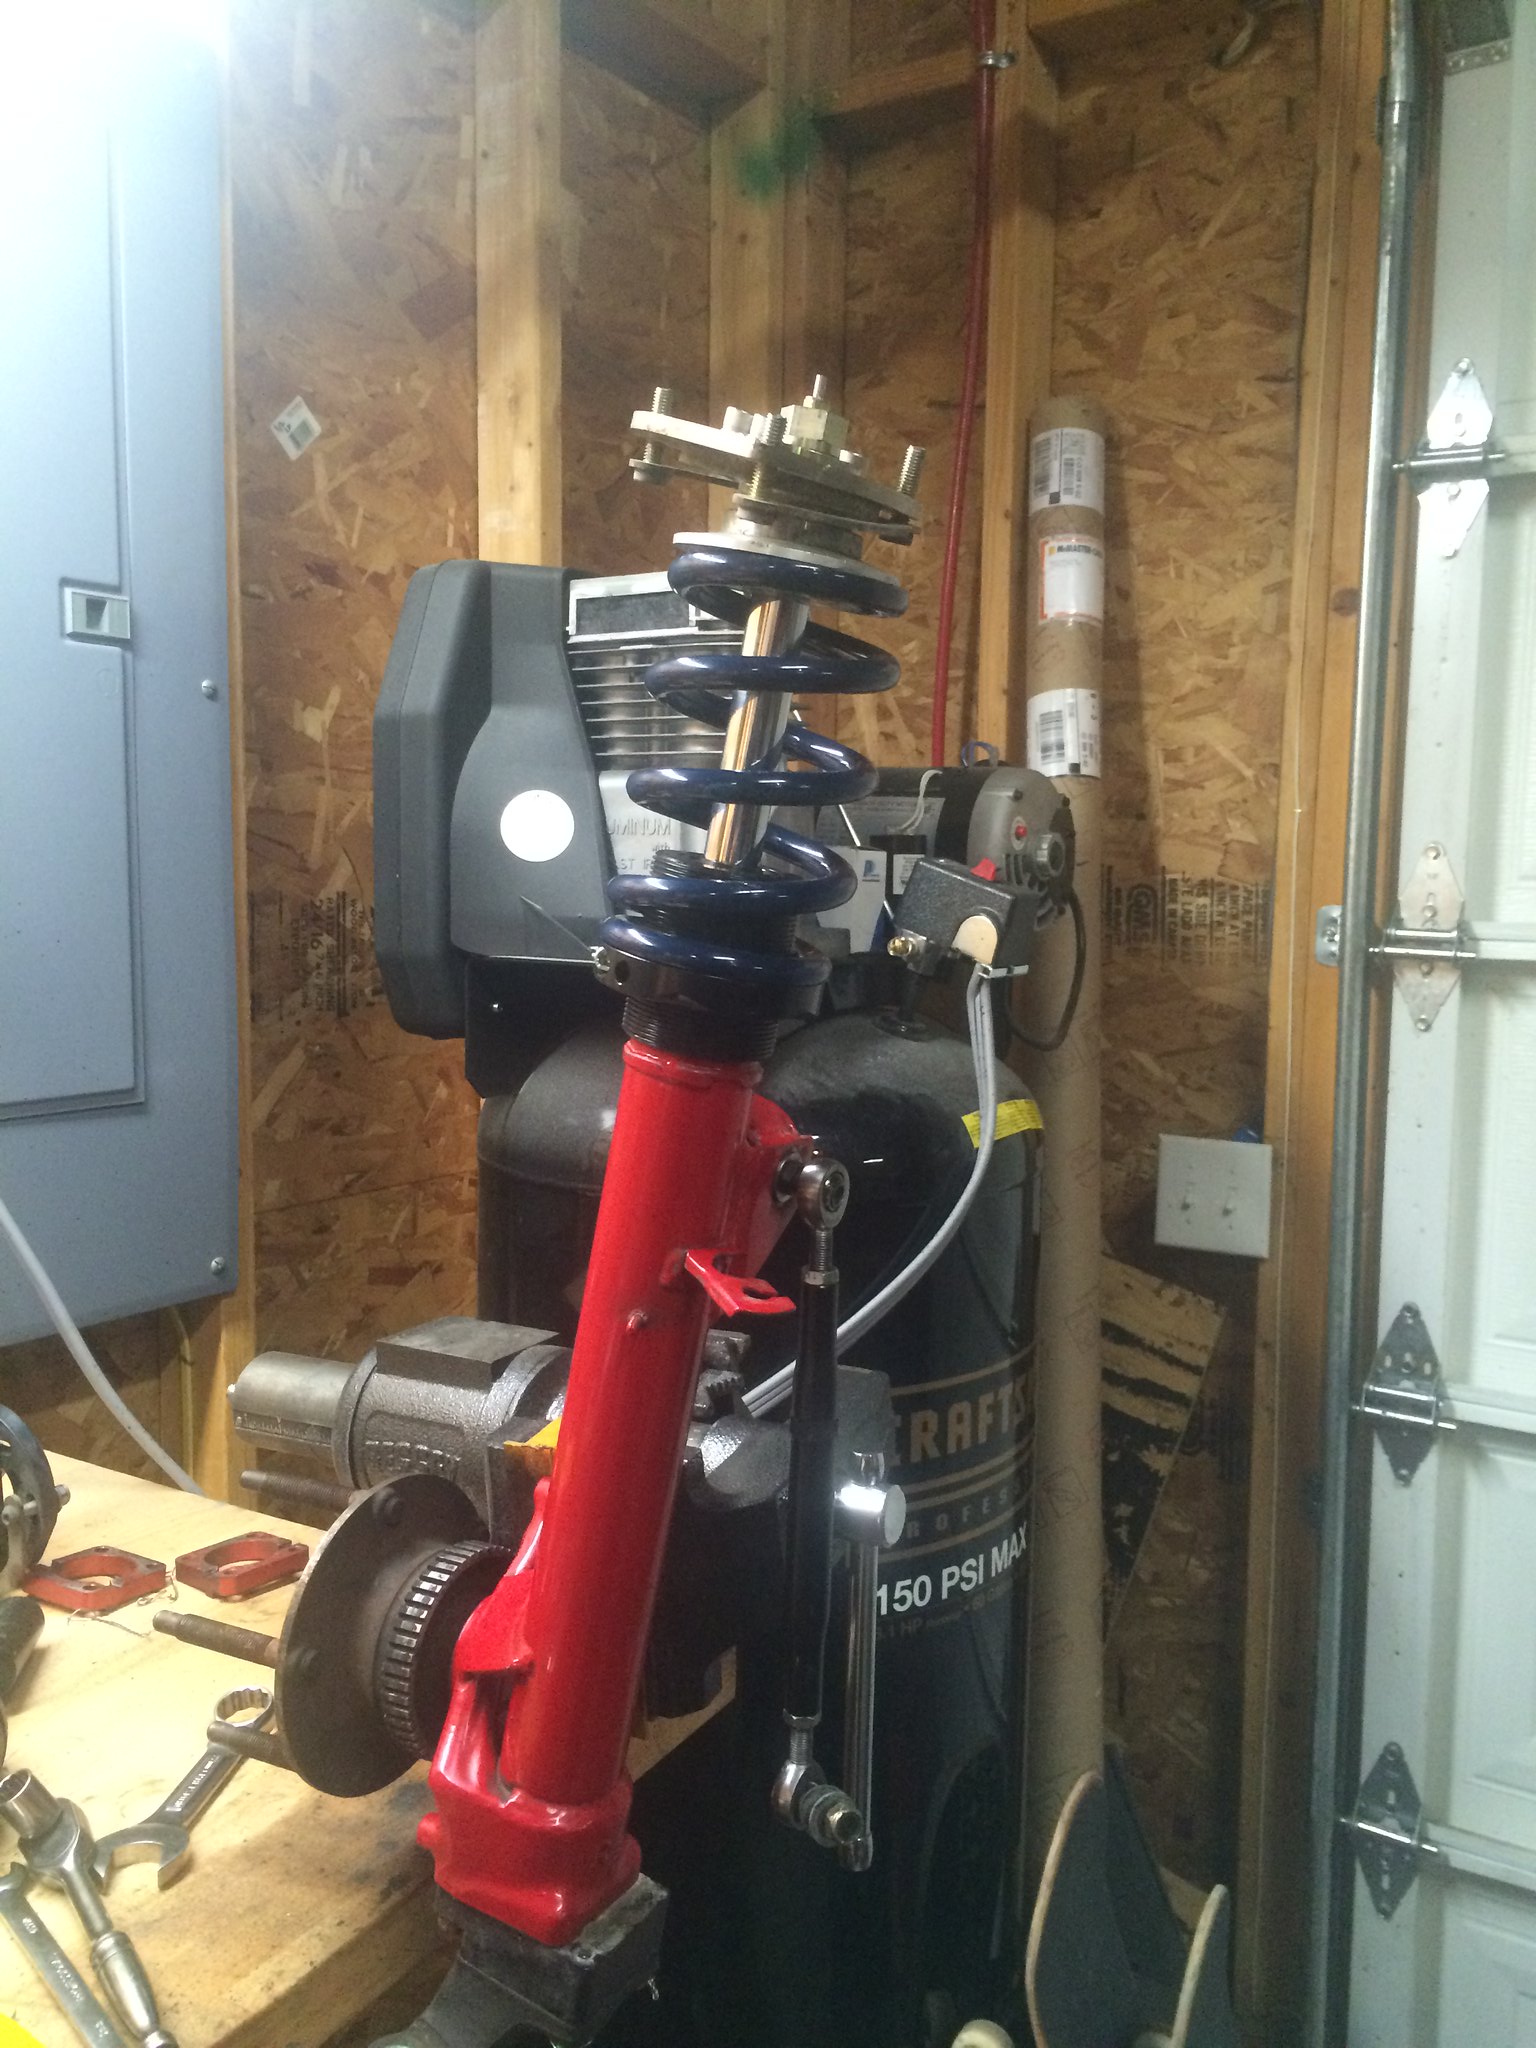
- Changed out the suspension to GC struts with AST 4100 insters, Hyperco springs, and AST 5100 rear struts.
 Untitled by ericandshovin, on Flickr
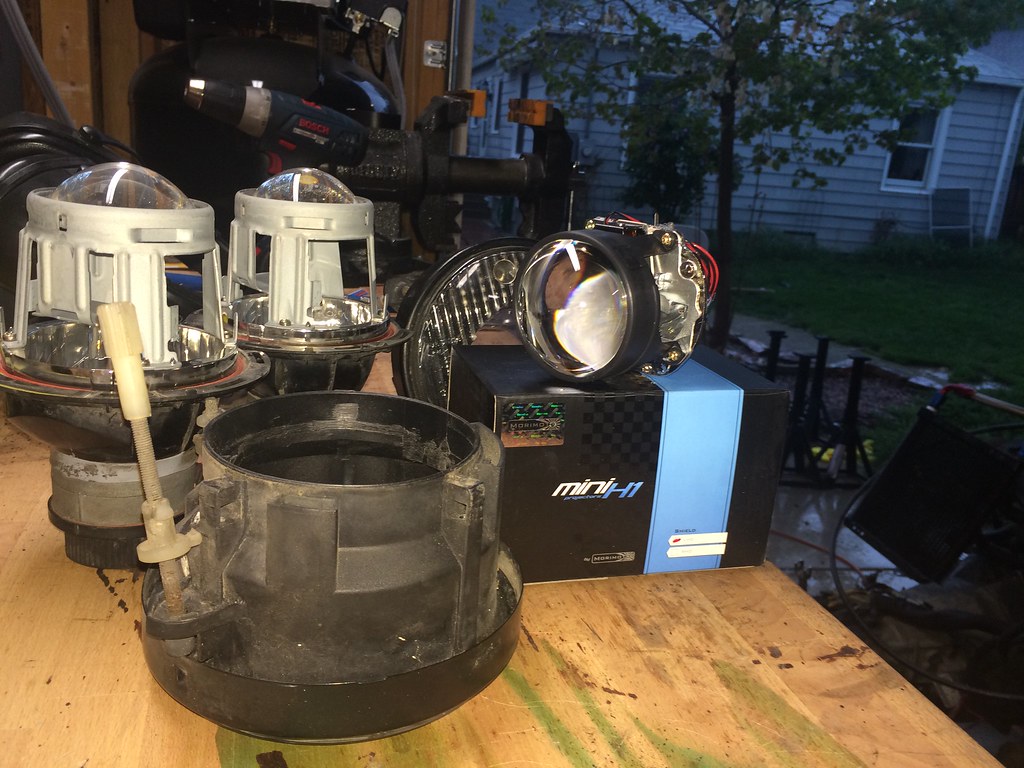
- Retrofited some HID's in the smoked elipsoids I had in a shed. I miss the frenchies now.
 Untitled by ericandshovin, on Flickr
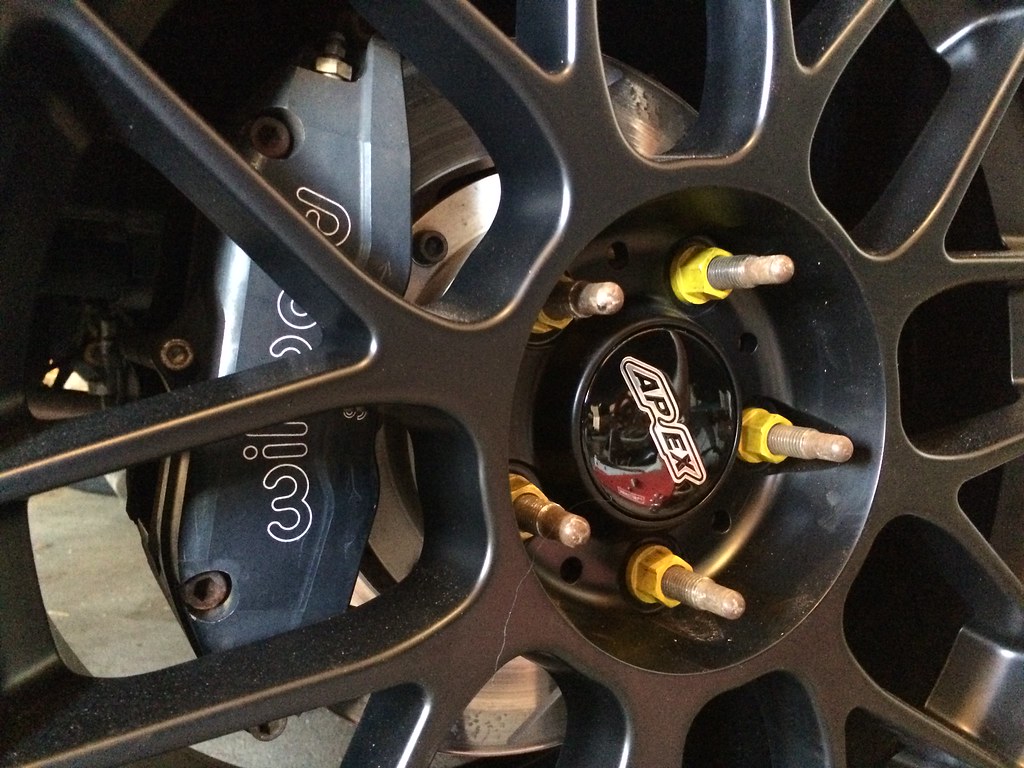
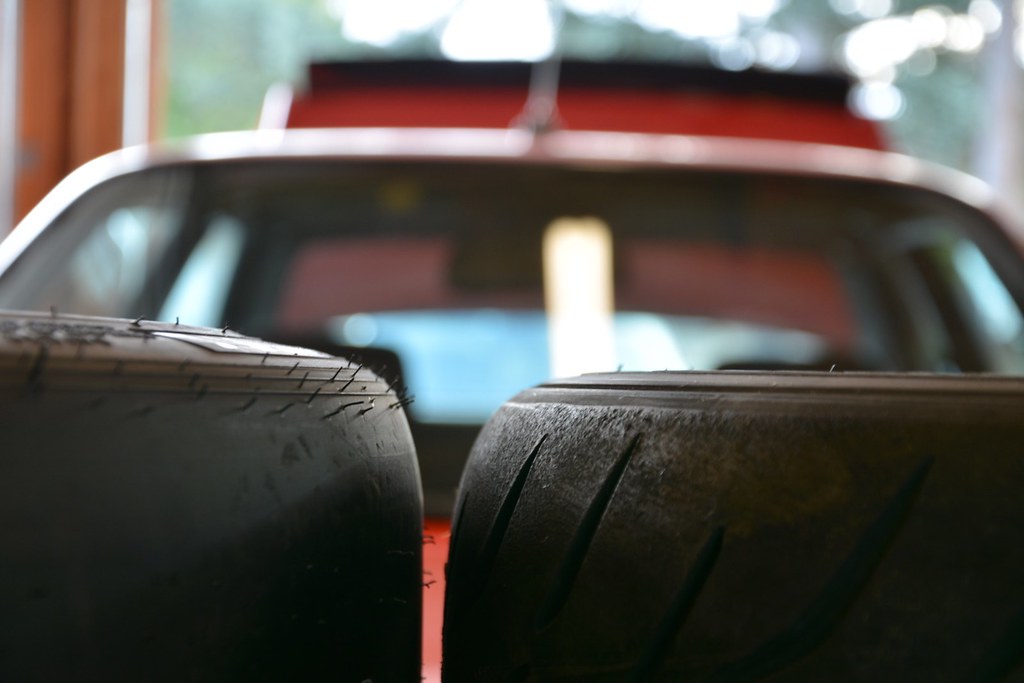
- Changed the wheels/tires. Now on 17x9 Apex Arc-8's with 255/40/17 Dunlop Star specs (I dont know how well this works, haven't driven on it yet to be honest)
 Untitled by ericandshovin, on Flickr
- Put some fancy yellow lug nuts on! haha
 Untitled by ericandshovin, on Flickr
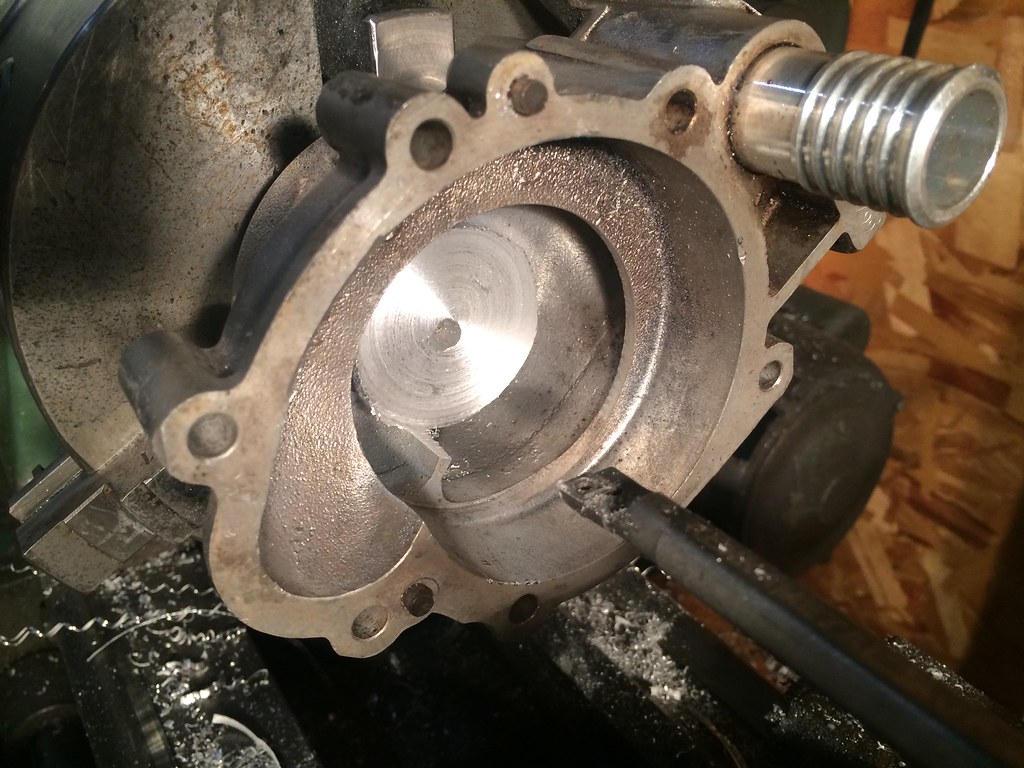
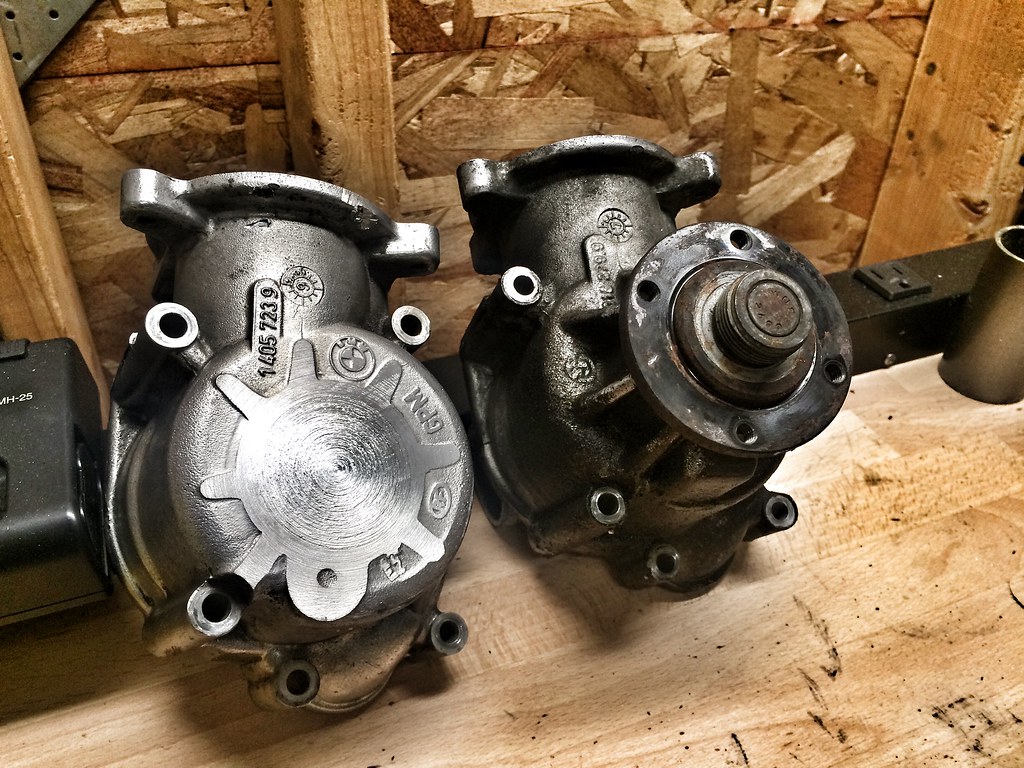
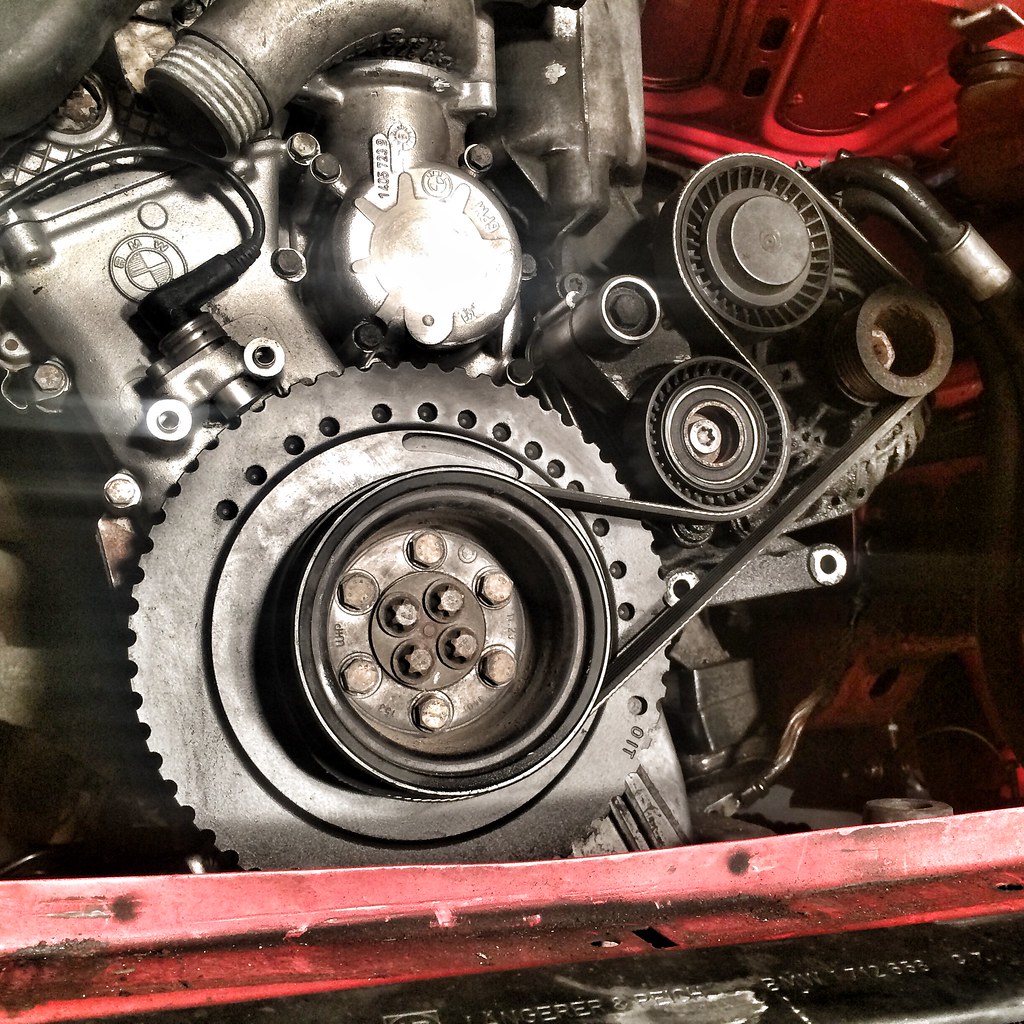
- Converted to an electric water pump
 Untitled by ericandshovin, on Flickr
I kept the stock pump as backup and ordered another one on ebay.de for 30 euros to modify
 Untitled by ericandshovin, on Flickr
I'm not 100% satisfied with the belt routing. Idealy I'd convert the alternator to be manually tensioned like the M20/S14 and ditch the tensioner and idler pulley as they aren't tensioning/idling as intended.\
 Untitled by ericandshovin, on Flickr
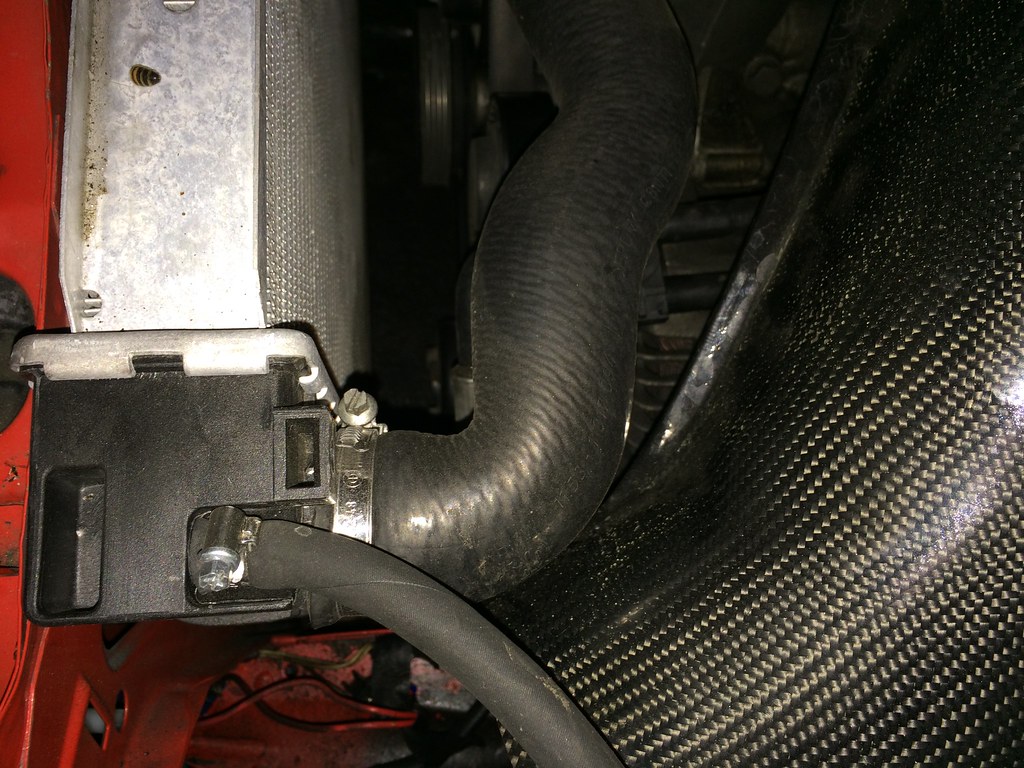
I also didn't like how this hose pinched.
 Untitled by ericandshovin, on Flickr
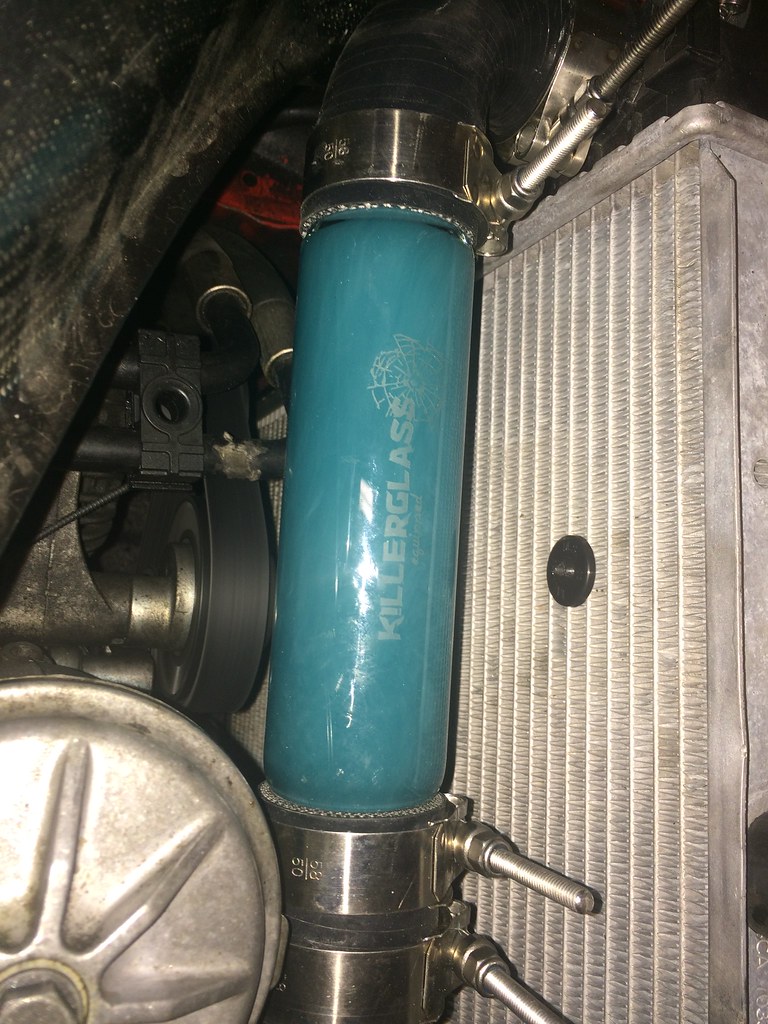
So this was my alternative. Surprisingly it's been super helpful testing the EWP setup!
 Untitled by ericandshovin, on Flickr
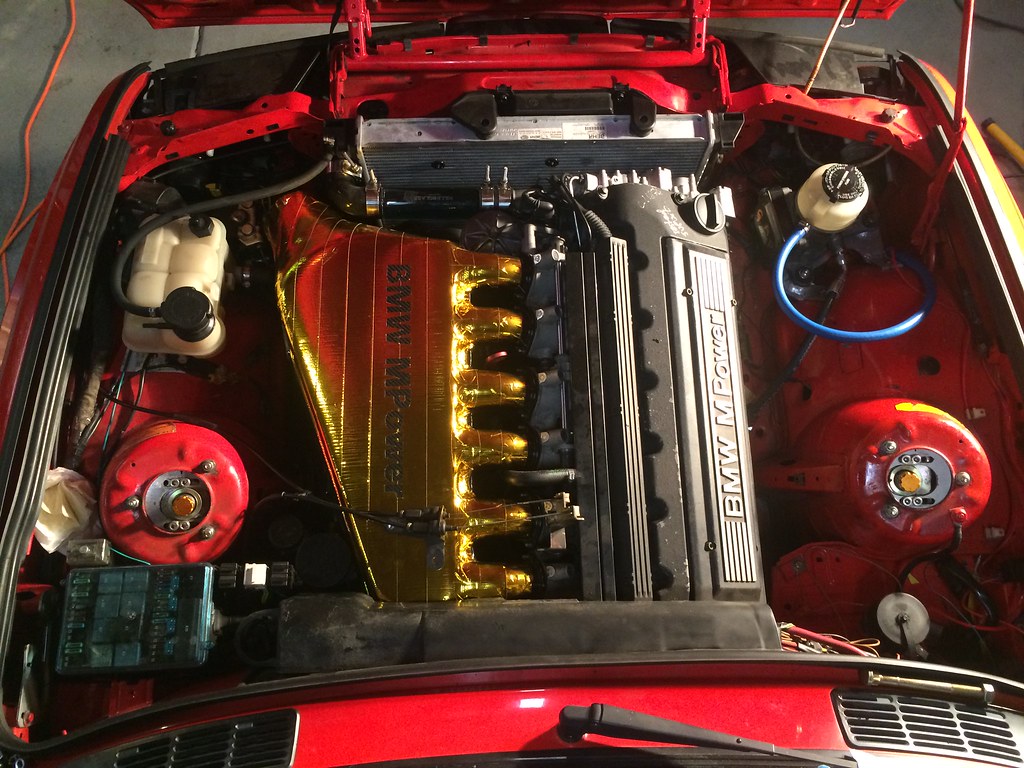
- Converted the power steering to an electro hydraulic unit from a Toyota MR-S Spyder. You can see it behind the passenger headlights with the blue return line. Also you can see I did a bit of gold foil tape on the airbox. Not sure I love the tape job.
 Untitled by ericandshovin, on Flickr
Of course everything was down the the last minute. I had an appointment to align/corner balance the car, and I put it down on the ground literally a few minutes after I needed to leave for the appointment. About 2 miles from my house I heard the knocking... So back home to cancel the apointment and dig back into it. Mind you, I'd been working evenings on this car for about 10 days straight.
Pulled it back apart to find this:
 Untitled by ericandshovin, on Flickr
It sucks pulling something apart that you just put in :(
 Untitled by ericandshovin, on Flickr
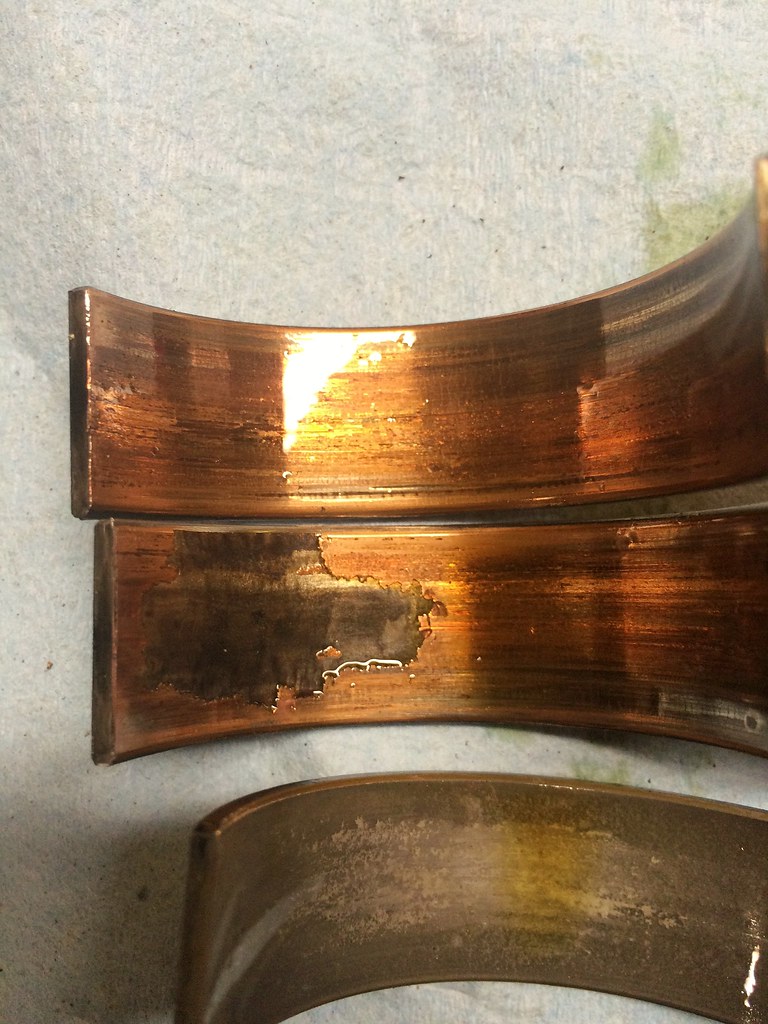
Here is a nice comparision of a spun bearing (top two), a worn bearing (3rd from top) and a brand new coated bearing with assembly lube greased on (bottom).
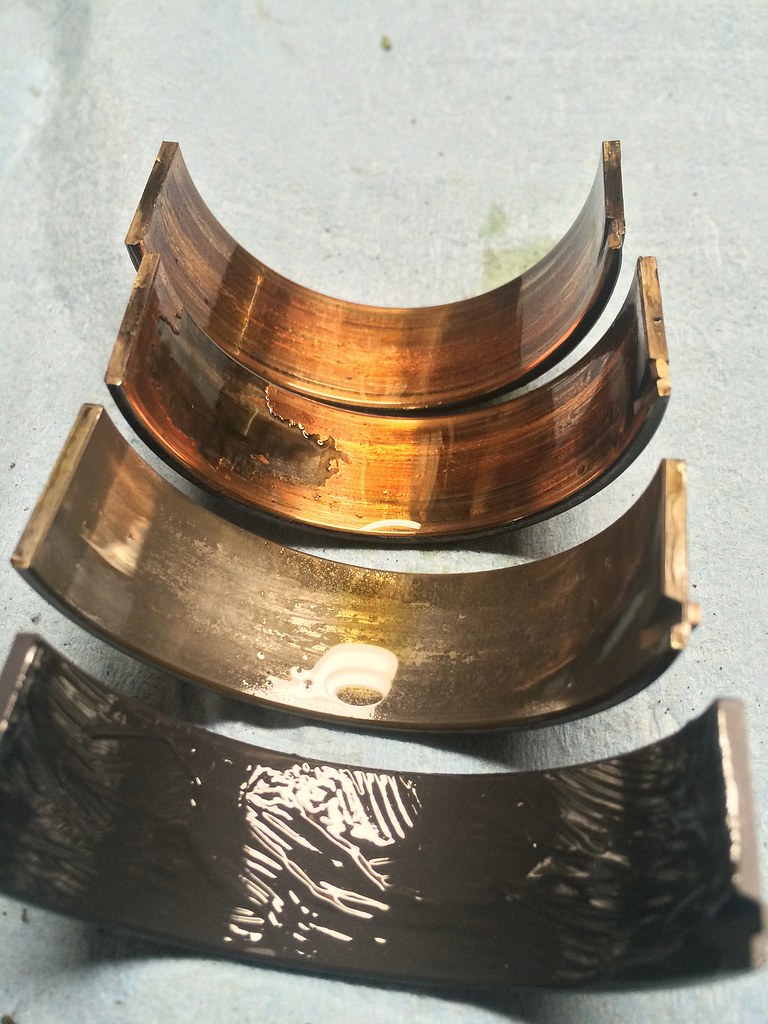 Untitled by ericandshovin, on Flickr
My oil pump nut solution
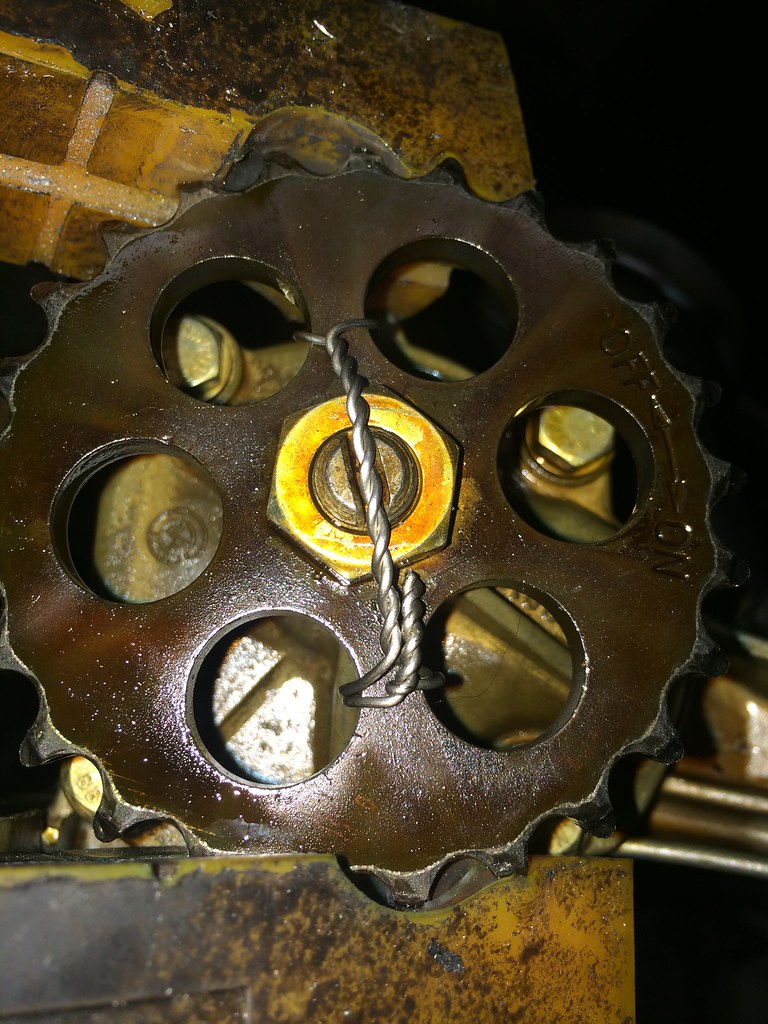 Untitled by ericandshovin, on Flickr
Fancy
 Untitled by ericandshovin, on Flickr
Put it all back together only to hear this on start up
At this point, I closed the hood, shut the garage and walked away. I was so pissed with myself, thinking I messed up the rod bearing job, wouldn't touch the car mechanically until a few days ago. Now I've been thinking about it a ton in this last year, and a few days ago I pulled the pan to see just how bad I messed up the rod bearing job. I only had time to pull one bearing before I had to leave for work, so I posted the knocking vid to facebook and a UK forum that has lots of euro S50 experience and got some great responses. A friend suggested that is top end noise, not lots of bottom end noise like I had thought. I always assumed it was just MORE rod's making noise since that is what I was messing with. Another chap suggested the baffle was making contact.
From 1/2 way around the world, he was spot on!
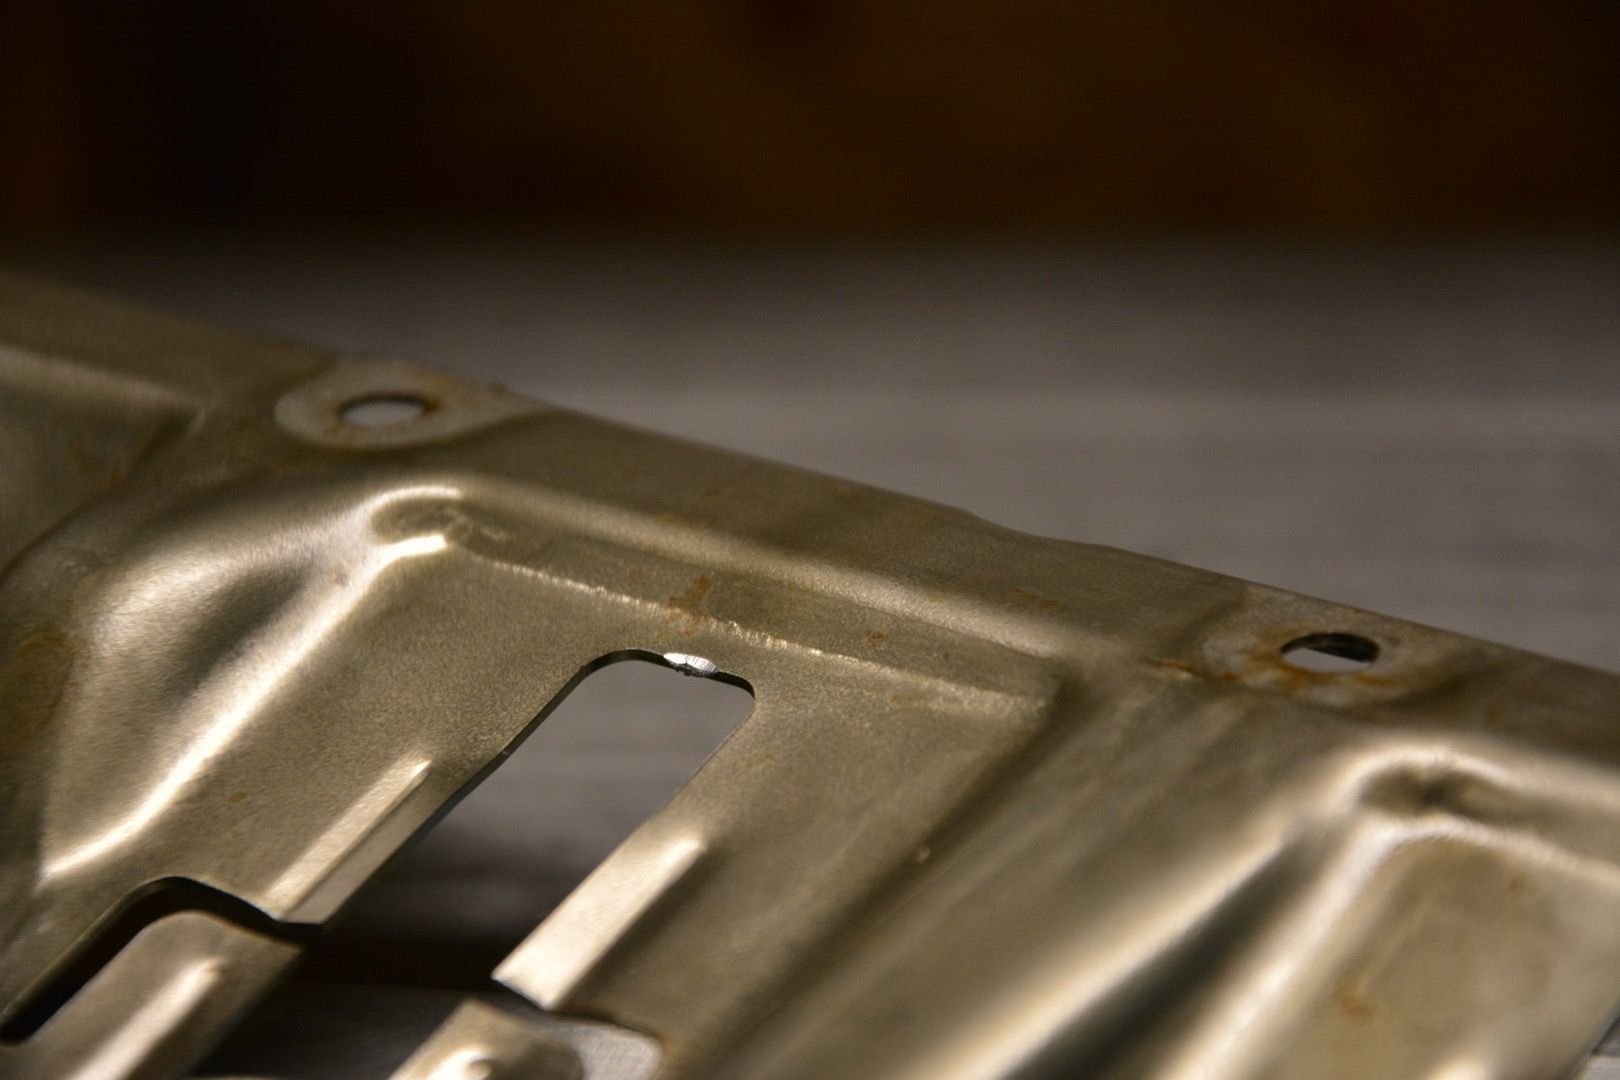
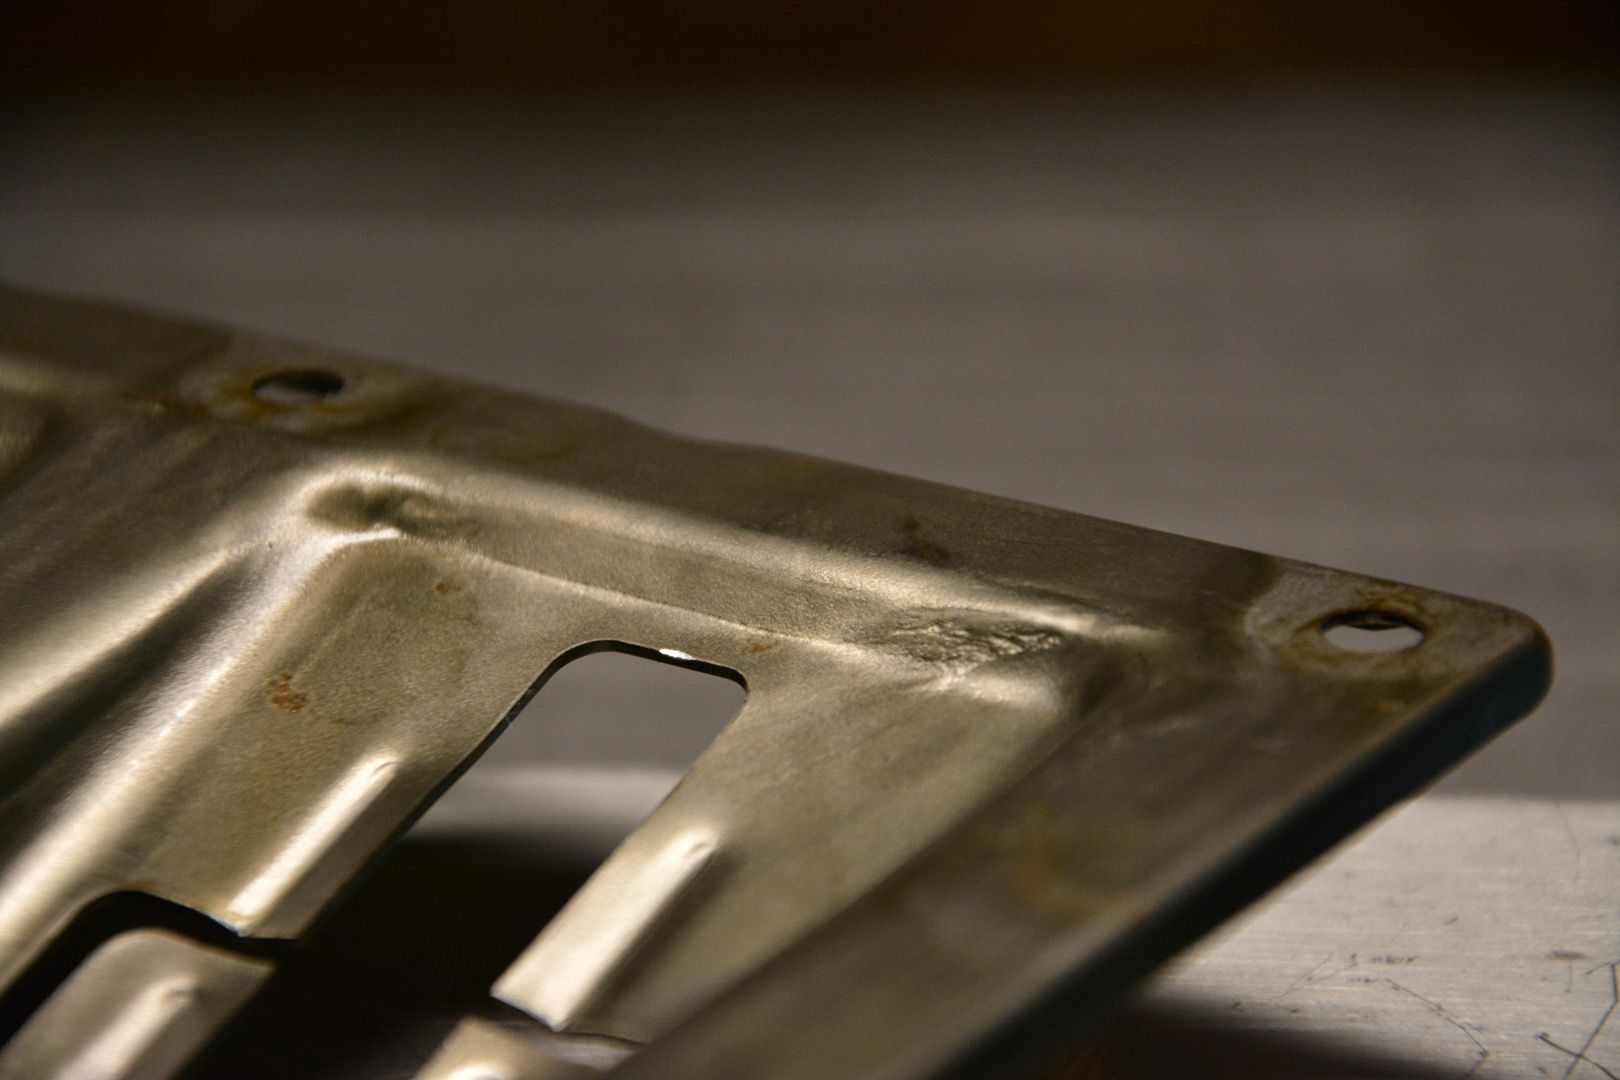
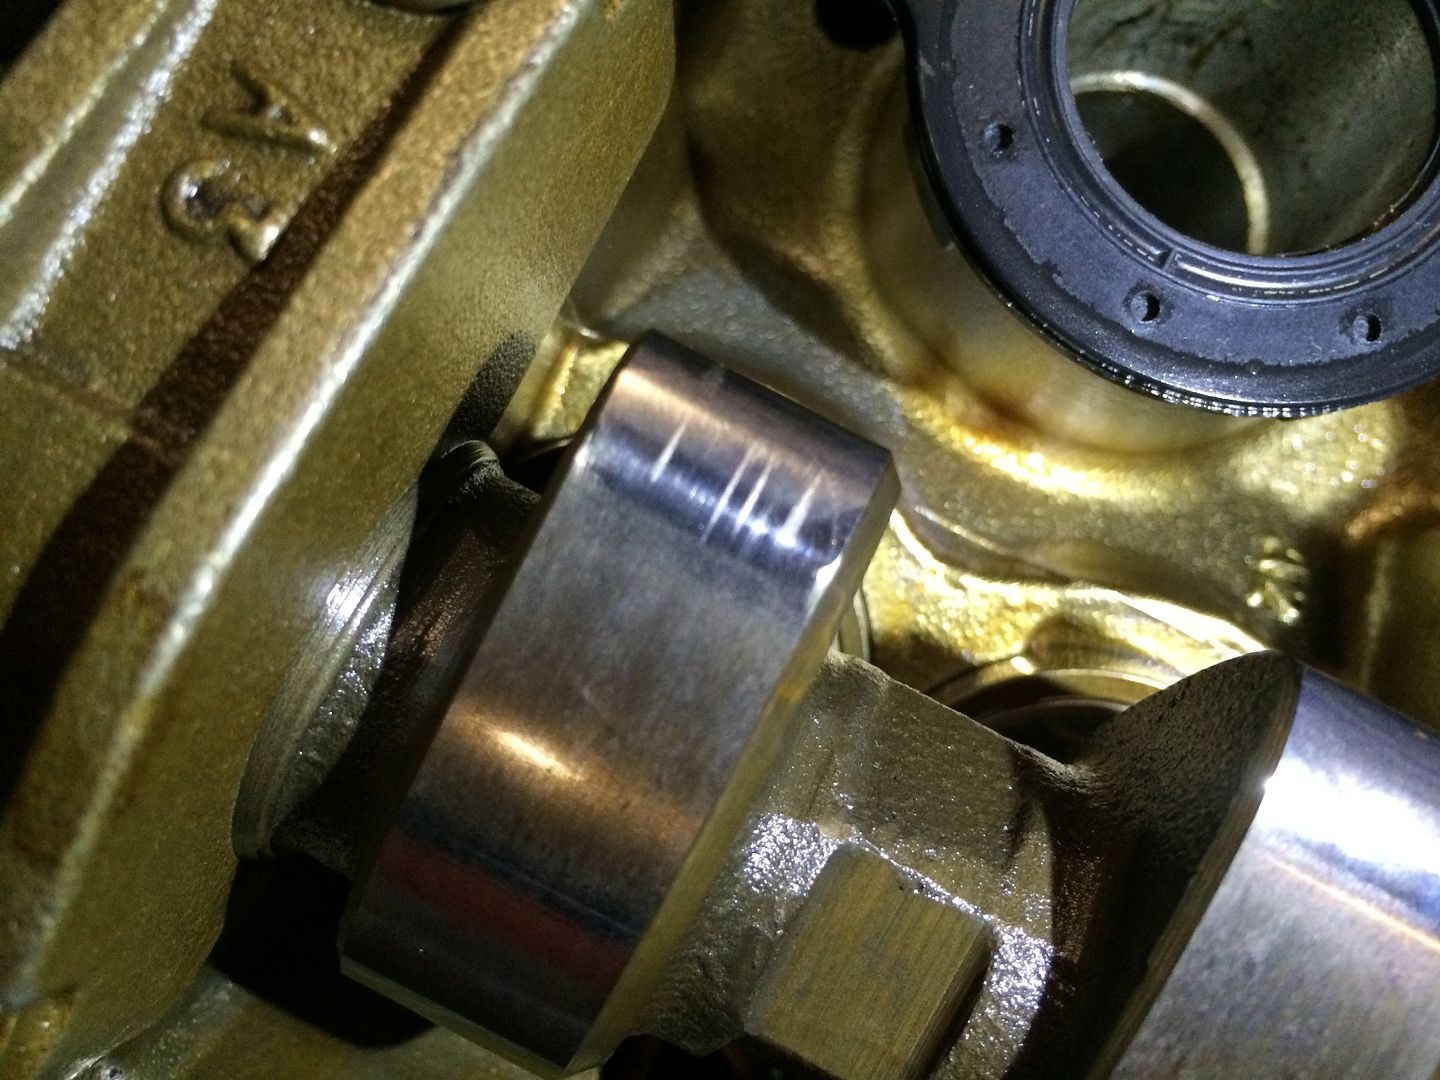
After reading this I stuck the windage tray back on the block and was able to replicate the noise by moving the tray alignment around a bit. 18 months this car sat in time out for just that? Damn that's frustrating!
Moved the tray around a bit, and viola, no noise!
I had to take out the good camera to be able to get a good shot of the tray/rod bolt contact.
For good measure, a friend that was helping me and I platiguaged all the bearing's and all were well within tolerances.
Stuck it back together, and viola, a running S50!
So now I need to put some miles on the car and change out the oil before putting the car into any type of stress. Unfortunately the last auto-x of the season is this weekend, but I am eyeballing the Texas Trifecta down at COTA in November...
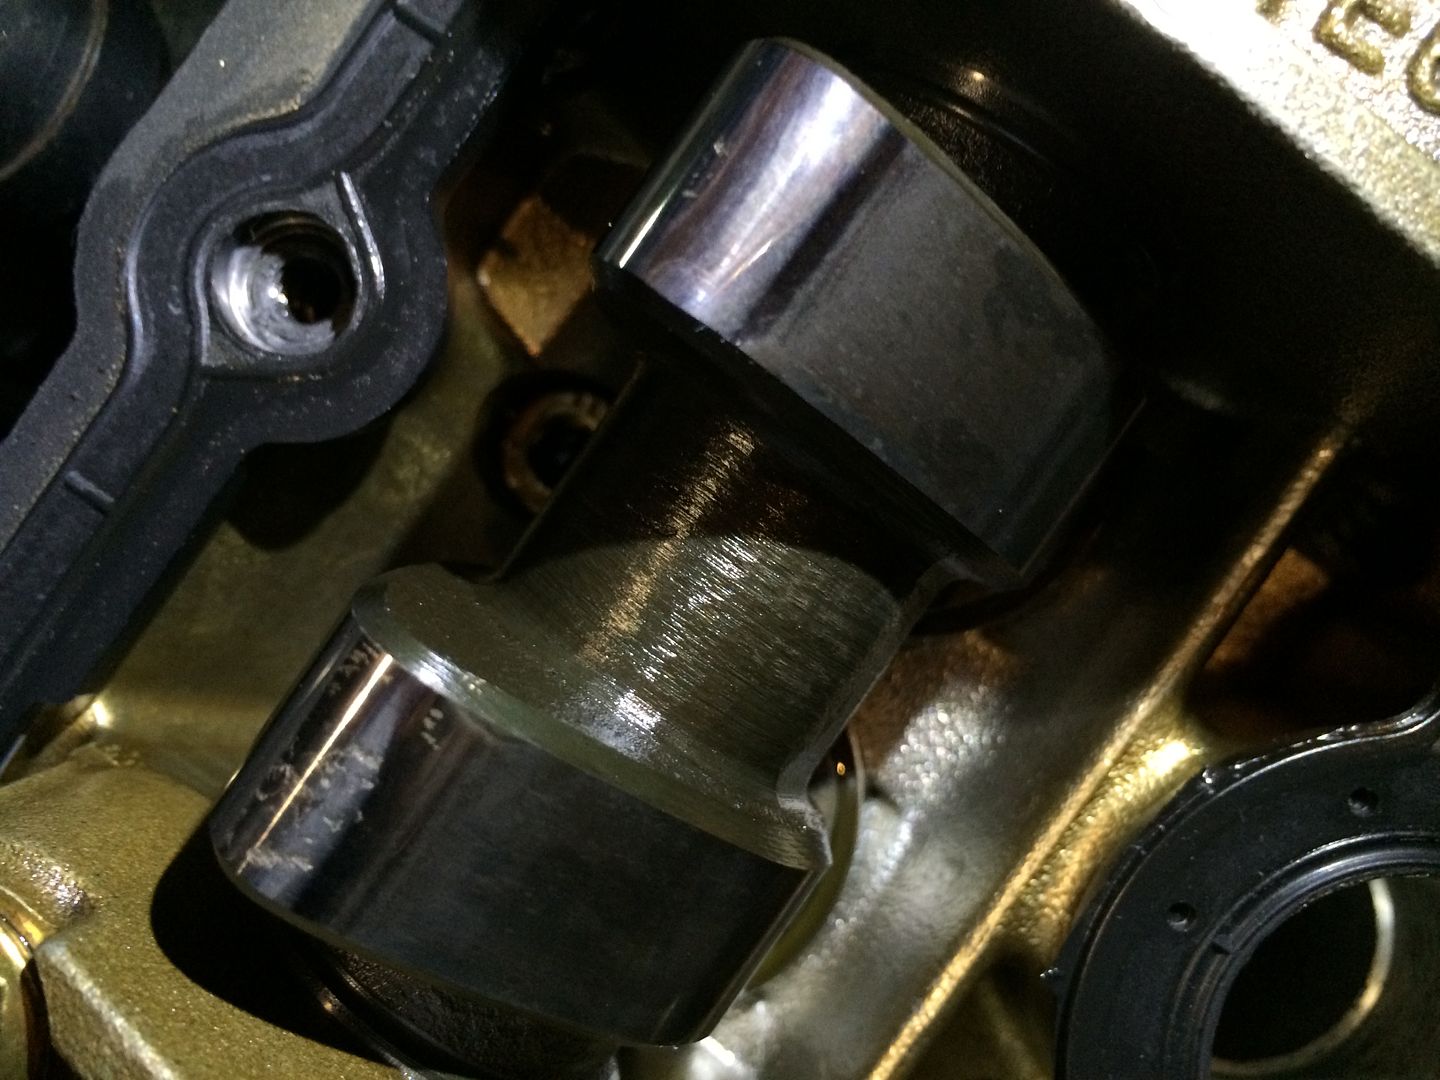
Also, I noticed a few of the cam lobes had some wear on them, should I be concered about this?
And finally, I bought this thing back last October to pull the motor/trans and put it in the E30. Now I'm not sure what to do with it... Thoughts?
Comment
-
What a rollercoaster of emotions on the rebuild!
Congrats to getting it all together!
Originally posted by whysimonComment
-
Ugh, so sorry you had to go through so much just because of the windage tray! It's actually pretty common.Comment
-
OK, this will probably be a big update in 3 significant areas:
1. motor progress
2. coolant woes
3. aero
1. motor progress:
I drove the car around a bit after finding the minor problem I thought was a major problem mentioned in a post above. However, I never really pushed it as my coolant gauge fluctuated too much to be comfortable... more on that later. Currently the car has some walmart mobil 1 oil that I'll change out after the bearings have a bit of a break in period.
In the mean time I signed up to instruct at the Texas Trifecta. 3 days at Circuit of the America's in Austin... I recently went to Oktoberfest in Monterey and was lucky enough to turn a few laps in my good friends S54 Mcoupe (an awesome experience and a post for another time).
 Untitled by ericandshovin, on Flickr
But nothing is better than being on track in your own car, so I better get cracking on sorting the M3!
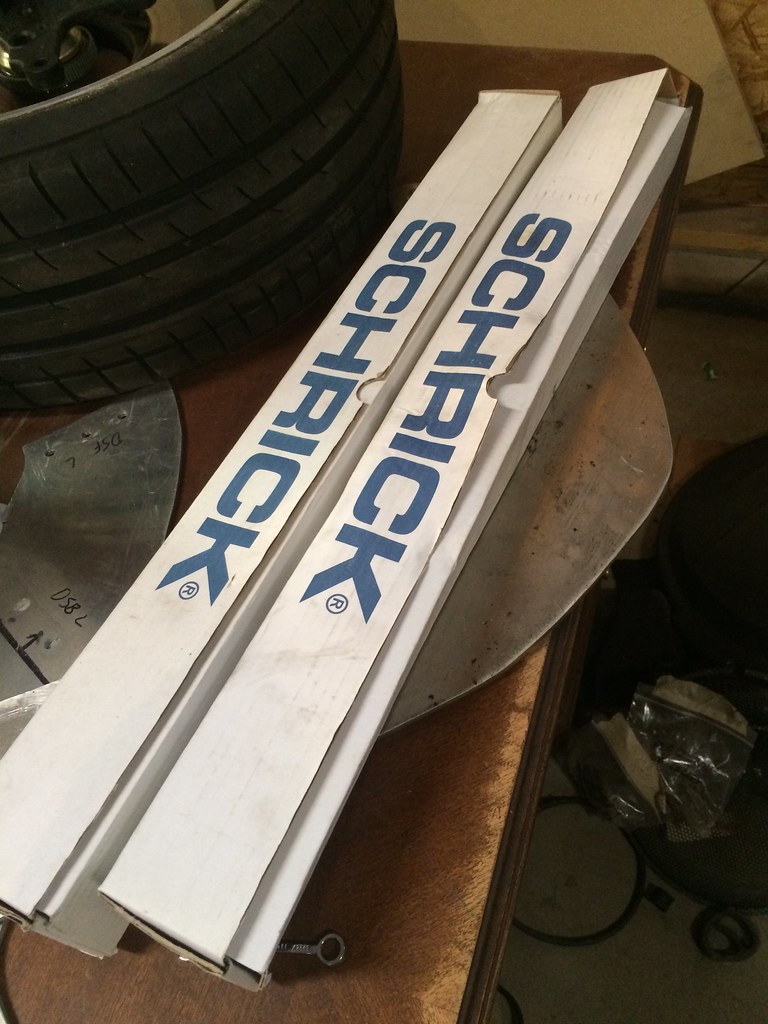
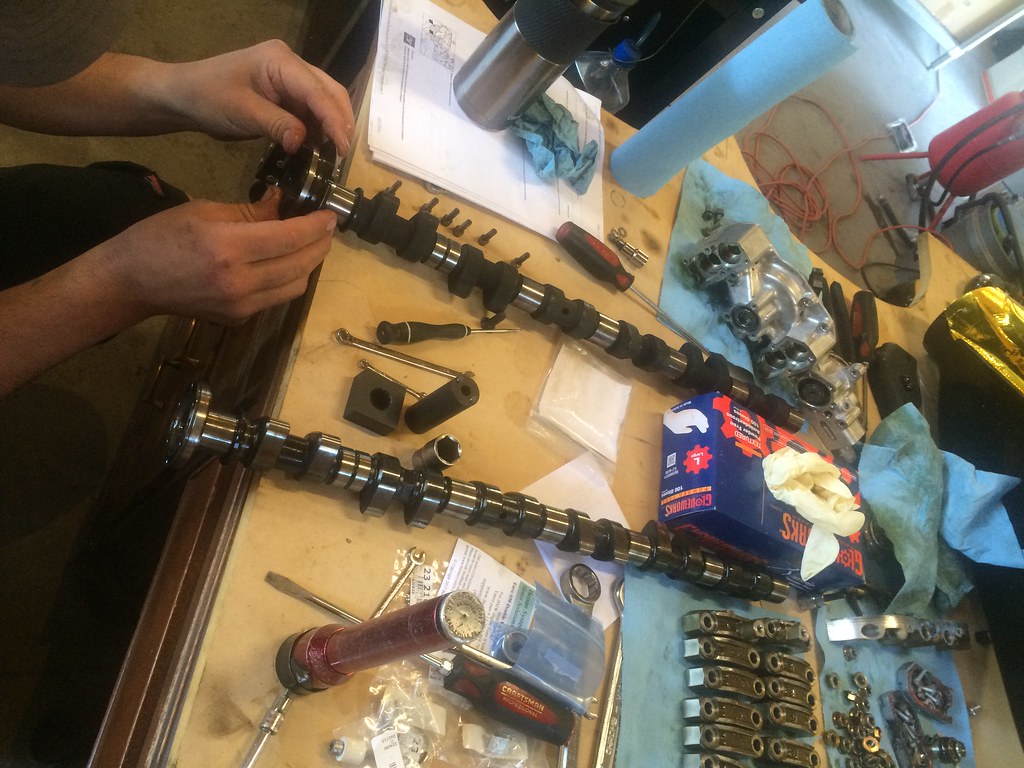
Back in 2012 I spent a chunk of cash with VAC and bought a set of Schrick camshafts for my old white track car with the euro 3.0l in it. When I bought this M3 with the 3.2L about 2 years later, I rang them up and asked if I could swap the 3.0 cams for the 3.2 cams. They graciously agreed with a restock fee and I promptly received my beautiful new Schrick 248° cams, and kept them in a box for 2 years. COTA has one of the longest straights of any racetrack, so I figured now that I have break in oil in the M3, it's as good of time as any to put the cams in! Only problem is the VANOS scare's me. Pulling the whole motor, swapping one motor from one kind of car into another is no big deal, but the intricacies of the dual VANOS system is a major factor to why the cams sat in a box for so long.
 Untitled by ericandshovin, on Flickr
Luckily our BMW CCA crew out here is amazing and one of the guys I auto-x with is also a shop foreman at one of the local dealers. He offered to take on the job and devoted an entire Saturday to help me. Thank god he did because even with Basain System's great instructions, I was over my head!
 Untitled by ericandshovin, on Flickr
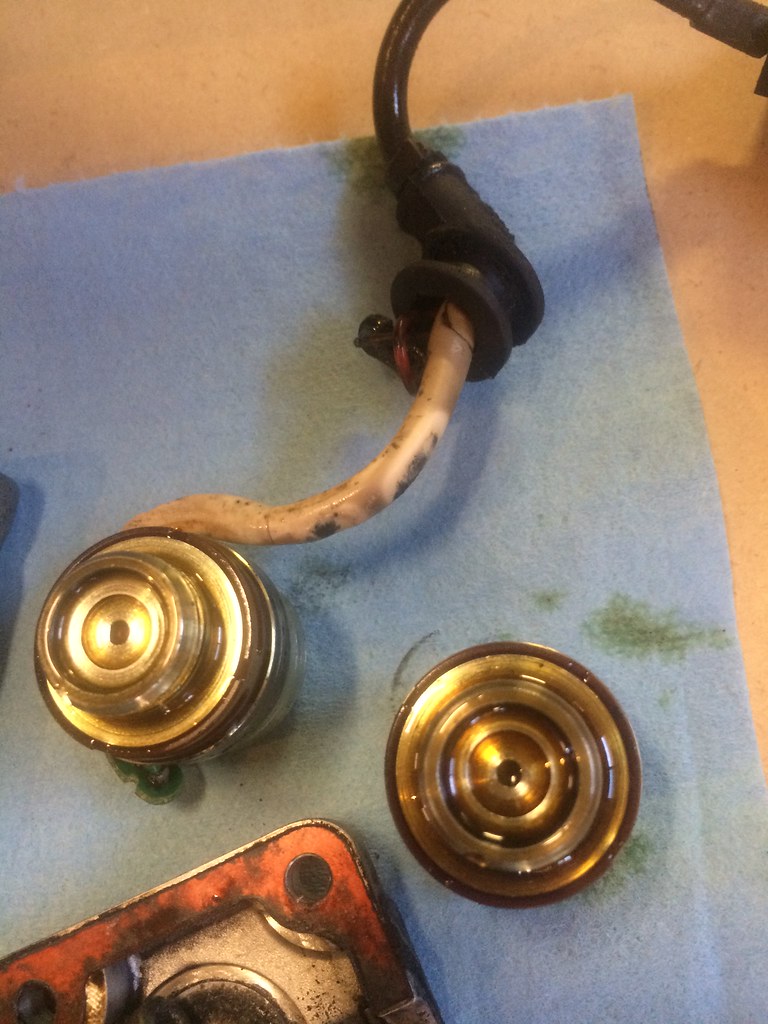
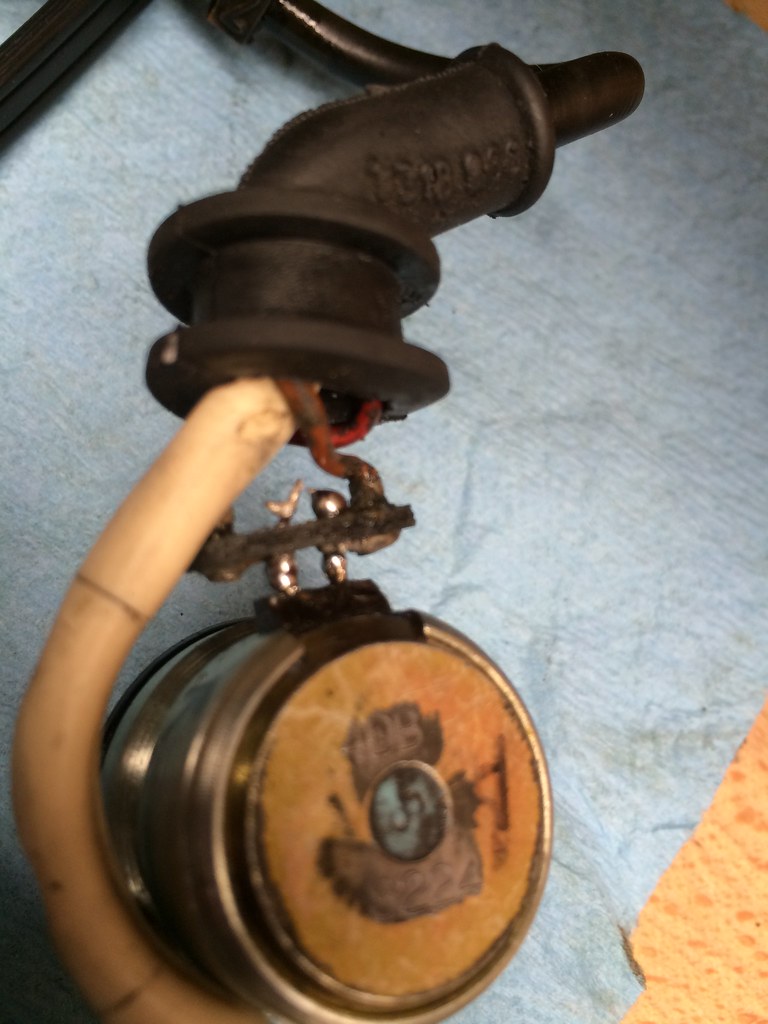
The exhaust plungers for the VANOS came out just fine.
 Untitled by ericandshovin, on Flickr
But the intake one had failed solder joints. Since this motor is swapped into an E30, I don't have a check engine light to warn me of VANOS failures. It makes me wonder if the VANOS was functioning previously. Hmmm.
 Untitled by ericandshovin, on Flickr
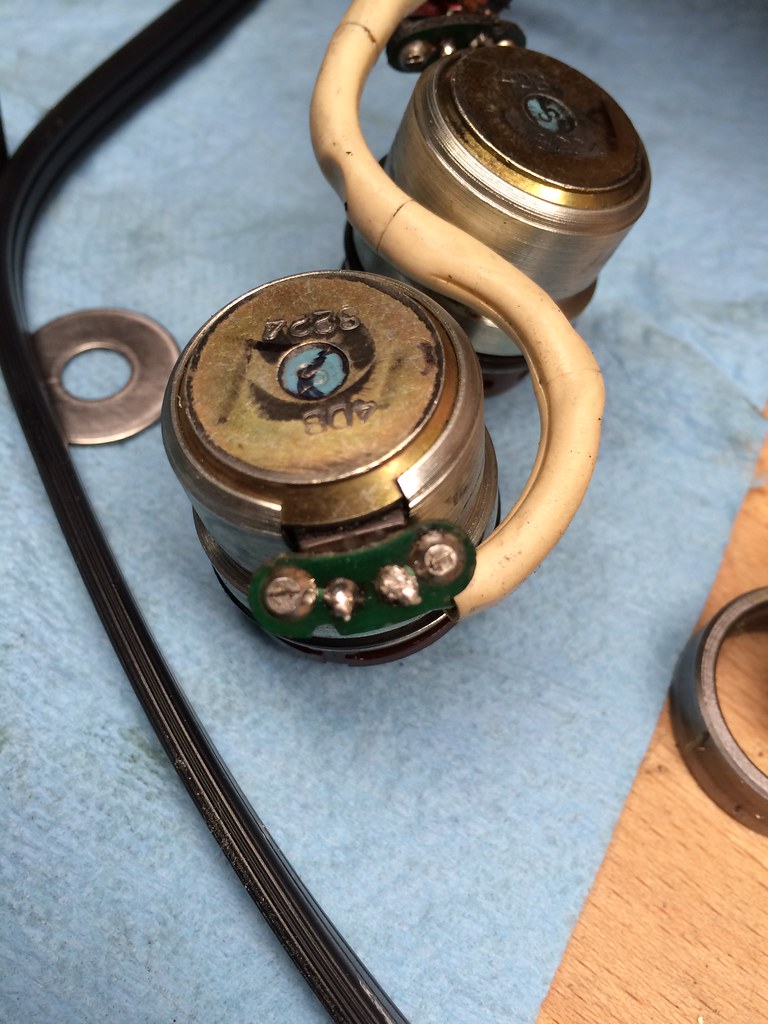
Re-soldered the joint and it has good connectivity, but I'm going to keep my eye on ebay.de to see if I can buy a known good one as I don't 100% trust the repair.
 Untitled by ericandshovin, on Flickr
Actually, now that I'm looking back at the photo's, both circuit boards had failed solder joints on the intake side, just one was much worse than the other. This one in the foreground was an easier fix.
 Untitled by ericandshovin, on Flickr
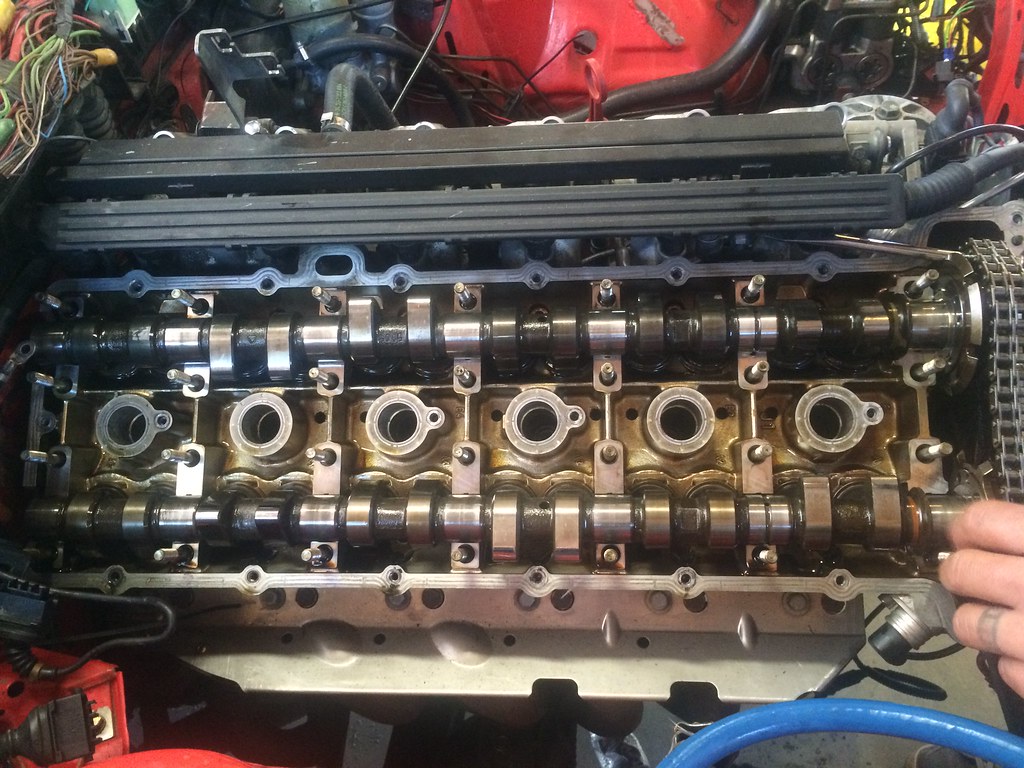
Transferring all the VANOS guts over to the new cams. The S50B32 dual VANOS is like a hybrid between M52 and S54 systems. Pretty interesting the evolution BMW does to it's systems. Small improvements with every iteration.
 Untitled by ericandshovin, on Flickr
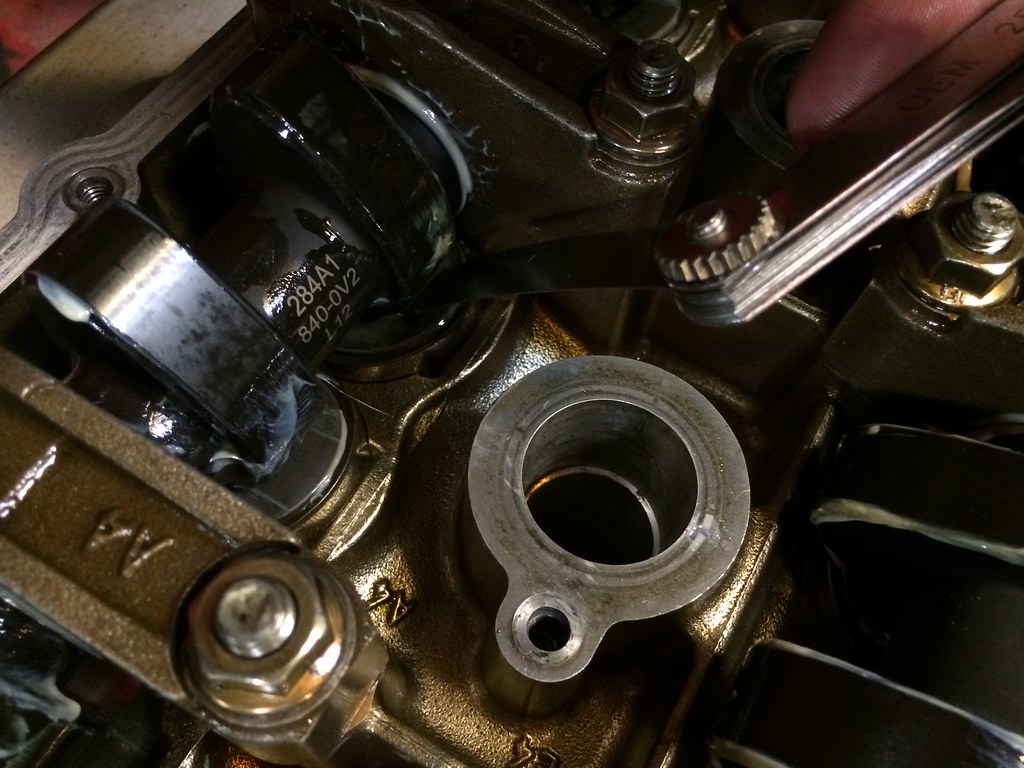
Back in and timed.
 DSC_8083 by ericandshovin, on Flickr
284°!
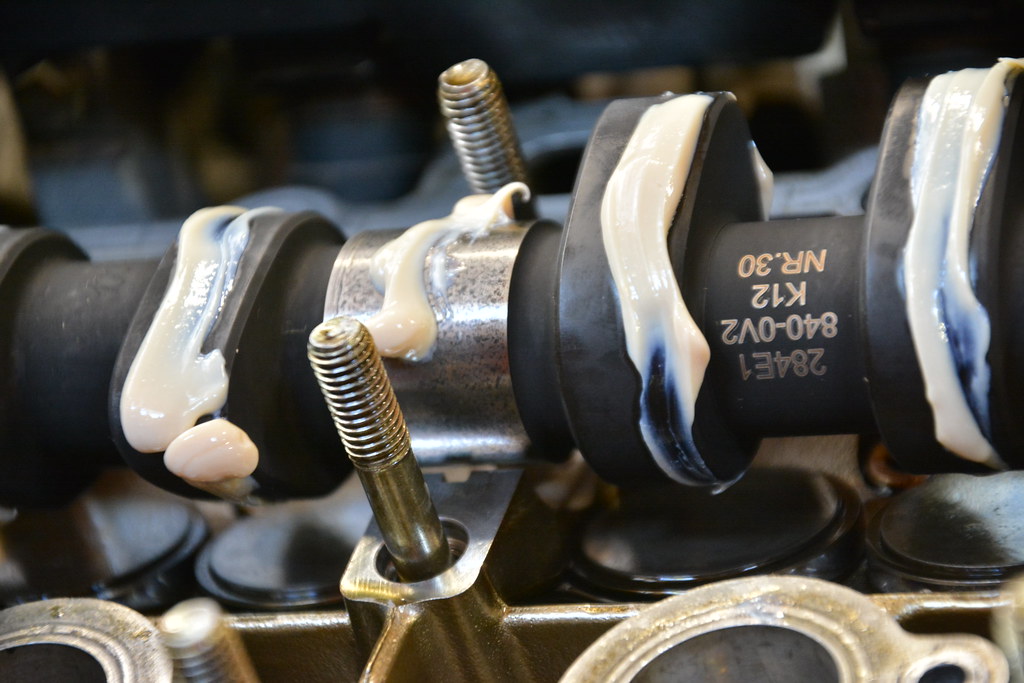 DSC_8086 by ericandshovin, on Flickr
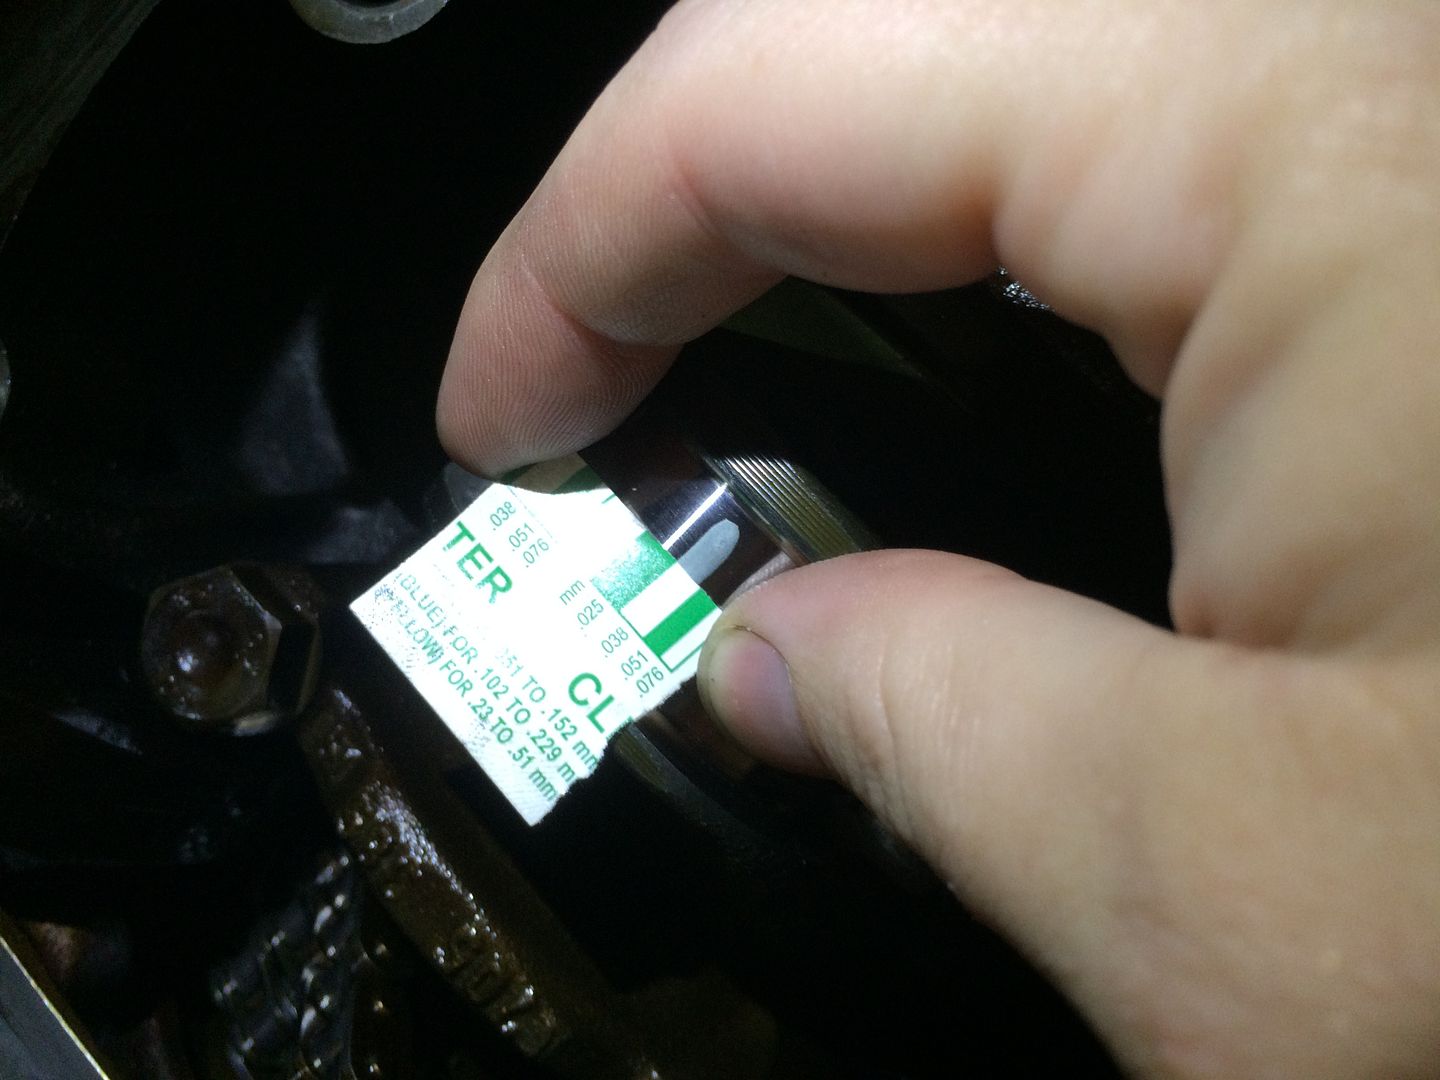
When the cams were out, I checked the thickness of all the shims. After the new cams were installed, I checked the valve clearance and surprisingly all were within spec! A few were a bit on the tight side, but all were within range.
 Untitled by ericandshovin, on Flickr
It's all back together now, but I haven't run the motor yet to see if I get the awesome lumpy cam sound because of my coolant woes. Oh my coolant woes.Comment
-
2. Coolant woes:
As documented previously, I've done a bunch of different things to my coolant system, the EWP and digital controller being the driving force. My theory is that the factory pump cannot be most efficient at all RPM's. It's either cavitating at high RPM's or not flowing enough fluid at low RPM's. and EWP runs at it's max efficiency at all run times, and pulses on/off as needed. Unfortunately I was noticing that my digi controller was not pulsing the motor on/off as it should saying the motor was less than 70°C yet I was seeing +220°F water temps on my VDO guage. Something that made me suspicious is the water temp dropping immediately to less than 180°F when making abrupt right hand turns. The sensor for the VDO gauge is on the left side of the outlet elbow as the coolant travels from the head to the radiator. To me this indicated there is air entering the system and the sender was only getting a true reading when a rush of waters was forced against it on aggressive right hand corners.
Air in the system....
I figured I had two options as to why air was entering the system, either the head gasket is blown, or air is being sucked in at a joint somewhere.
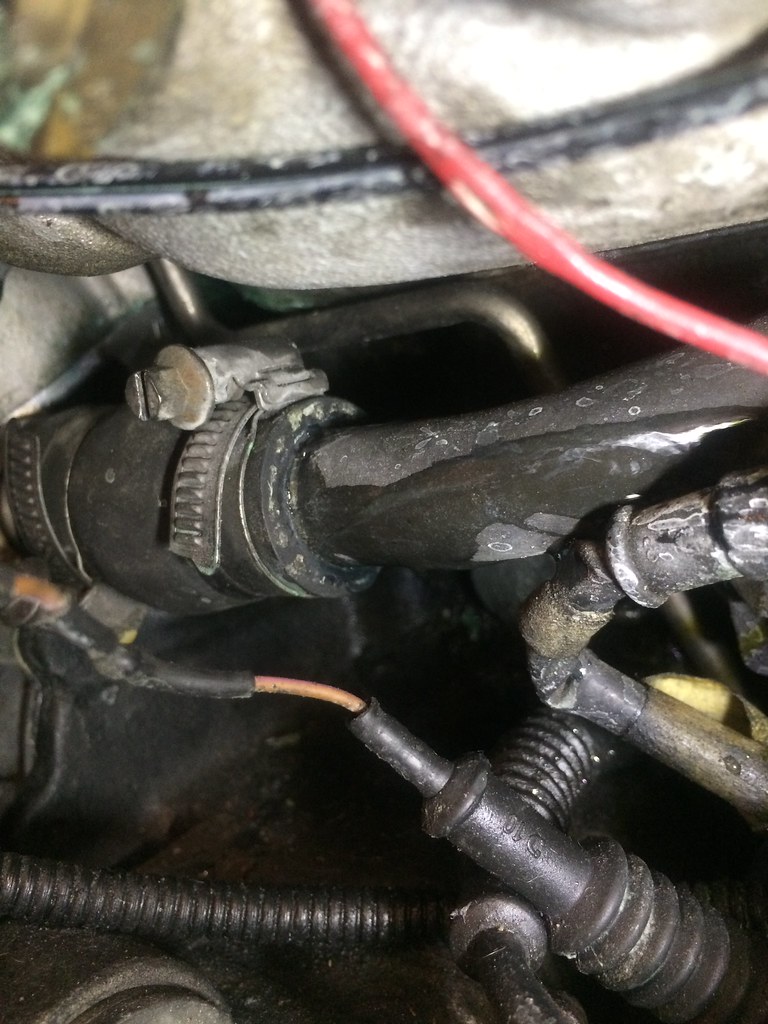
My initial thought that it was the upper radiator hose/glass was correct. The T-clamps were bottomed down, but were not clamping down. Swapping to smaller T-clamps solved it I thought.
 Untitled by ericandshovin, on Flickr
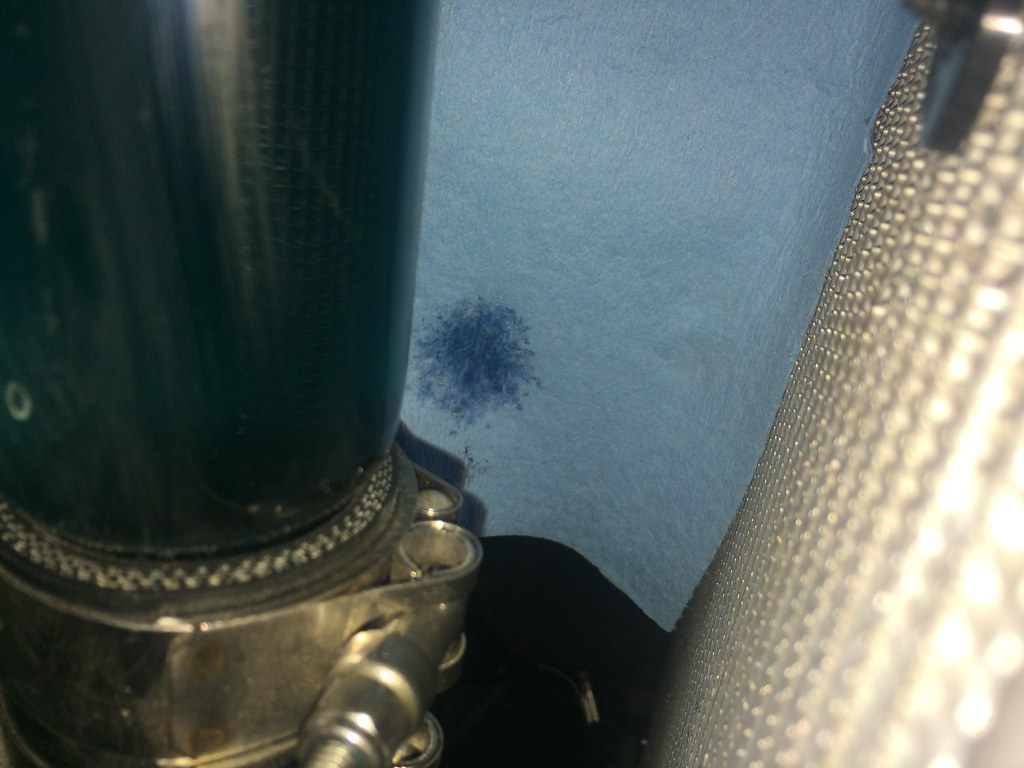
Still getting air in the system...
There goes $50 of BMW blue juice.
 Untitled by ericandshovin, on Flickr
Since it's a EWP, I can run the pump without the motor running, so this almost 100% ruled out the head gasket. I thought the next option would be at the EWP itself. I clamped the shit out of the hoses because the EWP inlet/outlet pipes OD are just a wee bit smaller than the ID of the hoses being used. I thought that maybe I'm sucking in air from there.
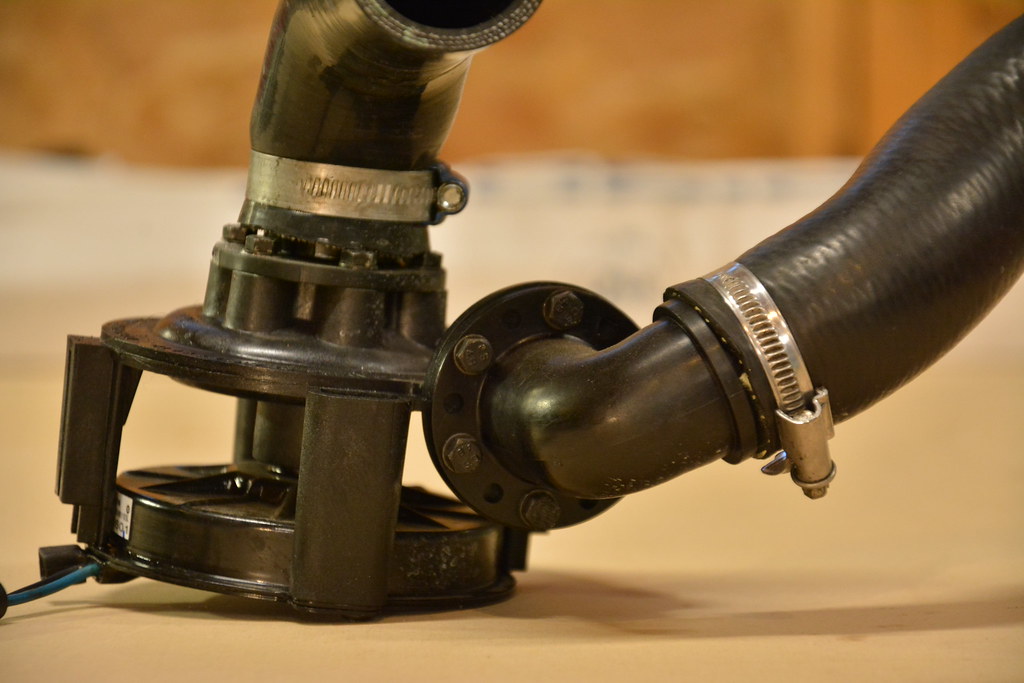 DSC_8082 by ericandshovin, on Flickr
The EWP kit comes with these little adapters to fit larger holes, and I initially thought it wouldn't fit, but with some old coolant as a lubricant, some persuasion and a shit load of cussing, I stuck the hoses back on with the adapters between the hoses and the EWP's pipes.
 DSC_8093 by ericandshovin, on Flickr
Still getting air in the system...
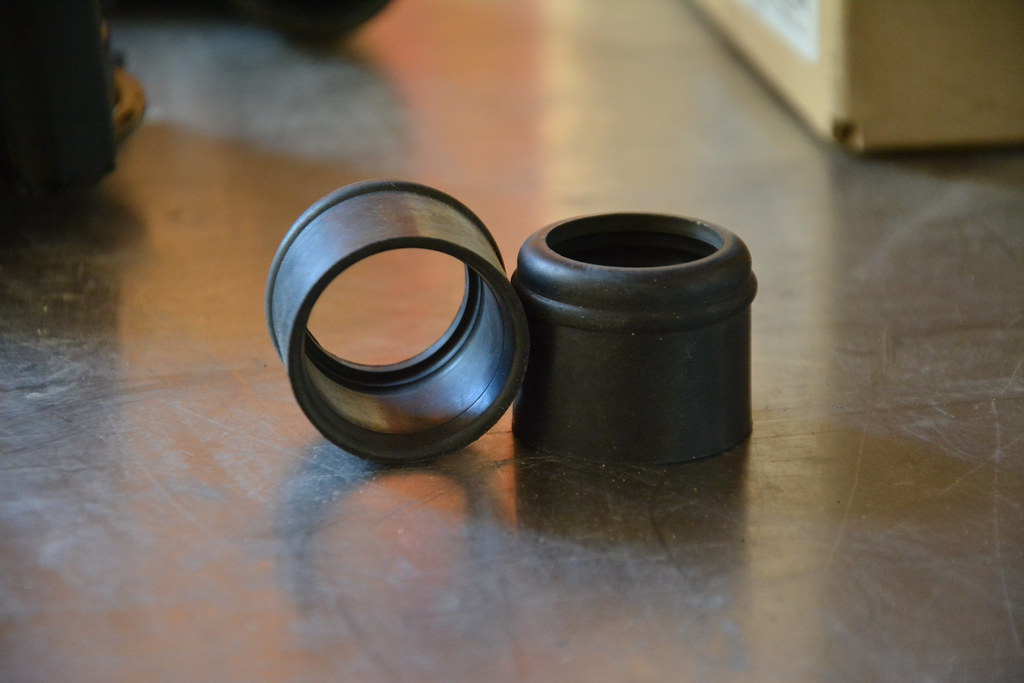
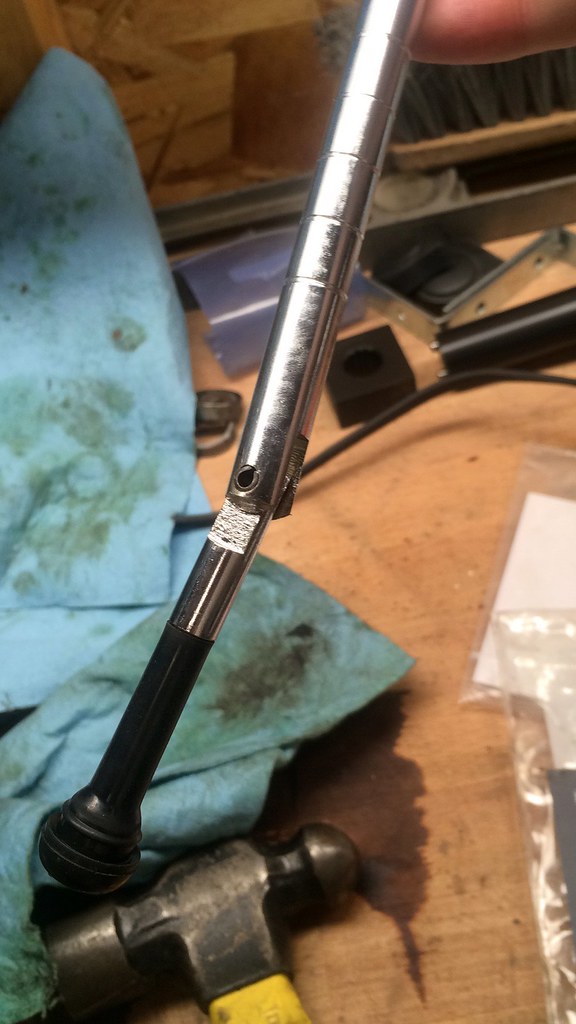
This is getting annoying. Next I thought that if air is getting in, then maybe I can force air or coolant out. A friend from back home suggested using an old radiator cap, adding a tire valve to it and adding pressure to the system. So one day after working a mid shift (and being awake for 25 hours) I stopped into autozone to pick up the cheapest cap they had.
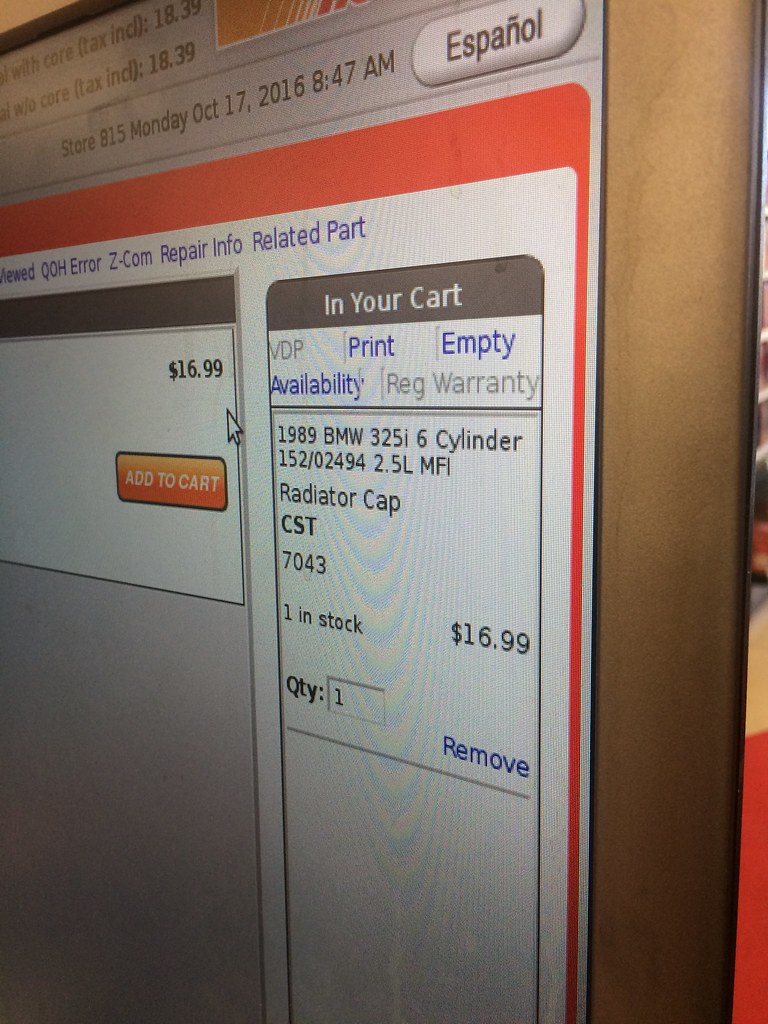 Untitled by ericandshovin, on Flickr
I was going to just drill it out, but I have a lathe... So I had to spend an hour doing it the way more complicated way!
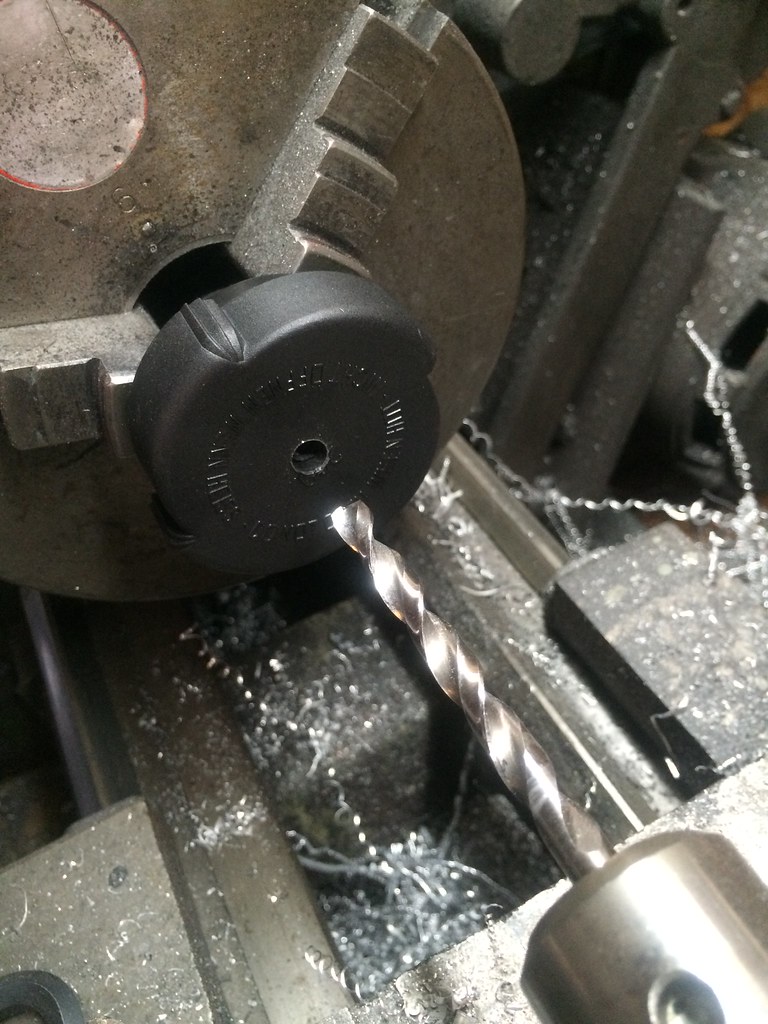 Untitled by ericandshovin, on Flickr
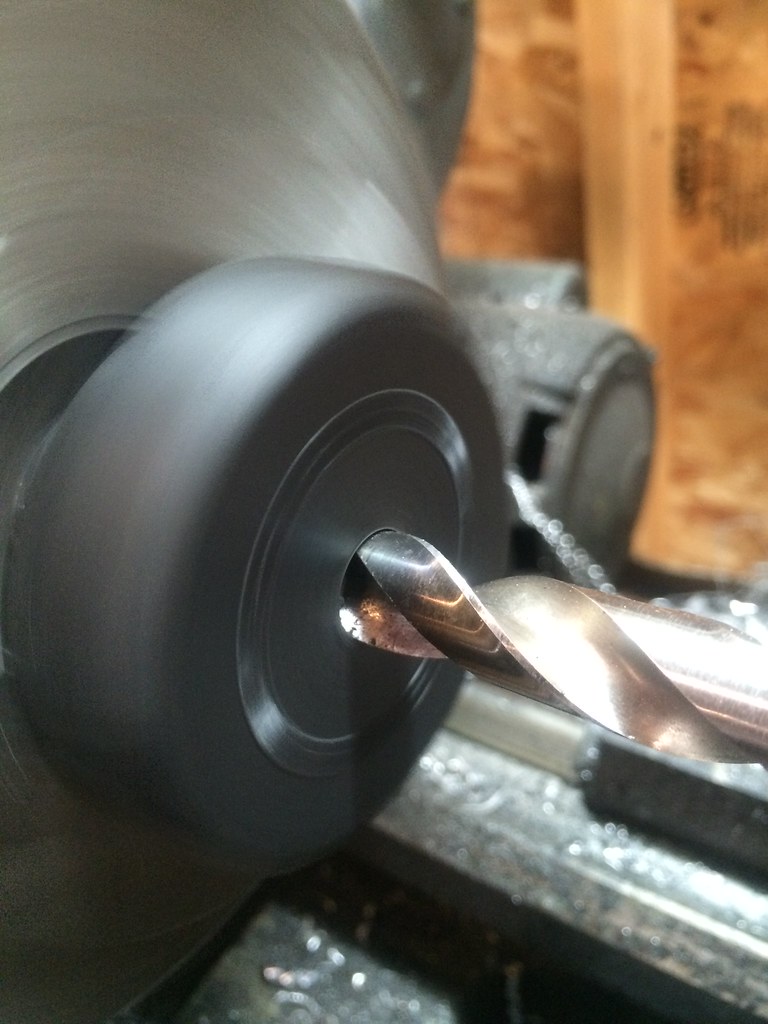 Untitled by ericandshovin, on Flickr
A trip to NAPA to buy this $10 tire valve puller tool... complicated
 Untitled by ericandshovin, on Flickr
 Untitled by ericandshovin, on Flickr
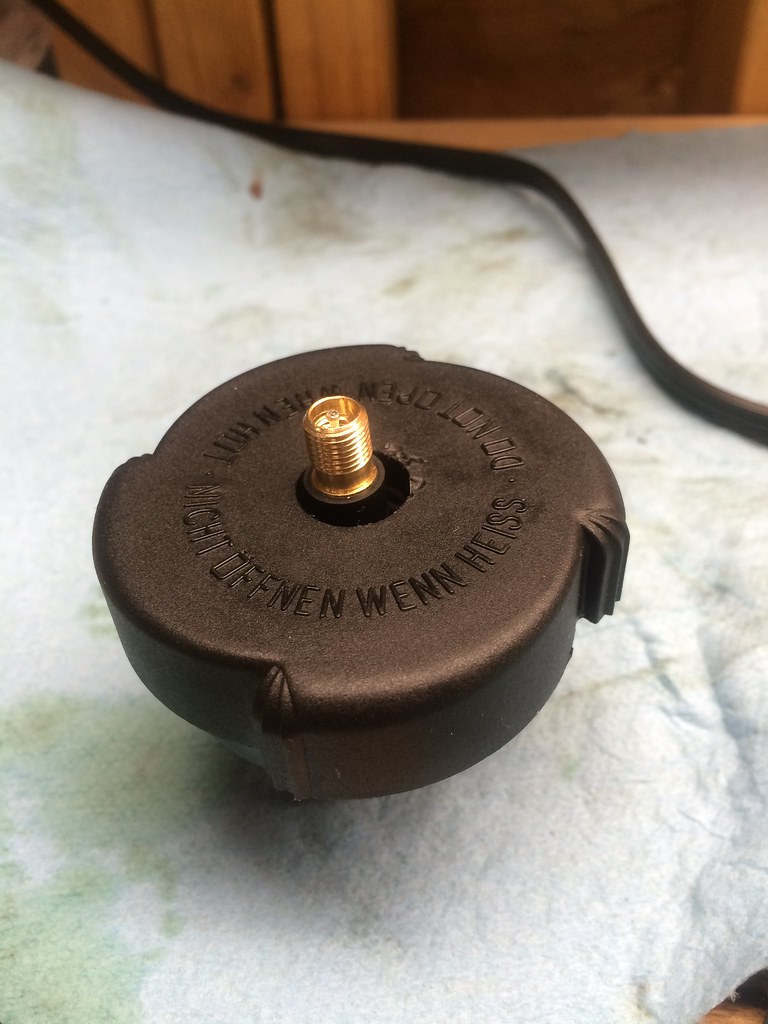
Some hot glue gun to seal everything up(not pictured) and a bike pump works great for giving your coolant system positive pressure, you don't need much, 15-20psi worked for me.
 Untitled by ericandshovin, on Flickr
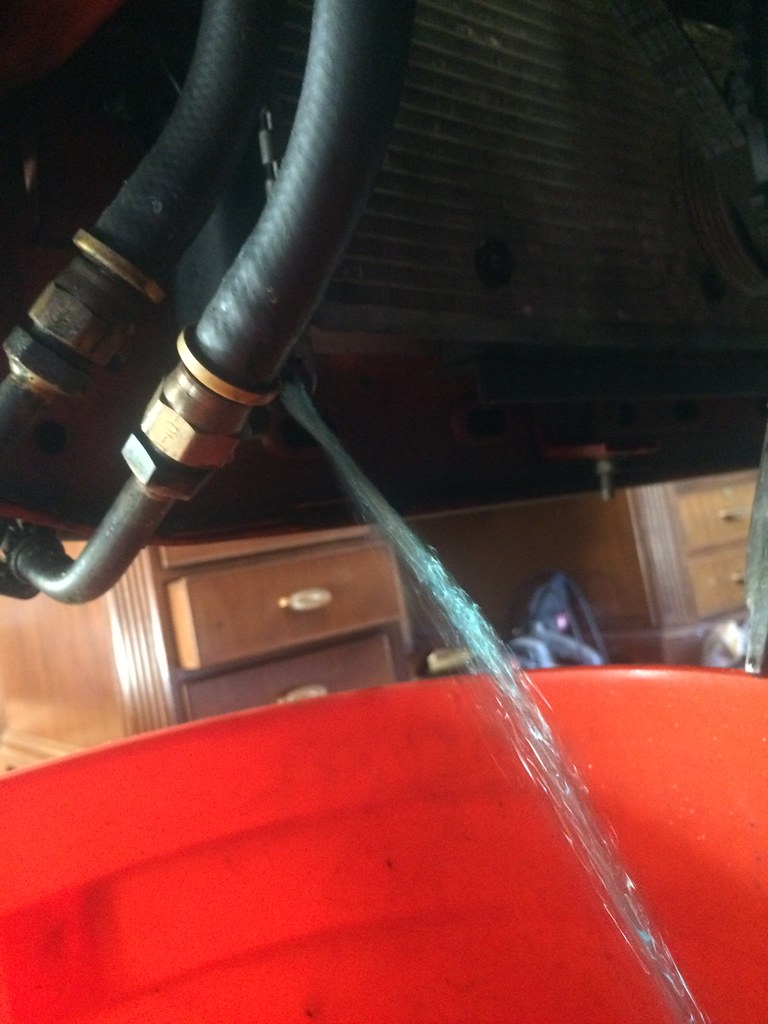
and Viola, Leaks!
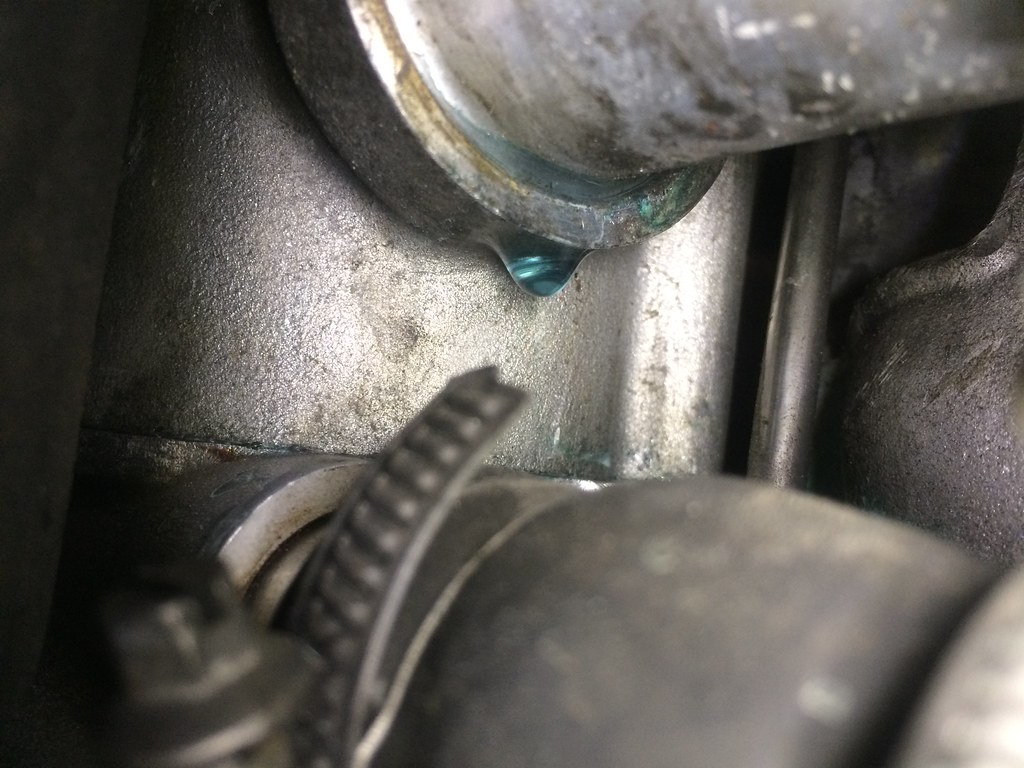 Untitled by ericandshovin, on Flickr
 Untitled by ericandshovin, on Flickr
So a few bolts removed later, look what I found!
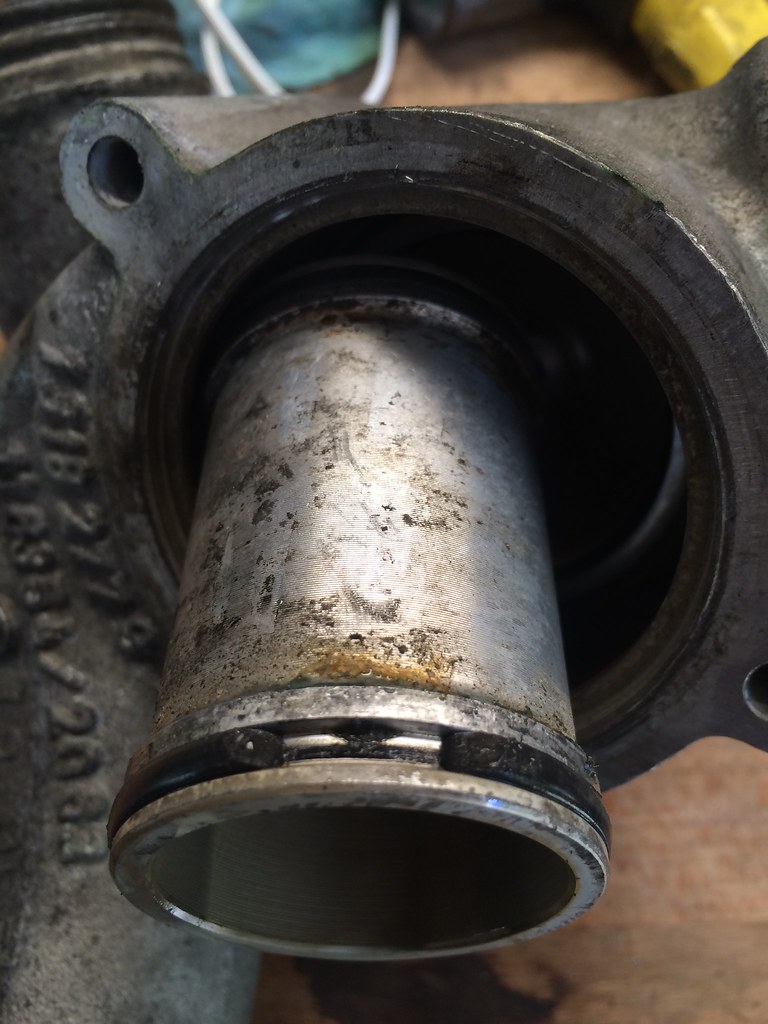 Untitled by ericandshovin, on Flickr
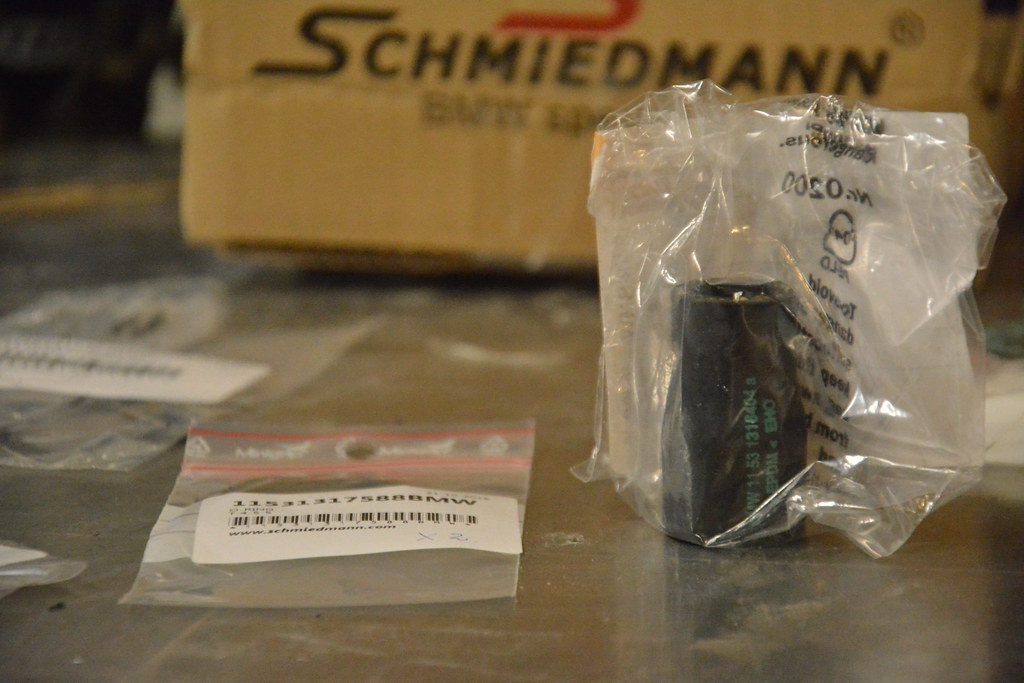
Of course I've now been awake for delirious amount of time, and I try to order the necessary parts from ECS, turner, pelican etc. Nobody will order them because they are euro parts and BMW NA blocks them. What cock gobblers this new rule is. So I pump the part numbers into Schmiedmann's site, spent more on shipping than on the actual parts, and 4 days later (today) this showed up!
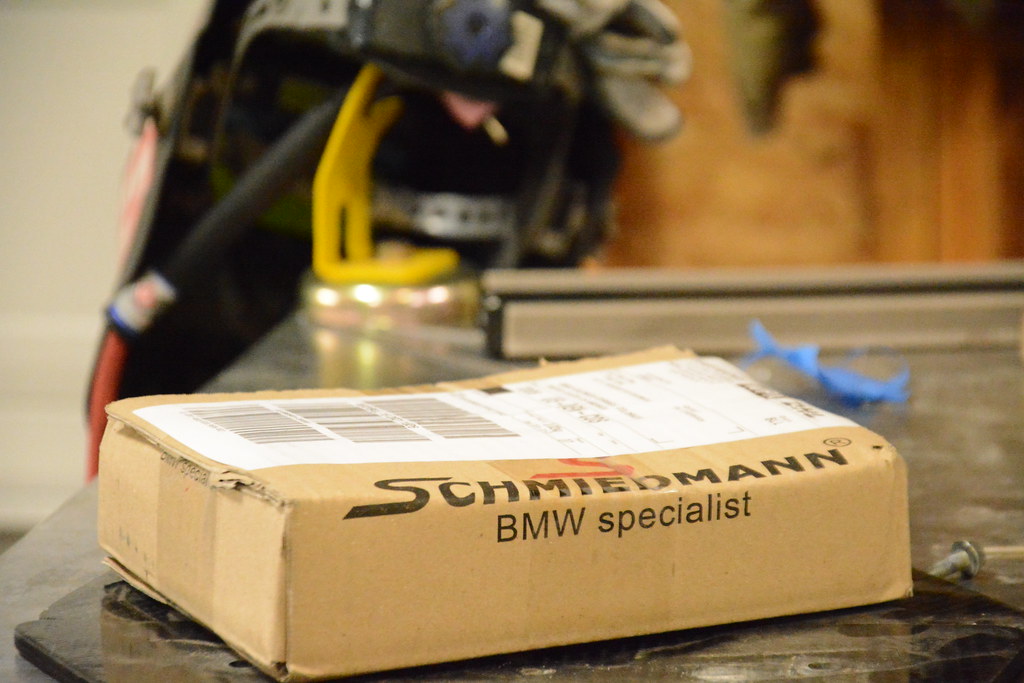 DSC_8157 by ericandshovin, on Flickr
Thanks Schmiedmann!
Tomorrow's task is to re-assemble the cooling system and do another pressure test/EWP bleed to see if I finally fixed the system.
Why do you block this rubber hose BMW NA? Ridiculous.
 DSC_8168 by ericandshovin, on Flickr
Comment
-
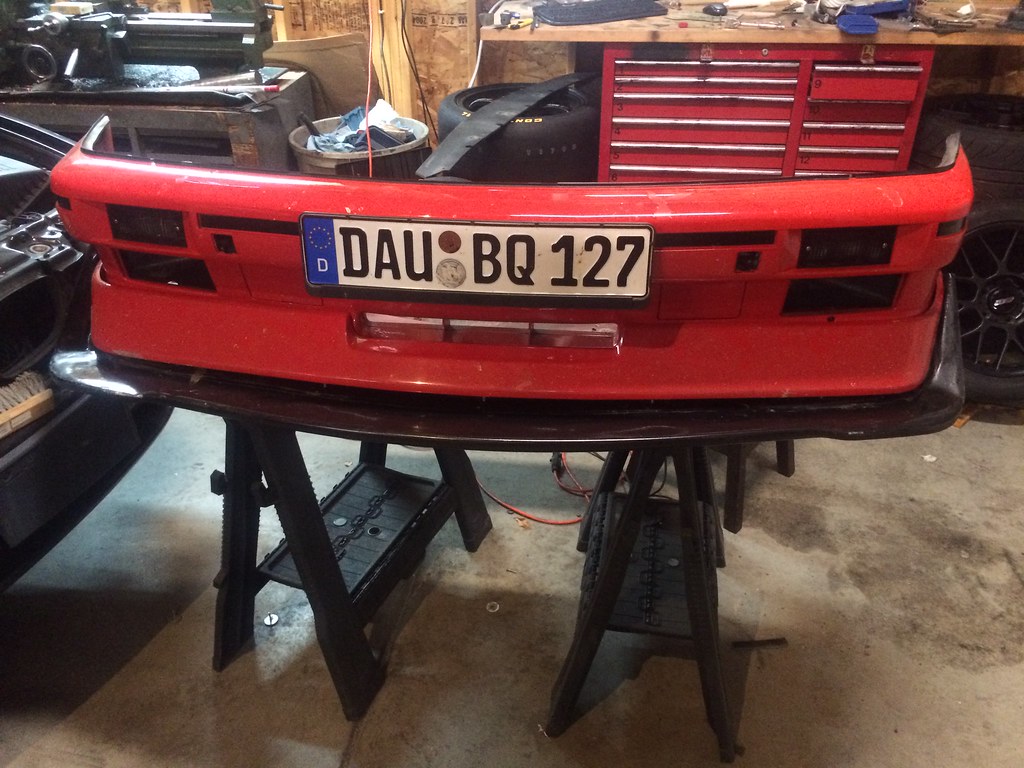
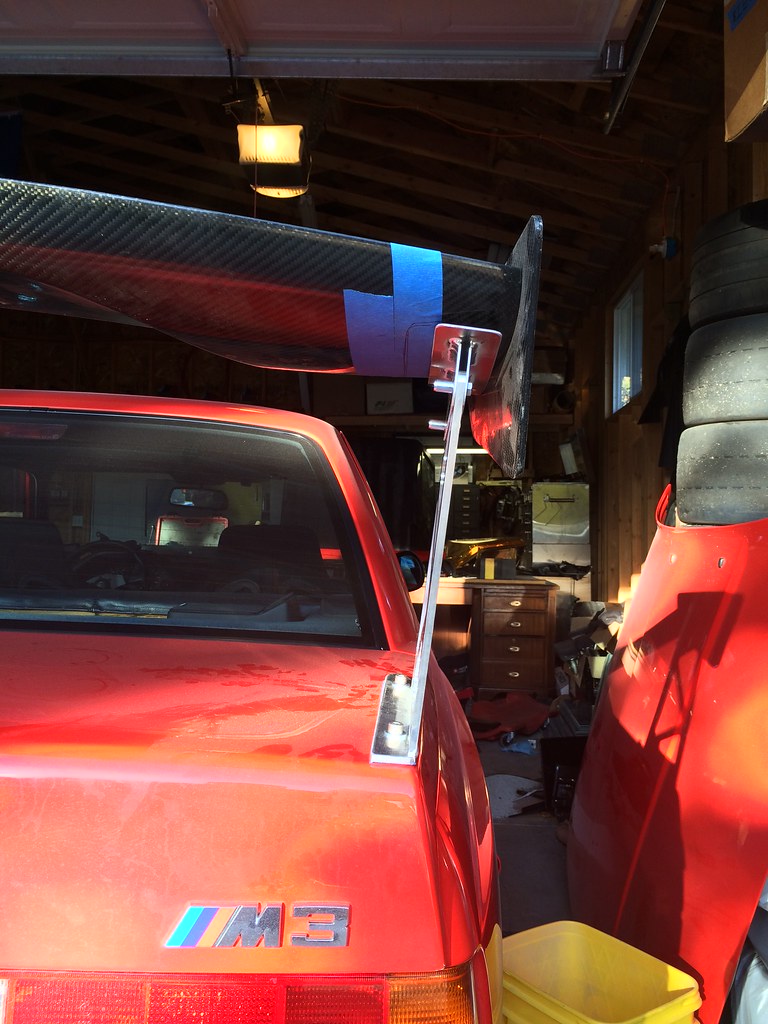
3. Aero:
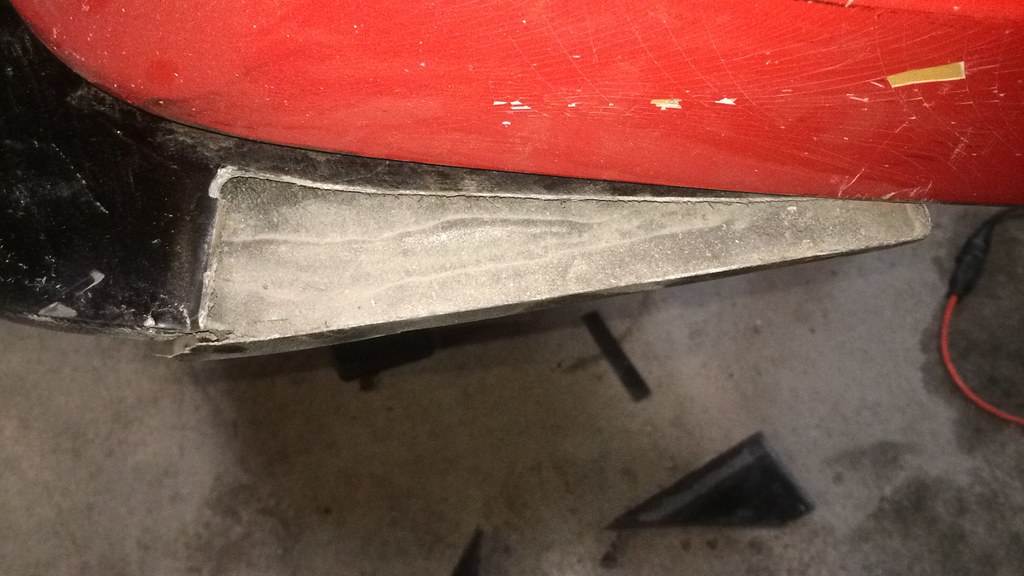
Of course I have a hundred projects going on, but one night when I should have been working on something else, I decided to see exactly why my EVO II spoiler and my Flossman replica splitter occupied the same space. I spent too much money on two of them so that I could modify one if I needed to and keep one pristine hanging on the wall in case I completely cock up the other one.
Hmm, that looks pretty good (mind you nothing is bolted down, gaps galore!).
 Untitled by ericandshovin, on Flickr
But from the side, the triangle thing looks pretty dumb.
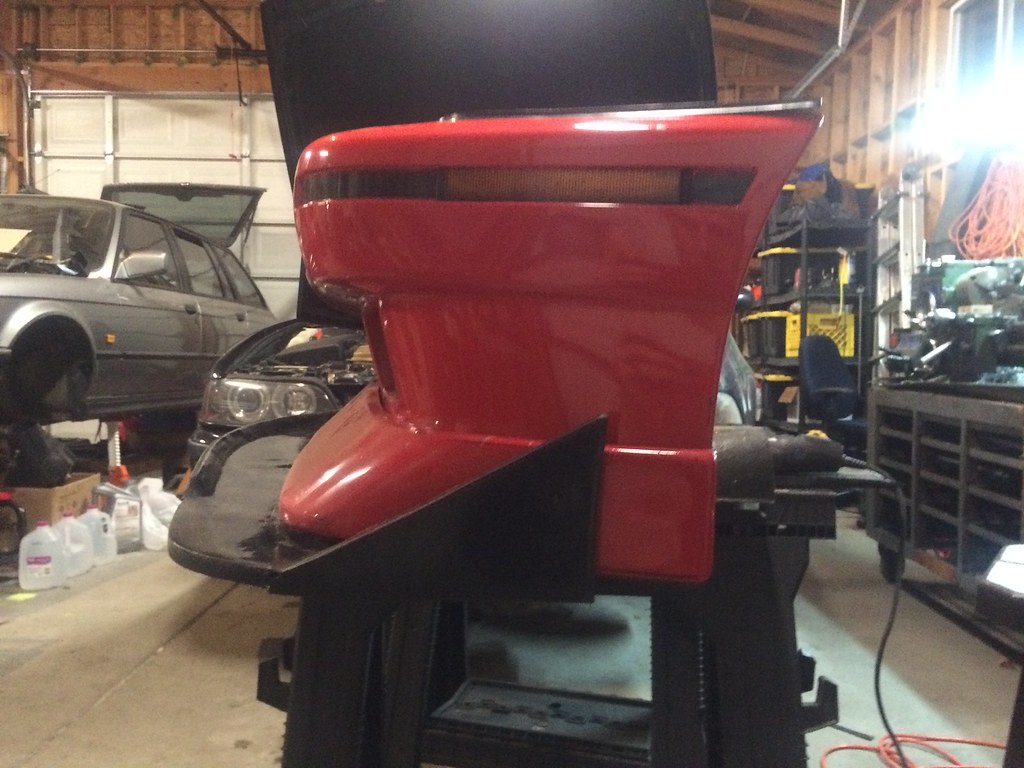 Untitled by ericandshovin, on Flickr
With the wisdom of cut twice measure once, I decided to lop off just the tip before taking it all off.
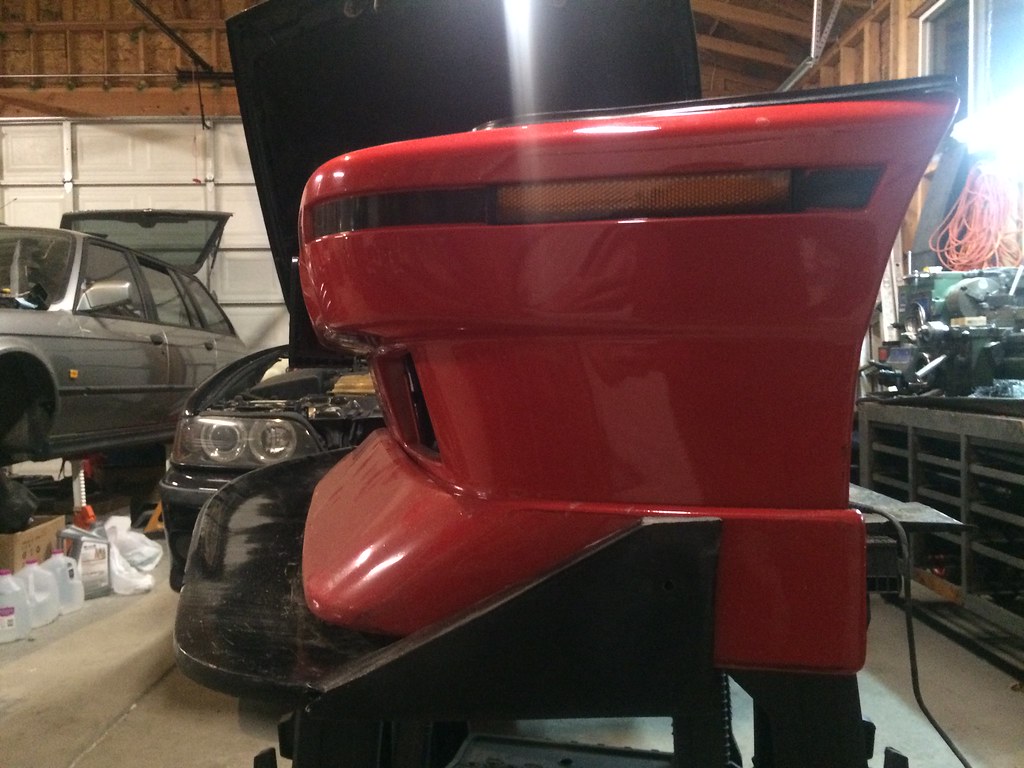 Untitled by ericandshovin, on Flickr
nope. Still doesn't look good.
 Untitled by ericandshovin, on Flickr
There we go! 99% better. Would I like the splitter to go all the way to the back of the bumper and end flush with the wheel opening? Yes. Will I make that happen when I finally decide to learn how to make molds and make a mold of this thing to reproduce a better copy of it? Yes.
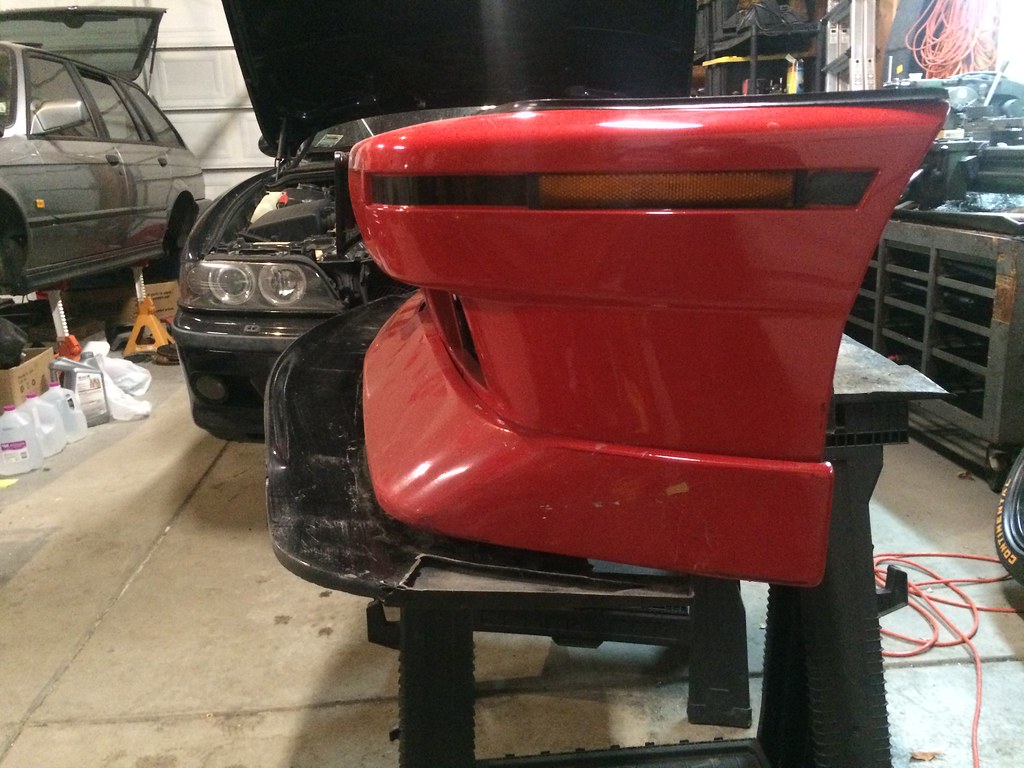 Untitled by ericandshovin, on Flickr
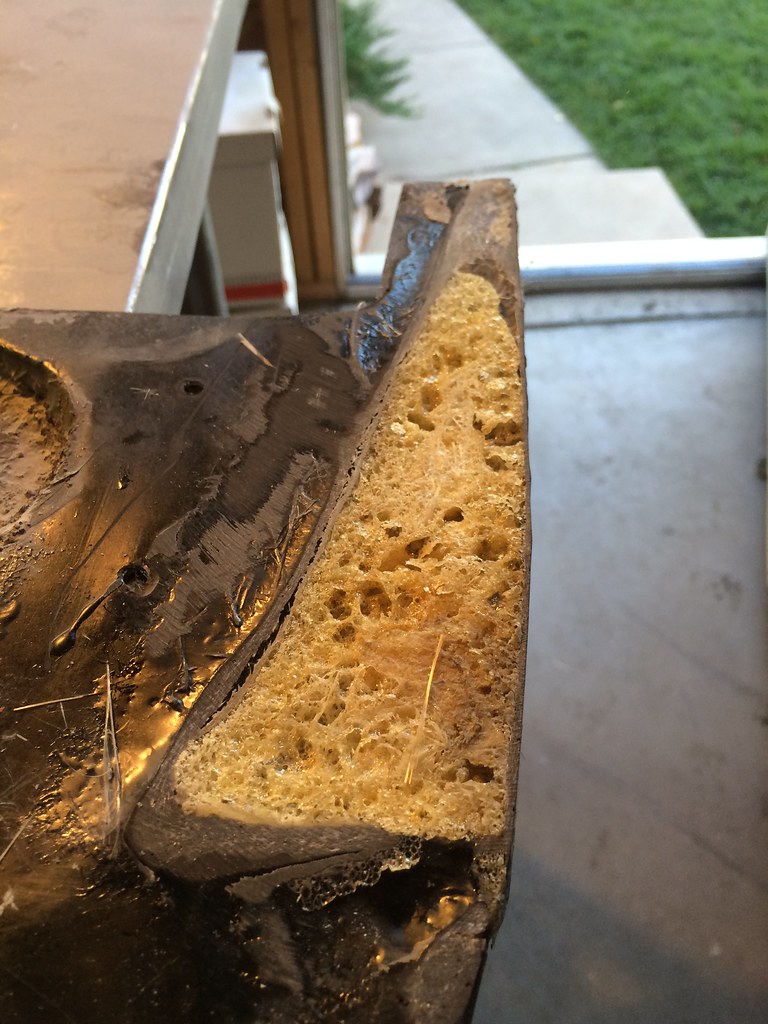
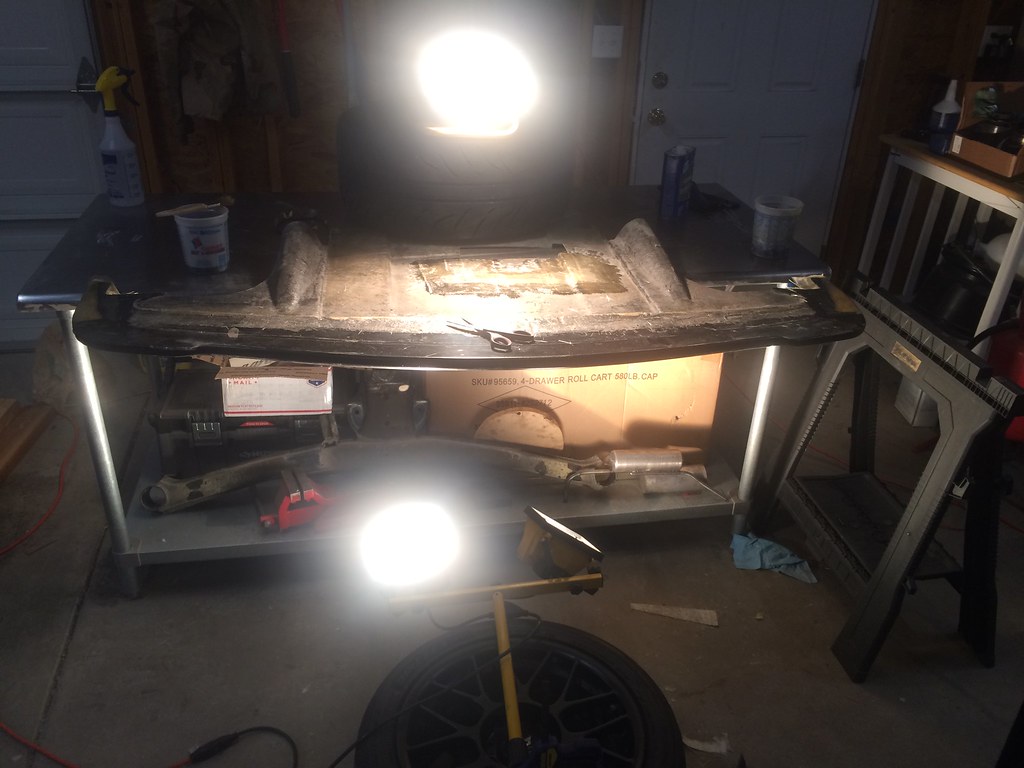
Now how to plug this hole.
 Untitled by ericandshovin, on Flickr
I first tried some chop mat and walmart resin, but I figured I'd add 30lbs of resin to each end before I filled the hole. Next thought was gorilla glue. Don't laugh at the chopped mat in the glue, I thought it might double as a filler material. I'm at 2nd grade education here on how composites work.
 Untitled by ericandshovin, on Flickr
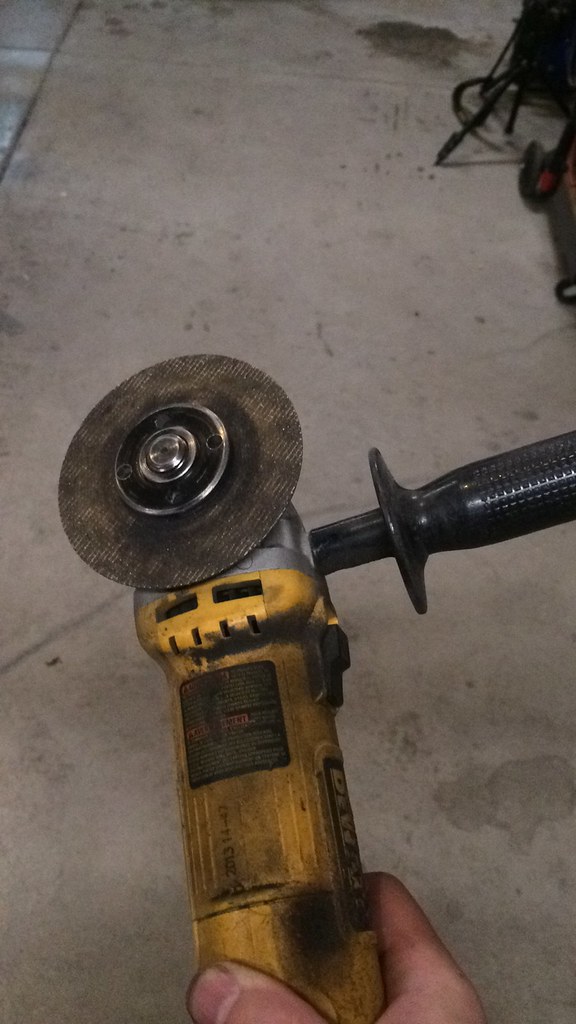
Luckily the Gorilla glue did it's job, and a bit of sanding disk erased my numskull filler idea.
 Untitled by ericandshovin, on Flickr
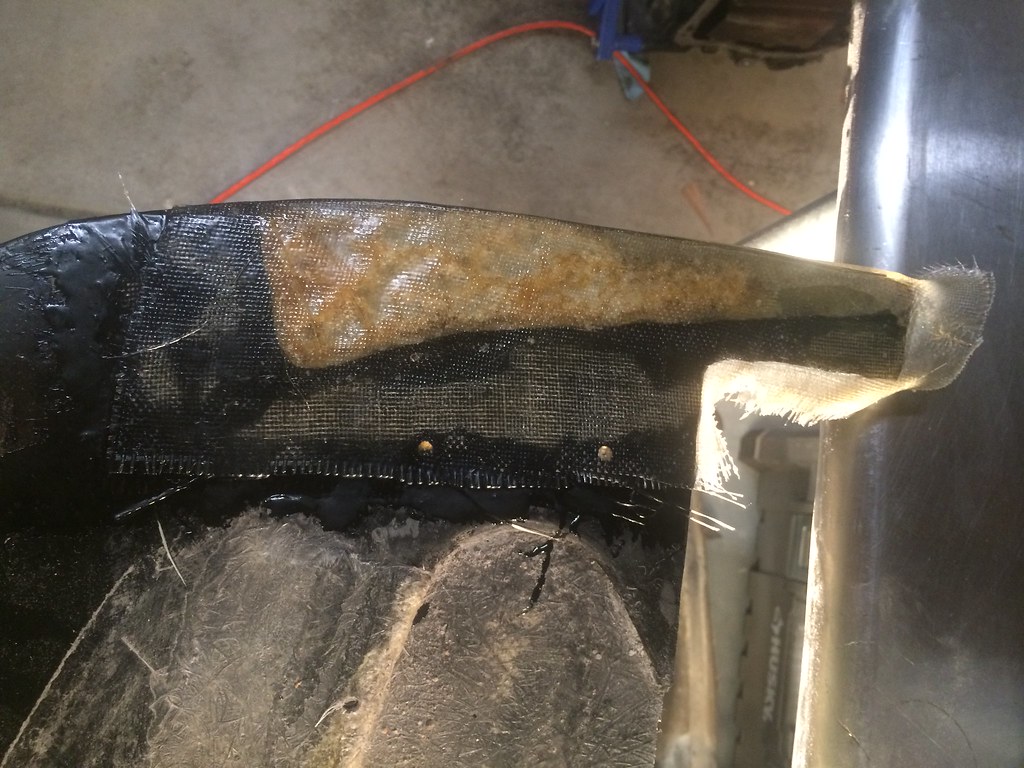
A bit of weave to try and hold it all together.
 Untitled by ericandshovin, on Flickr
I mixed the resin/hardener a bit soft, so I had to get creative to get the hardener to kick off. This application took about 30 hours to stop being tacky and I was about to pull it all off and redo it all when it finally wised up.
 Untitled by ericandshovin, on Flickr
Of course you can't have super awesome front aero and nothing out back. So I dusted off the old wing from the white car.
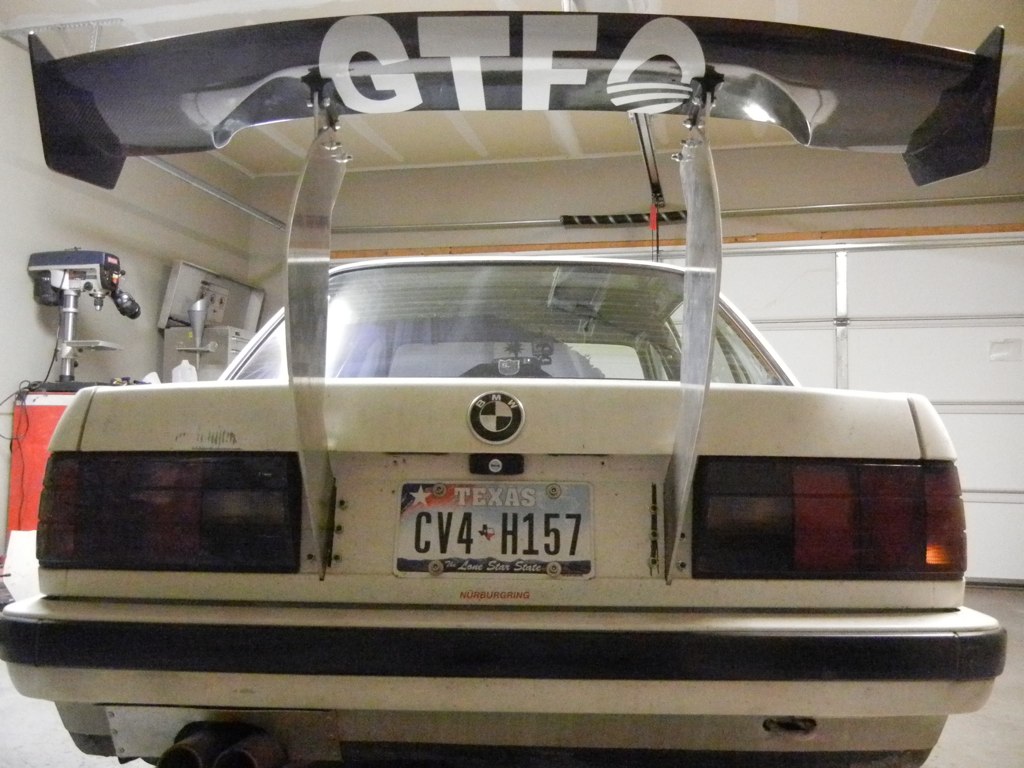 DSCN4627 by ericandshovin, on Flickr
And started brainstorming how I could stick it on the M3 without cutting up the car. First order of business was to remove the EVO III replica spoiler. BTW, I love how you can see the just barely see the weave through the paint like a Ferrari F40. Removing the wing revealed a perfect patch of dirt to trace an outline and use for alignment purposes later on.
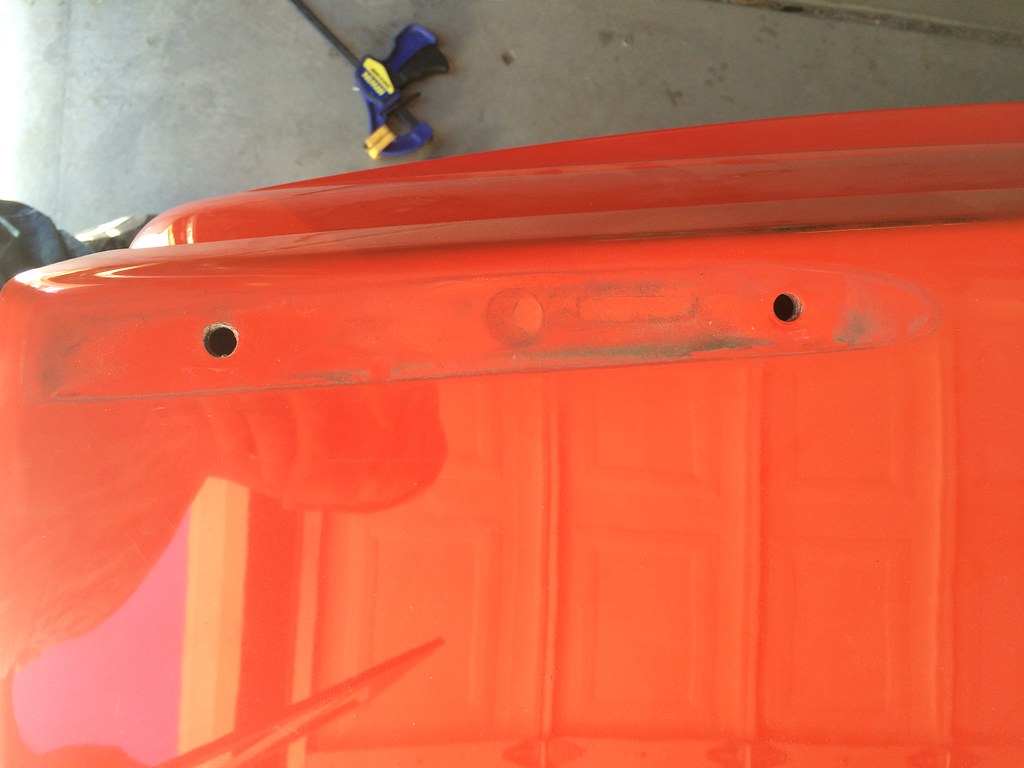 Untitled by ericandshovin, on Flickr
That's about straight.
 DSC_8143 by ericandshovin, on Flickr
Aligned this tape with the dirt patch of the EVO III wing
 DSC_8146 by ericandshovin, on Flickr
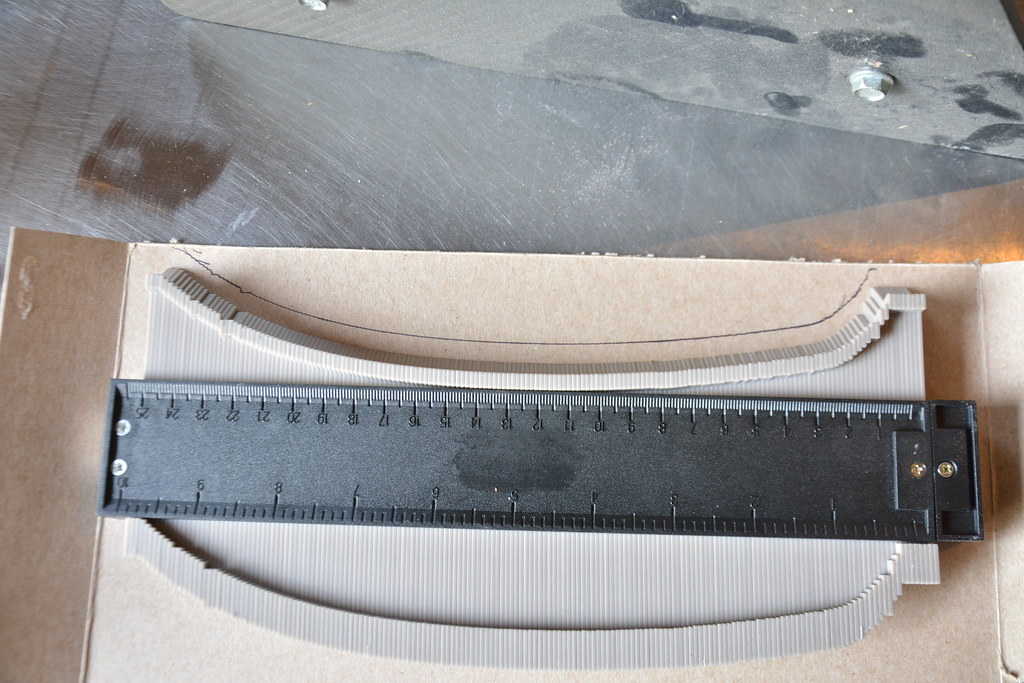
Found the profile of the wing.
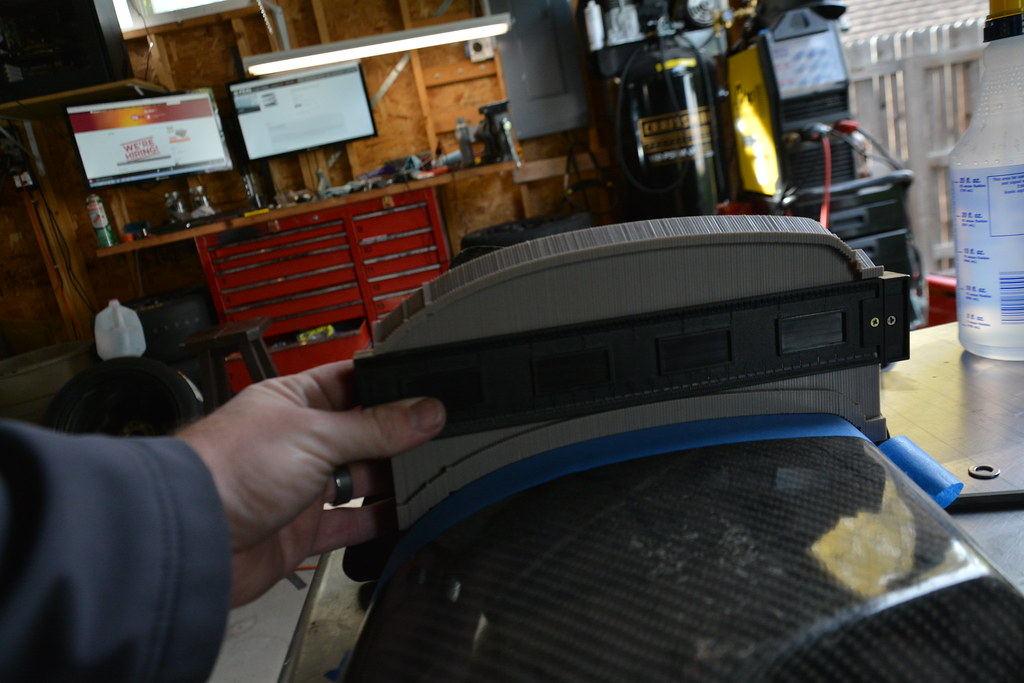 DSC_8148 by ericandshovin, on Flickr
Drew some things of my kids cereal boxes.
 DSC_8149 by ericandshovin, on Flickr
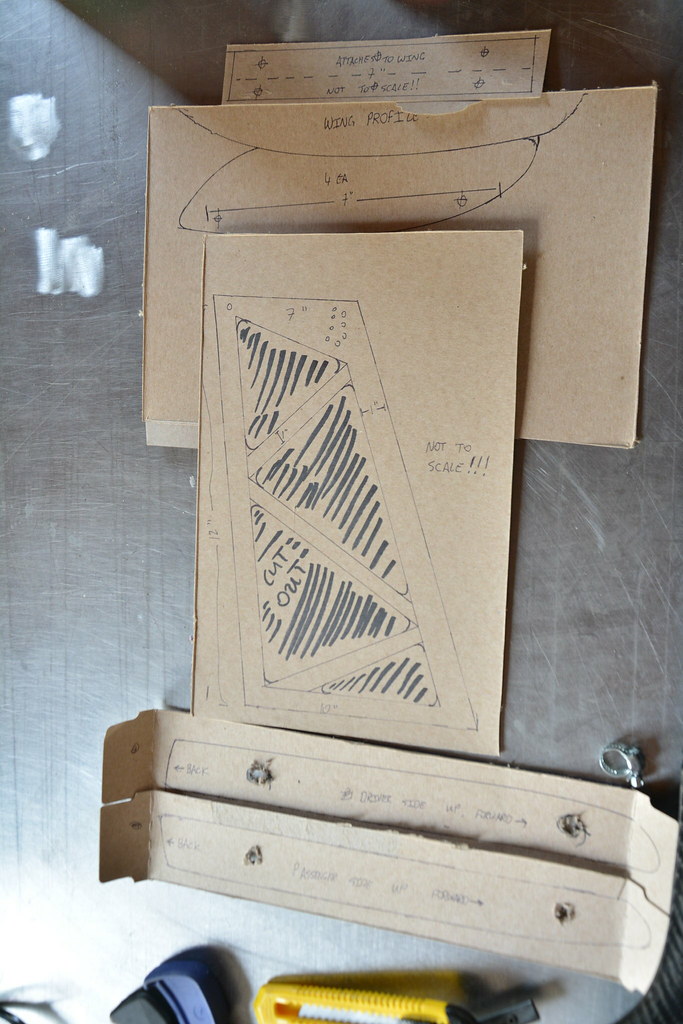 DSC_8152 by ericandshovin, on Flickr
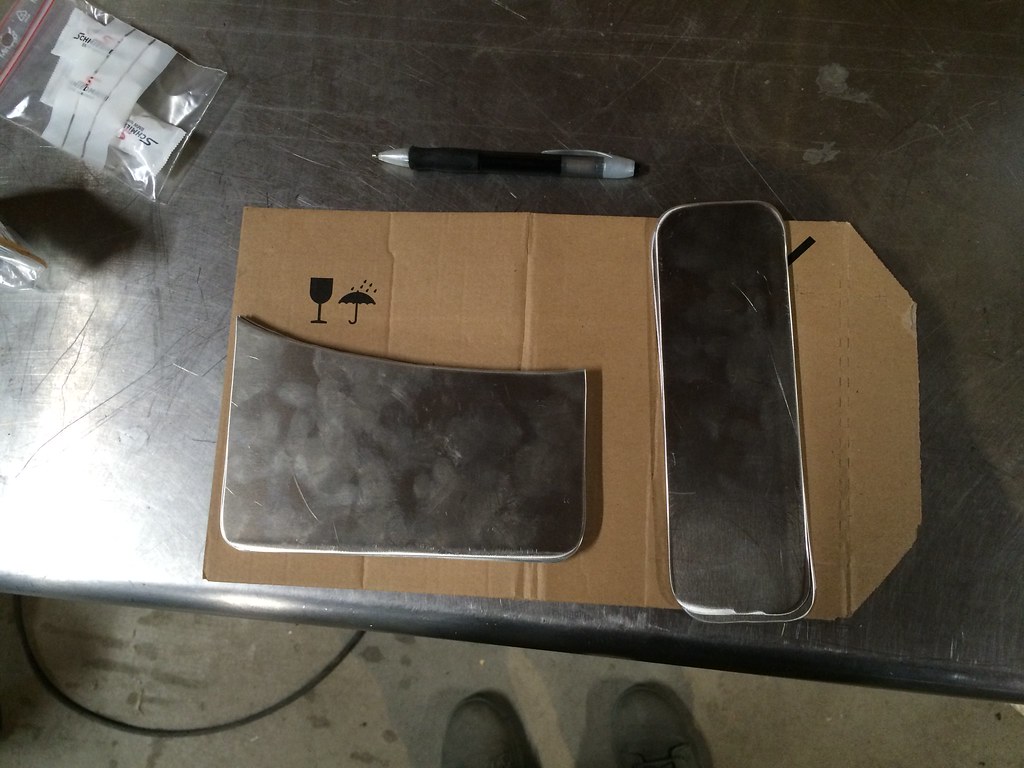
Zipped over to the local metal supply place and scored some good pieces in their scrap/extra bin.
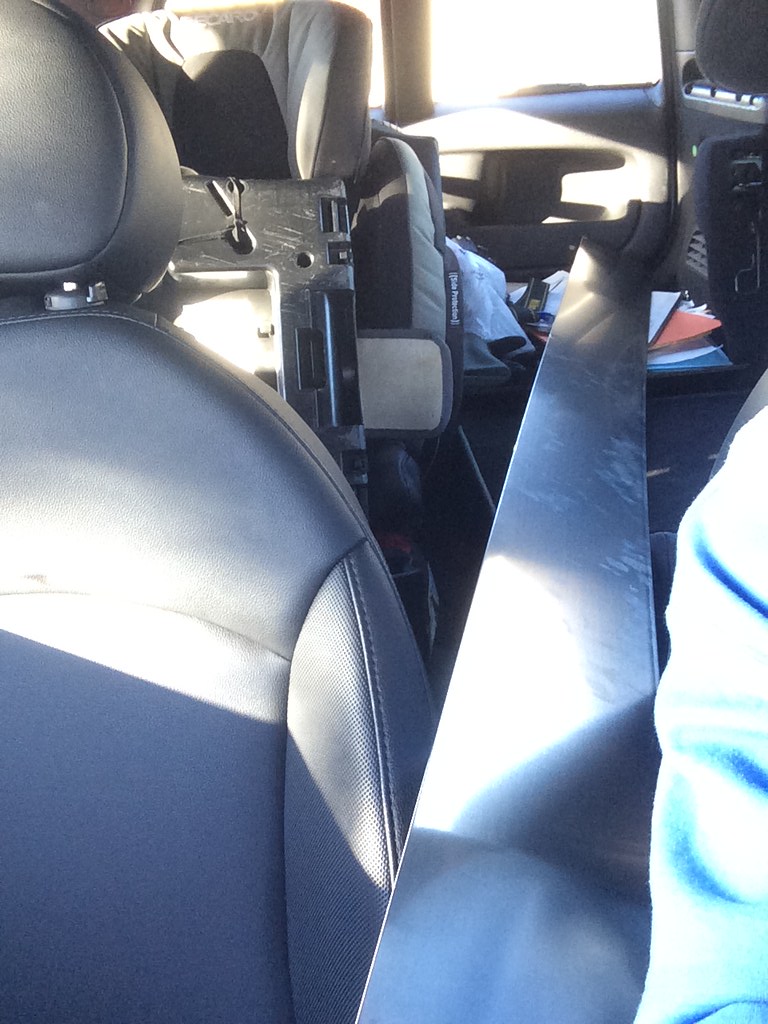 Untitled by ericandshovin, on Flickr
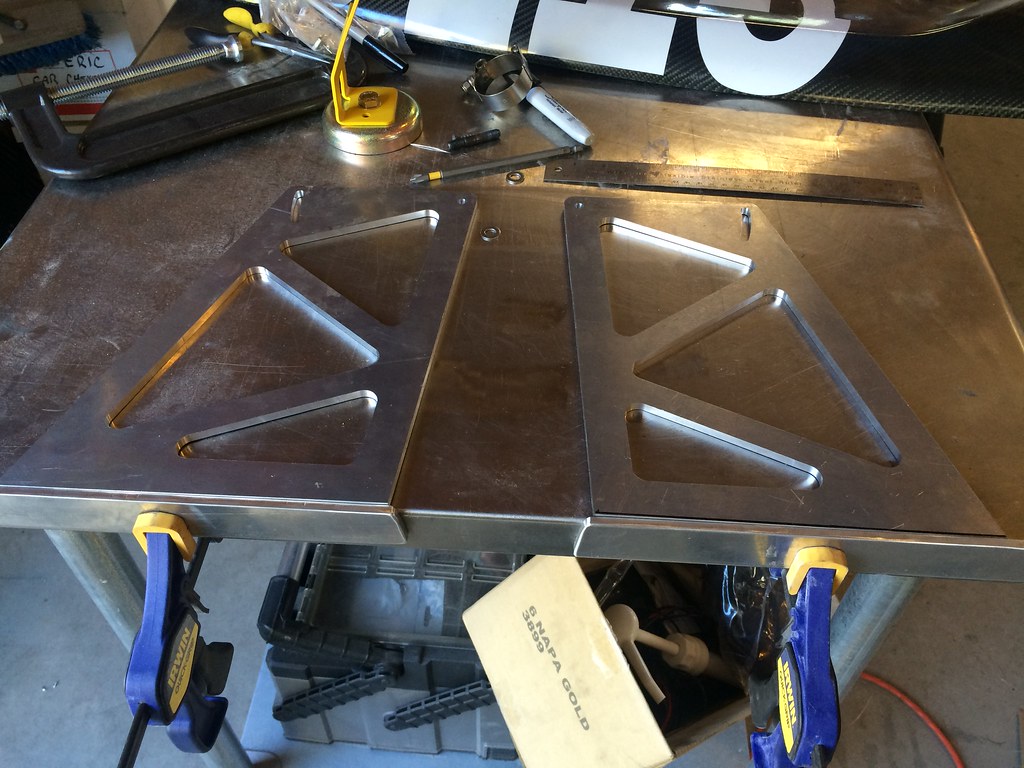
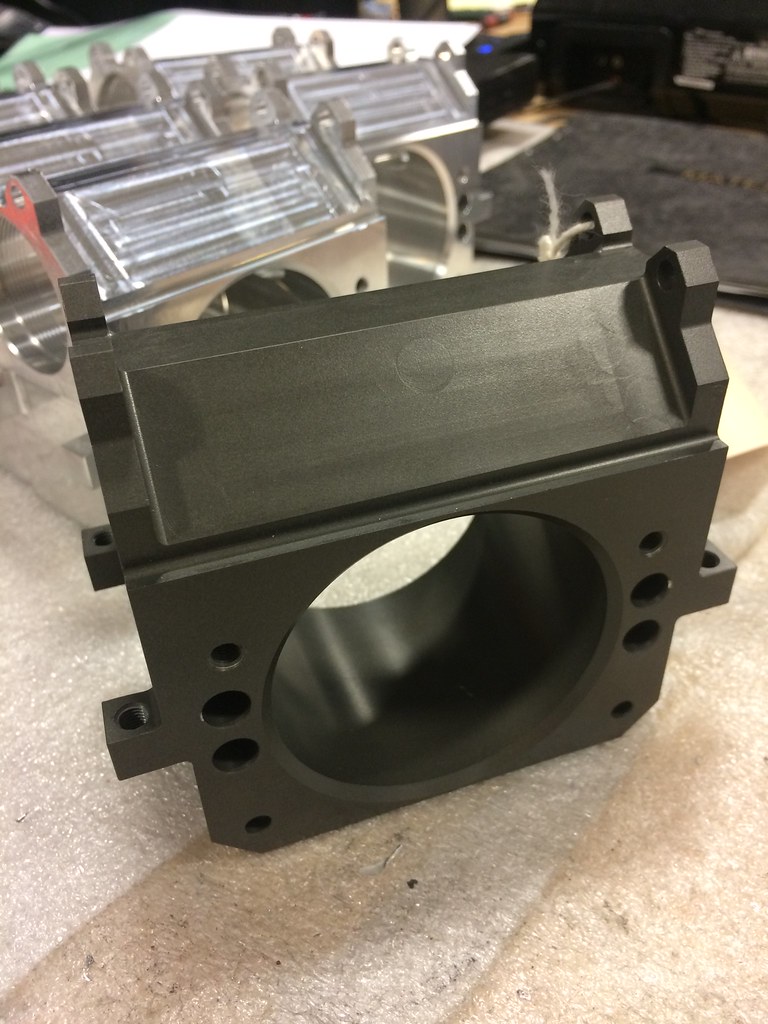
Then I mentioned what I was doing to my brother in law who happens to be a machinist. A few hours later...
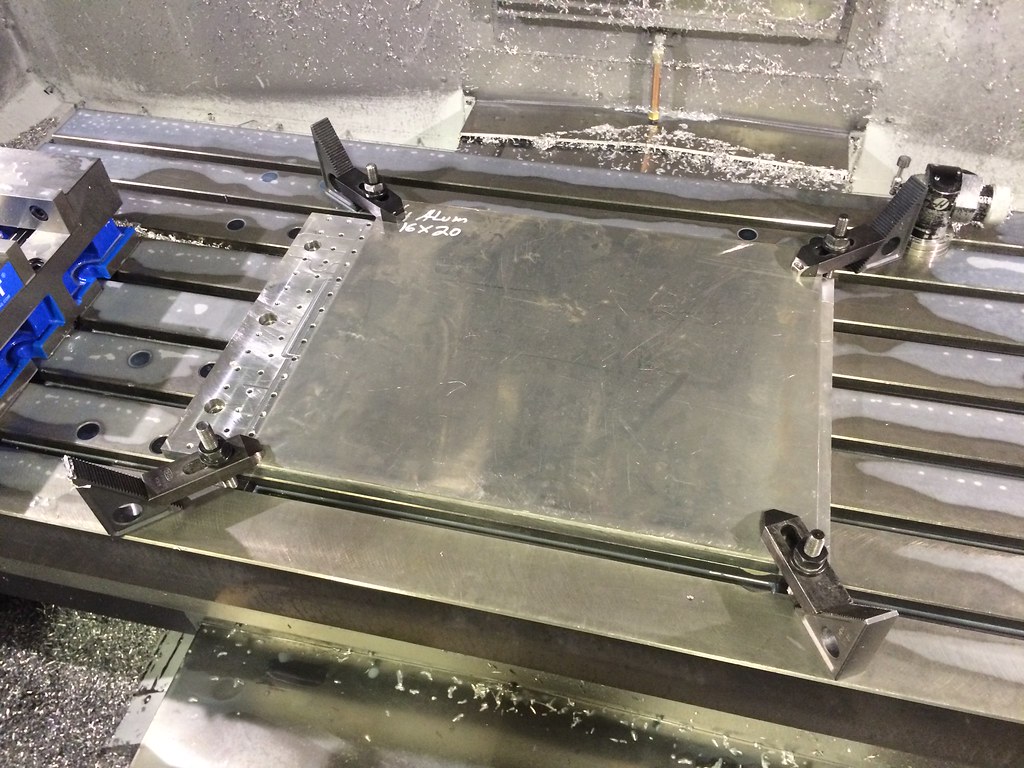 Untitled by ericandshovin, on Flickr
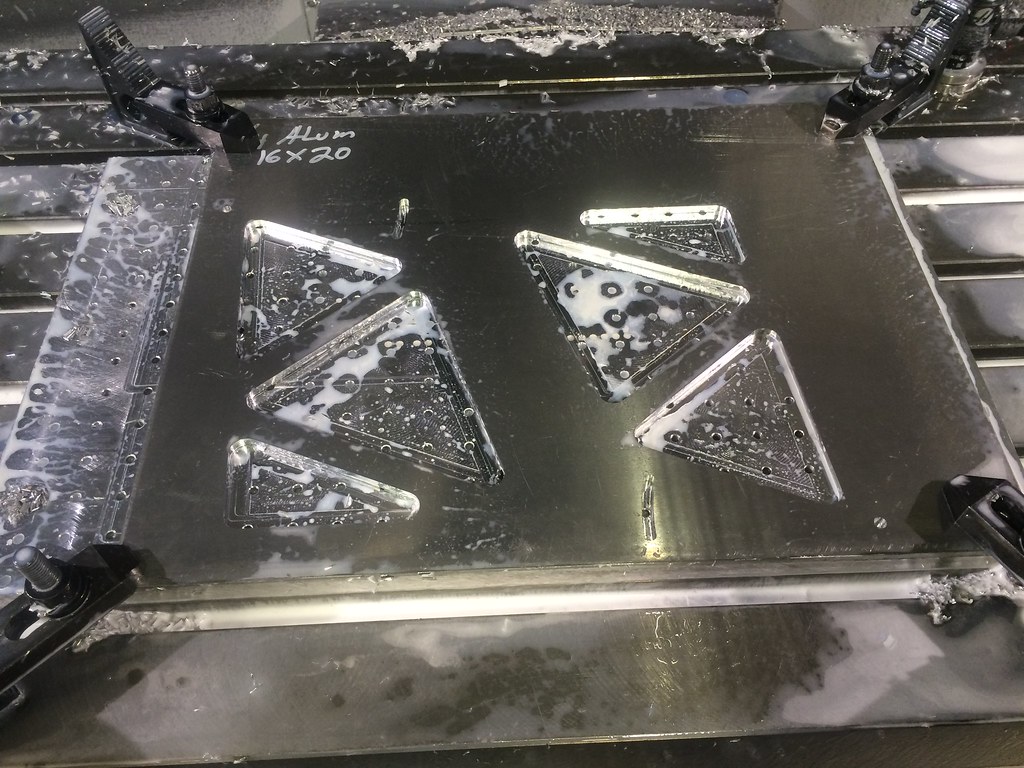 Untitled by ericandshovin, on Flickr
 Untitled by ericandshovin, on Flickr
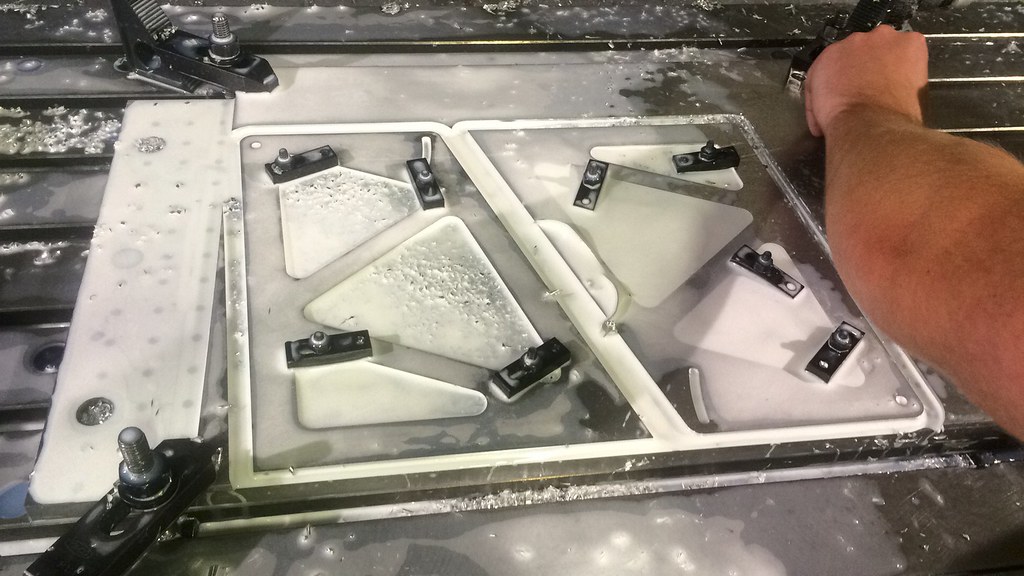
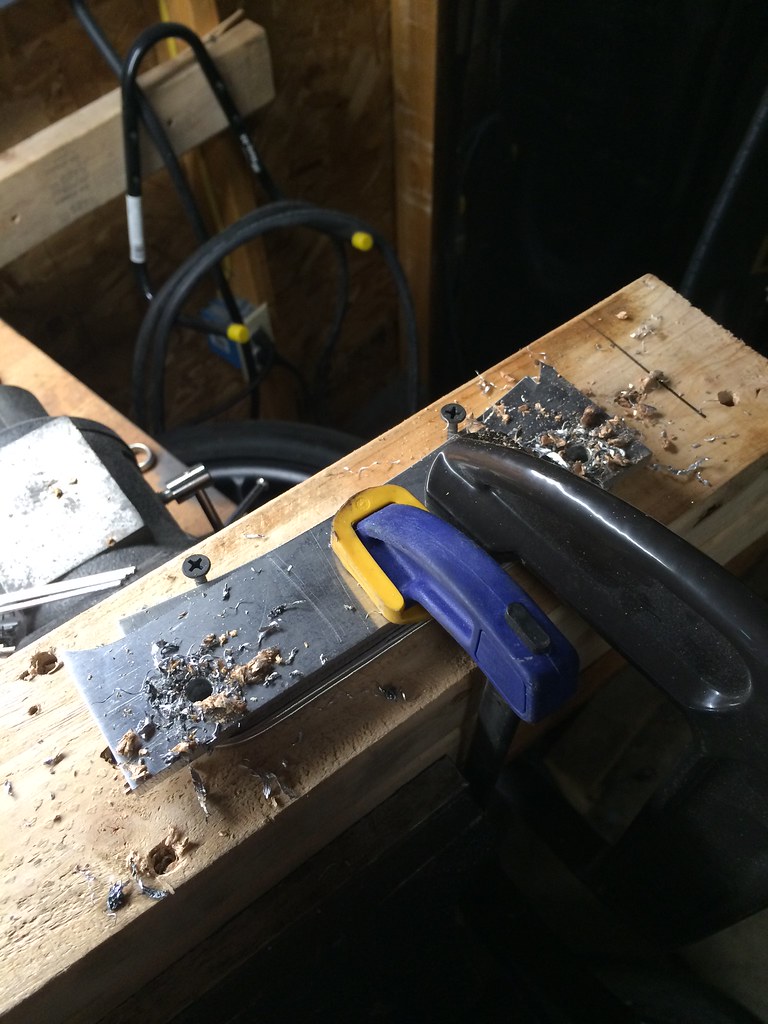
While the HAAS was running, I cut these out on the bandsaw. These are to connect the uprights to the wing.
 Untitled by ericandshovin, on Flickr
 Untitled by ericandshovin, on Flickr
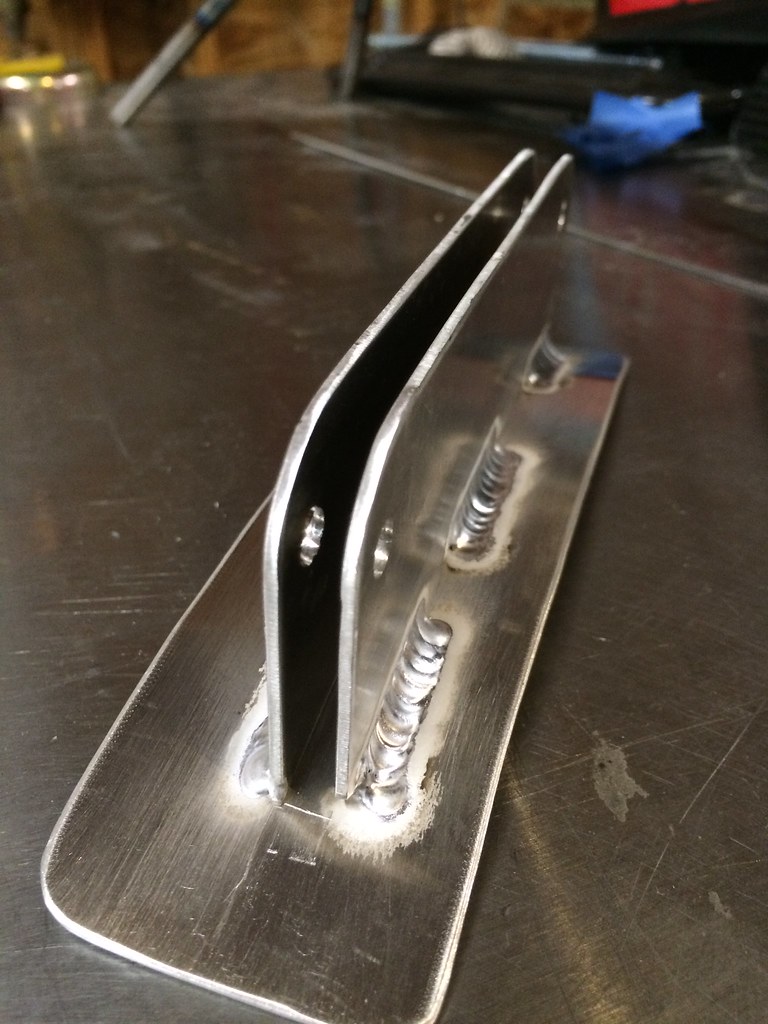
Looks pretty good! Back at home, I lined up the upright and the baseplate.
 Untitled by ericandshovin, on Flickr
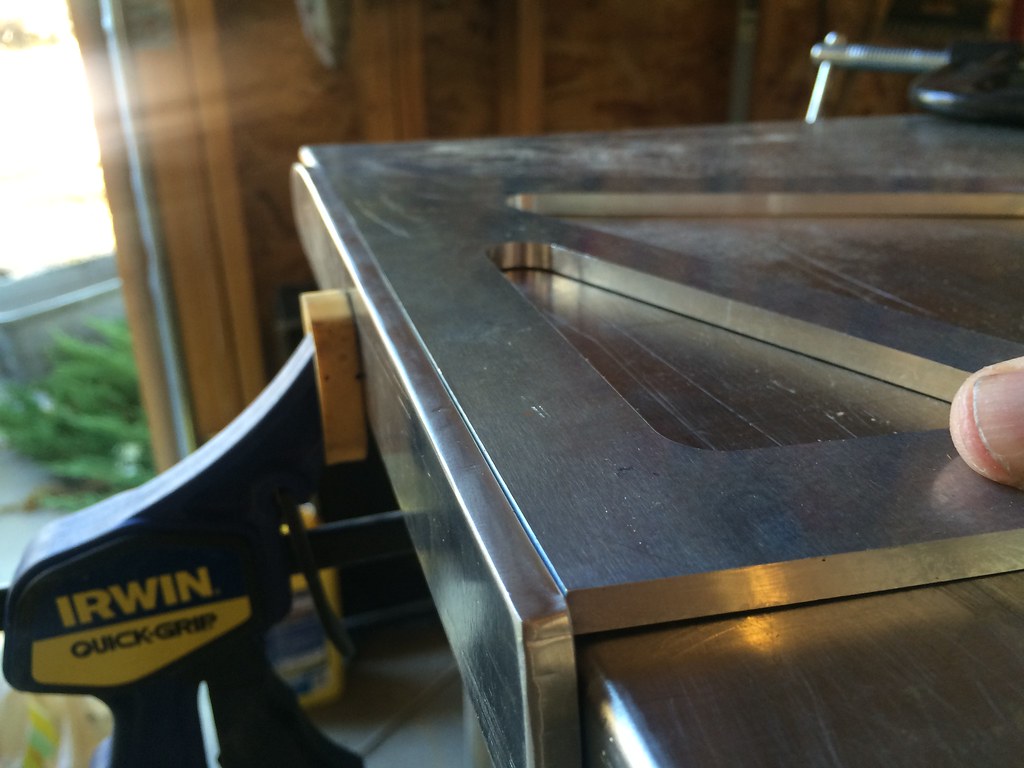 Untitled by ericandshovin, on Flickr
A bit of AC TIG.
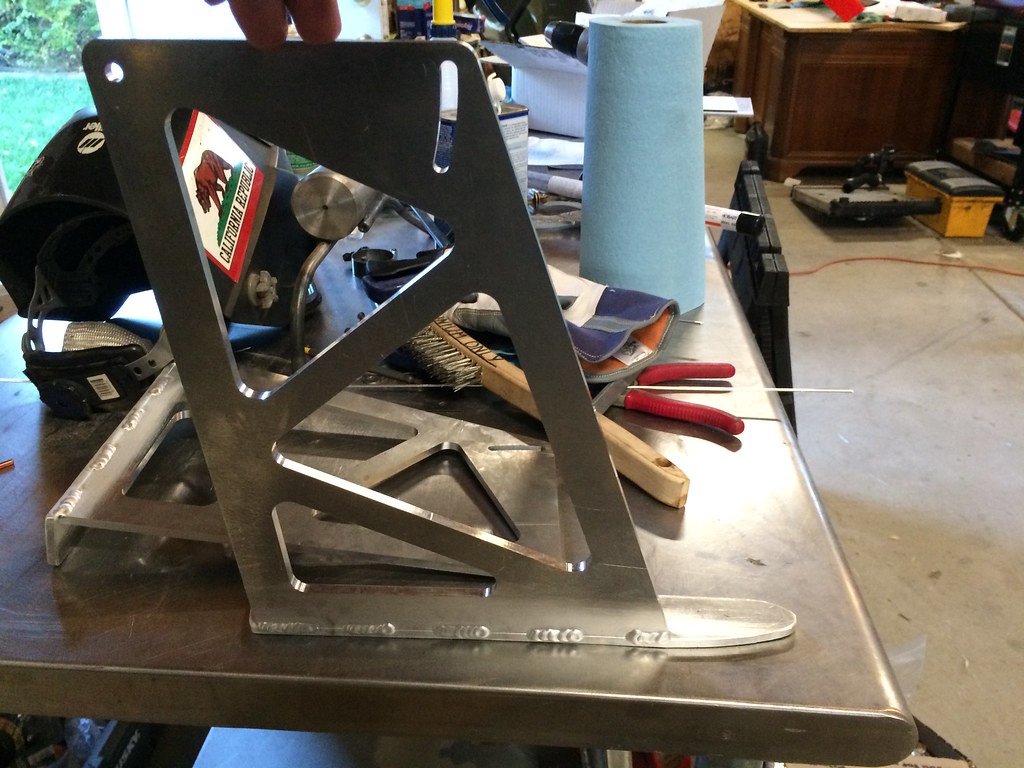 Untitled by ericandshovin, on Flickr
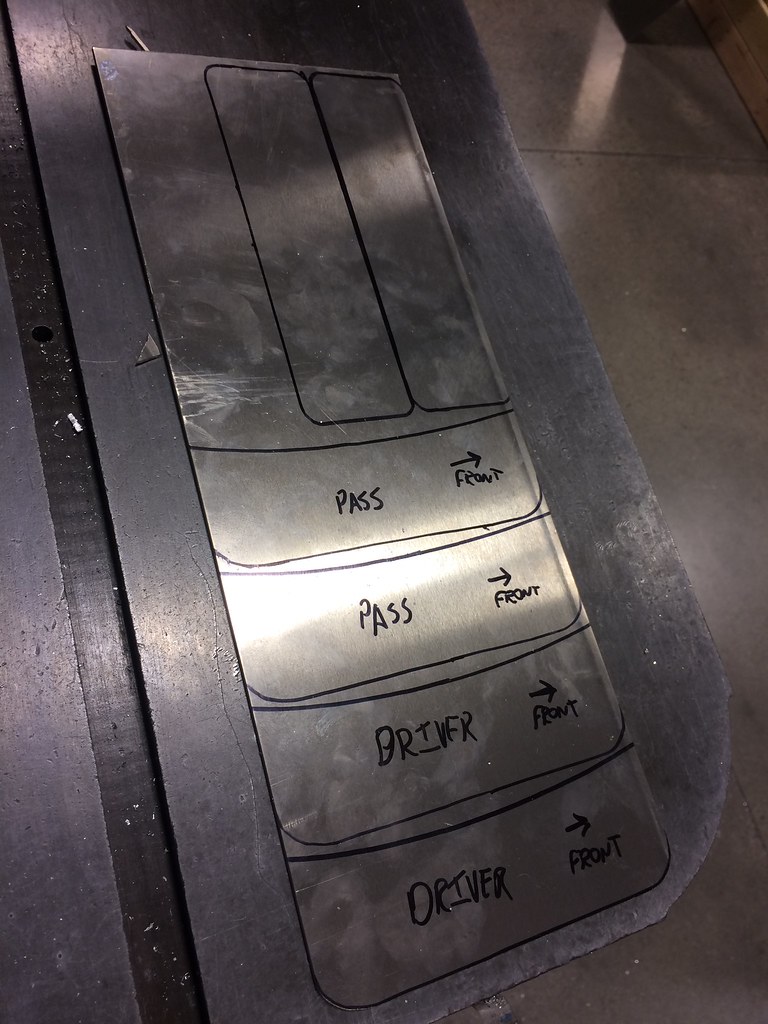
Then I used some scrap 1/4" to make a jig for the holes that needed to be drilled on the wing attachment uprights (what are those called?) I didn't want to have the drill bit walk and end up with miss matched holes, so I just powered through all 4 plates at once.
 Untitled by ericandshovin, on Flickr
Hand bent to plate that will attach to the wing and used the jig from the above photo to act as a spacer for the upright. This will give the two smaller aluminum plates the correct spacing to sit tightly on the upright.
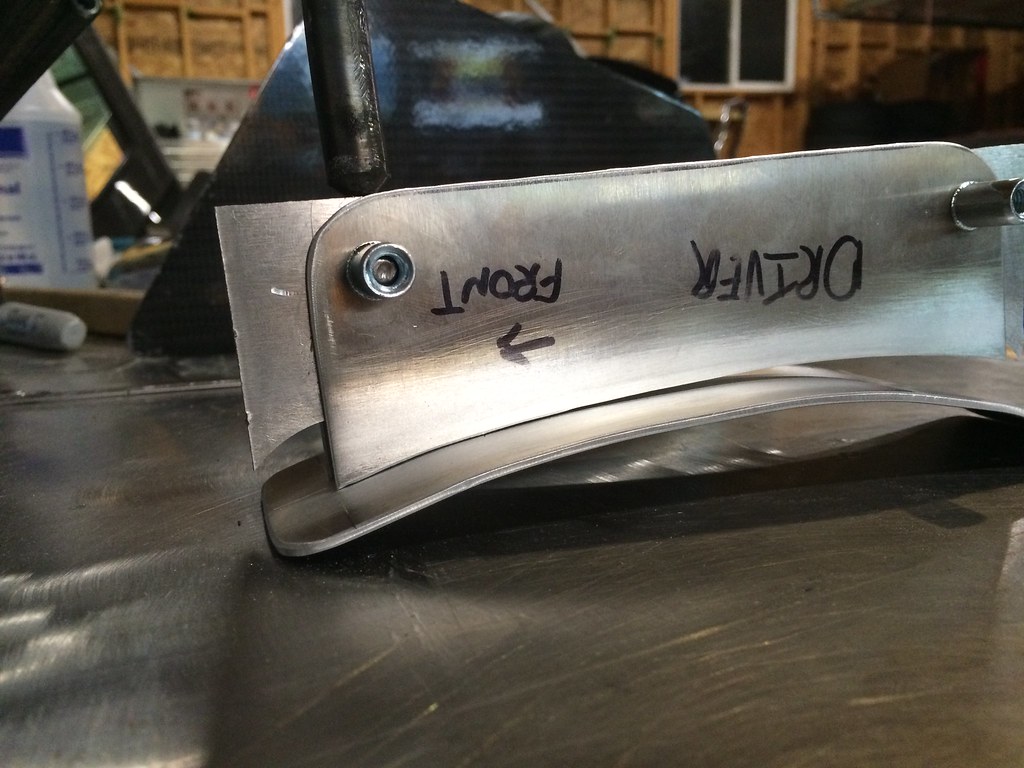 Untitled by ericandshovin, on Flickr
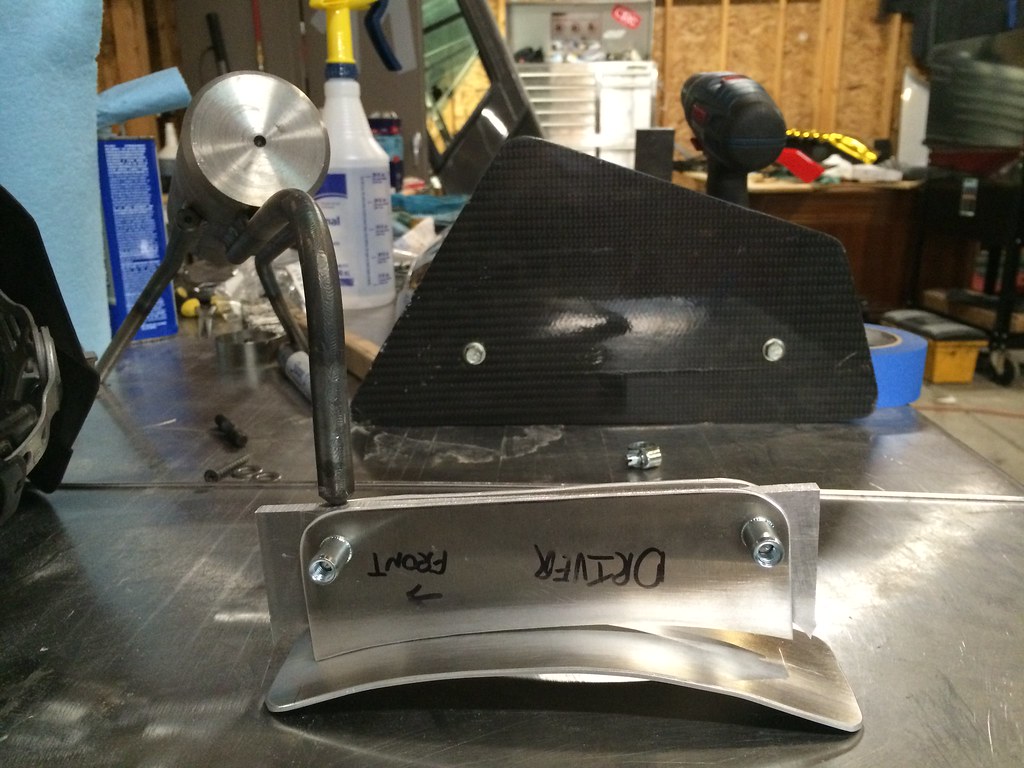 Untitled by ericandshovin, on Flickr
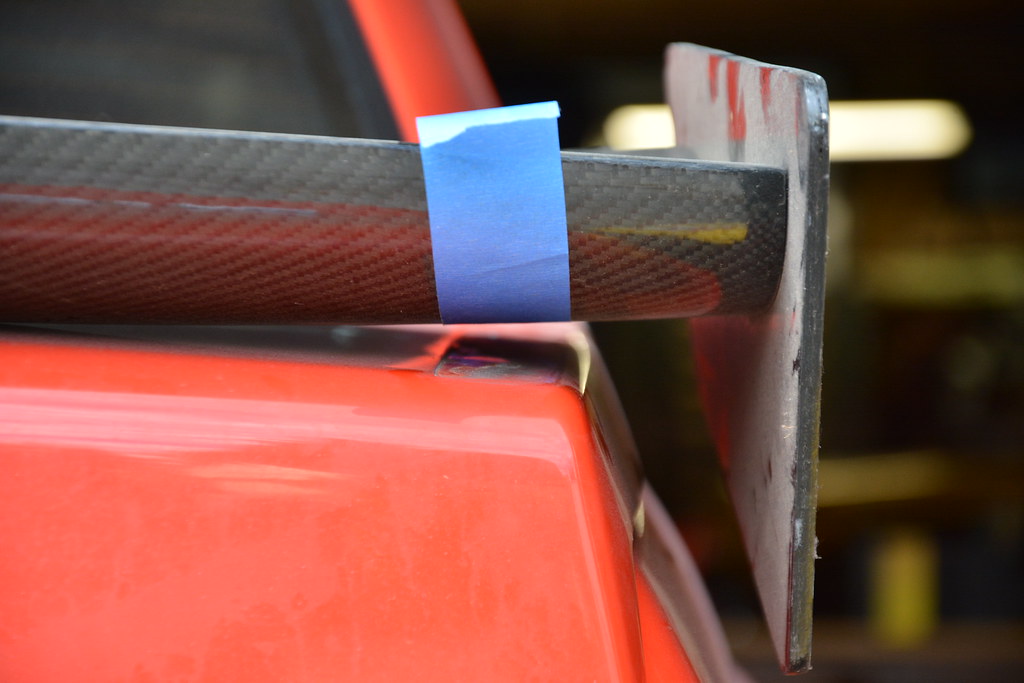
To close this gap, I used a C-clamp to squish it together.
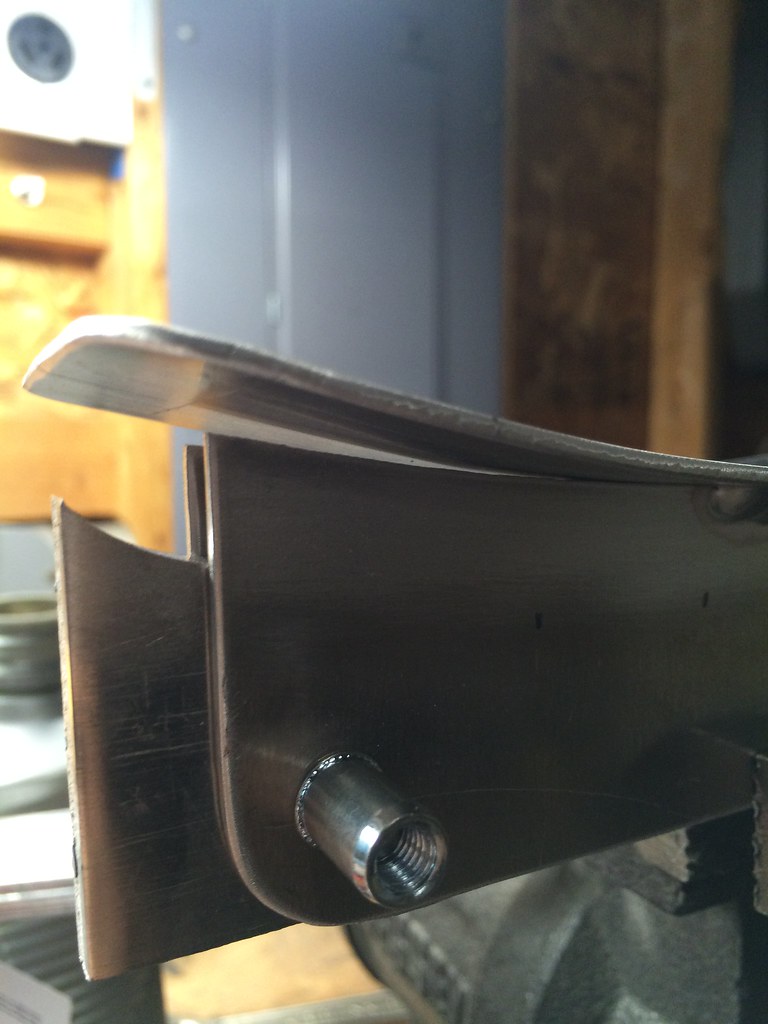 Untitled by ericandshovin, on Flickr
C-clamp
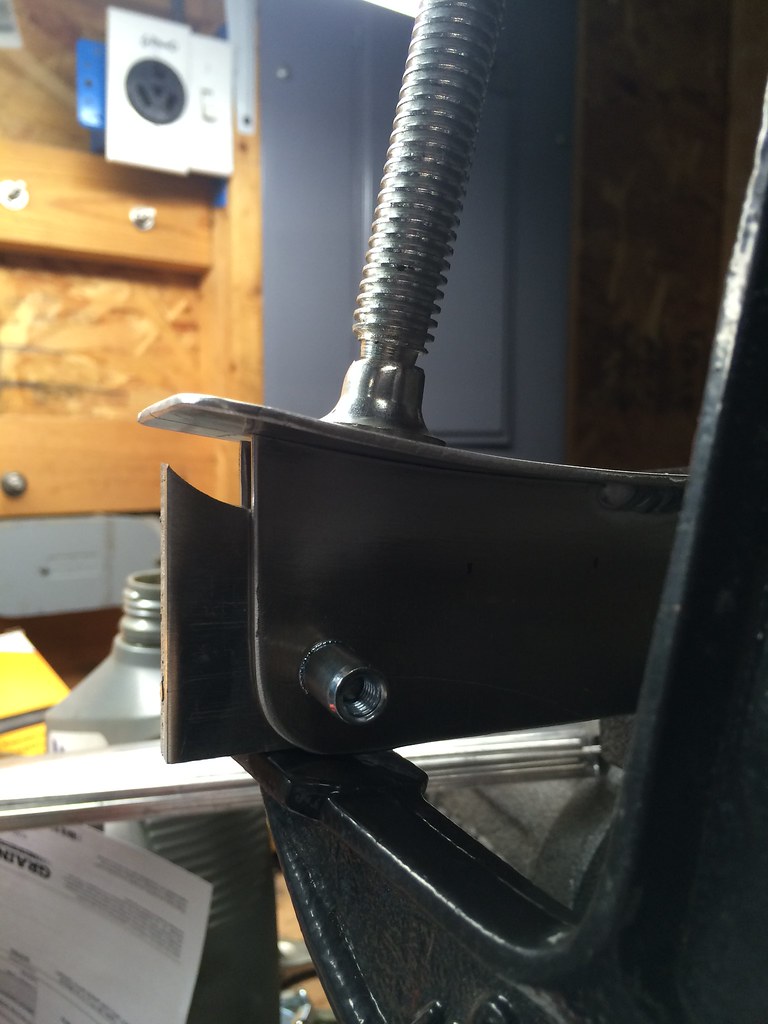 Untitled by ericandshovin, on Flickr
All done
 Untitled by ericandshovin, on Flickr
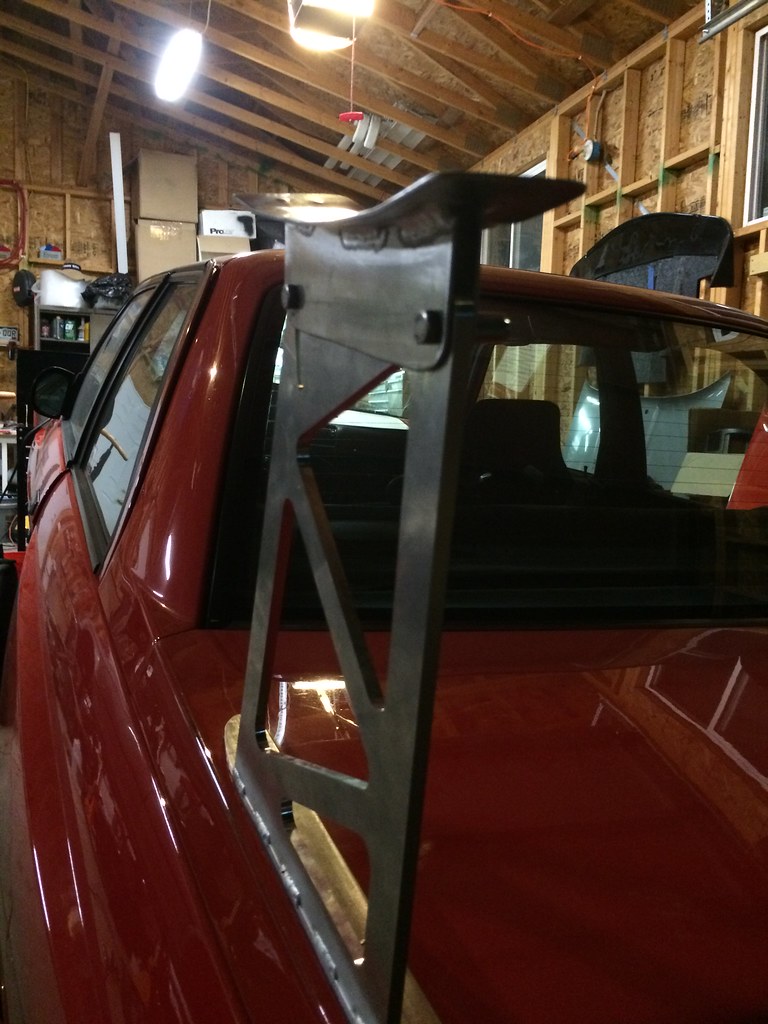
Test fit on the car, all the way up.
 Untitled by ericandshovin, on Flickr
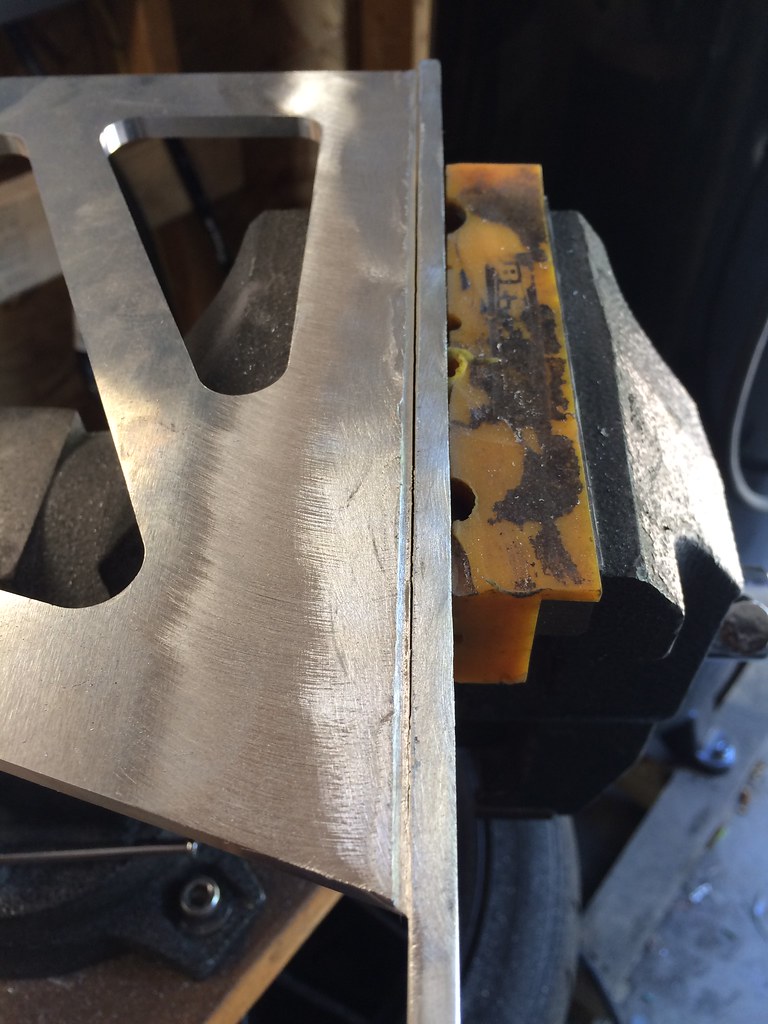
Tilted forward until it runs out of room... Measure once cut twice right?
 Untitled by ericandshovin, on Flickr
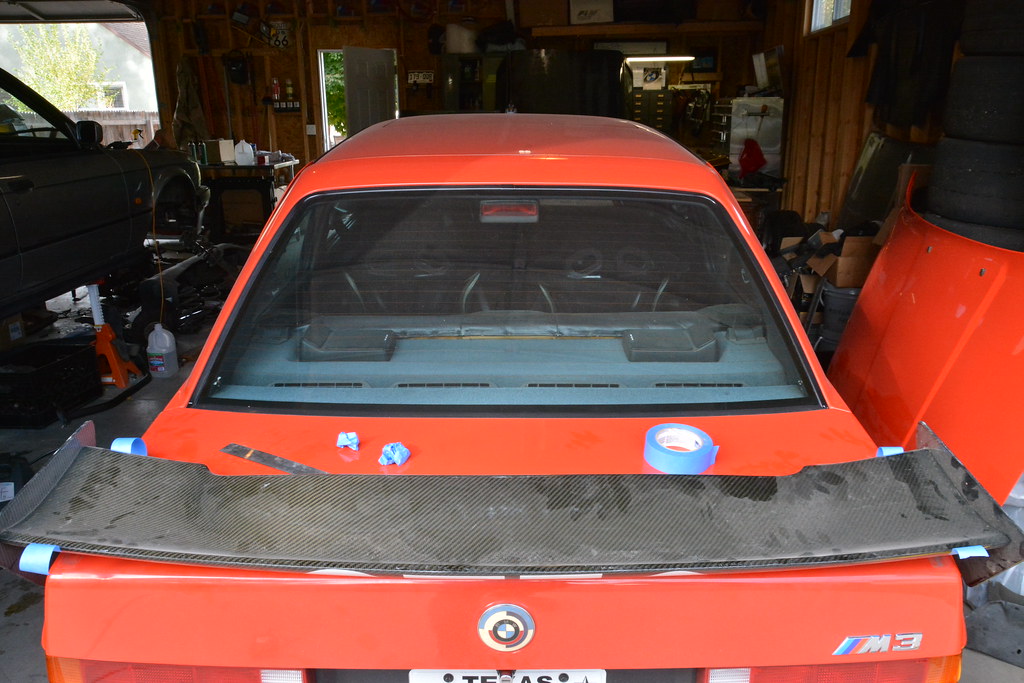
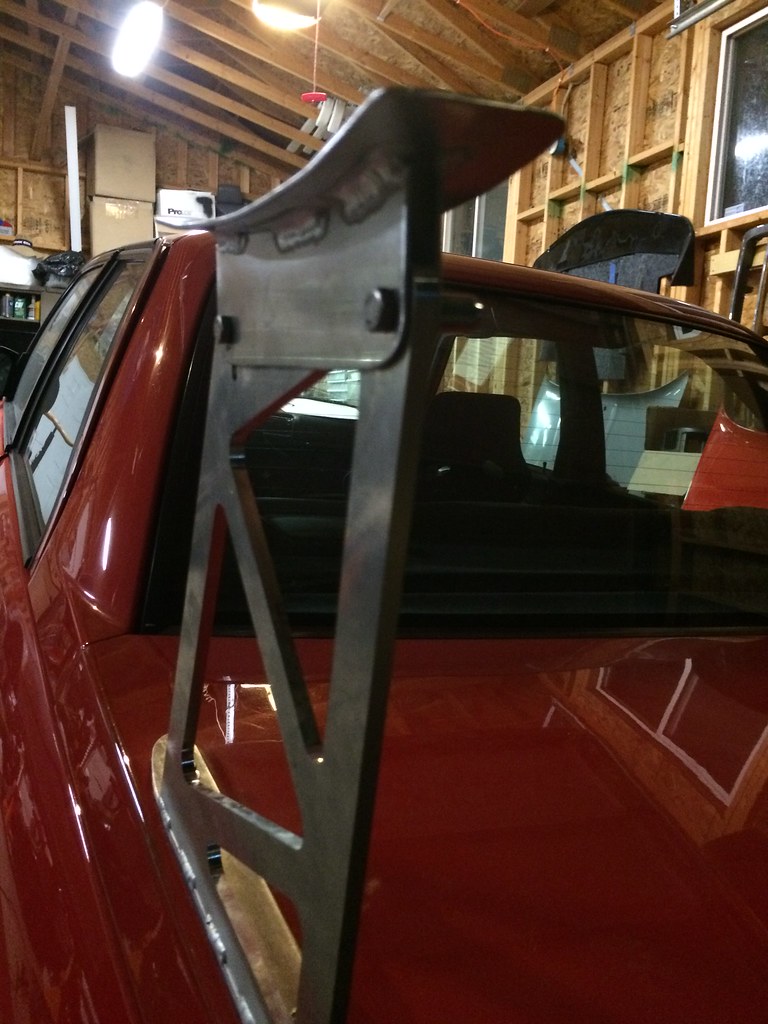
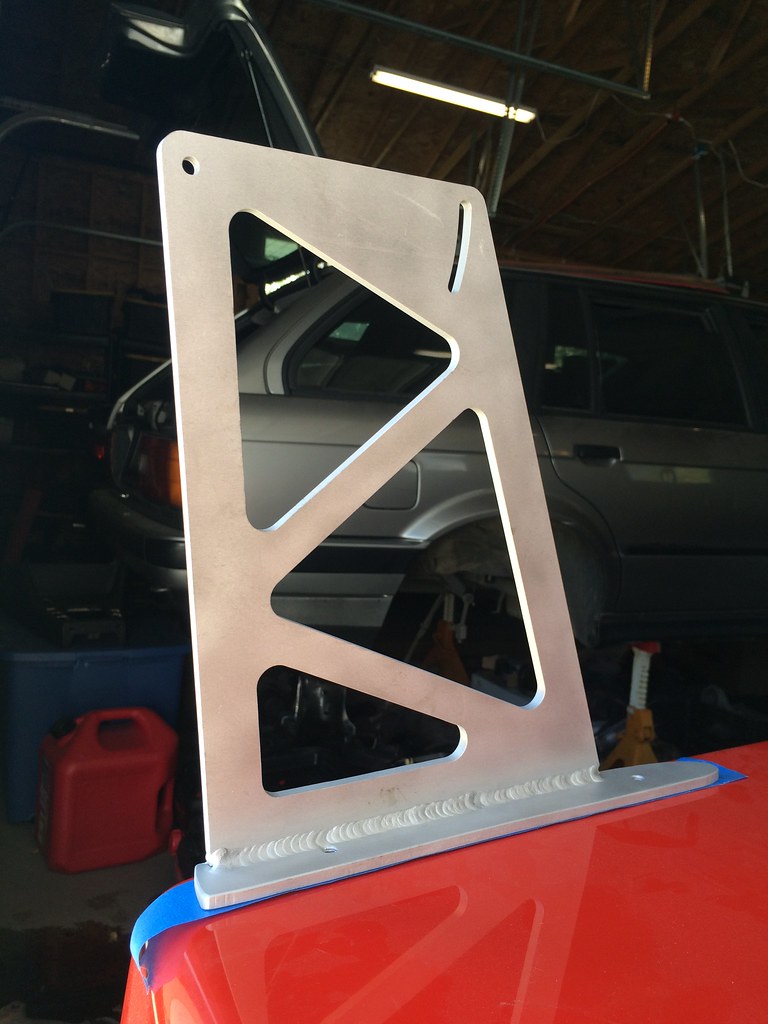
Step back and take a look overall....
 Untitled by ericandshovin, on Flickr
SHIT!
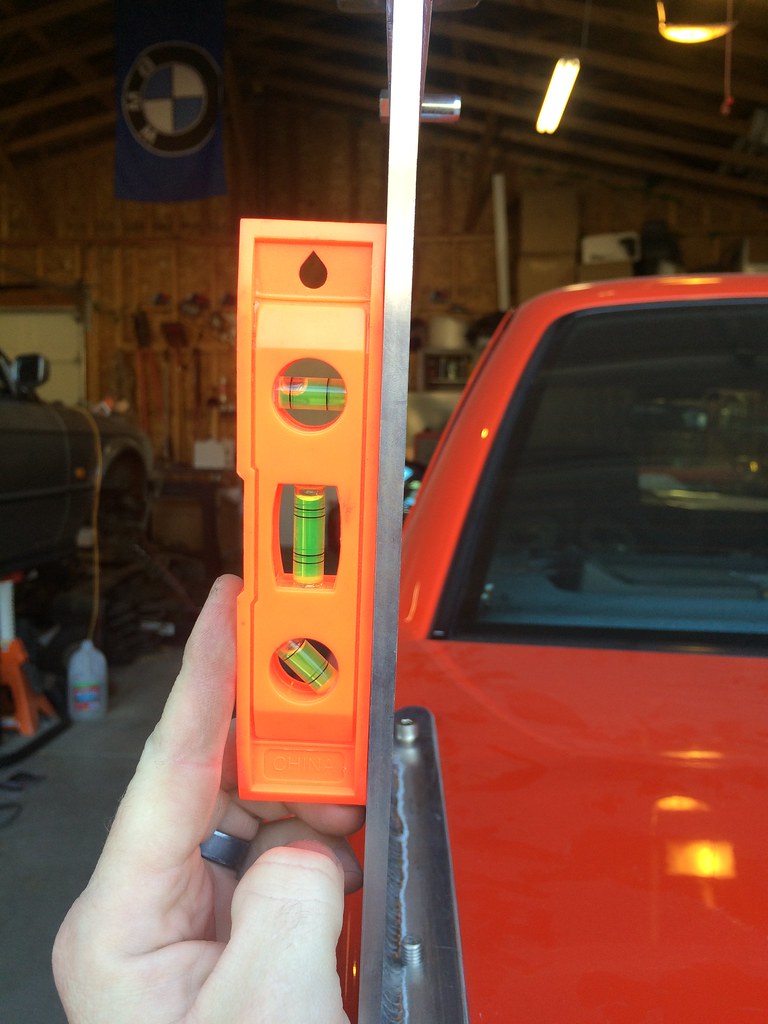
I failed to check the flatness of the trunk! Turns out it's crowned like a road.
 Untitled by ericandshovin, on Flickr
by ericandshovin, on Flickr
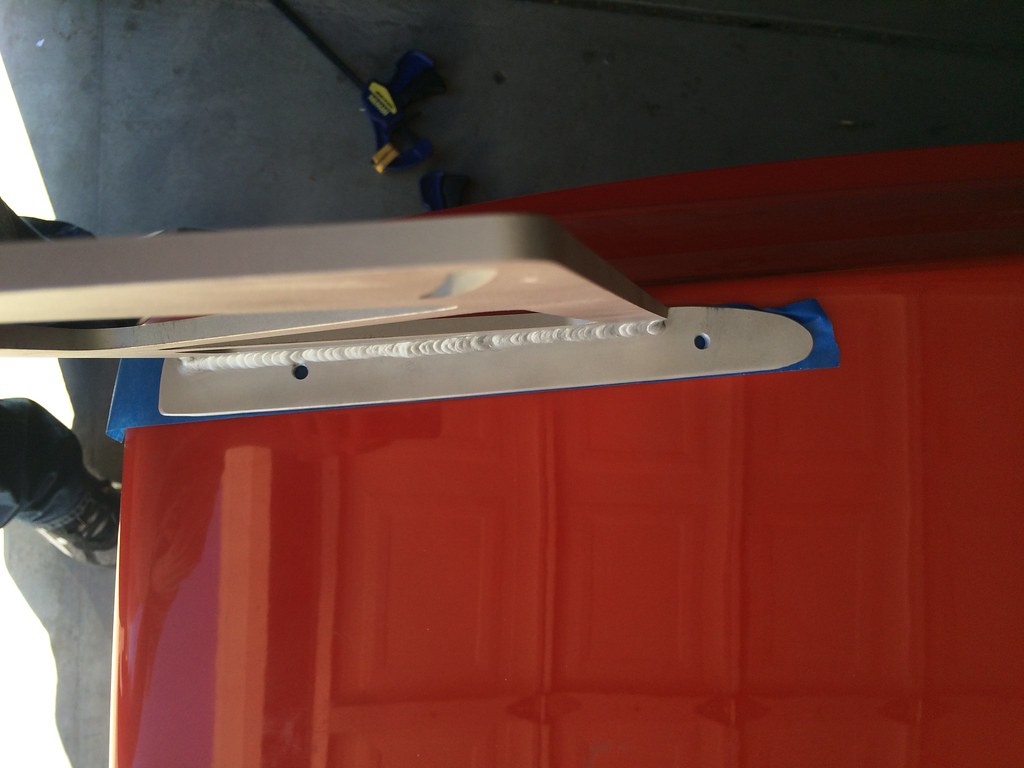
 Untitled by ericandshovin, on Flickr
That's better
 Untitled by ericandshovin, on Flickr
 Untitled by ericandshovin, on Flickr
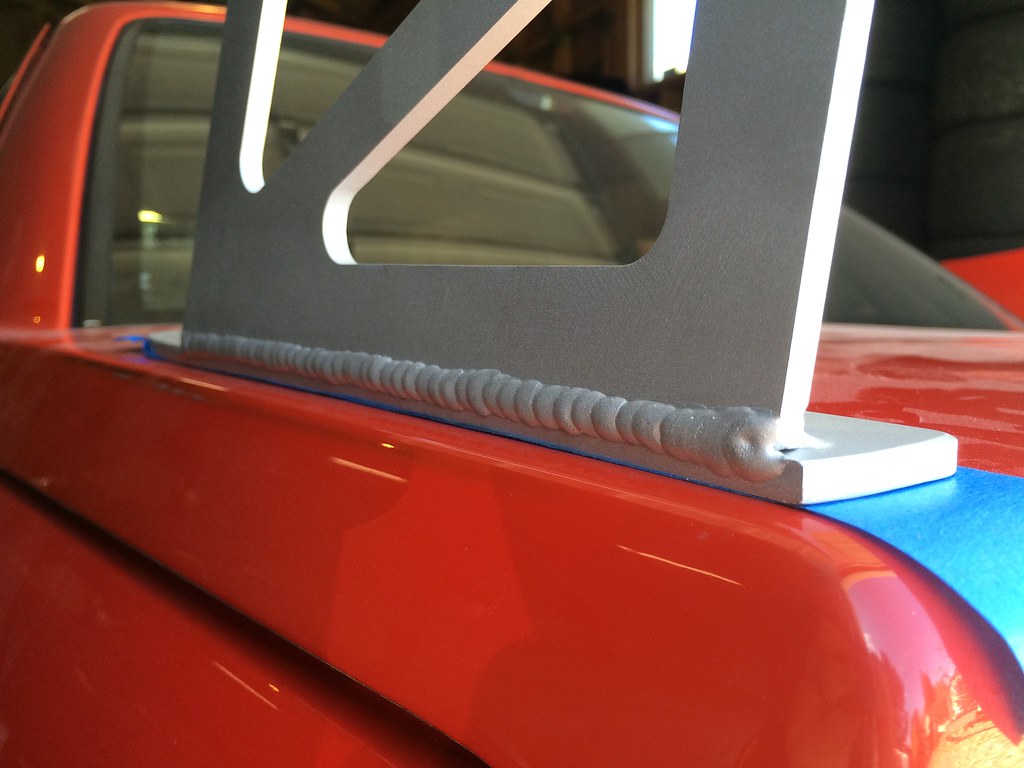
I didn't really like the gaped welds, so I just laid down a piping hot bead. 200 amps on an air cooled torch gets hot hot hot!
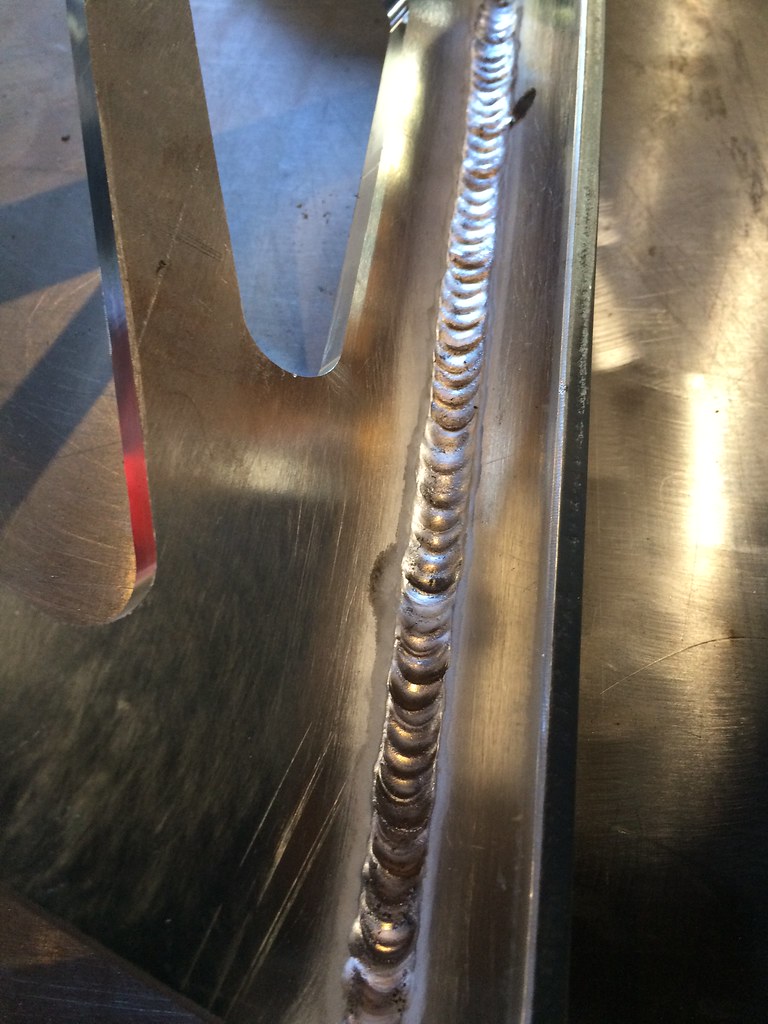 Untitled by ericandshovin, on Flickr
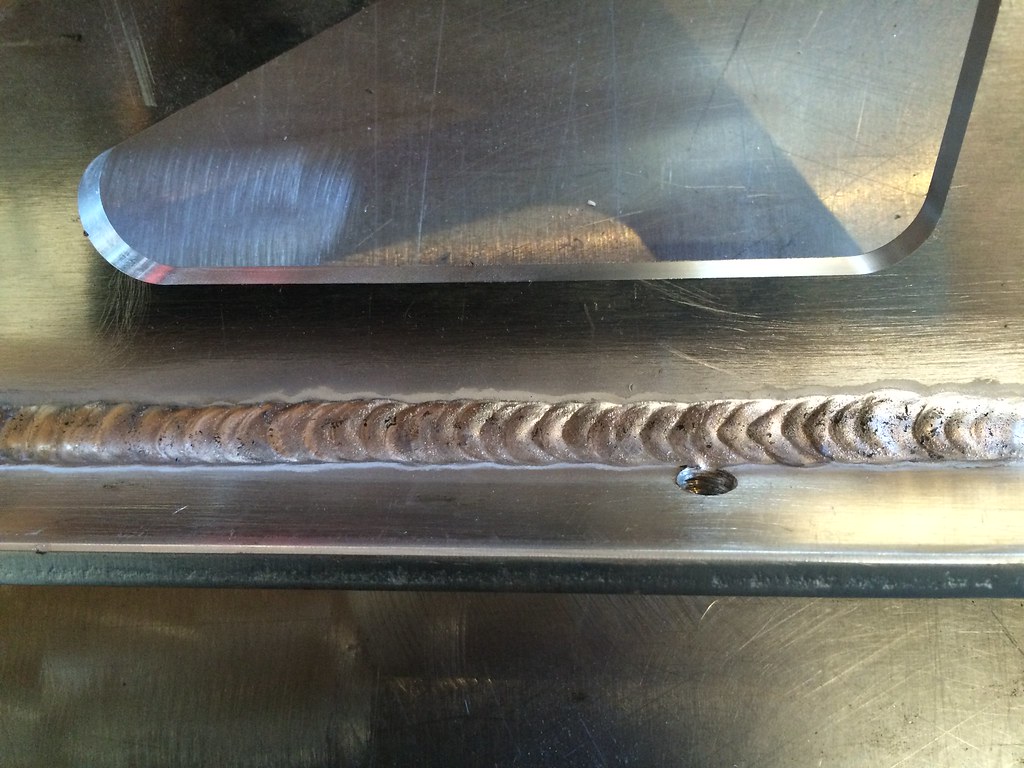 Untitled by ericandshovin, on Flickr
I decided to also re-do the wing attachment uprights for two reasons. 1. I want to use the full range of the uprights adjustment. 2. The wing was positioned pretty neutral on the attachment uprights, this led to the wing having a positive angle of attack. That's not so good. Even with them tilted all the way down, the wing had a positive AOA. Back to the shop for the bandsaw to create wing attachment uprights V2.0. Taller, steeper, better.
 Untitled by ericandshovin, on Flickr
While at the machine shop, I sandblasted the uprights. Looks pretty cool now! I'm still thinking I'll anodize them so they don't stand out as much.
 Untitled by ericandshovin, on Flickr
 Untitled by ericandshovin, on Flickr
 Untitled by ericandshovin, on Flickr
I'm thinking I'll anodize it this color. Not quite black, but still cool looking.
 Untitled by ericandshovin, on Flickr
Before I send everything off to be anodized, I need to finish V2.0 wing attachment uprights and find a solution for the rear bolt holes. I should have stopped the weld to give clearance for the bolt head, now I'll have to get in there somehow and grind the weld down a bit.
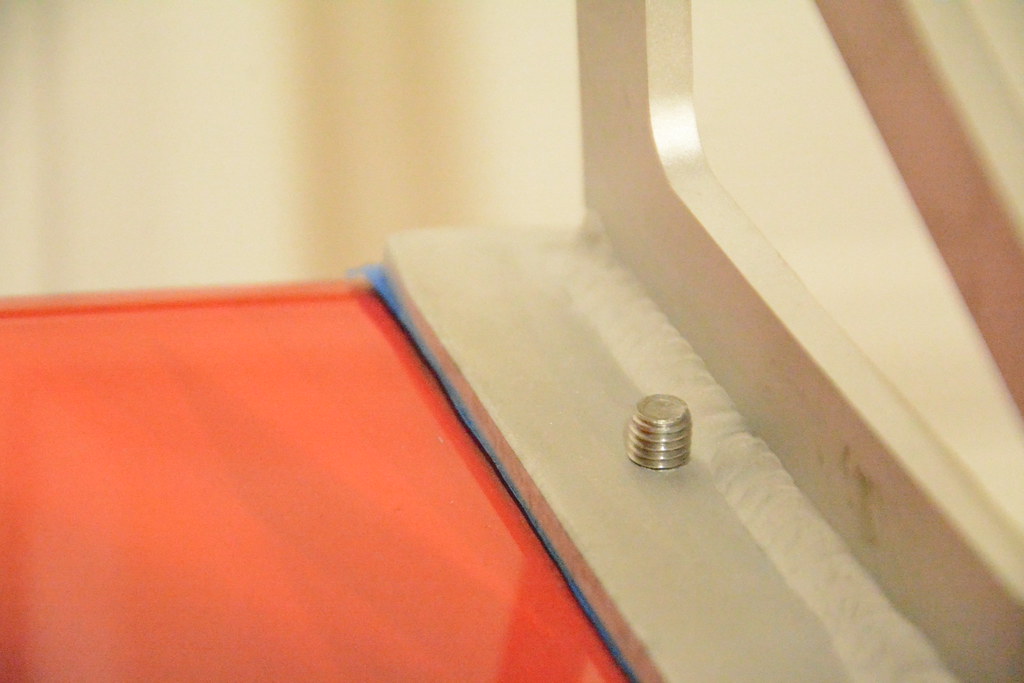 DSC_8164 by ericandshovin, on Flickr
Still to do?
- Finish front bumper
- Finish rear wing uprights
- Order brake rotors
- Choose/order new brake pads
- Corner balance/alignment
Oh yeah, and there is this too.
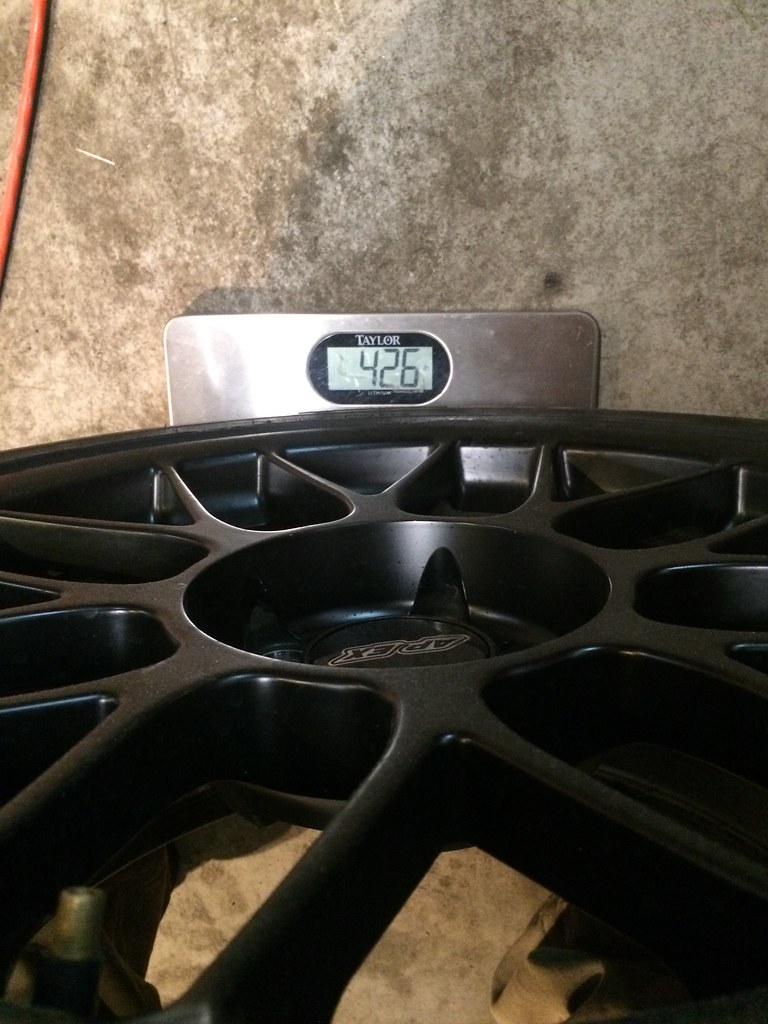 Untitled by ericandshovin, on Flickr
vs.
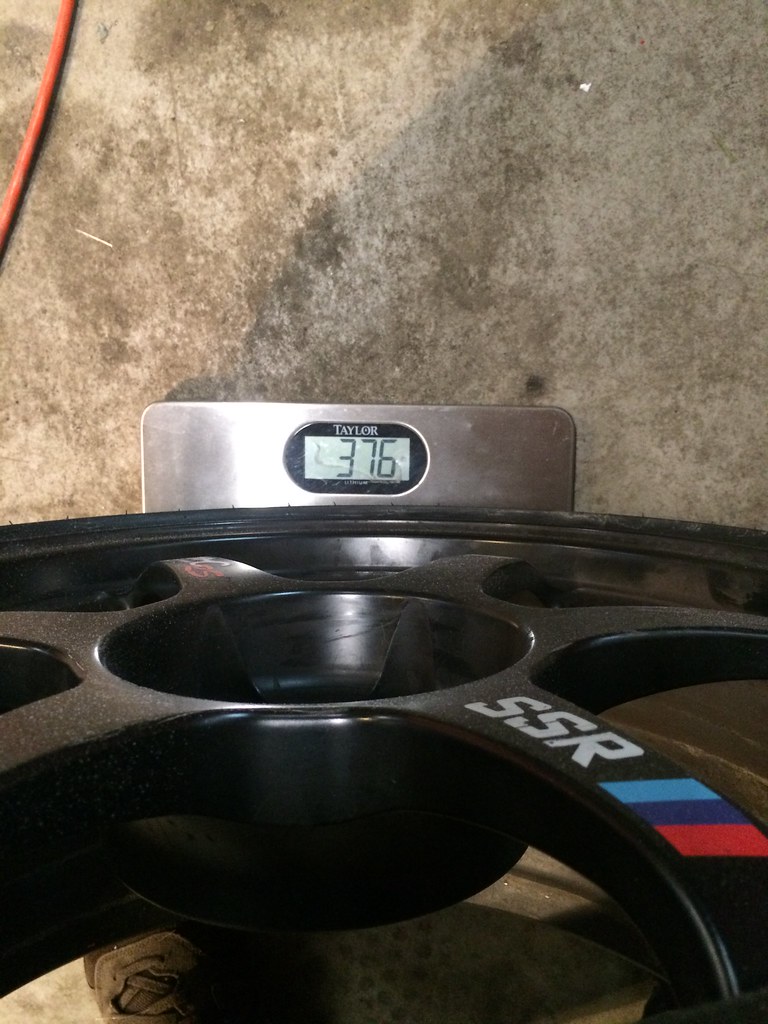 Untitled by ericandshovin, on Flickr
 Untitled by ericandshovin, on Flickr
 Untitled by ericandshovin, on Flickr
Comment
-
great progress!Comment


Comment