
Hello to the R3vlimited world.
i figured now would be a great time to introduce you to Carol.
Carol is my 1988 325i Cabriolet in Cirrusblau Metallic (paint code 189) with Natur interior.
Also please forgive me but i bought this car last year and have finally found the time to share with you guys ........
Anyway ........ i was looking for my first E30 searching craigslist for one to pop up that would be the perfect start for me when i found Carol.
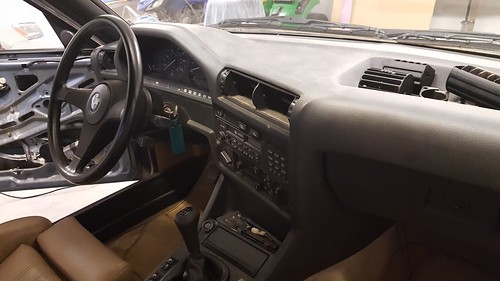
it was a craigslist add in Sweet home Alabama (not my home) that i saw " 1988 BMW 325i Convertible ". i never wanted a Vert but it peaked my interest.
 IMG_1758 by Michael , on Flickr
 IMG_1759 by Michael , on Flickr
 00G0G_i8JF3c190Vk_600x450 by Michael , on Flickr
 00y0y_7KOGuG3jPsz_600x450 by Michael , on Flickr
The craigslist ad stated he was selling for his aunt so i figured i would text him and ask about it. After asking for some pictures of the engine to make sure it was still in the car and everything looked on the up and up i decided to take a trip the next day after work to go take a look at it.
After a 2 hour drive i arrived at his aunts house where they introduced themselves. she was a older lady named Carol who after talking with her and looking at the car i come to find out it was her husbands car that passed that she didnt want to keep but wanted to find it a good home for it. After looking at the car we talked turkey and the next weekend i rented a car trailer and went and got the car.
Finally at home ........inspection report.......
 Carol by Michael , on Flickr
Needs a cleaning .....a good one
 Carol by Michael , on Flickr
 Carol by Michael , on Flickr
 Carol by Michael , on Flickr
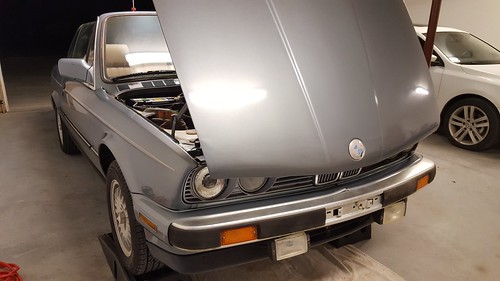
Also something i didnt notice till i got home...... one grille is newer then the other and one headlight doesn't match ........... i also didnt check the car-fax....... JK lol
 Carol by Michael , on Flickr
 Carol by Michael , on Flickr
 Carol by Michael , on Flickr
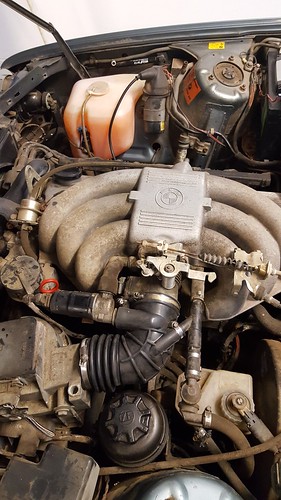
Also the thing on the intake boot is a performance piece that the P.O installed its to let fresh air flow into the motor from all different angles i think it adds 35 HP but dont quote me on that
Anyway after some cleaning ......
 Carol by Michael , on Flickr
 Carol by Michael , on Flickr
 Carol by Michael , on Flickr
And heres one of the reasons i bought this car besides it being 2 owner car and it runs with no rust ....... also this is before cleaning
 Carol by Michael , on Flickr
 Carol by Michael , on Flickr
And starting to take apart things
 Carol by Michael , on Flickr
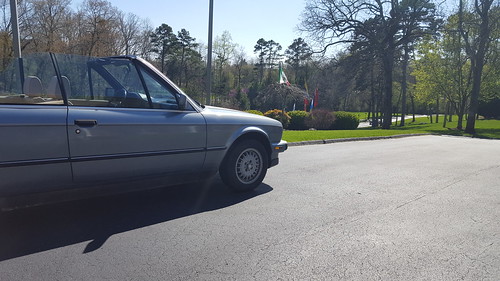
Wanted to bring her outside and take the top down to inspect everything......
 Carol by Michael , on Flickr
 Carol by Michael , on Flickr
So then i decided to change the oil in the car i used 15-50w Mobile 1 with a mobile 1 filter till i got my Mann filter for my next change ...... let me tell you what a pain in the behind this was ......i like to think of my self of having mechanical ability but i struggled with this thing for 2 days .......... so because its a vert it comes with a stock oil cooler because of that it rotates the oil filter housing 90 degrees so instead of looking at the ex. mani from the side and twisting off with both hands now you have to grab in between the two exhaust manifolds and use one hand to twist..... not a problem if you change the oil regularly but if you dont know when the P.O changed it then its really hard to get off. So i destroyed the oil filter with oil filter wrench's , i deformed it, i twisted so hard with a wrench it moved the car upward with the amount of force i was putting on it , i even stuck screwdrivers in the middle for leverage (heres the then not leverage the way the oil filter is installed with oil cooler). At this point i really didnt know what to do in the mean time my wife comes in the garage and askes me whats wrong i tell her and she goes "why dont you heat it up with the heat gun?" i told her it would never work and sent her away ....at which point i grabed the heat gun and it came right off
 Carol by Michael, on Flickr
 Carol by Michael , on Flickr
In the mean time i converted to the stock intake boot and the idle got better (oh yea had a un-regular idle)
 Carol by Michael , on Flickr
I also ordered a bunch of stuff to do timing belt , new fluids , and some misc. stuff ......
 20190328_143333 by Michael , on Flickr
 20190328_142805 by Michael , on Flickr
Also i dont have any pictures but i rebuilt my factory radio so it can accept cassettes again because i honesty love the factory look as much as possible how ever it works but there is a noise when it plays like a white noise or a skipping almost without skipping.
Anyway i followed this link to take it apart , https://www.bimmerforums.com/forum/s...pair-BMW-Radio do your self a favor if your planing on doing this and wear gloves to take the old belt off as it is like tar also i used rubbing alcohol with q-tips to clean everything. the new belts you order off amazon but there an assortment but a few do fit. The little o-rings for the playing action are a special size (ill edit it and find out but i have a bunch so if anyone really needs them let me know) i tried sanding down a o-ring but i could never get it perfect enough to play and its a pain....... also get a good set of precision screwdrivers preferably magnetized.
So i was sick of looking at the mismatching headlights and the mismatching grilles so i ordered a new headlight and some S.E.M trim black spray paint. (i swear by this stuff )
I took eveything apart and washed with dawn and water and a plastic bristle brush then wiped down with thinner
 Carol by Michael , on Flickr
 Carol by Michael , on Flickr
I think it came out alot cleaner.
 Carol by Michael , on Flickr
Just some more pictures of me actually driving it
 Carol by Michael , on Flickr
 Carol by Michael , on Flickr
 20190327_161558 by Michael , on Flickr
 20190320_160231 by Michael , on Flickr
Then i found some BBS basket weaves 15's
 20190412_160740 by Michael , on Flickr
 20190611_172327 by Michael , on Flickr
that last picture was right before my daughter was born so alot of things stopped for a few months.......
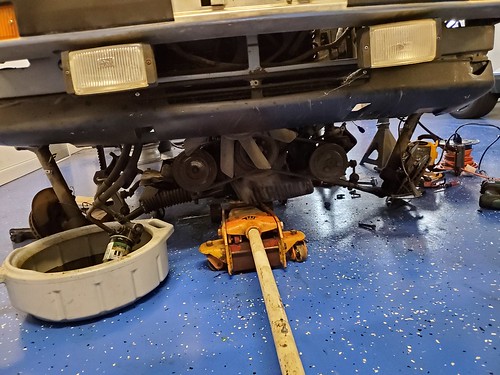
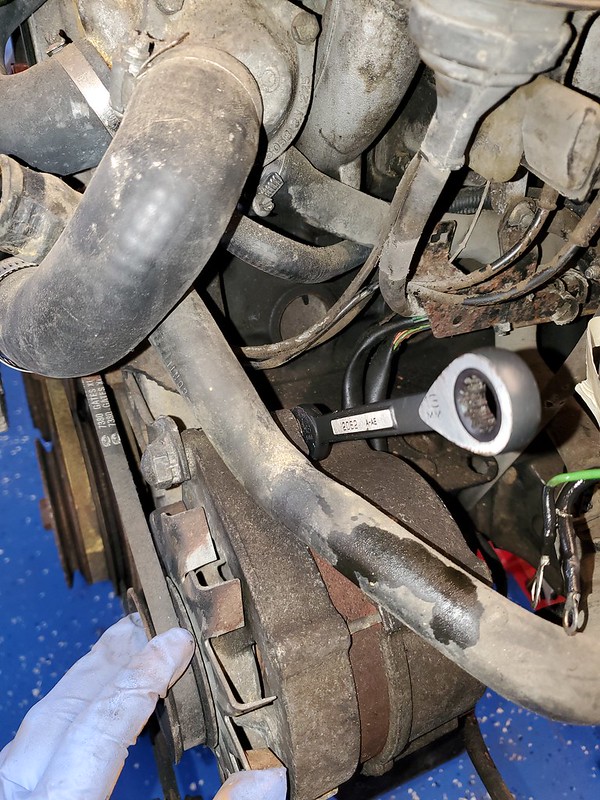
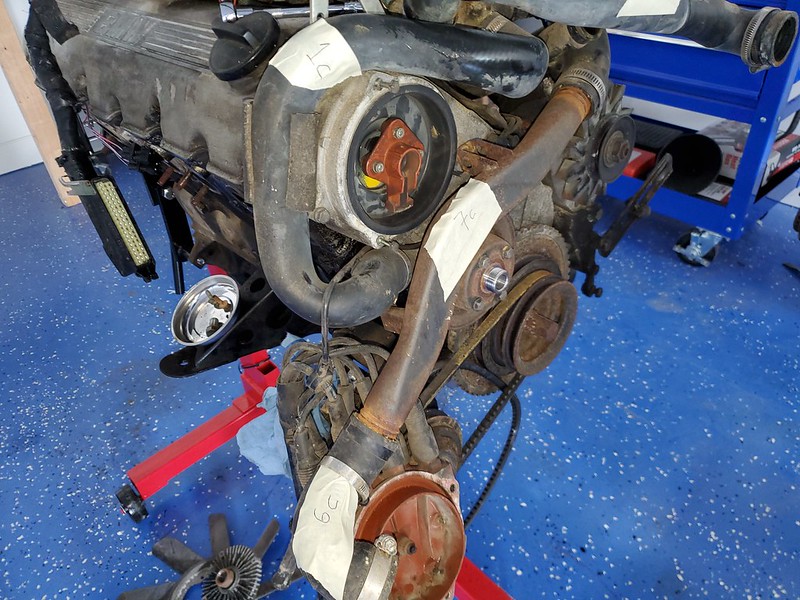
well two weeks ago i figured it was time to change the timing belt ..... well then i started thinking and it has a few leaks from things i dont like and plus i really would like to run boost so.... theres that well anyway this happened
 20200111_210805 by Michael , on Flickr
 20200111_210758 by Michael , on Flickr
 20200112_141611 by Michael , on Flickr
 20200113_084714 by Michael , on Flickr
 20200113_084720 by Michael , on Flickr
So thats how she looks now , i still have to get the motor on the stand and start planing the full build ........
Well R3vlimited i welcome to you Carol
i figured now would be a great time to introduce you to Carol.
Carol is my 1988 325i Cabriolet in Cirrusblau Metallic (paint code 189) with Natur interior.
Also please forgive me but i bought this car last year and have finally found the time to share with you guys ........
Anyway ........ i was looking for my first E30 searching craigslist for one to pop up that would be the perfect start for me when i found Carol.
it was a craigslist add in Sweet home Alabama (not my home) that i saw " 1988 BMW 325i Convertible ". i never wanted a Vert but it peaked my interest.
IMG_1758 by Michael , on FlickrIMG_1759 by Michael , on Flickr00G0G_i8JF3c190Vk_600x450 by Michael , on Flickr00y0y_7KOGuG3jPsz_600x450 by Michael , on FlickrThe craigslist ad stated he was selling for his aunt so i figured i would text him and ask about it. After asking for some pictures of the engine to make sure it was still in the car and everything looked on the up and up i decided to take a trip the next day after work to go take a look at it.
After a 2 hour drive i arrived at his aunts house where they introduced themselves. she was a older lady named Carol who after talking with her and looking at the car i come to find out it was her husbands car that passed that she didnt want to keep but wanted to find it a good home for it. After looking at the car we talked turkey and the next weekend i rented a car trailer and went and got the car.
Finally at home ........inspection report.......
Carol by Michael , on Flickr Needs a cleaning .....a good one
Carol by Michael , on FlickrCarol by Michael , on FlickrCarol by Michael , on FlickrAlso something i didnt notice till i got home...... one grille is newer then the other and one headlight doesn't match ........... i also didnt check the car-fax....... JK lol
Carol by Michael , on FlickrCarol by Michael , on FlickrCarol by Michael , on FlickrAlso the thing on the intake boot is a performance piece that the P.O installed its to let fresh air flow into the motor from all different angles i think it adds 35 HP but dont quote me on that
Anyway after some cleaning ......
Carol by Michael , on FlickrCarol by Michael , on FlickrCarol by Michael , on FlickrAnd heres one of the reasons i bought this car besides it being 2 owner car and it runs with no rust ....... also this is before cleaning
Carol by Michael , on FlickrCarol by Michael , on FlickrAnd starting to take apart things
Carol by Michael , on FlickrWanted to bring her outside and take the top down to inspect everything......
Carol by Michael , on FlickrCarol by Michael , on FlickrSo then i decided to change the oil in the car i used 15-50w Mobile 1 with a mobile 1 filter till i got my Mann filter for my next change ...... let me tell you what a pain in the behind this was ......i like to think of my self of having mechanical ability but i struggled with this thing for 2 days .......... so because its a vert it comes with a stock oil cooler because of that it rotates the oil filter housing 90 degrees so instead of looking at the ex. mani from the side and twisting off with both hands now you have to grab in between the two exhaust manifolds and use one hand to twist..... not a problem if you change the oil regularly but if you dont know when the P.O changed it then its really hard to get off. So i destroyed the oil filter with oil filter wrench's , i deformed it, i twisted so hard with a wrench it moved the car upward with the amount of force i was putting on it , i even stuck screwdrivers in the middle for leverage (heres the then not leverage the way the oil filter is installed with oil cooler). At this point i really didnt know what to do in the mean time my wife comes in the garage and askes me whats wrong i tell her and she goes "why dont you heat it up with the heat gun?" i told her it would never work and sent her away ....at which point i grabed the heat gun and it came right off
Carol by Michael, on FlickrCarol by Michael , on FlickrIn the mean time i converted to the stock intake boot and the idle got better (oh yea had a un-regular idle)
Carol by Michael , on FlickrI also ordered a bunch of stuff to do timing belt , new fluids , and some misc. stuff ......
20190328_143333 by Michael , on Flickr20190328_142805 by Michael , on FlickrAlso i dont have any pictures but i rebuilt my factory radio so it can accept cassettes again because i honesty love the factory look as much as possible how ever it works but there is a noise when it plays like a white noise or a skipping almost without skipping.
Anyway i followed this link to take it apart , https://www.bimmerforums.com/forum/s...pair-BMW-Radio do your self a favor if your planing on doing this and wear gloves to take the old belt off as it is like tar also i used rubbing alcohol with q-tips to clean everything. the new belts you order off amazon but there an assortment but a few do fit. The little o-rings for the playing action are a special size (ill edit it and find out but i have a bunch so if anyone really needs them let me know) i tried sanding down a o-ring but i could never get it perfect enough to play and its a pain....... also get a good set of precision screwdrivers preferably magnetized.
So i was sick of looking at the mismatching headlights and the mismatching grilles so i ordered a new headlight and some S.E.M trim black spray paint. (i swear by this stuff )
I took eveything apart and washed with dawn and water and a plastic bristle brush then wiped down with thinner
Carol by Michael , on FlickrCarol by Michael , on FlickrI think it came out alot cleaner.
Carol by Michael , on FlickrJust some more pictures of me actually driving it
Carol by Michael , on FlickrCarol by Michael , on Flickr20190327_161558 by Michael , on Flickr20190320_160231 by Michael , on FlickrThen i found some BBS basket weaves 15's
20190412_160740 by Michael , on Flickr20190611_172327 by Michael , on Flickrthat last picture was right before my daughter was born so alot of things stopped for a few months.......
well two weeks ago i figured it was time to change the timing belt ..... well then i started thinking and it has a few leaks from things i dont like and plus i really would like to run boost so.... theres that well anyway this happened
20200111_210805 by Michael , on Flickr20200111_210758 by Michael , on Flickr20200112_141611 by Michael , on Flickr20200113_084714 by Michael , on Flickr20200113_084720 by Michael , on FlickrSo thats how she looks now , i still have to get the motor on the stand and start planing the full build ........
Well R3vlimited i welcome to you Carol


Comment