-
Update: Progress was slow for a while. I broke a finger on my right hand, and it was casted for 5 weeks, and useless for another 2. Ive been in the garage quite a bit lately, and with the help of some friends made some good progress! My friend Julian has been a huge help; especially with the wiring.
modified my radiator for some clearance, and so I wouldnt have to go on a search for some elaborate hoses. Both the inlet and outlet are now welded at 90 degrees. I also had Rick weld an aluminum adapter to the inlet for a coolant temp sensor


The outlet on the radiator is now 2" connection on the water pump was 1.5". I had a hell of a time finding a hose that worked, but here it is

This setup provides some decent clearance for the intake and belt tensioner considering the size of this engine bay


I then had to figure out a way to plump the steam vent back into the cooling system. I ran a line from the vent and tee'd it into a looped section where the heater lines were.


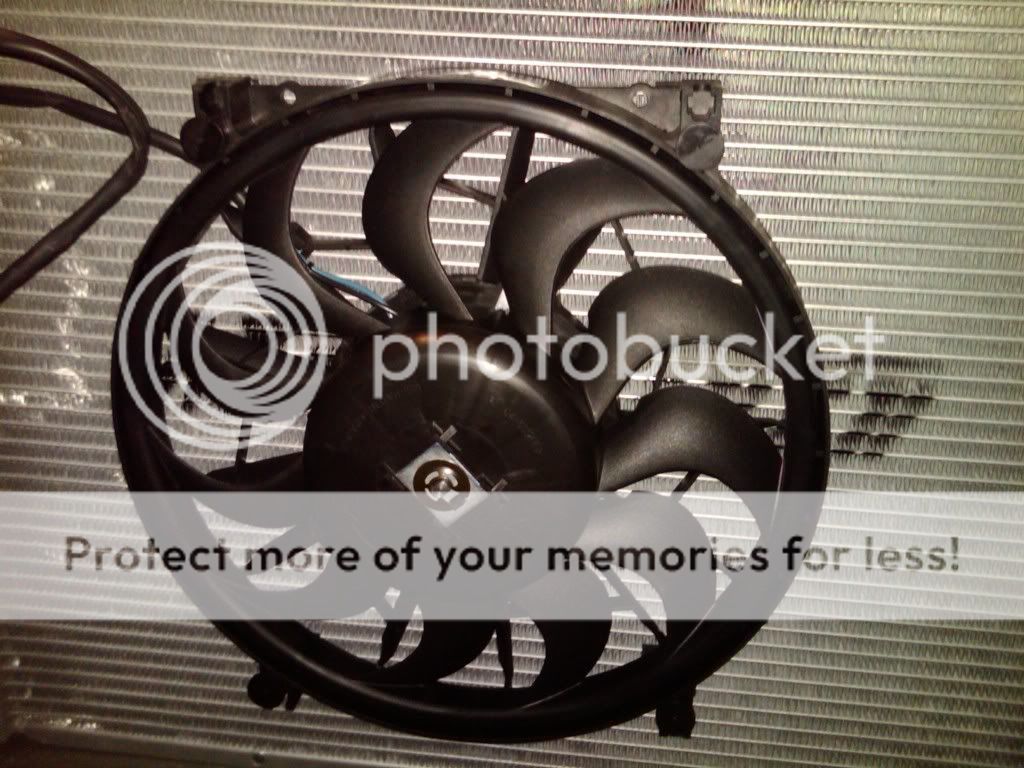
Installed this Derale pusher fan. Its only 12.5", but it moves 2150 cfm.
Also plumbed in this gorgeous overflow tank lol.

Next is started working on the gauges. I have a water temp, oil temp, and oil pressure gauge

I made a template and had Rick make me this plate for a switch pannel


the panel has a switch for my fan setup, for my gauge, and a toggle for push button start.


I also put in a 350mm Sparco steering wheel

put all the pieces of my intake together, and tapped it for the intake temp sensor. I made a support bracket out of some aluminum flat stock


Here is the engine bay as it sits. I wrapped the intake elbow in some 1500 degree insulation tape. You can also see the line for the overflow tank and the throttle cable.

I drove the car for the first time this past weekend, which was a huge milestone for me. I wanted to drive it before the new yr. The car is running really rich because I didnt have the o2 sensors connected, which fouled out the plugs. I went and bought new plugs and some o2 sensors today. I also took my y-pipe to have 02 sensor bungs added today. This week I plan on putting the y pipe back in, adding some clearance at the rear subframe for the driveshaft, and looming the wiring.
-MattLeave a comment:
-
We took a look at a 7" dual-diaphragm vacuum booster and mounted a late-90's Oldsmobile master cylinder to it. The system mounted in the same way as the HB. We developed it part way in Catia, and bought a booster & Olds MC. Holding it in the engine bay, there is room for such a system. Contact Steve at E30LS1@gmail for a pic of the unit.Leave a comment:
-
Wow. Great job on that "Blue Lagoon Special".
Subframe bushing - Yup. You need the lower plate that also bolts to the rockers.
Brakes (for those who enquired) - You need to compensate the removal of the booster by a reduction in MC size (19mm seems okay - from e21 - no ABS though) and increase in leverage. The MC must therefore be raised perhaps 3/4" and the pick-up on the pedal stem must be raised by the same distance (reinforce the pedal stem at the new pick-up area). Leverage ratio between 6:1 to 7:1 is what you want. Also, don't be shy to fit grippy pads. Hawk's HT10 fir the bill. ;-)Leave a comment:
-
Or a more appropriate pedal ratio and correctly sized MC. The stock pedal assembly is easy to modify to attain a better pedal ratio. Manual brakes are surprisingly good when setup correctly!
Diving into aftermarket parts for a greater selection of master cylinder sizes might be a good route for the Vorshlag guys. Should their budget allow, Wilwood makes a nice dual circuit master cylinder that could work well with a manual setup using stock pedals. Or go all out and simply get a Wilwood or Tilton pedal assembly. Wilwood pedal assemblies go for under $190 on Ebay (probably cheaper used) and "knockoff" master cylinders are $39 each all over the place. With dual master cylinders and a balance bar there is no such thing as "terrible balance".Leave a comment:
-
Yea... for a street car I think that would be ideal. But we're going for a more lightweight set-up now, and to keep it simpler and more reliable we might ditch the power steering system (pump, cooler, lines, etc) all together... so hydroboost is out for us. We have some custom rotor/caliper ideas + a different M.C. we're working on to fix our braking issues once and for all.Leave a comment:
-
Your bushing looked like that because you are missing the bottom plate that screws in with the two allen screws to below the quarterpanel in front of the rear wheel.Leave a comment:
-
Leave a comment:
-
-
Nice... V-bands are the hotness. They don't leak, can self-align when you tighten the clamp and can deal with a slight mis-alignment, and don't have any gasket material that ever has to be replaced. We're using them on our broke-ass-no-budget E30 V8, and taking the budget hit (for the lowest cost eBay versions we could find) - that's how much I believe in them. I've got them on all of my cars that I built exhausts on. I won't use anything else.


That's weird... were you supposed to re-use the stock upper/lower washer "pieces"? That's what we did, but we made our own Nylon subframe mount bushings (total PITA - don't do this no matter how broke you are, trust me!) so I'm unfamiliar with the Powerflex set-up.


Your E30 LS1 project is looking good - keep up the good work! We're doing the same thing with the brake MC - direct mounting to the firewall via an adapter plate, without a vacuum booster - so please let us know how it works/stops/feels as soon as you drive it. :)
Thanks,Last edited by Fair!; 08-12-2010, 11:24 AM.Leave a comment:
-
I used v bands for easy removal. and to have the ability to swap in a non catted y pipe. As opposed to what? Welding everything?
Powerflex doesnt provide any washers with the bushings. They want you to use factory washers. Once i get a replacement, I am gonna use some large washers.Leave a comment:


Leave a comment: