
bump
-
-
Finally an update so you guys know I'm still alive. For the last 4 months I have been vacationing and working overseas but i will be home for a while now and i'm determined to get this thing done.
Before I left I had measured the head and it was found that the thickness varied in many places. Even though the bottom of the head was strait the top was not. In most heads this wouldn't be a problem but in the two piece head that I have, I decided that this was unacceptable. Before I left for my trip, I sent the head to VAC Motorsports to have them try and get it flat. I measured it today and this is the values I came up with....
Not perfect but definitely a lot better then it was. Ill go with it. The machinist advised me to take off .0015" off the valve tips to compensate for this loss in material from the lower head. This should allow me to not have to buy all new thickness shims for the valve adjustment.
I wanted to see how close the piston comes to the head at TDC as well. Using the dial indicator I found that it comes up .051" over the deck at TDC. With a .098" head gasket I will have .047" of clearance.
When I had sent the block to the machine shop, I forgot to remove these plugs. They removed them for me and didn't say anything. Lucky I noticed they were gone. Im pretty sure behind them is an oil gallery and without them there will be no oil pressure because it will all leak out onto the clutch. There is a plug in the front by the timing chain.
I continued to gut the car for some reason. Prob so I could say i did some kind of work on it.
In the next few days I try and test the new piston to valve clearances and do the valve adjustment.Last edited by ttrousdell; 04-16-2013, 01:03 PM.Comment
-
This is bullshyte Tom! How you leave us hanging for 4 months and only post 5 photos?!?!
LOL!!
Okay, I'm done with my crap. GET ER DONE!!!Click here to leave me feedback on our transactions. :pComment
-
Cannot wait to get this in with you, see you soon!~ Puch Cafe. ~ Do business? feedback ~ Check out my leather company ~
Instagram: @BWeissLeather
Current cars:
~ '87 325 M30B35 swap
~ '87 535
~ 01 540 Msport 6spd
~ '06 X5 4.8isComment
-
I'd go with a ~.091" gasket to get the piston to head clearance down around .040". You may have previously mentioned that your PTV is close, though...Originally posted by ttrousdell View Post
Good catch. Nobody cares more about your engine than you do. It's always a good idea to double check work you have done for you. A friend bought a 13.5:1 Miata race engine. He bought 10.5:1 pistons for it and we were putting it back together with the lower comp pistons. I had him check the ring end gap again, even though it was supposedly ready for track use before we tore it down. Gap was .010 on the top ring... he'd have butted the rings and killed the engine on his first track day if we hadn't caught that.Originally posted by ttrousdell View PostComment
-
I checked the PTV clearance today. It didnt change much from before I had the head sent out for work. Intake was about .058" at the minimum clearance and about .071" at TDC. Exhaust was a minimum of .121 just before TDC and .141" at TDC.Originally posted by The Dark Side of Will View Post
So my question for all you expert engine builders is .058" acceptable. Ive been researching and some websites say .05. Most say .06. For exhaust most recommended at least .1 so i'm fine there.
If this is not acceptable I think the smartest thing to do is to have deeper grooves cut into the piston.Comment
-
I knew I'd be going with bigger cams on my Northstar, so when I had my pistons cut, I told them to make the valve reliefs .100 deeper than stock.Originally posted by ttrousdell View Post
If your pistons can take another .050 in relief depth, and you don't mind having it done, that's the way I'd go. That gives you more room to optimize your piston-to-head clearance, which is pretty important in a high performance N/A build.
I forget... are you piston crowns ceramic coated?Comment
-
1+ with Dark, make a nice higher CR engine? lol looks good Tom, keep at it! We will be having that s38 swap party in no time.~ Puch Cafe. ~ Do business? feedback ~ Check out my leather company ~
Instagram: @BWeissLeather
Current cars:
~ '87 325 M30B35 swap
~ '87 535
~ 01 540 Msport 6spd
~ '06 X5 4.8isComment
-
It would be ideal to have the groves cut deeper to give me a little clearance now and to make future plans involving cams/larger valves possible. To be honest i'm tired of stripping this thing down and sending parts out. Ive been reading up on acceptable PTV clearances and im going to run the .058".Originally posted by The Dark Side of Will View Post
My crowns are not ceramic.
I sure hope so bud. The party has been long overdue.Originally posted by F34R View PostComment
-
Keep in mind that the overhead cam valvetrain will not have NEARLY as much flex as the pushrod valvetrains in Chevies have. Your clearance shouldn't increase much at all with the checking spring vs. the real spring.Originally posted by ttrousdell View Post
If I built a Chevy and it had .060 difference in PTV between checking spring and running spring, I'd be very concerned.
If you send the pistons back out, it'll be another 2-3 weeks now, but in a couple of years, you'll be *REALLY* glad you did. I haven't regretted any of the "It would be that much better if I did X" decisions I made that caused the build to take longer.
I highly recommend ceramic coating for the crowns and moly for the skirts.Comment
-
wow, I don't know how I missed this thread but YES, S38 POWER!! Great to see a proper rebuild, I'm sure it will pay off in the long run. It looks like you already replaced the water pump with another b36 pump, is that correct? Have you decided the rest of your cooling system yet?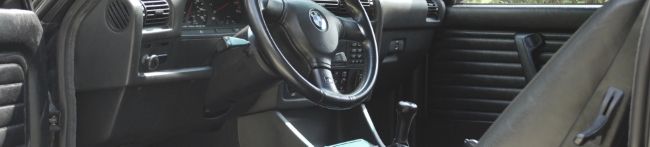
Comment
-
I retested the PTV clearance carefully and got .063" this time. I spoke to a few shops that specialized in these engine and even with .058" i will be fine with the stock valve train. It would have been beneficial to send the pistons back out for deeper reliefs and have then ceramic coated but for now im going to run it as is. In the future ill have deeper pockets and more patience for that.Originally posted by The Dark Side of Will View Post
Thank you again for the advice Will. You have dropped a lot of knowledge on this thread.
Im running the b36 water pump. I have a custom radiator that will fit in the front with a few modifications. As for getting the thermostat housing to fit, ill deal with that later in the build but I have no problem cutting and welding the bay to get it to fit.Originally posted by fronton View Post
It was now time to put the head together. Throwing the valves back in the head.
Lower head back on the engine and torqued down
There is no gasket between the lower and upper head. You need to lay a coat of gasket maker. Don't forget the 6 o-rings that seal the spark plug holes.
Upper head put on. In goes the tappets.
Cams laid and a test was done to see what shims I will need to have all the valves adjusted properly. When I received the head back from VAC I could either grind the valve tips to get the clearances between shim and cam within range or get new shims.
After setting the timing several times on this engine I found it very difficult to try and get the chain on while both the cams and the crank were at exactly TDC. It was much easier to turn the crank a few degrees counterclockwise for a little slack putting the intake cam sprocket on. Once everything is attached turn the crank back to TDC where you should feel the chain tighten up again.
Last edited by ttrousdell; 05-02-2013, 01:01 PM.Comment
-
Some more of the engine as is. It still needs to have the new valve shims put in, distributor and cam cover installed, rear main seal, oil pan put on. Once that is done ill throw the flywheel and clutch on, bolt up the tranny and drop her in.
Comment
-
Great build!!! Subscribed!!!!Comment
-
yyyyeeeeaaaahhhh
Comment


Comment