
Nice work man! Got everything looking good. Definetly a quality build done right. :)
-
Originally posted by RoysneonOriginally posted by MarkD -
Thanks Sam! :)
Worked on the M-Tech all day instead and got the bay striped. It's loaded on the trailer to go to paint shop to get a quote. Then it's off to my Oma's house to sit for god knows how long till the M50 goes in. :/

Comment
-
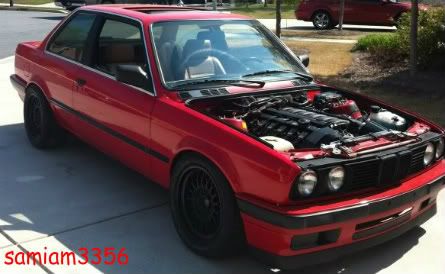
Oh yeah, still need to clean this too. The cabrio can't sit outside. Tomorrow is going to be non stop.

Comment
-
I'll do an update later, but a pic for now.

Comment
-
A little teaser of this weekend's progress.


Comment
-
Apparently there's a character limit....
Well le damn its been a while.
So much to type, but here it goes, 200 pics BTW....
I guess I'll start with the day before the S50 went in.
Here's some shots of the bay. The bay isn't perfect to say the least, but it's an engine bay. It ain't going to be perfect.


There use to be a bracket here
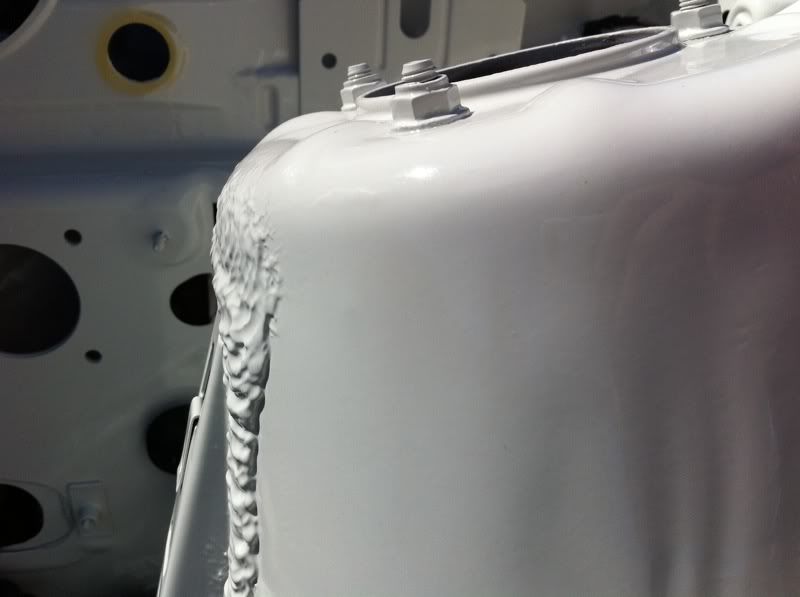
They made be plates to fill these, but I wanted the car back, so they will weld them in when the car goes back for the exterior paint


Before I put the engine in, I wanted to get some stuff out of the way. The master included one of these things.
Old
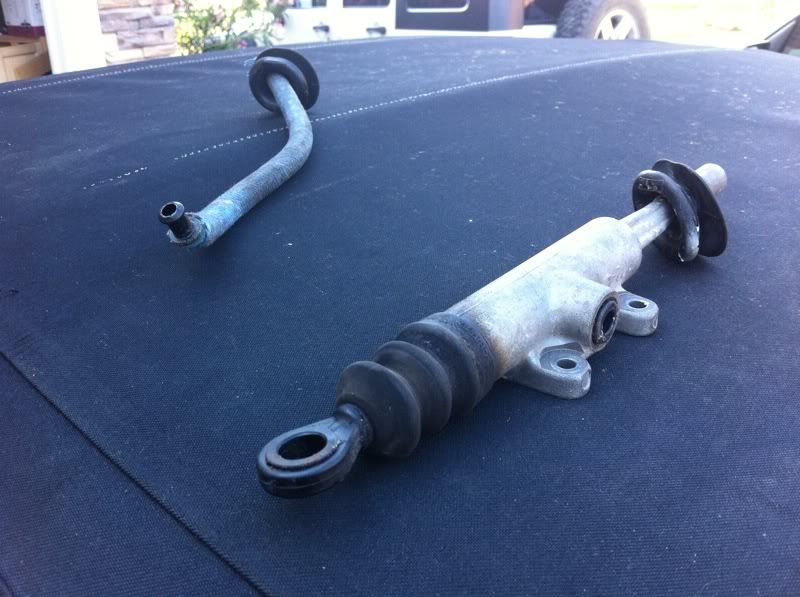
New w/new hose

E34 M50 throttle cable


Firewall insulation in
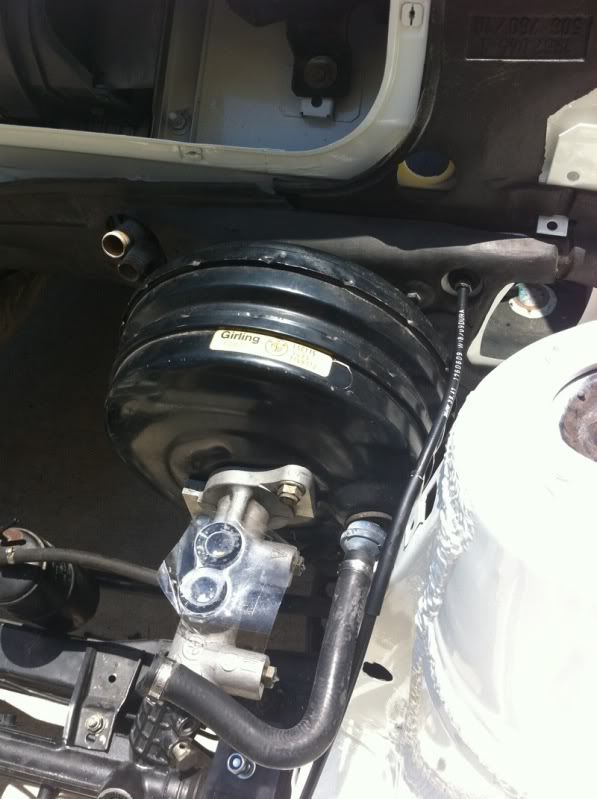
Next up was the booster. Flexy extensions and are your friends here.

5 min job with this^^^. Little did I know I would be taking that booster out 5 times before I was done with it.
Note the hole in the brake pedal to get at the booster nuts

I had to twist the clevis a few turns to get the pedal where I wanted it. Don't forget to put the pin in and clip it.


Let me point out the difference between the E32 booster and the IX booster. What we have here is the IX booster. Note the Girling sticker and the location of the vacuum hook up next to the strut tower. The E32 booster I have for my 4 door is exactly the same, except for the location of the sticker. Basically it's upside down when compared to the IX booster. You have to flip the IX booster upside down to clear that strut tower if you use the stock vacuum booster. In this pic I had not yet, but it gives you the idea.
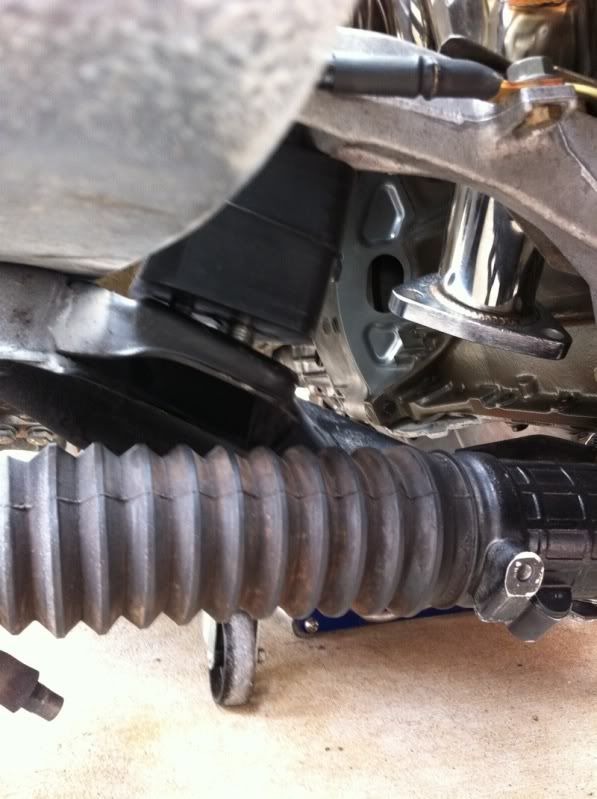
Grinded the firewall down a bit to accommodate for the new angle the E36 rack gives the column.

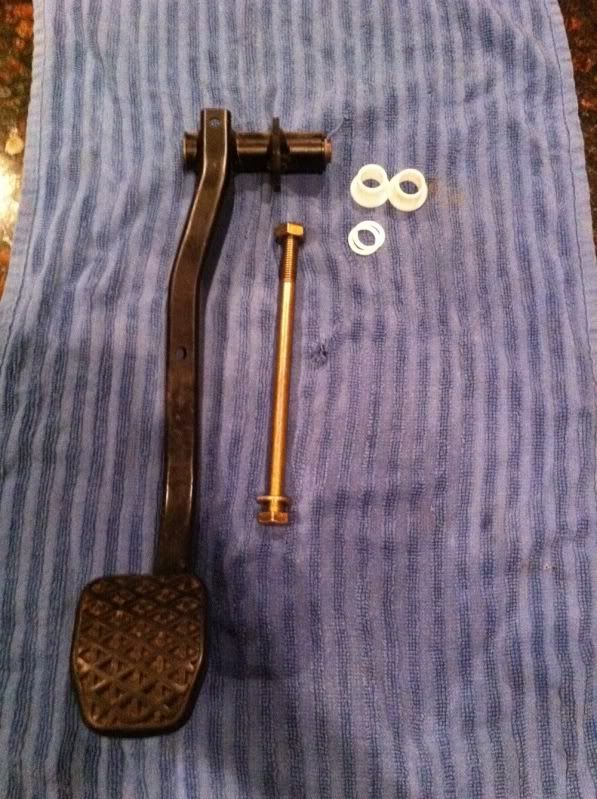
After all that I decided to install my UUC clutch arm bushings. They are made of Delrin, ridiculously expensive, and supposedly never go bad. My clutch squeaked so meh I ordered some.
Here's what you get for $20, some plastic and vague instructions. It isn't the least bit hard to do.

What you will be looking at:

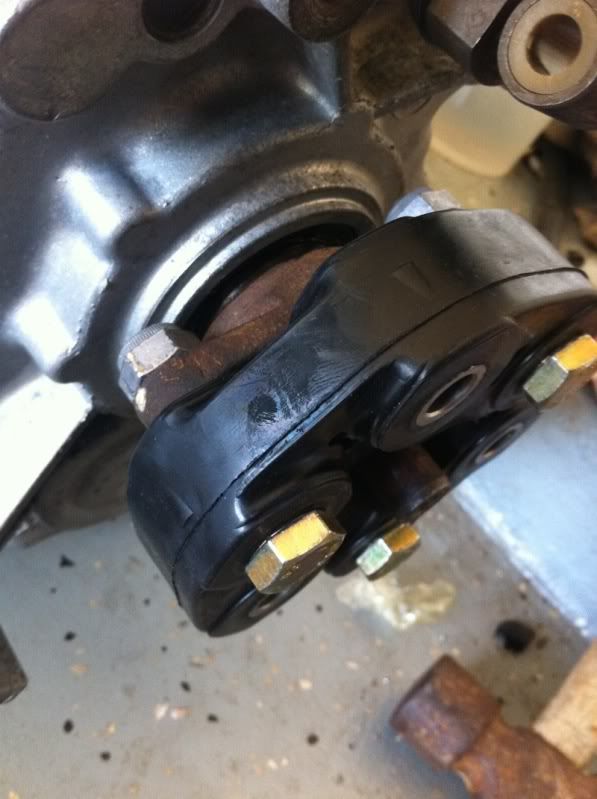
There's a nut under here.

Undo the other side

Undo the new master

Once everything is removed here's what you will have
Old bushings

Old stuff out. Everything just pulls apart

You can see the wear

Axle grease to the rescue again!

Push onto the rod. This is what everything pivots on.

Back onto the clutch arm

Reinstall everything and see if there is any play. If there is, use these two included washers to adjust for it.

That mangled rubber bit is what the tension spring hooks onto. It's a good idea to replace it. There's a couple down there, see HERE
Everything reinstalled

BTW do not forget to reinstall your brake lines before you put the engine in, makes things a little difficult. Ask me how I know....Comment
-
Now onto when the S50 went in.
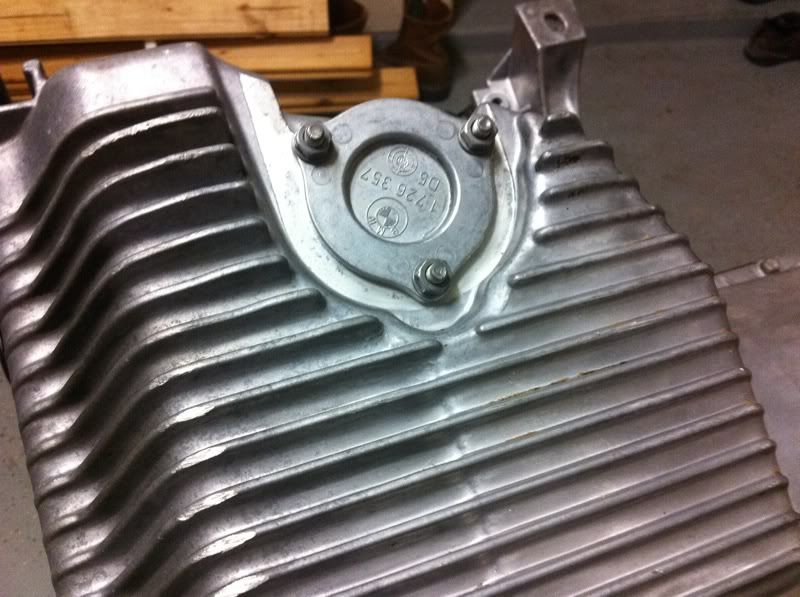
I finally got the cover for the front tranny seal off. I used a wrench to pry it off after I removed the 10mm bolts.

Old seal out after some negotiation

Used a big ass socket to get the new one in

Result

A light smearing of high temp silicon

Back together


Removed the rear seal. To get the output flange off you need a 30mm deep thin walled socket. Advance Auto parts sells one that's a perfect fit. It's one from behind the counter. I'll find the part # if someone asks.

After the new seal was in I greased the output flange to help getting it on.

Big ass socket again

Re-torque the nut

Moved onto the tranny. This little bit allows you to connect the shifter linkage to it. DO NOT FORGET THE PLASTIC BUSHING! It's yellow and you insert it in the middle. I ended up forgetting to install it and had to redo that whole process under the car, in short, it was extremely unpleasant experience.
This is fairly simple, that metal pin that is held in place by that clip is what keeps everything in place.


Guibo installed with new hardware. Note the directional arrows

Rolled the S50 out to mount up the tranny

Here's the difference between the 325i and 323i throw out bearing. The taller one is the 323i. I ended up installing the 325i in a lapse of sense. I should have installed the 323i since I have the 323i flywheel. We will see how it pans out.

AKG swap mounts. One side is taller, this side goes on the exhaust side.

I then spent the next two hours cursing the transmission. No matter what I did it wouldn't seat all the way. The problem ended up being the shaft on the trans had surface rust. Said surface rust is bad for a tight tolerance bearing. 1000 grit sand paper solved this and on it went

This now gets us to the pics I "teased" almost a month ago.
Sofie's new heart going in. Last one that was in here was a S52.
It went in after some man handling and removal of the AC tensioner bracket.

Dem headers......
Rolled into the garage

Ran into this problem.

This was because of my spacing I had done on the rack. Since I know there's going to be times when I'm going to slam it on the coils, I wanted to compensate for bump steer. To do this you move the rack up a bit. Well moving the rack up made the engine sit on the steering rack causing crap not to line up right and the engine not sit on its mounts right.

So to fix this I took the engine hoist and lifted it up a bit. You do not need to do this to get to those nuts. On a side note, it's actually much easier to get to them with the S50 than when the M42 is in.


You can see my wrong spacing. These washers need to be on the top.

Problem solved.

Comment
-
Ok for the swap you have to modify the shifter arm. Here's the new stuff, including more UUC delrin bushings. Note: The dismantler send me E36 bits, I didn't realize this till I went to install the shifter linkage, so if anyone has a spare E30 one, I would be grateful. :)

The old bushing comes out using the shifter to push it out

Grease up the shifter and bushing. See the squareness of the bushing opening? This is what allows you to slip it on.


Pop it in, note the "tabs"

They need to be in place. Keep pushing down till you hear two clicks. (Both sides seated)


After remembering that I need to modify the shifter carrier and what I had just done was now pointless, I got a hold of my 240 carrier. Note the length difference.

Here's the stock G260 linkage mounted up. Note the angle and offset.

Transmission mounts were sorted during this time as well.

Basically what I did is I chopped 2 inches off of the G240 carrier and bolted it together side by side. Looks shitty? Yes, but it's solid and it works. When I get the exhaust done, I'll see if they can weld it.


Modified linkage (This was the E36 piece I was talking about) Note it's too long to be clipped in place


Perfect!


Comment
-
Got bored and decided to screw with the BBK. Dem bolts were a bitch. To keep the rotor in place to remove the set screw, I tightened up a stud to stop the rotor from turning while wrenched.

"Dem" bolts

4ft of breaking POWER!


A few hammer hits later

New rotor, added a good 1.5 inches. :)

I haven't finished it since I'm missing the hardware, so I moved onto the brake fluid res.
Since I have an e36 harness, my diagnostic connector is on the passenger side. On the 318i/M3 cover there is a hole for the connector on the driver's side. Since I can't use it, I had I brilliant idea! (pardon the dirtiness, everything eventually got cleaned)

Basically to do this you need 3 things. A dremel to remove plastic, the harness cover, and a 318I/S blower motor cover. It is physically different from the 325i cover. So if you attempt to try this with the 325i cover, you will be disappointed as it won't fit. I tried. ;)
It's a simple process, just remove plastic and drill some holes. I ended up removing more plastic as you can see in the final pic. Just an FYI on the differences.


Some double sided tape to adjust for the angle and allow some give in the mounting.

Holes drilled and it mounted up.

From here on there's some random harness bits. I've done a lot to the body harness to get it ready to be put in. So much so there's too much at the moment to show you what all, so all I have are excerpts.

This is the dash harness. It is physically separate from the rest of the harness. It connects to the body harness via the C103 connector (that big white plug). On this harness you have the base connector for the hazards, rear defroster, flashlight charging base, glove box light, and the fog light connector base.

I added wires for the rear fog light. I ended up not installing it after all the work I put into it because I realized at that point if I did everything it would never be done. So long story short, I have the diagrams made and it uses factory everything and locations. Once you wrap the harness up, you wouldn't know it didn't leave the factory like this. This was the same goal I had in mind for this project below.

Basically I added a switched (green) and constant power (red/white) source to the harness for a future radio install. There's a ground below Hvac unit, so including it wasn't required. You can get the idea after this


Doesn't this look fun?

Since I'm running a BBK in the front, brake pad wear sensors are useless. So to delete them, all you have to do is loop them together to complete the circuit and tuck them back into the harness.

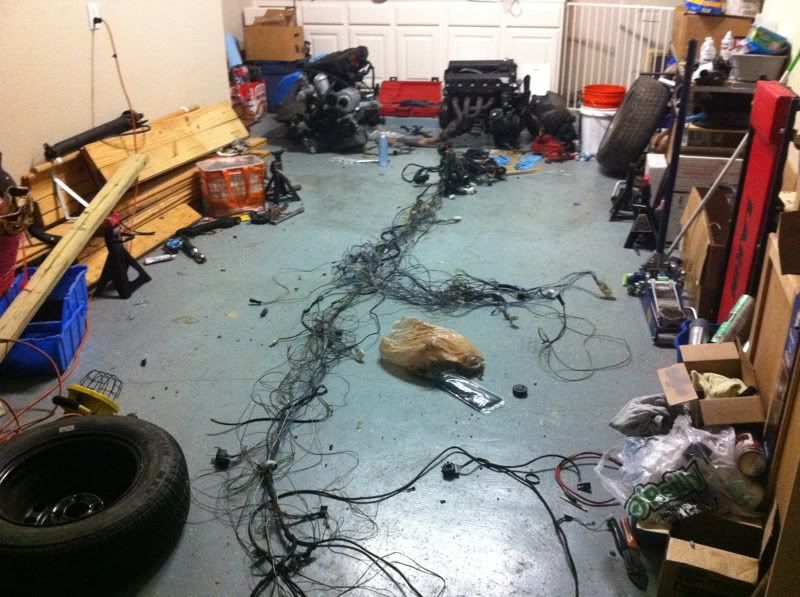
The next day I took the harness outside to untangle it and give it some kind of organization. Left is the new 325i harness and right is the old 318i harness.

Comment
-
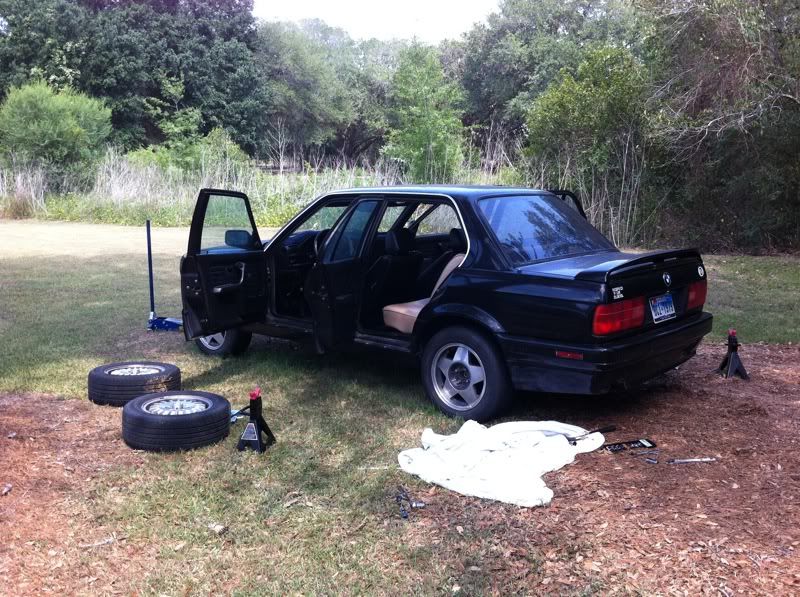
At this point the cabrio was moved outside to give me some more working room. The garage wasn't wide enough to do anything. To protect everything I threw my E90's car cover on it. You can kinda see the model bloat. That seam before the rear wheel is where the driver's door on my E90 ends (a 4 door). On the cabrio, that's where it's front door ends. What I'm getting at is the E90's front door is as big as a cabrio's which is the longest E30 door.

Any who harness moved into the garage until it goes into the car. I still need to do a few more things to it at this point, but it needed to be in an organized state for this to happen.
It's fan time

I'm using a Spal 14" pusher. 14" because it will fit on my AC condenser, more on this in a few weeks. All I did was transfer the resistor off of the stock fan to the new one. The stock resistor drops the voltage down to 9V till the fan switch hits a certain temp. When said temp is reached (87 degrees Celsius in my case) the resistor gets bypassed and it runs the full 12v. However the spal fan runs at 13.6v on full speed, so I will be keeping an eye on fuses to see what happens. If it does blow them, I will have to put in a resistors so max voltage doesn't go past 12v.
Model #

Wiring cut off of the old fan


End result after everything done. I reused the resistor since it was in decent shape. We will see how it holds.

By this time I still hadn't tracked down my 3.46LSD I wanted. So I visited my 4 door to grab its diff so I could at least move the car under its own power. On a side note, I discovered my flange bolts on the passenger side weren't even tight, in fact they were all loose which would explain my random vibrations I was getting in the car on the highway.

All out

Sold the bottlecaps to Kevin, so back to those terrible oversized tires for now.
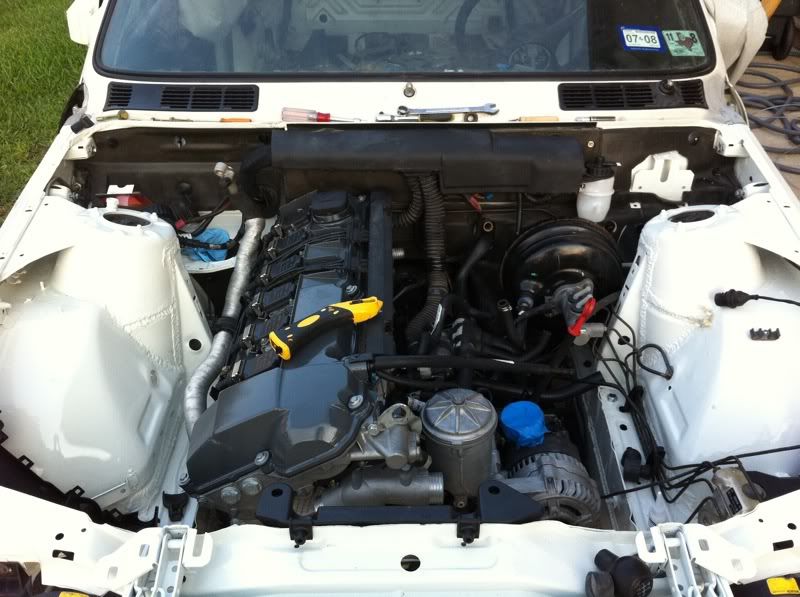
This is how the engine bay was looking by this time. You can see the brake lines, harness cover, etc sitting there.
One Thursday I decided to go get all of my fluids. It took an entire day tracking down everything. I've since fixed my coolant mistake. I was told Prestone wasn't good enough for my BMW. The brake fluid is temporary till I install the BBK. Then it will be flushed out and re filled with ATE Super Blue. Oil is for the first 100 miles or so to get all the crap out from sitting. Then I'm going with Liqui Moly. The MTL is for the tranny and the 75w90 is for the diff.

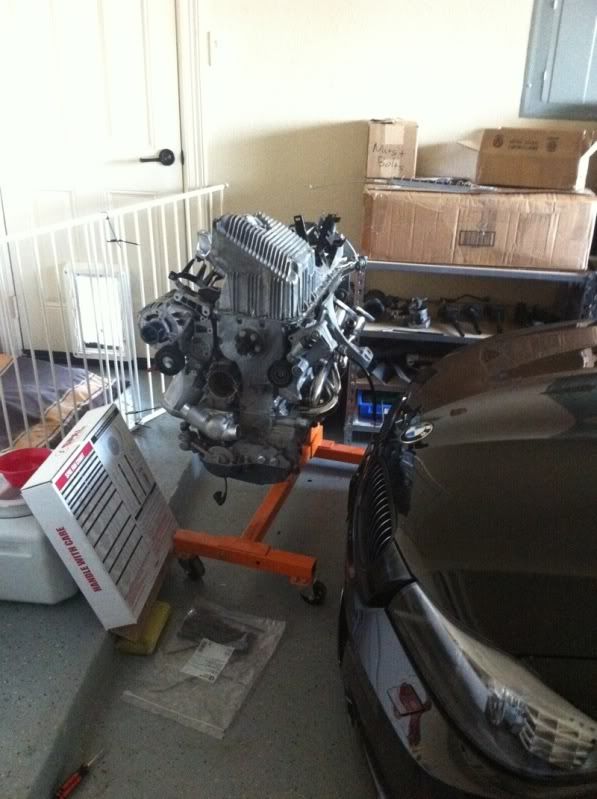
It was time for the cooling system. Quick shot of the engine chilling.

My radiator is a Mishimoto E36 all aluminum using an E30 325i over flow tank.


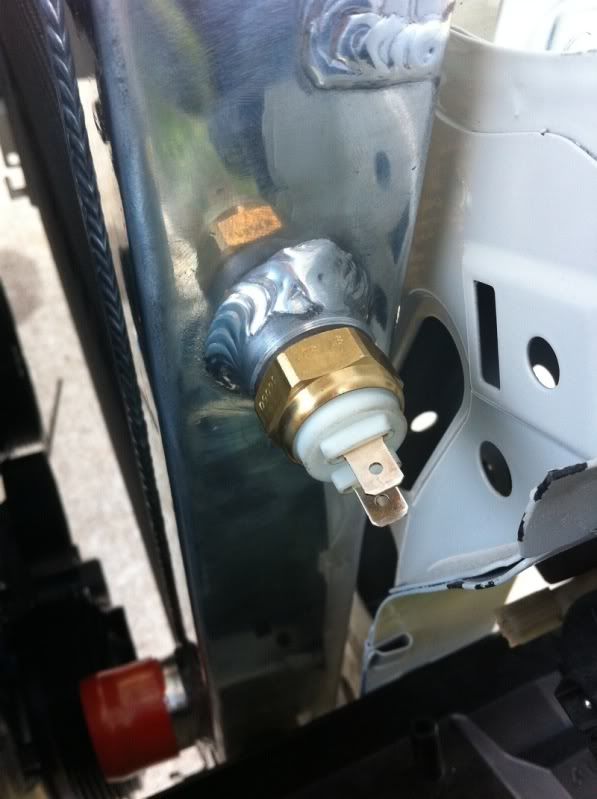
The 81/87 degree fan switch I mentioned earlier.
Hose clamp part numbers

New clamps mounted.

The hoses I used were a cut E36 lower hose and a standard E34 hose for the upper. I had a set of E34 and E36 hoses and this was the best combo for me.


New overflow tank and sensor

New overflow hose

Here is when I hooked up the res. You can get an idea how it went by the pics. Hopefully there won't be any air bubble issues, but we will see.


For the dip stick, I used the e34 mount utilizing only one hole. It's quite solid after everything is tightened.

I will be running my charcoal canister. It's there, might as well use it. To run it with the E36 arms and the stock location you have to tilt it by 45 degrees for it to clear.


Note the routing of the sensor. Small nipple goes toward the canister and larger nipple will go to the bottom of the throttle body
Oil being added. Basically I poured oil where ever I had access to. This meant taking off of the valve cover and pouring some on the timing chain, cams, and the oil filter housing, etc.


Comment
-
Some Stabil was added to the fuel. The gas that is in this car is 3 years old. It's not good nor bad, but I do not want it getting worse. At the time I had zero clue how much was in there as I was never able to power up the car to test the electrics.

Best way to work on a car, topless. ;)

Working on G300 I cut that I actually didn't need to cut to remove the harness. Those wires you see there go to the speed sensor, fuel pump, and fuel sending unit.


You can see the fins my dremel attacked to clear the booster. I still need to take the sander to them to take more away and make it look prettier.

Since I was going out of town for two days and we were expecting rain, cardboard was required to stop water pooling over the engine since there isn't a hood. ;)

God save the e30

Went sailing in the gulf for two days. We sailed from Port Aransas to Kemah. It was a quite pleasant two days till we were boarded in the Houston ship channel on our way back by US Customs. I have some pics of that for a later time. :)

That's Galveston in the distance.

Back at the Yacht club safe and sound

The day after that and recovering from my sunburns (I still managed to burn with 100 SPF), I went to the pickapull. I saw a E28 and took a look at it's diff. 3.25LSD. Not my preferred ratio, but it's better than nothing, plus it was $60. So out it came.
Great thing about the junkyard is if parts are in your way, cut them out! :)

Quite a task to do in 104 degrees by yourself! x-x

Also got an E36 battery cable. My car had a trunk battery retrofitted by the PO. However I was able to get a cable from him finally after enough pestering. :P

He told me to use the e36 cable as everything bolts up to the E36 harness without modifying. It is also roughly the same length. More on this on a later post.


Comment
-
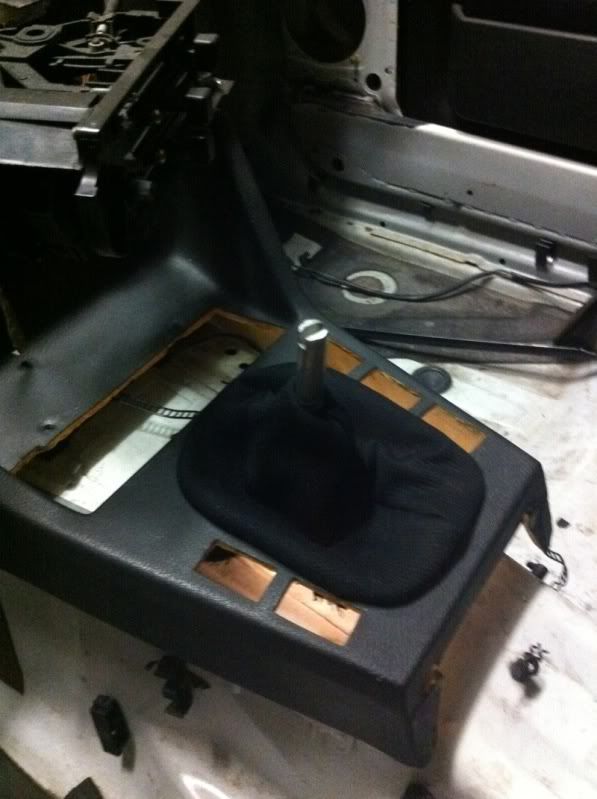
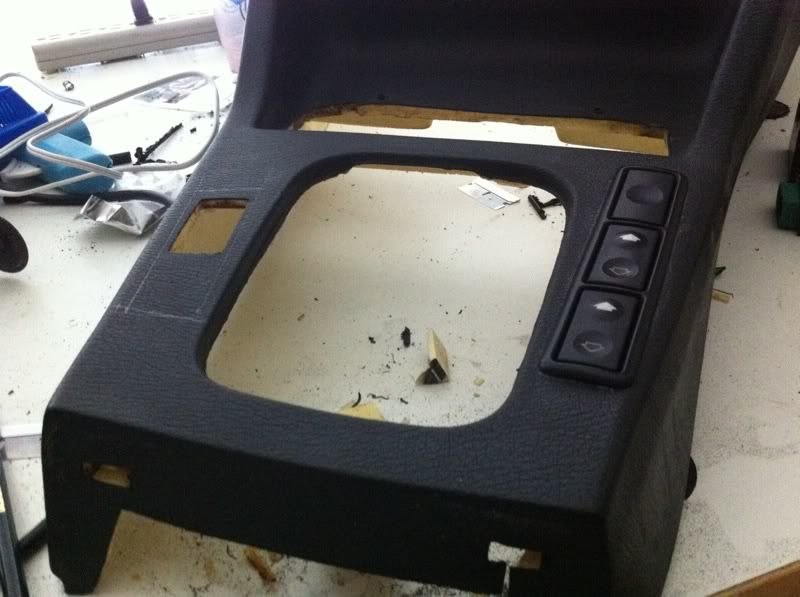
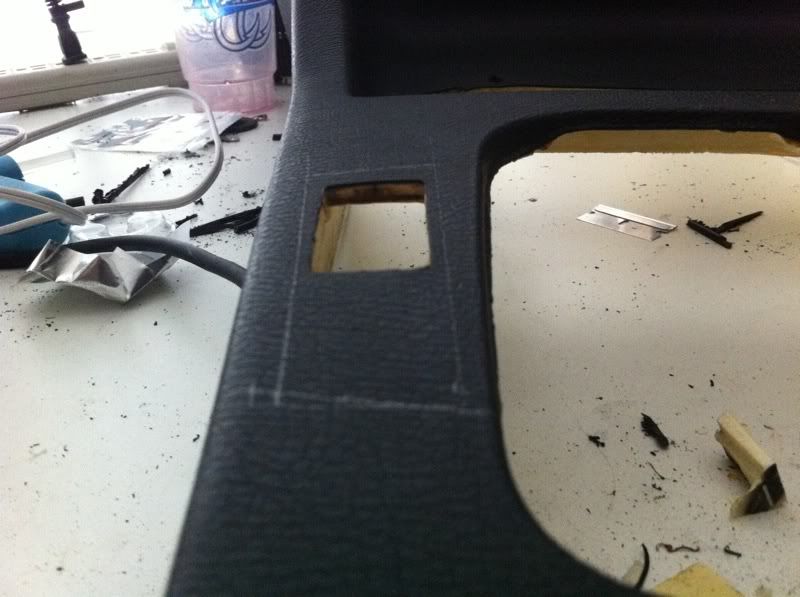
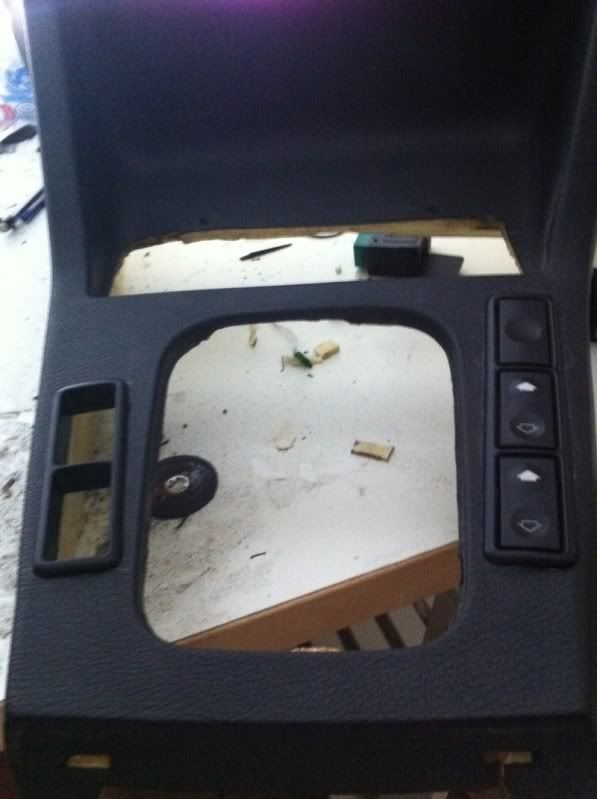
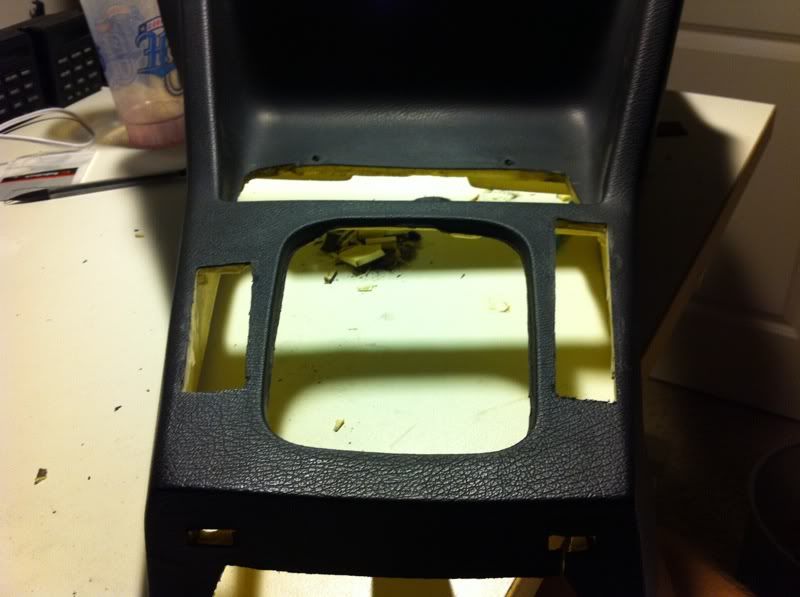
Moved inside and worked on the console I picked up at the yard. I used a two door console with the cutout for the breaker switch. I dremeled the right side to fit, then matched the angle on the other side with a ruler and a pencil.
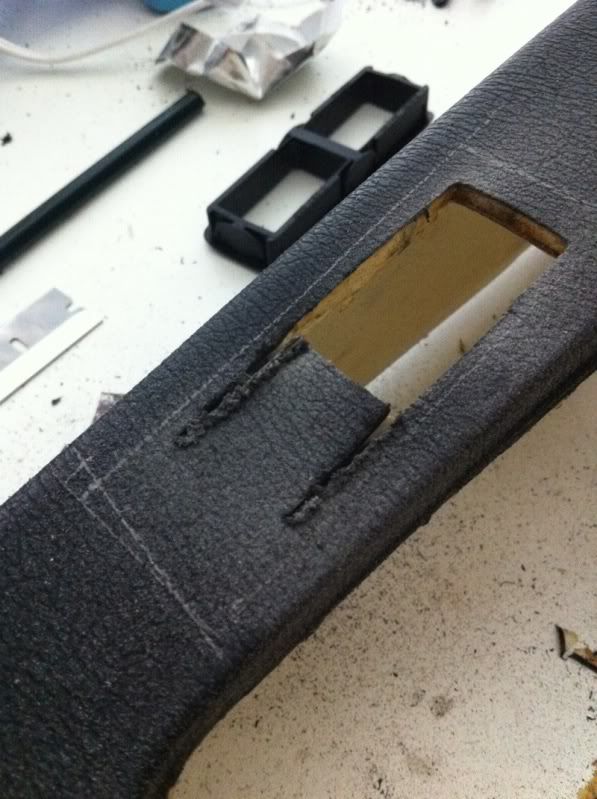
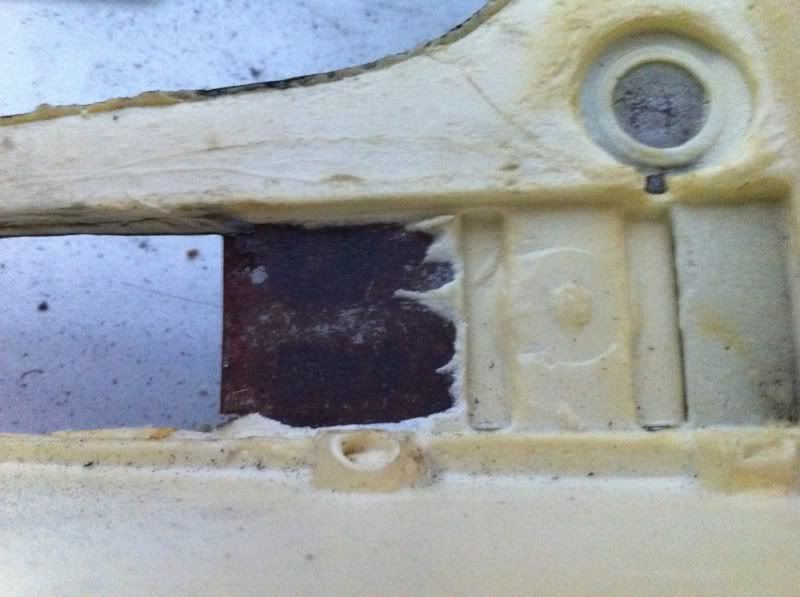
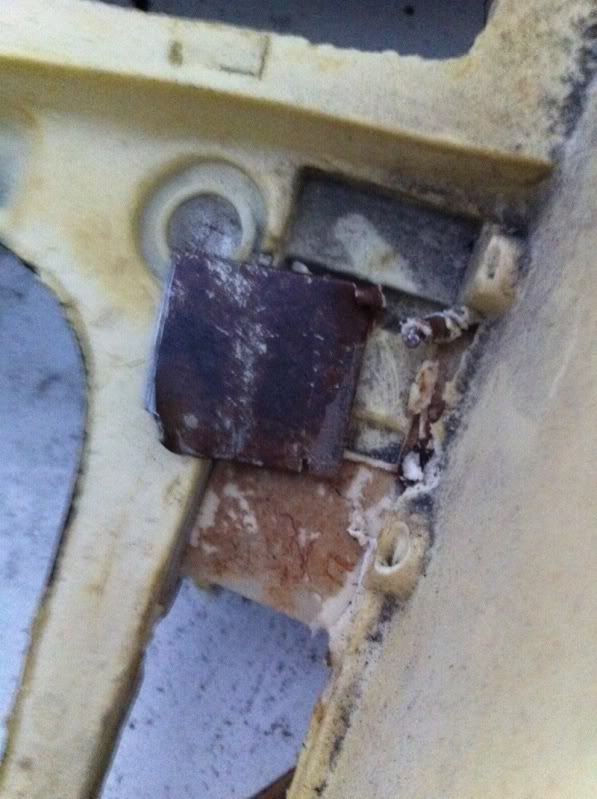
There's metal under the plastic and foam to form the shape of the stock cut outs. These have to be cut away for the switches to fit right.
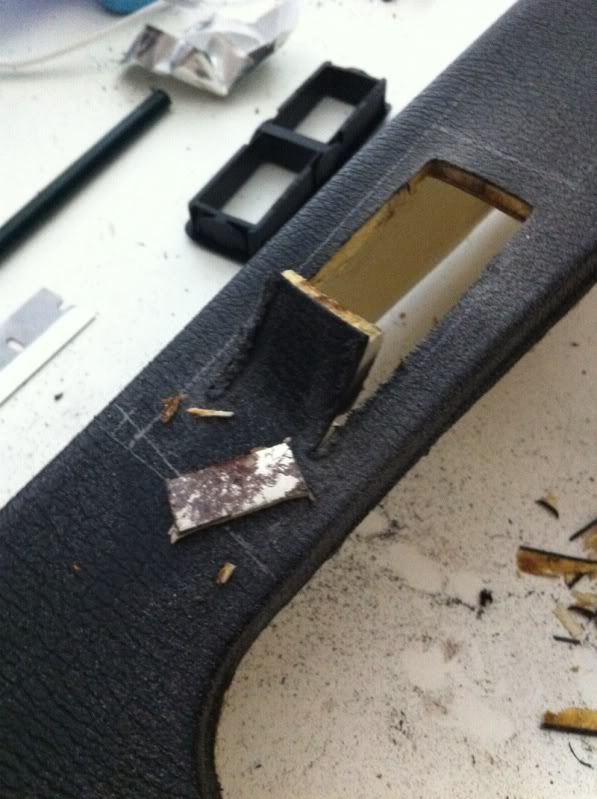
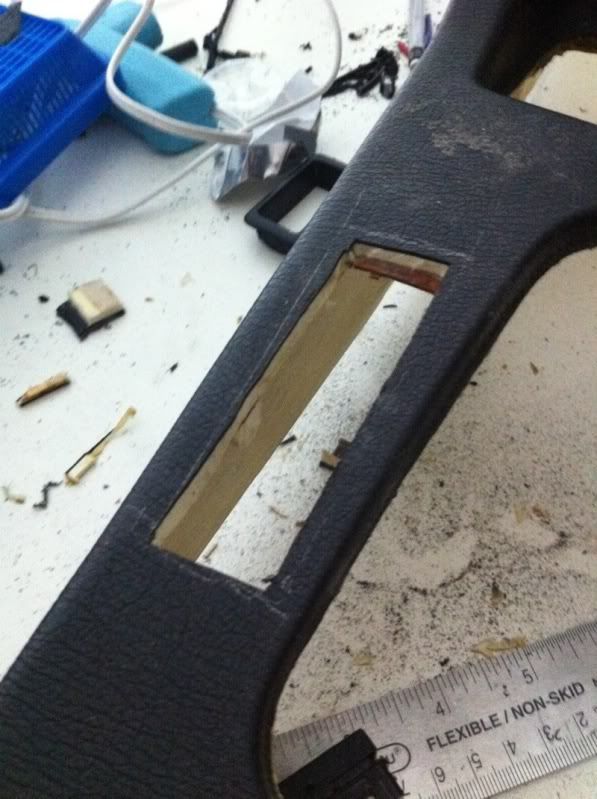
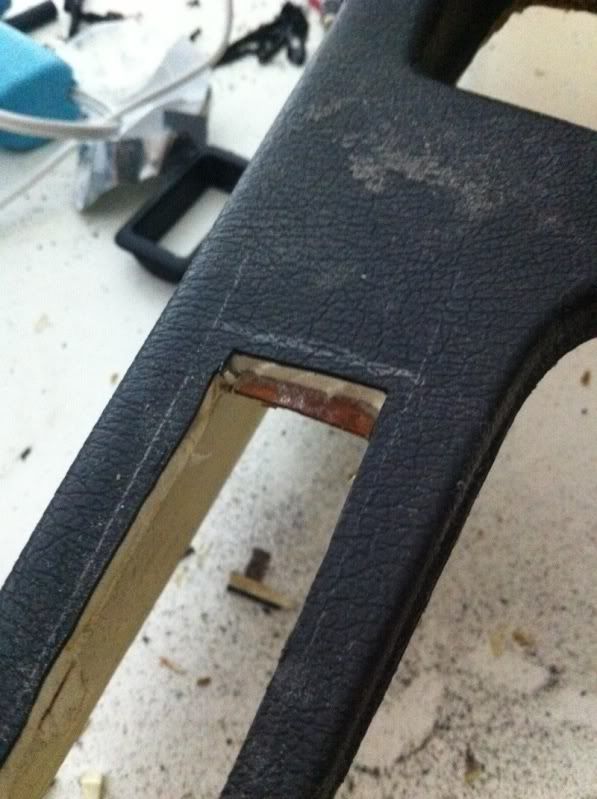
They are connected either on two sides or one side by more metal. The bottom had two, the top had one, so all I had to do was cut one side with the dremel, then pull it off with some pliers.
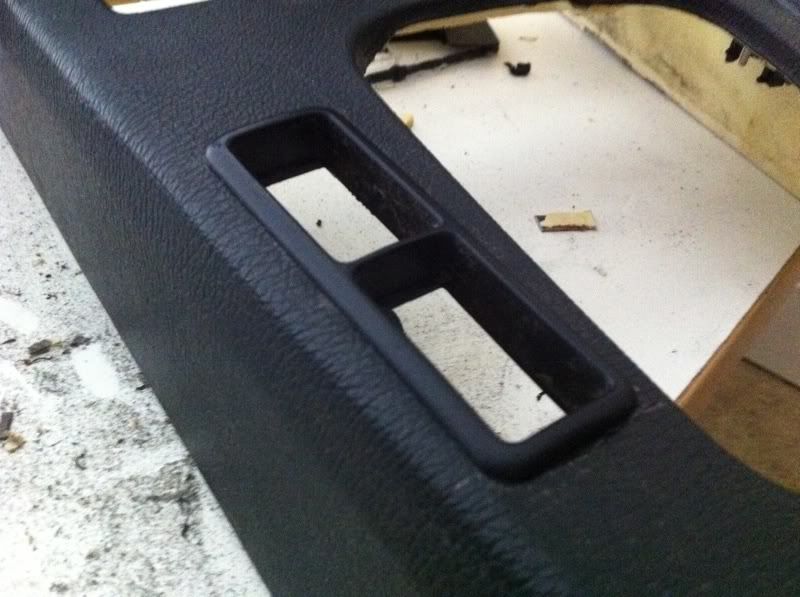
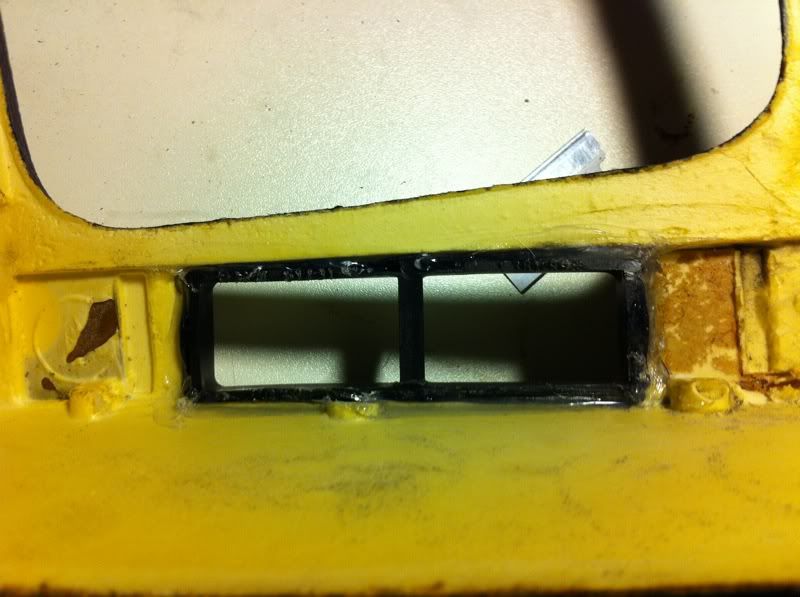
Bezeled mounted
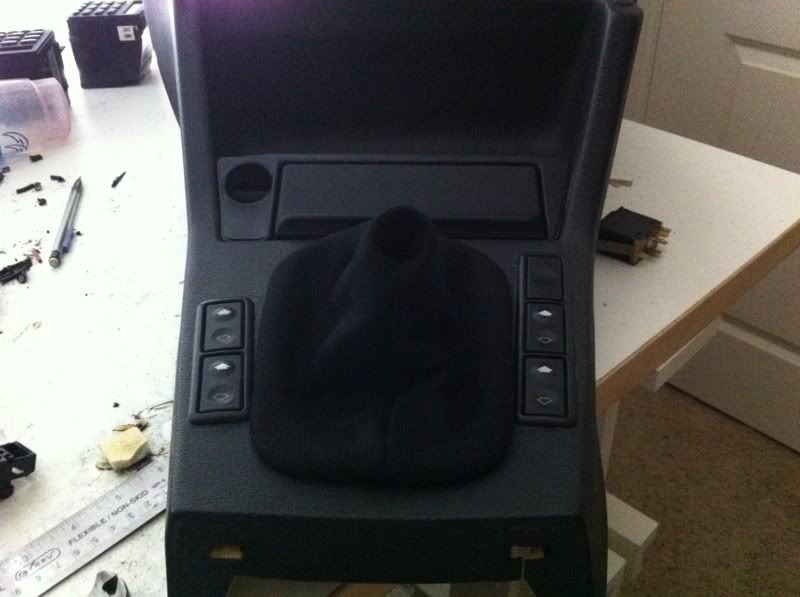
And everything mounted
What it looks like underneath
Dremel nicked it. You can also see the cut away.
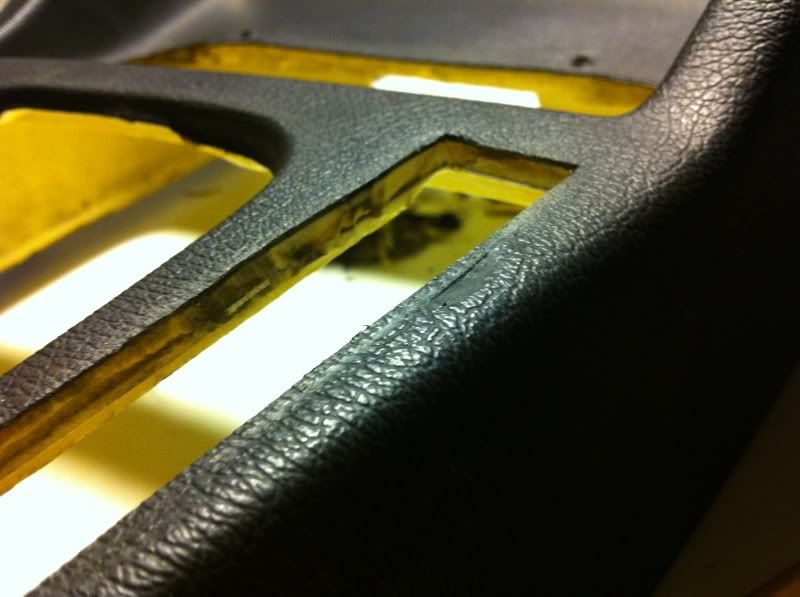
Bezels reinstalled and then hot glue was applied to fill the gaps and keep it in place.
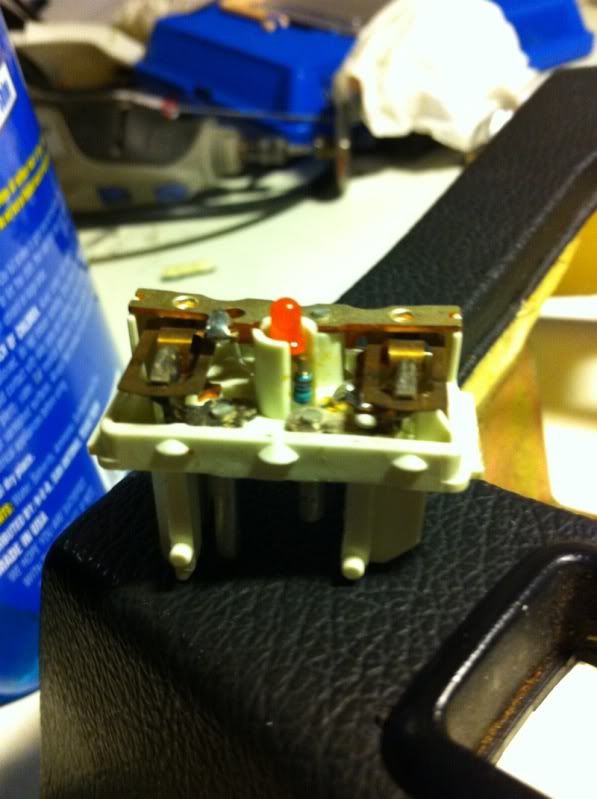
The type of E36 switches I have are the LED type out of a 93 318i 4 door. So no burnt out lights!
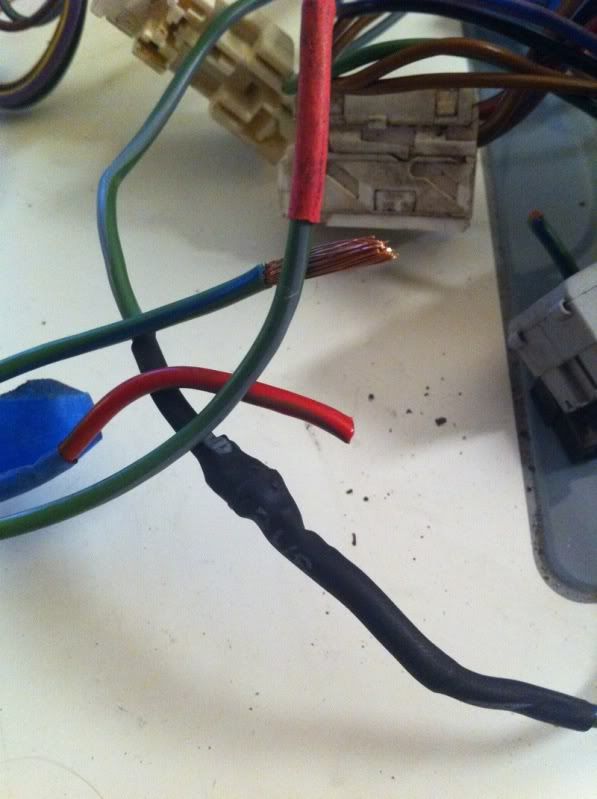
The day had finally came to install the harness back into the car. However when I was going over it one last time to check for any loose ends, I found this.
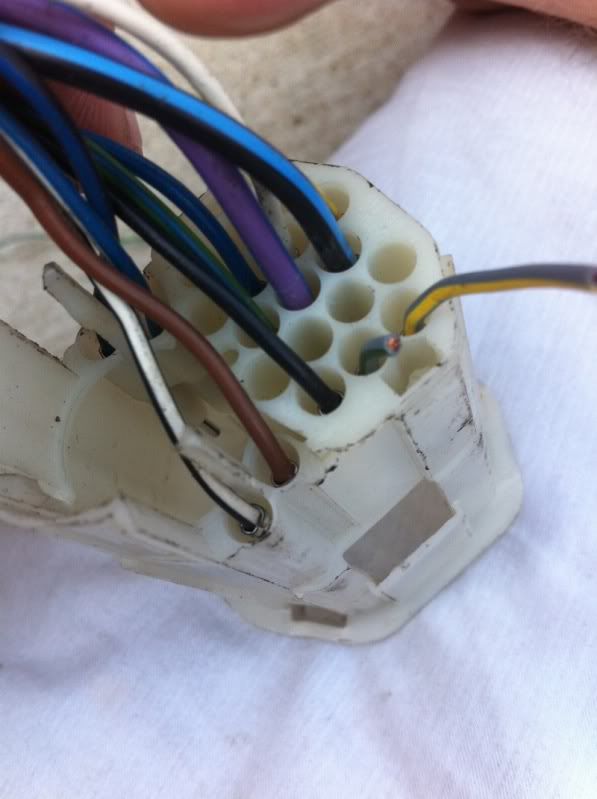
Two cut wires. One goes to the tweeter and the other I don't remember.
Pushed the old pins out and visited the old harness for new ones

The connector disassembled with the new pins

To reinstall, I had to do some cleaning first.


My God the wires!

The plan here is for the various sections, plugs, etc to be put in their proper location, then I will wrap everything up with new cloth tape.


Fuse box back where it belongs and a now sticky engine bay. Damn cloth tape...

Forgot to plug in the wiper motor


G100 was wrapped too short to meet the terminal. Luckily I had spare wire in there just in case that happened. So that was unwrapped to accomplish that.

Stalks installed
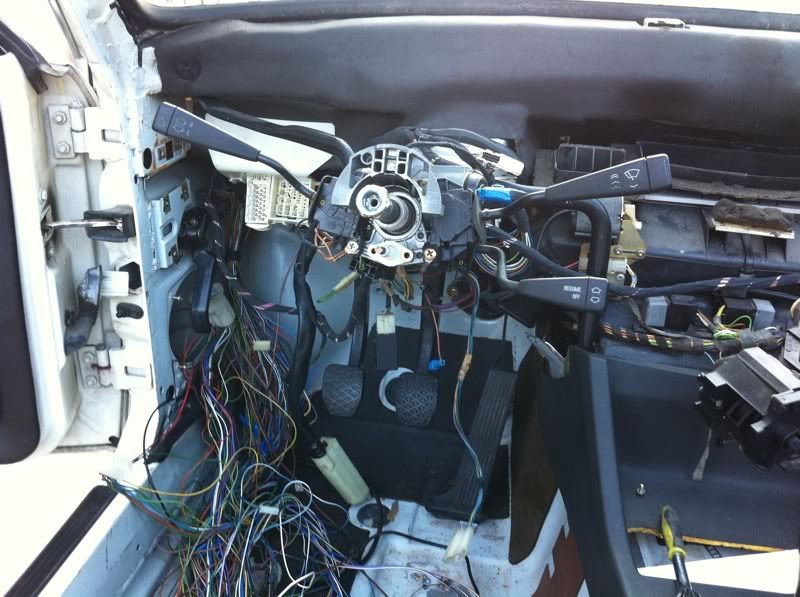
Note the general lack of dangling wires under the column, the way it should be! :)

This is the plug that connects the body harness to the door harness. I forgot what C number it is, but you get the idea.

A seal is formed when the rubber is pulled over the flange on the connector and inserted into the body harness connector. You are listening for a click to know you did it right.


Interior lighting and central locking relays

Starter installed. Since I lacked the stock bolts, new M10X75mm were used with locking nuts and washers.

With the harness back into the car, I could start hooking up the parts that were cut and left in the car. The fuel sending units are an example.

This bit simply left me stumped. I had 3 wires in the car, but only 1 on the harness. After spending the afternoon thinking about it and comparing the 318i to the 325i, I discovered I was an idiot. Basically one wire goes into the main fuel sending unit (the one on the driver side) through pin 1 on the connector. The main sending unit is the one that controls the gauge. (So if you are wondering which is bad, it's this one). The wire then comes out of pin 2 on the connector and connects to pin 2? on the low fuel sending unit (this is what makes the light come on). Think of this wiring part as an S Curve. /ranting of a crazy man


Tested to see if it worked. It did, I now knew how much 3 year old fuel I had.

Moved onto the wiring for the fuel pump and speed sensor.

The wires that lead to the speed sensor are joined together like speaker wire. One wire is brown the other brown/red. Those wires are suppose to lead to the diff, so I did just that.

For the rear brake pad sensors, I did the same as I did to the front.

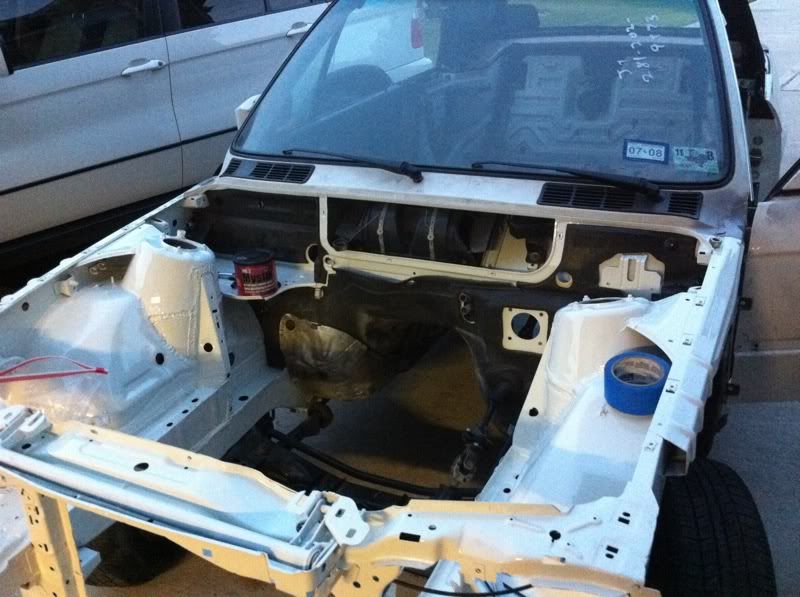
Move onto the front to what I did yesterday. For the past couple of days I've been screwing around with the wiring in the car and in the bay. I finally got around to trying to turn over the engine to get all possible crap out that might have accumulated in its 3 year sitting period. So out came the plugs and radiator to do so. I poured a little bit of oil into the combustion chamber and onto the intake valves. I then proceeded to crank the engine with a 22m socket on the crank rotating it to get all the oil moving in all of the engine before I tried starting it.

Kids do not let your terminals touch each other like me

I then ran into a slight problem. Half way through the stroke it stopped and wouldn't go any further, not I, the starter, or my dad could mover it. My reaction was to put it simply, "WELL FUCK". I already checked for nuts and bolts to find nothing. I couldn't figure it out other than rust. Which I thought my oil would take care of. So I left, defeated in the above pic to figure out something, this was around 8:30pm or so. Some of my Facebook e30 friends said to try some oils and ATF. I drove to the connivence store and bought some ATF. For a family that drives nothing but BMWs I'm shocked we didn't have any ATF for the power steering laying around.
Anyway before I went to put in the ATF, this was around 11:00 pm, I tried cranking it over again. Much to my joy, IT DID! The oil had finally soaked there enough to lubricate what ever surface rust was there! I did ended up putting some ATF down in there for good measure and left it to sit for the night.
And that's where I stand gents. Hopefully I will try to start it sometime today. :)
There will be a video of its open headers glory much to my neighbor's future annoyance.Comment
-
-
Details are awesome, must have taken double the time just due to the amount of photo's taken.Comment
-
The triangle thing... I need oneOriginally posted by glucklich21 View Post1989 M3
2008 135i 6spComment

Comment