Announcement

Collapse
No announcement yet.

My 325is project...

Collapse
X
 
  • Filter
  • Time
  • Show
Clear All
new posts

    My 325is project...

    Hey, picked up this alpine 1989 325is not to long ago as a DD, i havent decided exactly what my plans are for it yet other than suspension and eventually some wheels i will probably be doing a lot of small mods at first until i can get some funds. Im also open to suggestions. Hopefully i will be updating as much as possible with lots of pics enjoy!:p
    Click image for larger version

Name:	P3235760.jpg
Views:	1
Size:	118.3 KB
ID:	7220795

    Click image for larger version

Name:	P3235755.jpg
Views:	1
Size:	118.3 KB
ID:	7220796

    Click image for larger version

Name:	P3235753.jpg
Views:	1
Size:	112.1 KB
ID:	7220797
    Last edited by Harry's E30; 03-26-2011, 08:08 PM.

    BUILD-http://www.r3vlimited.com/board/showthread.php?t=242728

    #2
    Looks like a good start :D

    Comment


      #3
      sick rig there harry. now dump it to the MAGMA (it's lower than the ground).
      The Red Dragon V.5 1991 318iS / 2013 F800GT

      "You gotta fix the nut behind the wheel before you fix the bolts on the car"

      Comment


        #4
        haha hell yeah hopefully all have suspension on by summer.

        BUILD-http://www.r3vlimited.com/board/showthread.php?t=242728

        Comment


          #5
          tinted tails red today
          Click image for larger version

Name:	P3255785.jpg
Views:	1
Size:	85.4 KB
ID:	7130816

          BUILD-http://www.r3vlimited.com/board/showthread.php?t=242728

          Comment


            #6
            You should consider properly hitting those tails with clearcoat so they come out nice and shiny, instead of hazy.

            There is a good DIY with solid directions on how to properly perform the job.

            Comment


              #7
              yeah, i did use clear coat but probably not enough and in the picture it is still a little wet.
              all see how it turns out tomorrow and if it needs some more coats then all then all add them.

              BUILD-http://www.r3vlimited.com/board/showthread.php?t=242728

              Comment


                #8
                washed and waxed(valence has a bunch of chips in it and need to repaint it)
                Click image for larger version

Name:	P3265793.jpg
Views:	1
Size:	111.1 KB
ID:	7130851
                Finally finished removing the old tint it was a real pain in the ass but looks a lot cleaner.
                Click image for larger version

Name:	P3265794.jpg
Views:	1
Size:	76.7 KB
ID:	7130852
                Removed the destroyed door panels...
                Click image for larger version

Name:	P3265795.jpg
Views:	1
Size:	73.5 KB
ID:	7130853
                ...Replaced with these mint ones
                Click image for larger version

Name:	P3265803.jpg
Views:	1
Size:	73.1 KB
ID:	7130854
                Click image for larger version

Name:	P3265807.jpg
Views:	1
Size:	61.9 KB
ID:	7130855

                BUILD-http://www.r3vlimited.com/board/showthread.php?t=242728

                Comment


                  #9
                  what steering wheel is that? i like it.

                  1991 325i m20b25 5spd
                  GOES-R Systems Engineer

                  Comment


                    #10
                    its a momo daytona.

                    BUILD-http://www.r3vlimited.com/board/showthread.php?t=242728

                    Comment


                      #11
                      put blackout tape over the trim.
                      Before
                      Click image for larger version

Name:	P3275808.jpg
Views:	1
Size:	84.1 KB
ID:	7130879
                      After
                      Click image for larger version

Name:	P3275810.jpg
Views:	1
Size:	98.5 KB
ID:	7130880
                      Click image for larger version

Name:	P3275812.jpg
Views:	1
Size:	102.4 KB
ID:	7130881

                      BUILD-http://www.r3vlimited.com/board/showthread.php?t=242728

                      Comment


                        #12
                        Looking good! How long did it take you to do the blackout tape?
                        sigpic-Thanks warren

                        Comment


                          #13
                          thanks, it took about 30 min but i only had to do the bottom pieces.

                          BUILD-http://www.r3vlimited.com/board/showthread.php?t=242728

                          Comment


                            #14
                            I don't know what this tape is, but I'd like to try it before paint I do believe.....looks like the car is going in the right direction!
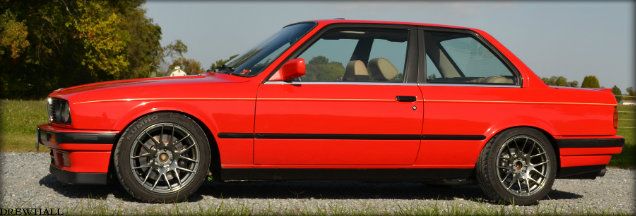
                            Comment


                              #15
                              Seems like it would last better then paint. P.O. painted them on my car and it looking like shit. Looking into this tape for sure.
                              sigpic-Thanks warren

                              Comment

                              Working...
                              X