Announcement

Collapse
No announcement yet.

316 superlite

Collapse
X
 
  • Filter
  • Time
  • Show
Clear All
new posts

    Originally posted by kid325e View Post
    This is a sick build. I love the two colored sides of the suspension components, not so much for the aesthetic appeal but because it's a race car thing. We want pics of the pistons!
    Thanks :)

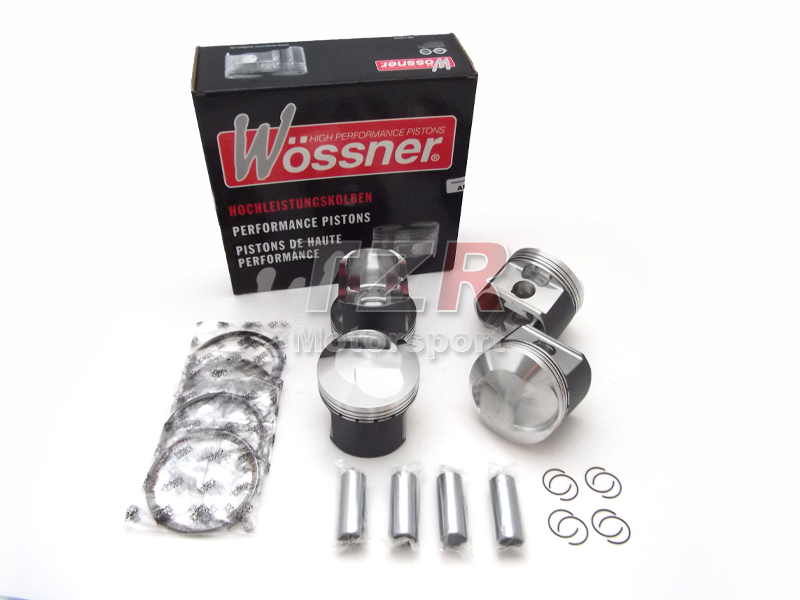
    I don't have them yet. These are the best pics I could find:
    - für MKB: M10B20 mit Halbkugelbrennraum - Verdichtung: 11,8:1 - Kompressionshöhe: 43,5mm - Technische Daten finden Sie im Produkt.


    So, some head grinding ahead.

    Comment


      Originally posted by kid325e View Post
      This is a sick build. I love the two colored sides of the suspension components, not so much for the aesthetic appeal but because it's a race car thing. We want pics of the pistons!
      Piston pin is shorter than stock and with thinned ends:


      Compare that dome to a stock TII piston. Plus these are with 1 mm higher compression height. I don't have a scale on hand right now but they sure feel light.


      Pic quality is bad as always..

      I've got an unused original set of Mahle 90,00mm pistons for the TII head if anyones interested. Going cheap. I was going to use them before I got these.
      EDIT. Disregard that. Pistons SOLD!
      Last edited by petrolhead; 09-06-2015, 05:30 AM.

      Comment


        Inspired by the "what did you do to your E30 today" topic.
        Today I just cleaned the garage a bit, inventoried parts a bit, aand I've been just tapping my fingers waiting for the machinist shop to call.
        Looked at the unfinished ITB adapter plate with a worried face. Fiddled with the radiator fan trying to come up with a clever way of mounting it.

        And I set myself a deadline when the thing has to be MOT'd and on the road. This means not doing many of the fancy stuff I like to plan about.

        I did weigh the pistons. The set is a grand total of 0,848kg lighter than Tii pistons so the standard rods should remain happier. Next up would be test assembly of the crank with pistons and measure how much they're over the deck height. Then off to a CNC guy with the pistons and cylinder head, because obviously the mugs will have a too high comp. height and the dome is monster compared to the combustion chamber it'll occupy. All this, if the machine shop doesn't phone me with any ill news like "your block is cracked" or we dropped your pistons.
        EDIT.. disregard that. I got my stuff back :) :)


        Playing with my new dial indicator


        Heat shielding for the version 3.2 muffler:


        ..I was happy to notice that the sway bar drop link mod A) works at all and doesn't collide with stuff and B) works just like I imagined it would. I set the drop link mounting points so that when you have steering angle, one side will push and the other link will pull a bit. So in straight line it works like a thin sway bar it is, but during cornering it has pre load even without actual roll.

        Tie rod inner ends arrived. Once I get them installed, and make one last brake pipe, all the suspension and brake stuff is done.
        Last edited by petrolhead; 09-12-2015, 10:37 AM.

        Comment


          I moved the fue tank a bit rearwards. Still tight fit with the muffler.


          I'll line the tank forward egde with this:

          2,80€ from the grocery store :D

          Comment


            Good call on the heat insulation, vapor lock is no fun :(

            Comment


              I'm more concerned that fuel might heat a lot and resulting fumes might make it go boom.
              On the other hand I have a returnless fuel line. No fuel returns from the fuel rail/engine bay so stuff in tank should remain cooler because of that. I understand that fuel travelling back and forth the engine bay and tank transfers a lot of heat... (?)
              Not exactly sure by what you mean by vapor lock.. but I do have a collector tank in between, that should separate air/gases from fuel going to the pressure pump and filter.

              :D Luckily I'm building a low power machine so heat should also minimal :P

              Comment


                I painted my tank white to try to reduce fuel temp a bit. What the hell a can of enamel is pretty cheap.
                Never argue with stupid people, they will drag you down to their level and beat you with experience. -Mark Twain

                Comment


                  Enjoying the pix
                  NASA
                  BMWCCA member
                  PCA member 25yrs


                  1991 318IS slick top
                  1997 M3 sedan
                  2001 325CI DD

                  “whoever turns the wheel the least, wins"

                  Comment


                    Steering joint angles are not too bad.


                    Standing on it's own


                    ..Ordered a bunch of stuff for the engine. Pictures & words when I get them.

                    Comment


                      I'll have to make an oil dip stick and pipe of my own, so I checked with an 1983 motor where the MAX level is supposed to be. Surprisingly low comprared to where the moving parts are. Other consideration would obviously be that undersides of cylinders must be able to breath between them, freely. And ofcourse oil level must not be so high that it blocks the oil return in blocks exhaust side, because crankcase breaths to valve cover through the oil retun. Anything else that I'm missing? I'm thinkin that I could fill my engine way higher than stock max-mark. Opinions?


                      Obvious reasons for wanting to raise oil level.. Less chance of the pump sucking air. Greater oil volume means lesser temperatures. And no, a dry sump pump is not in the budget right now. I'm living on tap water and eating shoestrings even now, with all the neccessary parts I'm getting. I'm even postponing oil pump/oil pan mods because they're not essential to getting this thing on the road. Well that prevents me from movin engine and trans toward the cabin but I'll do it later.

                      Moved her on to the lift to do a few things on the underside.


                      Engine and parts waiting patiently in the left background.


                      The radiator I'll be using:

                      Should it turn out to be insufficient, I've got a larger 318iS radiator at hand, and it fits the same mounting points.
                      A lot of cooling efficiency can be found by using the "tunnels" before and after the radiator plus I'm going to seal the edges. Front tunnel is supposed to create pressure on radiator front surface, even small gaps will bleed it away.
                      Changing the pressure cap from 1,4 to 2 bar item also raises the system's efficiency.

                      Cooling fan mountings, work in progress. That's a small diameter fan but I was surprised at how much it blows. Again, if it turns out to be too small I have another, bigger fan on the shelf that bolts up to pretty much the same mountings.


                      Semi finished
                      Last edited by petrolhead; 09-21-2015, 07:22 AM.

                      Comment


                        Some of the stuff I ordered, arrived


                        Still waiting for rockers, rocker shafts, flywheel bolts & plate, transmission (mounting) T-headed screws, shock adjustments tools.... plus something I forgot about..
                        aaand I need to get me more Wössner piston rings because I screwed up filing :/.
                        Last edited by petrolhead; 09-23-2015, 10:20 AM.

                        Comment


                          What a project. Enjoying the updates. Great work.

                          Comment


                            Originally posted by e30s50dan View Post
                            Enjoying the pix
                            My cell phone camera is a potato but hopefully they're clear enough to get the message across :)

                            Originally posted by David9999999 View Post
                            What a project. Enjoying the updates. Great work.
                            Thank you.

                            Installed the pistons to block. A bit tricky to measure how much the top land is over deck height, since almost the whole piston top is domed.

                            So, I found TDC with a dial indicator, then just put a feeler gauge next to piston like in the pic and try with another feeler which is higher. Accurate enough? My measurements varied from "bit over ,85mm" to "a bit under ,95mm" over the block. Feel free to comment/advice, this is new territory to me :) !


                            Anyway.. If I assume that pistons are 0,95mm over block (to be on the safe side), and buy a 0,066" head gasket, that would give 0,72mm piston to head clearance.

                            Measuring how deep the valve pockets are in relation to deck height @ TDC felt a bit tricky too. Anyway they are lower than deck height. With 2,6mm TDC lift the valves shouldn't collide. I need to verify this but hopefully no piston grinding is needed.

                            Friend told me he's halfway through soldering the engine management box.. New black roof lining or whatdoyoucall the roof upholstery in under work. It'll be without any of the rear seat belt etc. holes.

                            A few parts arrived


                            -The old crankshaft rear seal had eaten a groove in to the crank. Nothing too big. It looked like the new seal's lip is a bit deeper toward the engine. Also I'll be assembling that seal "frame" with sealing compound instead of an OEM paper gasket, that also moves the crank to seal contact point away from the groove.
                            Last edited by petrolhead; 10-02-2015, 08:40 AM.

                            Comment


                              I dropped the cylinder head off to a guy who has a CNC-machine at his garage, he'll grind the combustion chamber edges. Like I might have mentioned, I haven't even tried to calculate or measure the CR. Piston maker quotes 11,8:1 but that depends on what head is the starting point for grinding, head height, block height, gasket thickness etc.. My guess is prettydamnhigh :1. My cam is quite aggressive, so with it, the dynamic CR probably won't be too high.

                              Pictures and words when I get it back..

                              I managed to grind off a massive 25 grams per connecting rod. Atleast now they're all +-0 grams to eachother in weight. I use rods from an E30 M10, the old Neue Klasse rods that I have were even heavier than these.
                              Last edited by petrolhead; 10-02-2015, 11:52 AM.

                              Comment


                                Crank back from maching shop. Just polished, no other stuff done. Here's hoping that the journals haven't gone thinner. I measured the clearances and bought the bearings BEFORE I realized the crank had scrathes.. Possibly scratched by the same mystery shit that had scraped a mark to no. IV piston skirt. I've used assembly oil generously, kept everything clean and left parts protected from dust etc. when I finish. But my garage isn't exactly a laboratory.


                                A 0,066" thick Cometic head gasket with 91mm holes should be on it's way. Well, I'm anticipating a long delivery time but anyway. The nice people from Cometic told when I asked them, that the catalog-gasket with 90mm holes might be a bit too close for 89,93mm piston that is 0,9mm above deck. Managed to change my order.

                                Surprising difficulty with the pistons/ head work. The machinist told me the combustion chamber cant be opened enough for the piston domes, he'd hit the valve seats. First solution that came to mind would be to machine the domes a bit narrower, then copy the shape to combustion chambers.

                                edit.. I got the clearances right. Standard "blue" bearings on no. 1 & 2 journals, STD on others :


                                -they're 0,01mm per part tighter ..as I'm sure you all knew :)


                                Garage mate did the ECU assembly. I'm OK with basic electrics stuff on cars, but soldering circuit board is not my cup of coffee.
                                Last edited by petrolhead; 10-17-2015, 09:37 AM.

                                Comment

                                Working...
                                X