Announcement

Collapse
No announcement yet.

Project revival. Finally getting back to it.

Collapse
X
 
  • Filter
  • Time
  • Show
Clear All
new posts

    Project revival. Finally getting back to it.

    Hey guys-I thought I would make a thread about the revival of my project. I bought my '88 325is way back in 2006. It had 205,xxx miles on it, and was in almost perfect, completely stock condition. I was so paranoid about the T-belt snapping that I had the car towed straight to a shop to get it changed! I bought it for $1650 from a kid who wanted to get a Honda. His dad was trying to convince him to keep it while I was checking it out! 3 people called about it while I was looking at it too, which only made me want it more. I was lucky enough to find an "is" model, even though I didn't know what that meant at the time.

    The color is Bronzit (not my favorite) with a tan interior (also not my favorite). The paint was in ok condition, but the clear was just starting to go. I liked the car the way it was, but was already wanting to lower it and get stiffer springs almost right away. I also wanted to find a black interior at some point, since the tan interior just wasn't my thing. Here are a couple of pix:
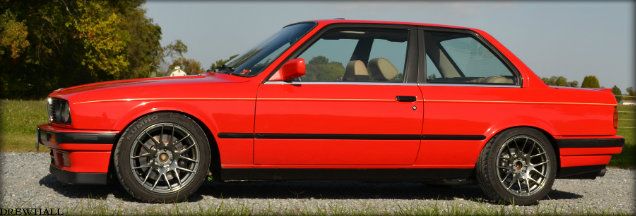
    Exterior:


    Interior shots


    I'll try to update this thread as I work on the car. I'll be a bit slow, but this is a long term project anyway. Thanks for reading!


    #2
    Looks super clean. Wish my driver seat wasn't all torn up!

    Comment


      #3
      Suspension time

      Thanks! Yeah, it was pretty clean for having so many miles. The previous owner took pretty good care of it.

      Ok! Time for the suspension! I got tired of the squishy 4x4 suspension pretty fast and wanted something more sporty. I went with the tried-and-true H&R Sport springs and Biltein Sport shocks. The install was pretty easy, this being a pretty basic suspension. The tie rods took more banging than I thought to remove but in the end came out fine.


      Front:

      Before:


      Comparison:


      Removing spring:


      Removing gland nut:


      After:


      Much better!

      Comment


        #4
        Nice work. The rear suspension is even easier!

        Btw keep the divingboards!

        Comment


          #5
          Thanks! I know the rear is super easy. I did all this work years ago. I'm just finally putting it all together into a project thread. I had the diving boards on for a while, but decided to go with the plastics.

          Comment


            #6
            Originally posted by e30serg View Post
            Thanks! I know the rear is super easy. I did all this work years ago. I'm just finally putting it all together into a project thread. I had the diving boards on for a while, but decided to go with the plastics.
            Good idea!
            For all things 24v, check out Markert Motorworks!
            Originally posted by mbonanni
            I hate modded emtree, I hate modded cawrz, I hate jdm, I hate swag, I hate stanceyolokids, I hate bags (on cars), I hate stuff that is slowz, I hate tires.

            I am a pursit now.

            Comment


              #7
              Nice car!

              Check out my Delphin thread for my full black interior conversion process, day and night difference.
              Ping me for photo sessions: ISOlution|Photography

              Comment


                #8
                Looking good. I'm running the same suspension setup.
                sigpic
                Parts Wanted
                The Never-ending Resto Mod

                Comment


                  #9
                  Originally posted by dandan1 View Post
                  Nice car!

                  Check out my Delphin thread for my full black interior conversion process, day and night difference.
                  I will!

                  Comment


                    #10
                    Originally posted by blocke View Post
                    Looking good. I'm running the same suspension setup.
                    Thanks!

                    Comment


                      #11
                      Well, time to post the rear suspension pictures. I swear the rear suspension couldn't have been any easier! I did have to use spring compressors on the springs since they were just a little too long for some reason.

                      Old stuff:


                      Comparison:


                      New stuff:


                      Well, here's the way it sat before the suspension settled. So much better than stock!


                      Also installed new rubber pads and upper strut bearing on the front. Oh yeah, I also got the windows tinted. After having it for a few years, I think I'm going to go with 45% all around for a more even look. We'll see.
                      Next up, SSK!

                      Comment


                        #12
                        looks like a great start. that thing is cleann man
                        -FREEDOM- is cruisin at 80, windows down and listening to the perfect song-thinking "this is it"
                        -The Beauty in the Tragedy-
                        MECHANIC SMASH!!- (you all know you do it)
                        Got Drop?? ;-)
                        Originally posted by JinormusJ
                        But of course
                        E30s are know to be notoriously really really really ridiculously good looking

                        Comment


                          #13
                          nice to see another bay area member! :D
                          she's looking good.
                          Last edited by Pantless Spency; 02-29-2012, 12:08 AM.

                          Comment


                            #14
                            Thanks guys! Working on these cars is pretty fun!

                            Another update. So, after tightening up the suspension, i decided the shifter was way too loose. In comes in the UUC SSK. The installation was a bit of a pain, since I had to remove the exhaust to get at the bitch clip.

                            I used a small flat screwdriver to lever off the clip. it was a little hard to reach since the driveshaft sits right below the shifter arm. Easy does it! You can feel your way around until you find it. First impressions? Wow! The throw is so much shorter than stock! I'm digging it! Feel really good to shift now. Nice and tight!

                            Exhaust out:


                            Before:


                            Comparison:


                            SSK Parts:


                            SSK assembly:


                            After


                            I also replace the front clip and the rear bushing.

                            Comment


                              #15
                              Make sure to loctight those small screws they back out a little and the shifter makes a click found when changing gears.
                              And it's a pain in the ass to retigten those screw with the shifter install in the car.


                              -
                              Project
                              Parts for Sale
                              Feedback
                              YouTube Channel

                              Comment

                              Working...
                              X