-
Now the the front clip sheet metal won't be in charge of supporting the structure at all, I needed to tie the two front frame rails together again. This is how they looked after removing the brackets for the 'diving board' front bumper:
Passenger side, prepped with weld-through primer and ready to be patched:

Extendsions tacked in place:
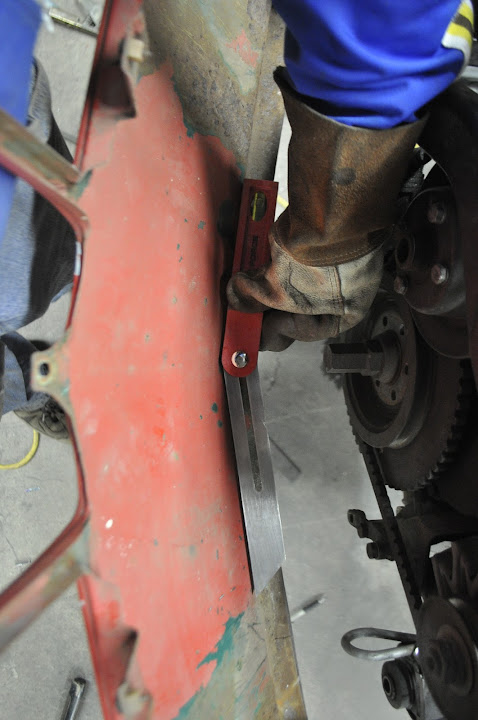
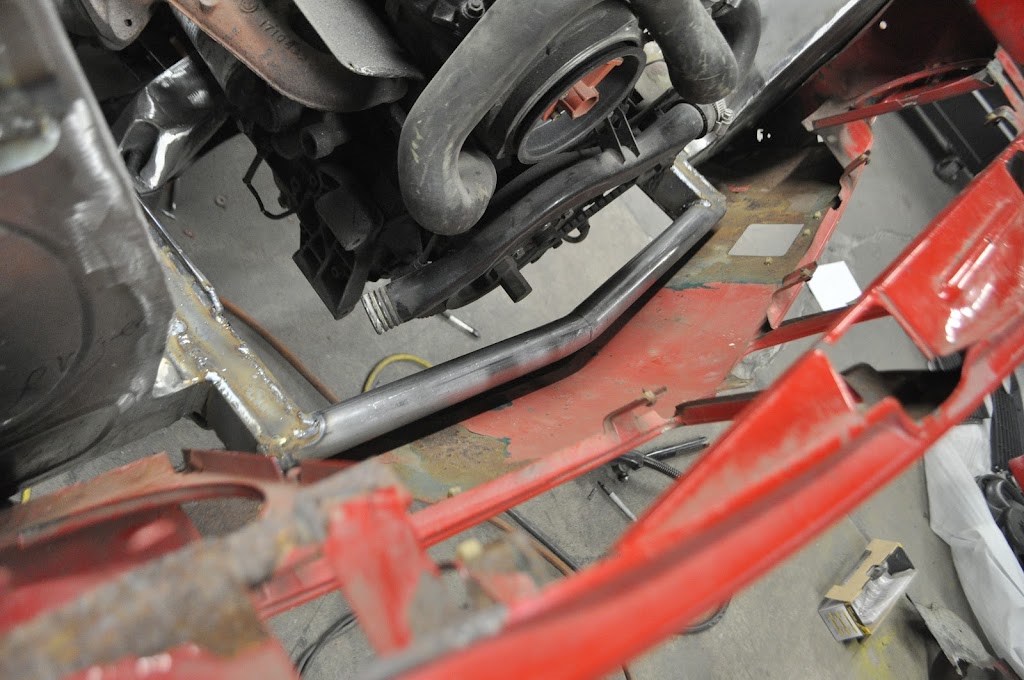
With both sides tacked up, it was time to make up the cross bar. I decided to use the same 1.5" DOM tube that the roll cage will be made from. The first step was to measure the angle needed to fit the nose panel:
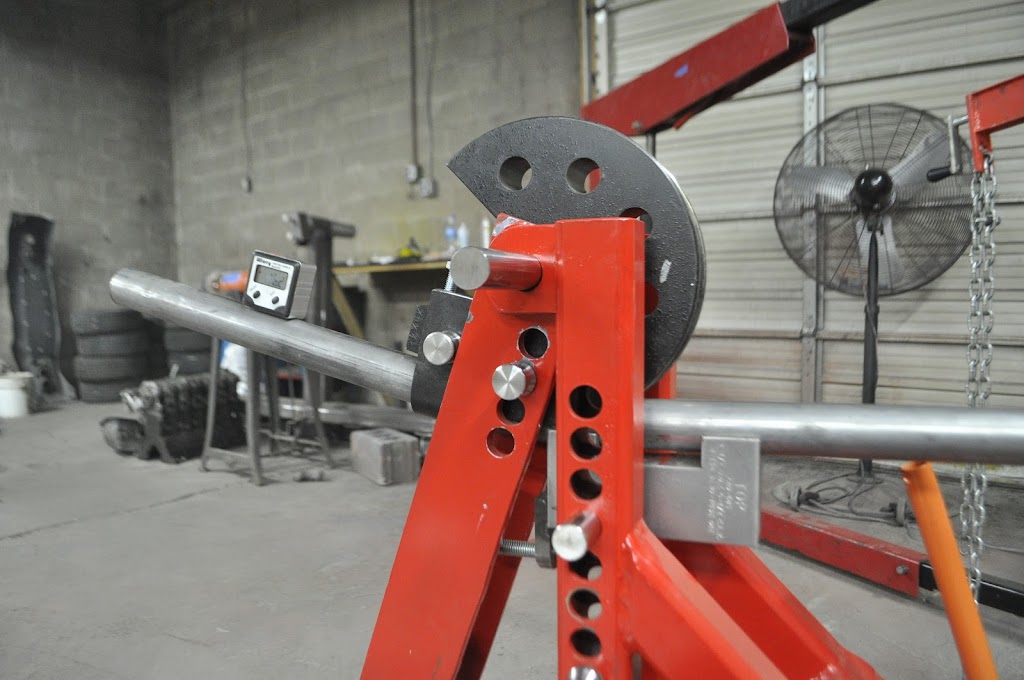
Then I used the bender to bend stuff:
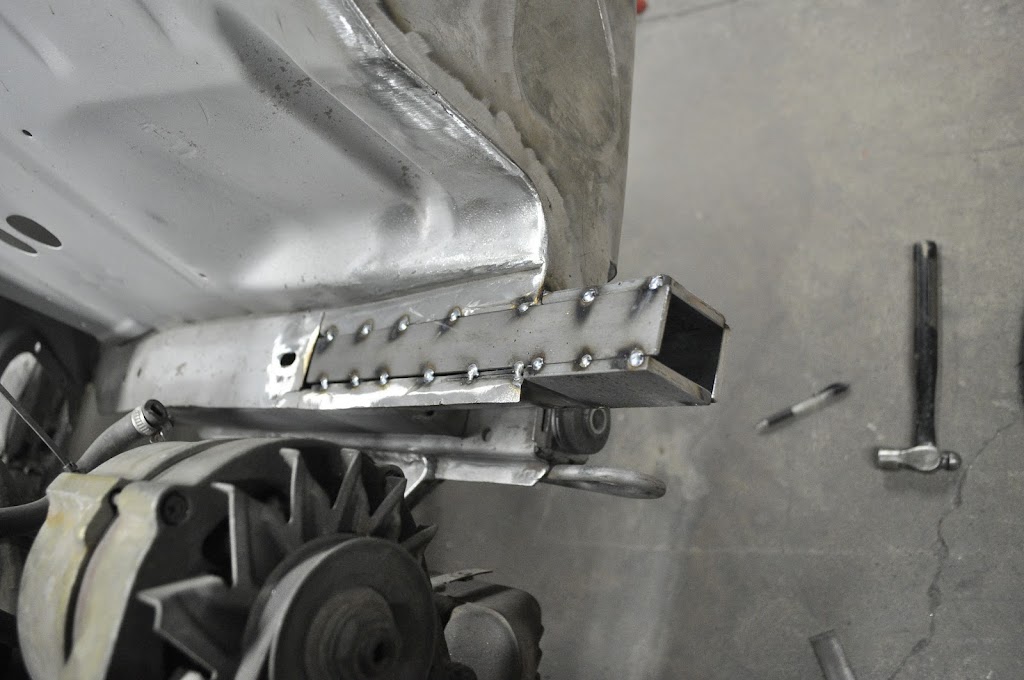
Then I cut and notched the tubing to fit onto the front frame rails:

And here's how it fits with the nose panel in place:
With the cross bar in place the next steps will be to mount the radiator and figure out how I'm going to run the coolant lines. I also need to get the last turbo flare ordered so I can mount the front turbo parts and make the necessary body modifications.
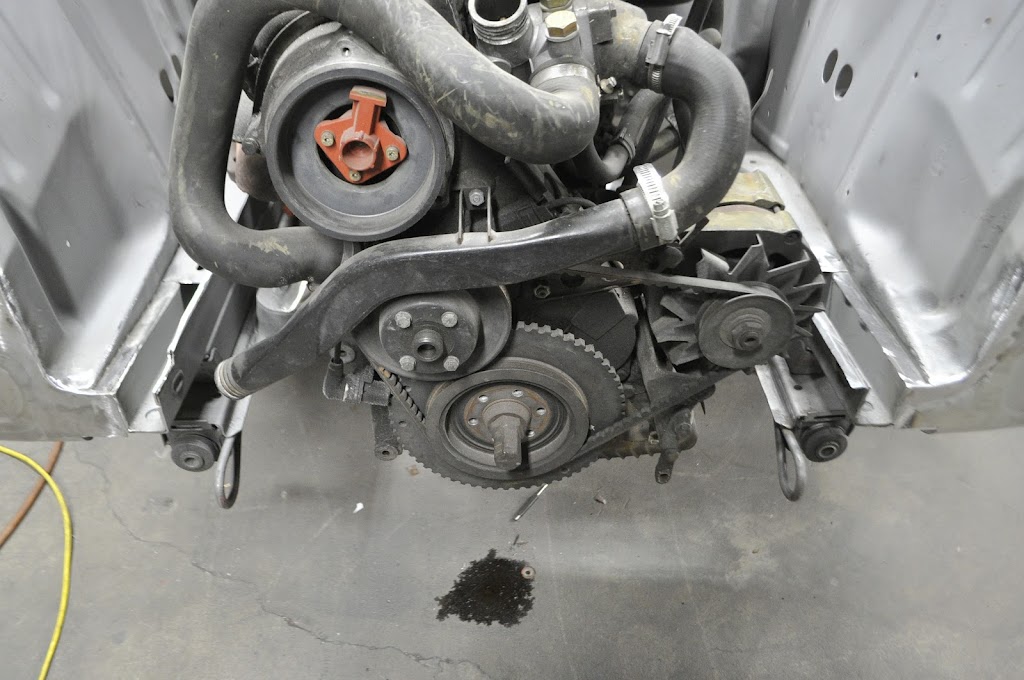
Then I decided to take a break from the body/frame work and work on some of the other things that need to happen in the engine bay. Any guesses as to what this guy will be for??? 10 internets to anyone that gets it right.

Last but not least I got a nice surprise in the mail today:

I got a smoking deal on a set of original e30 Racing Dynamics headers. Having only had one set of 'ebay' headers in the past I must say the quality on these is really great. I was very afraid that they wouldn't fit in the '02 engine bay, but turns out they are compact enough that there is plenty of room. I was able to get them for a steal, and I'll probably get them ceramic coated at some point. Some more pics of them:

Here you can see that I had to flip the Oil filter housing 180 degree's in order to get it to fit with the new headers. In the end it works out great because it puts the oil filter in an easier place to get to, I can take it off very easily without getting under the car.

Leave a comment:
-
This is a great thread! Picking up a 1970 2002 tomorrow awesome Inspiration !!!!Leave a comment:
-
Yeah, I'm planning to make a spot on the trailer to hold the bumper while I'm towing stuff.
As far as rolling 'dimples' or 'beads' into metal, it's all about having the right tools. In this instance, it's called a Bead Roller (go figure). Mine started as a Harbor Freight unit, that I improved with some tube steel and an old tractor steering wheel.
It started life looking like this:

This is how it looks now:

Depending on the dies you use, you can change between rolling dimples, beads, flanges etc. To roll a bead you simply insert the metal and clamp the rollers together with the small hand wheel in the picture below.

With the metal clamped tight between the rollers, you just turn the large wheel to feed the metal through. Once you finished rolling the sheet can develop a few small bends or kinks, especially a larger piece of thin gauge sheet. However, most of the time these can easily be beaten back flat with body hammers.
Haha, totally forgot about that part. Man I wanna watch that movie again now.Leave a comment:
-
*Don't know how to embed lolLeave a comment:
-
Great as always.. the hitch receiver was an unexpected surprise. So you'll pull the rear bumper to tow things? I assume you'll have some place awesome to store the bumper in the trailer while towing or something spectacular like that hehe.
How exactly does one "roll dimples" into the sheet metal? The rest of the metal is still so straight, and doesn't look stretched. If you have a minute, outlining a walkthrough of that would be valuable!Leave a comment:
-
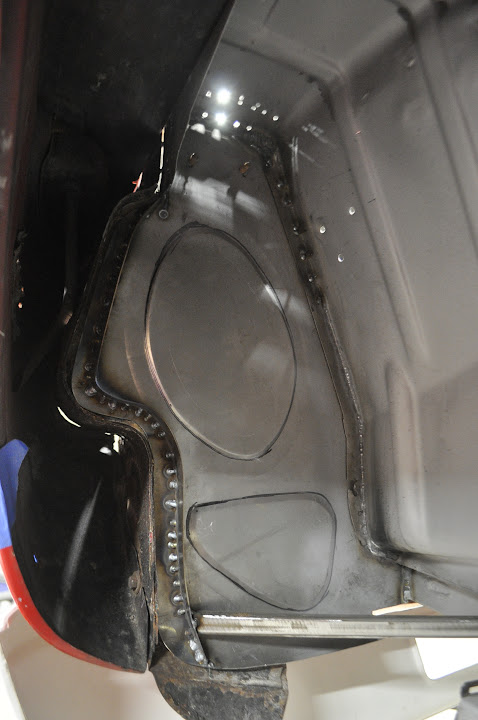
Finished up the front clip mounting points tonight. Where we left off last time was here, with the new front wheel well panels welded in place:

Then I added some bracing to the rear of the new panels. This ensures that they will have the necessary sturdiness to not move around or deflect as the car drives around. The bracing consists of two parts. First I welded a strip of 18ga x 0.75" metal down the outer edge, then triangulated the lower outside corner to the frame rails with some thin wall square tubing.
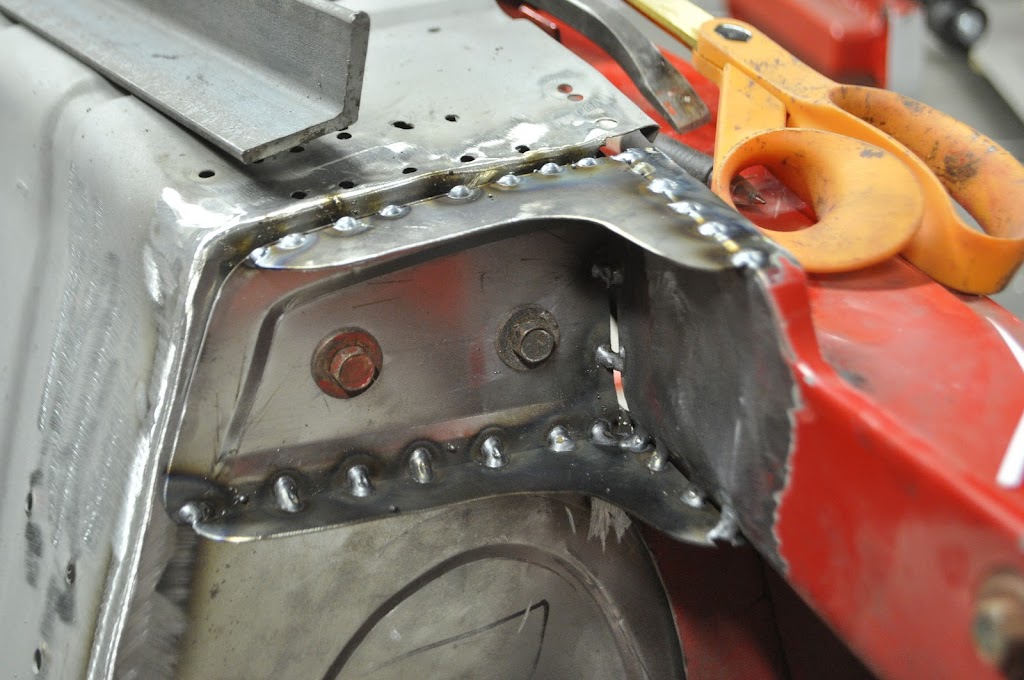
Then I remounted the front clip so I could locate the new mounting plates and holes.

Then I made up the new mounting tabs. This will be welded onto the front clip and attach it to front panels of the wheel well.

Test fitting before welding in place:

Drilled the mounting holes in the tabs. Once tacked in place I can transfer the holes to the chassis so I know they will be in line.

Here are the new mounting plates welded in place. As you can see I also made upper and lower braces to help strengthen it. How the passenger side looks:

And the driver's side:
I also got some goodies from the fatherland in this week. A bunch of new fasteners:

And new sheet metal for the rocker panel area. Now that I got these in I can locate the rear fender flares and finish up that area of the car.

Last but not least, a little teaser. I've got some goodies coming in the next week that should really start to pull the car together. No pics yet, but the waiting is half the fun lol.Leave a comment:


Leave a comment: