325ic Calypso Euro Conversion - Houndstooth & dbilas now, MT1 & MM 3.2 stroker coming

Collapse
X
 
  • Time
  • Show
Clear All
new posts

  • bradnic
    replied
    Also swapped out the chrome bumpers and finally painted and installed the euro valance and fogs. What a transformation!

    [url=https://flic.kr/p/Xqjf9g]


    Oh and that hardtop headliner repair failed miserably. You can push the cloth into the hardtop and if sticks.. But a minute later it falls. Will try attaching it again wth more adhesive ahead of the Vintage trip later this week. Worst case I'll pull the headliner on the road and use the hardtop without it!
    Last edited by bradnic; 09-03-2017, 01:52 PM.

    Leave a comment:


  • bradnic
    replied
    She's TUNED!!! Finally

    My ITBs are finally dialed in!!! Power is back and definitely stronger than stock. Multiple issues including a flaky ICV, extreme difficulty getting the carbs to sync and a semi loose connection on one of the 2 sensor cables that connect near the round service port. I know one is the pickup for the spark plug wire and I think the other is for the CPS. I assume CPS was connected ok since car started, drove etc.

    I also had a pinched seal on one end of the breather/bitch tube that slowly leaked so that and the crappy tune motivated me to tear everything down again.


    With the ITBs out I took the time to back each of the 3 adjuster screws out so that the throttle plates were all fully closed on each pair. Once back installed i went ahead and tried tuning at idle without the plenum installed so that I could access the third adjuster screw. I picked the ITB pair with the highest vacuum and started matching the others to it as far as I could, then tuned the higher vacuum ITB pair close to the others (I.e. Lowered vacuum reading to get closer to the others). Adjusting one pair affected the others so I had to keep switching between them. This time it acted very differently though, no backfiring and much smoother idle. My wife immediately noticed the difference as well.

    Hope this helps some end else with ITB tuning.
    Last edited by bradnic; 09-03-2017, 01:49 PM.

    Leave a comment:


  • bradnic
    replied
    drove the car today. below 3k absolutely blows. definitely need to work on the tune.
    these will help too I'm sure - E30 RD long tube headers going in after the Vintage.


    Still hoping the new RD group buy happens.. if so I'll move these to the IX.
    Last edited by bradnic; 09-03-2017, 01:46 PM.

    Leave a comment:


  • bradnic
    replied
    Mtech1 spoiler arrived today. Vert side skirts are in transit.

    Ordered a euro valance and received a BMW MISLABELED diving board valance instead! Definitely a BMW error - incredible.

    top part is a repro 41331933772 euro valance. bottom is a 41331933771 US diving board valance mislabeled as a 772 euro.


    Not the only person with this problem either.
    Last edited by bradnic; 09-03-2017, 01:45 PM.

    Leave a comment:


  • sonomabimmers
    replied
    i have a manuAL top and while i love it. I've always wondered about the electric. can't wait to see.

    Leave a comment:


  • bradnic
    replied
    Next project after the MT1. My car was a 7/90 build, the last month manual top verts were produced. cool thing is the sheet metal in the top compartment is fully stamped with all the power top mounting points.. So an electric top retrofit is absolutely feasible.

    Yes I know nobody does this. That's why I'm doing it. Already have about 90% of the parts including an electric top.

    Last edited by bradnic; 09-03-2017, 01:43 PM.

    Leave a comment:


  • doorman
    replied
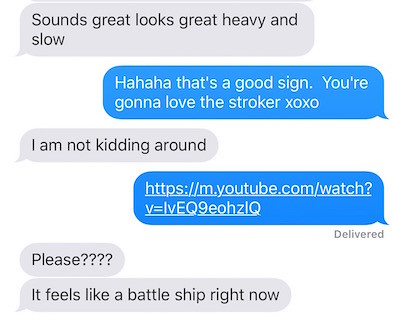
    My wife's texts when she'd drive the E39 usually involved her love of the car!!

    At least your wife seems to be on the same wavelength as you for motor work.

    Leave a comment:


  • bradnic
    replied
    Wife drove the car.. Stroker and FI definitely happening lol

    Last edited by bradnic; 09-03-2017, 01:42 PM.

    Leave a comment:


  • sonomabimmers
    replied
    dang looks really good man. had a busy weekend with my calypso vert as well. good stuff

    Leave a comment:


  • bradnic
    replied
    My OEM euro valance is finally arriving this week. Will get it body schützed and painted just in time for the vintage

    Busy with the car all weekend:
    - thermostat housing replacement to deal with a coolant link
    - reworked the ITB throttle linkage, grinding off part of it that wouldn't let me tighten mounting nuts correctly
    - swapped ECU tune to deal with high idle. a 3rd tuning is coming

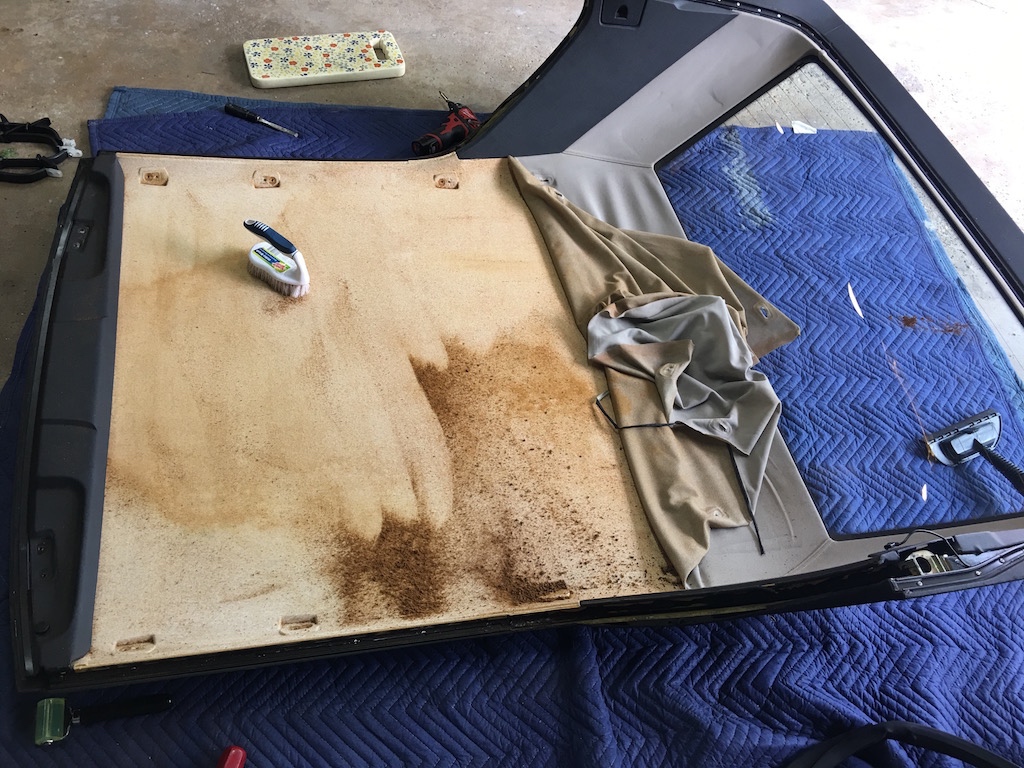
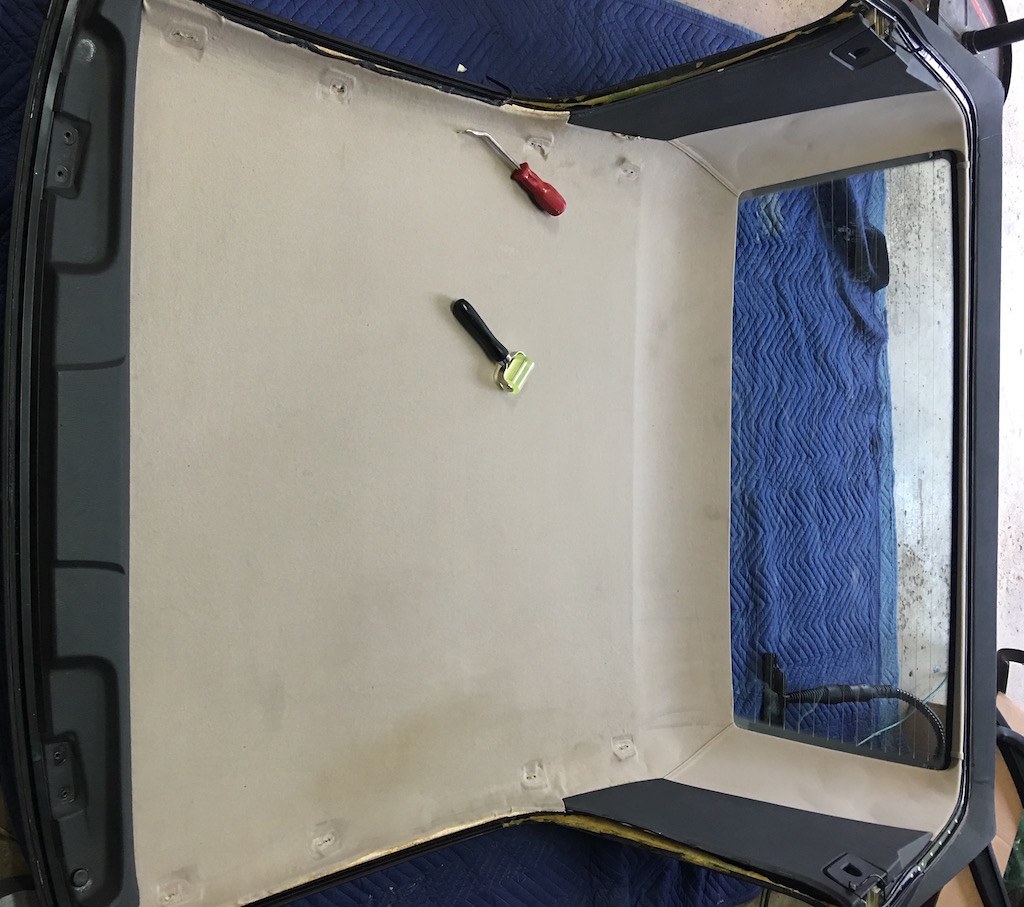
    Spent all day today reworking my hardtop, re-gluing the headliner and replacing all the seals. We didn't want to drive all the way to Asheville with just the soft top... learned our lesson picking up the hardtop in Toronto lol.

    Anyway the hardtop rework came out GREAT! Was really concerned about the adhesive soaking through the headliner cloth, but it all worked out. Bottom line: DON'T use 3M headliner adhesive, use Permatex.

    STEP 1: strip the headliner back to the rear window (don't pull it off the window area). Since I was replacing the hardtop seals I went ahead and remove them at this step too.

    STEP 2: scrape all disintegrated foam off the hardtop and back of the headliner cloth. be as thorough as possible. Took me over an hour to get it clean enough to not be concerned about lumps

    STEP 3: follow instructions and lay out 3 coats of adhesive, changing directions each coat and waiting 5-10 minutes between them. I also brushed the adhesive flat between coats and removed any lumps by hand.

    STEP 4: wait a bit and start attaching the headliner from the middle and work your way out to the edges. Take your time as it takes at least 30 minutes for the adhesive to start setting. I used my hands initially to smooth out the cloth and then followed up with a roller. BE SURE TO USE A ROLLER designed for this purpose. It is amazing how good that roller is at smoothing out the headliner!

    STEP 5: let it sit a few hours before moving it.

    STEP 6: Clean up the headliner fabric after the glue sets (still waiting on this). I picked up a portable steamer which should help here.


    No pics of the seal work unfortunately, but it took about 3 hours to replace the front and rear seal. If you don't have patience I'd recommend not doing it :-) still gonna go back and selectively add adhesive to a few spots. The original seals where glued in place in certain areas, and there was also some black silicone or adhesive used in certain areas.
    Last edited by bradnic; 09-03-2017, 01:38 PM.

    Leave a comment:


  • bradnic
    replied
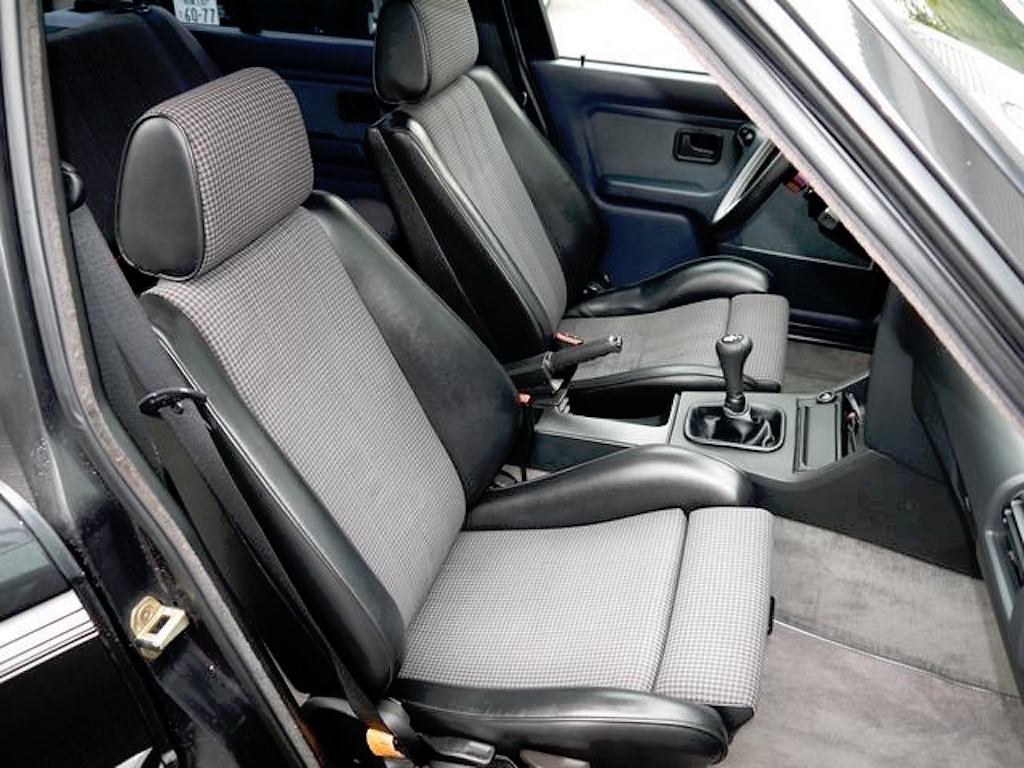
    fporro just posted this Hartge Japan H20 interior in the Hartge group on fb. cool to see OEM leather + houndstooth. every OEM houndstooth interior I've ever seen has anthracite/blue/brownish cloth bolsters

    Last edited by bradnic; 09-03-2017, 01:37 PM.

    Leave a comment:


  • bradnic
    replied
    True.. Probably just routed to a catch can

    Leave a comment:


  • JeLani
    replied
    Originally posted by bradnic
    How's this for cool? from e30.de, look for "Manfred: 325i"

    Note carbs and relocated brake booster


    Also a re-routed valve breather hose, where to? Kinda old photo i know.


    Sent from my payphone using Tapatalk

    Leave a comment:


  • bradnic
    replied
    The ITBs flow more than stock obviously, and I did add the M30 AFM, mustang injectors and tune. I've been pretty careful and thorough with the build.. I just don't get why the surging idle happens. As you can see in the vid the itb vacuum is all balanced now. I'm not touching the throttle in the vid. I tried disconnected the ICV wiring and it had no effect on the idle - what you would expect with the engine warm.

    So at least for now I'm stumped. Tempted to pull the ITBs and throughly inspect them, but there's no reason to think that will really help.

    Leave a comment:


  • 2002jm
    replied
    :)

    I was just thinking that something got unplugged, or a vac. line pinched and is leaking??:)
    jm

    Leave a comment:

Working...