-
Sound like me too...well got my Aux fan to work,finally....Yee Haa.
now water pump timing belt and call it done and then i'll wait for anything else that needs fixing....Seem like we tinker with these E30 more then we drive them....Leave a comment:
-
-
great stuff man i really enjoy how the progress is going and great illustration...Leave a comment:
-
For anyone who feels the above post is donation worthy, feel free to pm me for my PayPal.
Now the dssr was a very pleasant upgrade...thenkind you would never miss until,you've done it then it's...why did I wait so long.
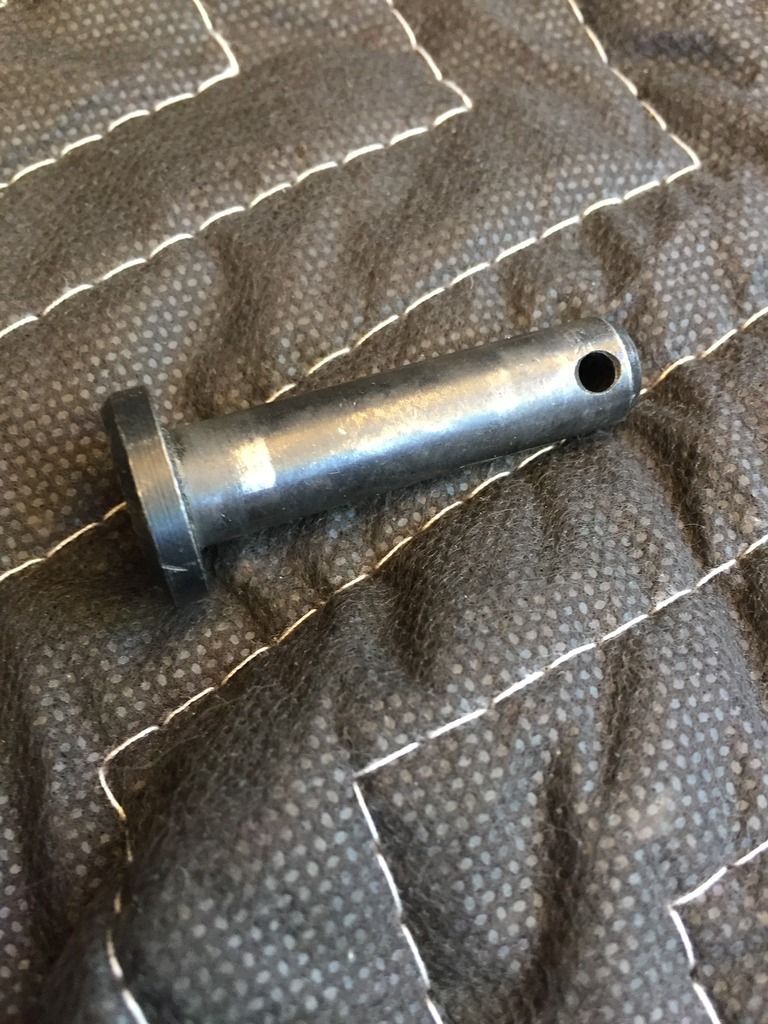
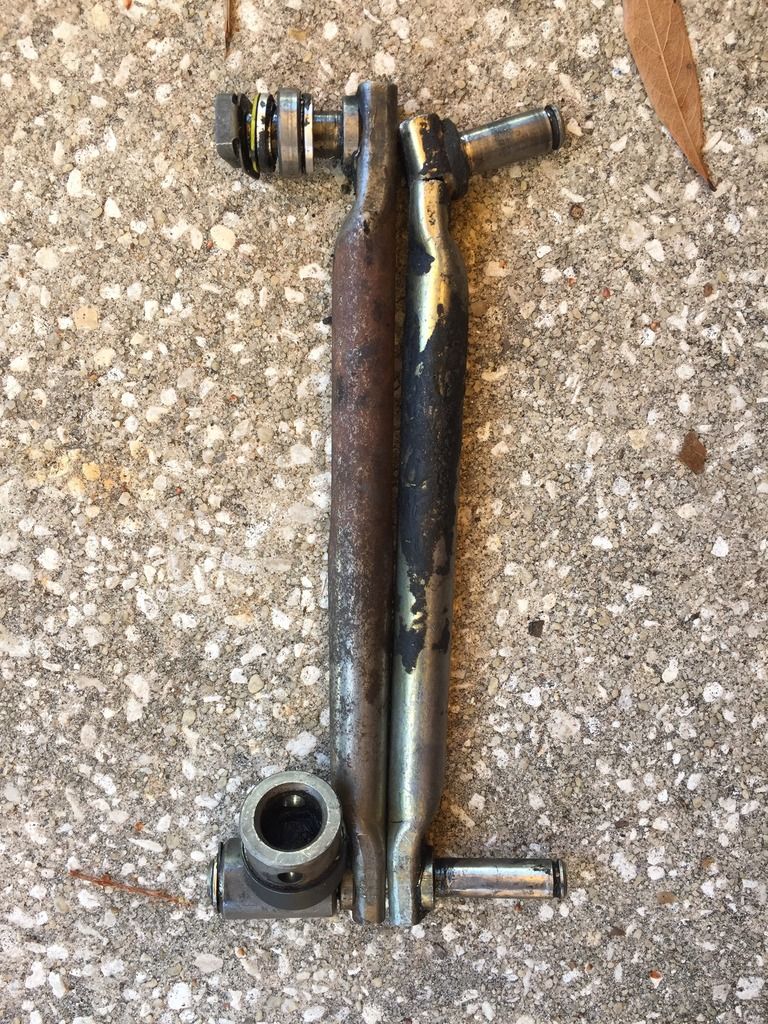
But wait...there's more...last week, just as I was pulling in the driveway which is a downshift to 1st, I found I was stuck in 2nd. . Seems the rear pin has come undone since I only zip,tied the front. This is what it looks like so good luck finding one locally.
Its only a couple of blocks from the main road which would be the last time I changed gears so I wandered back and forth formhalf an hour or so, to no avail. No pin to be found.
Went back to the car and climbed underneath with my calipers to grab some measurements in the hope that I wouldn't have to wait for a new pin to come from the west coast. I started,making notes then saw something that looked out of place.
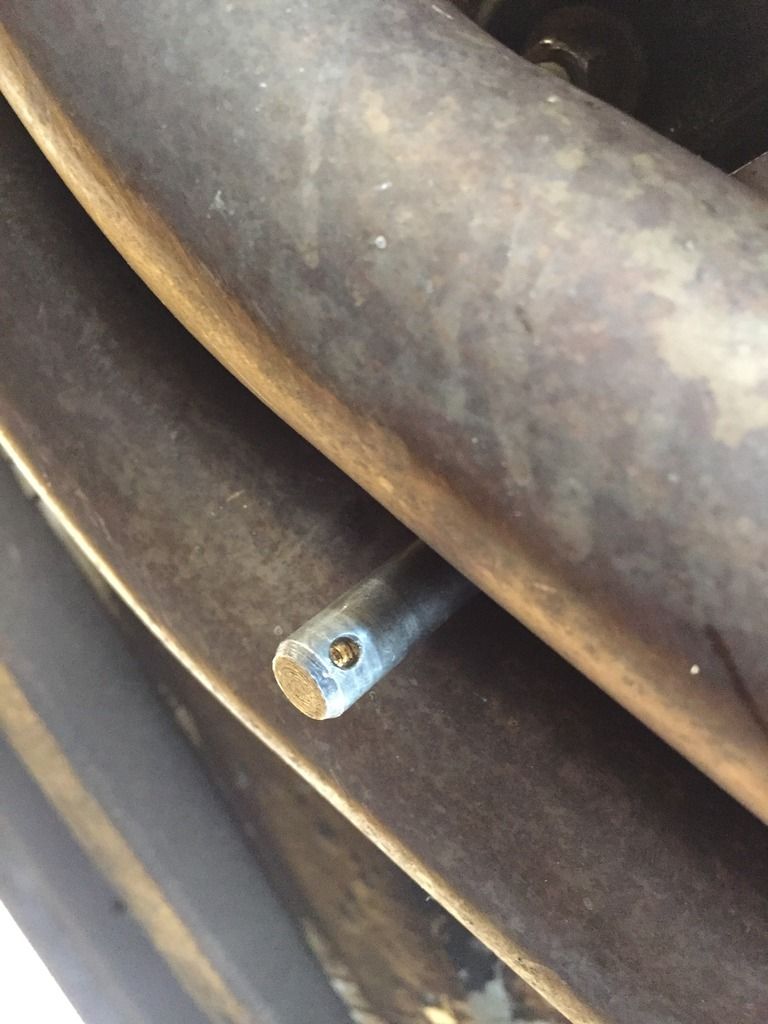
Yes, thats the pin dangling between my,down pipes. Don't know what the odds of THAT are but I bought lotto tickets that day :)Last edited by jeffnhiscars; 05-14-2017, 05:00 PM.Leave a comment:
-
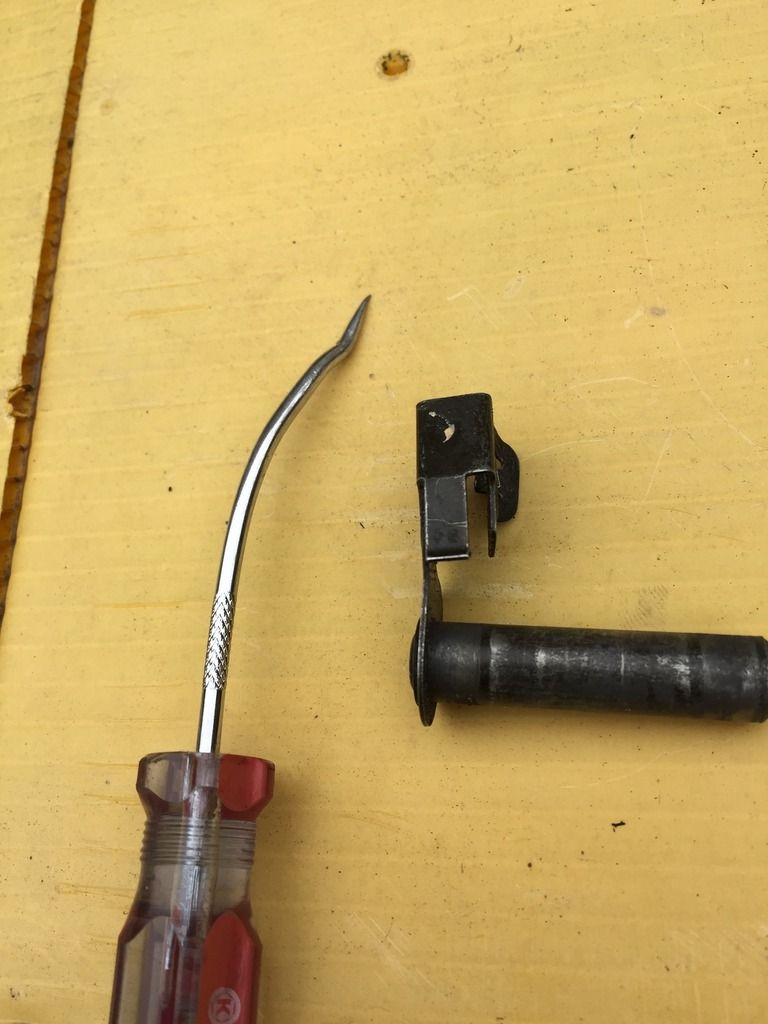
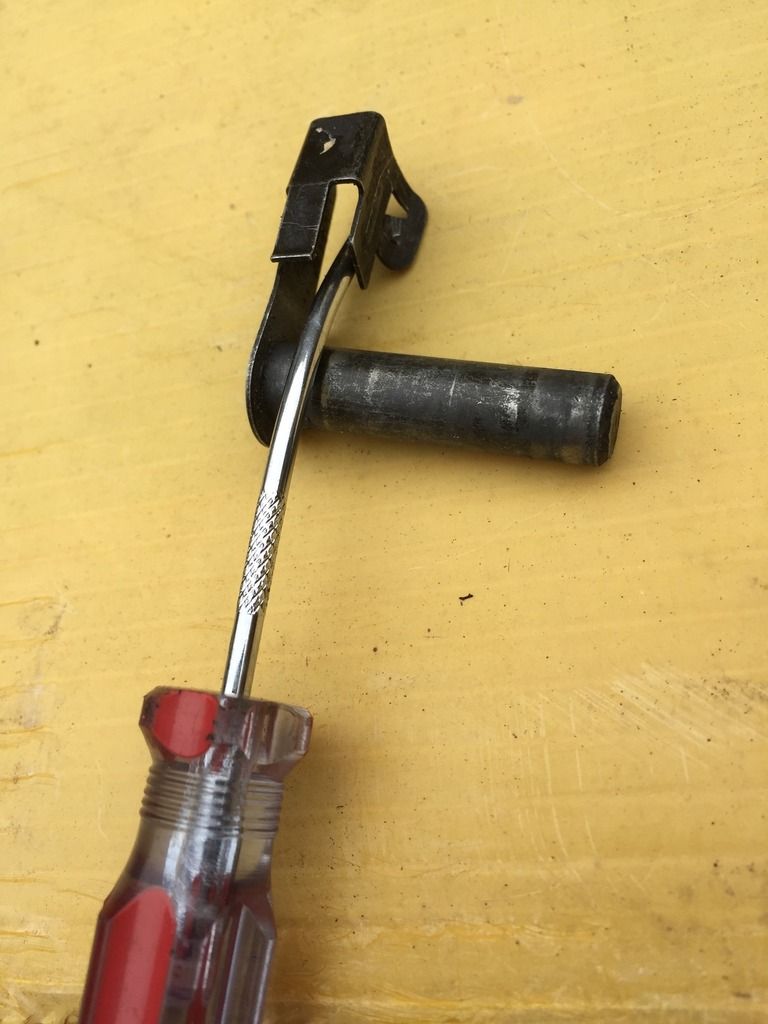
Now to install the dssr you have to go to the late model shifter joint which turned out to be a nightmare to install with the car on jack stands....UNLESS you rmov the bitch clip to get the shifter out of the way since YOU MUST insert to pin in the shifter joint from above.
The goods news,is that since I had a spare g260 and shifter assembly, I could fab a bitch clip tool with some precision. Note the lock tab on the clip..so it's out and up. EZPZ :)
Leave a comment:
-
Then there's the story of the broken shifter rod. It just fractured so I couldn't change gears.
Note that I have an eta g260 so you need the 180mm shifter rod vs the standard b25 187mm. I found this out the hard way after ordering a dssr from garagistic. Fortunately they were sympathetic and since th y weren't in production yet for the 180, they fabbed one for me.
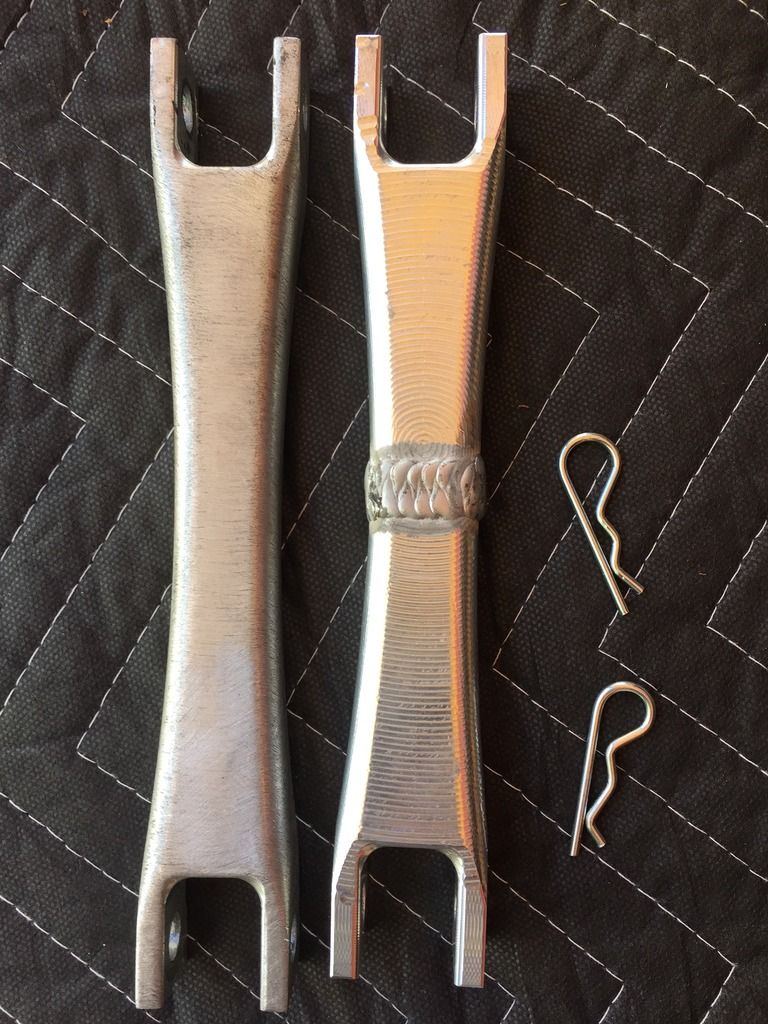
Note that I did not use the cotter pin they provided as there wasn't enough room to fiddle,with it so I grabbed these hairpins from Ace. I also zip tied the pic to the dssr in the front since I did not ever want to deal,with it againLast edited by jeffnhiscars; 05-14-2017, 04:47 PM.Leave a comment:
-
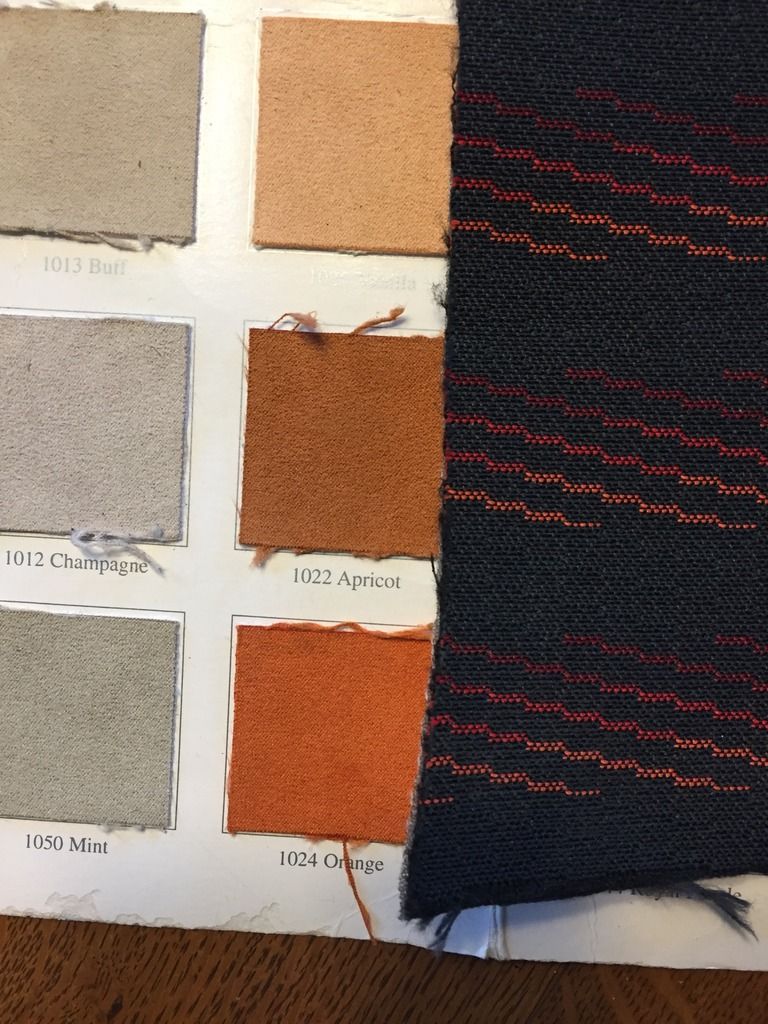
Oh...and I'm booked to,have the seat redone as soon s we get back from the Vintage. So excited to lose the leather and yes, that's the red mtech from thatoneeuro.
Going with the apricot bolsters and trim.
Leave a comment:
-
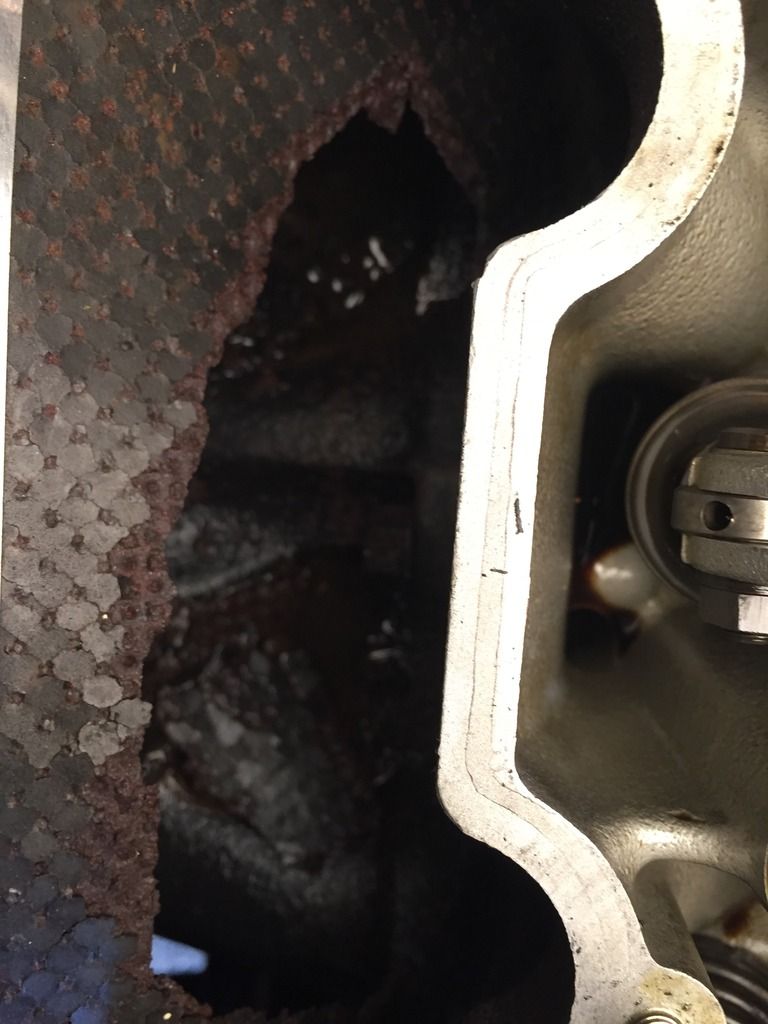
This exhaust gasket is a little baffling and clearly has moved to the top of the list. Can't have my plug wires melting so will try to rig a heat shield for now and hope the RD headers don't take forever (hint hint Frank) :)
Leave a comment:
-
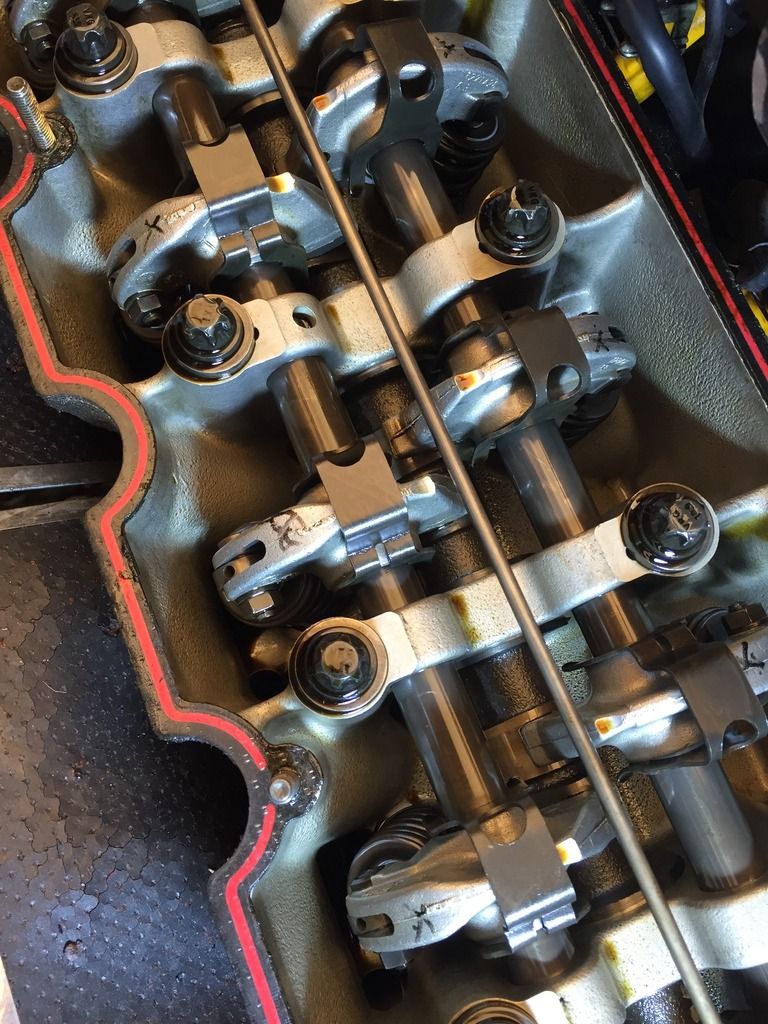
It's been ages...something about just driving a car without issue that's kind nice...but....in preparation for our trip to the vintage I decided to replace the vcg and check the valves. Clearances were still good but more interesting was how clean everything was after 32k. I use M1 15-50 which today, was $23 at Wally World, and typically a Mahle filter with intervals ranging from 3-4K.
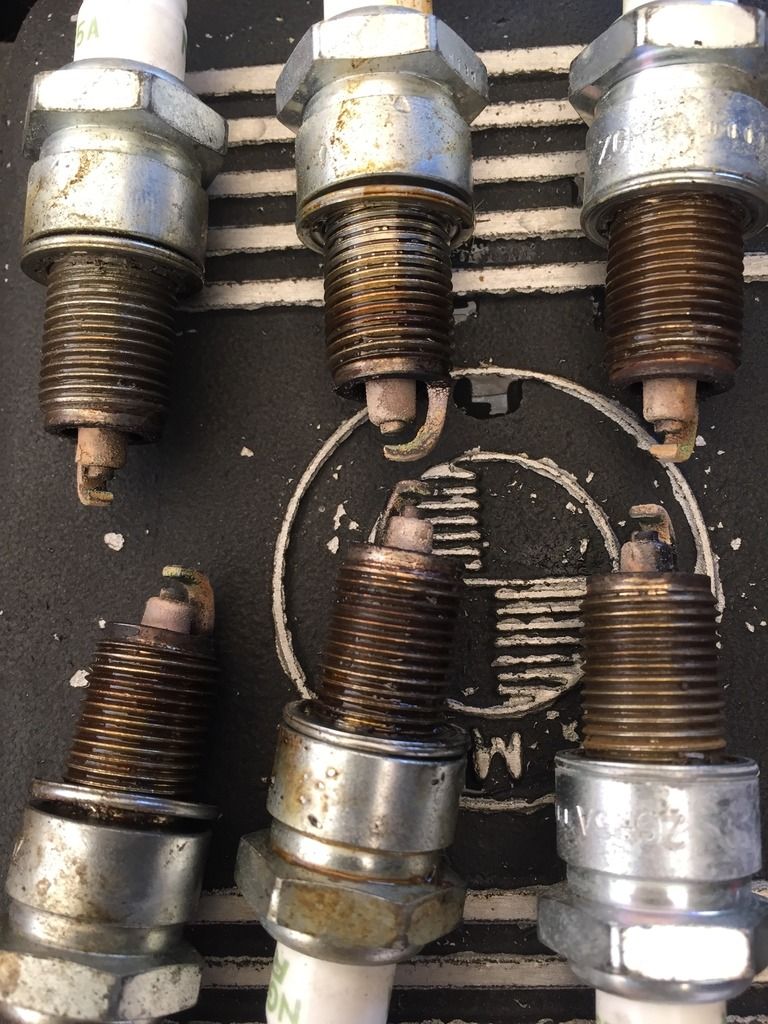
These plugs went in with the head install so also have 32k. Amazingly clean. I could have just gapped them and probably got another 20k out of them but had a fresh set handy so just threw them in.
 Last edited by jeffnhiscars; 05-14-2017, 04:24 PM.
Leave a comment:
-
Now do you want to rebuild a black one
Hey great write up and restoration on your E30..2 1/2 Hrs later from start to finish and very interesting...You know like reading a good book and can't put it down,same goes for this
I just bought 1988 325iC Triple black my dream car at a good price and never winter driven not bad shape from far body everything is solid for a 60k mile car.Wish i had the talent you have...i just bought the bentley service manual and kinda of sorts of your backyard mechanic your basic repairs stuff....
Keep up the great work...
Following...:coolphoto: and :thankyou:Leave a comment:
-
Getting the zipper started was a bit fussy since you do it from the inside which requires someone to support the new window from the outside and while it's easy to get the zipper tab to start on one edge of the zipper, it's tricky to get the fabric of the top side to fit into the slot on the zipper pull. I used a flat head screw driver to nudge it up and managed to get the zipper started.
While they tell you to mark the start point of the old zipper on to the new zipper, it's inevitable that you will have ripples once it's zipped. The secret is for them to be up and down rather than diagonal. It took 2 more tries, moving the zipper a tooth or 2 each time to get that right.
From there you stitch both sides of the zipper closed then mask the hell out of it all in preparation for gluing the flaps. I used blue painters tape and the paper the window came wrapped in and covered the entire window plus a few inches of top, then dumped some 1357 in to a jar and using a 1/2 paint brush applied the adhesive to the underside of the top flap and the top flap on the window.
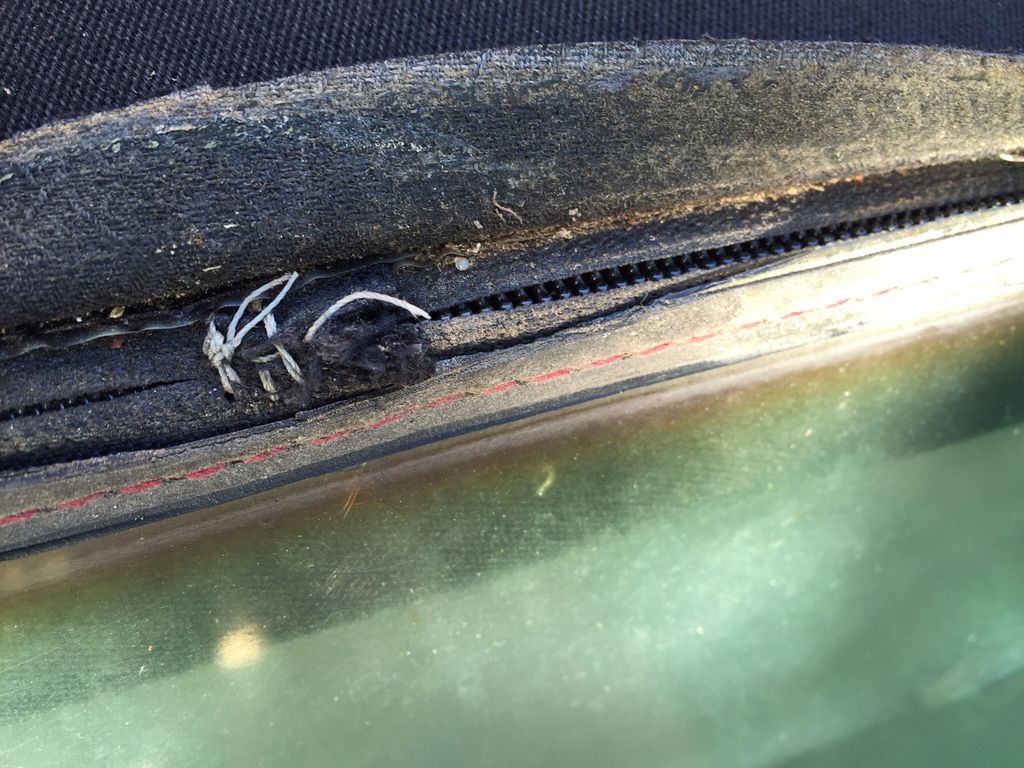
This is how that turned out. The fraying is just the natural aging of the top. I suppose you could put a bead of black silicone on there to really finish it off nicely. I might do that at some point
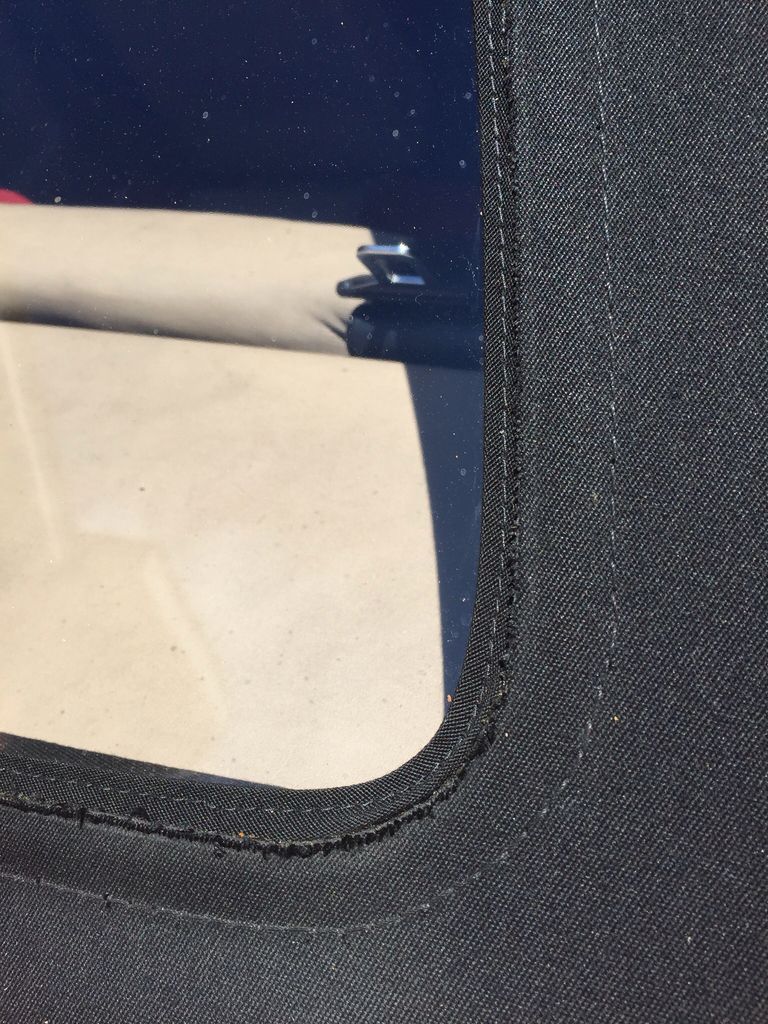
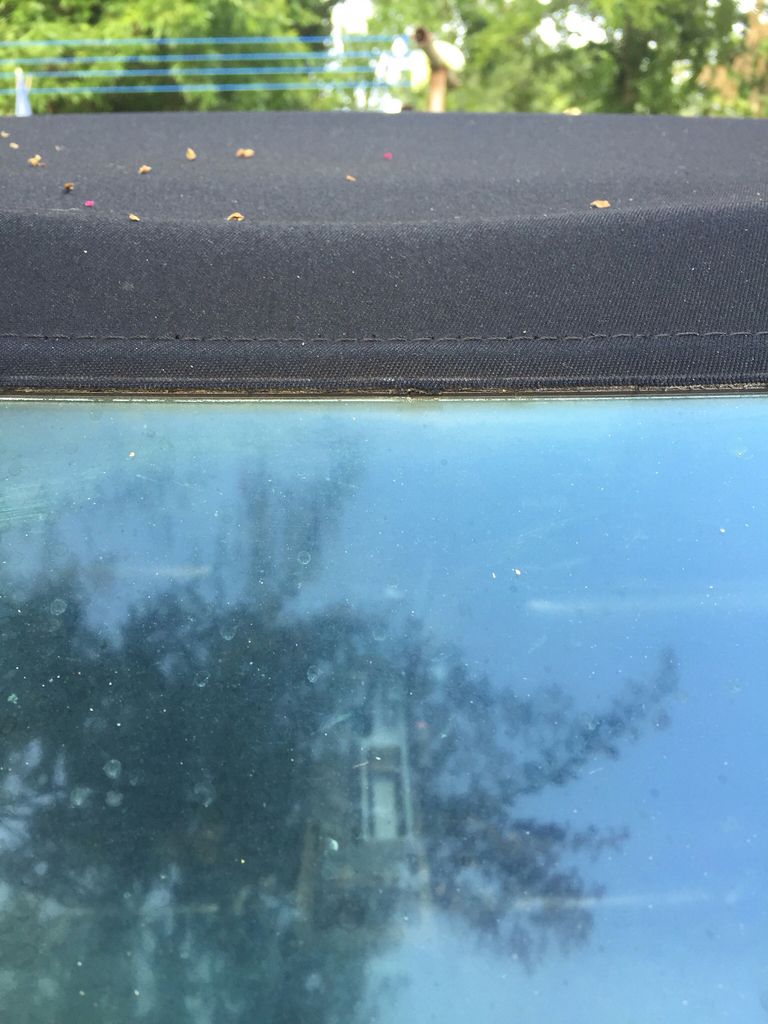
And in case you wonders what a brand new window actually looks like (can't help the dust)
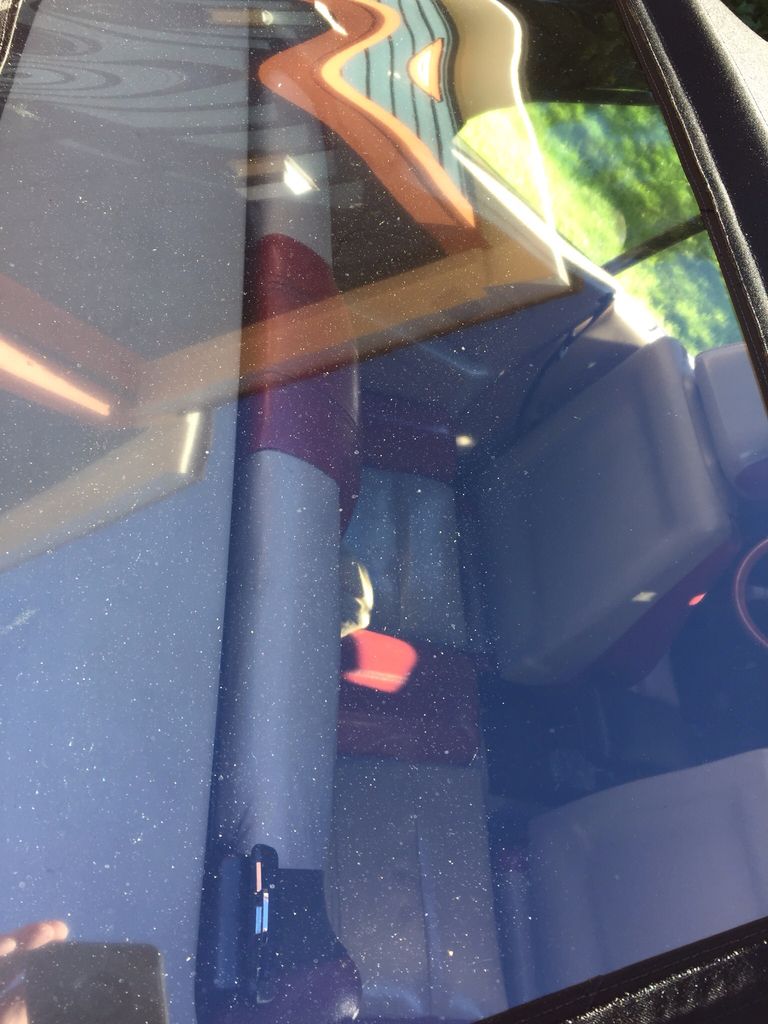
You can see a ripple in the above pic and again below. I did call emiata, who is local, to ask and they said it would tighten up within a few days to a week and leaving it in the sun would help. So that's where we are folks. Refreshed factory top, ne window and a few coats of 303
 Last edited by jeffnhiscars; 08-22-2016, 05:07 PM.
Leave a comment:
-
When I bought the Barn Find, the top literally feel apart the first time I lowered it so I kept it as a spare. To remove the rear hoop only required slicing off what little canvas was still wrapped around it and then removing one retaining bolt off each end. I can't find the spare bolts but they have a bushed upper so the hoop can pivot around it and the ends are punched to keep them from backing out. The problem with that is that if the punch mark can deform the thread which makes removing them tough and putting them back even tougher...so patience.
Beyond that it's simply unglue and reglue the flap. The diys I've read all talk about landau glue which runs about $60/gal (who would ever use that much) plus hazmat shipping. My bigger concern was that it's consider spray grade and although I know people have used it, I decided to check with Weldwood. They said it's much thinner than brush grade and the solvents are different so it's not idea for brush on.
After some more research I settled on 3M 1357 "neoprene high performance contact adhesive". It's rated to 230 degrees and has high sheer strength which is really what you need. LOTS of masking and drop sheets and the flap was done.
To remove the old window you have to gently separate the top flap from the window.
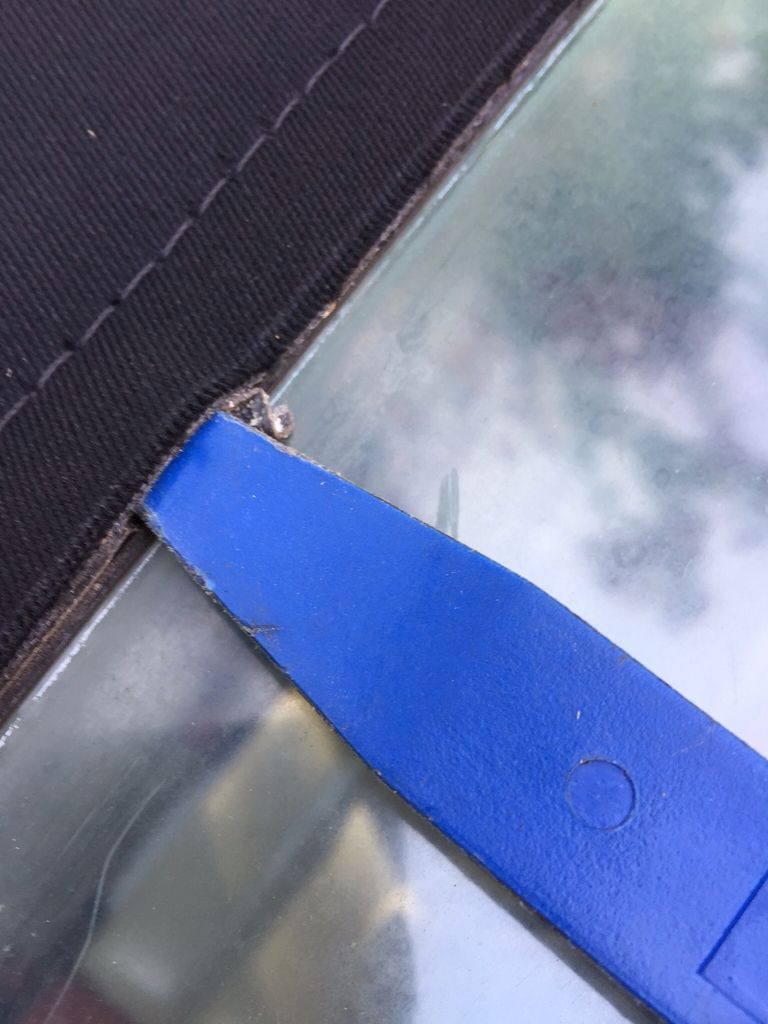
Since this was held on by what looks like sticky tape, it came apart fairly easily
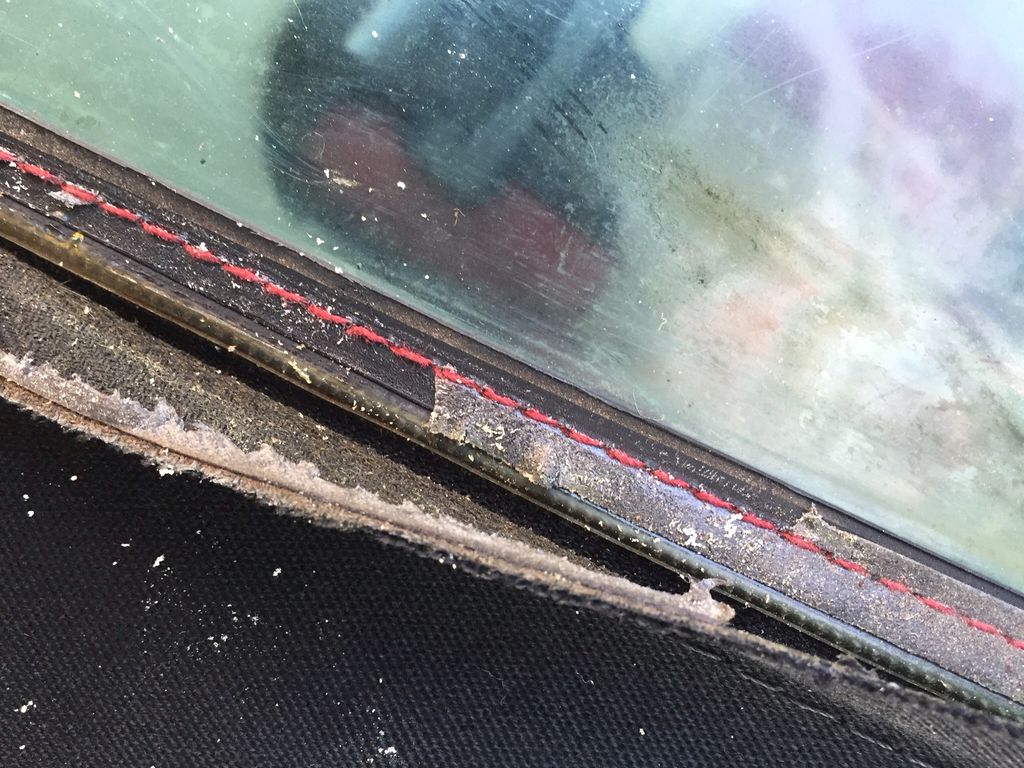
Once the flap is free you can easily see where they stitch the zipper ends closed since there is no start or stop on the zipper. Same thing on the inside but there wasn't enough light for a decent pic
Leave a comment:
-
I picked up this black Cabrio recently and it had a nice factory top but it was damaged and the rear window was hazel as hell. Since the plan was (and is) to sell the black car I swapped the good top off my barn find and set about restoring this one.
I don't even know how the PO did this but these bars are not flimsy
 Last edited by jeffnhiscars; 08-22-2016, 09:21 AM.
Leave a comment:
-
And not one I make lightly.
I've met quite a few people through this forum, including you, and count a number as friends. Matt organizes the Blue Ridge BMW gang and an annual BBQ and we've also done a bunch of parts deals so we've gotten to know each other over time. he's just a stand up, honorable guy who also happens to know his shit AND he has a shop in which he is now full time.
Honestly, if I didn't have that level of comfort I would still be driving an auto trans and not be thinking about cams, porting, headers, itbs and wondering whatever happened to my lo budget DD lolLeave a comment:

Leave a comment: