-
There's always some doubt when you piece meal a project like this. When I bought the mtech i had a very different idea for the bolsters and it wasn't til the seats were done that I decided to change the rest f the interior color.
The feedback is much appreciated so thanksLeave a comment:
-
-
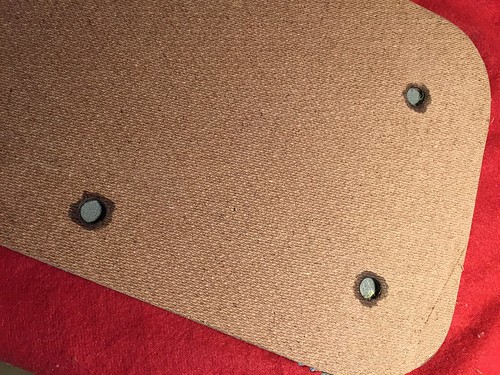
I picked up a cool hack for the door cards. Lay a small bead of Loctite Superglue (Cyanoacrylate) around the clip holes. It dries in a few minutes and hardens the masonite so your door clips are far less likely to tear out when you remove the door panels down the road.
Leave a comment:
-
Tonneau is done. Ill do a photo spread soon.
Changing the rest of the interior to black was a game changer IMO. Now Im afraid to sit in it :-)Leave a comment:
-
That’s how it’s done son
Now go dye that carpet and paint the tonneau cover vinyl
Suhweet wheel
You should sell those center pieces precut and ready to goLeave a comment:
-
The beige carpet in the back seat nags me but theres so little beige visible up front that Im not feeling any pressure to dye the carpets soon.
Oh...did I not mention a little finishing touch ? heres the view from the drivers seat
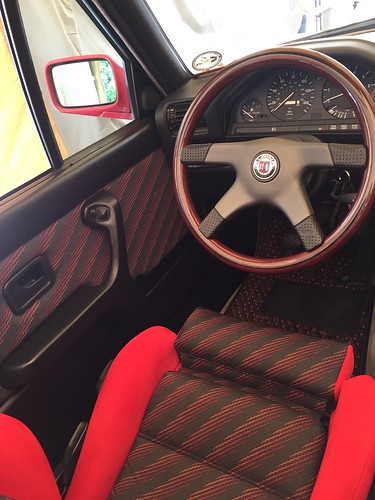
Ta Daaaaa !!!Leave a comment:
-
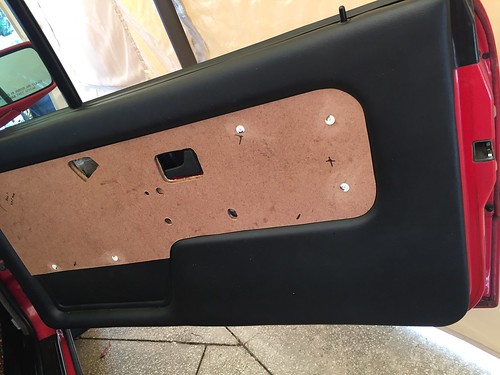
I then drill holes in the actual door card where there was no metal behind it to allow for the panel clips I used for the insert and then fit it all together to make sure it fit before I covered the insert in fabric. These are the exact same clips that hold your door panel to the door.
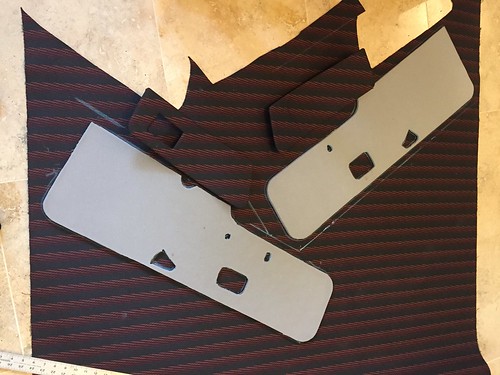
The fabric layout to make sure the stripes lined up :-)
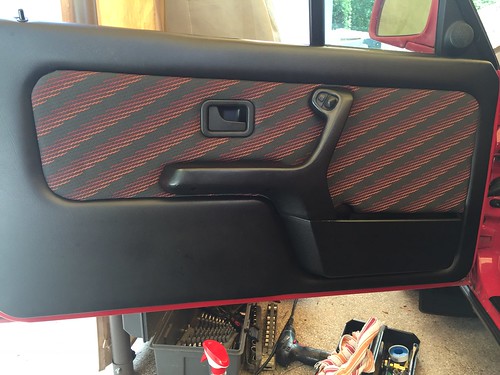
I did not glue the mtech to the face of the insert but rather just wrapped it and glued it to the back edge. From there it was just a matter of popping it on just like a door card. Once the handle was screwed on it pulled everything nice and flush
Again, the finished door.
 Last edited by jeffnhiscars; 07-16-2017, 08:38 AM.
Leave a comment:
-
As to the door cards, it was quite a journey. I did have a spare which turned out to be from a coupe so after dying it black and hacking up my original, I realized it was from a coupe. This required me to attach a piece where the door pillar cut out was.
Note...this is both door cards side my side. The one on the left is contoured to go around the B pillar whereas the other runs straight back for the Cabrio
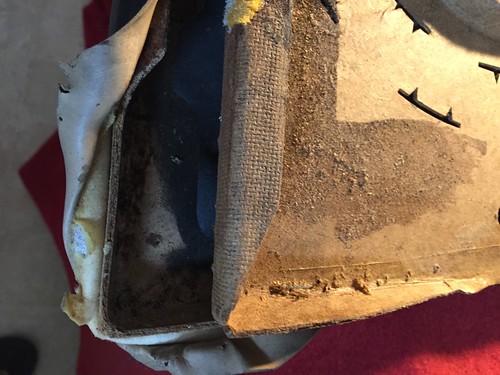
I then cut out the vinyl center and scraped all the foam backing off to get here. At this stage it only needs the holes for the insert clips & the door pocket to be installed before hanging it on the door
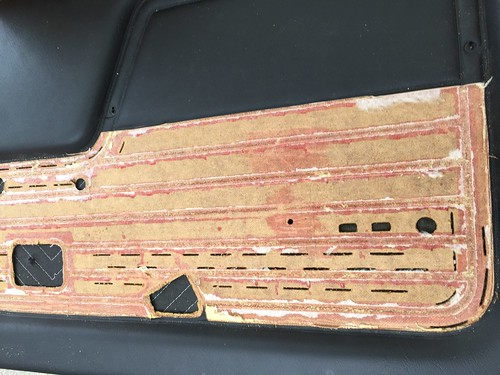
i then cut out the center of the old panel as a template and made a pair of these out of 1/8 masonite that cost $8 for a 4x8 sheet. Material costs for each door was $1. I did not want the door to get too thick so I removed the new foam with the door pull would go.
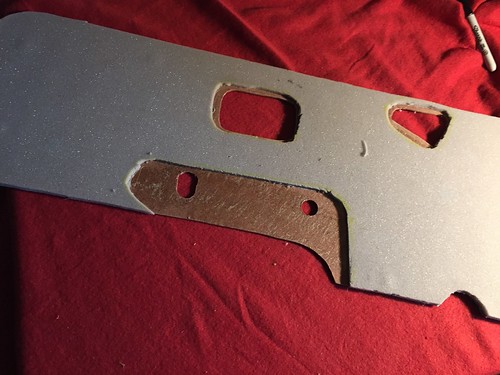
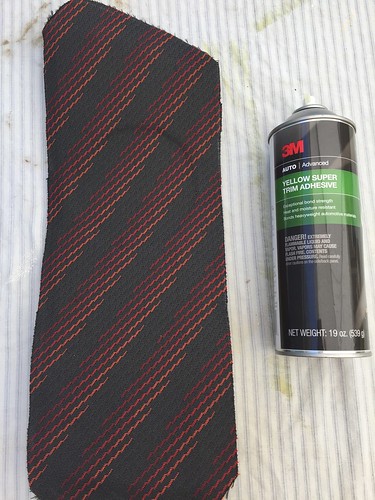
The foam is what is known as "sew foam" and its 1/4 with a fabric backing. At $6/yd it added less than $1 to each card and I used a can of this to glue it to the backing
 Last edited by jeffnhiscars; 07-16-2017, 08:37 AM.
Leave a comment:
-
Its probably a good time to update this. As some of you will recall, this is what my cabrio interior has looked like for the last couple a years. I did the dye job after mixing and matching skins to get good ones, then did the Leatherique thing to get by...til now.
So here is the before
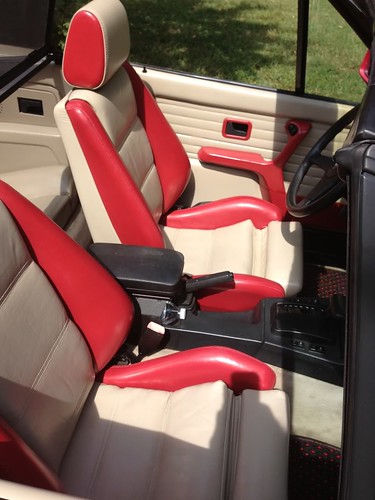
There are a lot of gaps to fill in but to avoid excess suspense, this is what it looked like after the upholstery shop got done with the seats themselves
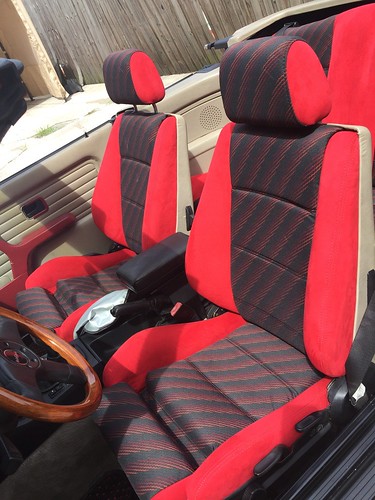
All fine & dandy but the beige just DID NOT Work, so I did some tweaking
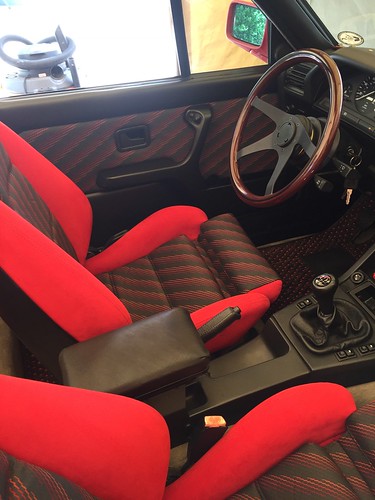
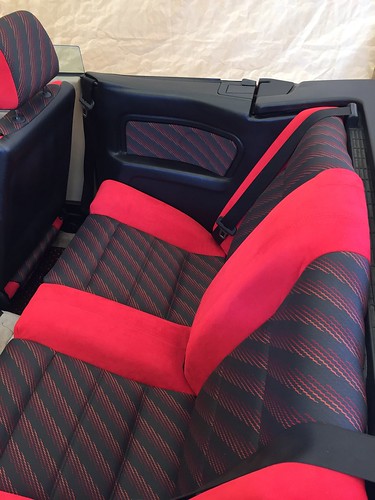
Id say it turned out half decent :-)Last edited by jeffnhiscars; 07-16-2017, 08:28 AM.Leave a comment:
-
I picked up a spare door card that actually nicer than mine so Im testing the SEM redye process on it <insert imaginary pic of random door card>. I started with SEM Prep Soap which has a mild abrasive in it so it cleans and puts a bit of teeth in to the vinyl so the adhesion promoter with hold better <insert imaginary pick of vinyl under a microscope with tiny little scratches in it>.It does a good job IMO
Im also working on using the red Mtech for panel inserts. Panel material typically comes without a foam backing so its thinner and the good news is that the backing on the mtech is not that difficult to peel off. Im thinking to find a thin yet fairly rigid backing (perhaps fg or acrylic) to wrap then fasten to the door in a way that doesn't cause lumps. We shall see
Hopefully Ill have a new host to share picsLeave a comment:
-


Leave a comment: