-
I made some ABS juice but it was lifting cause the bed would not stay hot enough. I insulated my PCB with header wrap and can now maintain 108 bed temp with my little 12v power supply (hacked Dell laptop charger).Leave a comment:
-
Them wheels are niiiice! Gonna look good under some fender flares!Leave a comment:
-
-
Yeah non heated.... it sticks like mad. Sometimes it's hard to get the piece off after the print is done. I have had some warping troubles with thick bases or certain shapes...mostly ones with a sharp corner.
I was using PLA and I liked the way that printed a little better but the spool I had got really brittle and I was having issues with the filament snapping when getting pulled into the extruder.Leave a comment:
-
Your printing abs on a non heated bed? I can barely get it to stick to kapton tape or glass on anything less then 90 degrees Celsius.Leave a comment:
-
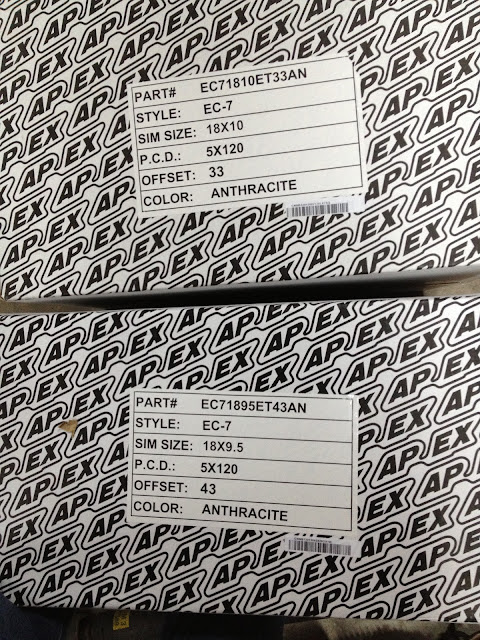
Wheels showed up today! Tires will be 265/30/18 in the front and a 285/30/18 in the rear. To fit a tire that wide it with get e46 fender flares grafted in.
Just pics of one of the rears and specs on front and back.
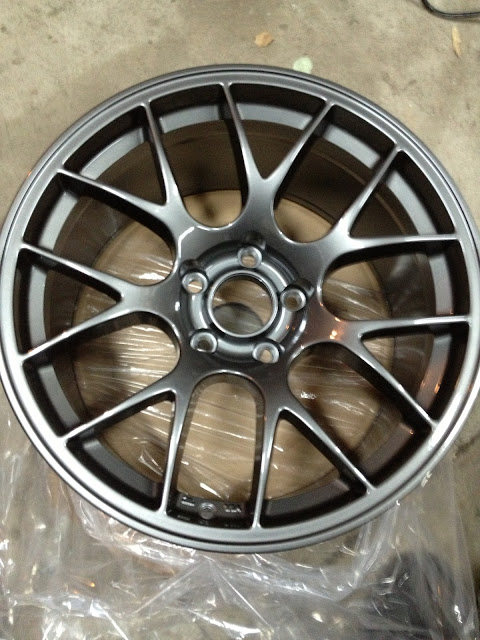
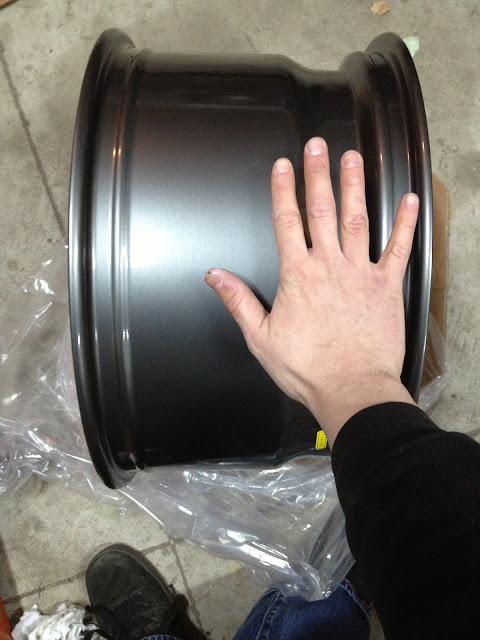
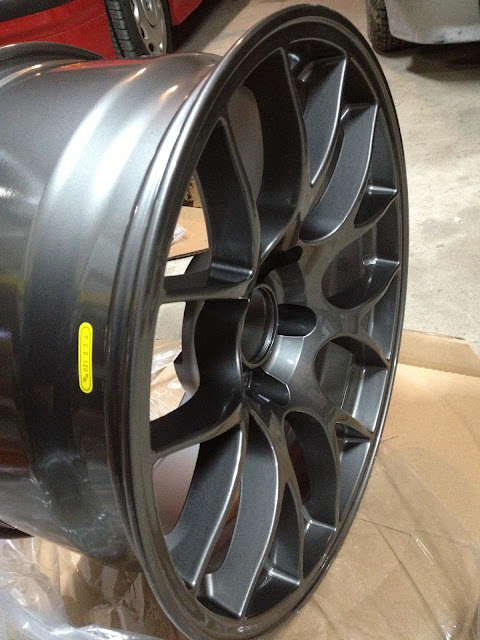
Will run a 15mm spacer in the front.
Leave a comment:
-
Broke apart the rear axles. They will get cleaned...painted...new grease and boots.

old grease


First clean...everything will get cleaned again before going back together

New boots
outer

inner

Leave a comment:
-
Then made out of metal.... The stock camaro carrier has the shifter coming from the bottom up. This design has it from the top down. That way if the shifter ever needed to be replaced it would be MUCH easier. It also will make getting the entire assembly in and out of the car a lot easier.

There will be a plate thin plate on the top to hole it all together.

You can just see the small lip down in there

The circle might get squared off on two of the sides to make welding a bracket to go to the trans easier.Leave a comment:
-
-
Nice work!
A nice addition to that notcher is the "super shaft" from SWAG (no affiliation with them).
Leave a comment:
-
A little more progress on a shifter option. I am looking at a couple different options but right now I am planning on making a new carrier that would mount directly to the trans. It would use the camaro shifter or an aftermarket short shifter.
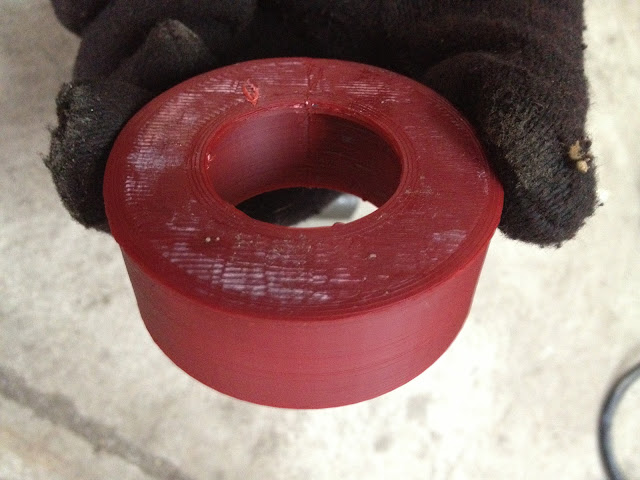
Drew up a test in Alibre (3d Cad) and printed out a test in ABS Plastic.
On the printer.
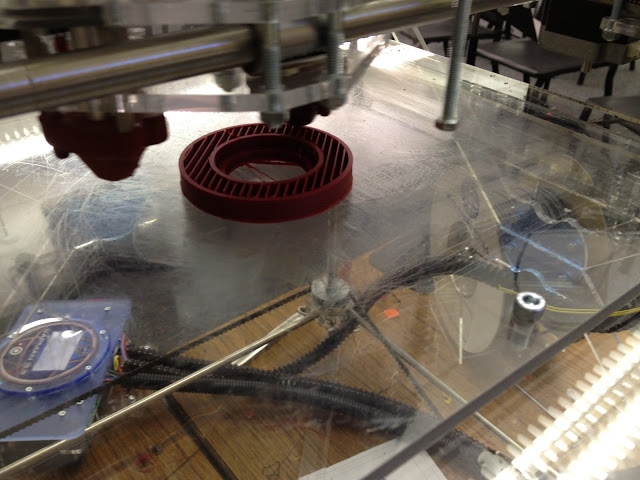
You can see there is a little ledge down in there.
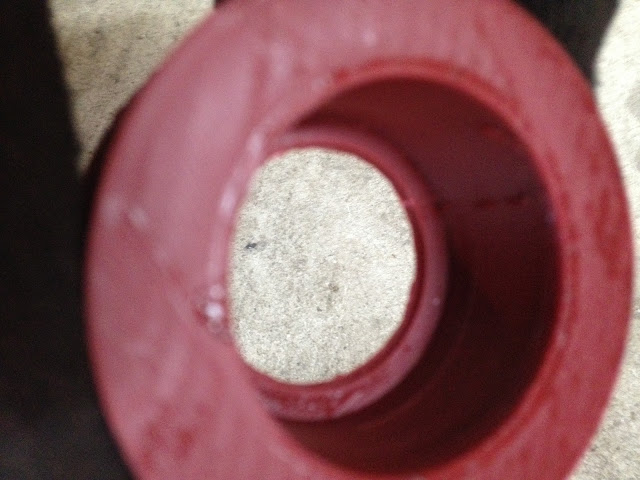
The camaro shifter uses a plastic bushing similar to how BMW does.
[img]https://lh6.googleusercontent.com/-d5lyTptKMI8/UVoWNJuvxOI/AAAAAAAAF-4/8LBdC1UGFZM/s640/IMAGE_51426B44-E276-4DFA-9539-69E9393043E2.JPGp/img]
It uses a little locking plate to hold it in.

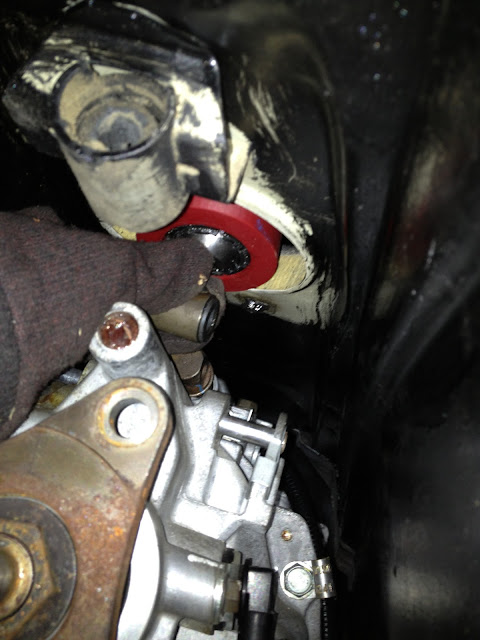
Up in the car...
The idea right now is to make the piece I made out of plastic out of metal. Then make some supports from the carrier ring down to the mounts on the trans.
Then also make a new selector rod that will go between the shifter and trans.Leave a comment:


Leave a comment: