While You're In There... CA BAR Certified S52 OBD2 Swap

Collapse
X
 
  • Time
  • Show
Clear All
new posts

  • arch4ngel
    replied
    BAR Appointment

    Last week I brought the car into my local BAR referee.
    The ref was actually pretty interested in cars and told me has several BMWs in the family.
    Apparently they mostly get folks doing smog retests so engine swaps are a nice change from the usual for them.
    The kids working for the ref loved the car, especially the podi.ca gauge cluster haha.

    The inspection went fairly well, as all of my obd2 emissions equipment passed visual.
    However I knew I was going to fail because I have a check engine light for a fuel injector code.

    What I didn't expect was to fail because of my exhaust.
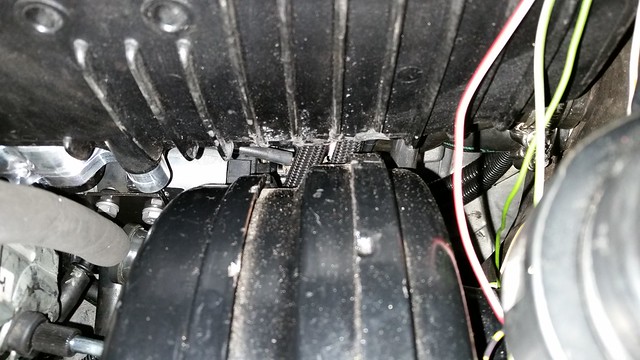
    Apparently modifying the downpipes before the catalytic converters is a no-no.
    This is very annoying because I have no idea how to get the stock midpipe to fit without modifying the subframe, or possibly by lifting the engine significantly to allow room for the down pipes.
    Another option is getting a modified subframe from a seller here who makes them fit around rear sump pans. Not cheap but should give me enough room to clear the exhaust.

    The other items I failed on should be easier to fix I hope.
    The carbon canister mount in the trunk needs to be secured and I failed smog (not sure if due to the injector code causing a rich condition or bad cats).

    To add insult to injury I found a new code when I got back home, vanos mechanically stuck.
    Odd because this never occurred before so I don't think my vanos was installed incorrectly.
    I do hear some vanos rattle though so I'm thinking the solenoid may have failed. Argh. I really don't want to have to open the motor up again.

    TLDR I now need to fix the following so I can pass the BAR inspection:
    New midpipe (already purchased)
    Modify subframe/find way to install cats without modifying
    Fix injector code
    Fix vanos code
    Remount carbon canister

    In other news I got the car aligned.
    Camber - -2.5 degrees front -1.5 degrees rear
    Toe - 0 front and rear
    Caster - I forget the number and the machine crashed before the tech could give me a spec sheet but he basically just evened them out. They sit more towards the middle of the wheel well now which is perfect.

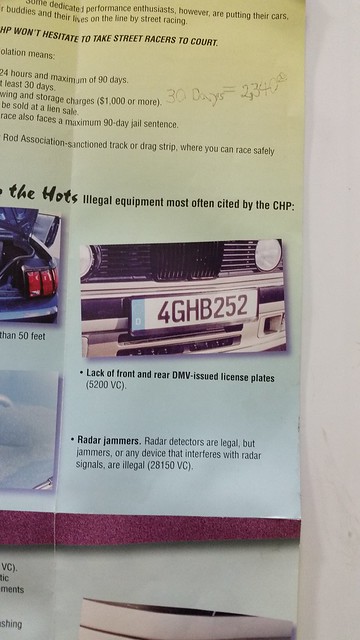
    This has got to be someone here (spotted in the BAR office)
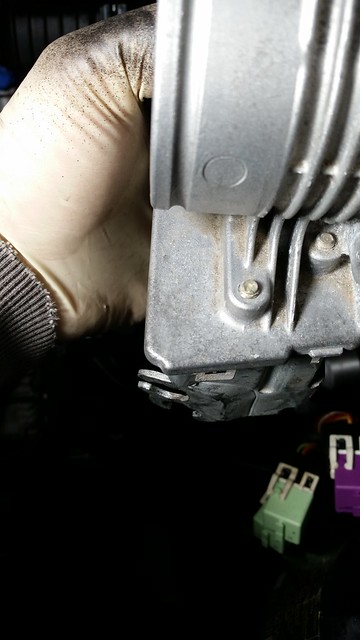

    Air pump installed


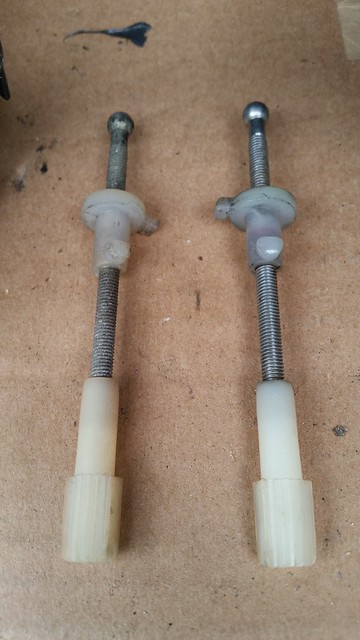
    Pic I found of a cleaned up adjuster. Did them all when I installed my hid retrofit kit.


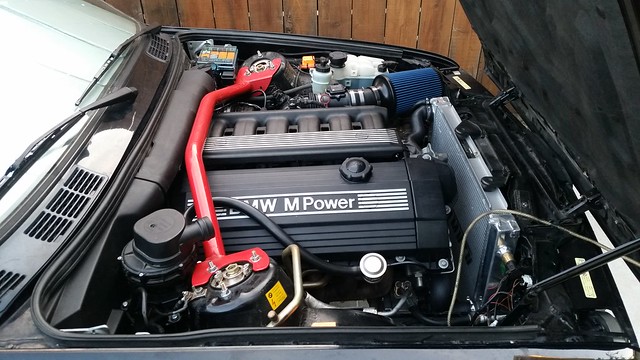
    Latest pics of the engine bay


    Leave a comment:


  • arch4ngel
    replied
    Test Drive

    Break in run was a success!

    The car runs beautifully for the most part. There were a few hiccups but nothing major.

    I drove up to a remote local mountain road.
    The starting point was close to my exhaust shop which was an added bonus.
    Started off relatively easy until I got to open road then proceeded to beat the hell out of the car.
    The road is very twisty but the car accelerates quickly enough I was able to apply full throttle then engine break every time I found a short straight.
    Beginning with sweeps from 3-5k, I worked my way up to 5-7k.

    After about 20 of these sweeps I decided the engine was ready for some 'regular' spirited driving.
    I took the rest of the drive relatively quickly while still taking my time and listening for signs of trouble.
    After 30 or 40 miles I ran into some construction. This gave me a chance to let the car idle for awhile and make sure the fan came on as expected, etc.
    After the construction zone I encountered some beautiful new pavement and tore my way down the mountain.

    I've got to say this engine is perfect for the car. In any gear even up steep hills the car never felt like it was lacking or running out of steam.
    I can see myself eventually wanting to squeeze out a bit more power but the current setup should keep me happy for awhile.

    The exhaust note is pure sex. I wasn't quite sold on the giganto tips at first but they're starting to grow on me and the remus cat back was free so I really can't complain. The tone is great, has a nice growl but doesn't drone at all and is fairly quiet until you open it up. When on throttle the sound is fantastic but isn't loud enough to attract unwanted attention.

    On the down side, I found a few bugs that will need to be ironed out before my bar appointment next week.

    Peak Codes:
    Fuel Injector #1 - This code appears to be re-occurring, so I had my injector rebuilder send me a couple spares for testing. Should be in on Thursday.
    A/C relay - Didn't realize this would be a problem, a small modification to my .bin and a reflash should solve this one.
    MAF - This one is a bit disconcerting. I seem to have MAF related issues (stalls occasionally on startup and idle is a bit off) so I ordered a brand new one. Not cheap but worth the peace of mind. If this for some reason doesn't clear the code I may be up shit creek as I won't have time to take it in for a smoke test until after the appointment.
    Vehicle speed signal not present - See below.

    Other problems:
    Check panel weirdness - This one I'm actually a bit concerned about. The check panel now lights up almost completely (5 out of 9 lights stay illuminated) and pushing the check control reset button doesn't do anything. The check light on the cluster stays lit whether or not the button is pushed. No idea how I"ll go about troubleshooting this one yet but at least it shouldn't prevent me from being BAR certified.
    Speedometer/ODO - No idea what the problem is here yet. I re-used my 325i diff cover when I swapped to the 3.15 and the sensor was working fine before. I also had my cluster completely rebuilt by BavRest so the speedo should be fine but I'll probably have to take it apart to figure out what's up.

    Obligatory glamour shot.

    Last edited by arch4ngel; 07-08-2015, 09:21 PM.

    Leave a comment:


  • Sh3rpak!ng
    replied
    Originally posted by arch4ngel
    Thanks! I was just reading through your build thread and marveling at all the work you've done.

    For the AC lines I purchased the compressor to condensor and compressor to drier lines from zionsville autosport. Pricey but worth not having to worry about fitment. The rest of the hoses were purchased new from BMW or rebuilt by a local shop (iirc one of them was NLA).

    I did all the dme flashing myself. I just used a cheapo galletto cable and software I purchased on eBay. I have a better setup using the chipster.no software using the ftdi cable but haven't been able to get it to work yet. Changing emissions and rpm/speed limit settings are actually quite easy. Tuning naturally is more difficult. I can send you some resources if you're interested.

    Sorry the schrick manifold is long gone.
    Hahaha yea I'm a glutton for punishment when it comes to working on my cars. I'll probably just have my lines rebuilt/modded.

    Hell yes please send me resources. I am interested in changing the emissions/rpm limit/ews delete etc. If I can do that stuff myself it would save some headache.

    Figured the schrick IM would be gone. Oh well.

    Leave a comment:


  • arch4ngel
    replied
    Originally posted by Sh3rpak!ng
    Great progress!! You beat me on the AC install. I still need to get my lines modded. Did you just bring them to a shop?

    Also agreed on the brake booster fiasco. I wound up doing A LOT of modifications to get everything fitting properly. Much more of a pita than it's made out to be.

    How are you / what are you using to flash your DME to remove ews etc?
    Is your schrick intake manifold for sale?
    Thanks! I was just reading through your build thread and marveling at all the work you've done.

    For the AC lines I purchased the compressor to condensor and compressor to drier lines from zionsville autosport. Pricey but worth not having to worry about fitment. The rest of the hoses were purchased new from BMW or rebuilt by a local shop (iirc one of them was NLA).

    I did all the dme flashing myself. I just used a cheapo galletto cable and software I purchased on eBay. I have a better setup using the chipster.no software using the ftdi cable but haven't been able to get it to work yet. Changing emissions and rpm/speed limit settings are actually quite easy. Tuning naturally is more difficult. I can send you some resources if you're interested.

    Sorry the schrick manifold is long gone.

    Leave a comment:


  • Sh3rpak!ng
    replied
    Great progress!! You beat me on the AC install. I still need to get my lines modded. Did you just bring them to a shop?

    Also agreed on the brake booster fiasco. I wound up doing A LOT of modifications to get everything fitting properly. Much more of a pita than it's made out to be.

    How are you / what are you using to flash your DME to remove ews etc?
    Is your schrick intake manifold for sale?

    Leave a comment:


  • arch4ngel
    replied
    Replaced the alternator with the mz3 unit.
    The wires are relocated to the top of the back plate.
    Unfortunately this puts the wires right into where the bimmerworld oil distribution block puts my oil pressure switch.
    Removing the sensor and replacing it with a bolt did the trick for now but I'm going to find a way to hook it back up eventually.
    The podi gauges are fine but an extra layer of security in case the gauges fail would be nice.

    With the new alternator in place the car fired right up and idled at 14.0 to 14.1 volts.
    The idle is smooth but I noticed a little misfiring when holding the throttle steady at around 2k rpm.
    Peake tool shows codes for injector #1 and maf. Hopefully everything will clear up during the break in run.

    I was able to bring the car up to operating temp.
    The blower is pushing hot air and the fan turns on right before the gauge hits the middle bar, perfect.

    All that's left before the exhaust shop and break in is to clean up some wiring, install the headlights, permanently install the sap and partially assemble the interior.


    Last edited by arch4ngel; 06-29-2015, 10:55 PM.

    Leave a comment:


  • arch4ngel
    replied
    It's alive!
    I'm going to circle back to the emissions equipment installation and post swap wrap up in a later post.

    This project has been frustrating, anxiety inducing and extremely tough on my wallet.
    Hearing the unrestricted fury of a rebuilt s52 coming to life for the first time made it all worth it.
    Scared the hell out of my dog haha.

    There are so many moving parts, so much margin for error I was sweating bullets when I first turned the key.
    I ran into some trouble getting the car started (detailed here).
    It took awhile to track down the culprit but the car started right up when I figured it all out. The injectors froze up from sitting too long. Looking at the invoice I realized I had them rebuilt over a year ago!

    Special thanks to justXtreme for getting a replacement set of injectors out to me so quickly. He didn't have time to turn around the injectors for me same day so he was nice enough to send a replacement set out so I could get to work that weekend.

    Once the car started my podi.ca gauge pod came in handy helping me quickly diagnose a bad alternator. I pulled a bunch of codes but I'm not going to worry about them until I get the alt replacement and the ecu is running on proper voltage.
    After a bit of research I found an alternator without the cooling vent hole. I had to grind the lip down quite a bit to make room for my oil cooler hoses and I'm fairly sure despite my best efforts some shavings fell into said hole and melted inside the alt.
    It turns out the s52 mz3 came with a factory oil cooler like the euro m3. The alternator has no cooling duct and outputs 25 more watts, exactly what I need.

    I have a BAR appointment coming up in a few weeks, should be enough time to get to the exhaust shop and work out any bugs.

    Obligatory start up vids:

    Leave a comment:


  • arch4ngel
    replied
    Throttle Cable

    After a ton of research and purchasing both e36 and e34 cables I decided the e36 was the way to go. I'd personally rather have too much slack (can be adjusted out) than not enough.

    Originally my 735i brake booster bracket was pushing the booster too far forward. This led me try several different hack ways at fitting the cable, all of which led to broken cables. Long story short, don't modify your throttle cable if you can help it, it will probably bind and/or break on you.

    Once I got the brake booster issue figured out I had more room but still not quite enough for the cable to fit properly. Next I started messing with the cable bracket on the throttle body. I basically pulled the bracket off and hammered it so the "lip" was hammered flat and the holes were angled slightly outward. This gave me a few more mm of clearance and moved the cable slightly to the side to prevent it from hitting the booster. This just about did the trick, the only modification still needed was to shorten the adjuster by about half (see pic).

    With the cable now fitted and with proper clearance I had to figure out a way to adjust the cable. I found some go cart throttle cable stops on ebay that did the trick. I'm using loctite on the set screw and I bought a few spares to ensure I don't get stranded if it falls off.

    Bent bracket


    Chopped adjuster


    Throttle cable stops

    Leave a comment:


  • arch4ngel
    replied
    Originally posted by kamotors
    nice work
    Thanks Kam, it's kind of sad you've done 3 swaps in the time it's taken me to do one. Well less than one.

    Originally posted by ncrmtrsprtsE30
    I always wondering why people are piecing together OE brake parts to rig their brake system for swaps..

    why not opt for the boosterless wilwood pedal box and remote res's.. as Garagistic does.. http://store.garagistic.com/ocart/e3...ss-brake-setup

    edit: nice build btw, i will be coming back here for info lol
    This is going to be a street car with occasional track use. I wanted to keep the brake feel more or less stock. Smaller boosters, boosterless setups all increase braking effort from what I've read. The iX/735i booster setup used all stock parts with no modifications necessary.

    Leave a comment:


  • ncrmtrsprtsE30
    replied
    I always wondering why people are piecing together OE brake parts to rig their brake system for swaps..

    why not opt for the boosterless wilwood pedal box and remote res's.. as Garagistic does.. http://store.garagistic.com/ocart/e3...ss-brake-setup

    edit: nice build btw, i will be coming back here for info lol

    Leave a comment:


  • arch4ngel
    replied
    Brake booster

    The infamous brake booster.
    Not sure why so many folks claim this is easy, I had a bear of time with it.

    As i noted earlier in the thread I started off with a e32 735i booster and master. This seemed to fit at first but as I started buttoning down the car I quickly realized there were going to be fitment issues.

    I started out by cutting off the rear fins on the m52 intake manifold.
    This helped a bit but I was still just touching. Next I tried very lightly dremeling the bit that was touching but I inevitably broke through the plastic. After getting another manifold I started playing with engine mount spacers.
    Again this seemed to help a bit but even with several head washers stacked under the mount arms the manifold was still touching. Back to the drawing board.

    After much research (and re-research at this point) I came upon a thread mentioning that the spacer on the iX booster is shallower by 6mm than the 735i spacer. So I decided to put out for another booster when I couldn't find just the spacer for sale.
    Lo and behold! The spacer was not only 6mm shallower but also offset downwards by several mm.
    Didn't get a chance to measure but should be about the same distance as the spacer was shallower.
    This allowed the booster to sit lower and now easily cleared the manifold.
    Also the throttle cable problem, though not quite solved, had significantly more room now.


    Unfortunately the iX booster's vacuum port was now very close to the shock tower.
    This meant it would be nearly impossible to remove the check valve if that was necessary. Good thing the 735i booster has the port on the other side!

    Basically my setup now consists of an iX booster spacer, 735i booster, e36 check valve and e30 clevis.

    As an added bonus I discovered that either manifold will work using these parts. They are both practically the same dimensions.

    Leave a comment:


  • kamotors
    replied
    nice work

    Leave a comment:


  • arch4ngel
    replied
    Originally posted by Toodaloo
    Awesome progress! It was grey to meet you on Friday and check out the car, Raphael! Anytime you need help, shoot me a call or text. I'll pm you my number.
    Thanks buddy!


    I'm currently at an impasse with the car so I now have time to finally update this thread!
    The thread is sorely out of date so I'm going to try and focus on a particular area for each of the following posts:

    - Brake booster
    - Throttle body cable
    - OBD2 emissions plumbing/ fuel system replacement
    - Everything else

    Leave a comment:


  • Toodaloo
    replied
    Awesome progress! It was grey to meet you on Friday and check out the car, Raphael! Anytime you need help, shoot me a call or text. I'll pm you my number.

    Leave a comment:


  • arch4ngel
    replied
    Soon to come.
    Have been busy trying to finish the car but I'll fill everyone in when I get a chance.

    Leave a comment:

Working...