

subscribed
-
-
-
Wow. Great work so far. I wish I had the spare time to embark on a project like this.- '88 m54 coupe
<3Comment
-
This is gonna be good, subdOriginally posted by Wh33lhopComment
-
Well last week I started the final stages of stripping the undercoating off.. the passenger front wheel well is the last thing I stripped!
So glad that is all over with. I would estimate I have 70-80 hours into the stripping process.
Then this week I learned how to MIG weld by starting to mess around with my buddies welder that I've had in my garage since I started stripping.
After messing around on a spare tail panel I decided to jump right into stitching the chassis.
I need to go back and redo some welds from the beginning and some that just don't meet my standards of work quality.
Being a 115V welder you have to make sure the metal is CLEAN since the rubber undercoating inside the seam (that you will never get 100% out) will pop and contaminate your welds.
You can't have any other issues with primer still being there or any other contaminate.
I'm about 80% done stitching the chassis. I called it a night and took the drop cloths down to sweep and blow out the garage.
What an easy cleanup (compared to IronFreak's garage ;))
Updated to do:
finish stitching/paint underside
take off the rotisserie
tail panel replacement
rust repair
fiberglass flares/hood/bumpers/skirts/sunroof mounting
hydraulic e-brake fab
removable core support
CAGE
back onto rotisserie
install fuel tank/lines
refresh/install suspension
take off the rotisserie
fill in door molding recesses
cut/mount lexan rear quarters/rear windshield
body work prep
PAINT
all this by 2014ish is the plan... and school starts next monday :(


 Last edited by unloadedak; 04-17-2014, 11:40 PM.
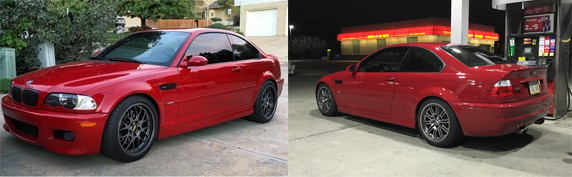
2003.5 Imolarot M3: daily
1995 Alpinweiß M3: hpde
Comment
-
Great work, Adam!
CAGE ALL THE THINGS!!!!‘Tis by the grace of God that my cars run!Originally posted by LJ851
Siobhan's Build Thread - UPDATED!Originally posted by unloadedak

Comment
-
This will be so awesome.
I've also been looking for the link to the Czech parts for the longest time, so a bonus surprise :)Comment
-
Looks good man, I'll have your sheet metal this weekend.sigpic
Rebellion Forge Custom Fabrication
1988 325is - TrackRat in progress
Instagram @rebellionforgeComment
-
looking good, Thats a lot of work!

•• Powersteering Deletes • M20 Motor & Trans Mounts • 24V swap mounts • UHMW Offset CABs ••
•• Rear Subframe Bushings • RTABs • Facebook ••
Comment
-
Wow, this looks amazing. Definitely in to watch the progress.88 325is - S52 powered
Originally posted by King ArthurComment
-
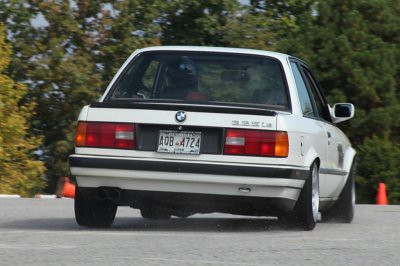
Keep hooning in this thing. It looks like a boat load of funComment
-
I started this labor day weekend doing a ton of work on the car.
First I took it off of the rotisserie and 'fixed' the rotisserie to make it a set of extremely tall jack stands so all of the body work is at working height.
I then grabbed all of the fiberglass parts and started to mock them up with masking tape.
Then I took the angle grinder and took off one of the rear flares to see how stable the fiberglass would be with no support on the arch. Check out all that bondo lol
It's fairly stable but I will probably add in my own flare just to push it out more so I can fit more tire ;)
Front fenders are totally mounted and fit pretty damn good.
Next is to order some cleco clamps, rivets and other fab stuff to get all this stuff mounted.


 Last edited by unloadedak; 04-17-2014, 11:53 PM.
2003.5 Imolarot M3: daily
1995 Alpinweiß M3: hpde
Comment
-
Wow, Adam, what an update!!!!!!!!! Schön!!!!‘Tis by the grace of God that my cars run!Originally posted by LJ851
Siobhan's Build Thread - UPDATED!Originally posted by unloadedak
Comment
-
Im subbed this looks nice man keep it up.Float like a cadillac sting like a Bimmer!:)
sigpicComment
-
Fabrication and mounting stuff happened this last week. I got a ton of fiberglass mounted and it's going really good.
Couple phases of bumper mounts shown. Final version being euro bumper mounts with extended portions chopped off with some square tubing and an M12x1.75 nut welded to the end. I have about 10 hours of fab time into these mounts, such a PITA when you're the only one holding the bumper up and measuring.
I needed to push the fenders out to be flush with the wider bumper, I was in the metric section of ACE hardware for at least 40 minutes trying different stuff out and figuring it out in my head, I finally narrowed it down to an 'adjustable' mount, I'm able to push them out if I need to make room for more tire. Bumper is taped up on the sides right now because I'm going to make a splitter to hold the sides up, waiting on Alumilite pricing.
These are just rough welds ;) need to be cleaned up when it's on the rotisserie.


I then went out there today and started by taping up the rear bumper and beginning to line up the drivers quarter panel for drilling holes for my rivets, I'm using cleco clamps to hold it on right now (temporary rivets) and they are worth their weight in gold.
Then I started the then daunting task of cleanly mounting the skirts. I was going to use some of the 3" angle iron from the rotisserie to mount it but it was too heavy, I looked over at a shelf in the garage that is rarely used and thought it was perfect to chop up and use for mounts.
I wasn't sure if it would be rigid so I cut a 3.5" strip and it didn't flex at all! I tacked that on and drilled some holes for clecos and it held perfectly and is so solid it moves the car back and forth. I then began to fab front and rear mounts for the skirt as well. Got all everything mounted except the rear bumper and passenger flare/skirt.
After that I called it a weekend. So glad that I've almost got it all mounted..


 Last edited by unloadedak; 04-17-2014, 11:57 PM.
2003.5 Imolarot M3: daily
1995 Alpinweiß M3: hpde
Comment


Comment