-
You're going to love that hose reel and hose. I got Northern Tools version a while back and it was one of the best upgrades I've done to my garage. So much easier to use than the crappy PVC hose I had been using before, always getting tangled and hard to store. -
So I hope you all had a good Christmas. Other than adding another 12 dozen (or so it seems) children's toys to the clutter in my house, ours was relatively uneventful. Did a bit of car work, some garage work, got a few tools and stuff, etc....
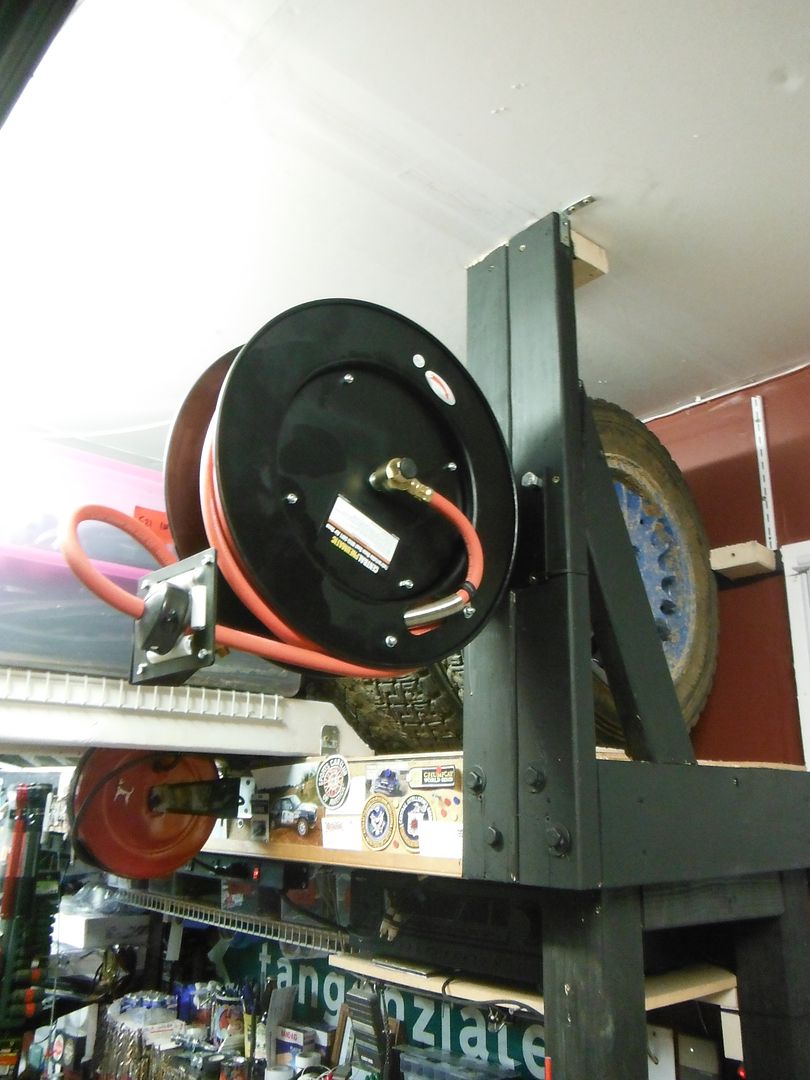
One of my gifts was a 50' air hose reel (the "better" one from Harbor Freight, lol). With a garage where space is at a premium, once again had to think of creative mounting solutions, so I put it up by my tire rack where I can reach it but can't hit my head on it. Came out pretty good. Now if only I had a REAL compressor and not the little guy under my toolbench...
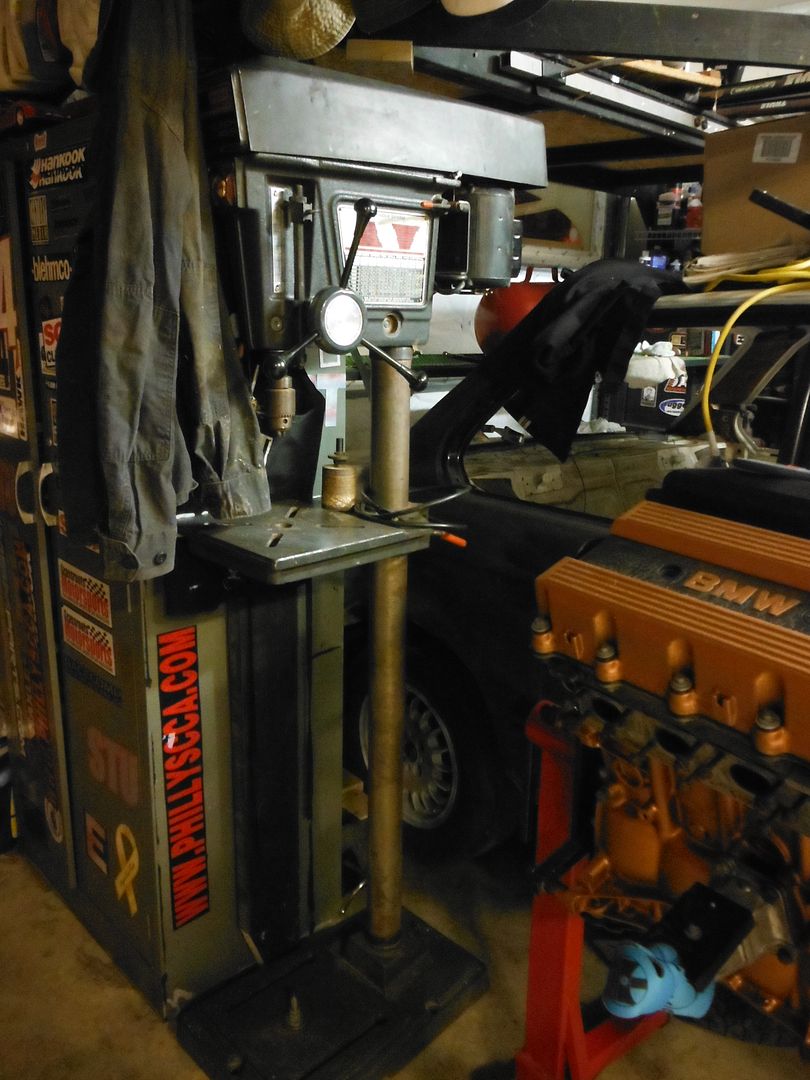
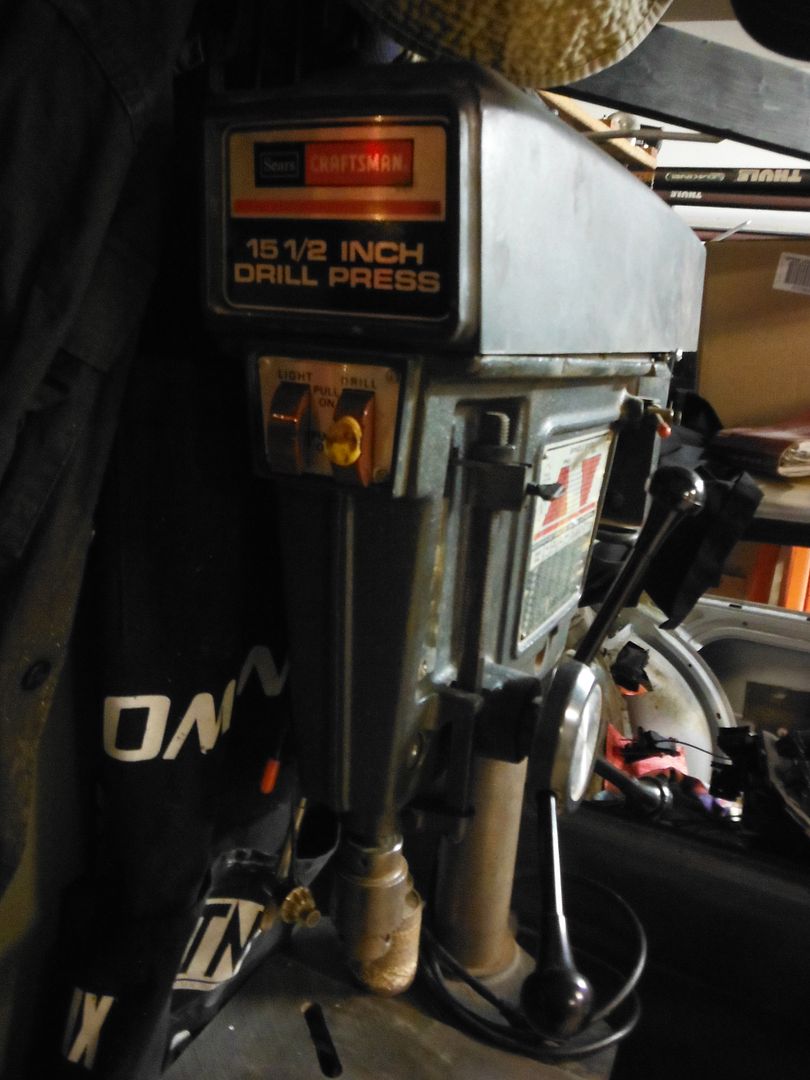
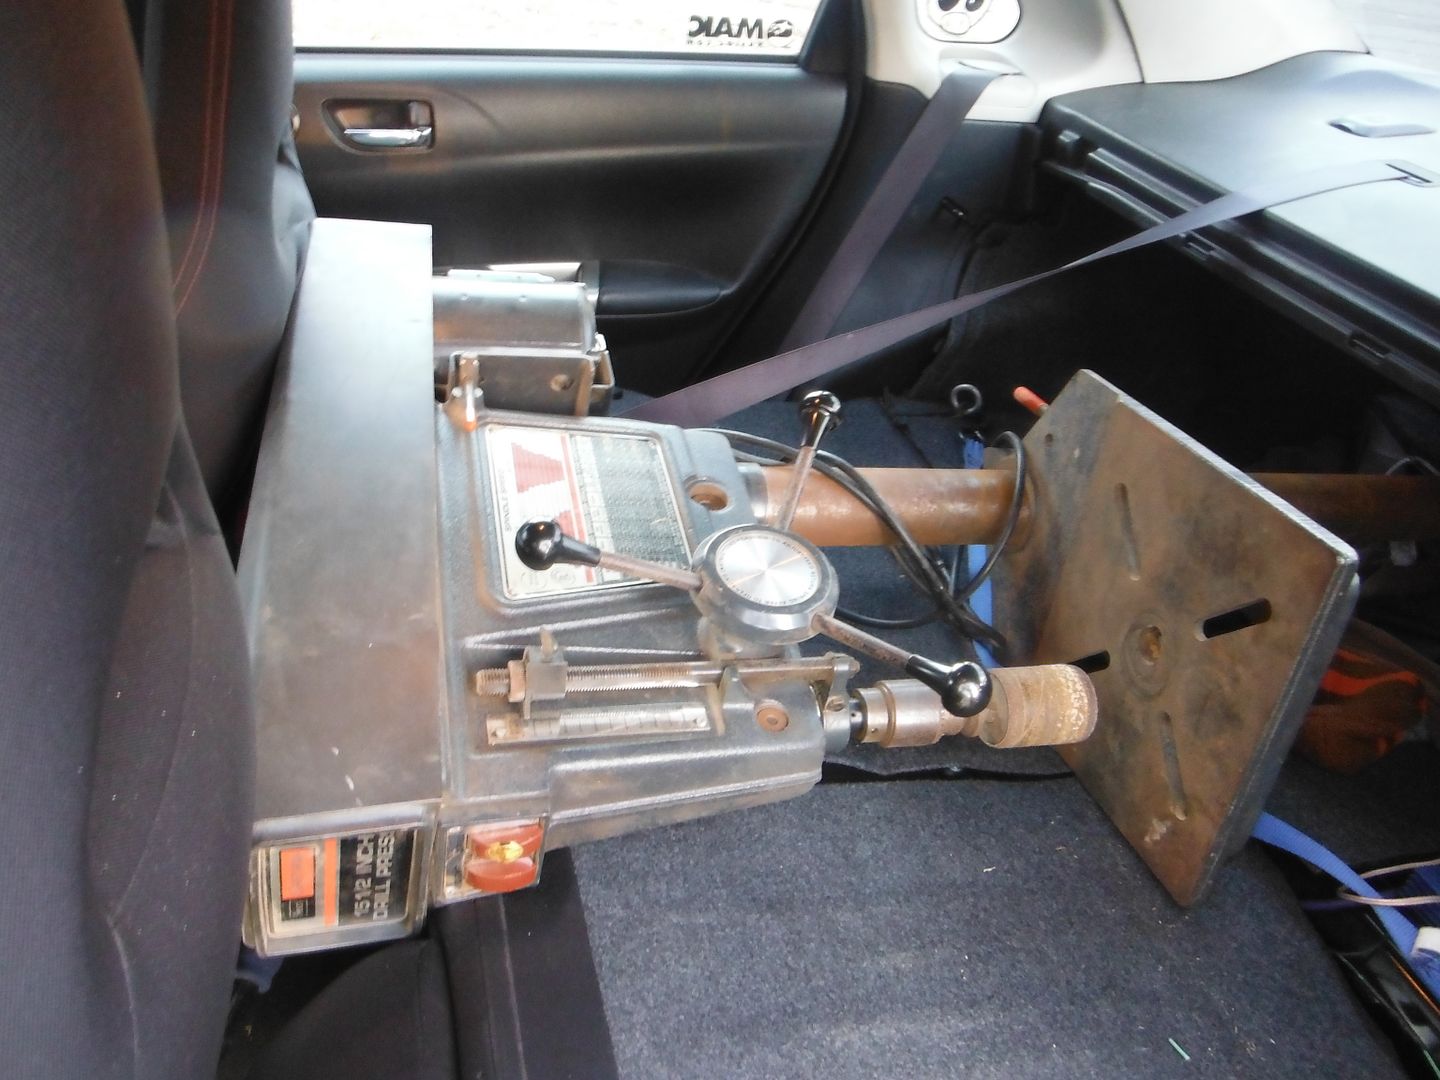
I also got a "gift" for myself courtesy of craigslist on the day after Christmas. I've been watching out for a good deal on a drill press and finally found one from a woodworking shop that was liquidating all their machinery. It's a 1970s Craftsman 1/2 HP 15 1/2" full stand job. Great running condition and has been maintained well. A little cleanup and it looks good and is exactly what I wanted. And for $50 to boot!
And yeah, I brought it home in the WRX since my wife had the truck. That was interesting
Ok, so back to some car stuff. I'm slowly putting some engine bay stuff back together before I toss the engine back in.
Brake booster back in (as well as the clutch master), after a good bit of cleaning, sanding, and painting.
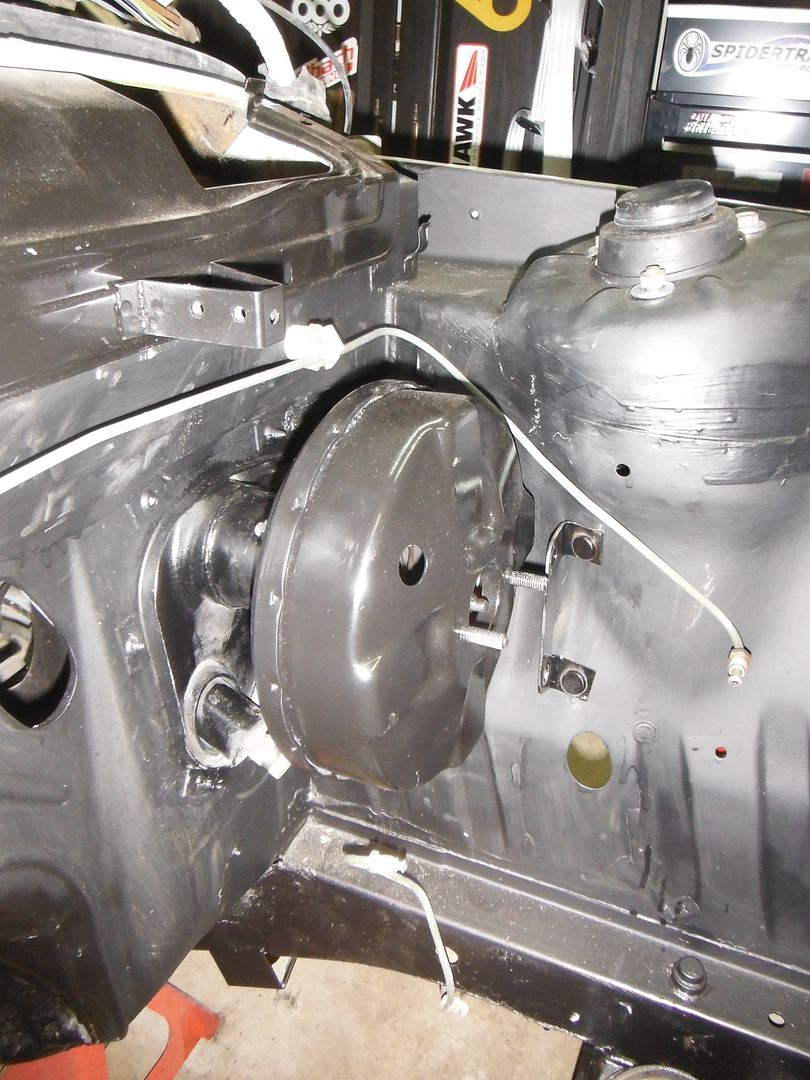
Tonight I'm cleaning up and checking the brake M/C, which had a lot of rust on it but has good seals, and good feel on the throw (though I may rebuild it anyhow). No evidence that it was leaking before, so may not mess with it for a while. In the meantime I cleaned it up and POR-15'd it.
Non-sequitur.....anyone here remember the early 1980s Japanimation series "Star Blazers?" One of my favorites as a kid, and it was a English-overdubbed version of a Japanese series called "Space Battleship Yamato." Anyhow, apparently in 2010 a big studio in Japan made a live-action version, pretty similar in CGI quality to the new Star Trek movies (but with the usual cheesy Japanese acting and penchant for long speeches in emergency situations, haha). Anyhow, my brother scored one up with English subtitles and it's pretty good - so if you watched that show, definitely try to pick up the movie.

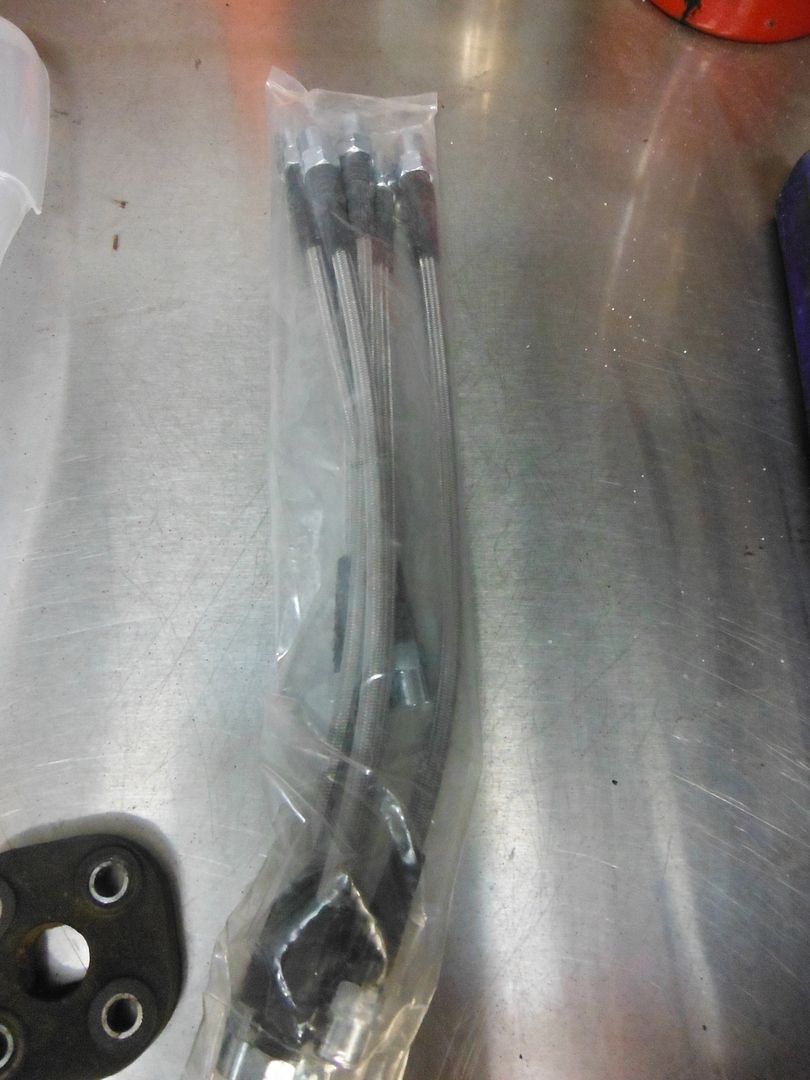
What else what else....oh, picked up a new set of stainless brake lines (Ireland Engineering, I think) from a forum member here for $50. One less thing to get later at a higher price.
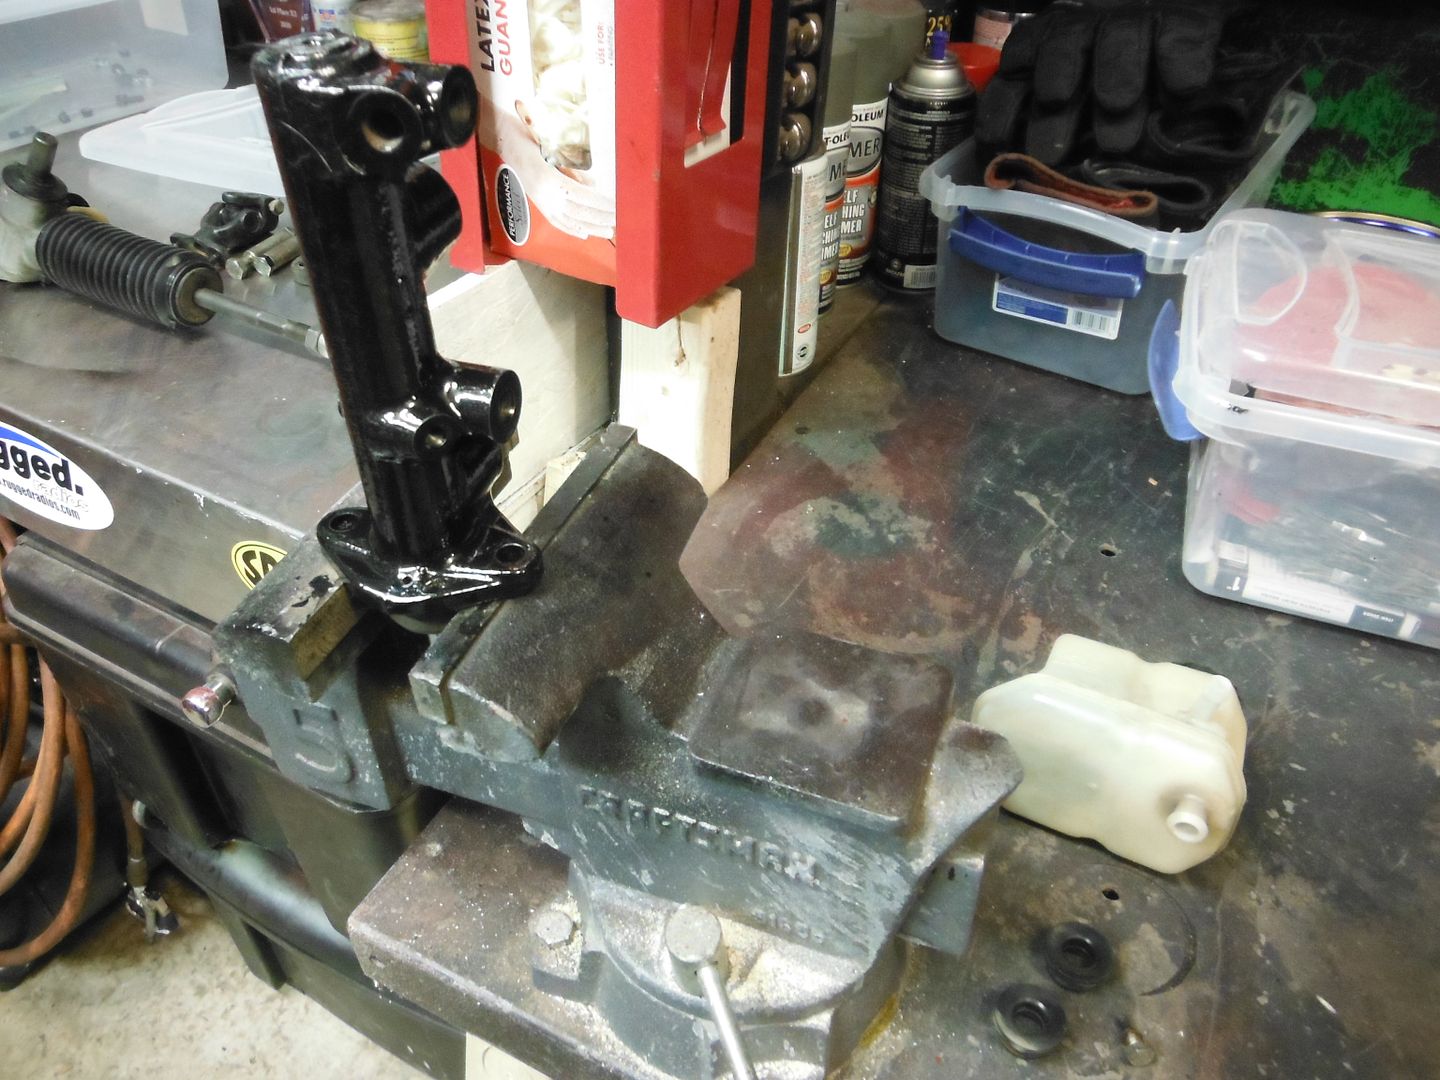
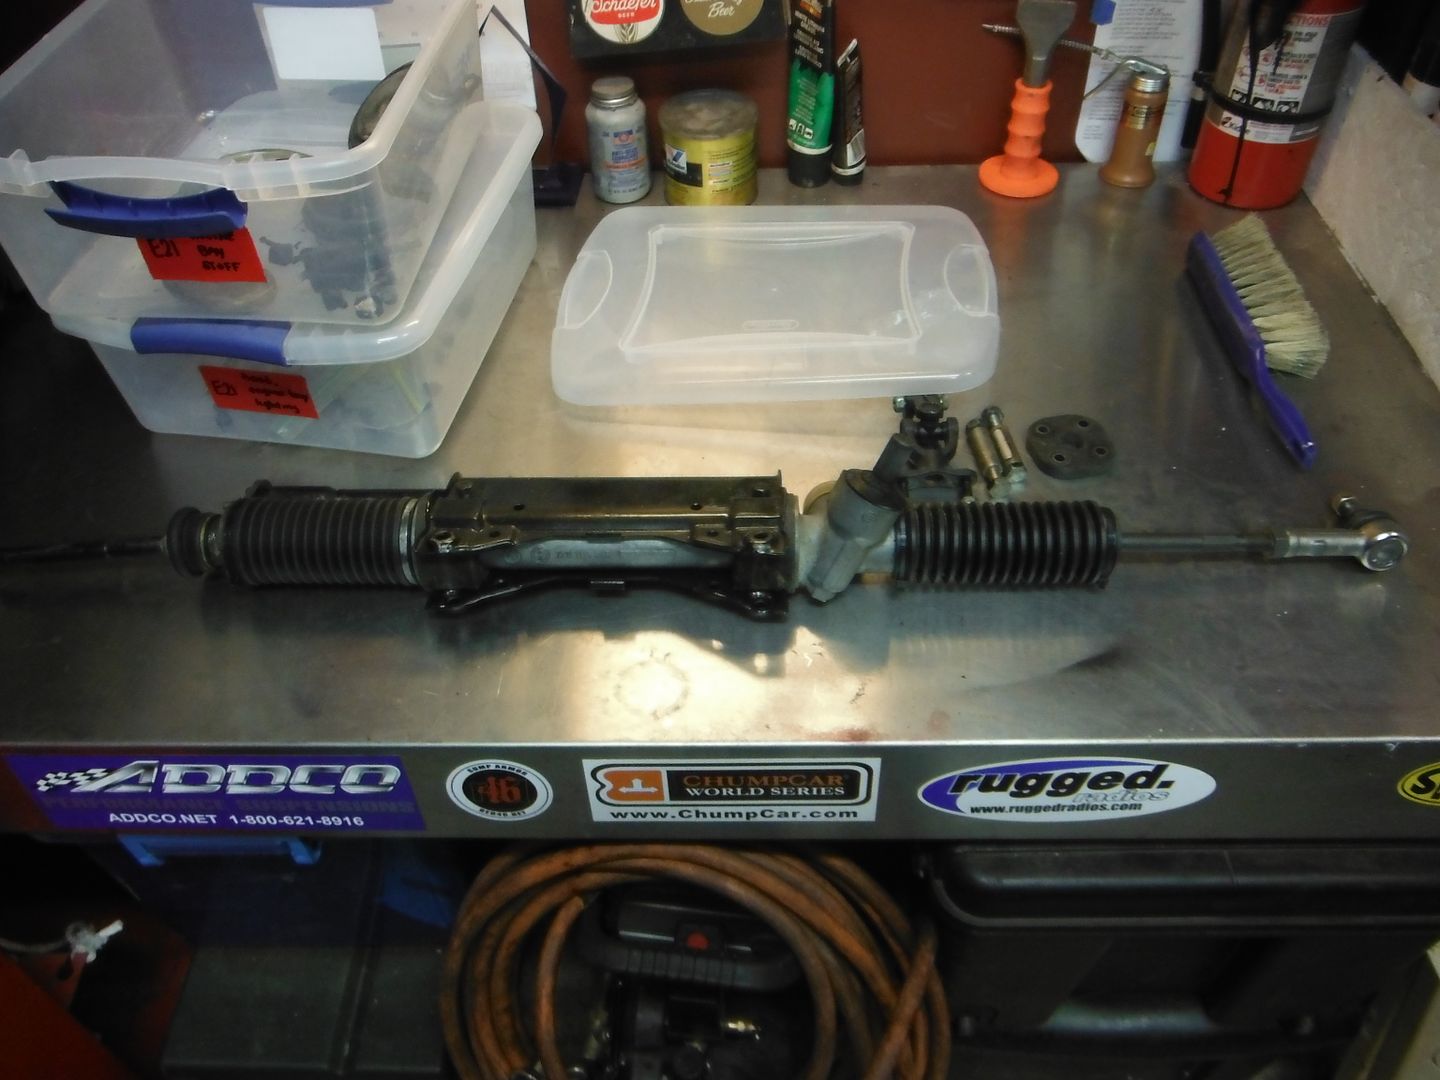
Steering rack is ready to go back in once the eurometric bushings get here. Also cleaned up the linkage, which is tight and has smooth action so that's a plus. It was so gunked up it wasn't smooth, but after a good cleaning it's going well now.
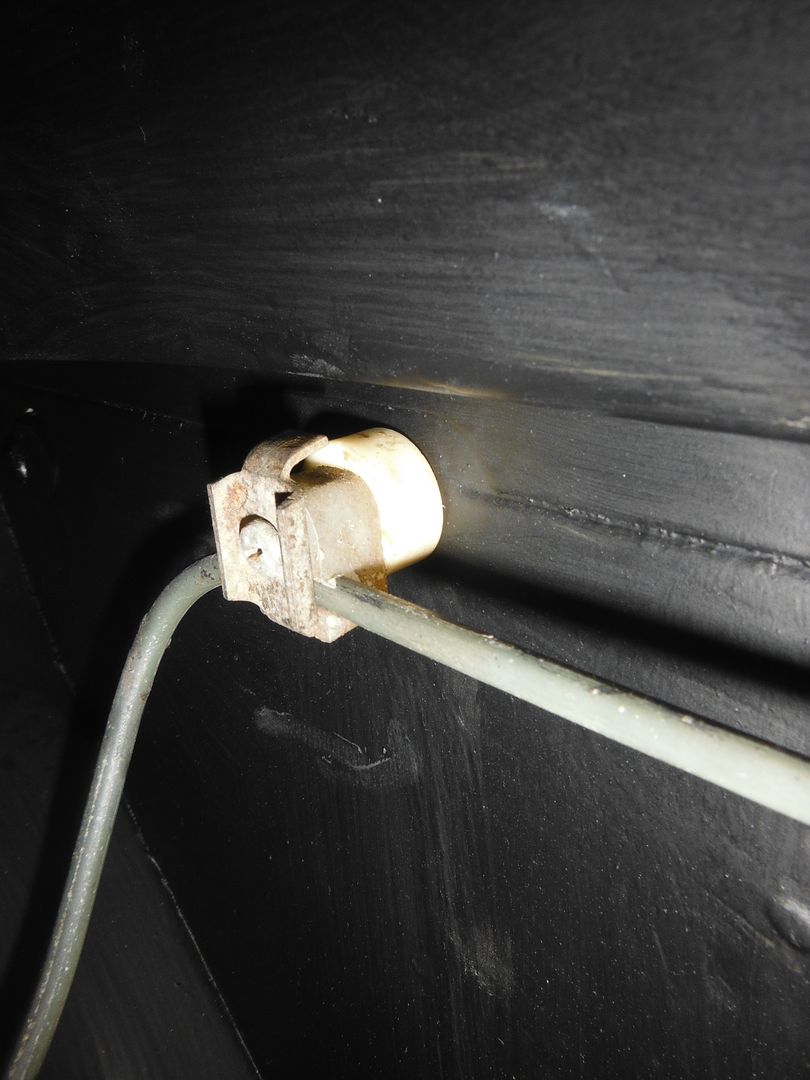
Oh, and one dumb question that I just can't remember.....is this how the clips for the brake line across the firewall go? I can't remember if the line goes above or below, or if I have the clips wrong. The just look kind of odd/not right, IDK.
Leave a comment:
-
-
We did our engine bay with glossy brush on Rustoleum pro. It's been durable and still looks pretty good outside of some minor discoloration from the headers. I didn't do a super great job since we didn't have the bay as completely empty as yours, but it still looks pretty nice.Leave a comment:
-
-
Loving the build. I say stick to it being a weekend cruiser. And when the opportunity arises (keyword "when"), do a 2.0L stroker. Keep with the 320i theme ^_^Leave a comment:
-
I don't think that flat black looks bad at all. Good progress! I also took advantage of the warm to push my car in and get some work done, not often you get a 60+ day a few days before Christmas.Leave a comment:
-
-
-
I've been short on updates recently for the four of you still following this thread, lol. It's been mighty cold recently and no fun to work in the garage. Plus all the holiday stuff has kept me busy on other issues. But somehow we were blessed with a few 65-degree days here in late December, so needed to get some work done!
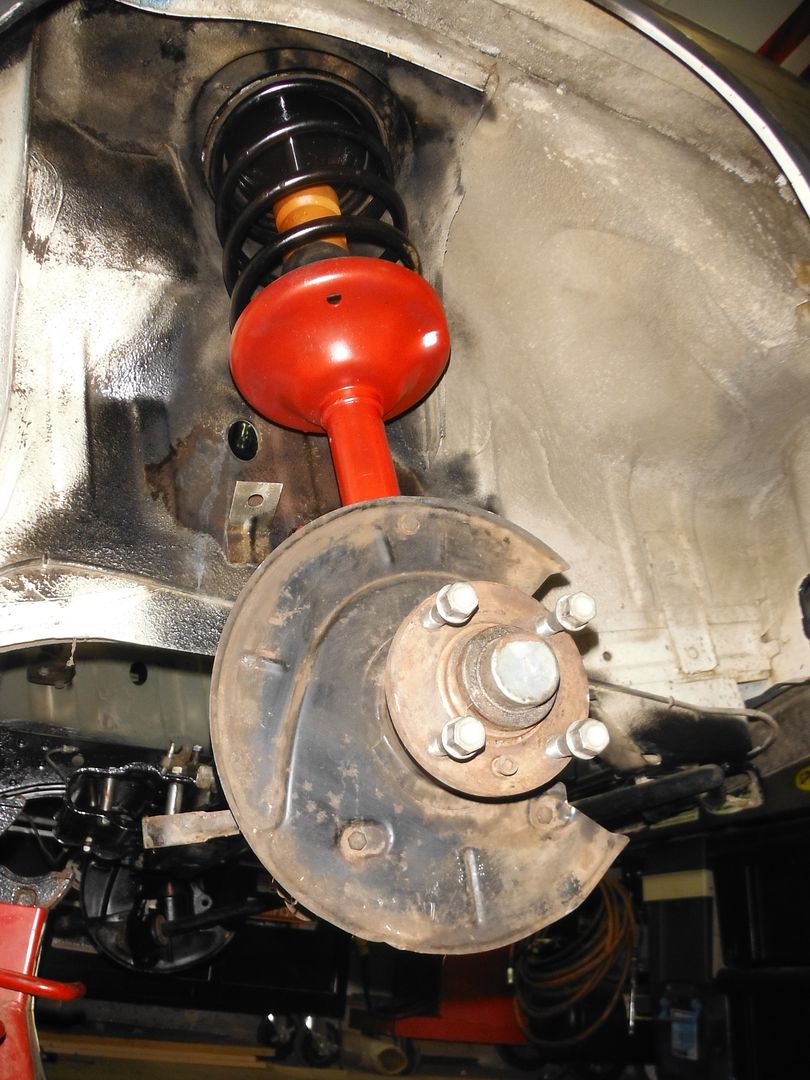
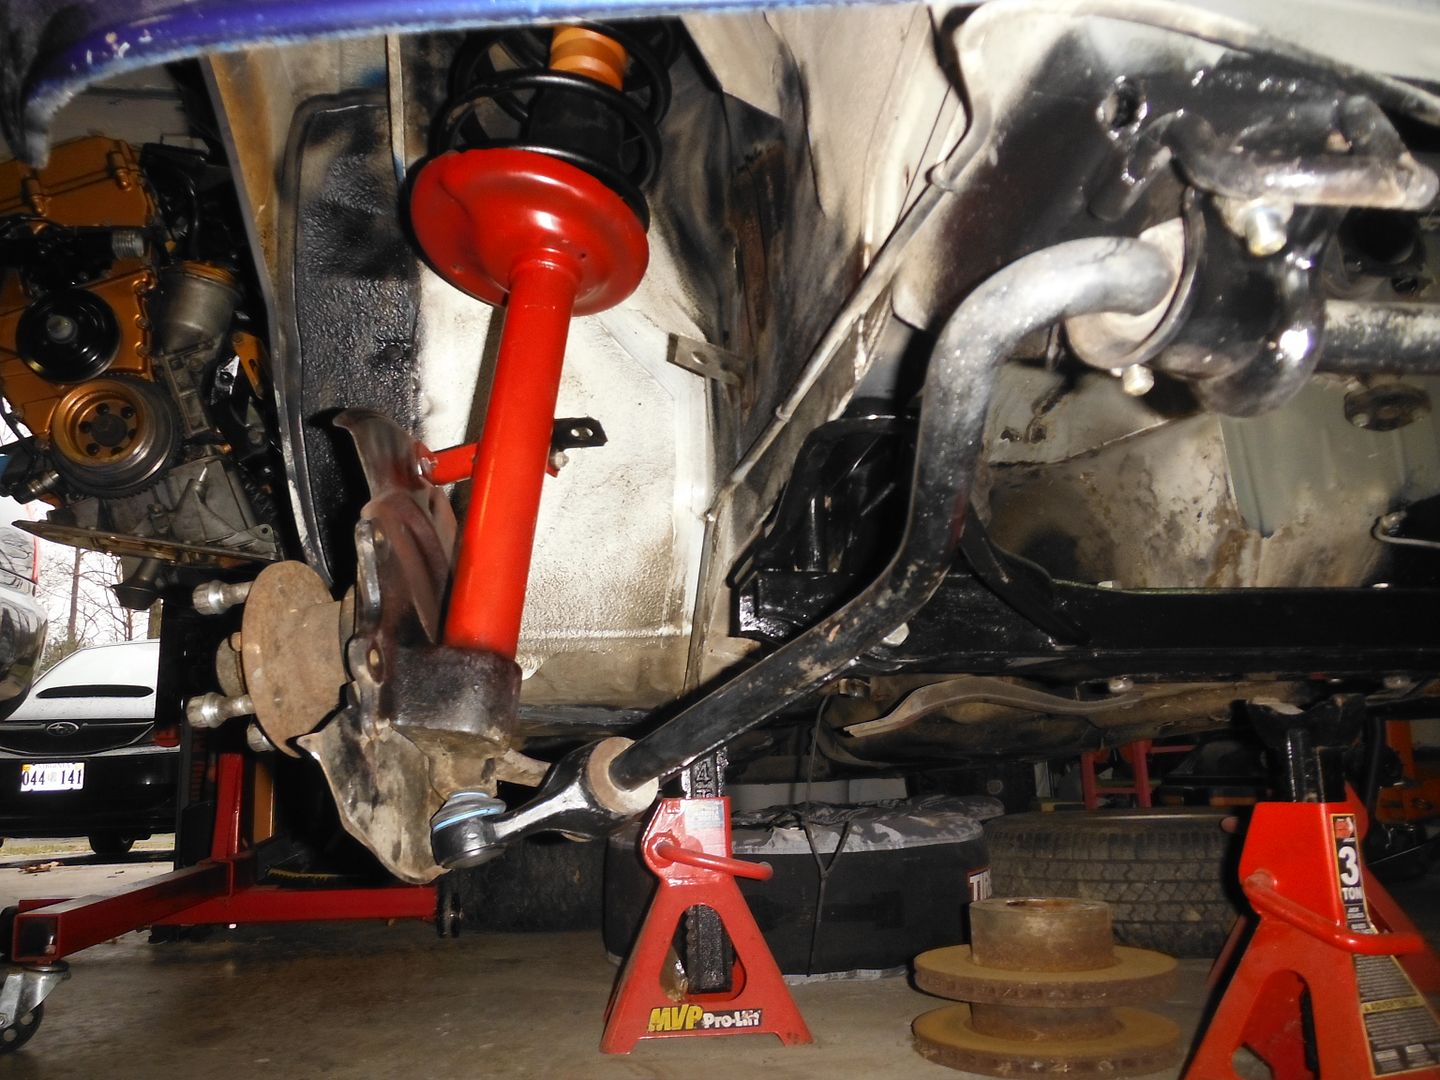
So, got the front struts back together with the Konis, some painted-up stock springs (for now), new upper mounts, new bumpstops, and some red spray paint for the housings (hey, why not....need some color in there).
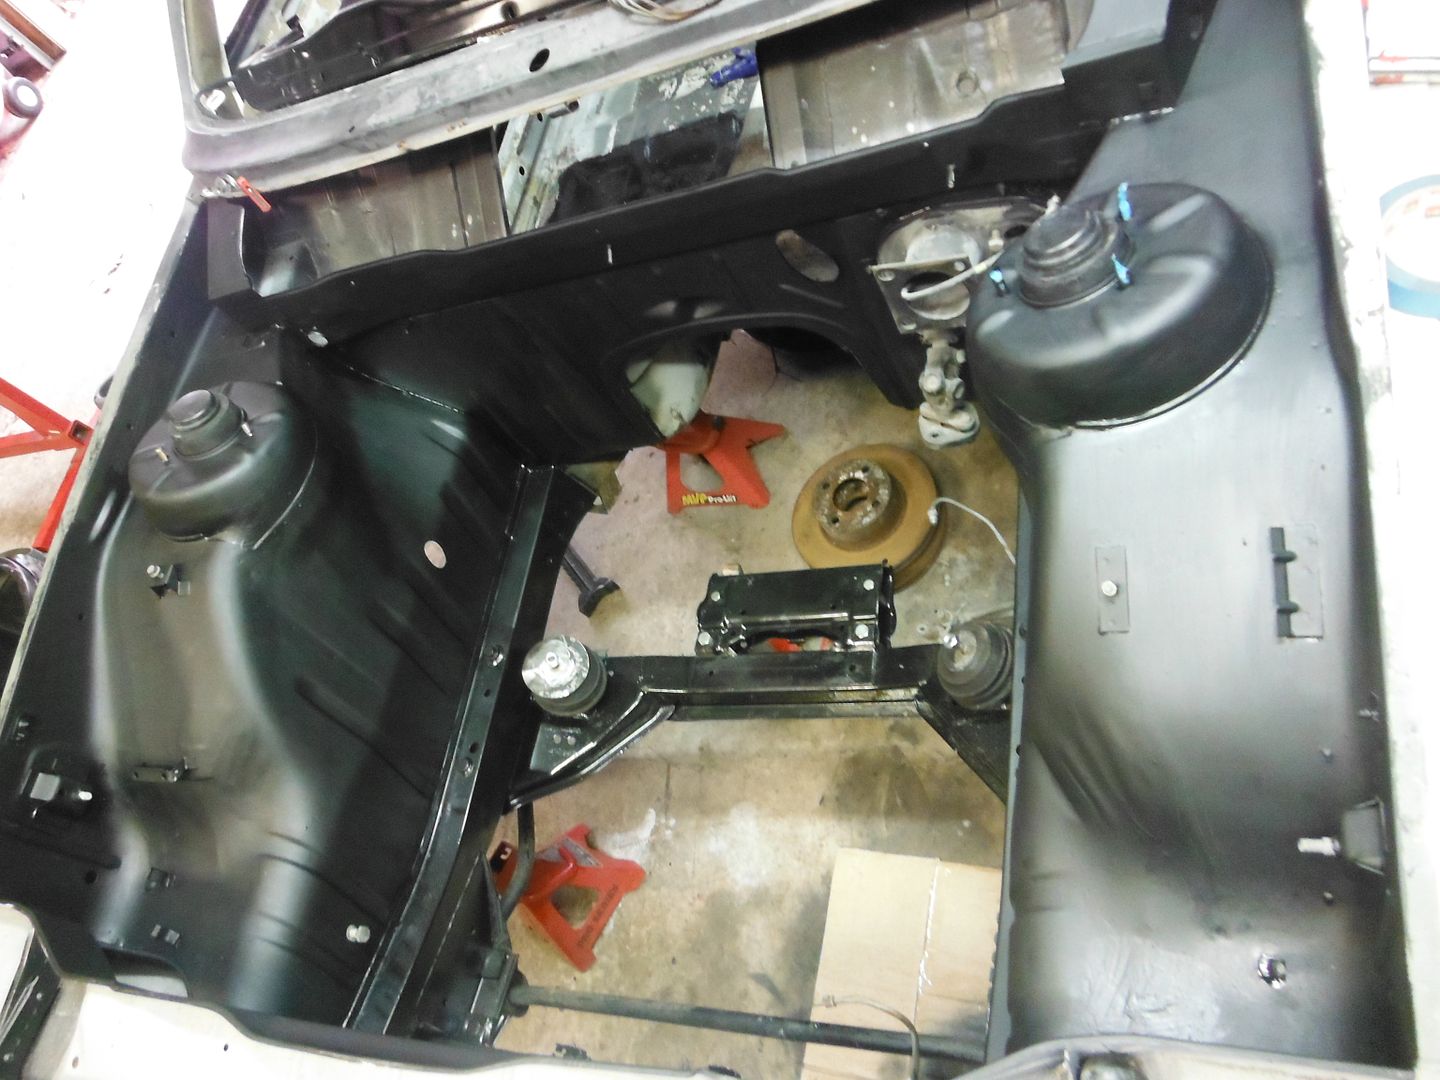
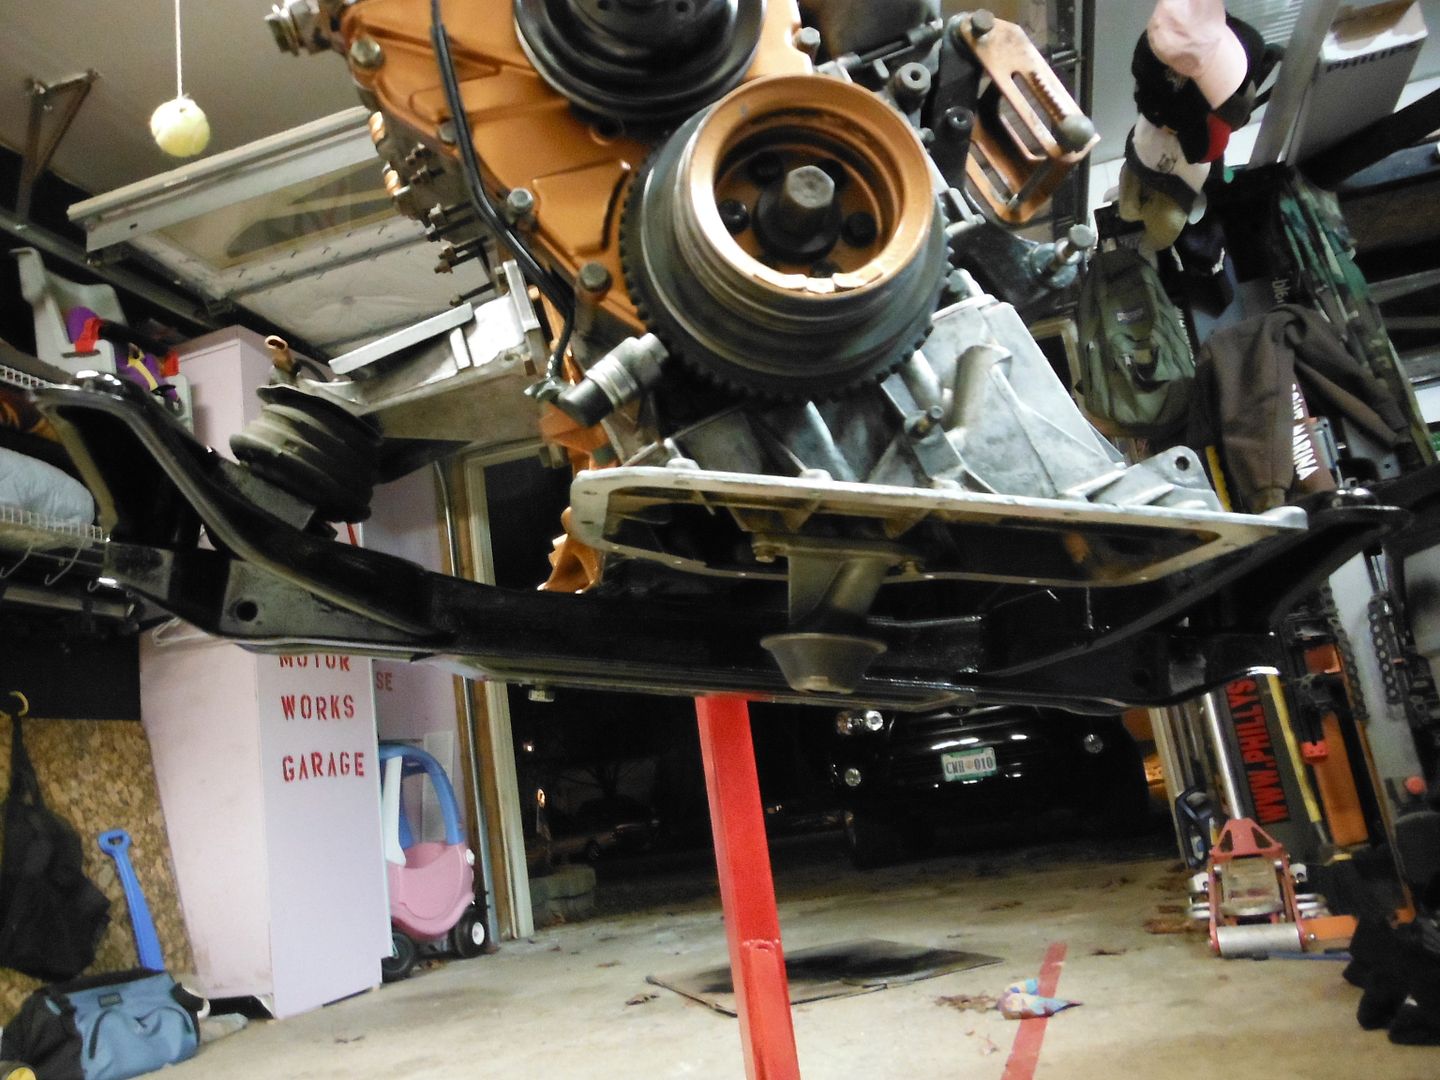
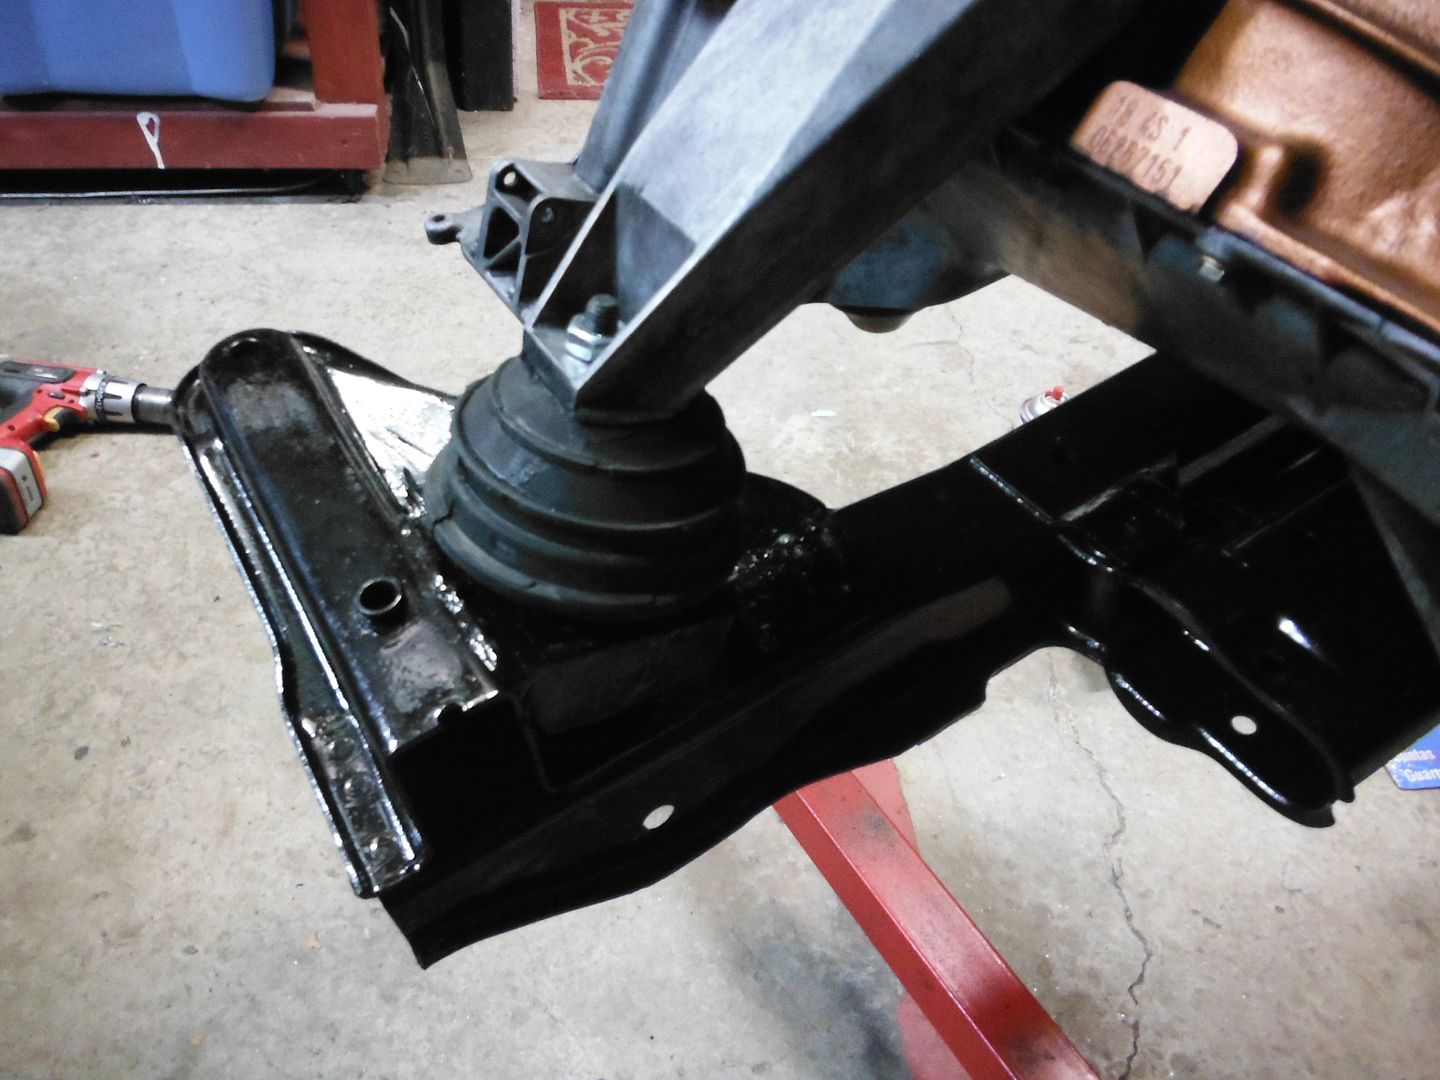
Got the subframe back in...
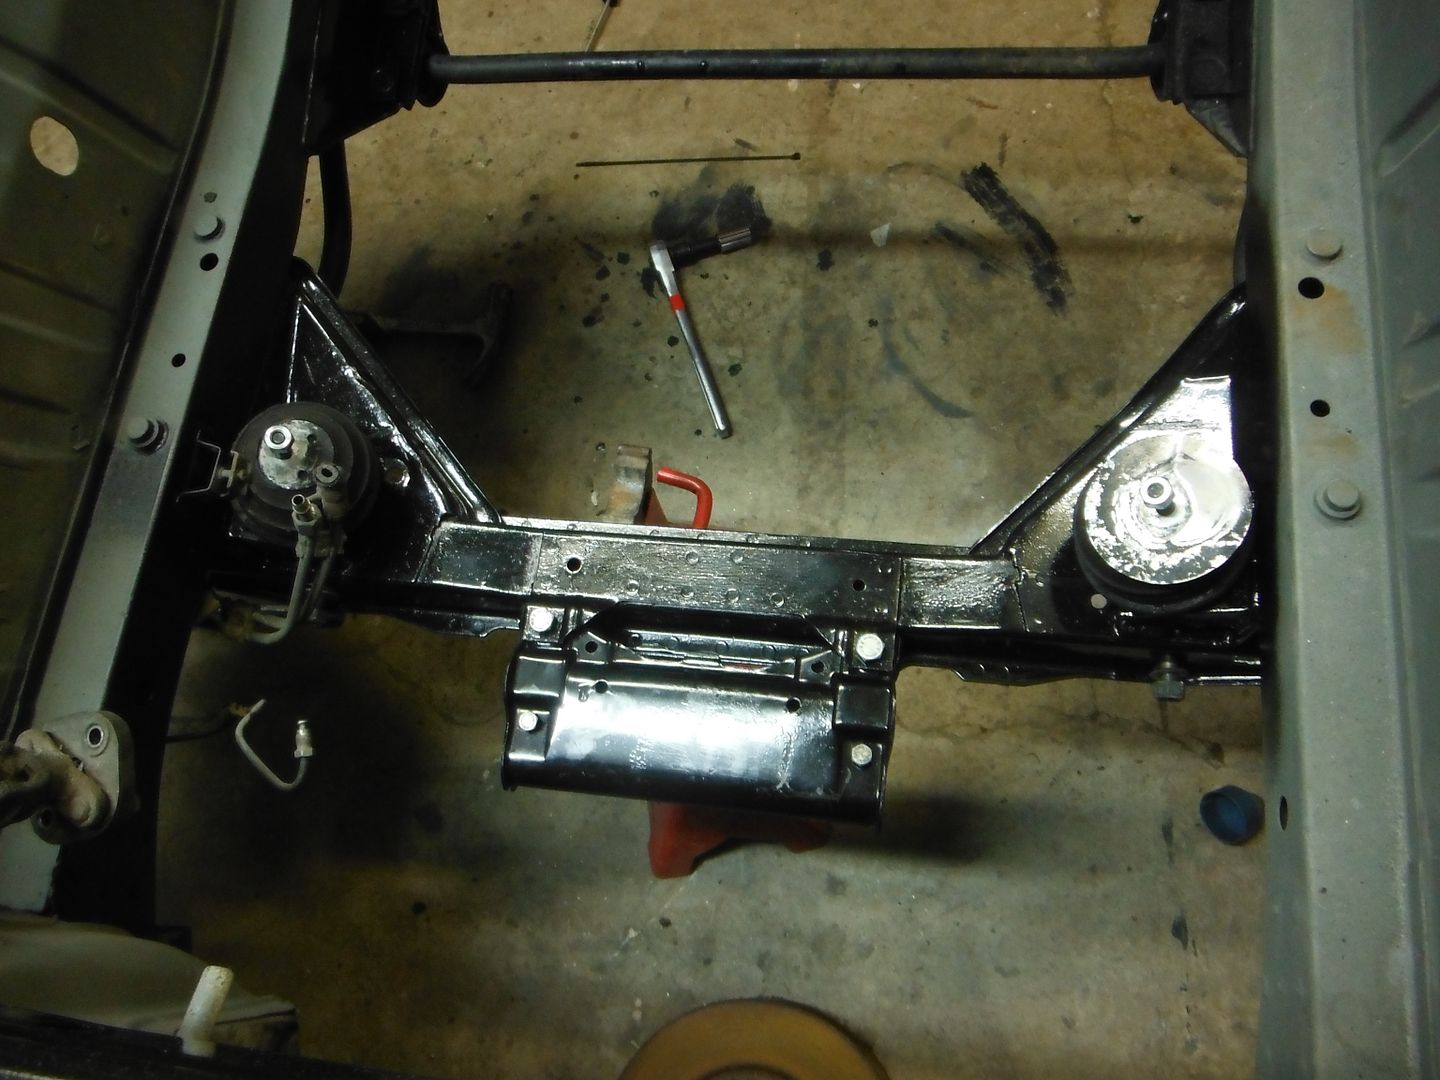
But forgot to grind off the old fuel line bracket, which interferes with the mounts....it's gone now.
Then went about putting the front suspension back together. This is really just temporary, since I plan to change swaybars and springs probably before the car is able to be driven, but I want it together enough to be rolled in and out of the garage. Maybe I just need to learn the "trick" or right sequence, but it took a good bit of muscle to get it all back together and bolted up due to the multiple different parts that are attached together (swaybar, struts, LCAs, etc). But eventually got it all back in with the new LCAs/bushings.

I'm still waiting on the steering rack bushings from Eurometric, but I have gotten a reply from them on their FB page (thanks for the suggestion, whomever suggested that!), and due to the cold weather and no heat in his shop, he hasn't been able to make them yet. No problem, but at least I know what the delay is now and that I'll have them eventually.
In the meantime...with it almost 70 degrees today, decided to try something. Let me put on my flame-suit first.......
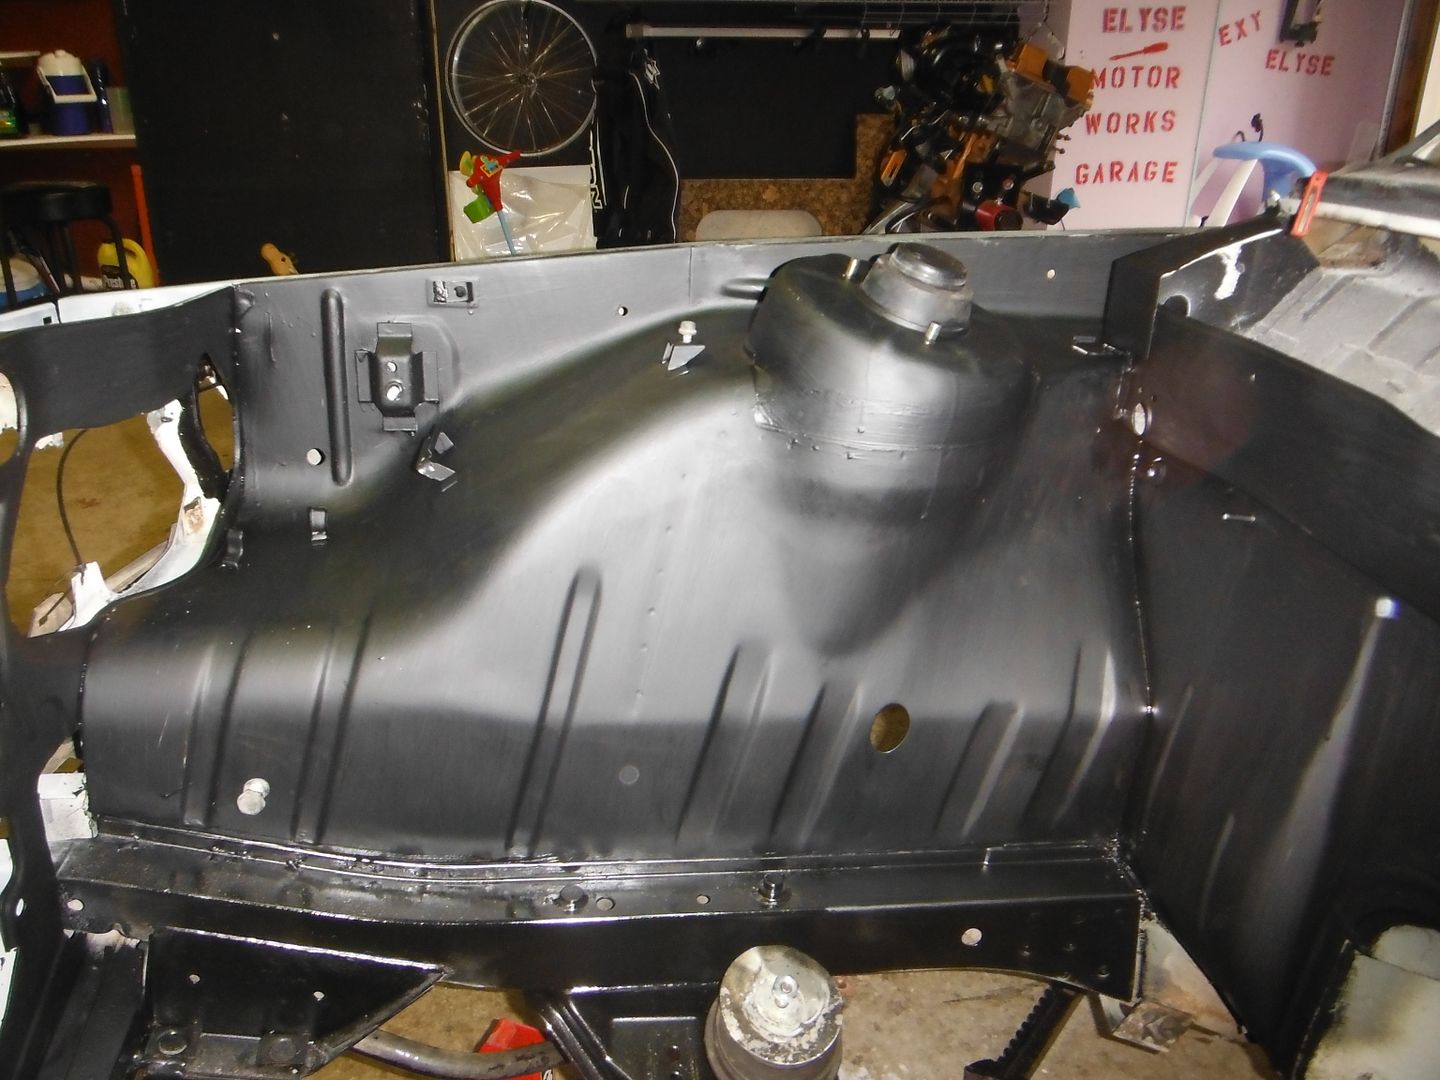
I have a gallon of Rustoleum Professional flat black paint that I'm going to use to do the floorpans and such. My plan had been to do the engine bay in body-color.....but the main problem there is that 1) I haven't decided on a body color yet, 2) It may be 6+ months before I decide and/or get the car painted, and I"m sure I'll change my mind 10 more times on the color in the meantime. But I want to get the drivetrain back into the car now that it's a good ways done. Also note that I'm not a "car show" guy who plans to be sitting around with my hood up very often. I like the bay to look decent - and I'm always impressed by some of the beautiful engine bays I see - but overall I just want it to be functional and not rusty/dirty.
So...I hand-brushed the engine bay. A couple reasons why I did it this way: 1) I'm doing it in a closed garage with poor ventilation, so I can't have a crapload of paint fumes in there with kids in the house. 2) I want a tough, thick finish - but also one that's not so pretty I'll get pissed about if I scratch it up or something. 3) Once I put the drivetrain back in, I'm going to have to weld on some brackets here and there for the coils, MAF, etc. And it will be convenient to be able to just be able to wire-wheel that area, do the welding, and then have an easy off-the-shelf paint to touch up the area with matching paint.
Also since I put some color on the engine, I figure that will be enough cosmetics for me, lol.
So I did a nice thick coat today. This is the same paint that we painted the e30 Chumpcar interior in, and it's been bulletproof on that car. I just used a cheap 75-cent Harbor Freight brush, to boot. Once dry I think it looks pretty good as-is, but the real plan is to give it a few days to dry well, then do some wet-sanding to get rid of any brush marks, and just spray-bomb the entire bay with a light coat of flat black over it, giving it a smoother finish. Then I can start putting the front end back together to some extent.
So, here's what it looks like right now. Looks ok, but it will look better when I'm done, if not real exciting....
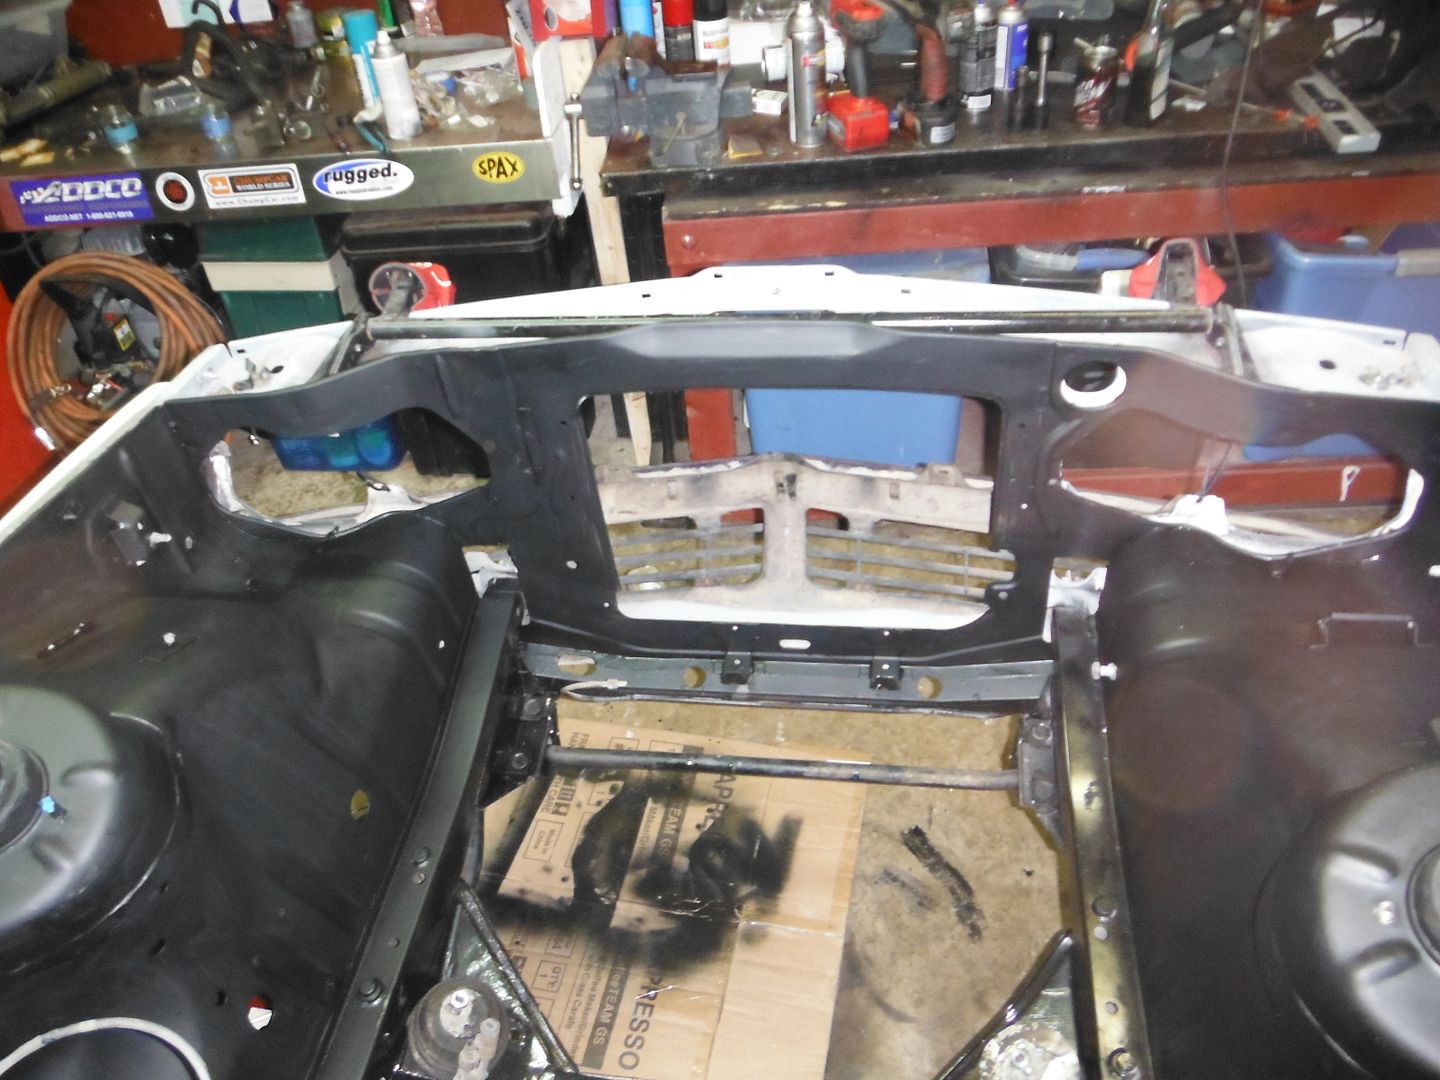
(much of the texture visible here is from the factory seam-sealant around the strut tower)
Leave a comment:
-
-
You do great work Josh! I see that pulley found it's way to you finally.Leave a comment:
-
Progress continues!
Got a few last parts I needed in to put the oil pans back on
Plastic (updated) oil pressure relief valve (next to the original one)
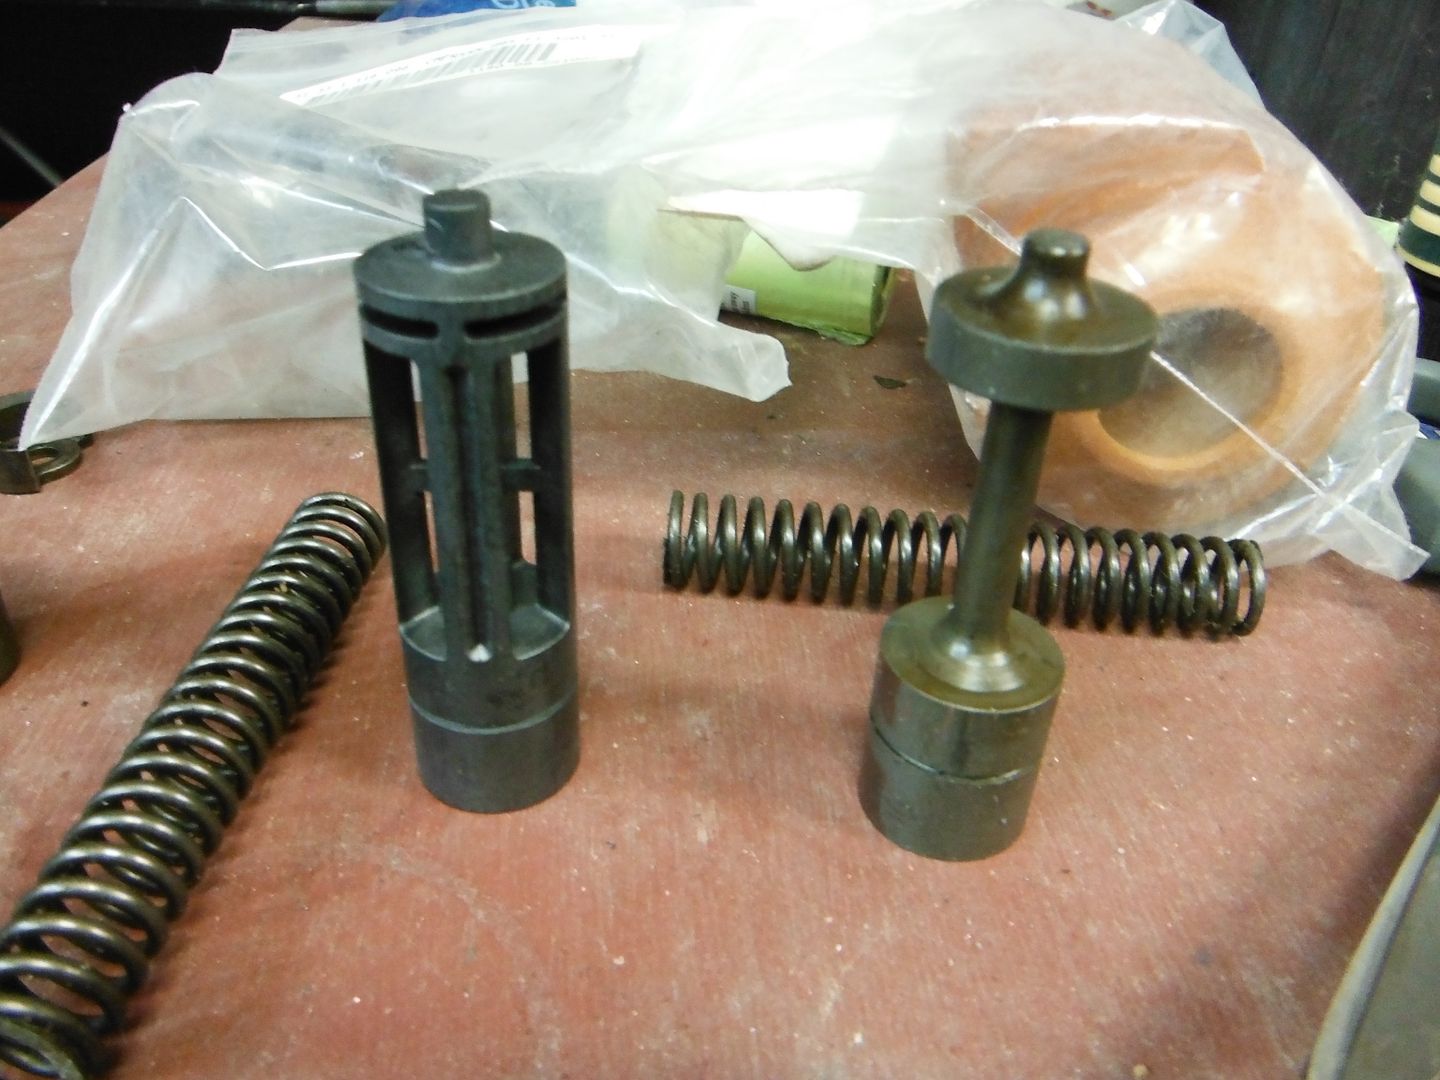
new bumpstops for the front struts, seeing as the ones that came off the car basically crumbled into tiny pieces as they were taken off... Had to double-check on the bumpstop/dustboot arrangement, since it's kind of odd compared to most other cars I've worked on where the bump stop is inside the dust boot. But this is how RealOEM shows it, as well as several other write-ups - and the FSM. So I guess the bumpstop is exposed to the elements. Odd. No wonder the old one fell apart....
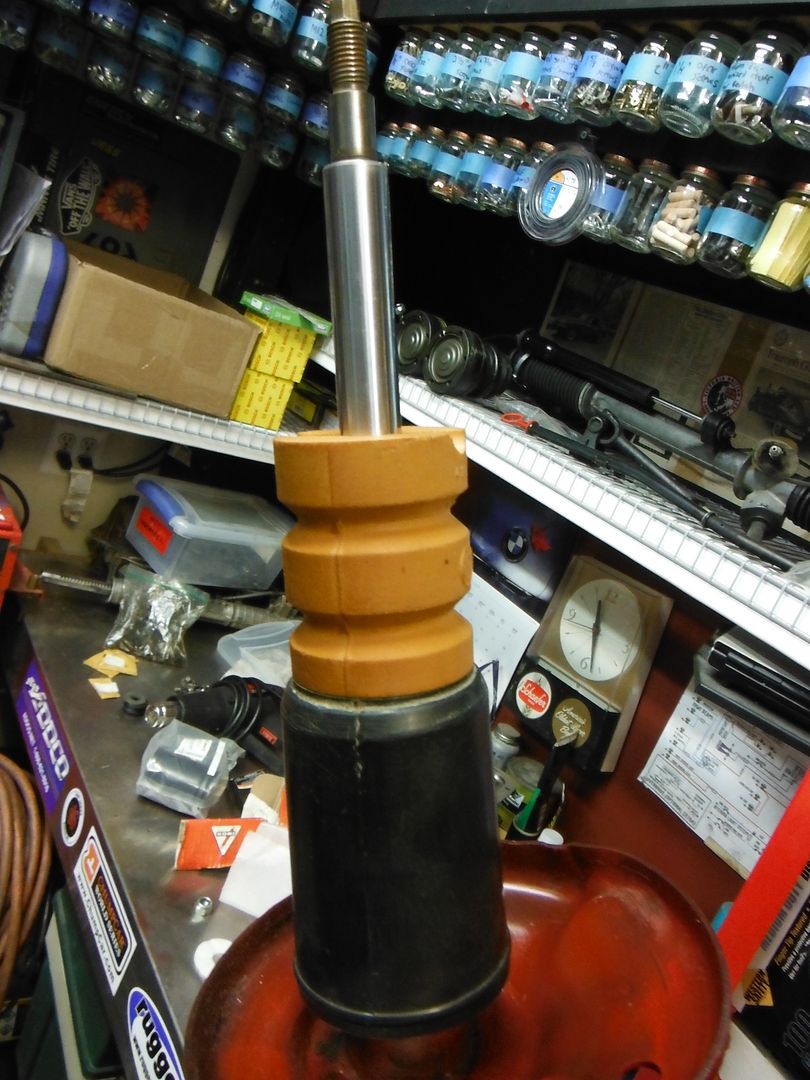
so got one of the struts back together (after some painting of the housing in Koni Red - just for fun, and epoxy black on the springs - might as well make them look good while I'm using them ,even though that may not be for very long). with a new top hat and cleaned-up isolators. Should be good to go. Still have to do the other one.

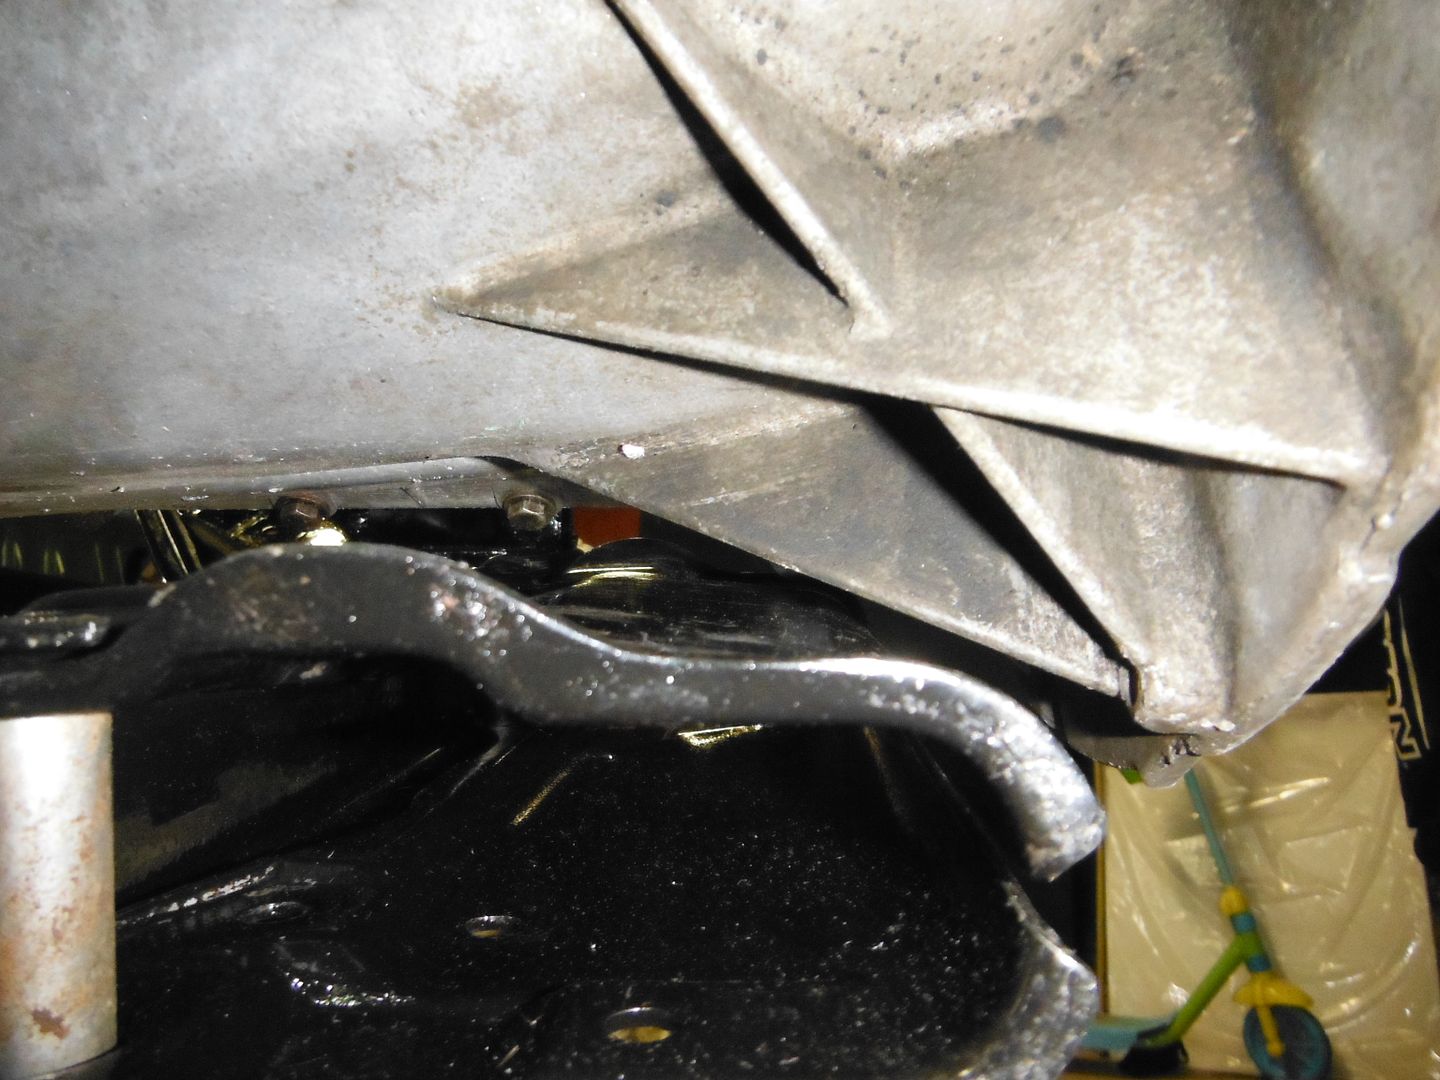
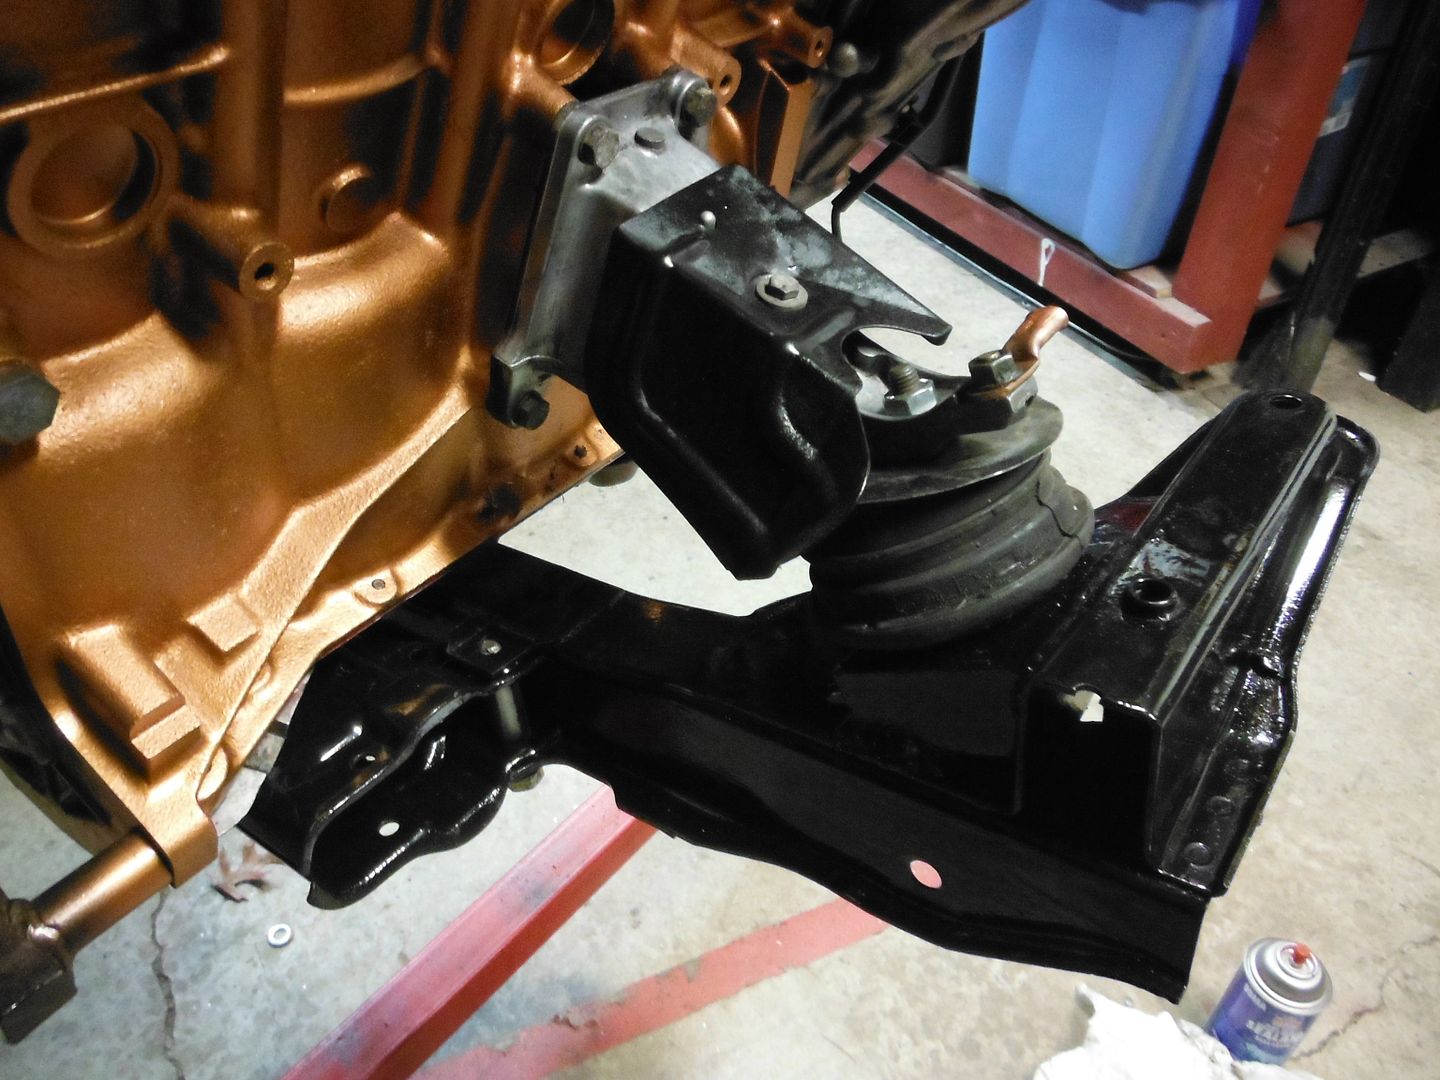
Then it was time to drill the crossmember for the motor mounts. After measuring about a half-dozen times, popped the holes through, and a second set of holes for the "nubs" on the motor mounts. I did some minor position adjustments to minimize interference with the oil pan at the rear, but still may need to shave it a bit. The rack is ready to go as well, but I'm STILL waiting on Eurometric rack bushings, which I ordered almost 2 weeks ago. Guess they actually come from Europe, IDK....
Some photos of the mounts - and as Tom noted earlier in this thread, they will just fit inside the frame rails.
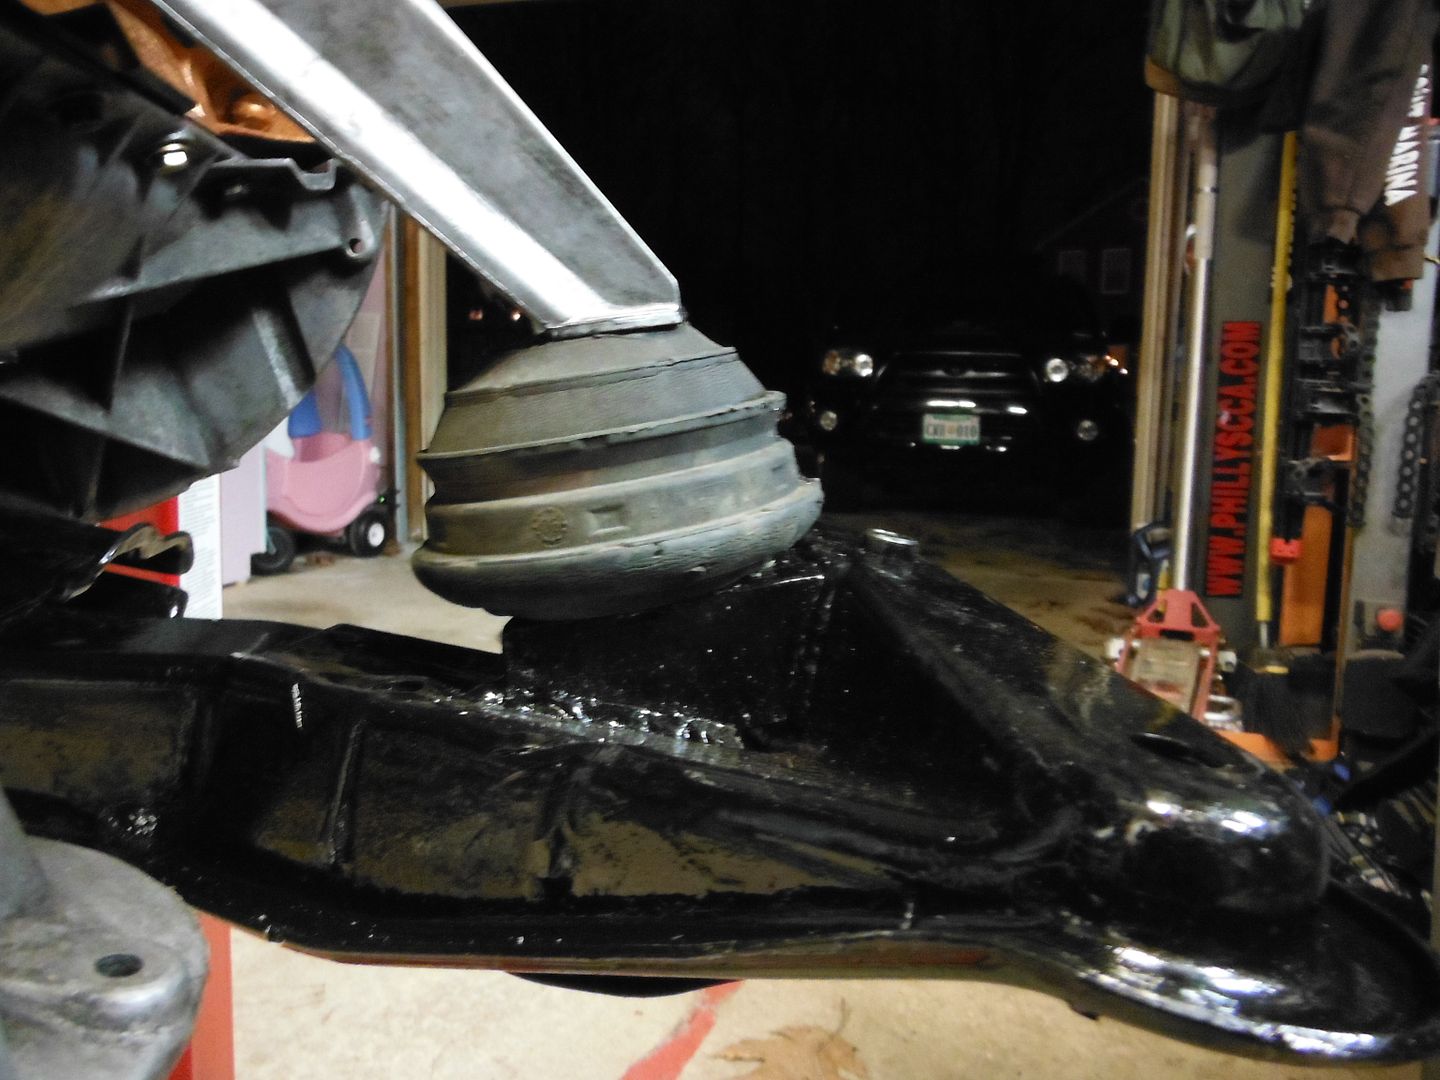
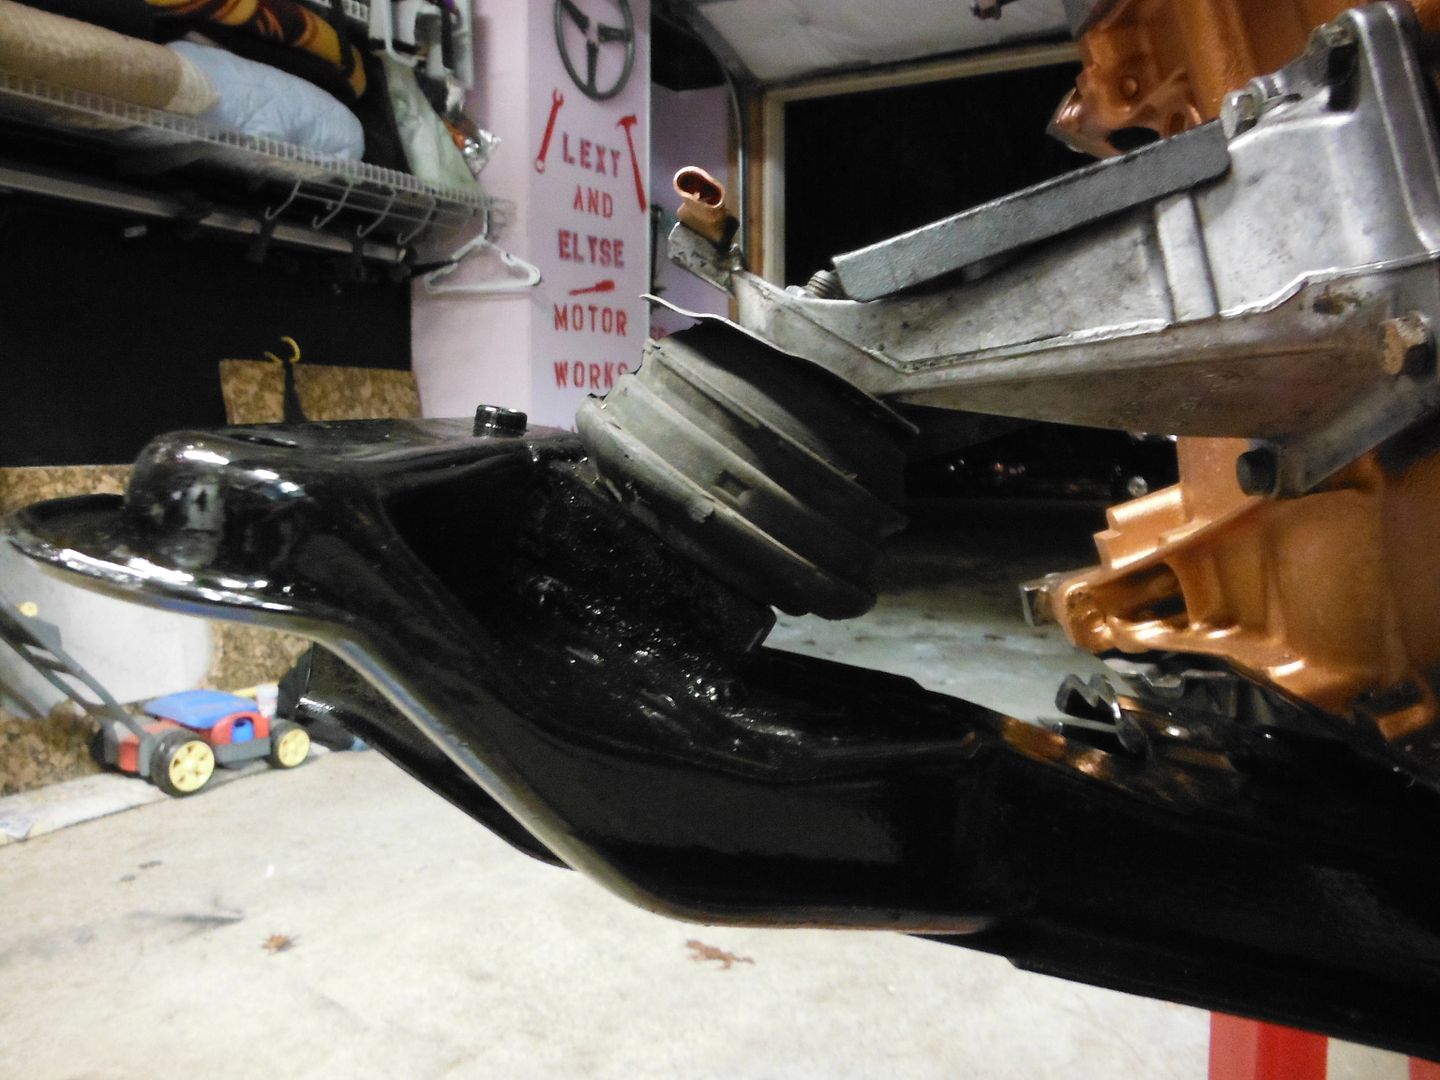
closest point of contact on the pan
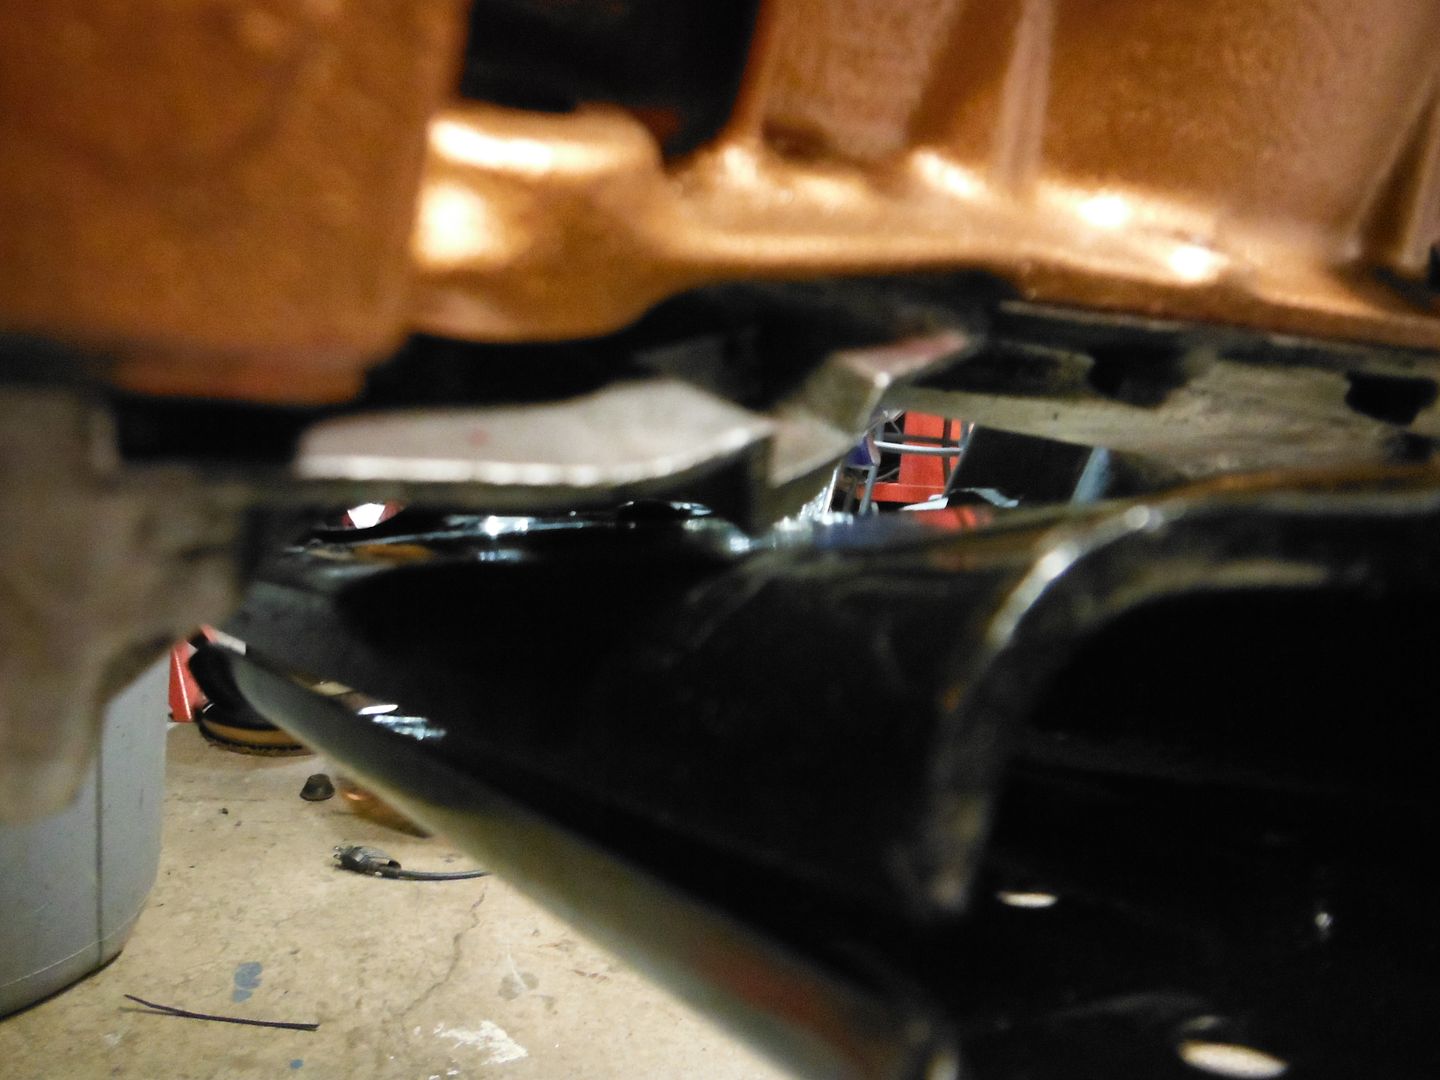
clearance on the other side
a few more shots for posterity
Leave a comment:
-
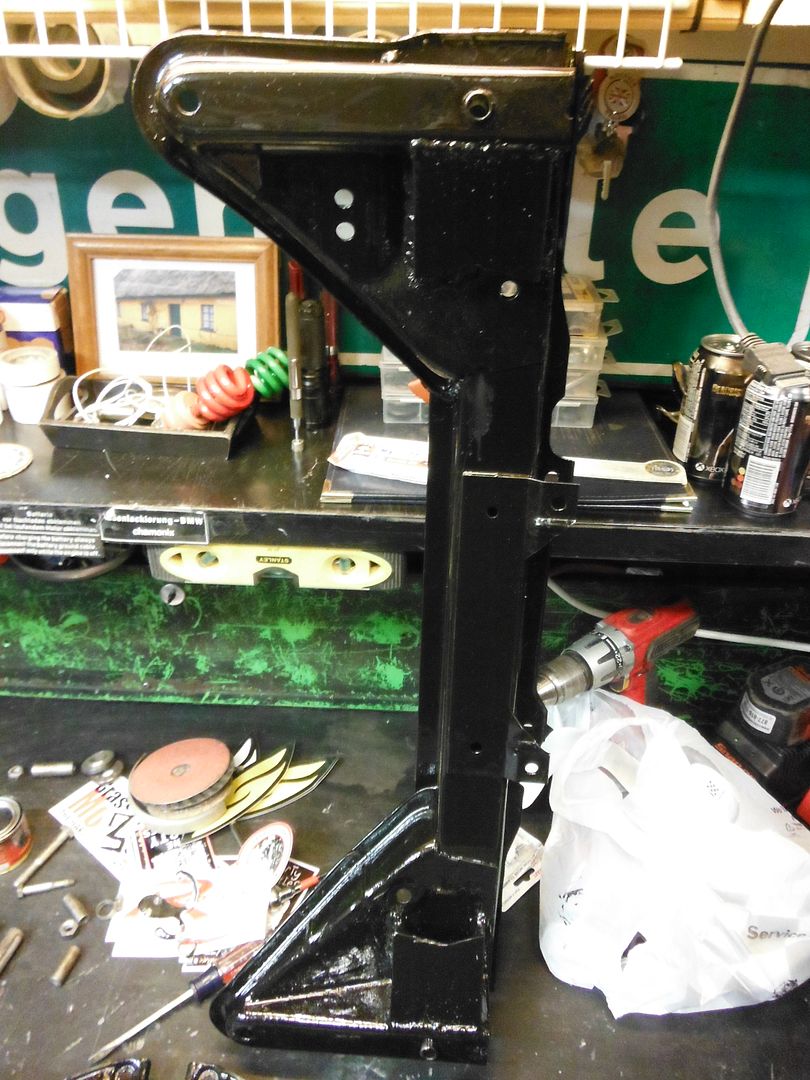
Today I took the front subframe over to my buddy Diego to do the full welding on it. With this heavy stuff I'm not totally confident in my skills (nor of my flux-core welder) so figured I'd tack it in place and have him do the real welds, since I want to make sure it's strong. As always, good work by him (and I got to see his awesome S52-engined 2002 with giant fender flares that he's currently doing an extensive rebuild of, which is very cool).
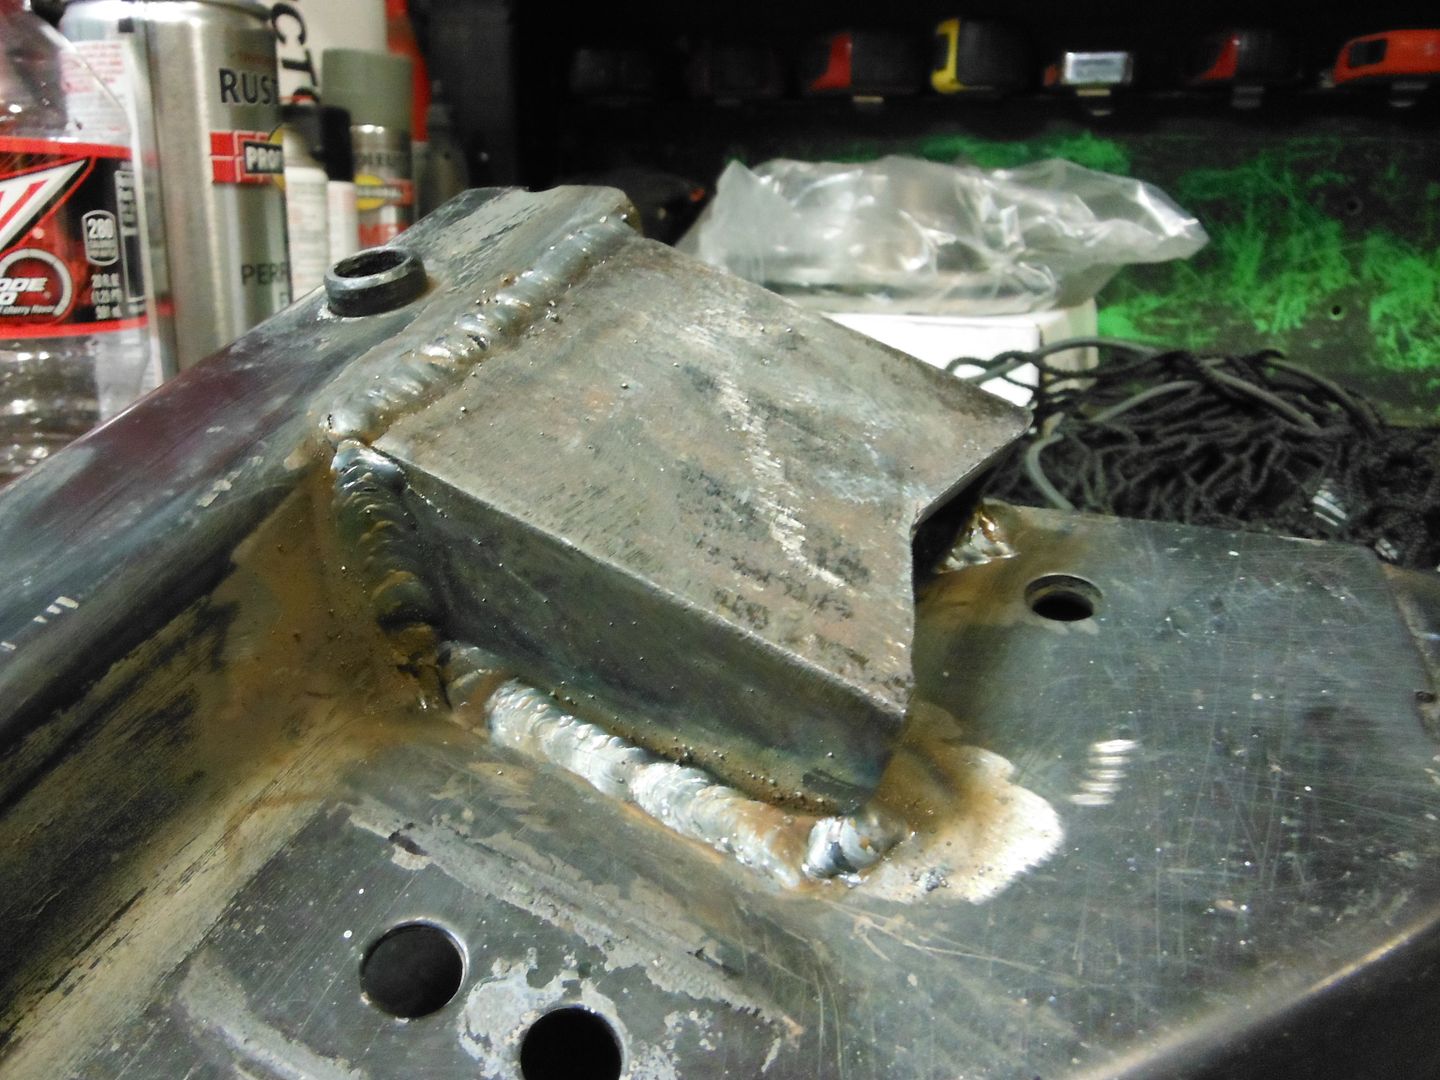
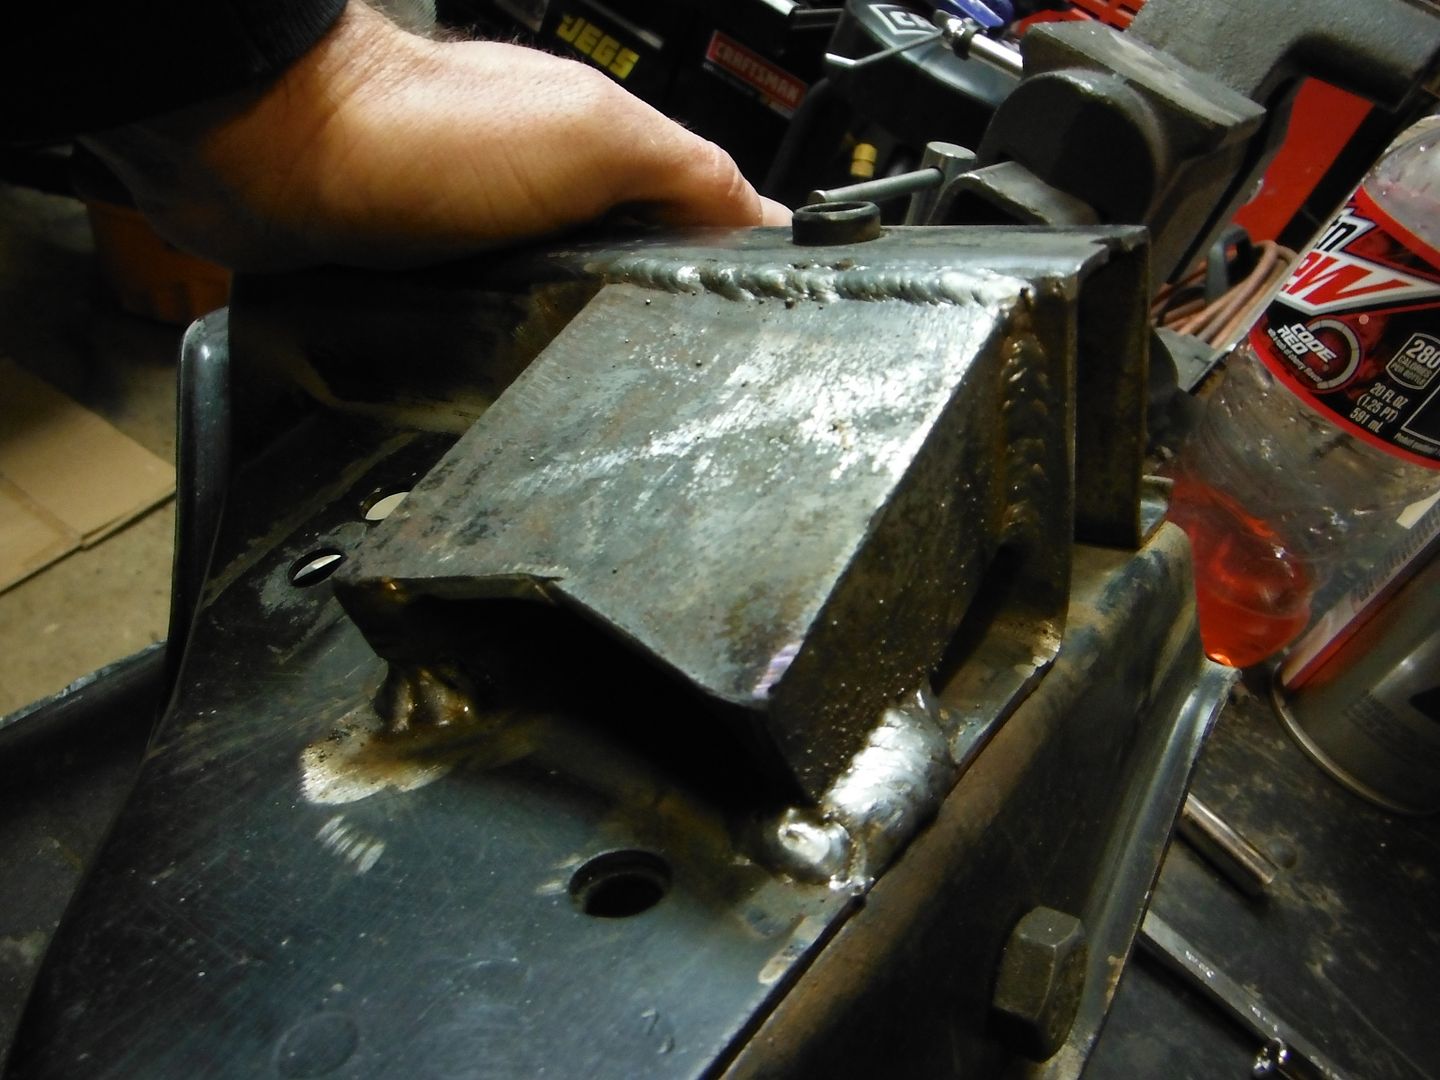
Got it home and POR-15'd the whole thing
Leave a comment:


Leave a comment: