Project Lela: a 4wd, Turbo, Porn-star in the making.

Collapse
X
 
  • Time
  • Show
Clear All
new posts
  • imwhyteyo
    E30 Enthusiast
    • Oct 2008
    • 1165

    #16
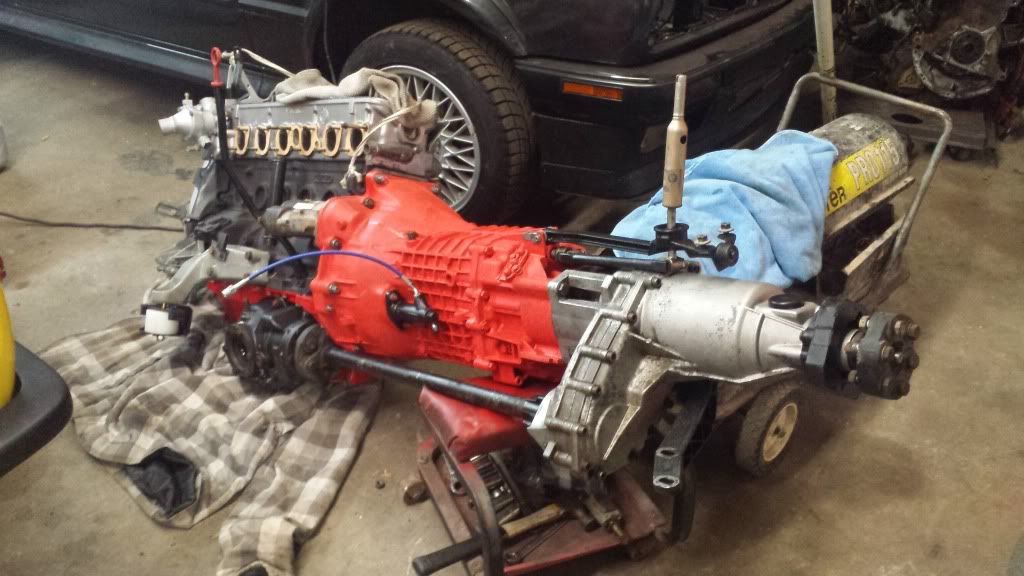
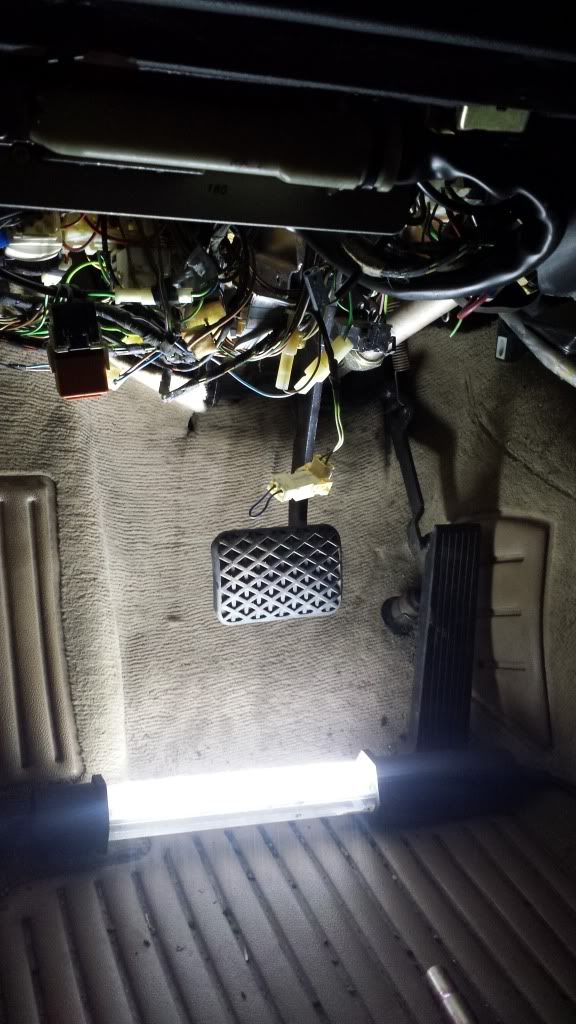
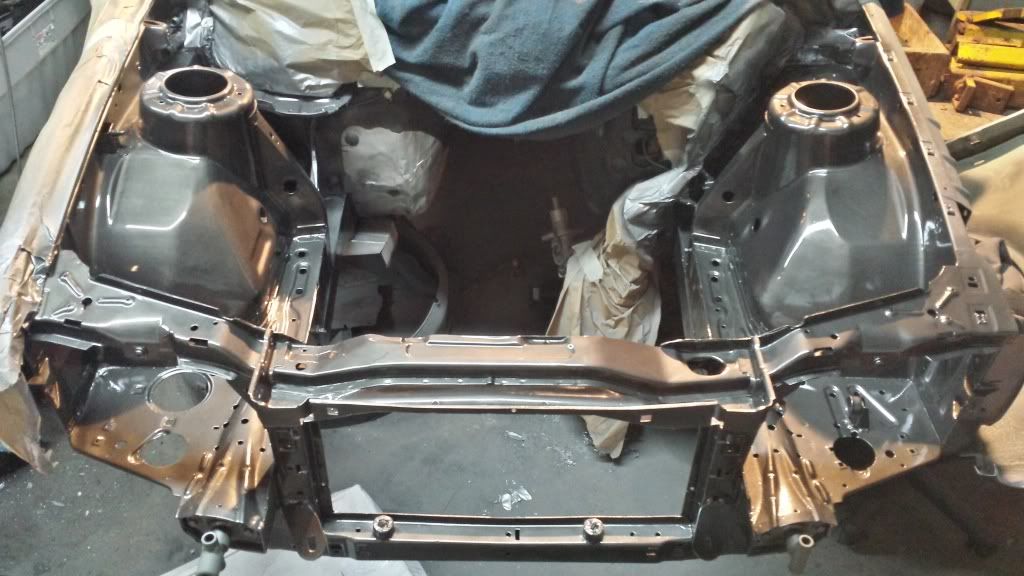
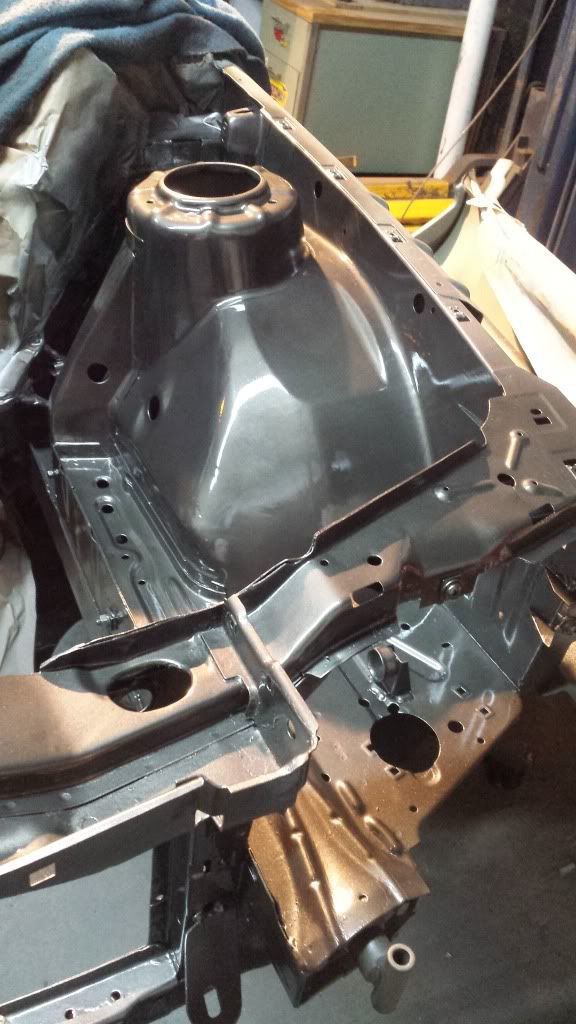
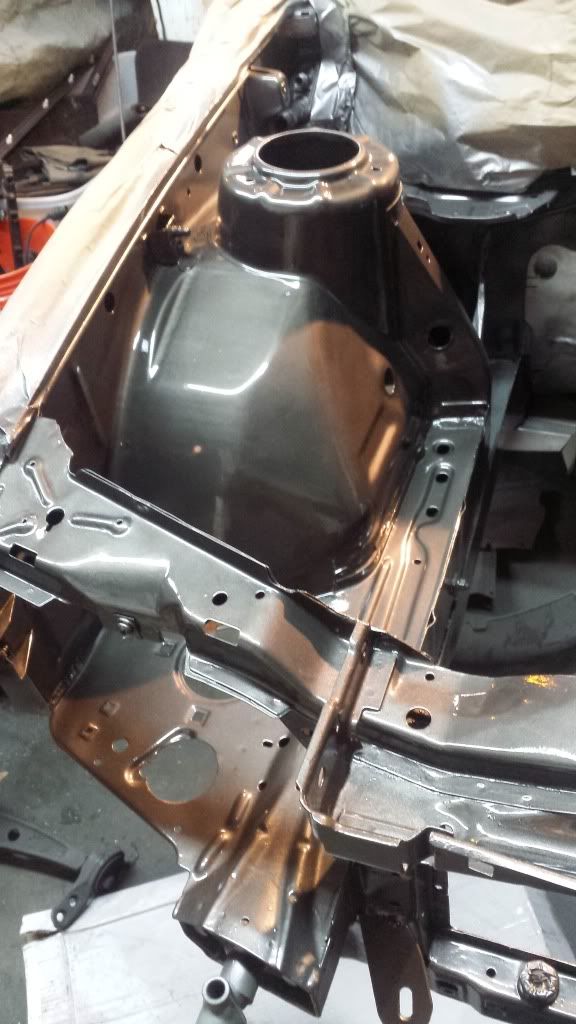
    Got to the transfer case finally all cleaned and sealed.... and finished swapping the pedal clusters. At this moment all I have to do before reinstalling the engine is attach the clutch master cyl. Hard line back on. I'm going to swap the old ACC core for one that's not damaged. The old one had a leak. Anywho... pics!

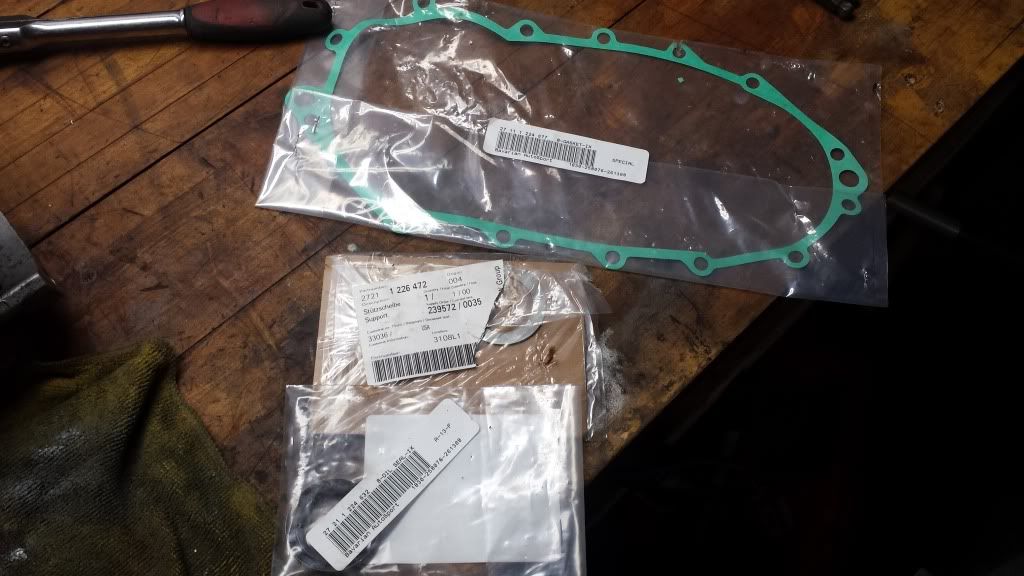
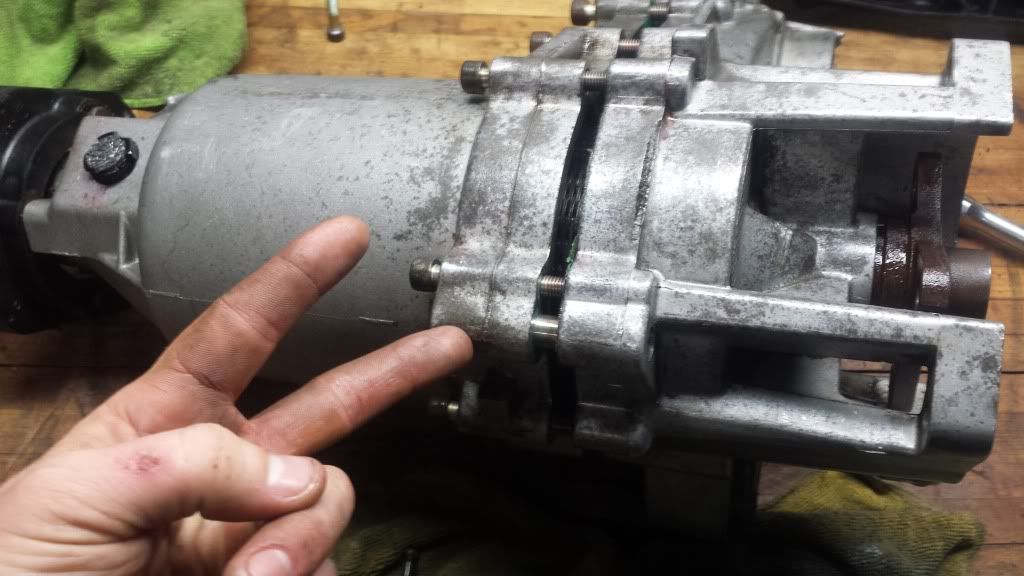
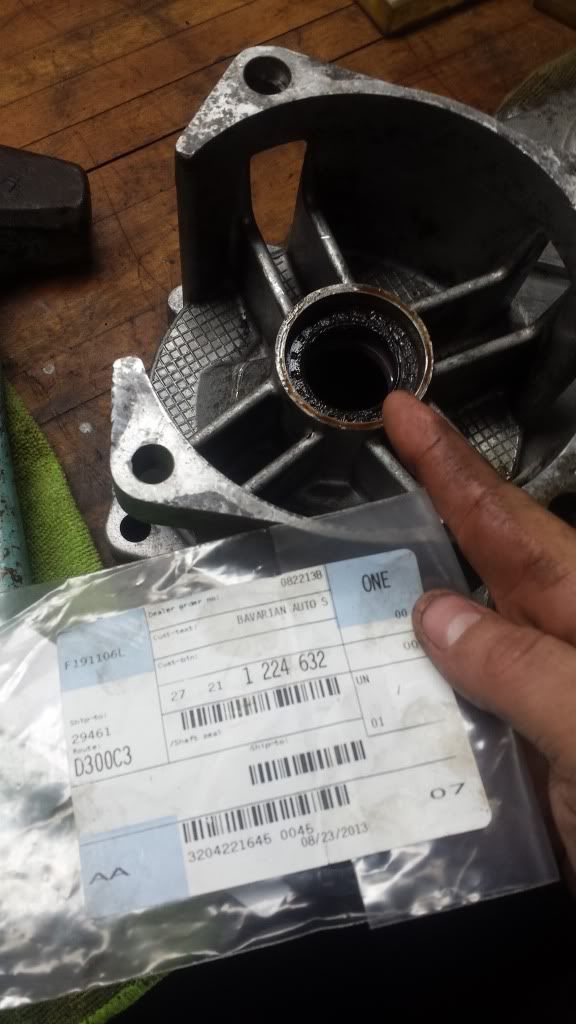
    Got a main outer gasket, and this is the last seal I had to do after showing you how to do the other two.


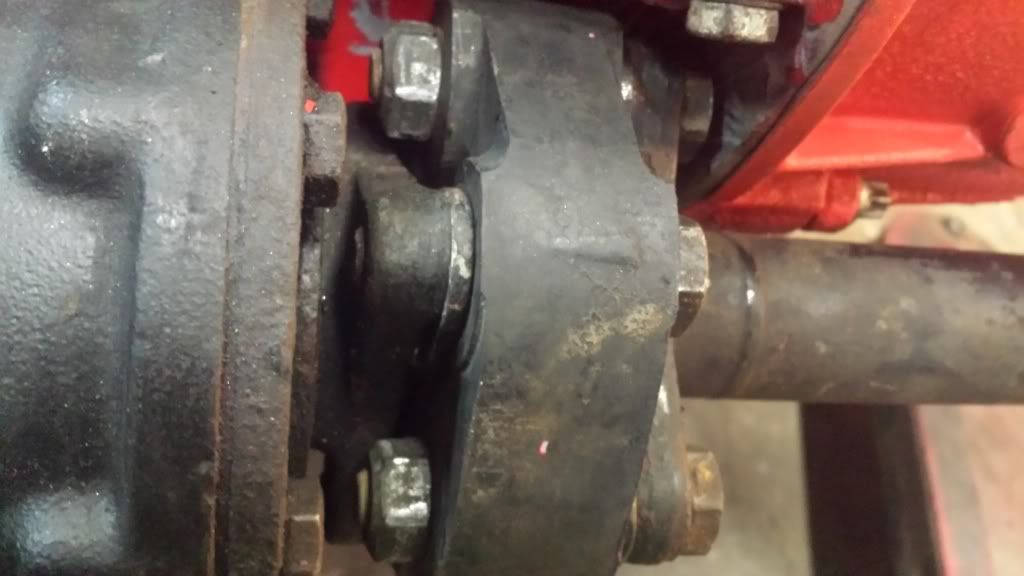
    Cracker the bolts all about 1/8th of an inch all the way around , hitting the bolts with a rubber hammer to separate.


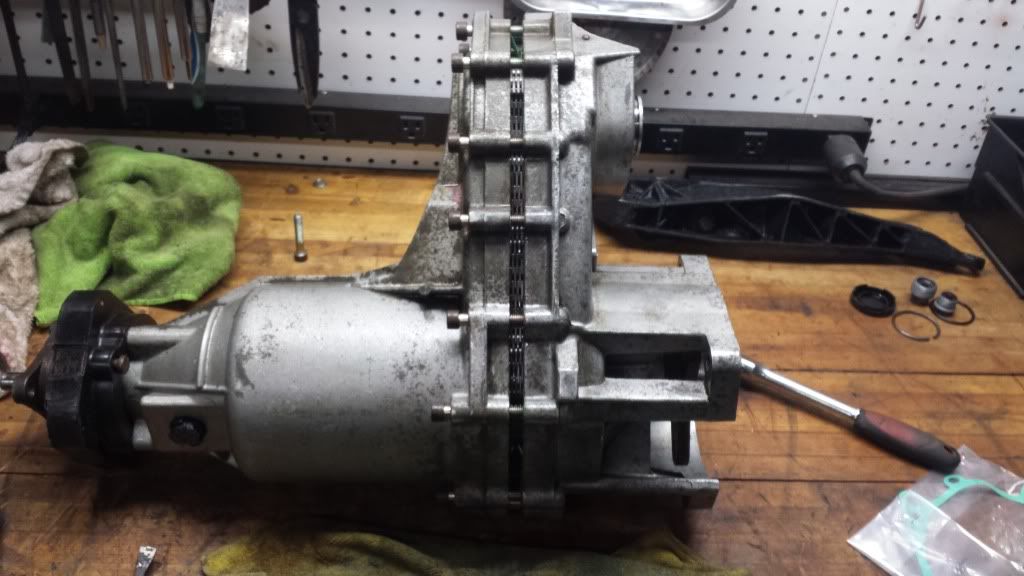
    Once it's apart from the two aligning pins you should have your case exposed.


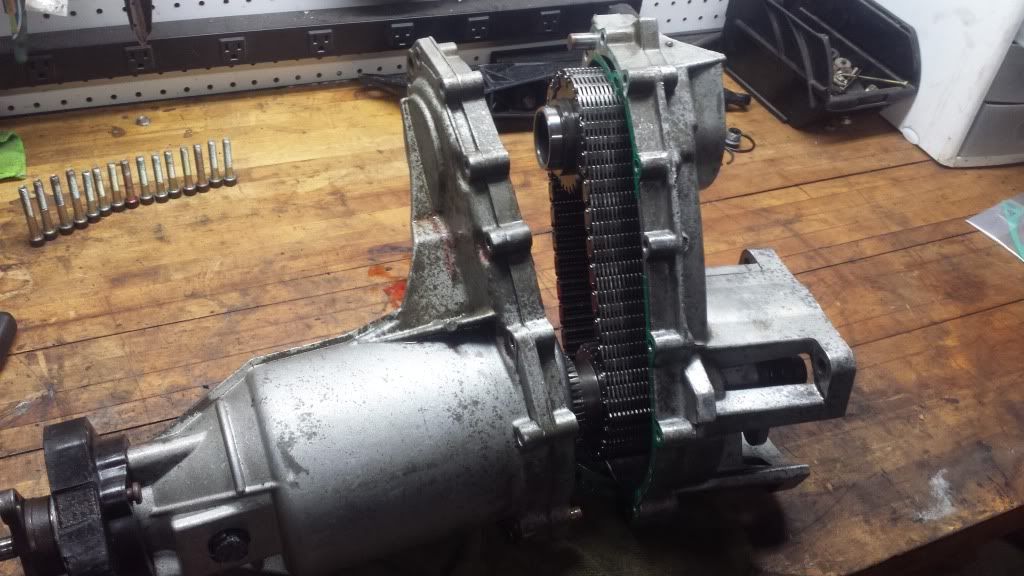
    Pull up all the old green gasket and throw away. (Don't Foret about the middle hex nut gasket on install!!)


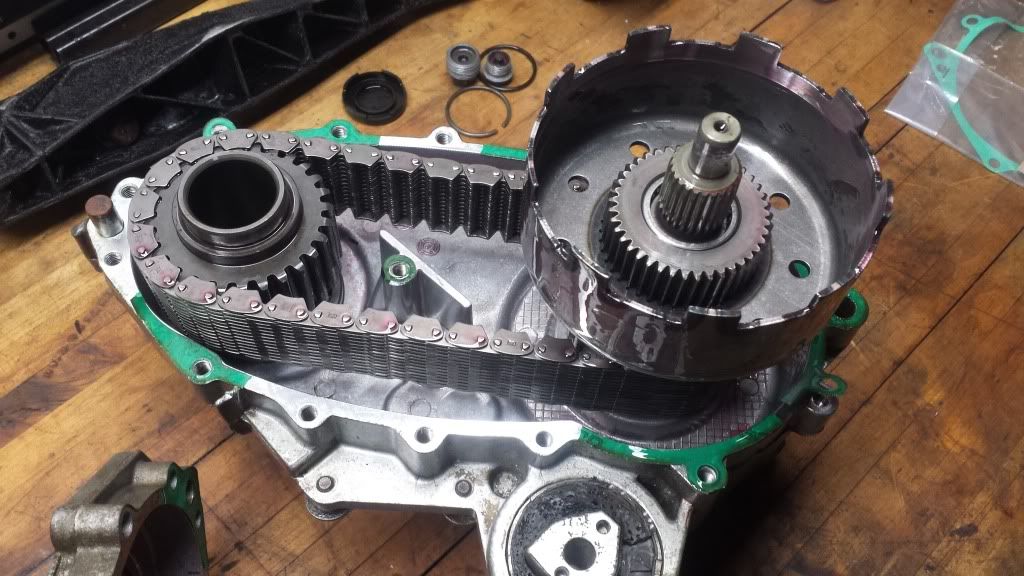
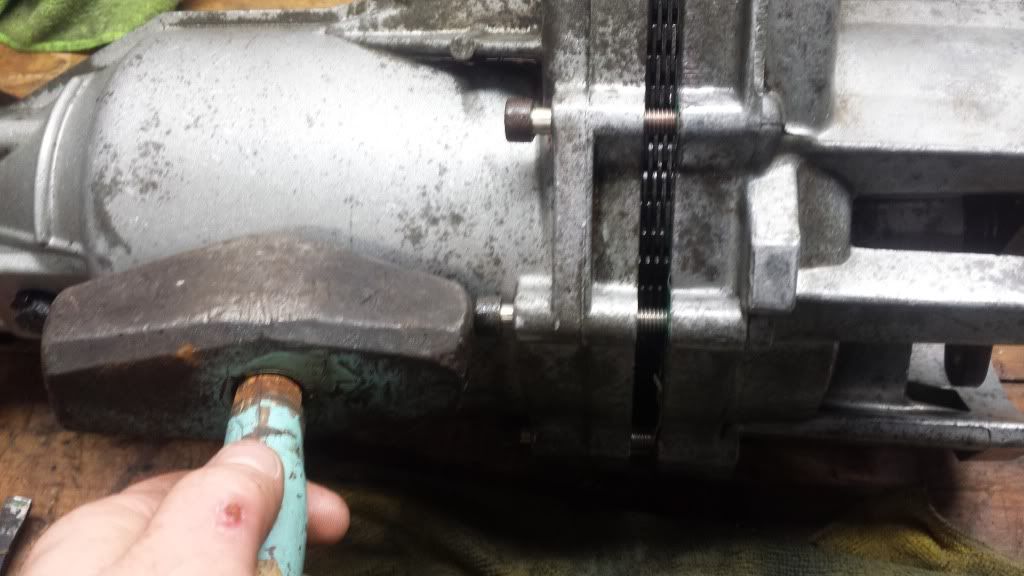
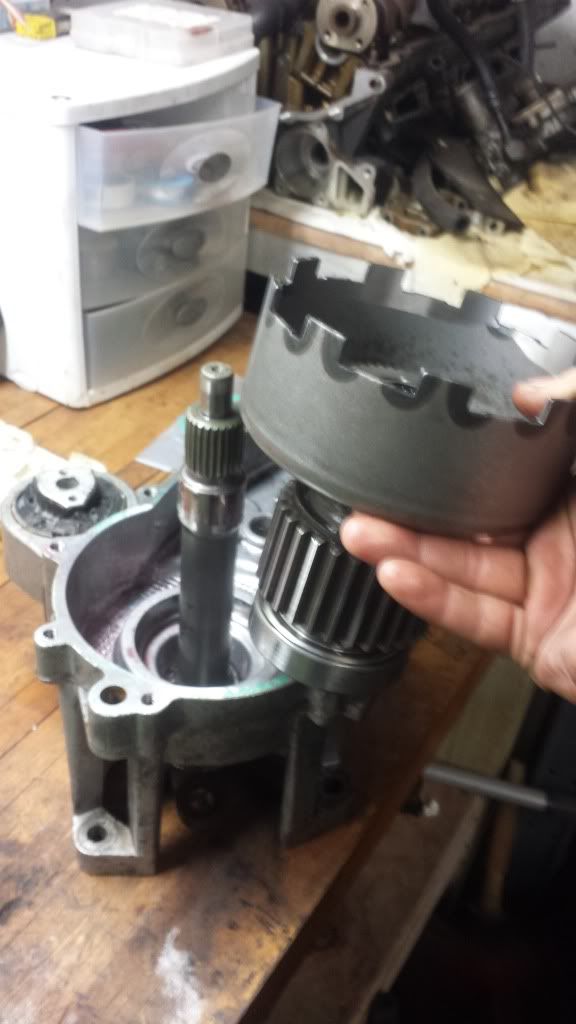
    Remove this gear to get the chain off.


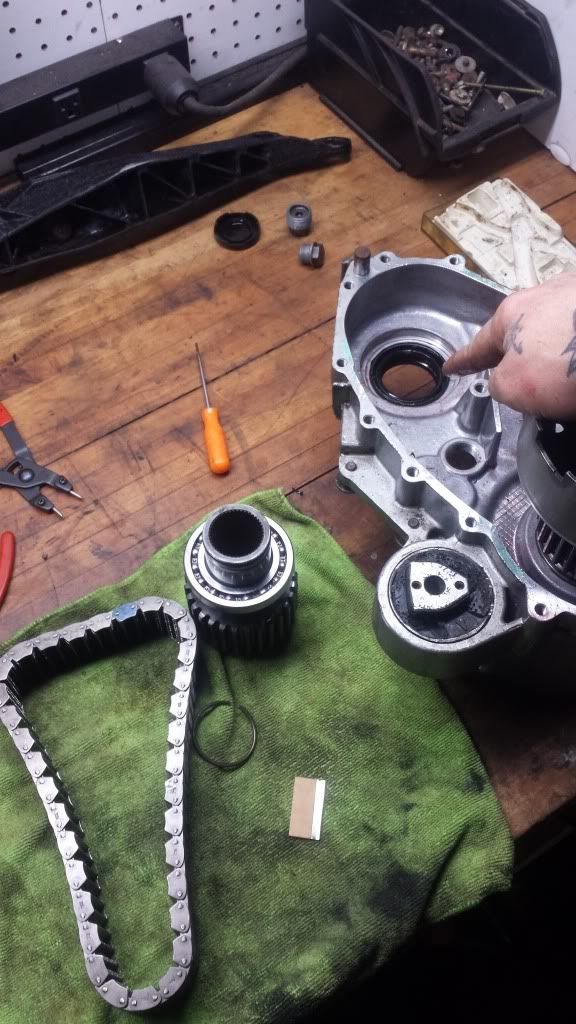
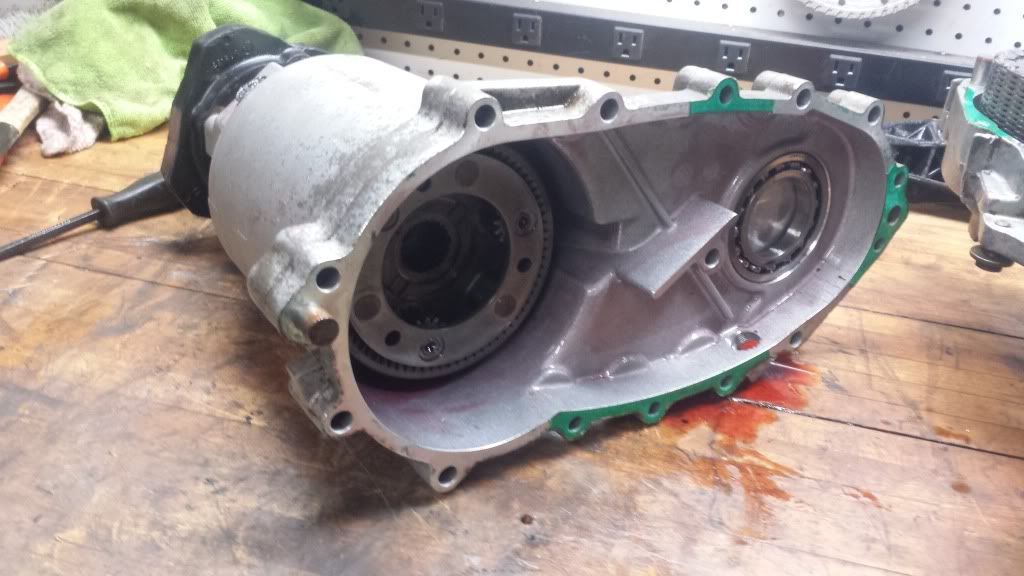
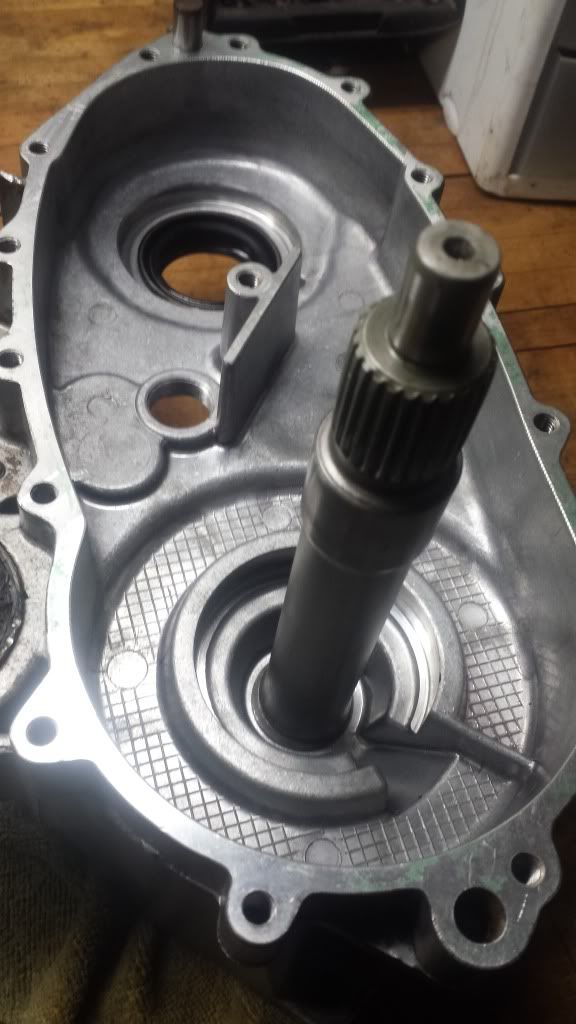
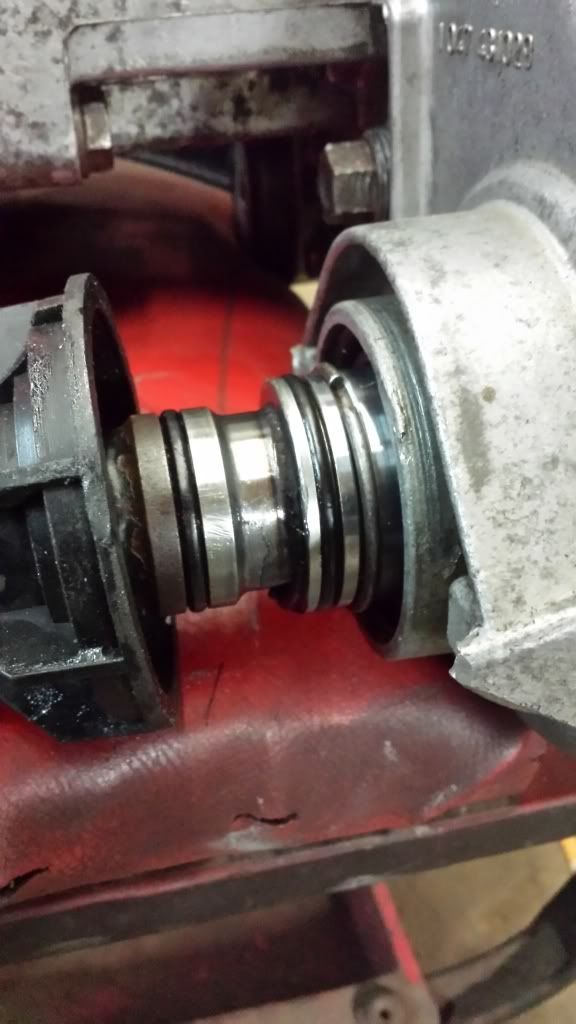
    Then remove this assembly after moving the chain. This will expose the main shaft with a c clip. This shaft has more potential to vibrations, making it a common area for seal failure.


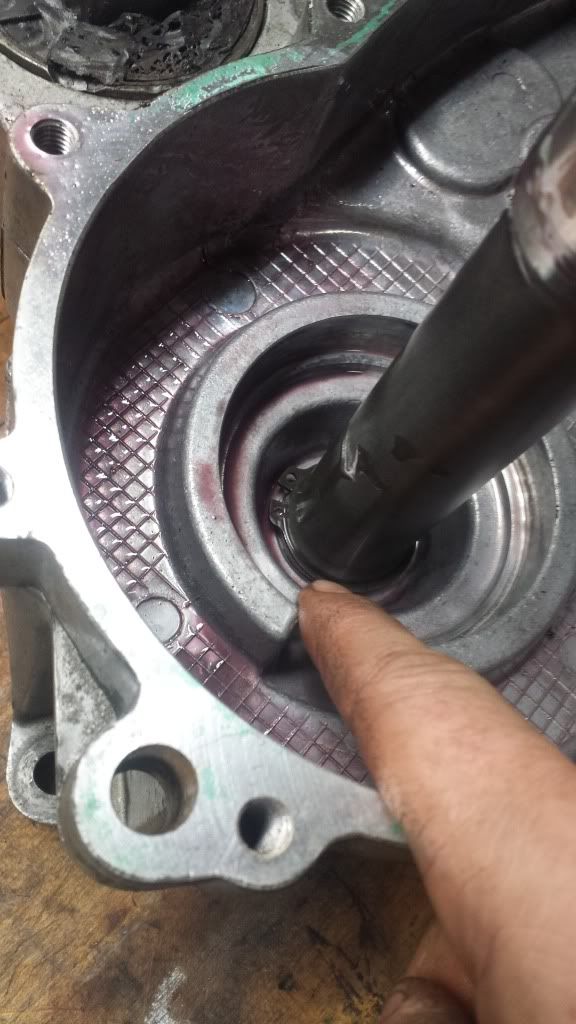
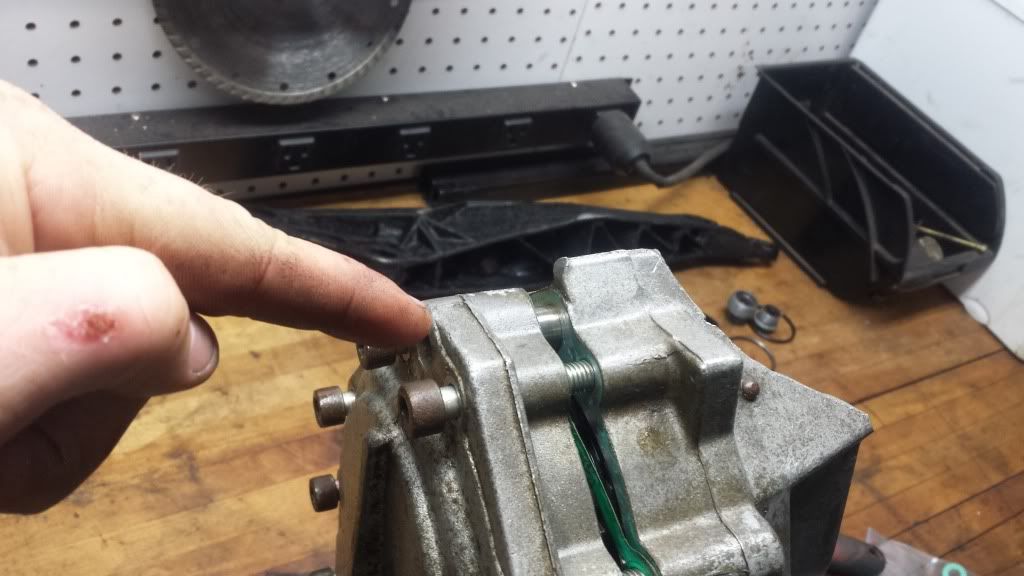
    Got our seal ready. Pull out the old one any way you can, be I g careful not to score up the wall of the seal. I have a seal puller, but any pick or hook can snatch it out


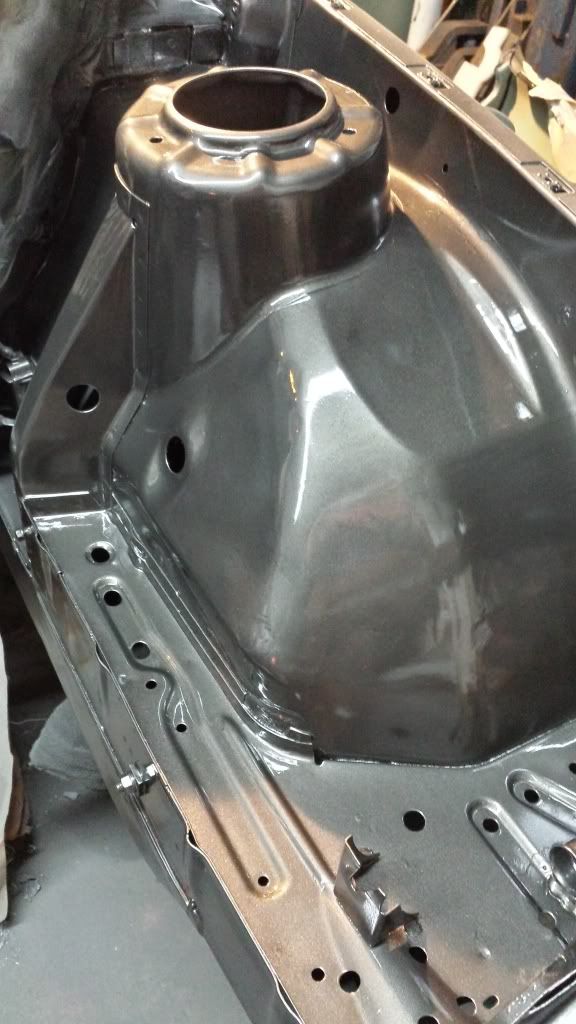
    Clean every removable part and transfer case covers to remove lots of old debris! You'll be surprised how much you fin on your rag.


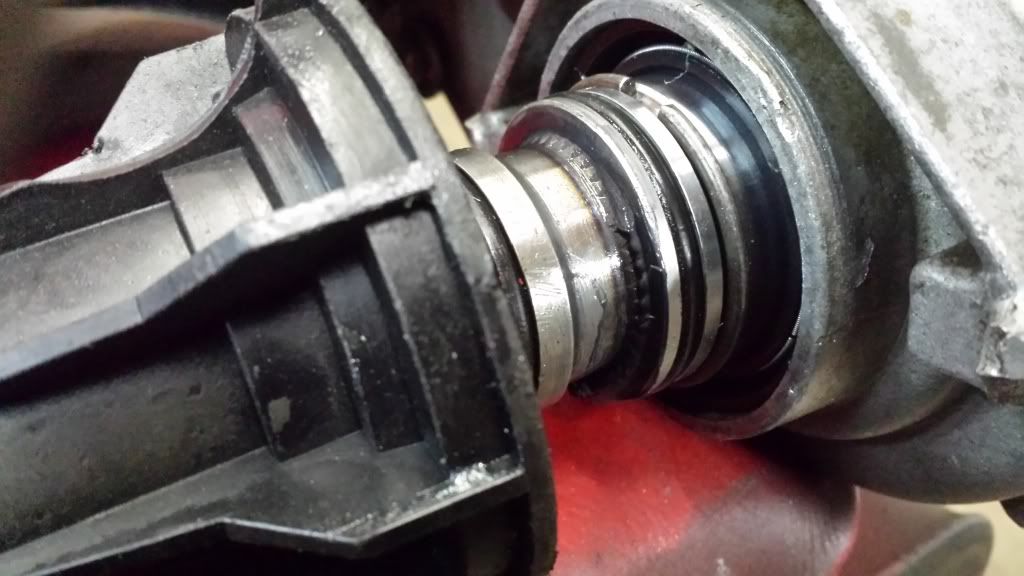
    After installing the new seal, you can put the old seal in also, double stacking them to 1, reduce shaft play, and double your sealing efforts. Install the second seal backwards for later removal.

    Reinstall shaft w/ c clip after doubling seals.


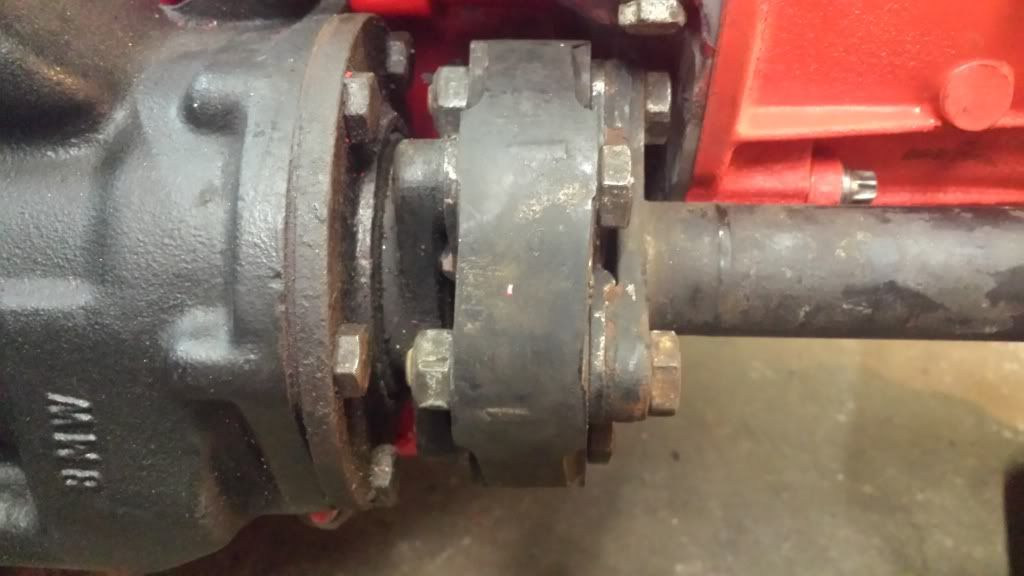
    Install in opposite order from removal, scrape old gasket surface, and install new gasket. Don't forget the small single gasket for the center nut.


    Tighten everything up in a cross like pattern so everything seats evenly.


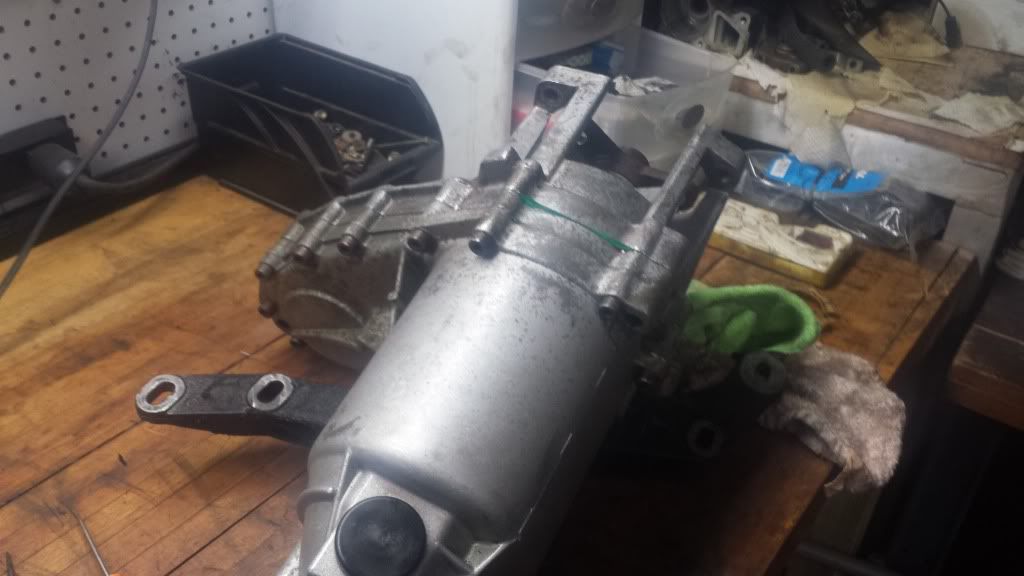
    All done! Ready to go back on the motor.


    Some people would fill the transfer case with the fluid at this point, but I will be doing all my fluids at once while everything is installed further down the road. It's easier for me to log all at once, what type of oil is going Where, and the amounts they took considering every drivetrain unit has been completely dried and cleaned inside.

    Comment

    • imwhyteyo
      E30 Enthusiast
      • Oct 2008
      • 1165

      #17
      Also got the pedal cluster finished. This was a big project in itself.
      You have to remove all steering area trim to make things easier on yourself. Then remove the steering wheel as well.

      Remove booster assembly, and remove steering shaft half from knuckle and guibo. Knock out the steering cluster so it hangs with the wires. Their are 2 aligning ears on each side you should make note of before removing so you'll know where you'll have to hammer the rounded studs with plastic washers back in.

      Before:


      And I forgot to take an after.. but just imagine 1 more pedal.. lol.. ill get one later on.

      Comment

      • imwhyteyo
        E30 Enthusiast
        • Oct 2008
        • 1165

        #18
        Got a little bit done today.. here's what went down.., I was upset by the heat of the turbo and manifold cause g the factory paint to bubble and chip creating rust, so I sandblasted and ground it all down. Also removed some ugly seam sealer, and ground out a few useless brackets. Smoothed things over with body filler, sanded it all out. Primed it with a high heat primer, and coated it with a high heat paint. Going to hide the wiring best I can at this time as well. I removed the a/c lines for now, as spring time comes, I will be converting the air conditioning to a r314 system. No need for that in the Winter!

        Pics...


        got to work on the other side of the engine bay. heres some pictures of the progress.. haven't painted yet but im repairing some things as i go.


        taking care of some rusty spots.. not bad.. just surface stuff i had to fix before they got bad.


        going to repair some damages, this was all bent and banged up from a long time ago..


        using this stuff to take care of that rust spotting permanently.. works the best in my opinion


        priming and smoothing grind marks.


        that's all for now.. going to finish smoothing and put a coat on as soon as possible, perhaps tomorrow with my day off.. will again post when i can of the progress.
        Last edited by imwhyteyo; 04-02-2014, 01:15 AM.

        Comment

        • imwhyteyo
          E30 Enthusiast
          • Oct 2008
          • 1165

          #19
          So to be quick about things that I only took pics of.. started on my headliner fix. Alot was sagging and wrinkling and needed straightening out. Also needed the old stained cream color to be gone!.. so I dyed it black. Also got my e36 seat brackets done.., so everything else went on a hault! And it was time to strip the interior... anyways pics speak for themself. One 4 hour session: GO!
          Got these seat brackets to make way for my super heated/power e36 leathers:


          removed these old girls... even though they were toasty heated, they aren't fully black and powered and are now up for sale.


          I got carried away on the interior removal.. and changed a few things.. (installed convenience window regulator. Ie: "one touch window roller downer" for the driver and passengers door.


          And of course, I simply dyed the & headliner and sunroof panel a black tone, while tightening up the wrinkles and seams, (sorry no before pics.) to create a dark and cozy ambiance.


          I will have more pics to follow of this as I ddid end up restoring and refined is hang alot of the minor pieces. Interior b - pillars were painted, factory wiring were trimmed, windows were modded, and tinted.

          The stage is set for the stereo. Get ready... to cream.

          Comment

          • imwhyteyo
            E30 Enthusiast
            • Oct 2008
            • 1165

            #20
            Got a few more things done.. times been tough with the holidays. Grey carpet is in concealing the e36 brackets for a clean professional look. I. Wired the power wires for the power to the seats and the heater elements. Touched up some headliner work, added a few touches with some fabric.. installed my map light. Feeling alot better about the inside :)


            Plaid.. it's not perfect.. I'll clean and fix things up later.


            Also got these bad boys in the mail.


            That all for now. I'll be back.

            Comment

            • imwhyteyo
              E30 Enthusiast
              • Oct 2008
              • 1165

              #21
              So I've gathered all my brake upgrades, gonna get those calipers reassembled with all new boots, sliders, and seals. But when I do that, I will be removing the old suspension in replacement for a brand new set of h & r lowering springs and new modified bilstein sports. I'm also going to sandblast the strut tubes and hubs and coat them with a good few layers of POR-15, THEN coat the fender lining with rubberised undercoating to prevent any salt damage, as this will be driven in the snow in the future. Here's the brakes! Zimmerman cross - drilled and slotted rotors, hawk race/street pads, red vanilla coated stainless 6 peice brake lines, and SANDBLASTED and rebuilt calipers hand - painted with g2 chemical and heat resistive calipers paint. All new brake hardware, boots, guides, sliders, seals, etc. 100%. Rebuild. Not just cleaned.

              Comment

              • imwhyteyo
                E30 Enthusiast
                • Oct 2008
                • 1165

                #22
                Finally got my front driveshaft reinforcement upgrade done. Lengthened it using a larger guibo and 2 centering pins, one ground down, on each side of the guibo. It pushes the splines exactly as much as they need to fully engage all splines on the driveshaft. As seen here:


                Here's the guibo side.


                Picked up a set of acura tsx projectors to Retrofit into my new glass smileys


                And I picked up a few new amps for the sweet stereo... components are on the way!


                that's it for now

                Comment

                • imwhyteyo
                  E30 Enthusiast
                  • Oct 2008
                  • 1165

                  #23
                  Engine bay painted. Reassembly underway!


                  Deleted the cruise control, wasn't able to find a cleaner means of keeping it.. ground out all unnecessary brackets.. doing an

                  Comment

                  • imwhyteyo
                    E30 Enthusiast
                    • Oct 2008
                    • 1165

                    #24
                    SO! my standalone came in today!... big things are soon to come..!

                    Heres my rant on the progress so far, its been tough getting pictures of my every move, so if you want the details, listen up!

                    i got the drive train back into the car.. and will be having it running very soon to start tuning. I also opted against the spec sport clutch i originally installed and went and purchased a SPEC stage 3 , 6 puck clutch rated for more power. I did this based off the assumption that the awd drive train needed something a bit heavier duty to have it supporting it, especially if i wanted to romp her for alittle fun every now and then. With the flexibly in the power and torque rating of the clutch and lightweight flywheel I won't be afraid to squeeze out a little extra power or drive a bit more aggresive.

                    I bought all my fluids for the driveline, and heres how it will go:
                    I'll be putting red line MTL in the transmission, royal purple ATF in the transfer case, and royal purple 75w90 in the front and rear diffs. I'll be using Mobile1 fully synthetic 15w50 for engine oil. I'll be using factory BMW Blue coolant, and ATE SUPER BLUE for the brakes after i install the brake lines. Ive already installed an upgraded braided clutch line. (Quite the colorful combination of liquids!) Seeing as how I'll be keeping power steering, I'll be using a typical penzoil power steering fluid. Nothing special here. just a relocation and shortening of the power steering hoses.

                    I don't have pictures of me removing the transmission again to install the new 6 puck clutch, but it's definitely In there. I was very eager to get it in and back together so I could FINALLY fit the drivetrain back Into the car!... which I did!! Yaaay!.. one thing I have to make note of was the fact that those upgraded poly/delrin shifter bushings made things very difficult to maneuver when it came to lifting the transmission side shifter assembly up through the chassis hole and into place.. They're so stiff that it was very difficult to get any flexibility for things to line up with such tight tolerances. With it all snug I there, I must say how amazed I am at how ttight and clean the shifter feels. I couldn't be happier. click clack! i just want a weighted shift knob now.

                    The megasquirt is a plug and play unit by whodwho which is an excellent peice of work. After installing, I will be eliminating the afm. I'm also looking to upgrade the blowoff valve to something more appropriate than the plastic bosch piece i already have.. I'm looking to tune for a simple 13 - 14 psi on stock head gasket and internals being that i dont want to ruin anything... I want an efficient and reliable tune, not something aimed for dramatic power Increases.

                    I Also completed a wire tuck of the chassis harness along the drivers frame rail, putting a few holes in the wall and covered the edges with a more professional look with grommets. the hood release cable also has been hidden this way, and it definitely cleaned up the drivers side engine bay quite a bit.

                    For the suspension, I installed a much bigger rear sway bar with polyurethane bushings and some heavy duty endlinks.
                    For the front sway bar I modified it to perform better by shortening the ends and re drilling holes so the bar has less ability to flex, installed polyurethane bushings and also purchased new heavy duty endlinks.
                    The suspension itself was going to be coilover setup, but instead is a brand new set of h+r springs, with bilstein sports in the rear, and bilstein HD, up front with news spring pads.
                    The front strut bearings were replaced, and rear strut mounts were upgraded to Ireland engineering polyurethane/aluminum options.
                    A schiemdmann red front strut bar is going to be installed, and a rear strut bar is going to be made custom and also painted red, only after my false floor and stereo installation.
                    The engine suspension is a pair of VERY hard polyurethane engine mounts, with heat shields and the vibration isolators still attatched (i know the cabin will likely vibrate :) ), the rear trannsmission/transfer crossmember mount design was junk, but the bushing was pressed out and a new one was pressed in. there are gaps from the factory in the rubber meant to flex alittle so the cabin doesnt rattle with noise. l filled the voids and strengthened it with a high density polyurethane filler and is much more solid.
                    I have yet to install my brand new AKG rear subframe and trailing arm bushings, but that will be done as soon as possible. i look forward to the responsiveness of this button downed AWD machine!

                    I've also cleanly and hidden installed 3 sets of HELLA TRIPLE air horns(9 total) to let people know when I've arrived, or to GTF out of my way ;)

                    The lights on the exterior have all been converted to LED. The headlights were purchased new, as "glass euro smileys" and have amber led daytime running lights. The low beams are converted to 4300k oem white HIDs, the high beams are 12000k pink HIDs, and the fogs are 3000k yellow hids. All the lenses appearance are clear, with a smoked film over them to match my charcoal "diamondschwarz metallic" paint.

                    European fender markers have also been installed with bright white leds that will remain on as daytime running lights, constantly when switched on, until the blinkers are turned on, they begin to flash. This took certain wiring procedure i didnt get to document. The reverse lights, and license plate lights have also been converted to white led.

                    The shaving in the engine bay didn't get too extreme, I removed many brackets and studs that will no longer be used and will be simplifying and relocating the power steering fluid setup. The brake booster hose has also been rotated and modified as well relocated. The fuse box harness has been hidden and the fuse box cover is painted black for a cleaner look. All hid wiring has been concealed to the best of my ability. The cruise control has been removed as it was too much wiring and cables to consider altering. I never use it anyways, but always will have the option to reinstall. The alternator and engine ground wires will be upgraded to a more "flashy" updated look, with red cable, and golden plated connectors.

                    I also purchased some new wheels for her, so she will roll in style!... They are O.Z. Racing 3 peice Fitipaldi, in 16x8 and 16x9. Im not sure these will fit at the moment, but i bought them knowing i have complete intent on doing future bodywork. The car will be painted, and this will involve shaving the antenna, keyholes, and hood sprayers.

                    I changed out the nasty old fuel filter as well, mounting it alot more securely than it was before.


                    The Next Big projects I have on deck are:
                    e36 heated and powered seat installtion (Halfway installed, need to finish)
                    e36 REAR heated seat (thats right, rear heated ;) ) and armrest/headrest installation(need to finish , just waiting on hog rings)
                    ADDED e36 interior lighting installations for the rear, with red rocket labs auto dimmer and delay mod. Interior LED Red lighting.
                    installing permanent in-console navigation.
                    Push start ignition
                    one touch window button installations with en illuminated switches.
                    euro fog switch for amplifier power on.
                    Wiring map light and euro clock
                    competition stereo installation with false floor trunk installations
                    getting my wheels drilled and filled to fit 4x100
                    Finishing my 3" Remus exhaust setup.
                    Painting and drilling my trunk to fit the e28 mtech 2 wing
                    And so much more.


                    [URL=http://s1071.photobucket.com/user/maneshorin/media/Mobile%20Uploads/20140129_001146_RichtoneHDR.jpg.html]


                    all cleaned! Still in excellent shape!

                    Comment

                    • imwhyteyo
                      E30 Enthusiast
                      • Oct 2008
                      • 1165

                      #25
                      Today I was determined to remove the final amount of history this car has seen. In an attempt to make this a completely "0" mileage car, I knew the underside would have SOME kind of surprises for me, especially being a new England winter driven car. To my suprise, there was legit only one hole on the drivers side floor, so she needed some weld!


                      After I patched in the hole fully seam welded.. I laid on some primer, por 15, seam sealer, and finished with rubber undercoating.
                      Finished product:


                      After I finished this side, I went about putting por15 and rubber undercoating on the entire underbody, especially in all 4 fender wells, all along the fuel and brake lines, and frame rail areas, and Jack points. I'm so amazed how clean this car is underneath, and I Intended it to stay that way by doing this preventing maintenence.


                      Here are some pics of that wire tuck I scavenged up. It wasn't complete at the time but you get the idea.


                      Mocking things up ;) putting the fender and bumper back on and making sure wiring is correct and working. Finishing horns install tomorrow.


                      Comment

                      • imwhyteyo
                        E30 Enthusiast
                        • Oct 2008
                        • 1165

                        #26
                        I sprayed both fender wells, and underbody with lizard skin


                        Added a total of 9 HELLA air horns. :)

                        3 on the left 6 on the right, 3 compressors total, powered by a wired relay setup with its own 20amp fuse.


                        Found a means of eliminating my expansion tank finally.


                        Red fan pulls much more volume of air from the bigger engine it cooled before. Fills the area of the cores perfect and is exactly 3/4" clearance all the way around once mounted. On the opposite side I have a spal slim fan I have wired to an interior manual controlled illuminated switch.


                        Happy Valentines day!!


                        My sweetheart modeling her new car show tshirt I got her.


                        Turbo blanket, manifold wrapped, and heat deflection installed. No angle spared here.


                        Altered throttle body. Tapped for iat valve, eliminated icv.


                        Last minute beautifying, new ggaskets + hardware, polishing, clearing etc
                        .


                        Lots more in the mail ready to go in, stay tuned!.

                        Comment

                        • imwhyteyo
                          E30 Enthusiast
                          • Oct 2008
                          • 1165

                          #27
                          Today I got quite a bit completed. I installed my hids, hard wired and installed a relat/fuse kit. Low beams and fog lights are done. Debating what to do with the high beams... Also tinted the fog lenses as well. 300 install to stay yellow without doing the typical yellow film.


                          Let there be light! (Notice there isn't any tint of blue! ;))

                          Odd color from camera. . It's a super white, purlle. More white.


                          All together:


                          Another large taste of the day was relocating the factory oil cooler to the front lower opening of my valence. I think this location makes things much more efficient and Fills the void nicely. Bending the lines was difficult, especially pulling them away from the turbo manifold, I may put a little heat reflector onto them to isolate temps even more. Thoughts?


                          It could be cleaner, but I feel it got it as even and level as possible. It's far away from the bottom of the valance too so chances of damage are very minimal now.

                          Originally posted by Nisse Järnet
                          Nice, are those 4300k?
                          Yes. 5000k is too blue and actually has less lumens. Even though many people would argue this. They are oem osram xenarc d2s 4300k bulbs, philips ballasts, with acura tsx xenon projectors. The lenses were modified to make a crisper cutoff line at 25 - 30ft. All oem level adjustments still can be utilized. It's a very confident and lasting setup. I did want to post pictures of my install, but I provide retrofitting services to people at a price and cannot reveal this as I have with many other things I've shown.
                          Last edited by imwhyteyo; 04-02-2014, 01:46 AM.

                          Comment

                          • imwhyteyo
                            E30 Enthusiast
                            • Oct 2008
                            • 1165

                            #28
                            Did alittle wire action..! New upgraded grounding straps for the engine. I will be creating a new starter/alternator power wire out of 0awg. In red (for the theme)
                            After the alternator gets a internals rebuild and a sandblast if the outer case, this will allow me the chance to start considering wiring of amplifiers for the extreme stereo I'll be installing.


                            Also tinkered with the spark plug wires.. hard to make these look any cleaner.. I'll be relocating the ignition coil far away from the potential of heat from the turbo. Under the intake mani it goes!


                            Comment

                            • imwhyteyo
                              E30 Enthusiast
                              • Oct 2008
                              • 1165

                              #29
                              Few more pics of latest stuff

                              Brake res painted with viewable fluid level line on side


                              Heat shielded and bent the lines of the oil cooler off the manifold


                              Tidy routed oil feed and sleeved pressure sender tied away from heat.


                              Broken down alternator I'm rebuilding blasting and painting to match engine.


                              "Mila" being torn down for "project 800" (850 whp goal by summers end)

                              New box to handle all the extra work on the other side of the shop (box#3)


                              M20 cam gear in the mail


                              AKg subframe rebuild on deck.


                              -AN hose makeover, bilstein HD's going back in for now ; (


                              Can anyone tell me what rear valence this is? As soon as I find out I'll be trying to get one. Need to finish up the exterior, so I can rush her to the booth for some new skin!.. I have a limited window I'm 2 months to get her there... will I make it. ?!?!

                              Comment

                              • imwhyteyo
                                E30 Enthusiast
                                • Oct 2008
                                • 1165

                                #30
                                More progress pics.

                                Shortening the bump stops.


                                Cut!


                                Finally sorted out the grounding issue with the interior lights! Led upgrades, woo


                                Graves light dimmer module installed!


                                Tore apart the whole car to fix all the electrical problems


                                Crazy spaghetti mess..


                                Cleaned and tidy


                                Crossover done, wires tied tucked and cleaned. Everything electrical works! No dim lights, all indicators work, solid contacts and no more parasitic drain.


                                E36 window switches after I installed the one touch modules.


                                Illuminated now too


                                Door speakers cut and fit, cleaned up and put back together. Boston acoustics tweeters and midbass, hidden crossovers and wiring thru the rubber door grommets.


                                Another.


                                Got this little gem in the mail too!.


                                Thinking about this rear valence, anyone know what it is?


                                Thanks for looking. Keep on checking in daily, it will be all coming together rather quickly now.

                                Comment

                                Working...