Aussie 318is - now S54B32 swap

Collapse
X
 
  • Time
  • Show
Clear All
new posts

  • AusScare
    replied
    E32 brake master cylinder came in the mail. Here it is mocked up with the Clio booster:

    Click image for larger version

Name:	IMG_20160323_202847.jpg
Views:	199
Size:	64.7 KB
ID:	10071611

    Should there be a gasket or something between the MC and booster?

    Other parts pending purchase:

    - Front M3 offset bushings
    - Front control arms
    - Outer tie rods
    - Stainless brake lines

    Then I'll have all the brake parts, bushings and new rear axles installed.
    Last edited by AusScare; 10-15-2022, 03:48 PM.

    Leave a comment:


  • rzerob
    replied
    Originally posted by badwella
    That's friggin' awesome. Do you have a link to where we can get the bonnet pins? I would love a set.
    Ditto.

    Leave a comment:


  • CorvallisBMW
    replied
    Good idea if you're going to be removing the hood/bonnet frequently. Lining that thing up is a pain.

    Leave a comment:


  • badwella
    replied
    That's friggin' awesome. Do you have a link to where we can get the bonnet pins? I would love a set.

    Leave a comment:


  • AusScare
    replied
    Minor update - picked up some 'quick release' bonnet pins from a guy on the local Facebook group.

    They work by replacing the pins in the hinge that connects the bonnet to the body.


    First step is to pop the bonnet and drill out the stock pin:


    Then slot the new pin in, it's a tight fit so I know there's not going to be any movement there:


    This means that to take off the bonnet, I just slot out these pins, disconnect the ground cable, washer hose and bonnet strut without having to deal with re-aligning the bonnet each time. With the impending engine swap this will probably come in handy. Cheap and effective mod.
    Last edited by AusScare; 10-15-2022, 03:44 PM.

    Leave a comment:


  • AusScare
    replied
    Latest updates are:
    • Date set for swapping the engine over as Christmas holidays
    • Installed a 24mm front sway bar
    • Changed the oil/filter on the M42
    • Adjusted the handbrake to be mostly set at 5 clicks and fully by 7 clicks

    Quick pic working on the car over the weekend:

    Click image for larger version

Name:	IMG_20151128_130050.jpg
Views:	220
Size:	56.2 KB
ID:	10065816
    Last edited by AusScare; 08-22-2022, 04:11 AM.

    Leave a comment:


  • chrisbmx68
    replied
    No worries I forgot haha, uh the tune isn't quite right yet but its probably around 300-350 ish at the moment im running 15 psi currently and I don't think I want to go much higher than 18 since I'm on stock head gasket and rods (who knows if it will even hold up at this level)

    I don't really have plans for traction I have a set of nice wheels that have 205x45x16's and they are staying that way for fitment purposes but I also have some 15" kosei k1s that I might get proper sticky tires for. I did do a dual ear diff hanger upgrade from an e36 to keep wheel hop down and that seems to be working well.

    Leave a comment:


  • AusScare
    replied
    Originally posted by chrisbmx68
    There are way to many pictures of the build on my flickr https://www.flickr.com/photos/511702...57648591537758

    It's a Porsche 944 booster but that's because I had an M50 swapped before this. I think it would just barely fit with the stock one. The diamond plate is just a heat shield I'm experimenting with since it gets really warm I'm the area near the downpipe. The manifold is crappy and from eBay cx racing for a Datsun 510 swap but it put the turbo and wastegate exactly where I needed it.
    Thanks, and sorry I realised I asked you about the booster a while ago. What sort of power are you putting down, what're your plans for traction?

    Leave a comment:


  • chrisbmx68
    replied
    There are way to many pictures of the build on my flickr https://www.flickr.com/photos/511702...57648591537758

    It's a Porsche 944 booster but that's because I had an M50 swapped before this. I think it would just barely fit with the stock one. The diamond plate is just a heat shield I'm experimenting with since it gets really warm I'm the area near the downpipe. The manifold is crappy and from eBay cx racing for a Datsun 510 swap but it put the turbo and wastegate exactly where I needed it.

    Leave a comment:


  • AusScare
    replied
    Originally posted by chrisbmx68
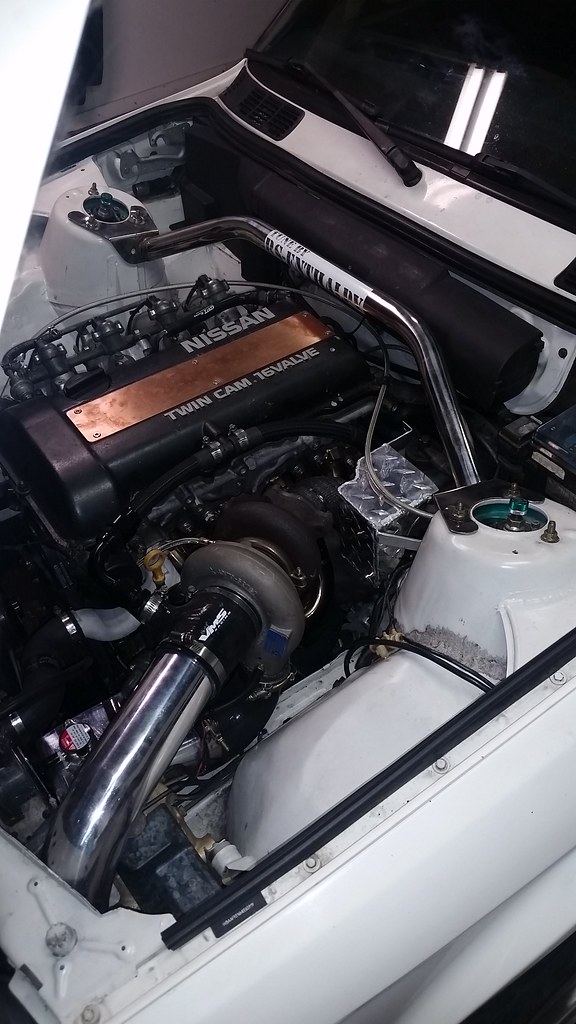
    progress looking good man! I finally got my setup running and driving just working through some tune and drivetrain bugs. I had even less clearance with my strut bar and m42 I actually had to grind the little ribs on the intake manifold off. Look at how much clearance there is now with the sr20.
    That looks awesome - any pics of the exhaust mani? Is that the stock brake booster/mc and did you have to move it or anything, or just change the res to a metal one?

    Leave a comment:


  • chrisbmx68
    replied
    progress looking good man! I finally got my setup running and driving just working through some tune and drivetrain bugs. I had even less clearance with my strut bar and m42 I actually had to grind the little ribs on the intake manifold off. Look at how much clearance there is now with the sr20.

    same bar with the m42

    Leave a comment:


  • AusScare
    replied
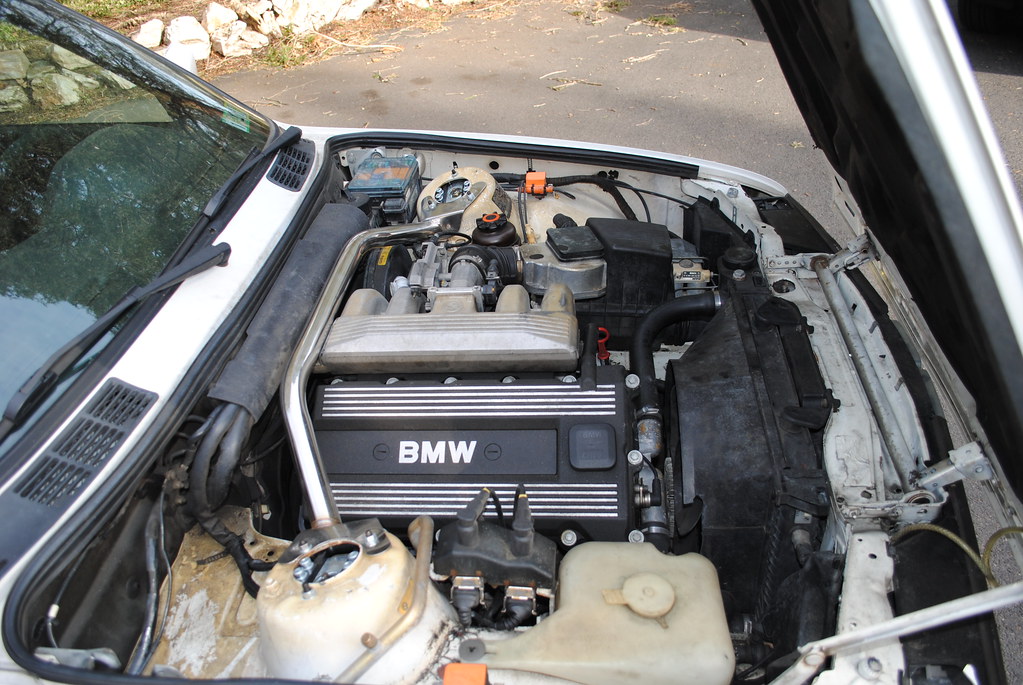
    Front and rear strut braces arrived in the mail this week from Ultra Racing Australia. Pretty happy with how they are put together, fitment was fine for the most part (see pics) and the finish seems good for a couple of steel metal bars!

    The front was first in, fitment was extremely close as you can see - hoping the engine doesn't move around too much!

    Click image for larger version

Name:	IMG_20150829_112534.jpg
Views:	240
Size:	85.4 KB
ID:	10065813

    For the rear I cut little flaps into the fabric so the bar could go through. Had to crawl into the boot to do all this, bloody hell I'm not as young as I used to be, my body will be hurting when I wake up tomorrow I'm sure.

    Inspected the strut tops while I was there, condition is good:

    Click image for larger version

Name:	IMG_20150829_120931.jpg
Views:	251
Size:	91.9 KB
ID:	10065814
    Click image for larger version

Name:	IMG_20150829_124812.jpg
Views:	248
Size:	74.2 KB
ID:	10065815

    Will take it for a bit of a drive and report back - though I'm unlikely to feel any difference with street driving...
    Last edited by AusScare; 08-22-2022, 04:10 AM.

    Leave a comment:


  • AusScare
    replied
    Some more bits arrived today.

    CATuned axles from the group buy - wasn't overly impressed by the way they were packaged, very loose in the box, plus they forgot my Revshift bushings. Have emailed them so hopefully a quick, positive outcome:

    Click image for larger version

Name:	IMG_20150814_175908.jpg
Views:	253
Size:	42.4 KB
ID:	10065811

    Also got some seat belt pads for the new seats from eBay, $11 delivered! Bargain!

    Click image for larger version

Name:	IMG_20150814_180434.jpg
Views:	241
Size:	50.2 KB
ID:	10065812
    Last edited by AusScare; 08-22-2022, 04:08 AM.

    Leave a comment:


  • AusScare
    replied
    Fitted the Recaros today. Used Massive seat adapters, top quality product, and super easy to swap over the seats and still use the stock rails.

    Click image for larger version

Name:	IMG_20150812_133657.jpg
Views:	252
Size:	69.6 KB
ID:	10065810

    Went for a test drive, the seats sit lower and are 100x more supportive, it's great. Went through a few quick corners with a lot more confidence, since I wasn't fighting to keep myself in the chair.
    Last edited by AusScare; 08-22-2022, 04:07 AM.

    Leave a comment:


  • AusScare
    replied
    On my quest to remove all signs of rust from the e30, the next lot to go was on the sunroof hinges.

    Few steps:

    1. Remove sunroof

    Click image for larger version

Name:	IMG_20150802_122110.jpg
Views:	245
Size:	40.3 KB
ID:	10065807

    2. Inspect rust, remove rust with wire brush on a drill, treat with rust converter and leave to dry/cure for 2 hours

    Click image for larger version

Name:	IMG_20150802_122251.jpg
Views:	248
Size:	45.1 KB
ID:	10065808

    5. Paint with a few coats of primer and gloss white, refit to body and align

    Click image for larger version

Name:	IMG_20150803_203720.jpg
Views:	250
Size:	57.1 KB
ID:	10065809


    Fairly painless exercise. Worst bit was aligning it at the end. The sunroof seal looks to be half OEM (at the rear) and half aftermarket (front) so the front wouldn't close properly, kept getting stuck on the wind guard. Got there in the end.
    Last edited by AusScare; 08-22-2022, 04:06 AM.

    Leave a comment:

Working...