-
cool build man! I had the same issue with my crank position sensor... caused all kinds of idle problems -
So I picked up a new coolant tank, because mine was to long, and since I have an early model the tank gets in the way of everything. Its off a Mini Cooper I believe, but works great so far.
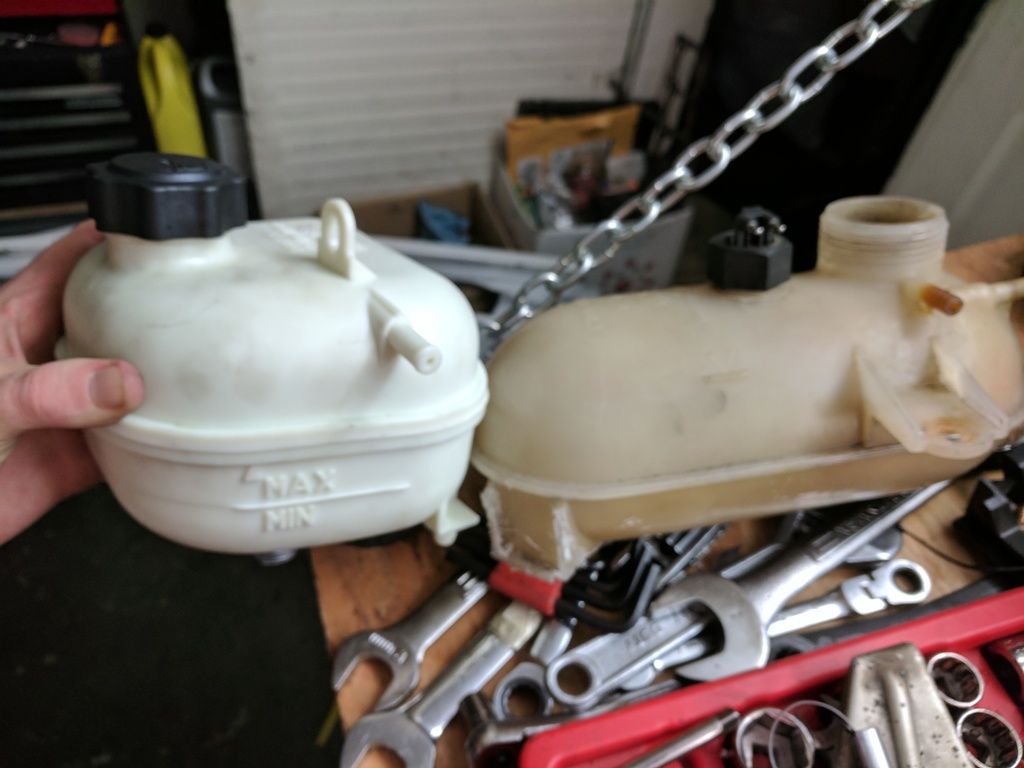
The bottom hose attachment was slightly to small, so duct tape to the rescue!! haha
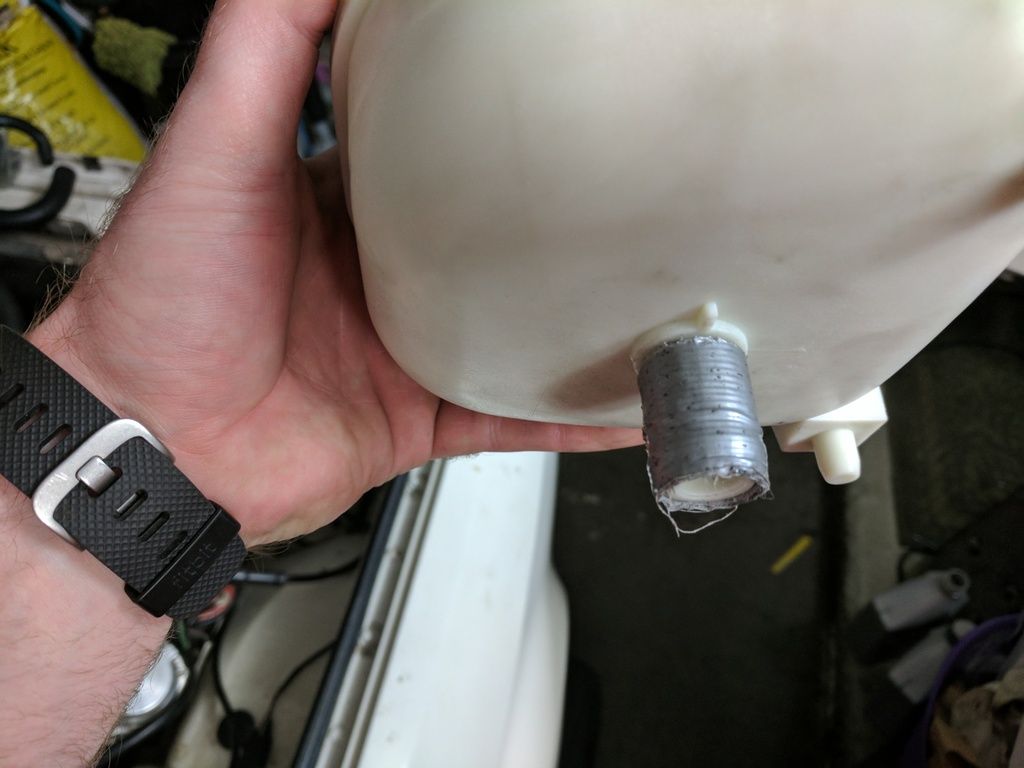
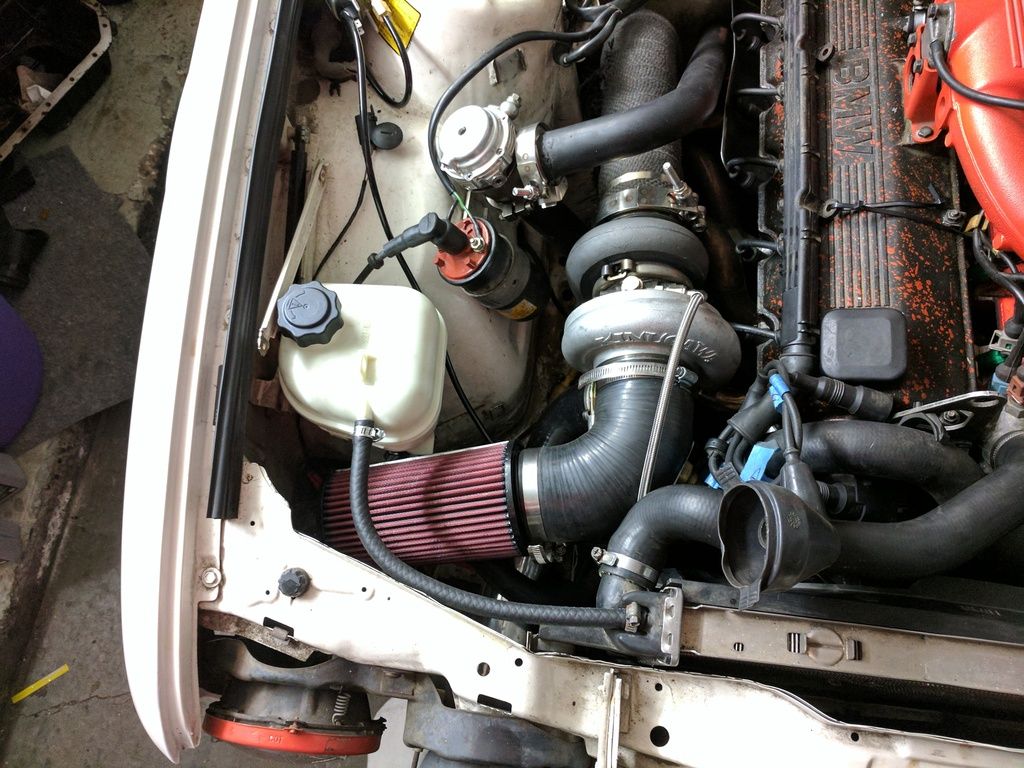
And here it is in the bay. Fits much better. Also you can see I moved the coil off of the intake. Which will cut down the vibrations.
This is when I test fit a different coil wire I took off an E34 wire set. Wanted to make sure it worked before I cut the stock on off. (Which is why it is tied up currently)Leave a comment:
-
Bonus picture of a SEMA car they were working on.
#eleanorshottersister was the sticker on it.Leave a comment:
-
Problems :(
So I got the exhaust on it. Sounds good at idle. Haven't been able to rev it up because it is on a bad tune. One to just get it running.
So I took it to Carburetor Connection in Kirkland to get it Dyno tuned. Great guys. Lots of knowledge and highly recommend them. Especially if you have a big V8 or any american muscle. They were working on everything.
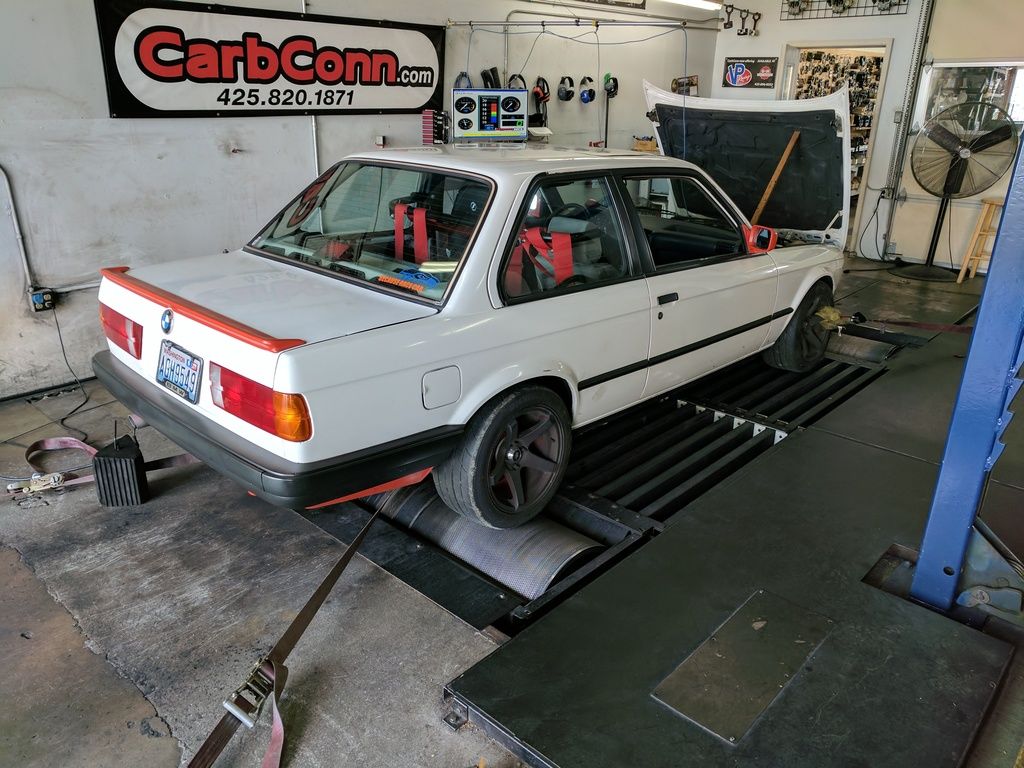
All hooked up! Super pumped/nervous, because this was the test to see if a screwed up anything. And I did.
So what would happen is when it would r3v up it would hit 3700 RPM and the go crazy. Back fire, pop, bad news. When you'd watch the fuel map, the RPM dot would go up steady as it should and at 3700, start jumping back and forth between where it should be and super lean. We tried diagnosing it in MS, but nothing. I had a spare MS at home and while they were waiting to hear from the MS guy I grabbed it that night so we could see if it was car problem or ECU problem. Nothing changed and had same problem, so it was car side. I didn't want to pay them to try and figure it out, so I towed it home. They said check all electrical sensors and plugs, CPS, etc.
And here is what I found :(

I forgot to put the plastic cover back on the CPS and Spark sensor and the alternator belt cut into the CPS and ground it to the wire.
Replaced that and r3ved it to 4500 RPM no problem. Looks like that fixed it. So I made another appointment for this Friday to go back and get it tuned. Fingers crossed.Leave a comment:
-
And the first start!!
I forgot to calibrate MS to the 42# injecters and it still thought they were 19#. So it died. Once I fixed it, it ran better.
Leave a comment:
-
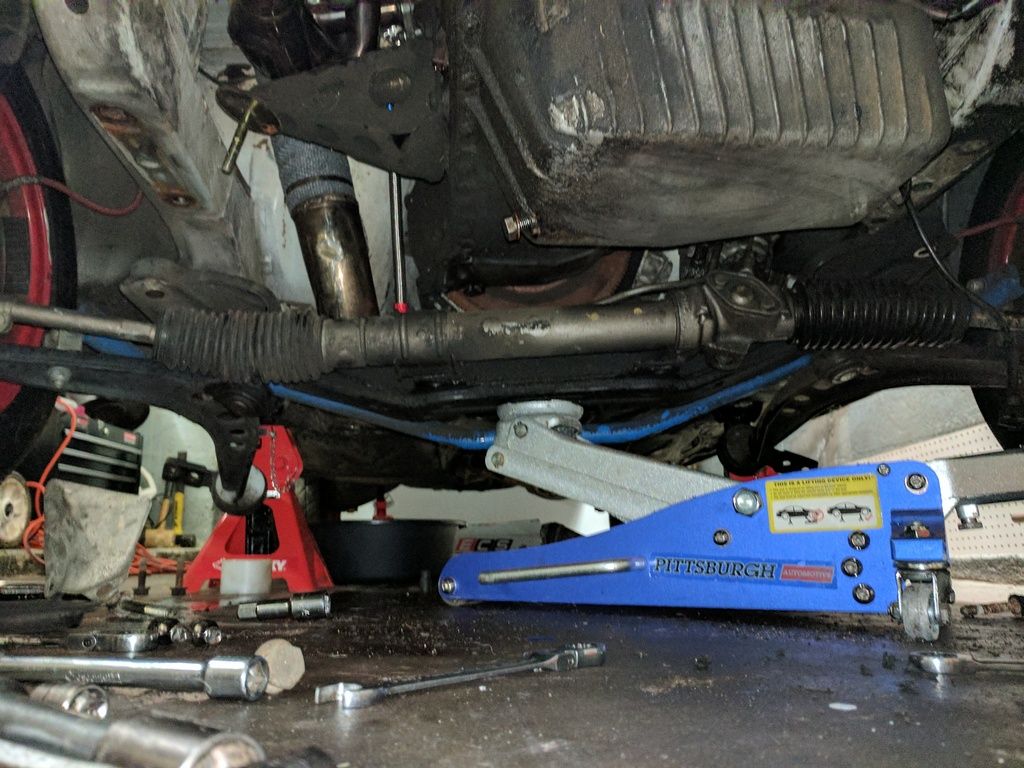
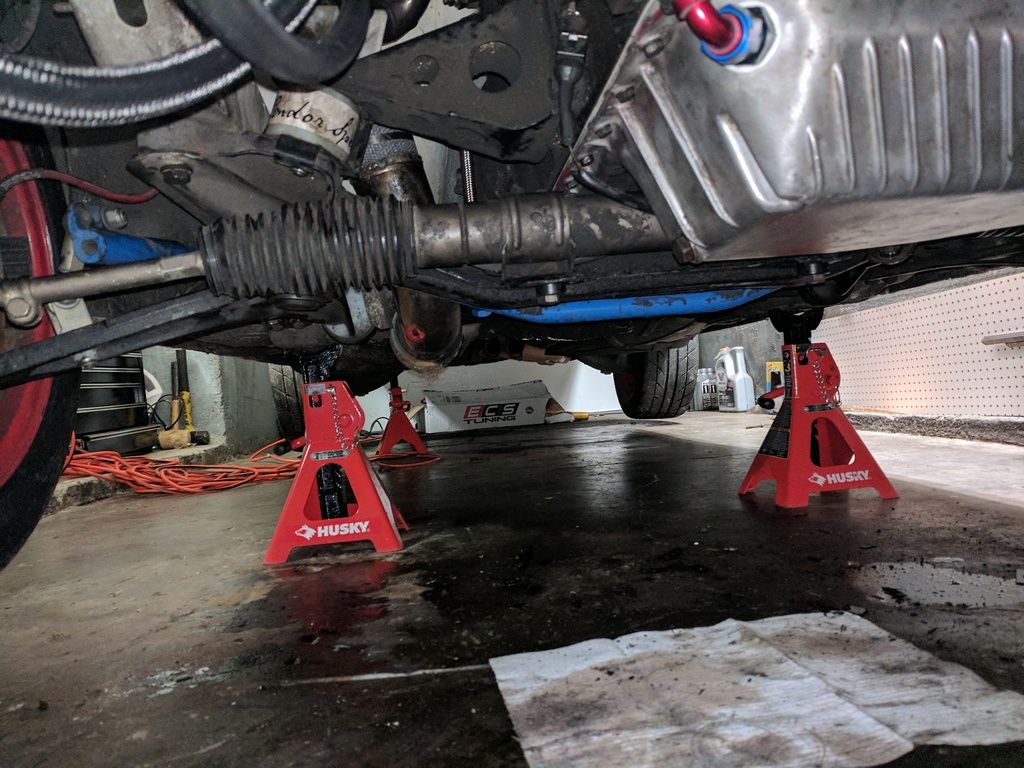
Next was dropping the oil pan to get the new one on. I didn't want to take the oil pump off, so I decided the easier way would be to drop the sub-frame. So engine hoist goes on.
And the sub-frame comes down.
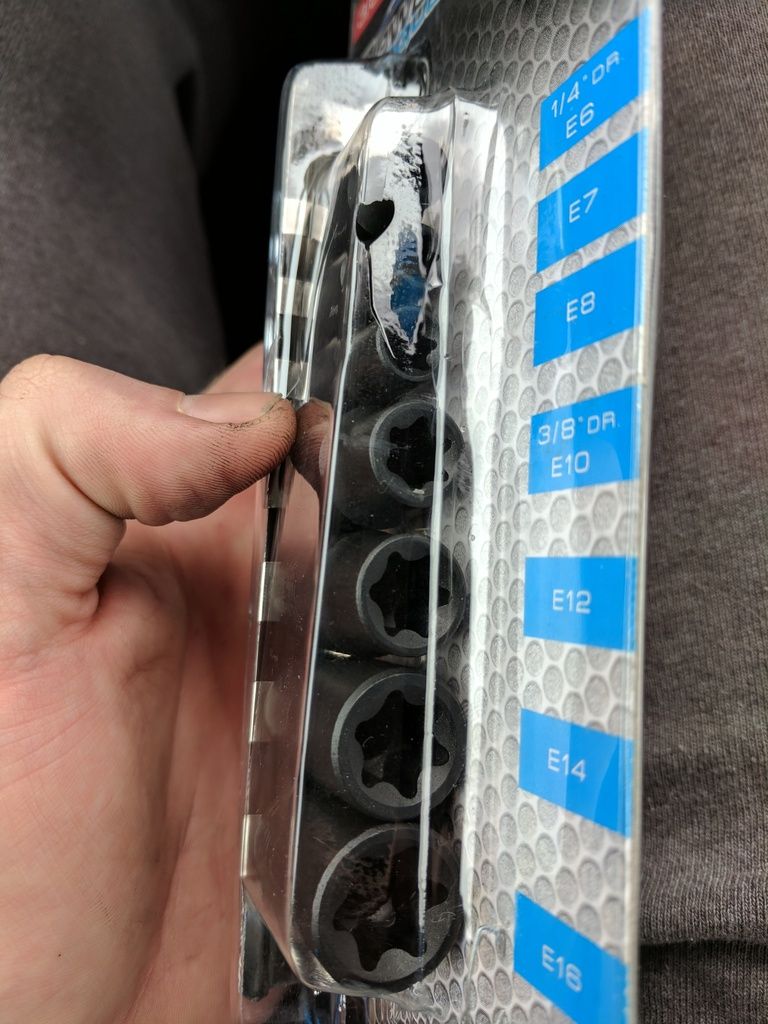
Then I didn't have the right sockets to get the bell housing cover off, that covers the back of the oil pan. So I grabbed these. Which will probably come in handy for other things.
And she's off.
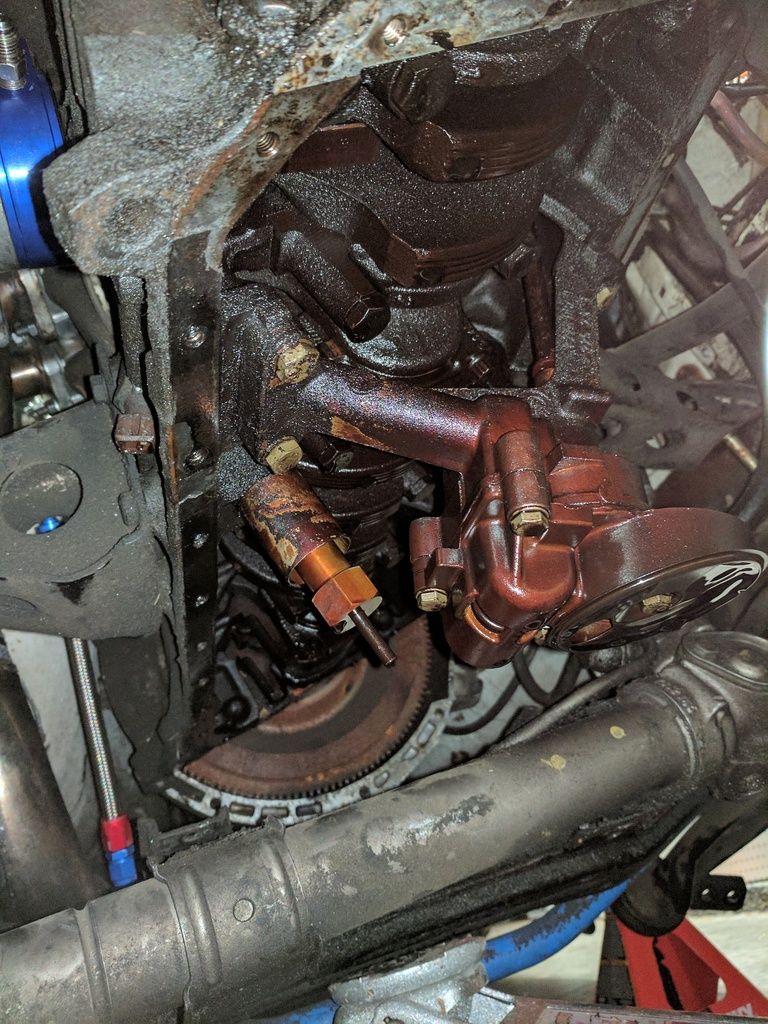
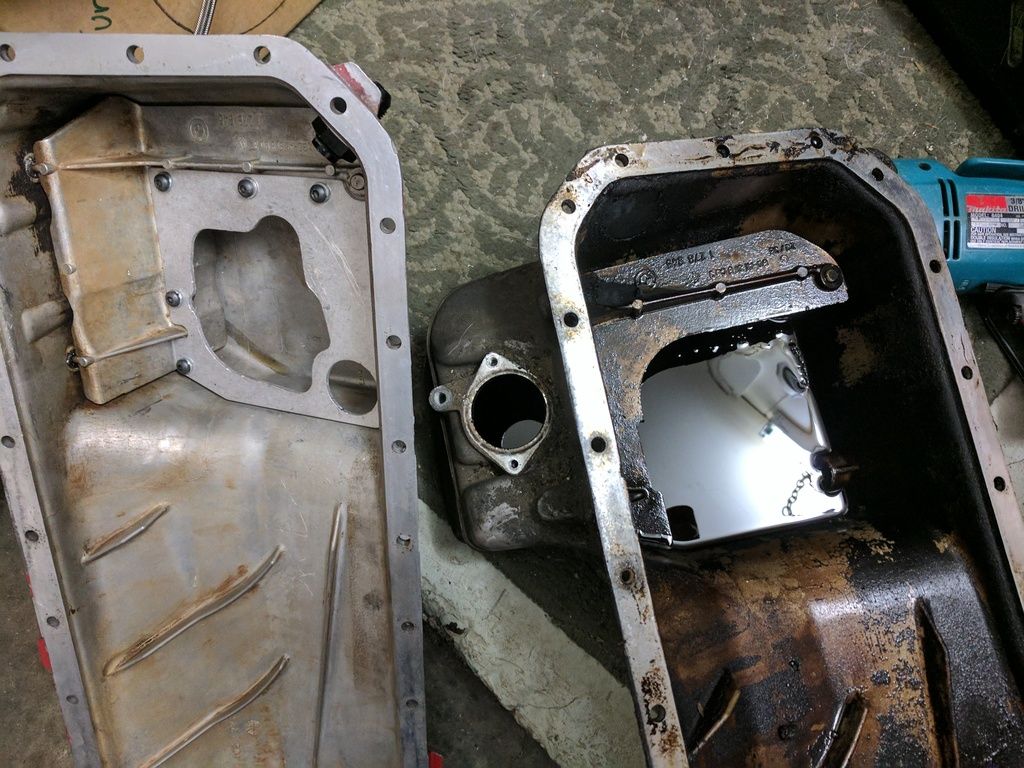
I didn't realize it at first, but the new pan had a little baffle in the bottom. and that made it a BI*** to get it back in. I had to grind down a couple spots to get it around the pump and that other thing next to it. (Forget the name. Not the dip stick tube)
New vs Old
But shes back in!!
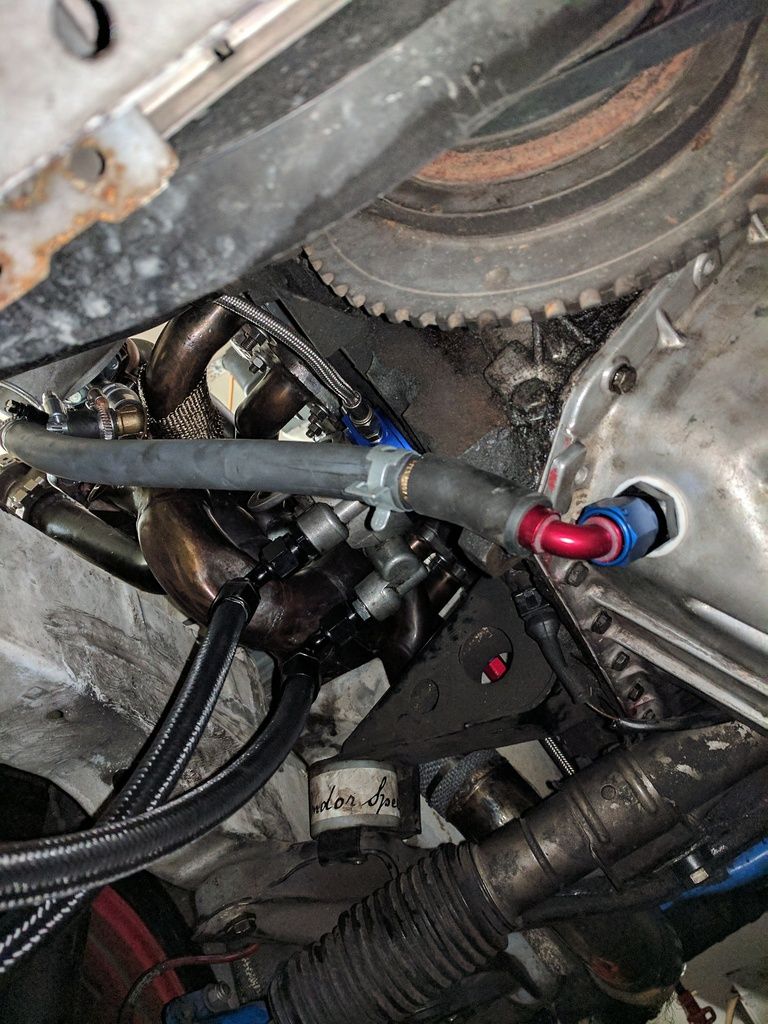
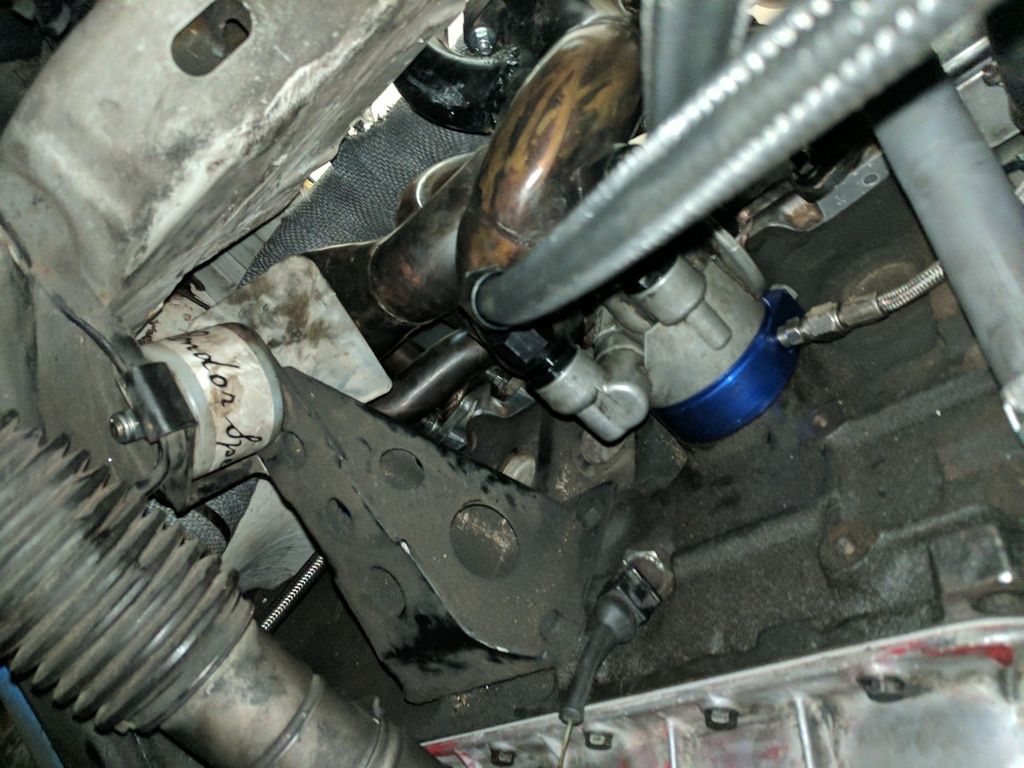
And I know I'm going to get a lot of crap for this, but here's my ghetto drain tube. (will be changed shortly, but it works.) The only plate I could find for the turbo drain was a tube fitting, and that tube was larger than the fitting to go into the oil pan. So I had to splice a slightly smaller hose in the middle.
Ugly but works.
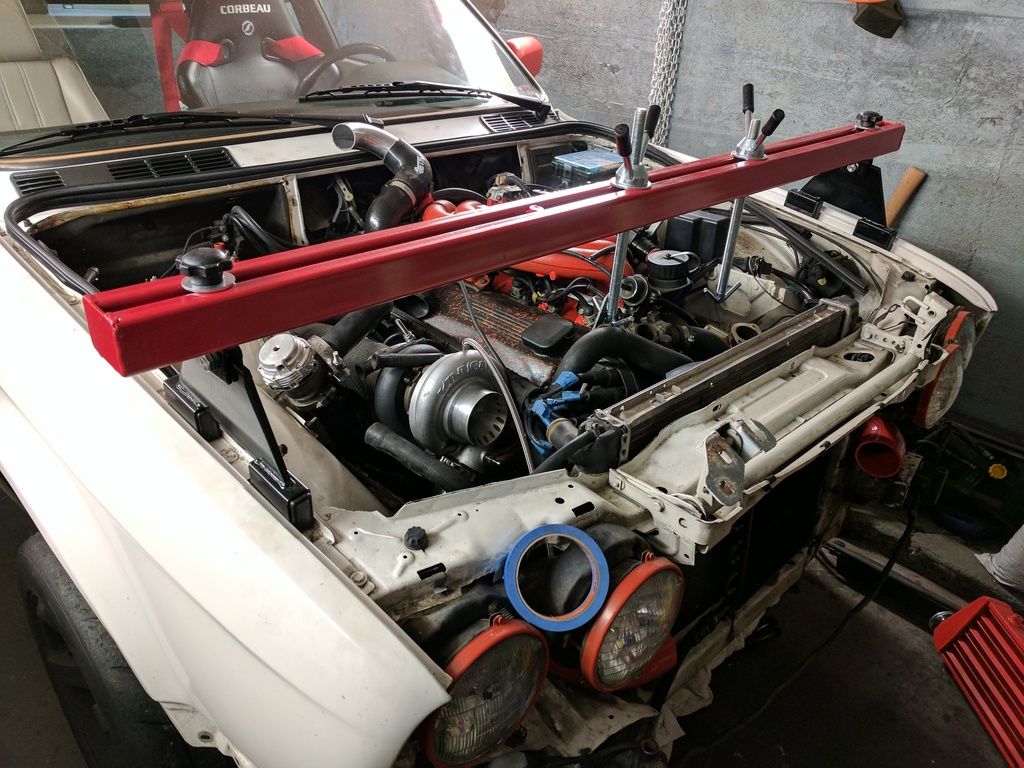
And then I could finish putting the piping and start buttoning her up. So here is how she sat. Which I finished the night before She goes to get an exhaust put on. I had a down pipe but that was it.
Also, had to temporarily move the coil because that was the only place the wires would reach.
Then I dropped her off to get an exhaust put on. My valence needs a little trimming to fit over the charge pipes, so that stayed off, and I could close the hood because of the coolant overflow tank was in the way. But she RUNS!!!
Here's when I dropped her off at the exhaust shop. (Shout out to Muffler King in Kirkland for doing a great job, and pretty cheap.)
Leave a comment:
-
Updates!!
Update on the Tarbo and a photo dump. (cause who doesn't love a good dump? ;D )
But I've had my ups and downs the last month or so. It is running, just not well yet. Tried to get it Dyno tuned but no dice. Anyway here we go!
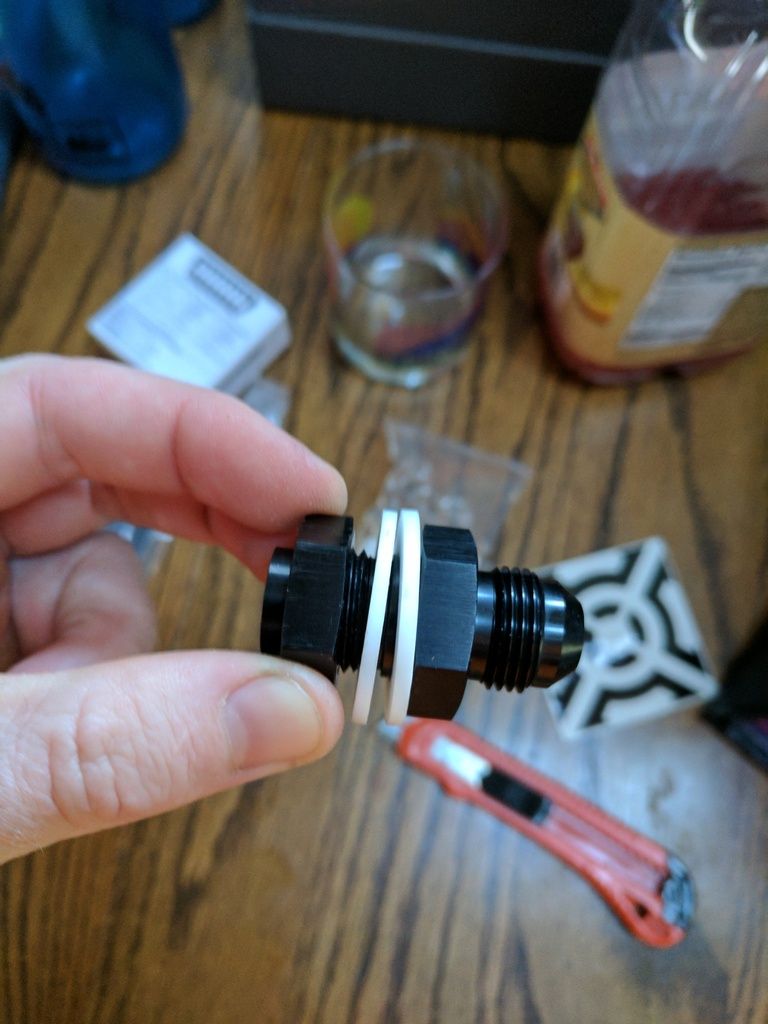
So I went to install my sandwich plate. And was a dumba** and had thought that both adapters went in. And looked at them, saw they were different sizes. So ordered another because I thought I got the wrong parts. (ordered over a year ago so could really file a claim)
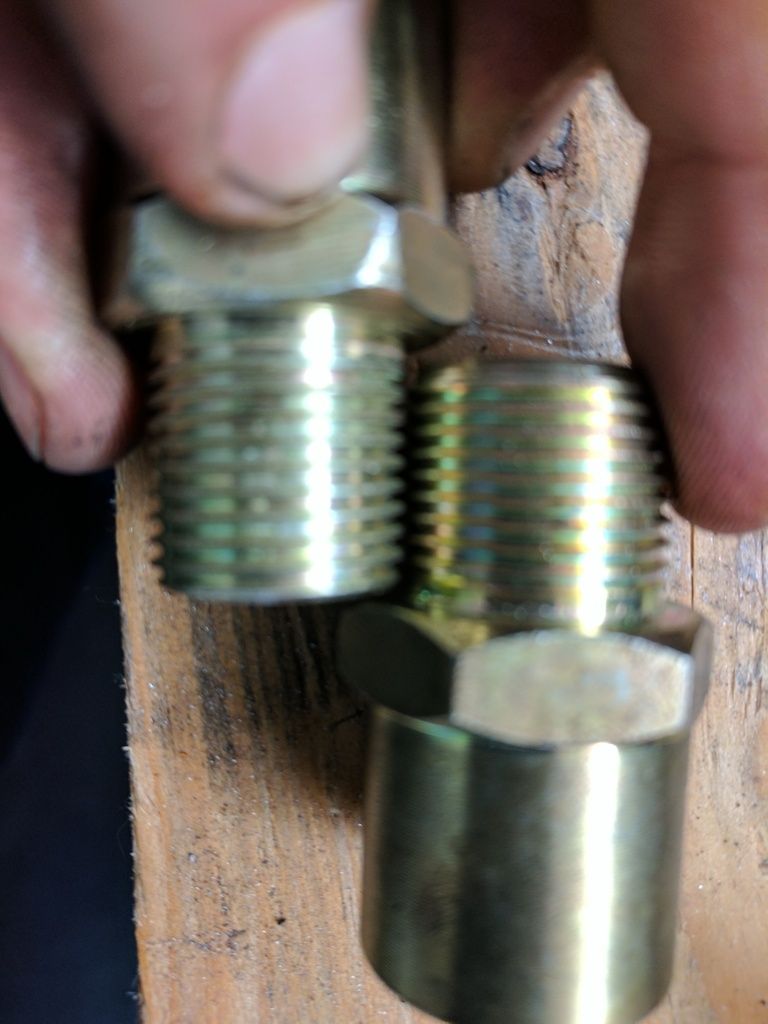
As you can see they are different. (so they can be "universal" adapters) So I felt dumb. But once I figured it out I got that in.
But here it is once I got it in.
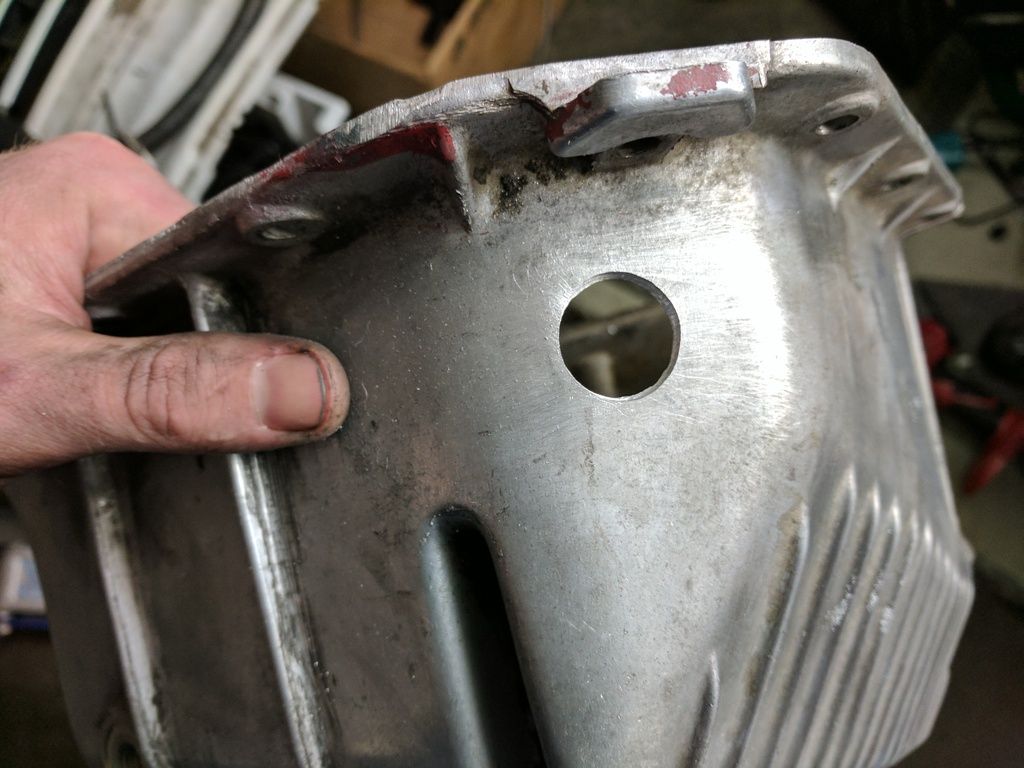
Next was tapping my oil pan. I had a second one car because a local guy did a $20 sale for everything and one was an oil pan. No dents or cracks and just a couple scrapes, but nothing deep. It was a steal.
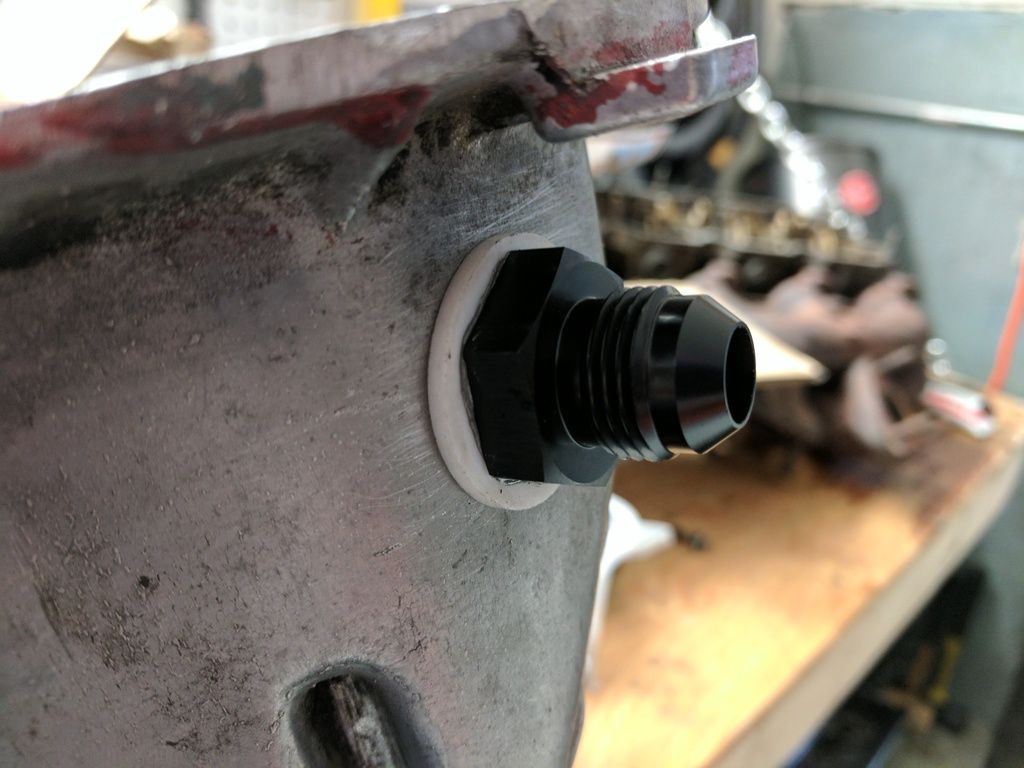
I didn't have a way to weld aluminum so I bought a firewall bung to put in the hole of the oil pan. (I know its not the best way, but what ever)
Then I had to drill the whole in the pan.
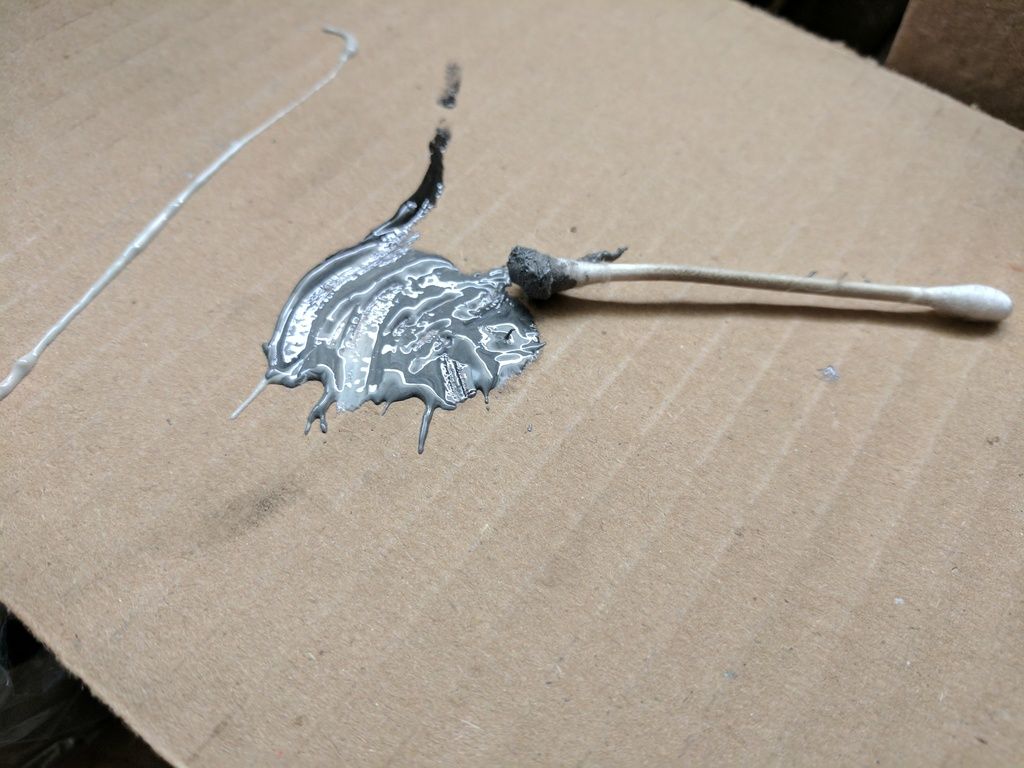
Whipped up a little JB weld to help it seal and not come unscrewed.
And here it is in. I don't think its bad, and is an -8AN fitting. We'll see how it holds up. And if all else fails I'll do it properly with my other pan and have a bung welded in.
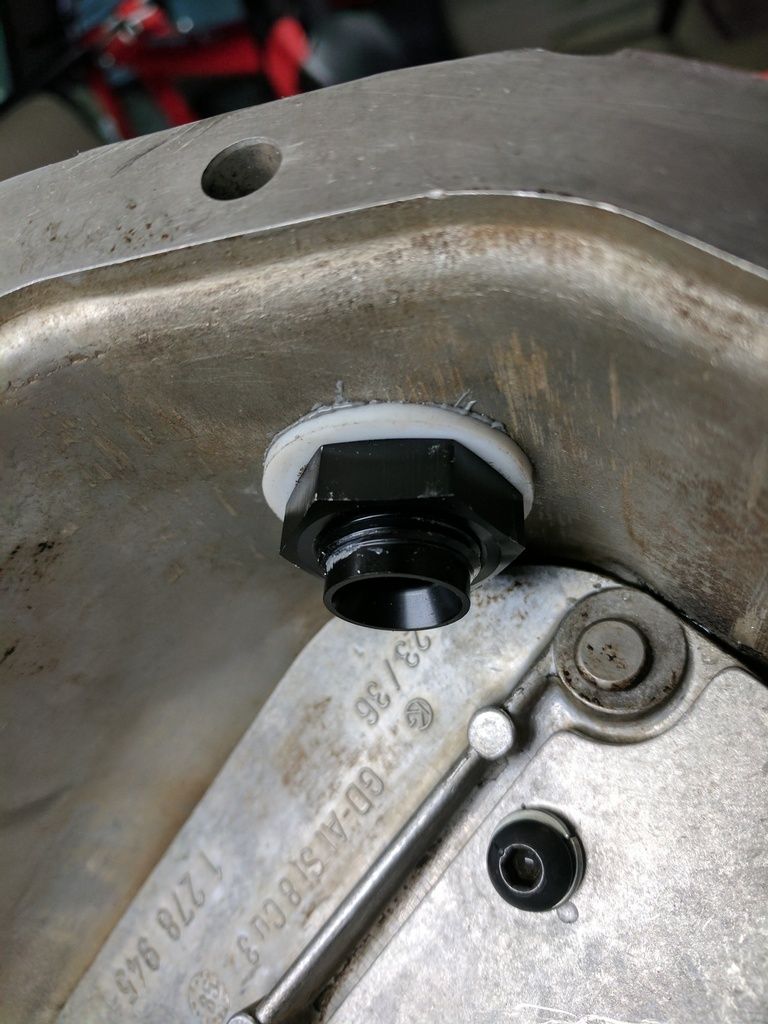
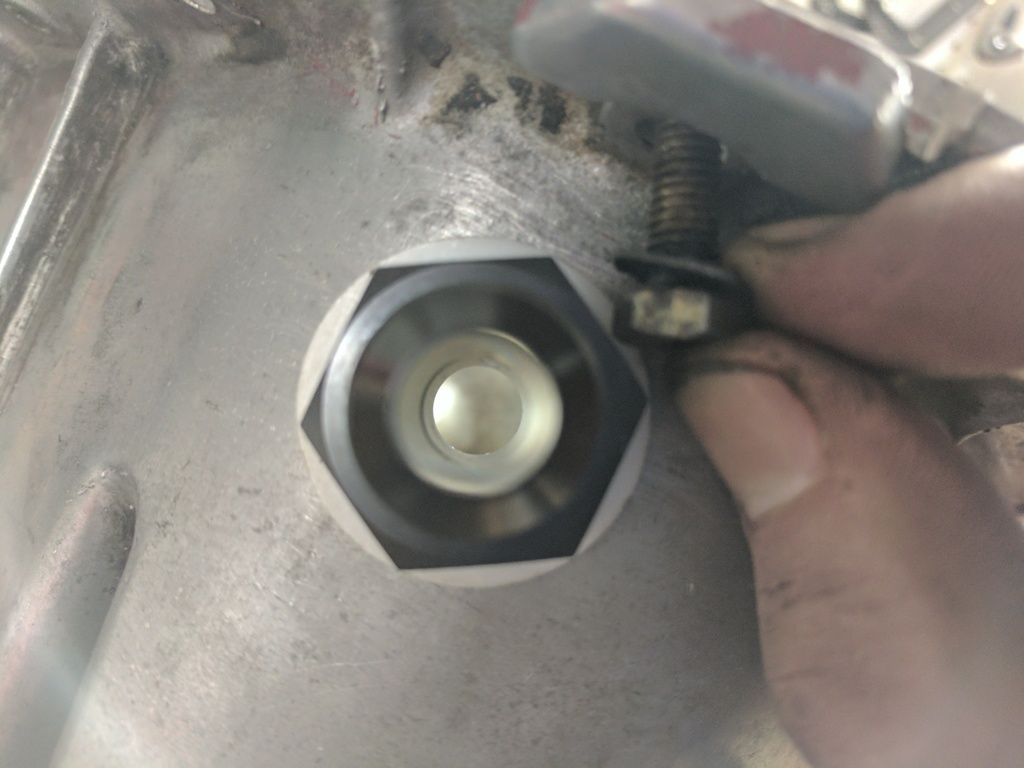
And the pan screw still misses the drain :)
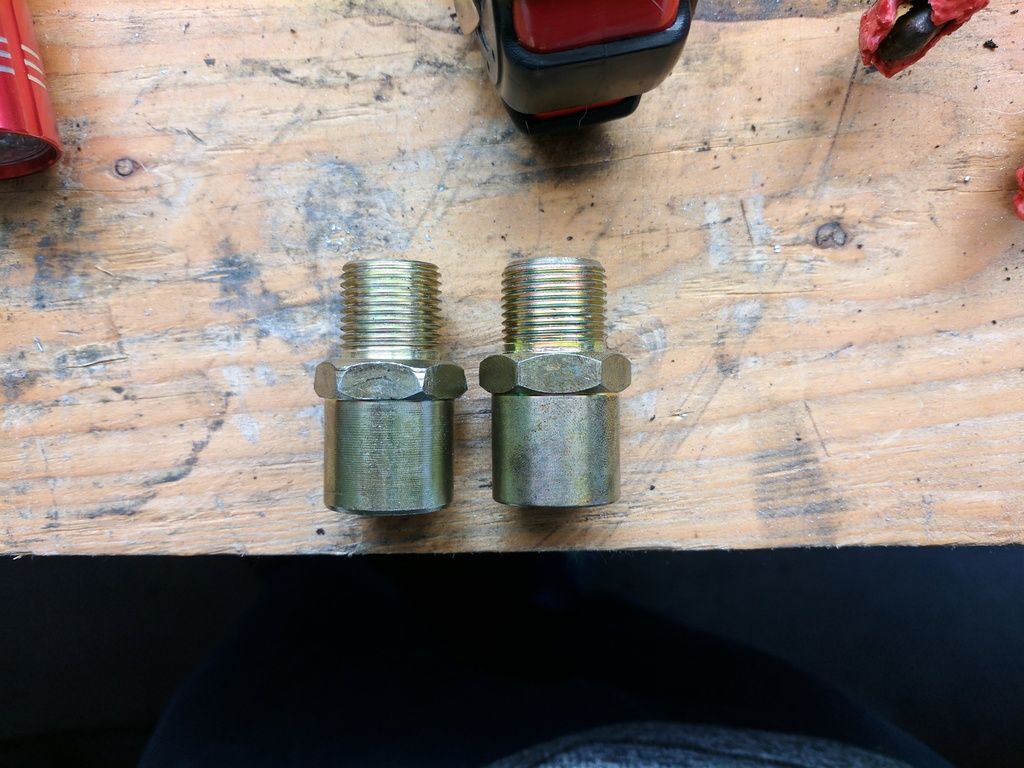
And I couldn't use the stock oil cooler but wanted to keep one so I picked one up off Amazon and the associated lines and adapters. (which they sent me the wrong adapters that screw into the filter housing.)
Fittings with 90s and ends for the cooler. All -8AN
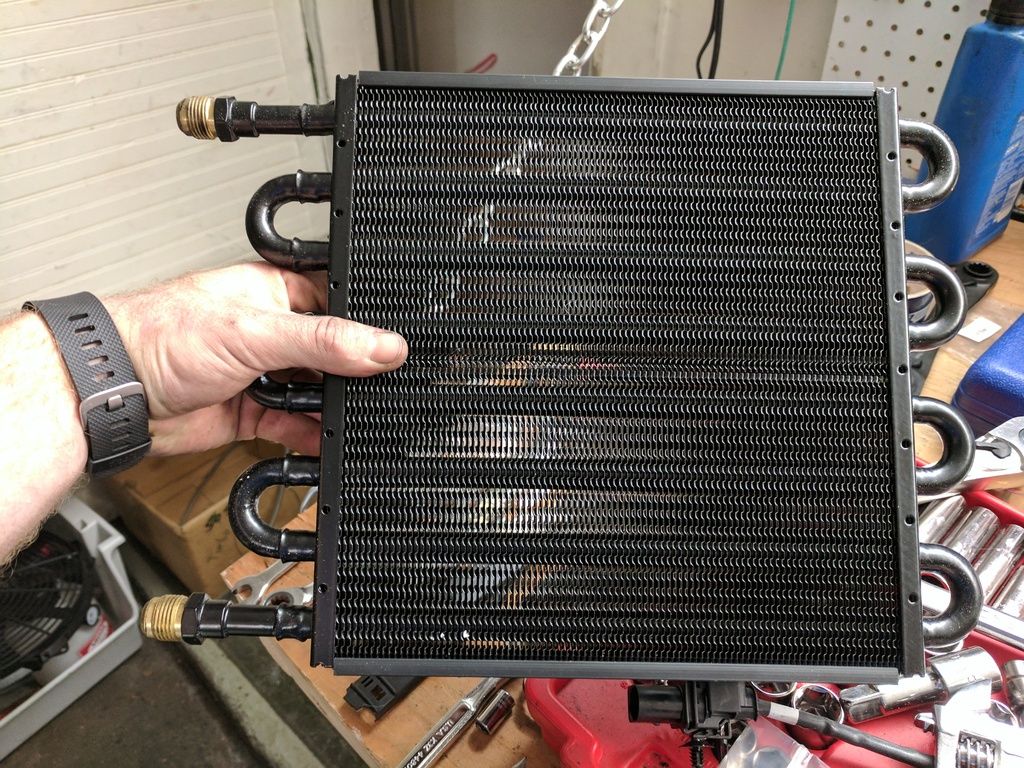
Here's the cooler I picked up. Nothing crazy, just something to keep temps down. Only mistake is I found the same one but is 16 pass instead of 8 for $5 more. Probably would have gone with that for extra cooling.
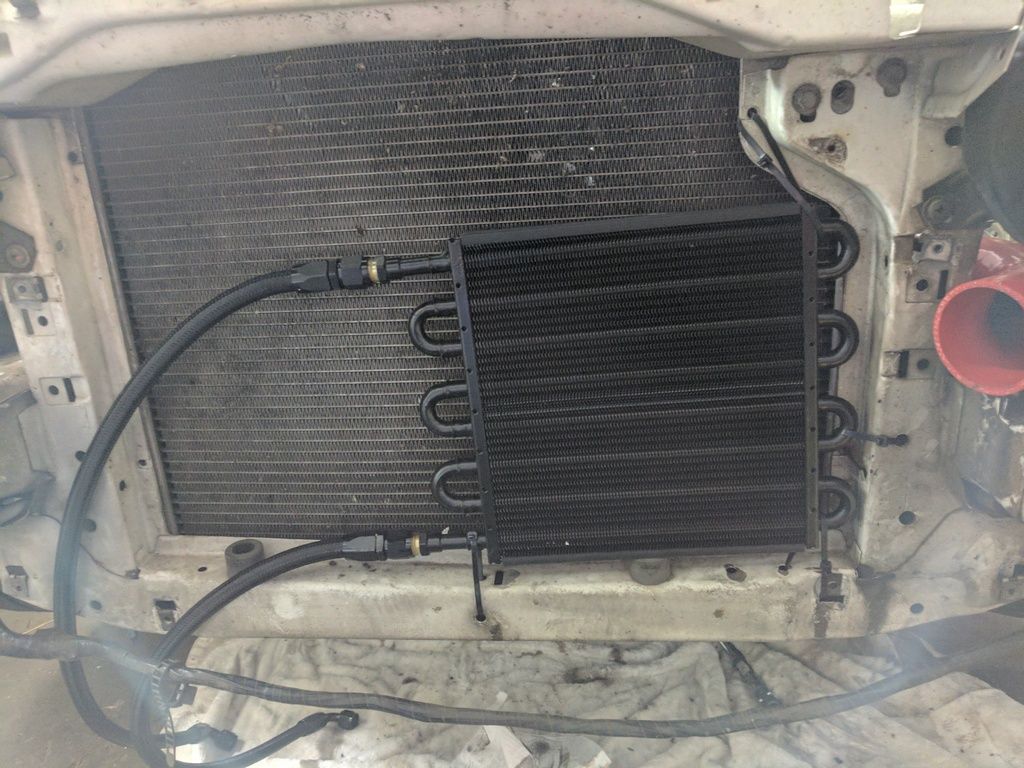
And temporarily installed with zip ties.
Leave a comment:
-
Thanks! ya, I have a page book marked for the RX7 brake upgrade. And I have ducting waiting to go in to make sure they are well vented. :)
Ya, I will fully admit I stole the drain idea from your thread hehe. I F***ING hate draining the block. Its so damn messy. But no more!
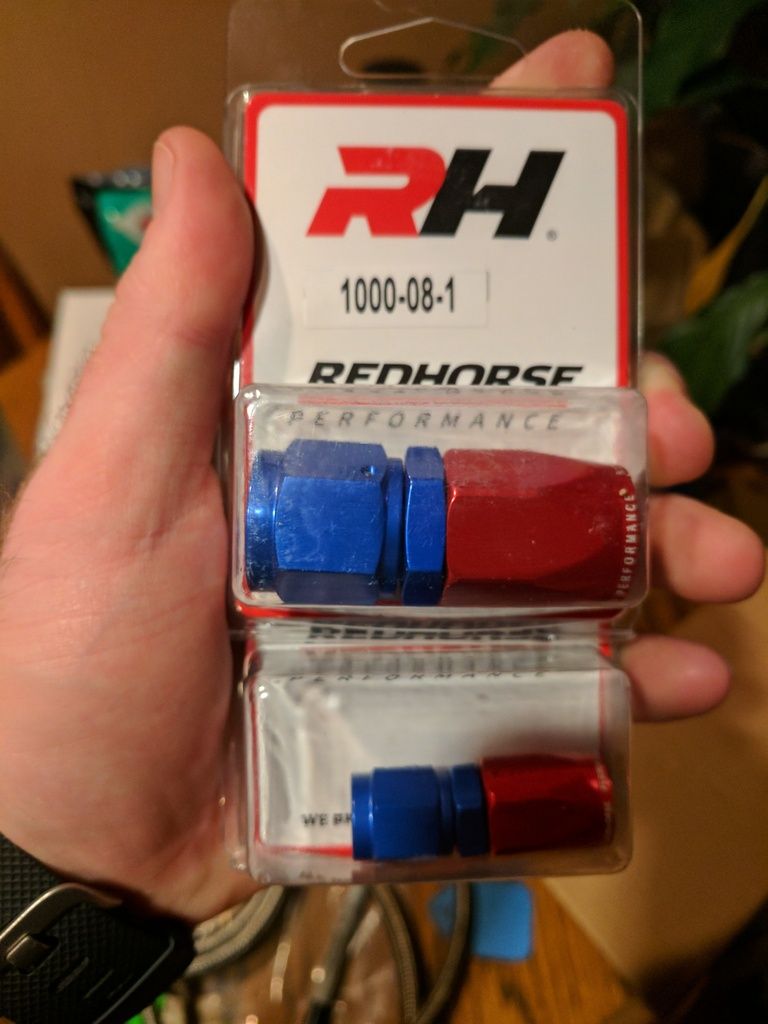
And so far they seem great. I've bought cheaper ones of Amazon and the RedHorse ones definitely feel higher quality. We'll see how they stand up to time.
Ya, I ended up not using AN fittings for most of the drain. The only drain plate that they had for my turbo used a rubber hose. But its the side of a -8AN hose.Leave a comment:
-
Nice work.
The -8AN is what you want actually. I believe I'm using the equivalent to a -10.Leave a comment:
-
Just stumbled on your thread, nice work so far! Car looks great. Got a kick out of your block coolant drain :D How do you like the redhorse fittings?Leave a comment:
-
Good looking progress on the turbo build! That road trip also looks like it was awesome! I wanted to hit some tracks down in California with mine, but didn't feel like my car was running well enough and incidentally broke a rocker while I was down there...
One thing to consider once you go turbo is upgrading your brakes. With the turbo you will be hitting "holy shit that's fast" speeds much more often and you'll want better brakes than stock so they don't overheat.Leave a comment:
-
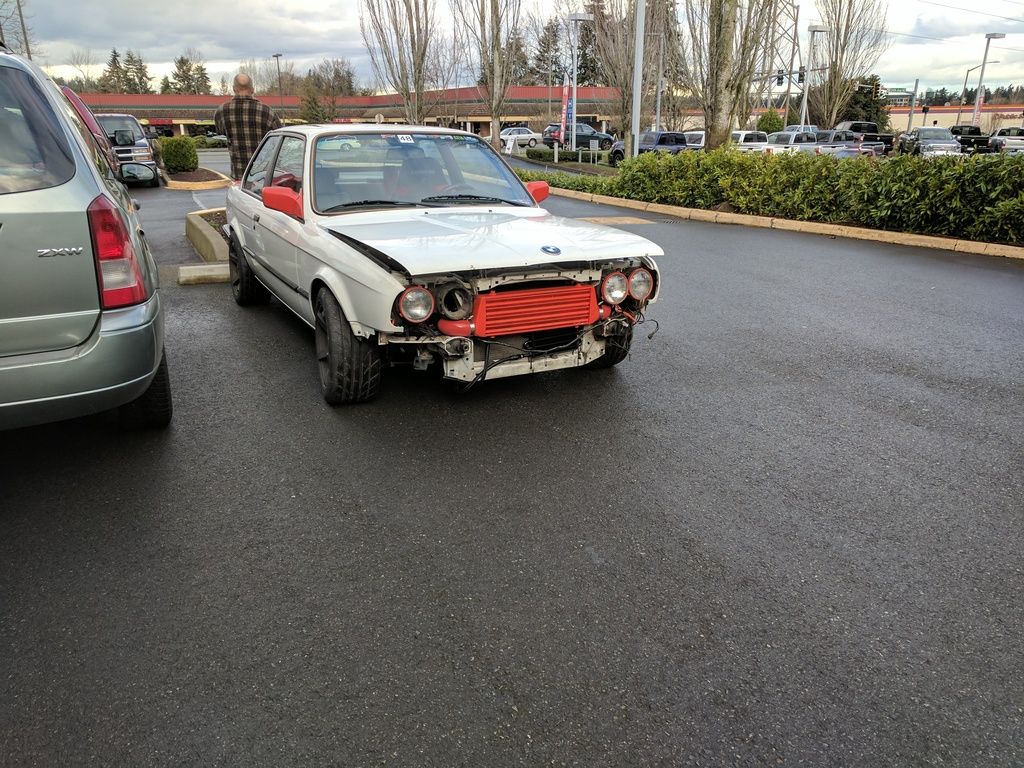
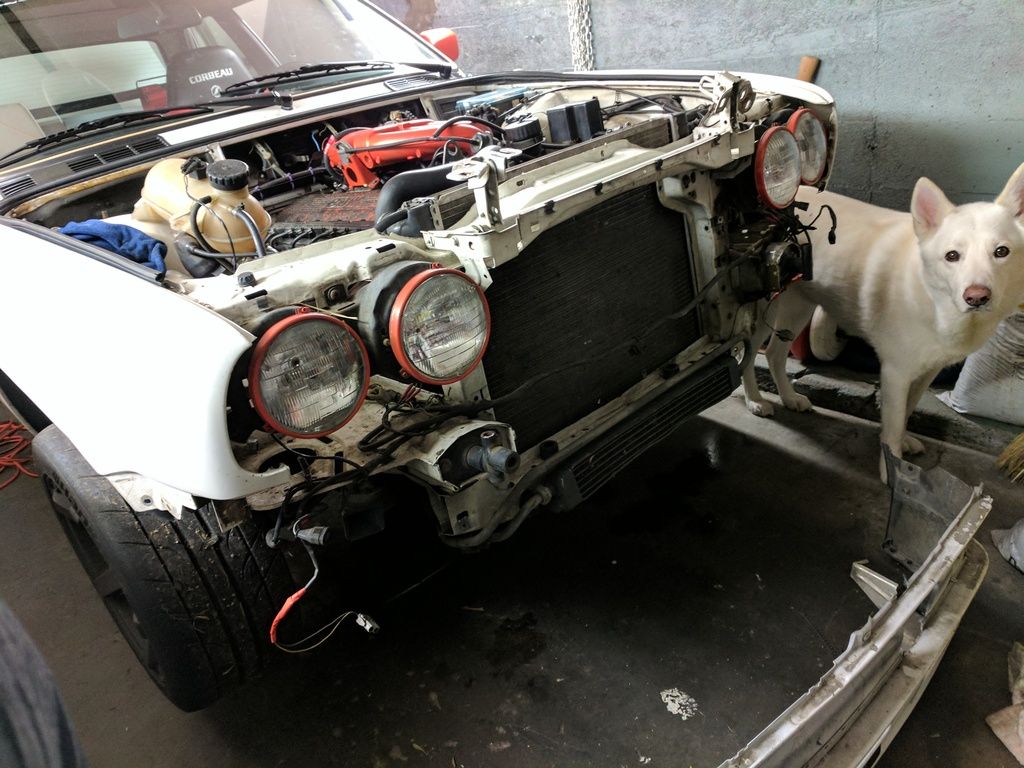
While I was waiting for parts, I decided to start the mock up for boosty things. So off come the bumper, grills and valence.
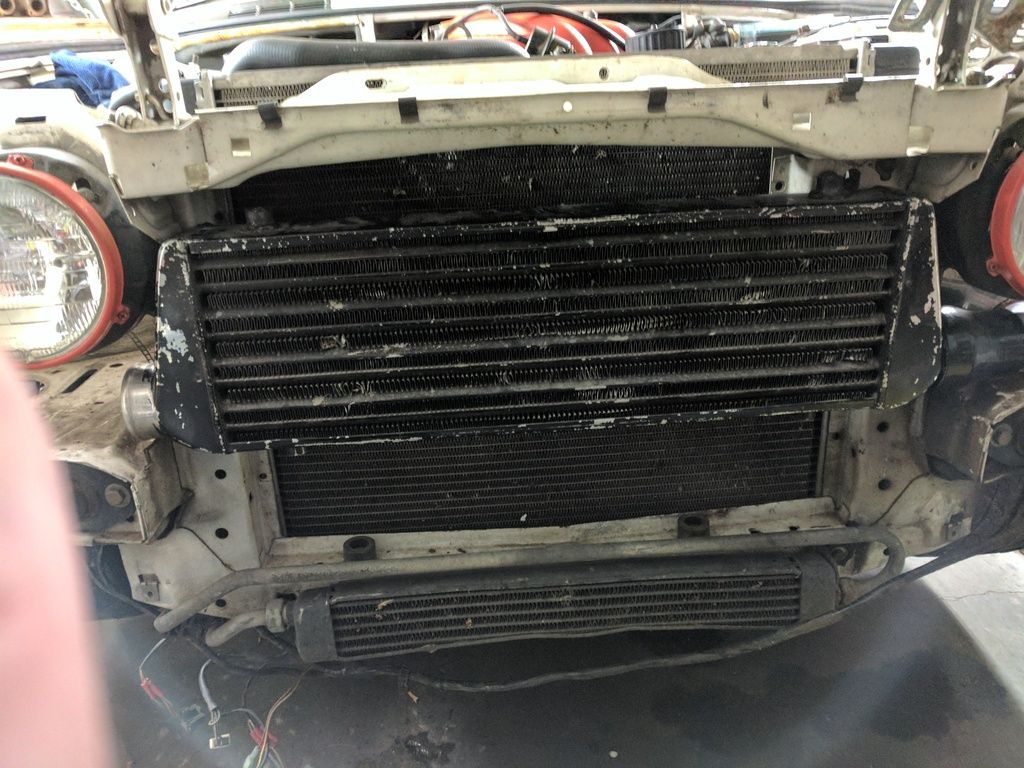
And placed the intercooler in to see where I want it. Since I have the small one, I figure right behind the grills is easiest. And then route the pipes under the headlights.
And shout out to Darin (CorvalisBMW on here) for selling me his left over charge pipes for cheap!
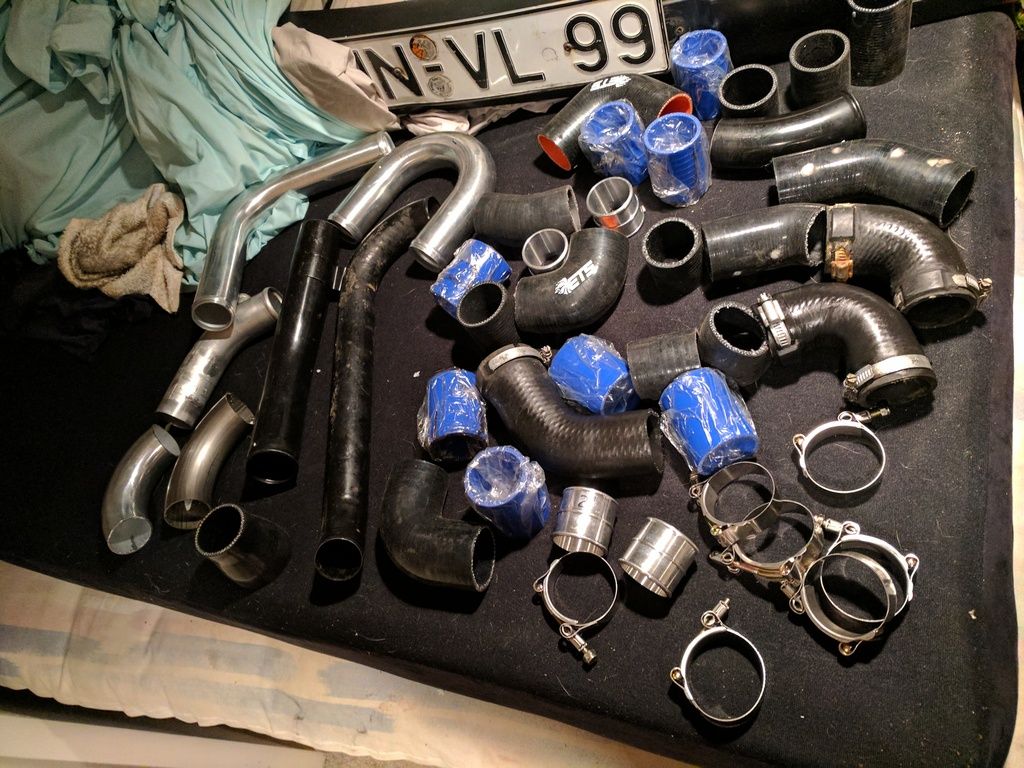
But his were all 2" pipes, and the intercooler has 2.5" ends, and the rubber boot into the TB is 2.75" so I have to order other parts. Reducers and other sizes, etc. So I stopped there and worked on a different project.
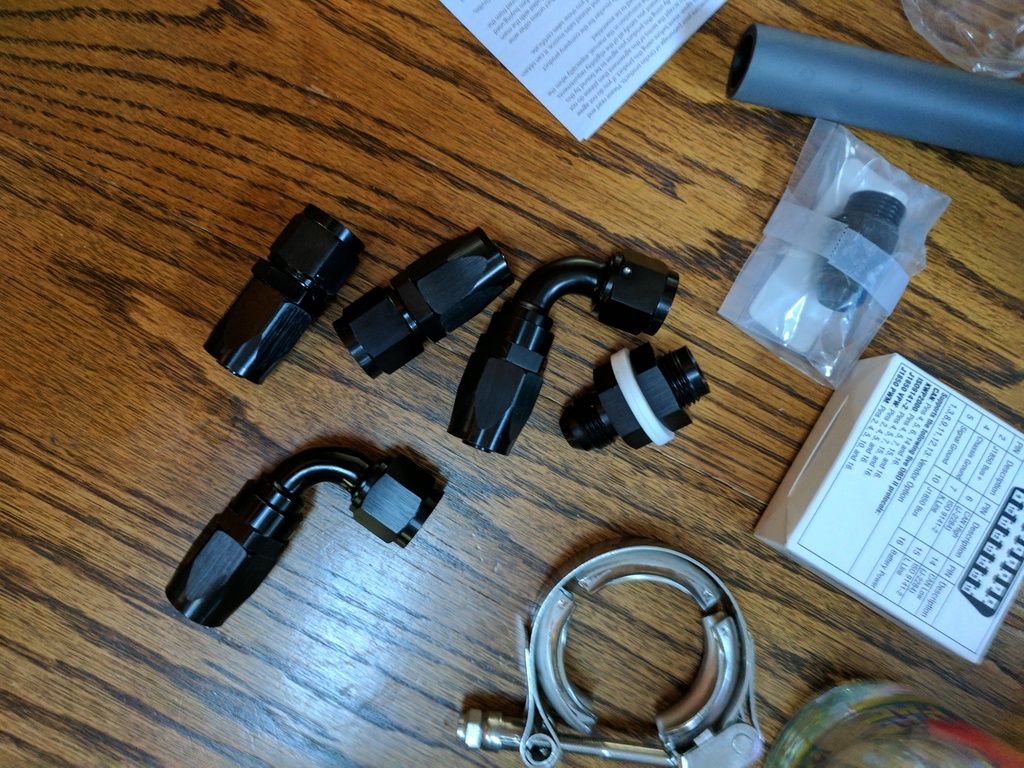
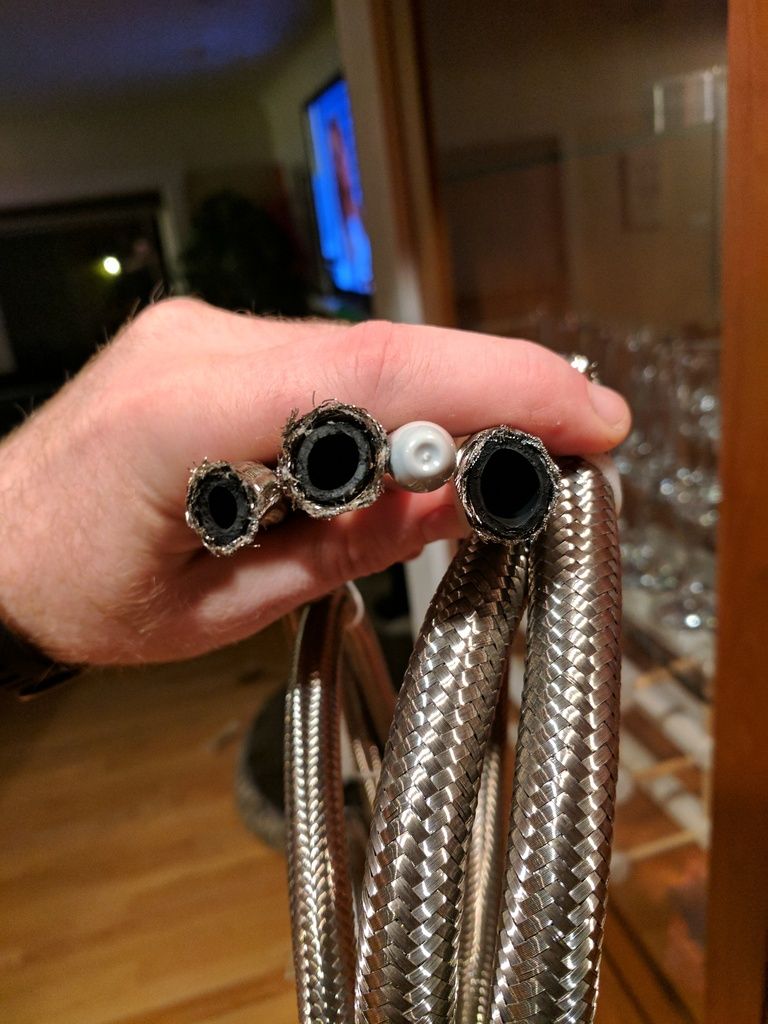
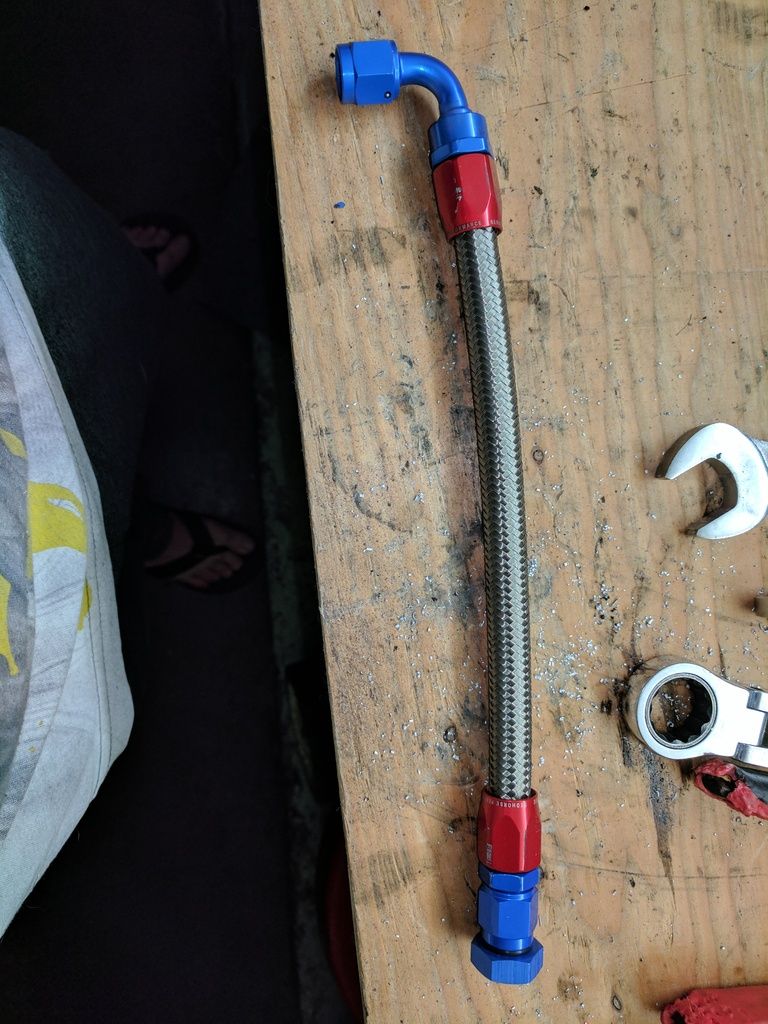
I bought a bunch of AN stainless tubing and fittings to start building feed line and drain line for the turbo.
Its like Christmas!!
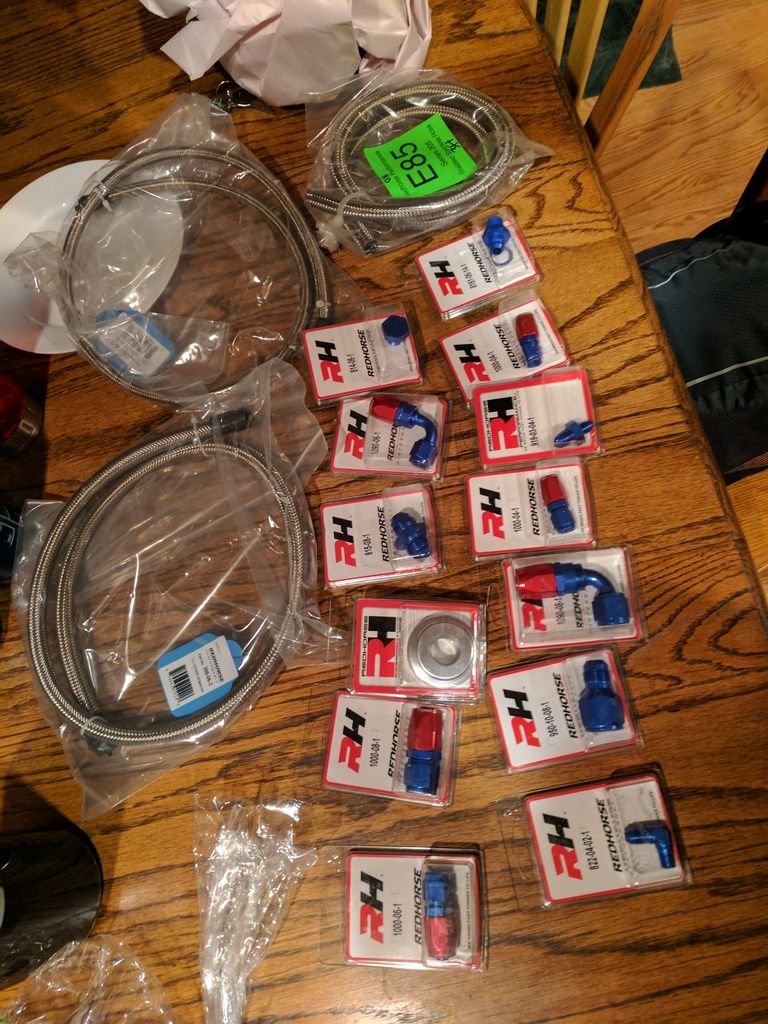
I judged a little too big on what I thought were sizes. (first time buying AN stuffs) But i'll be able to use it in the future for oil cooler or PS stuff.
But here is a size reference. -4 AN left, -6 AN middle left, Sharpie, and -8 AN right.
And a big ass -8 am fitting. Propably don't need that big of a drain line, when I only have a -3 AN feed line.
But my side project is a different drain line. One of the biggest BIT**ES when working on an M20 is draining the coolant from the block. It goes right onto the sub-frame and created a HUGE MESS!! So when I was reading Sh3rpark!ng's build thread he made a tube out of AN fittings to solve that problem. GENIUS!! So I bought the stuff for it.
That's after putting it together and here it is installed.
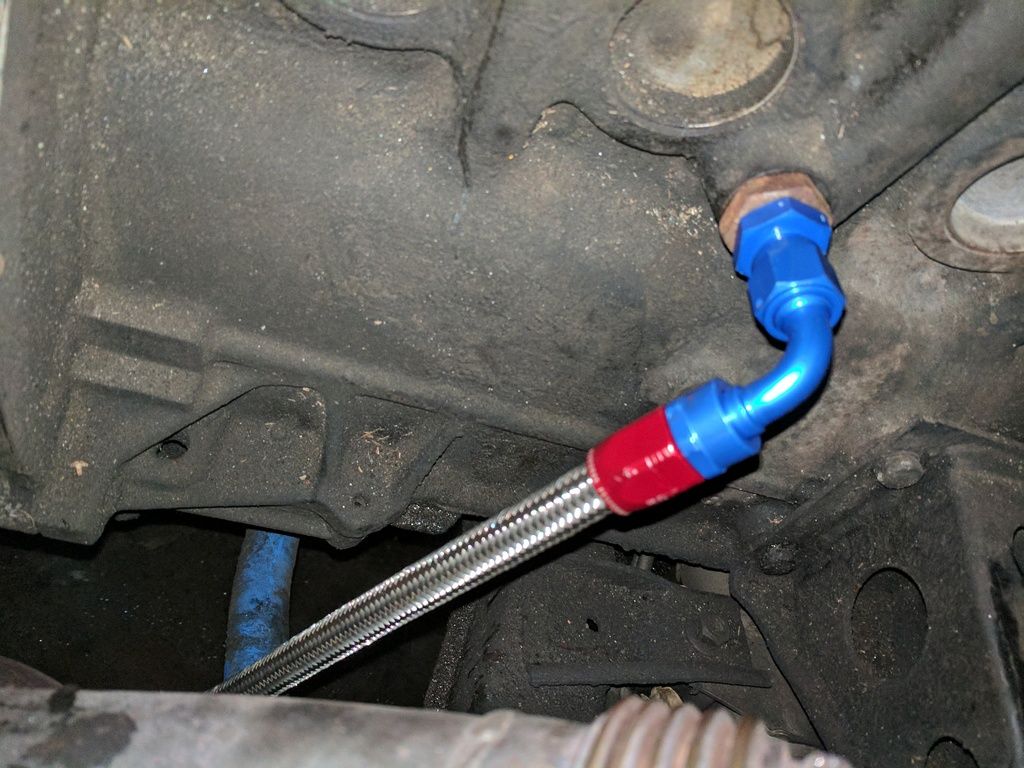
Hopefully no more messes for me! I'll let you know how it works the next time I need to drain it.
Thats all for now. Hopefully more boosty stuff soon!Last edited by dugly52; 02-23-2017, 03:03 PM.Leave a comment:
-
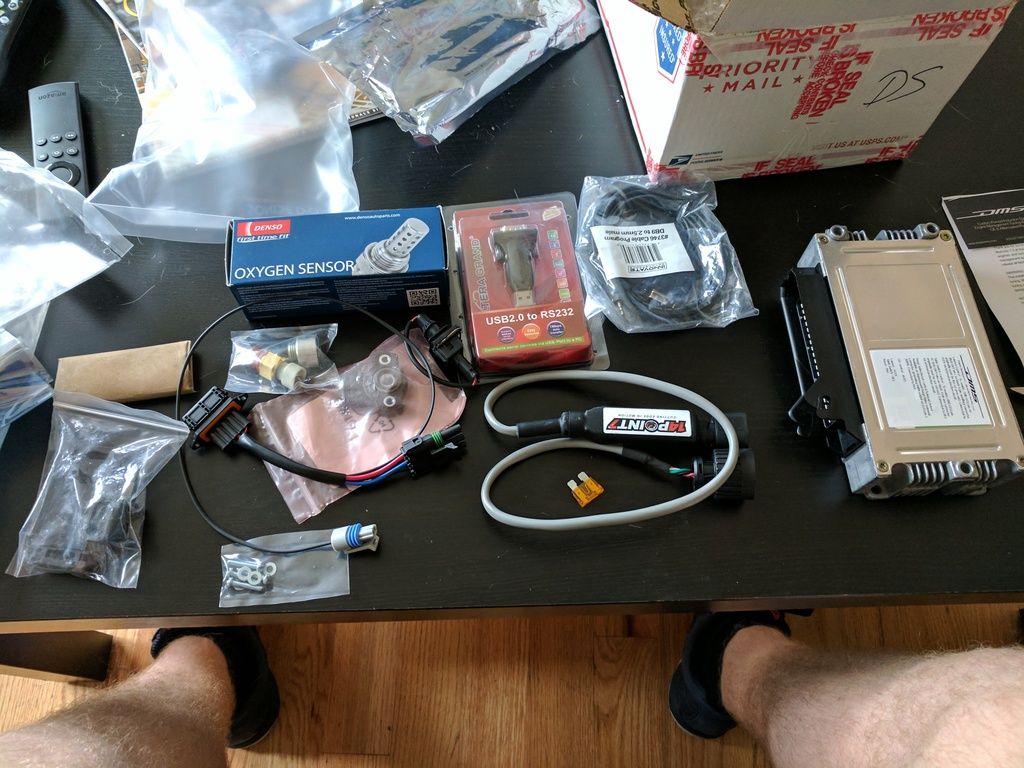
Been getting some things done. Started getting it all wired up for MegaSquirt.
I picked up the plug and play kit from Derek on here. The wait was long, but seem like a great kit!
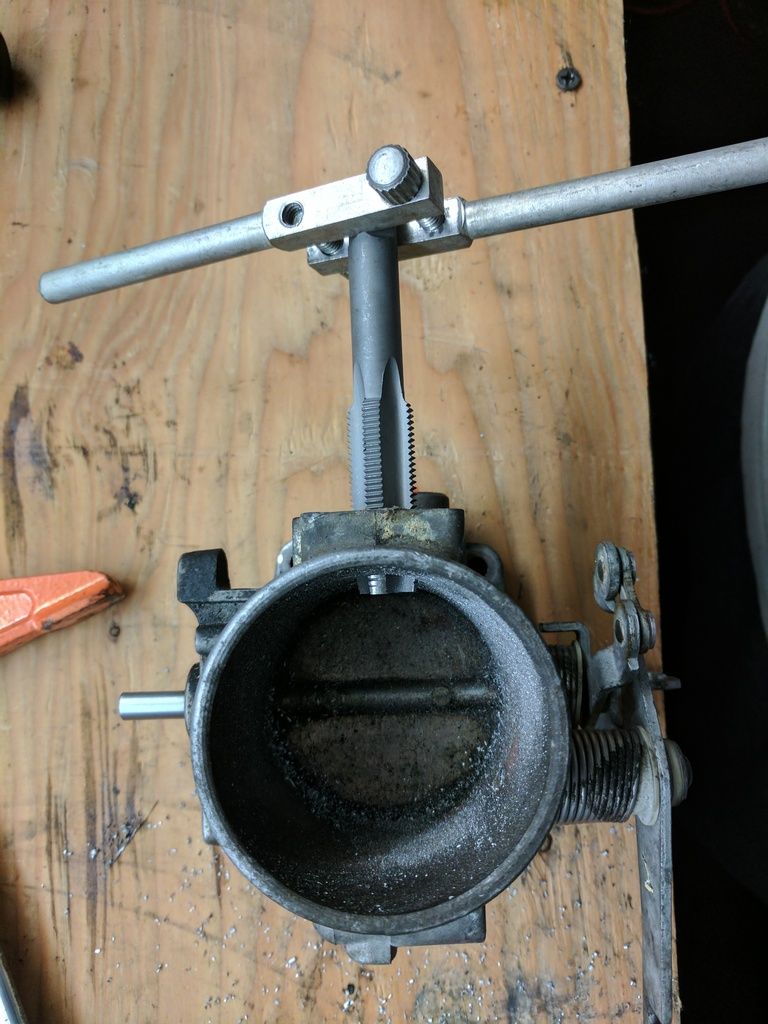
Only problem I had was where to put the IAT sensor. He give an aluminum bung to weld on, but I can't weld aluminum, but I decided to put it in the vacuum port for the crank case. (Since I will be venting to a catch can in the future)
So fist I was just going to cut the end and screw it it. Too small. So I took off the TB heating tubes. Which 2 screws of 3 broke off :/ oh well. You can see the screws still in there later
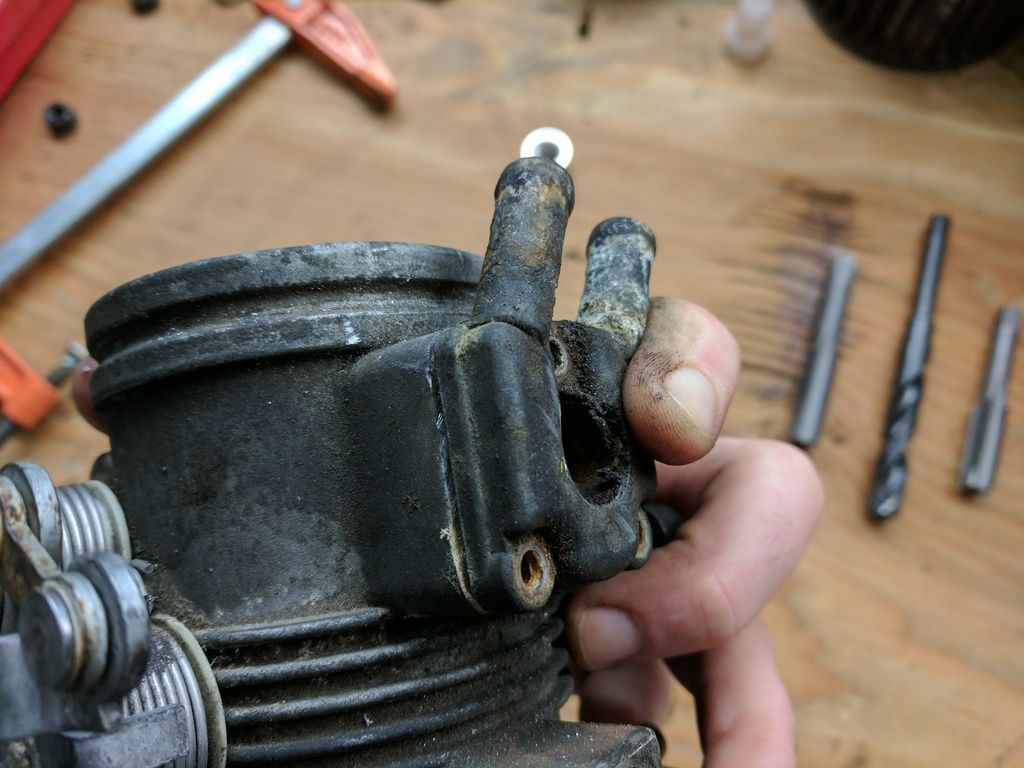
Then I had to go buy a drill bit big enough for it. Which ended up being a 9/16ths bit. But most drill bits that size have to go in an industrial drill and don't fit in a normal electric one. So I have to go to 2 Home Depots to find one.

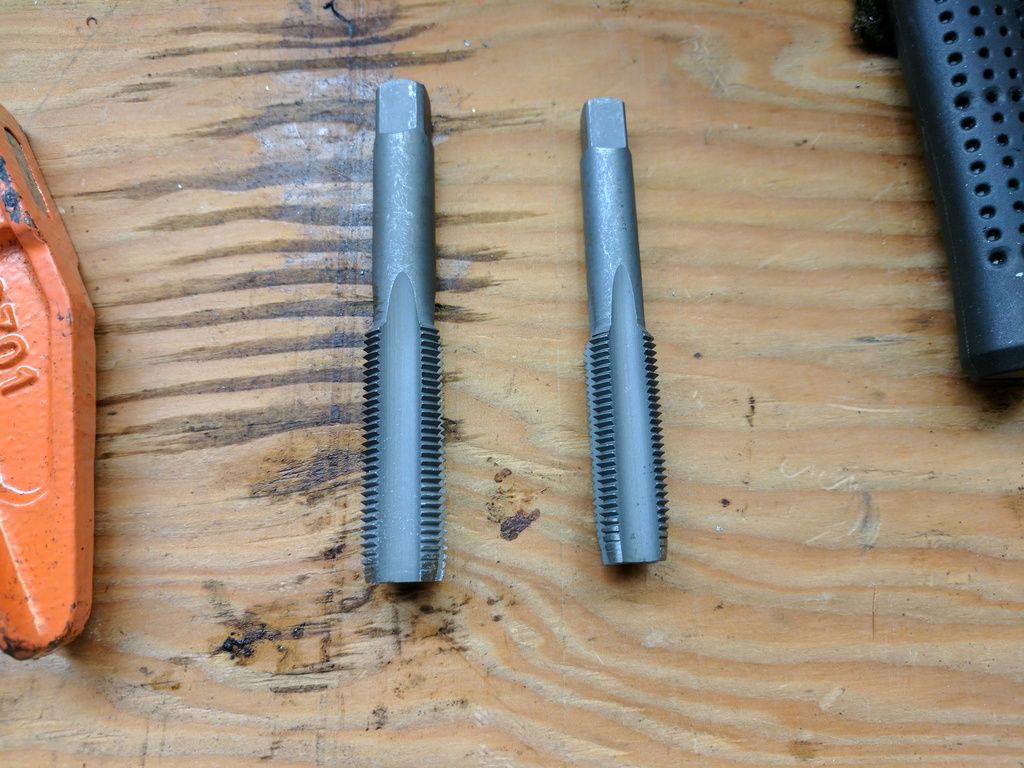
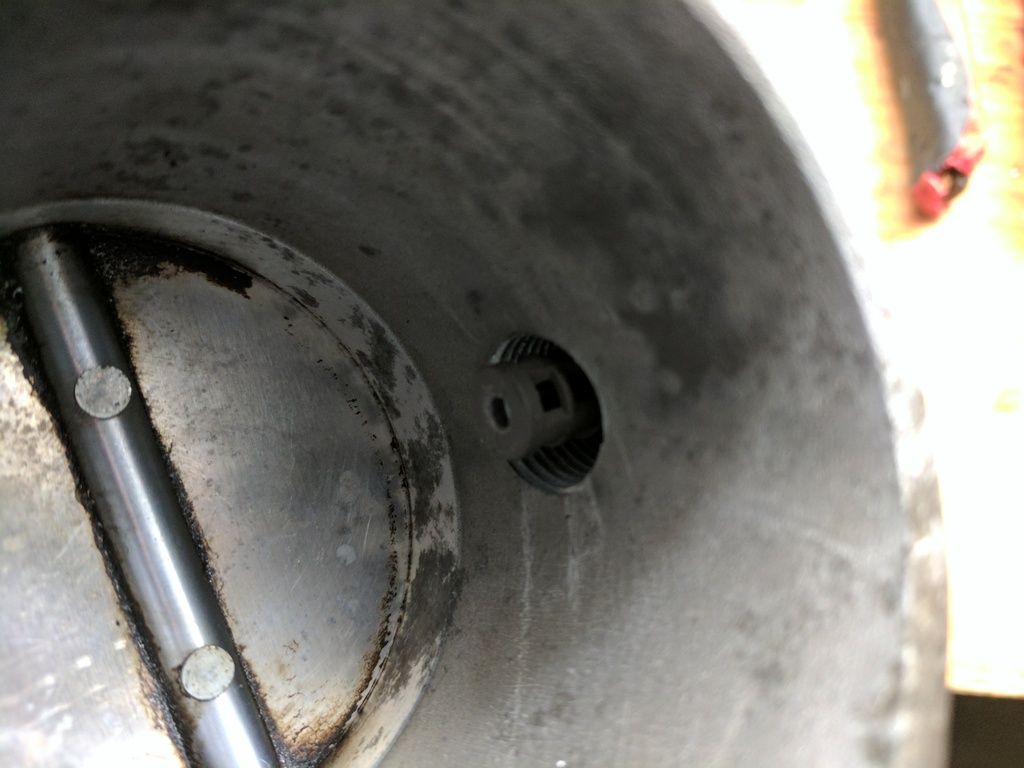
Then to tap it! Which I had to order a tap because my tap set didn't go that large, and thought a 9/16ths tap would be the right size since it was the drill size. Nope! Slid right through the hole. So I had to order another tap. The 5/8ths tap worked. You can see the difference in size here.
And here is with the 9/16th bit
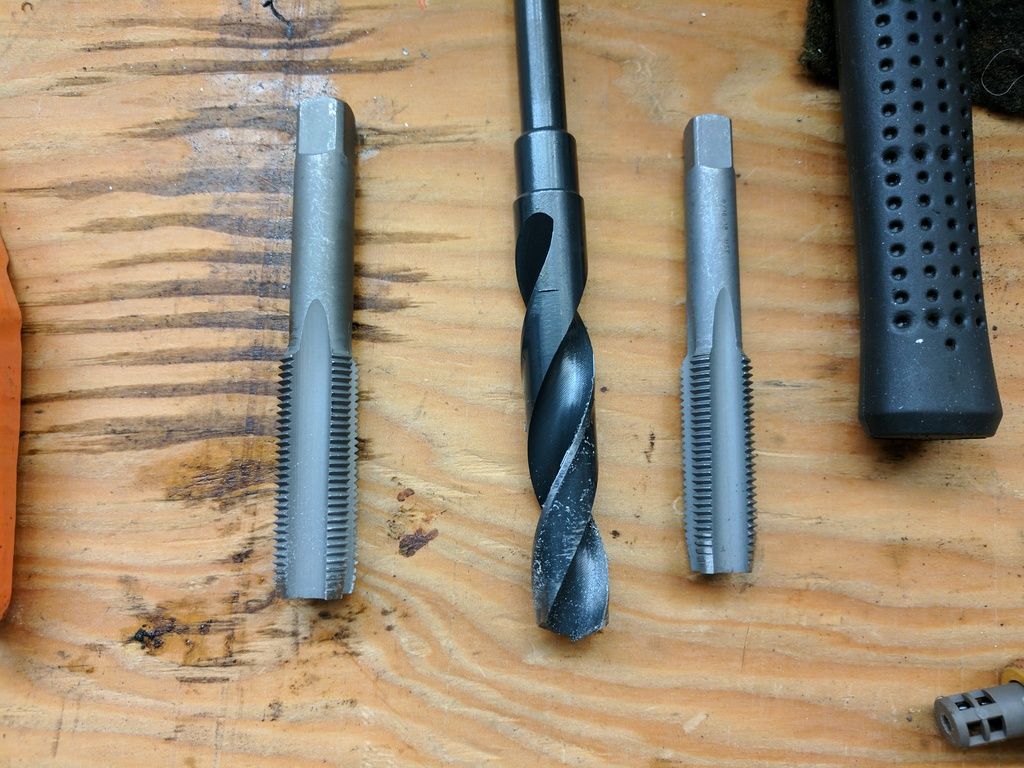
Then tapped it.
You can see the 2 screws that broke off here.
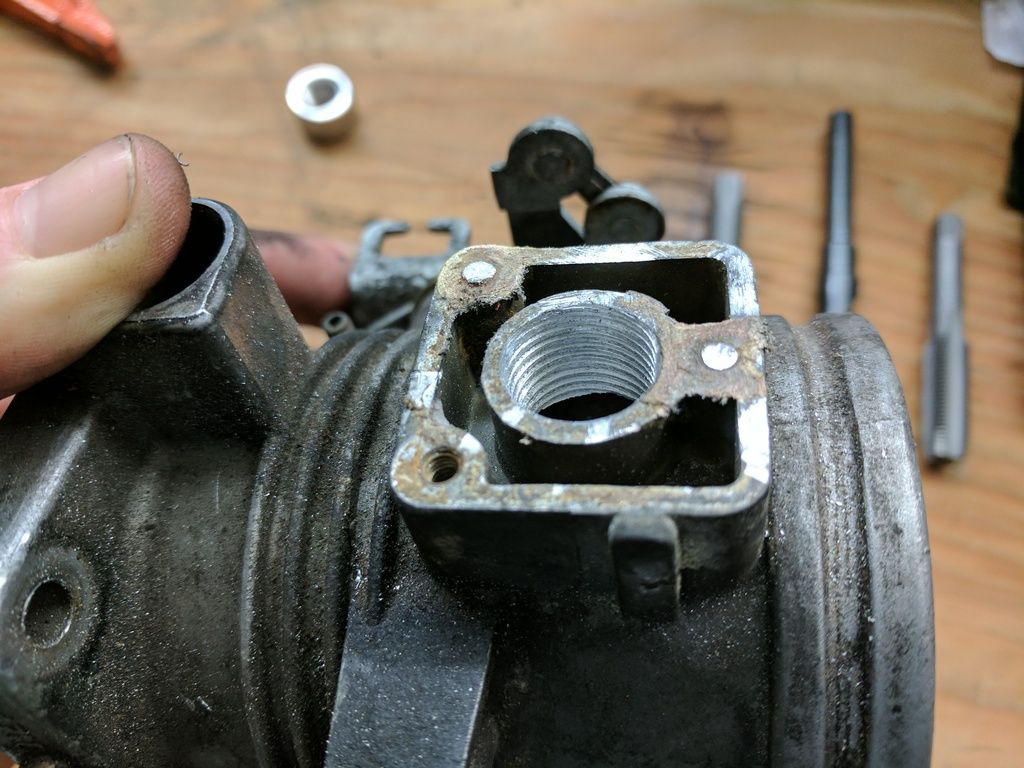
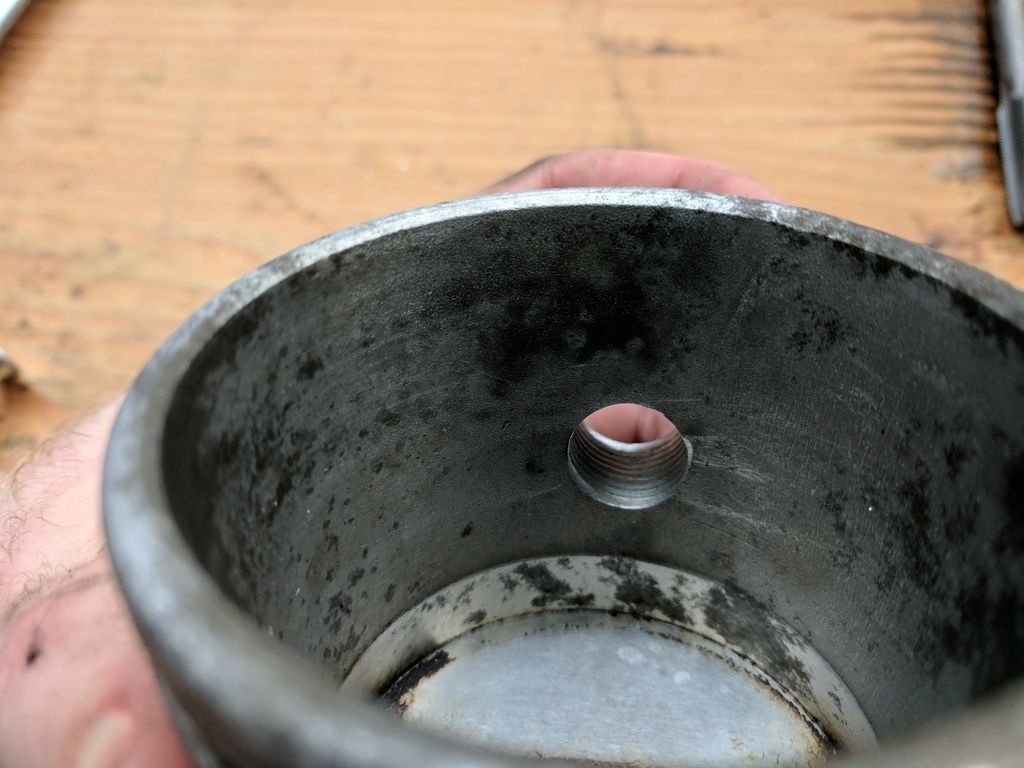
And here it is installed. I hope this works for depth, because I didn't want to tighten it anymore for fear of striping it.
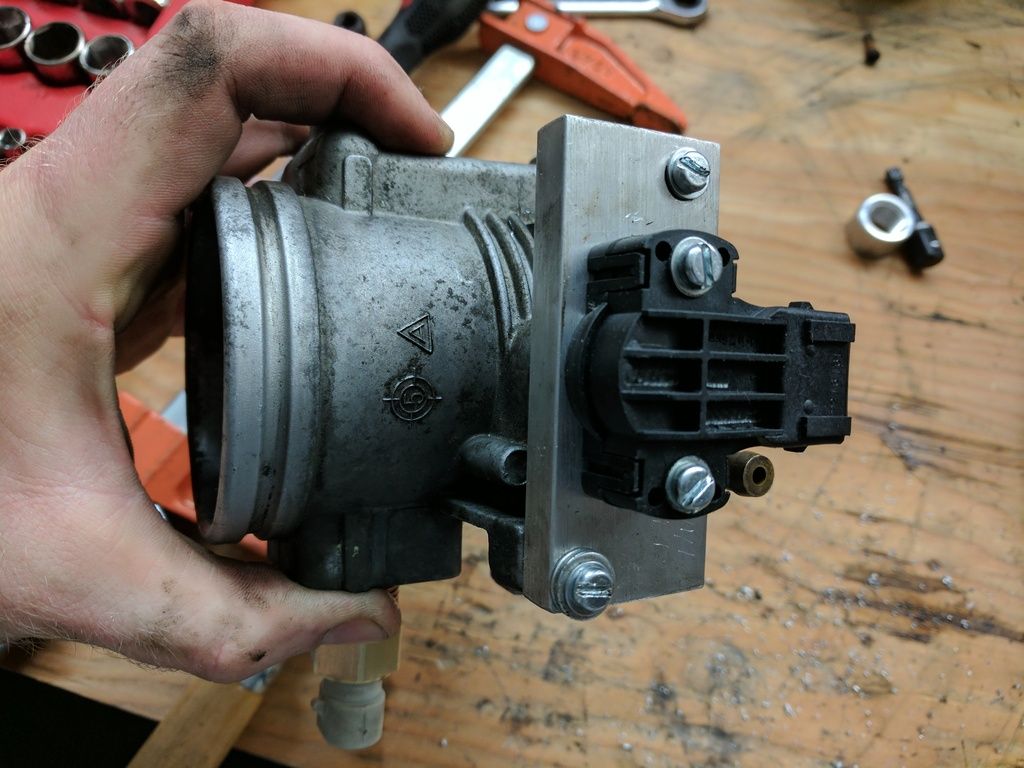
And this is the new variable TPS with the included mounting bracket.
Leave a comment:
-
And that brings me up to date!
So plan isn't to go too crazy with the turbo. I don't want to be fixing things after every session at the track. So I'm going with something around 8 psi. Figure that should get me around 250 at the wheels. The car is already a blast at the track, but anytime there is a corner that turns up hill, the M20 is gutless. And I mostly go out with Audi Club, so most others are in 400+ hp S4's. And not to mention that if I go all out on front straights, I'm lucky to hit 100. Vs in the RS6 I could half ass it and hit 135.
But enough with that. Time to start tearing into the engine to do head gasket and ARP studs.
Since this wont be quick, hood came off, jacked it up and started.
Intake off and a look at the old head.
[IMG]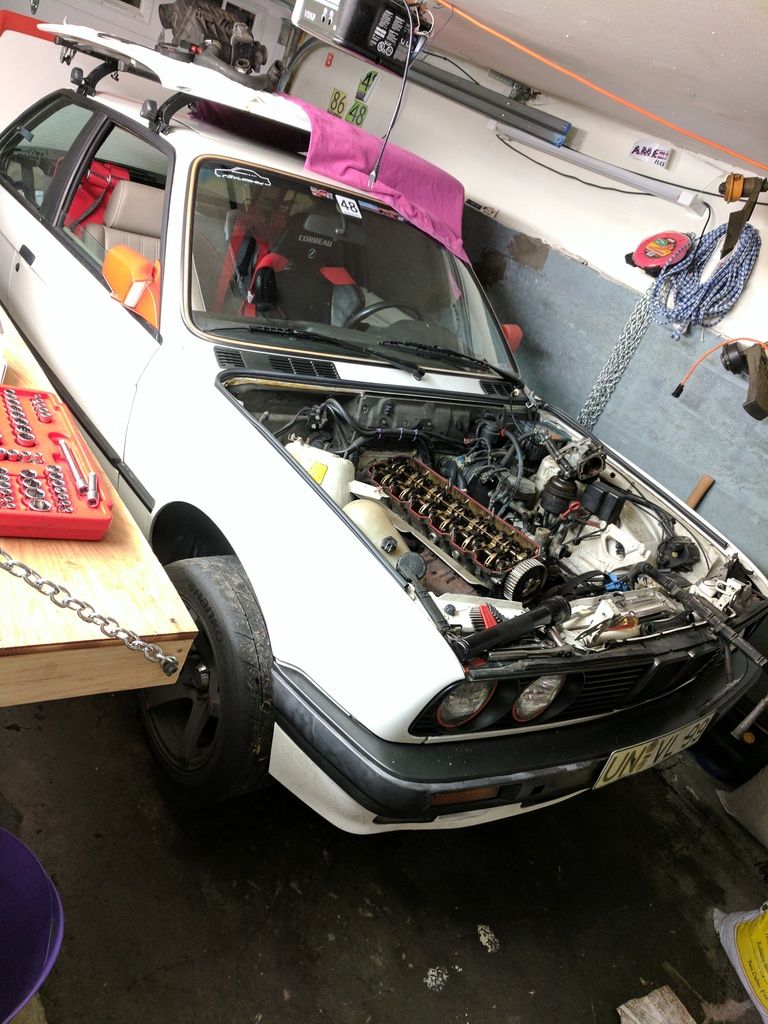 [/IMG]
[IMG]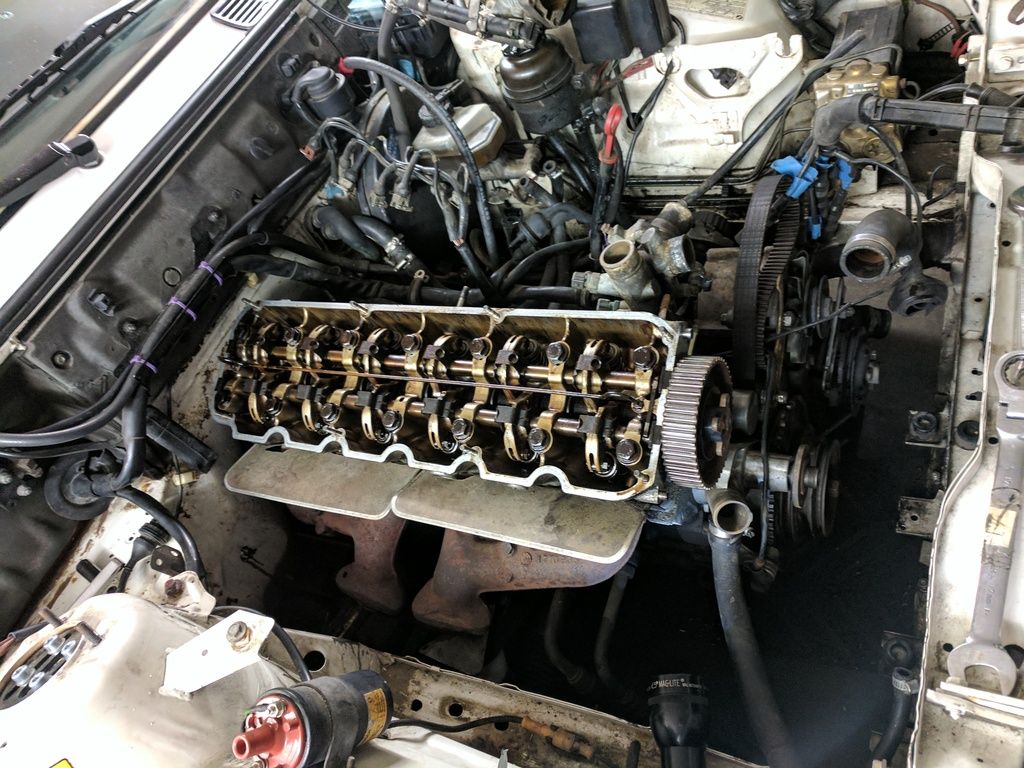 [/IMG]
[IMG]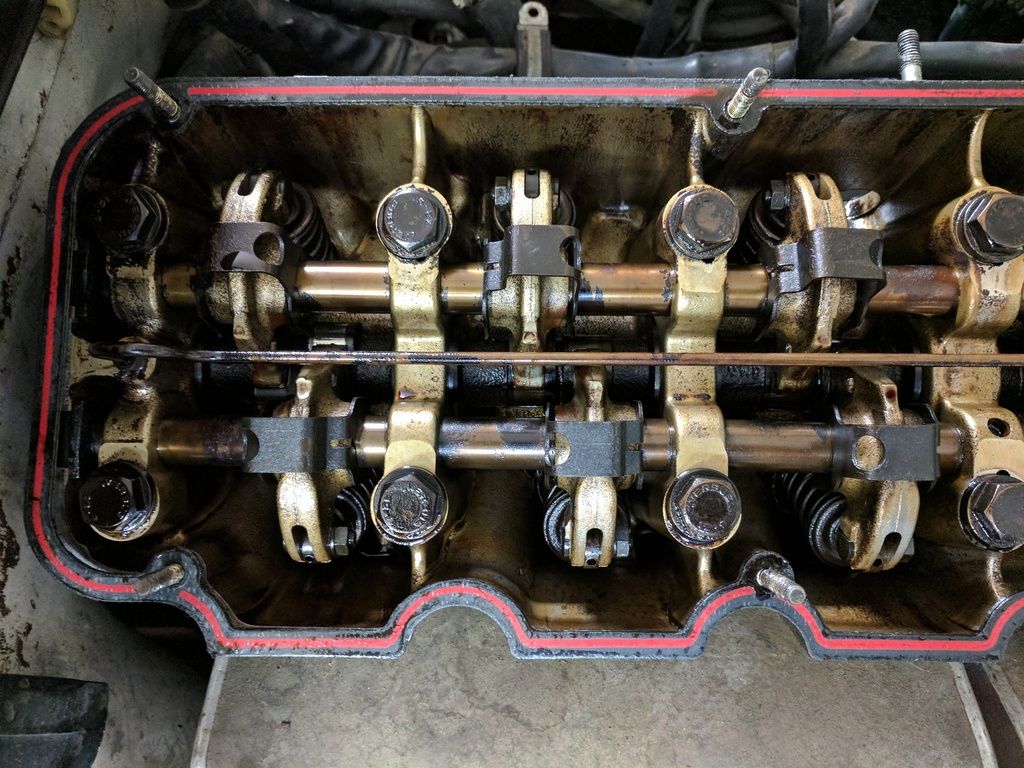 [/IMG]
And the old head off
[IMG] [/IMG]
There was a lot of oil in the back part, so something might be up with the piston rings. But could just be it didn't drain right when coming off.
[IMG]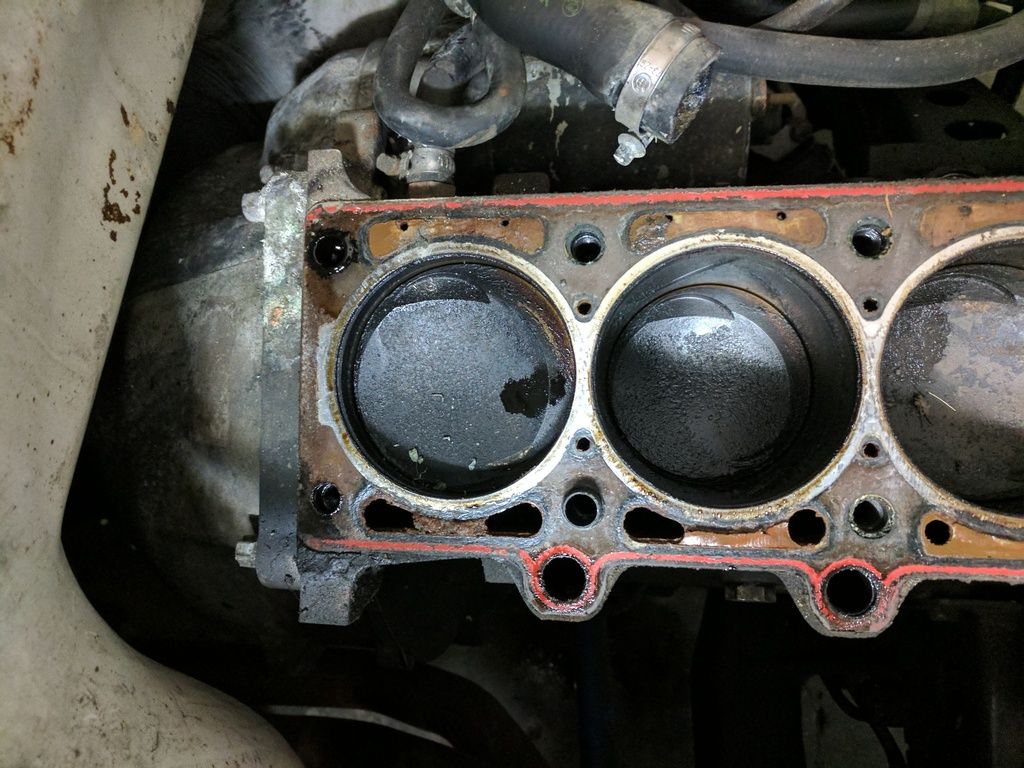 [/IMG]

But you can see some of the cross hatching on the walls. So happy about that.
[IMG]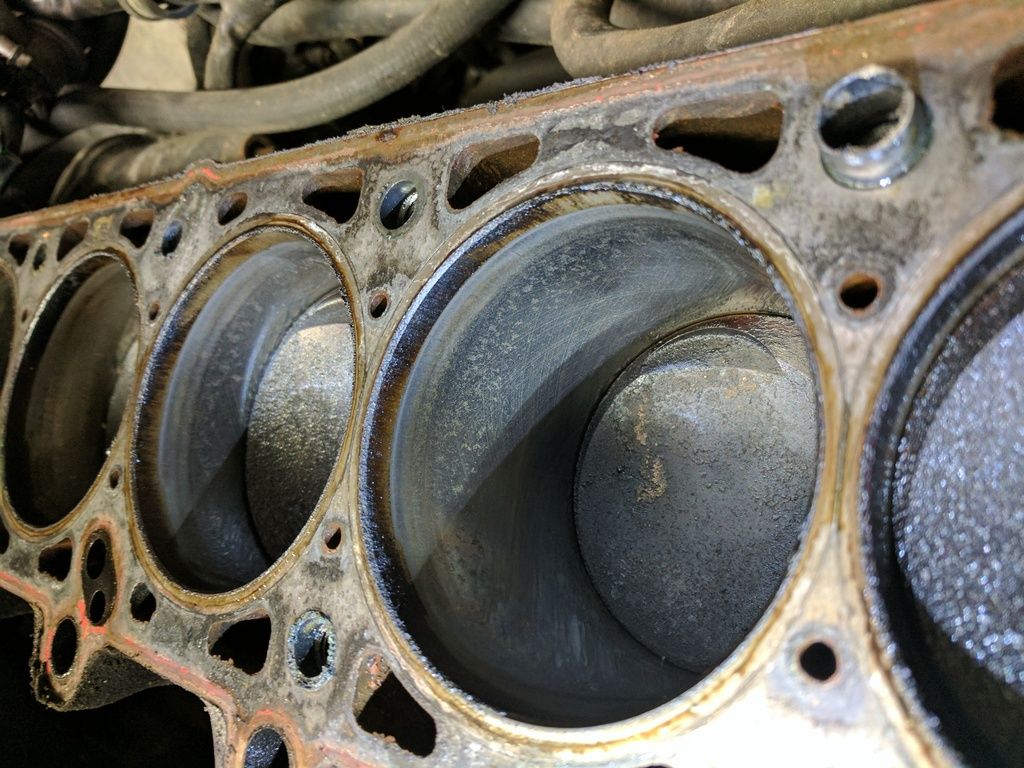 [/IMG]
I picked up a new 885 head that the PO had cleaned mostly and put a 272 cam in it. So a little upgrade from stock. And I bought a Nuke adjustable cam gear. That way I can fine tune timing
[IMG] [/IMG]
[IMG]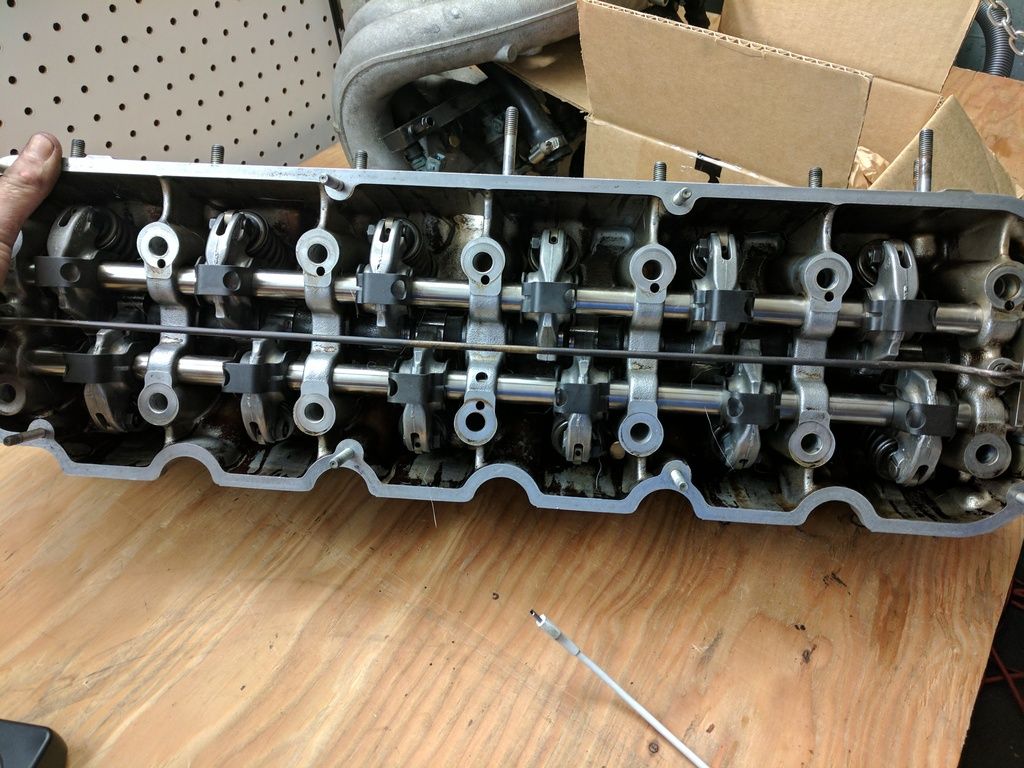 [/IMG]
Got the new head on with the ARP head studs. Their site said to do 3 equal torque sequences to get to 75 ft/lbs. Which made it easy with 25, 50, 75 sequences.
[IMG]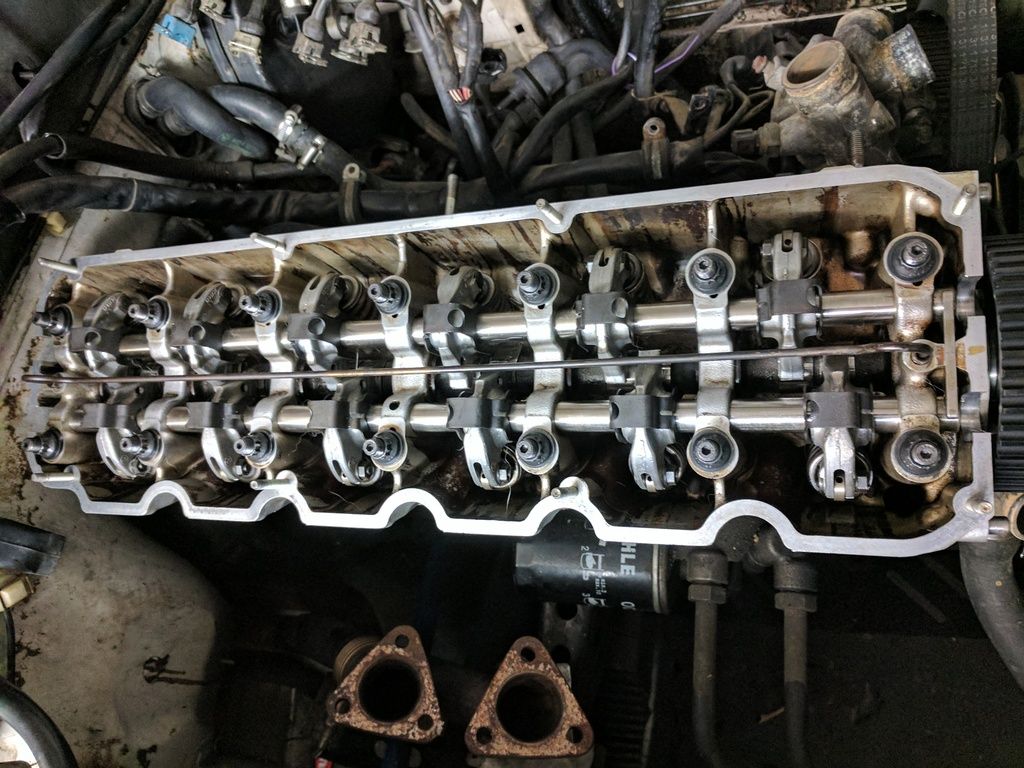 [/IMG]
Before I put the cover on, I went though and adjusted the valves and made sure I could do a full rotation of the engine and no valves hit each other.
Cover back on
[IMG]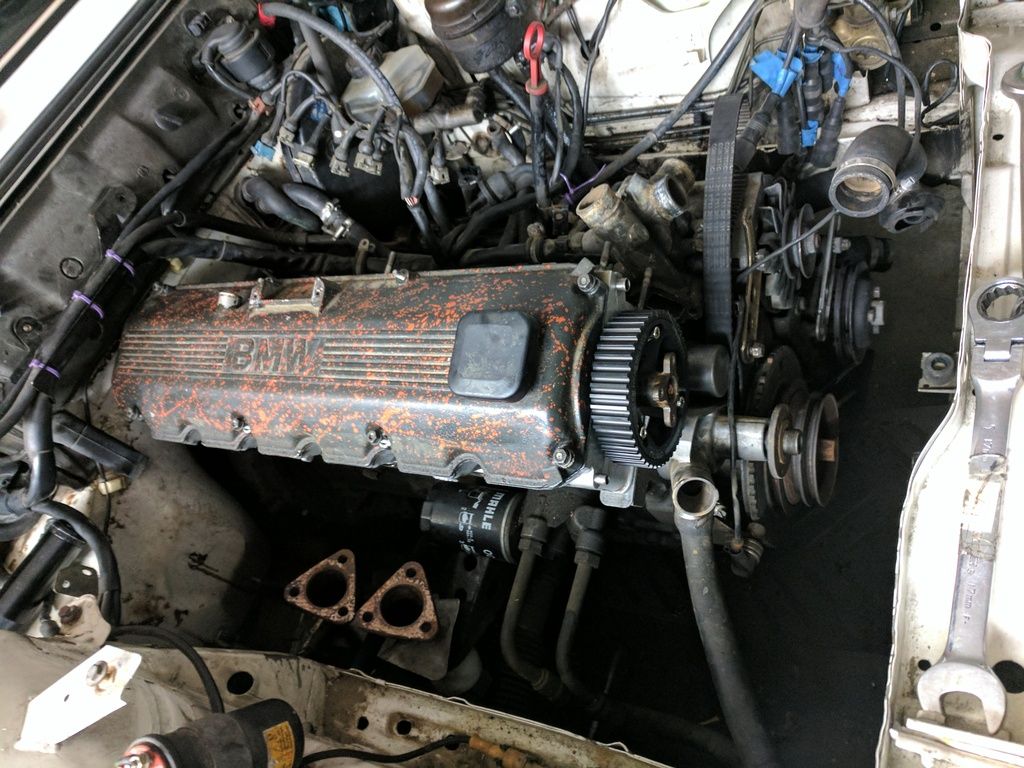 [/IMG]
And with timing belt back on.
[IMG]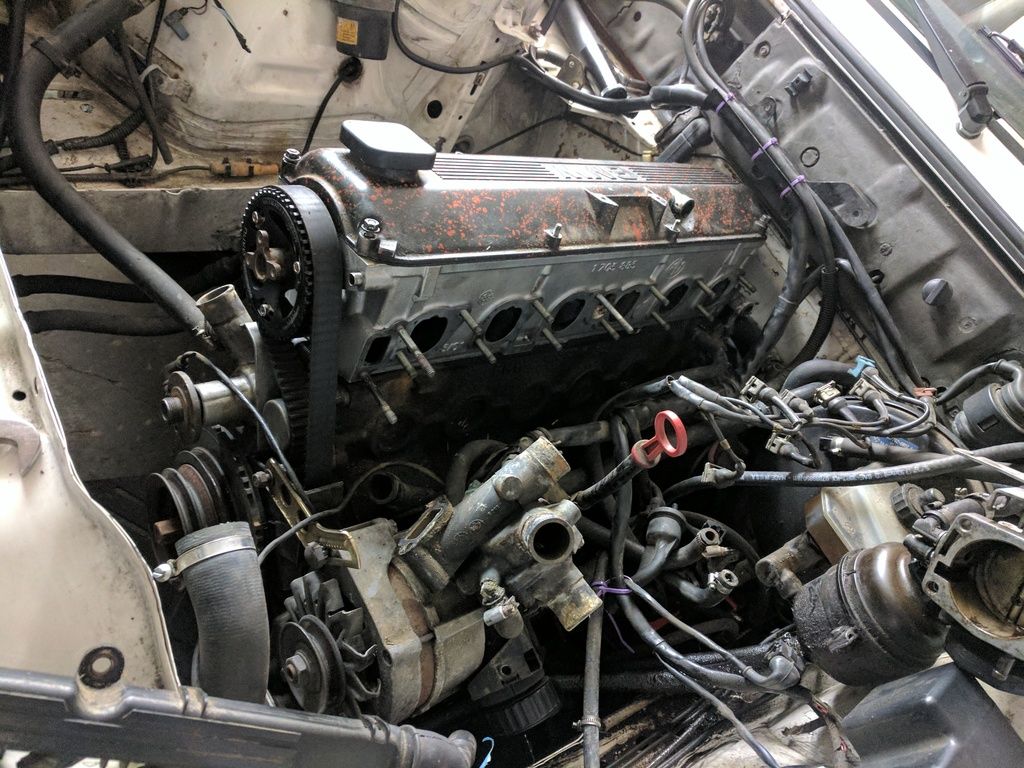 [/IMG]
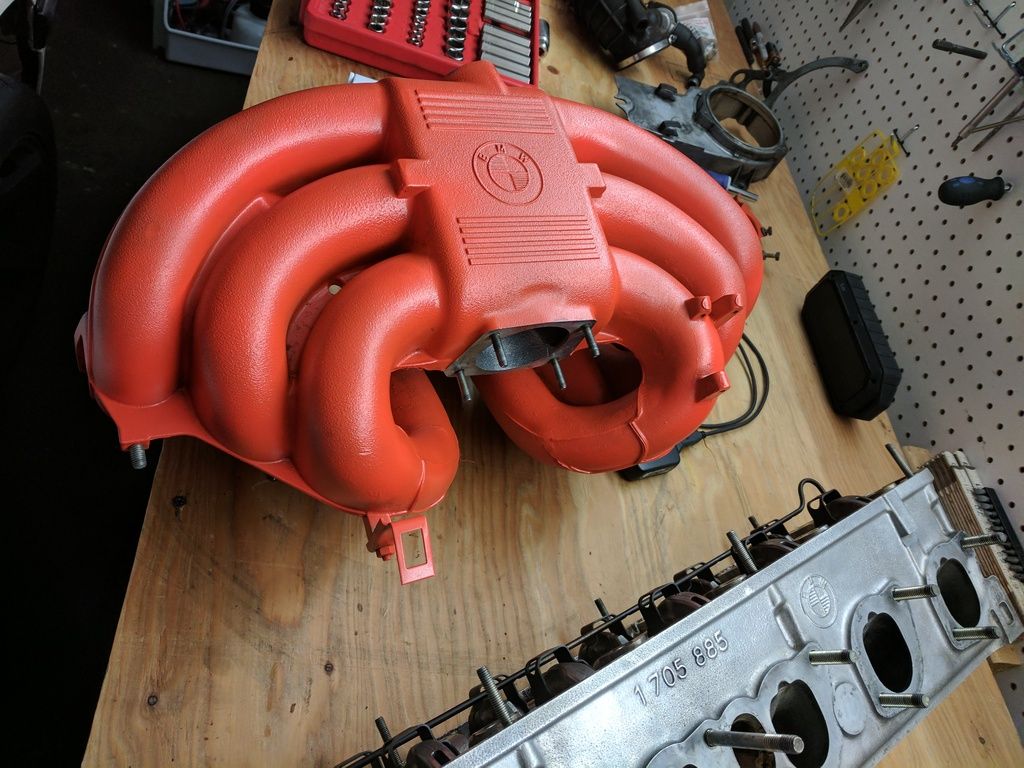
While I had everything apart I decided to paint the spare intake I had. (because racecar, duh)
[IMG]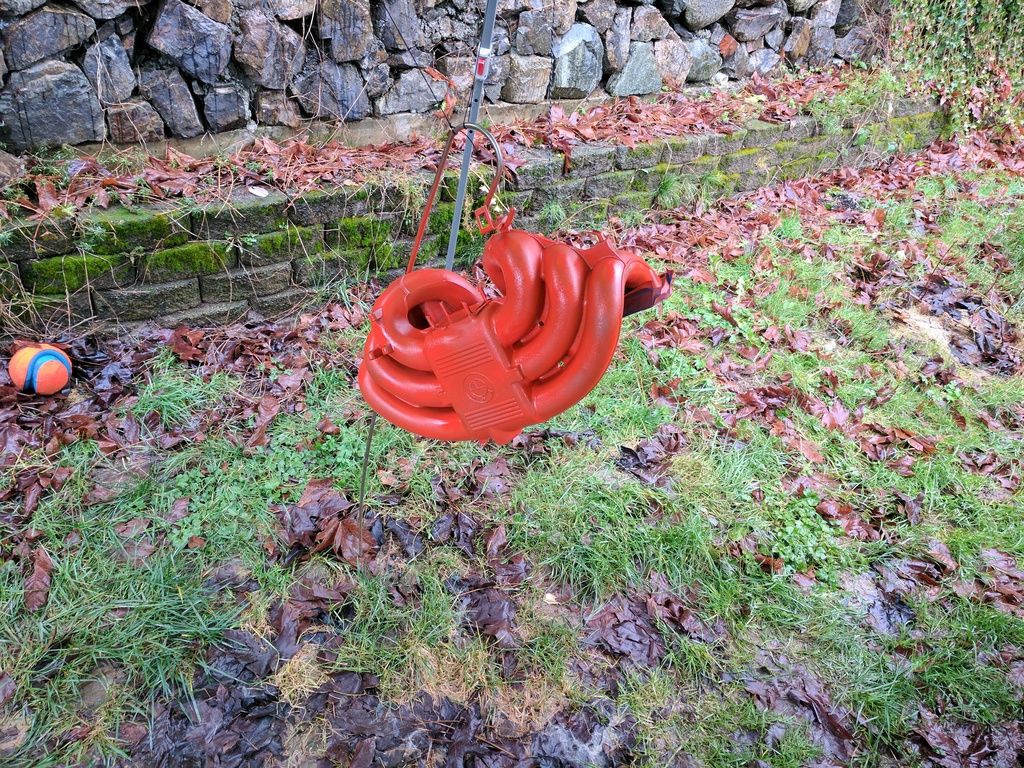 [/IMG]
Here is what the old intake looked like with old injectors. (everything in this car is dirty)
[IMG]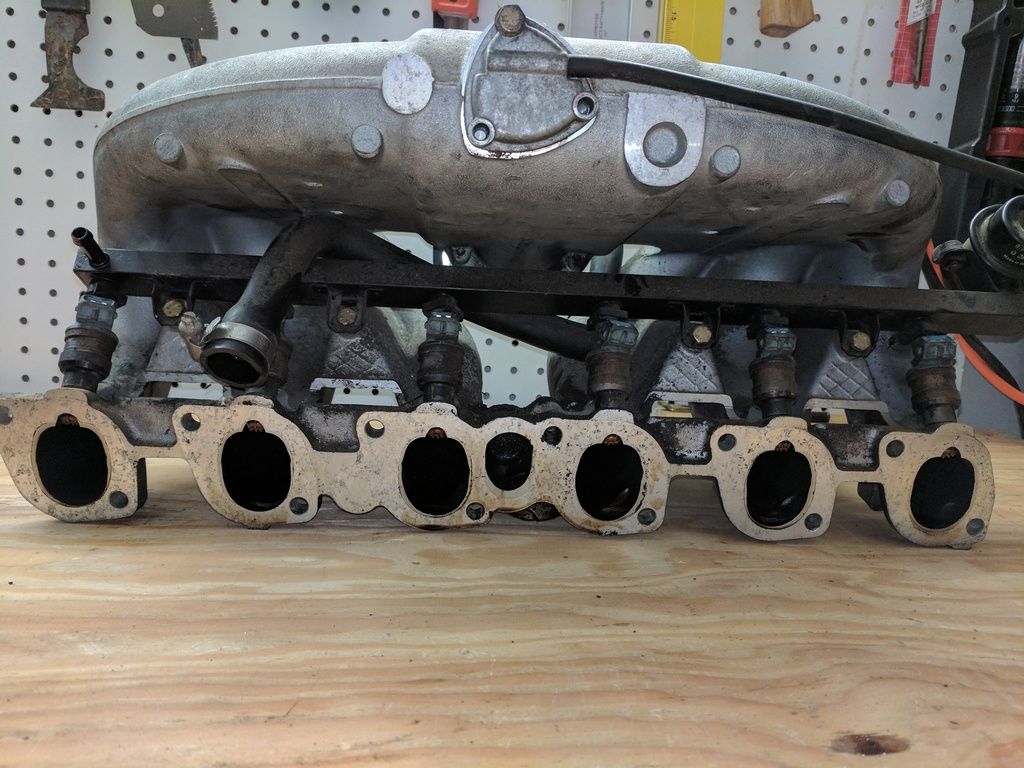 [/IMG]
Here is what the stock injectors looked like coming out of the car.
[IMG]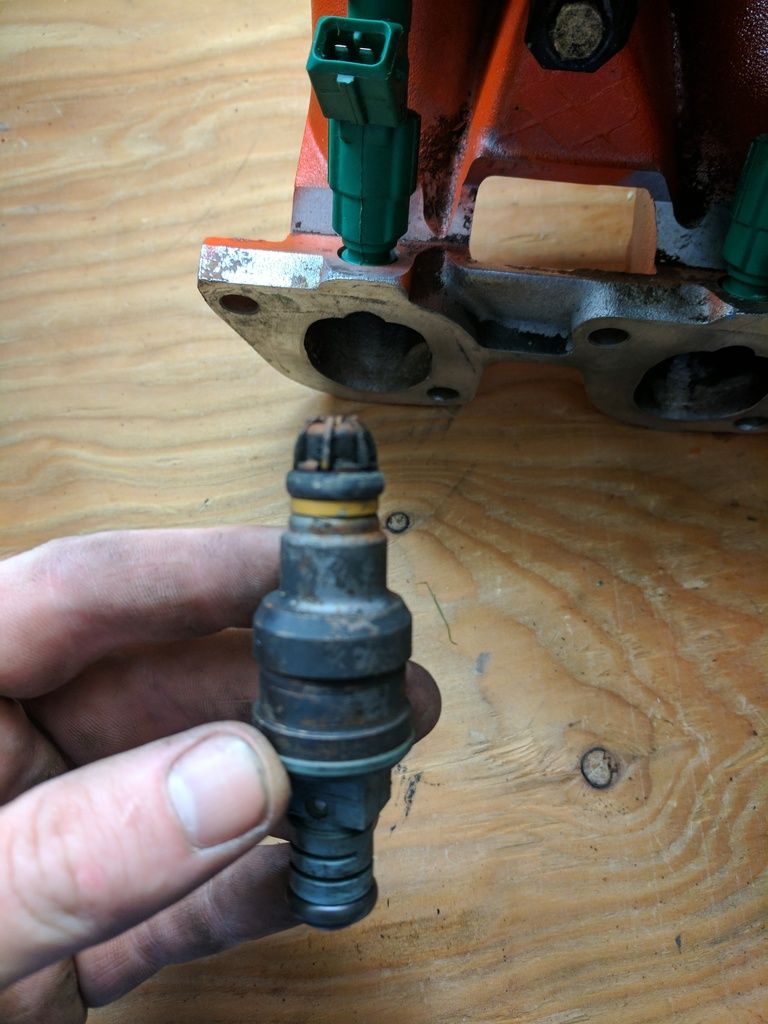 [/IMG]
And new 42# injectors going in
[IMG]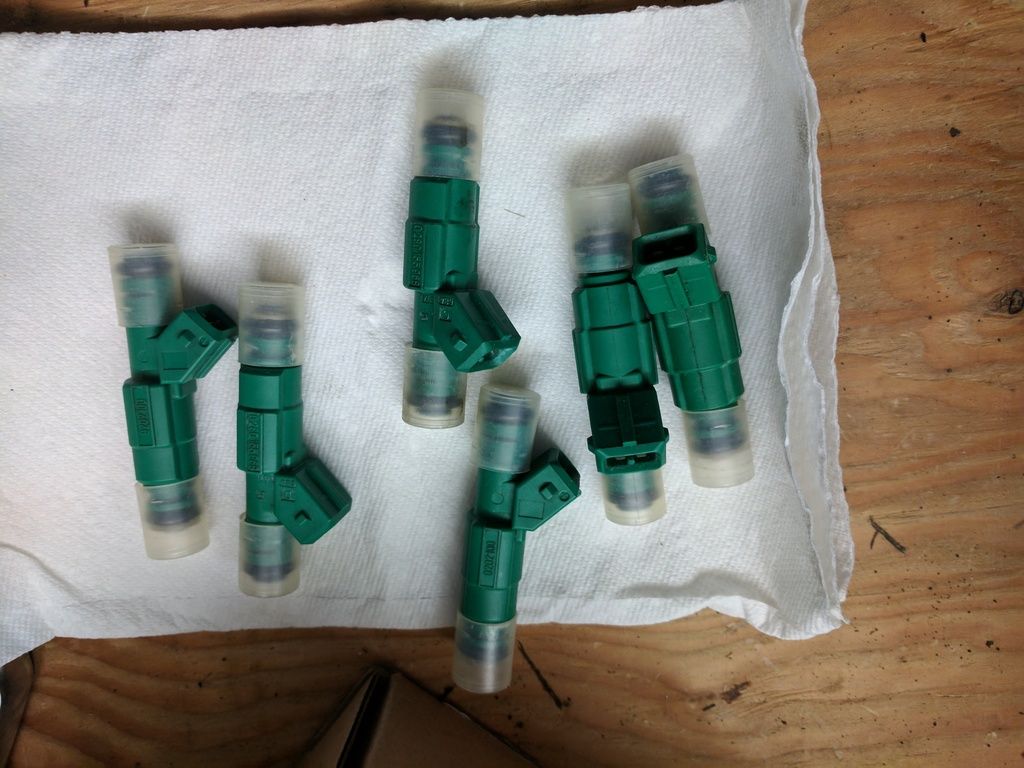 [/IMG]
[IMG]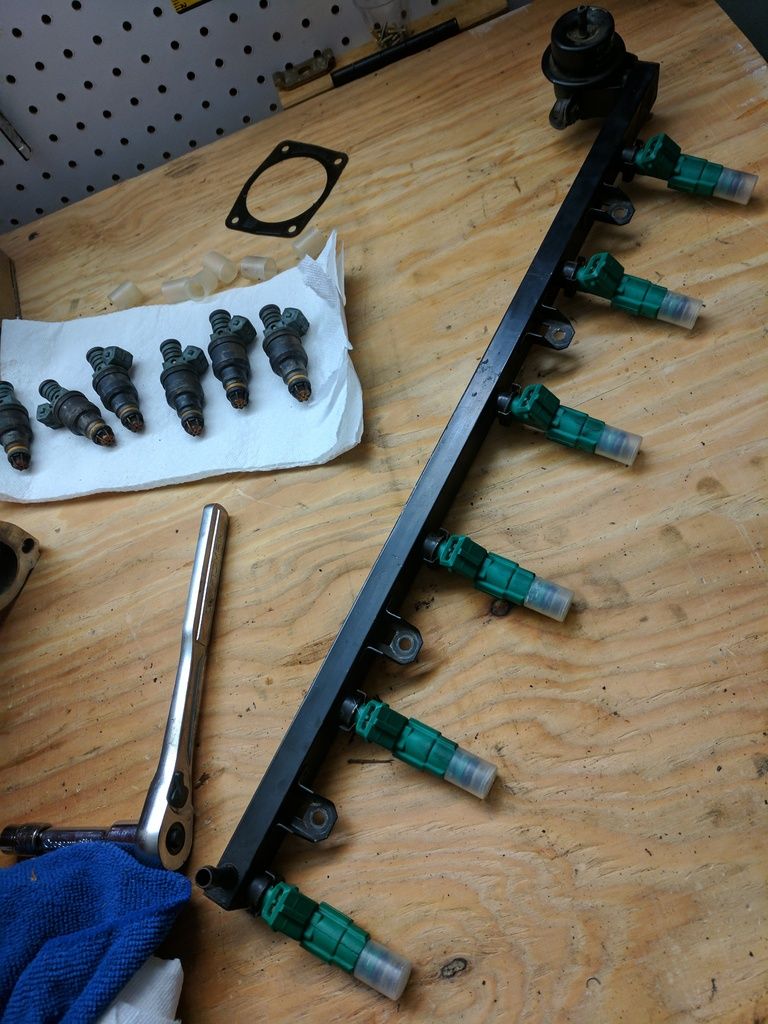 [/IMG]
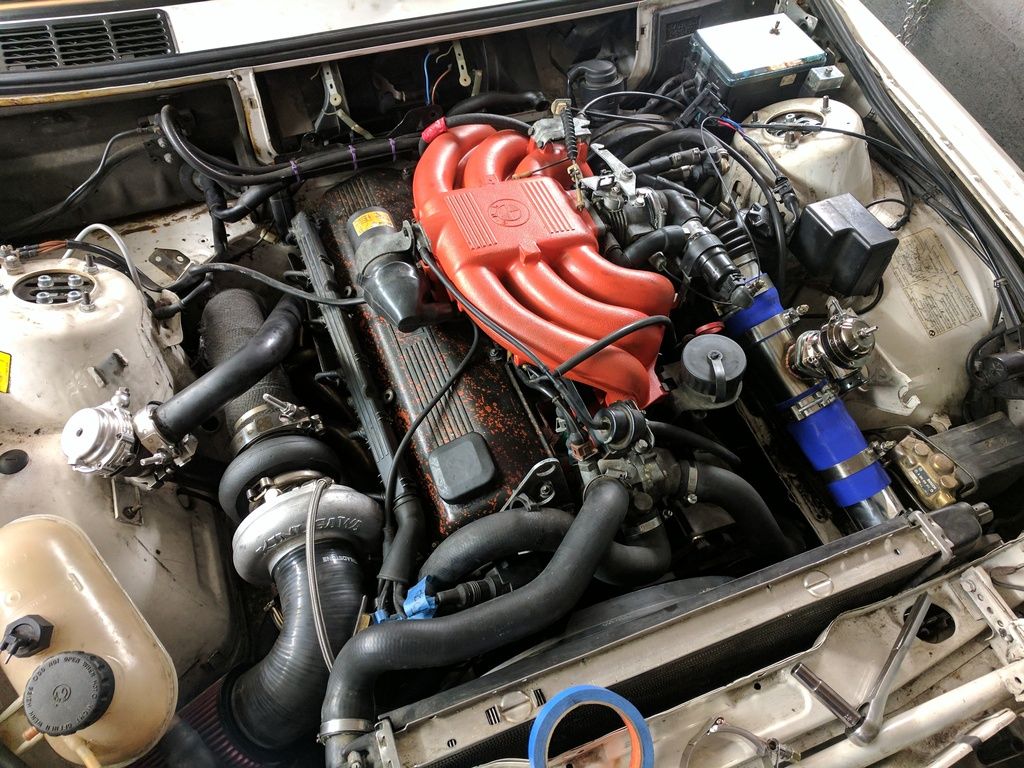
The intake with new paint. Its 500* engine paint so we'll see how it holds up. The intake shouldn't get too hot, but it was only a quick paint job.
And the engine back together. Not to get it wired up for Mega Squirt.
[IMG]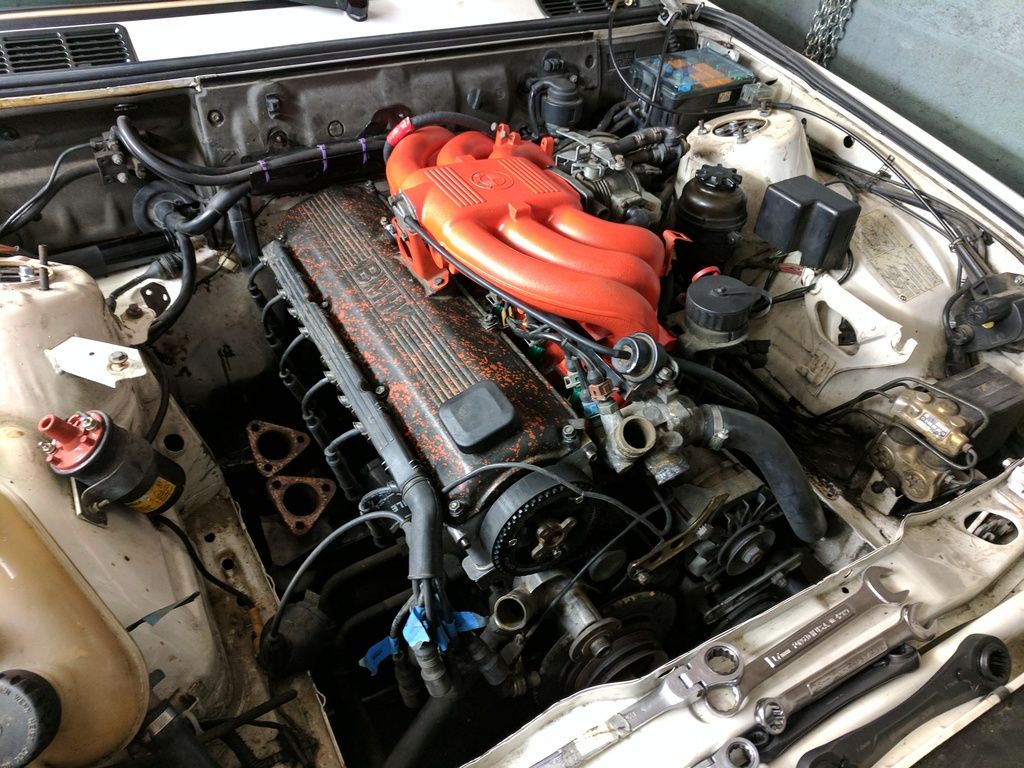 [/IMG]
And you can't work on a car without a little battle wound.
(the wrench slipped off when trying to get the cam nut off) :/
[IMG]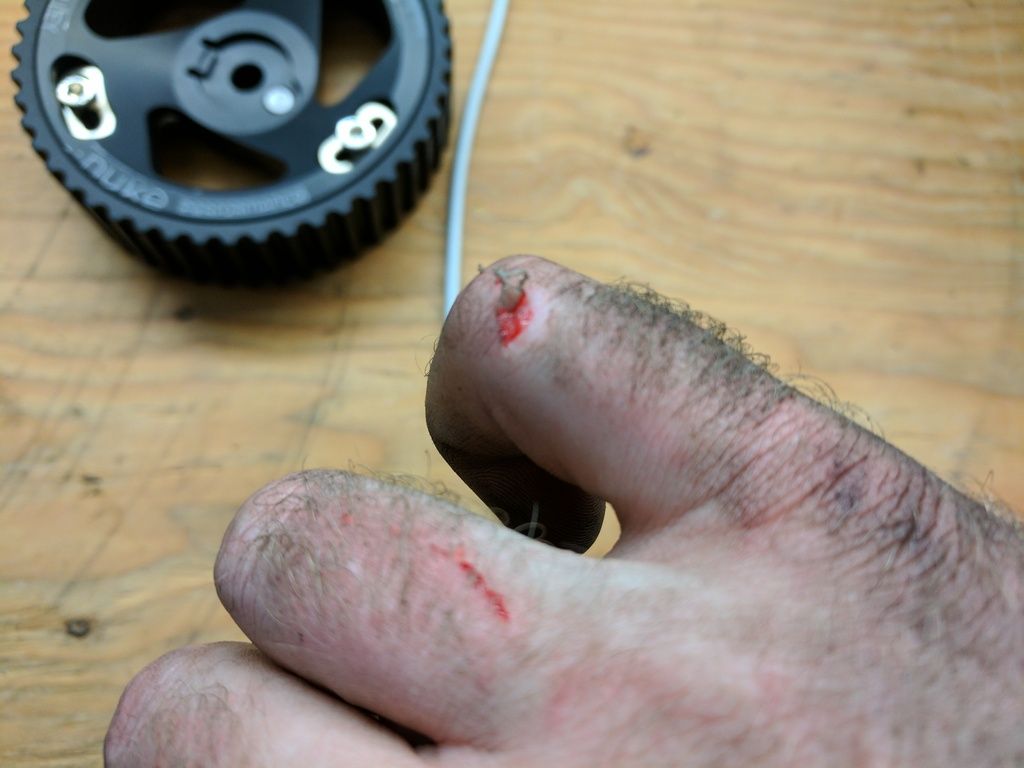 [/IMG]
And bonus creepy dog photo.
"Hey dad, what are you doing in the garage?"
[IMG]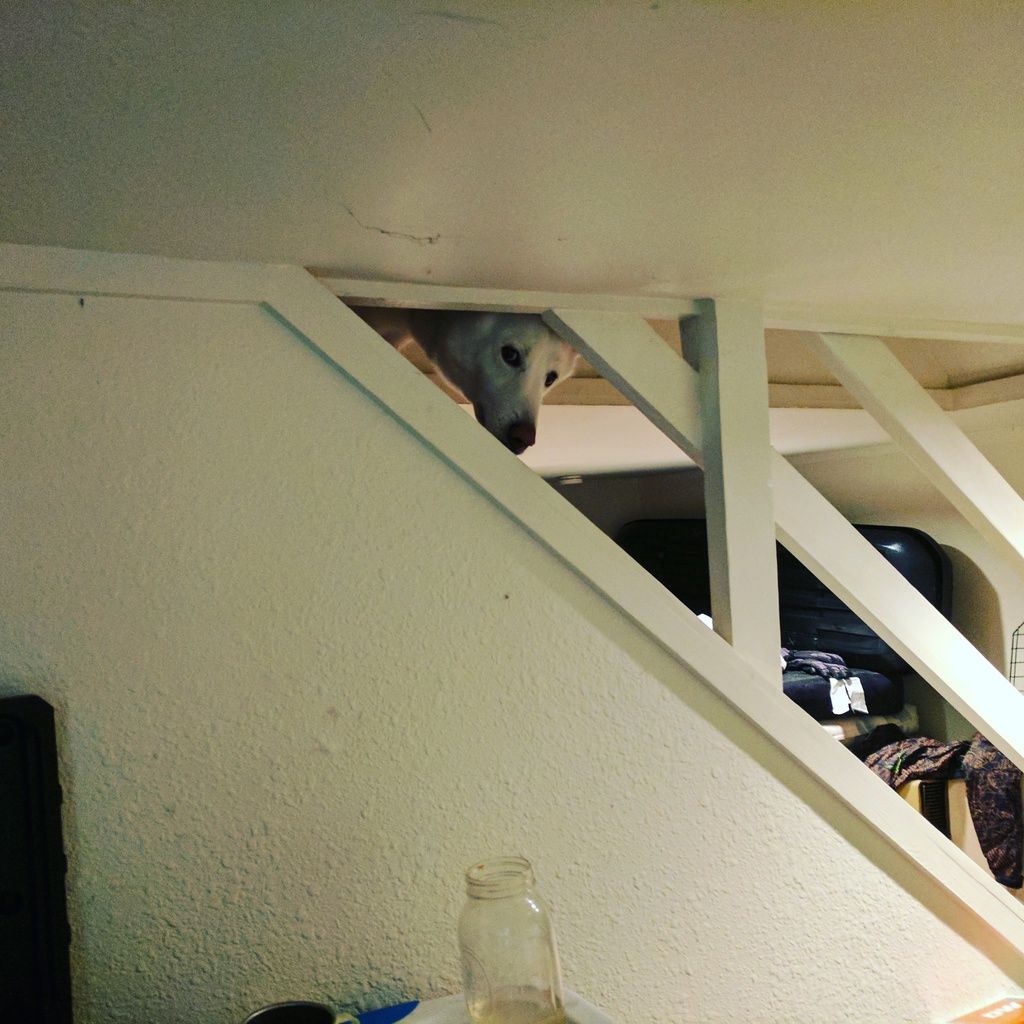 [/IMG]
Last edited by dugly52; 02-14-2017, 03:31 PM.
[/IMG]
Last edited by dugly52; 02-14-2017, 03:31 PM.Leave a comment:


Leave a comment: