Announcement

Collapse
No announcement yet.

Project Facelift

Collapse
X
 
  • Filter
  • Time
  • Show
Clear All
new posts

    Part IV: Fun with Plastic-Welding

    Not a ton of work done today, there will be a lot more tomorrow. Today we just plastic-welded the seams of the bumper and bumper trim using Loctite Plastic Epoxy.

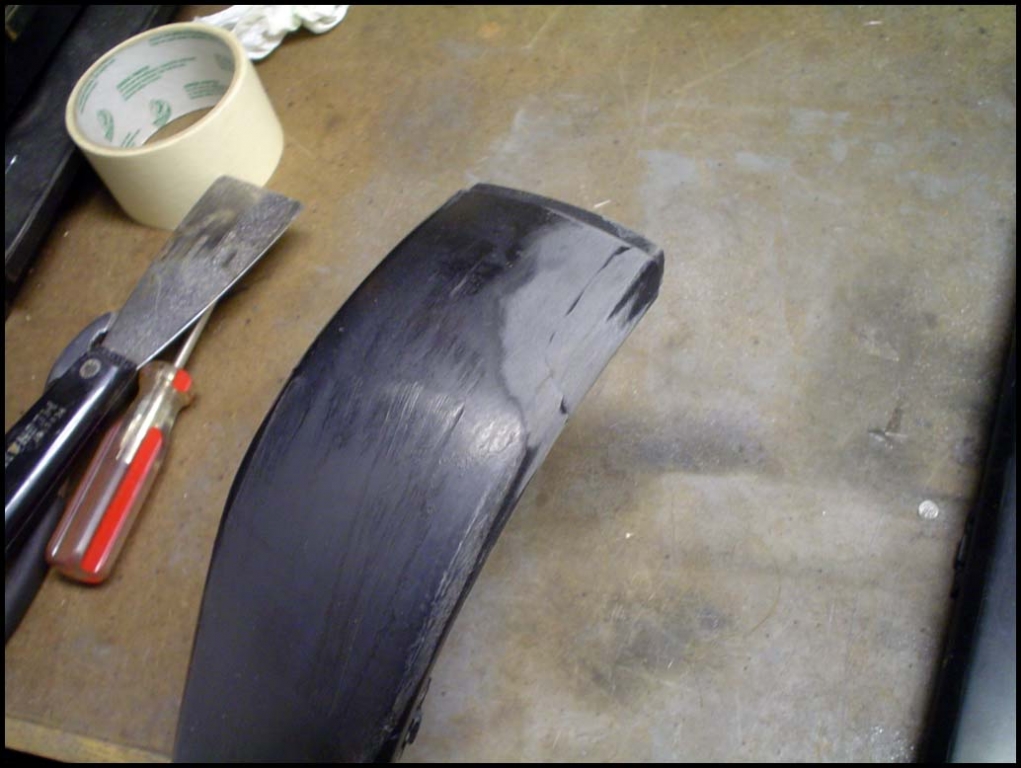
    The seams of the trim are sanded down to remove any excess fiberglass resin and to make a smooth surface for the epoxy:


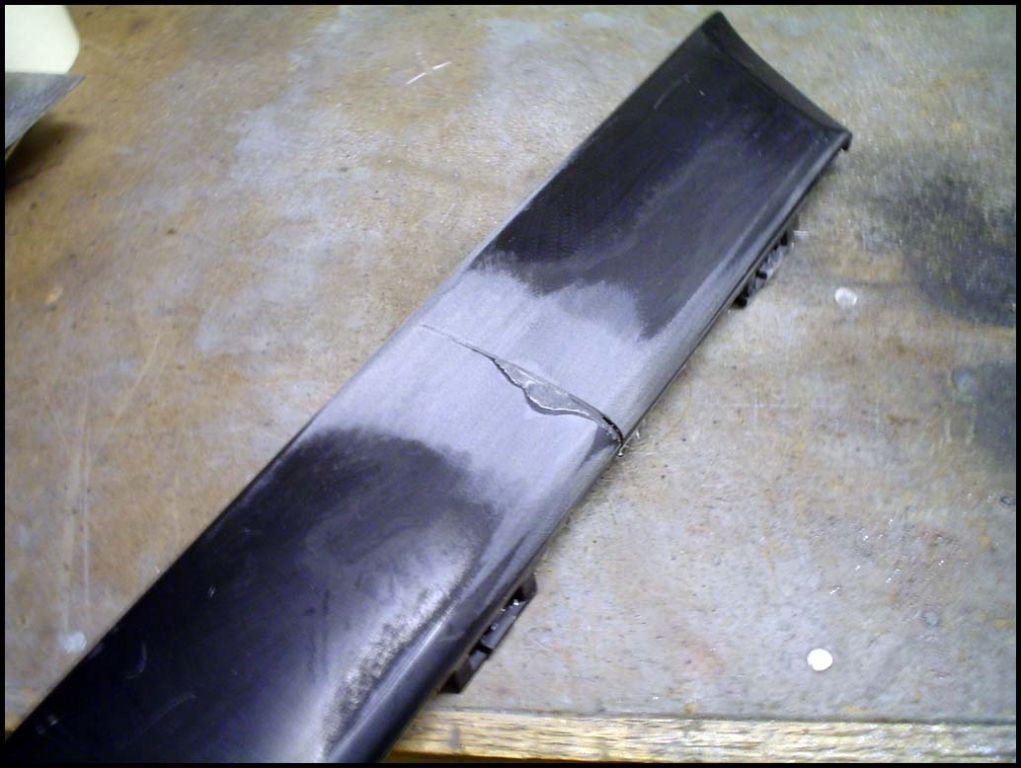
    The same is done with the cracked portion of the rear trim:


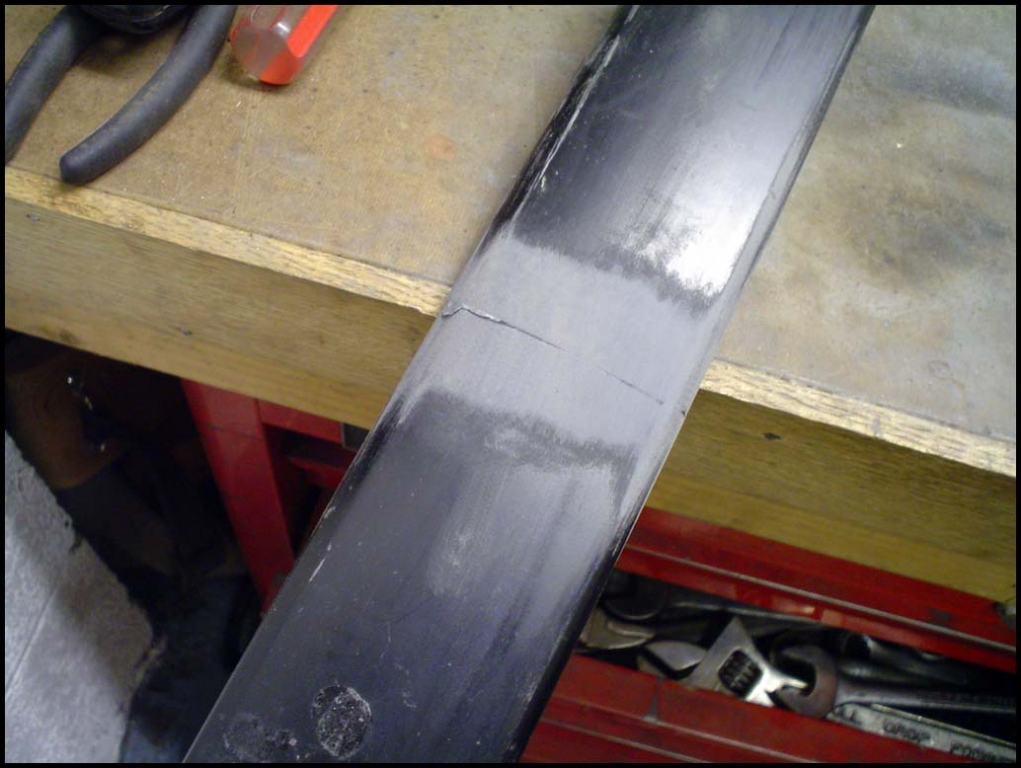
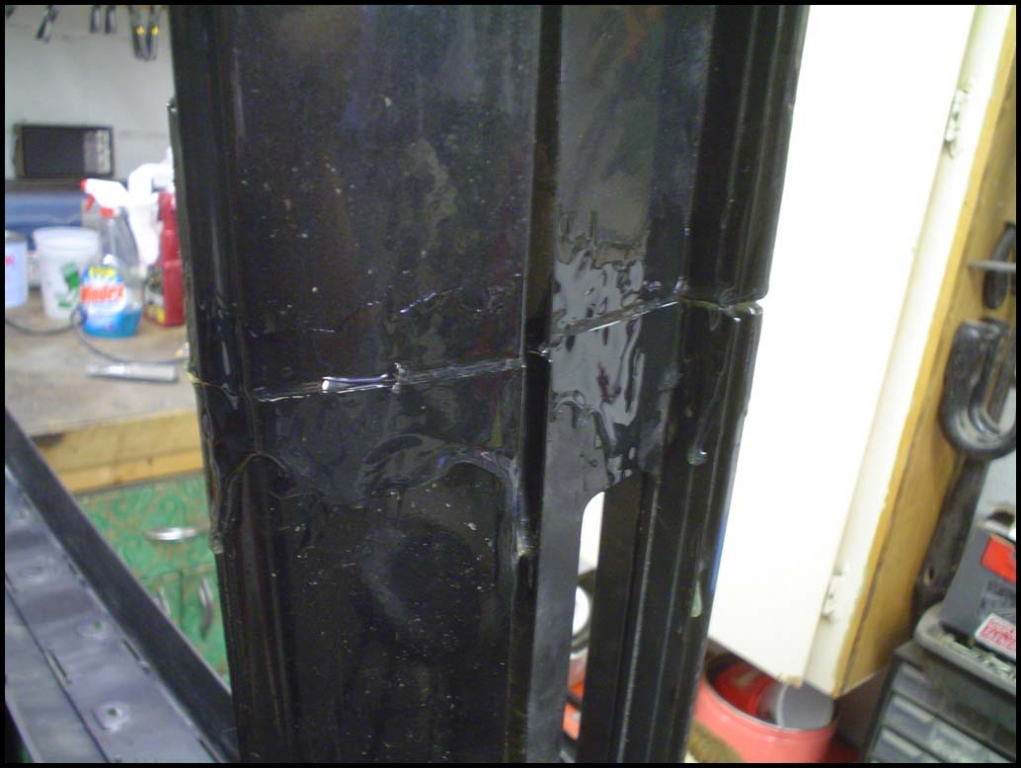
    The seams of the bumper are filled with plastic epoxy. This stuff is kinda messy, so it looks pretty sloppy right now. Tomorrow when it's fully cured, it will be rock hard and easily sanded down:


    The plastic epoxy didn't completely fill in all of the large gap at the top, so we'll be using a very small amount of filler to even out the gap before we ready it for paint:


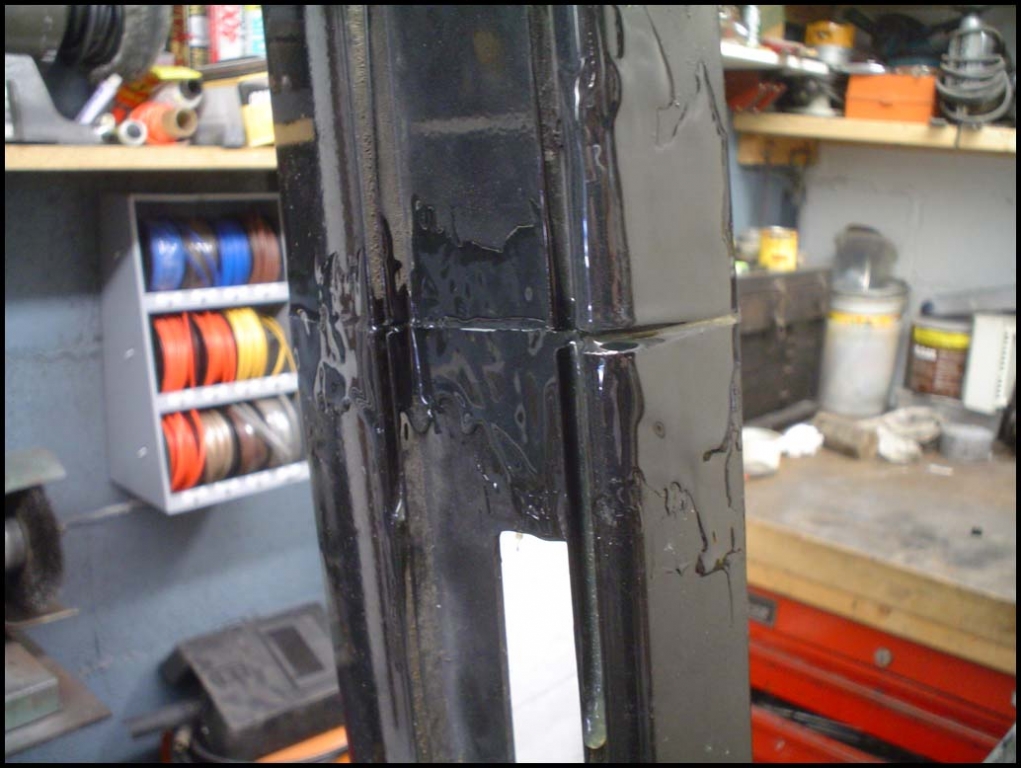
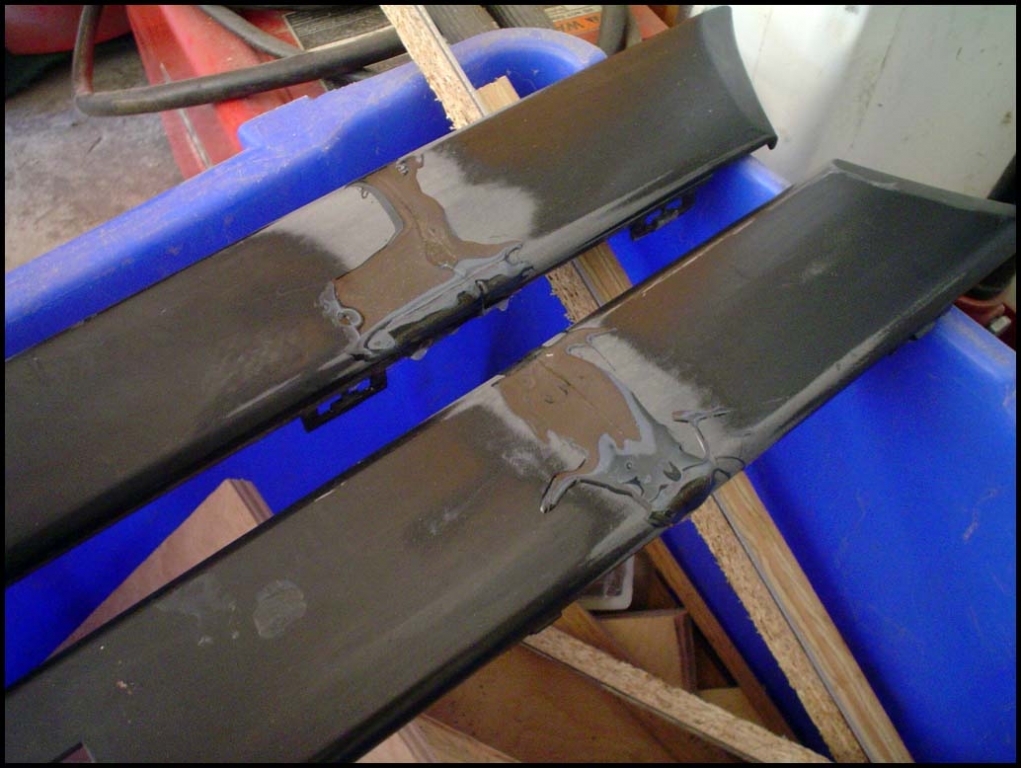
    The seams of the bumper trim after epoxy, left to dry overnight. Tomorrow, we'll sand down the excess:


    Also, just in case anyone is wondering, the fiberglass has had a week untouched and un-messed-with to cure, and it's solid as a ROCK. I can hold the bumper skin and pull one way or the other pretty firmly on the end, and it barely even moves, much less disturbs the fiberglass. And especially now that we've plastic welded the seams together on the outside, and there's 2 layers of fiberglass on the inside, this is going to be one seriously solid chopped bumper.
    Last edited by Jand3rson; 10-08-2006, 04:24 PM.

    Comment


      Nice work. I will be doing all of this to my bumper over the winter to make it as solid as yours:) Good idea with the epoxy. Makes sense and the bondo will just be for cosmetics and not for structural.
      Originally posted by cabriodster87
      "Honey? What color is this wire? Is it the same as that one? Are you sure? I don't believe it. OK, it works. Thank you sweetie."
      Originally posted by Kershaw
      i've got a boner and a desire to speed.

      Comment


        Originally posted by Mike325 View Post
        Nice work. I will be doing all of this to my bumper over the winter to make it as solid as yours:) Good idea with the epoxy. Makes sense and the bondo will just be for cosmetics and not for structural.
        Exactly. With as tiny of an amount as we'll be using to level out the gap, it will be fine, since we're not using it to fill in the gaps like we'd originally planned.

        Comment


          i love this project and how meticulous you are with your car. i can't wait to see the final results. should be Amazing. good work, keep it up.

          Comment


            Part V: Sanding, sanding, and more sanding. And then we sanded some more...

            Today we sanded off all of the excess epoxy from plastic welding all of the bumper and trim seams, using a handheld Skil sander. We went through about 4-5 sheets of 100 grit paper, but the epoxy sanded very nicely, it din't take too long.

            Epoxy sanded off of the seam of one of the side pieces of bumper trim:


            Shot of the bottom edge of the seam, or for all intents and purposes, lack thereof:


            Epoxy sanded off of the seam from the other side piece of trim. The end piece of this side set up just a hair uneven from the other, so we added a bit more epoxy further out, and feathered out the difference:


            Underside of the sanded seam:


            One side of bumper trim, completely finished and ready for prep/paint:


            This was the corner of the trim that was cracked (see farther back in the thread), now with epoxy and sanding, it's like it was never there:


            Second side of trim all finished, well, almost. You can see a very small little area in the upper left of the trim where a little piece of epoxy chipped out. We mixed up some more and packed the area full, and when it's dry, we'll re-sand it:


            Now onto the bumper... :D

            Driver's side bumper end top, with all excess epoxy sanded down:


            A better shot of the top:


            Finished trim installed on top of finished bumper seam, looking pretty damn good:


            Sanded seams on the passenger side of the bumper. At the top bumper trim groove, Andrew ground out just a bit of the actual bumper plastic when removing the excess eopxy, so we filled it in a bit with some more, and we'll shape it when it dries:


            Passenger side seams, also just a tiny little area where we added in a bit more epoxy, there was a very small bit at the end of the seam that didn't get filled:


            Later this week, we'll sand down the new epoxy we put on for the small repairs, and then with any luck, this weekend will be prep and paint!
            Last edited by Jand3rson; 10-08-2006, 08:51 PM.

            Comment


              Lookin great Josh!! I can't wait to see the finished product. You should have filled the sidemarker holes tho.

              Comment


                Fucking nice!!! Great work. Your car will look 100% oem when finished:up:
                Originally posted by cabriodster87
                "Honey? What color is this wire? Is it the same as that one? Are you sure? I don't believe it. OK, it works. Thank you sweetie."
                Originally posted by Kershaw
                i've got a boner and a desire to speed.

                Comment


                  Originally posted by h0lmes View Post
                  Lookin great Josh!! I can't wait to see the finished product. You should have filled the sidemarker holes tho.
                  See, I thought about that. But I'm going to euro without even trying. Everyone here wants euro trim, and all of the euro guys want US trim. So if I keep my US trim, I'll be euro-styled by default.

                  It makes sense in my head... :D

                  Comment


                    Originally posted by Eurospeed View Post
                    See, I thought about that. But I'm going to euro without even trying. Everyone here wants euro trim, and all of the euro guys want US trim. So if I keep my US trim, I'll be euro-styled by default.

                    It makes sense in my head... :D
                    Looking good... still waiting to see your rear valance job too.

                    Are you hand sanding all that fiberglass work?

                    Comment


                      Originally posted by Ritalin Kid View Post
                      Looking good... still waiting to see your rear valance job too.

                      Are you hand sanding all that fiberglass work?
                      All the fiberglass is on the inside, it doesn't need anything done to it.

                      Comment


                        good stuff bud. hope to see this done soon

                        Comment


                          Originally posted by Eurospeed View Post
                          All the fiberglass is on the inside, it doesn't need anything done to it.
                          Sorry.. I was actually referring to the plastic epoxy. I was going to suggest using a DA Sander with 80 grit pads will chop your sanding time in more than half. A cheap $30 Skil DA sander is perfect for body work like this and save all your hand's energy for more important things later. ;)

                          Comment


                            Yeah, there was no way in hell we were going to hand sand any of that shit. Using the Skil it still took a couple of hours to get it all sanded. We're hand sanding the finishing work, but that's about it.

                            Comment


                              Do you plan on keeping your trim a satin rubber black or painting it to match the rest of the bumper?

                              Comment


                                Originally posted by Ritalin Kid View Post
                                Do you plan on keeping your trim a satin rubber black or painting it to match the rest of the bumper?
                                We will be painting it satin.

                                Comment

                                Working...
                                X