
Mike, thanks for the heads up on the pics. I think they are fixed now... let me know if you still can't see all 7 of them. When you guys say go OEM on the engine mounts, do you mean Genuine BMW? I bought the mount kit from FCP, which are all Corteco brand.
Also, I had seen the Stromung exhausts but didn't really like the Youtube videos that I heard. Most of them were pretty poor quality though. Do either of you know of a clip that has audio that's pretty close to the real sound?
-
For sure go OE on the engine mount front, try to find a solid rubber mount for the differential that won't break the bank, and perhaps consider a low durometer non-stock transmission mount as the options out there just don't seem to last, but do work well.
I can second the Stromung suggestion, although I did struggle to get a good seal at the catalyst connection. There is of course nothing wrong with a stock rear section.Leave a comment:
-
Sounds like a ton of progress! FYI, most of the photos in your last post aren't working for me... not sure if you can fix that or it's a hosting problem.
Regarding engine mounts... go OEM. They cost a little bit more money, but the consensus on the OE-style aftermarket mounts is they are junk cause a lot of NVH. There are a bunch of options for trans mounts so just pick a quality brand there.
Regarding exhaust ... another option is Stromung. I've been very happy with mine from a fitment and sound perspective (smaller 3" slash cut rolled tip). See my thread (link in signature) for photos.Leave a comment:
-
First update in a few weeks, but I just now had some time to write up everything that's been going on. Hope everyone had a nice holiday!
I spent most of my wrenching time chasing down the "oil leak", which actually turned out be two separate leaks: power steering fluid and brake fluid. The brake leak was particularly nasty, as the dripping fluid managed to eat all the paint off a pretty big section of my sway bar and a couple other parts. :( It was fixed with a pretty simple replacement of the master cylinder reservoir grommets. P/S leak is a longer story, I ended up replacing the reservoir, hose clamps, and the pressure hose from the pump to the rack. Now that the big leak is fixed (the hose), I can see it's unfortunately still leaking from the body of the pump. I will try a pump rebuild the next time I feel like taking the car out of service for a few weeks, but the weather is good for driving right now. :)
I also got the Blaupunkt stereo head unit installed; more details over here: https://www.r3vlimited.com/board/for...res-retro-look
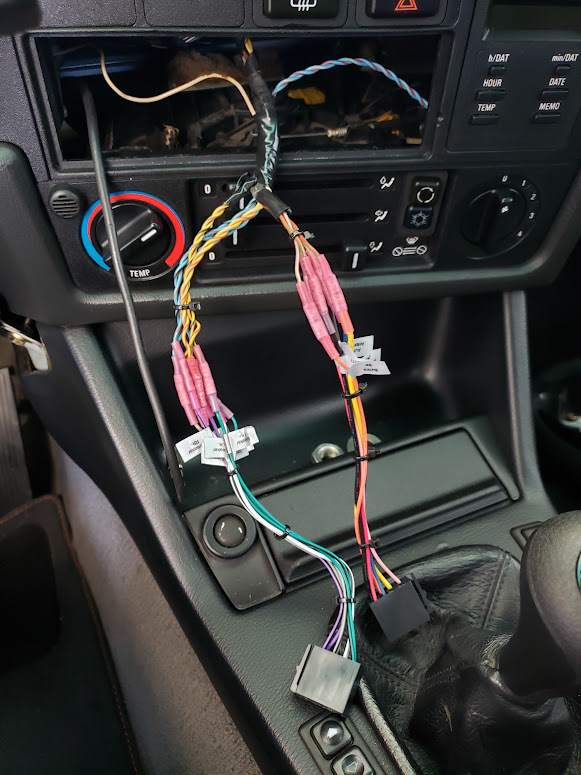
Here are a couple more pics of the install than I posted in that thread. First, the existing space-ship Alpine and the monstrosity of a wiring harness that I found in the car:
That's about three feet of wiring and components from at least two prior head units in there! I cut out everything back to the factory wires and started fresh, came out looking much cleaner:
And the installed head unit. Looks and sounds great!
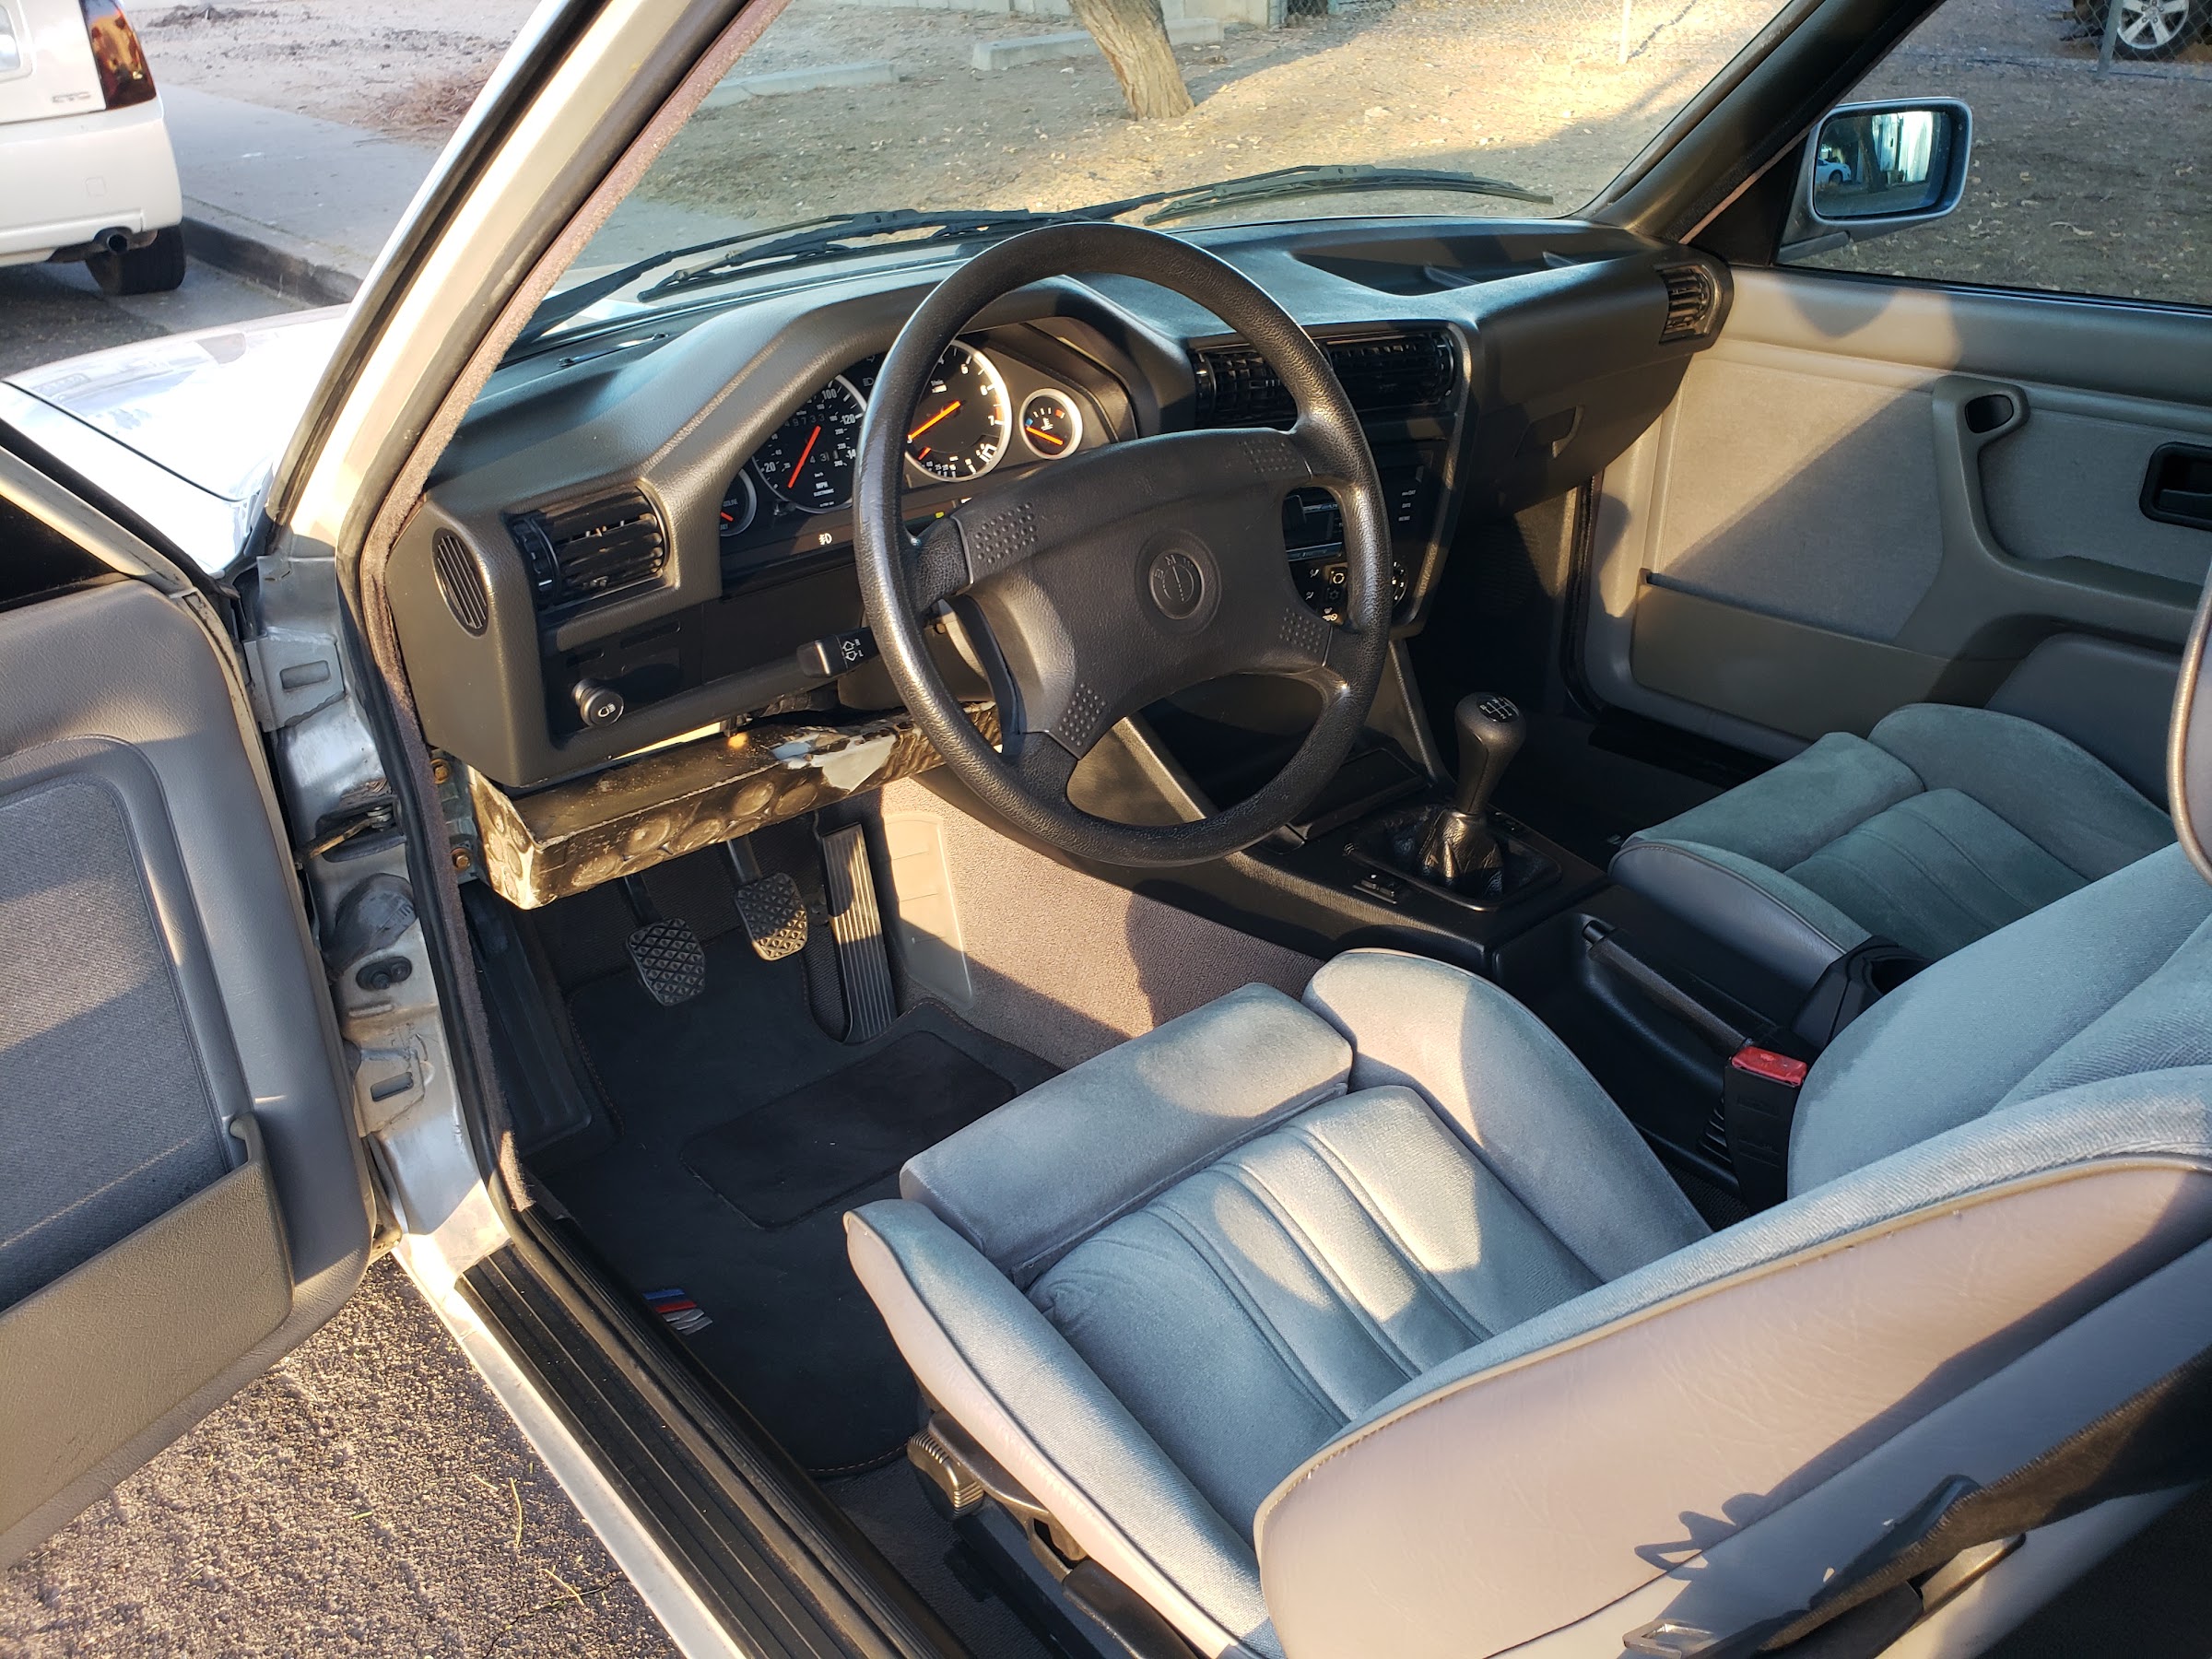
The interior is coming along really nicely now. It's got the vibe I've been looking for:
Still quite a bit left to do, the shelf of new E30 parts is not going getting any smaller:
Next on the list are engine/trans/diff mounts, since they are all shot. I also need to figure out a solution for the exhaust, which is super rusty, features a no-name muffler with a crap welding job, and is hanging by a single rubber hanger and a couple zip ties. I'm debating between trying to find an OEM-style replacement muffler, or just going with something like a Supersprint, but I don't want something that sounds like a four-banger with a fart cannon. I already have a Miata with longtubes and a race exhaust for that, lol. Any suggestions on a muffler? Does the Supersprint sound pretty nice?Last edited by Nate37; 01-05-2020, 04:40 PM.Leave a comment:
-
Yep that’s the one I have, the feet sit just inside the lip of the fenders where they bolt to the chassis.
though as others have said, if your in a pinch a come-along or chain hoist to a tree branch, rafter, etc. would do. The engine brace is super useful to me as a professional but would likely be seldom used on a single vehicle. maybe not worth the space it takes up. I’ve found it’s hard to store it anywhere other than a special shelf I made or in a corner.
p.s. - that blaupunkt is effin sweet, hadn’t seen that beforeLeave a comment:
-
Sounds like your new dash is pre airbag. The airbag cars have that riveted on extension to mount the knee bolster.
Car looks like a nice find.Leave a comment:
-
Can't figure out how to quote more than one post in a reply... thanks for the tip on checking Amazon. I wasn't sure if I needed a BMW-specific one or not. Something like this one will work OK? Where do you typically mount it on the body and engine?
I will get under the car this weekend to check out where it's leaking from and start ordering parts, so I can get this fixed and back on the road.
In other news, this showed up in the mail today. Fresh off the boat from the UK:
A little bit of a splurge (OK a lot), but I'm super stoked about it! Can't wait to get this in the car and see how it looks. I can post an unboxing and install thread over in the stereo forum, if folks would be interested in that.Leave a comment:
-
Yeah same thing happened here. Realized I had a half inch gap at the front of the dash and none of the vent controls were working right. Fortunately I was able to just loosen all the bolts up and shove it forward a little bit, but it sill added a couple of hours of fixing. In total it probably took me 12-15 hours, but I'm the slowest mechanic I've ever met...Leave a comment:
-
I’ve got one of those engine support bars, and it’s fantastic. I use it all the time fixing cars. It makes a lot of jobs easier than rolling on the floor trying to avoid a jack or crane legs. You can find them cheaper on amazon or eBay. Side note, make sure to brace the hood open on an e30 or you will have a couple dents popping out of your hood when your done. I trusted my hood shock once, poor choice. Better yet just take the hood off. Sent from my iPhone using TapatalkLeave a comment:
-
I replied to your thread regarding the steering issue with a number of possibilities.
Nice work on the dash swap! Total pain in the butt, but definitely worth it. I did mine a couple years ago and it took me 6+ hours. And then I had to do most of it again the next day because I realized the middle clip wasn't seated correctly. Fun times.Leave a comment:
-
Thanks for the tips and the kind words, and sorry for the delayed reply. Have you or anyone else used something like this to support the engine? https://www.ecstuning.com/b-schwaben.../010049sch01a/
I don't have a good spot in the garage to lift the engine from, so something like that seems like a pretty good solution.Leave a comment:
-
It's been a few weeks, but that's mainly because it took quite a while to replace this dashboard, and I've only had an hour here and there to work on it. Here's the latest progress:
-Crack-free Euro dash courtesy of 70ccrossi
-Replaced front speakers with new Focal RCX-130
-New shift knob
-New window circuit breaker switch
-Gearshift center console cupholder
-New floormats, rescued from my 135i before it went to the scrap yard
-Fixed a bunch of minor issues in the dash with loose bolts, etc.
A couple pics of the newly cleaned up interior are below. The dash looks fantastic! It has a lot more insulation around the HVAC ducts than the old dash. I read somewhere that this might mean it came out of an M3? Is that true?
Note the missing kick panel - the new dash seems to have a different attachment method than my old one. Whereas the factory dash had sheet metal screws attached to little threaded clip/tab things, the new dash just has slots for what I assume is a quarter-turn fastener, similar to the forward center console. I did a little research and ordered these guys to re-attach the kick panel. Hopefully they work.
Now for the bad news:
-Something is seriously messed up in the steering wheel after I re-installed it, as described here
-Horn contact broke when I removed the steering wheel, so I will also be pulling the wheel again to replace that
-The car puked about a half quart of oil onto the floor in the two months it sat in the garage. I knew it had some kind of leak, but after driving it to work today, I could see a trail of oil drips across the parking lot to where I parked. There was also a good sized puddle by the time I was ready to head home. It definitely wasn't leaking that bad when I bought it, so I guess fixing the leak is now priority #1. Sigh.
More to come... my race car needs a new motor so that may be a distraction for a bit, but I'm hoping to get this oil leak fixed ASAP (along with a bunch of other maintenance under the hood) so that I can drive it while the weather is nice here.
Leave a comment:
-
You can use a come-along to a rafter in the garage, tree, etc. Not pretty but it works in lieu of an engine hoist. Thanks for the update! I really like this car and it's great to see the transformation already happening.
Remember to unbolt both motor mounts and only raise it 1-2" at most as needed, you will figure out the best way to get the pan in and out of there, it's not fun but it can be done.Leave a comment:
-
Yeah, seems like both pan gaskets would make sense. Do I need to buy some sort of support to raise the motor up? I don't have an engine puller.
See my update below for more pics of the seats. The door cards are apparently original, as are the vinyl side panels on the seats. Only the cloth was reupholstered according to the PO. He said this is the shop that did the upholstery work:
-
Alright, a couple of updates with stuff I've been working on for the last few weeks:
When I bought the car, the rear tires were corded all the way through the first set of steel belts (yikes), so the first order of business was new tires. There don't seem to be a lot of options for 14" tires these days, so I decided to upgrade to 15s. As much as I would have liked a nice set of BBS wheels, I'm trying not to blow the whole budget for this build in the first week, haha. These 15x7 TRMotorsports C1's with 205/55R-15 Yokohama S.Drives will do the trick for now. All for $850, mounted, balanced, and shipped to my door:
My next plans were just to wipe down the incredibly dusty interior, which resulted in this about two hours later:
The interior is clearly pretty filthy. The back seat isn't much better, with a big stain that clearly leaked under the lower seat cushion:
Fortunately that big stain came out just by throwing the insulation in the wash. A few hours of scrubbing with carpet shampoo and Purple Power resulted in this progress on the carpet. Way better, but not as clean as I'd like. I'm thinking about renting a steam cleaner. Has anyone had good results with using one on their carpet?
Also, this was neat:
Fortunately the PO provided the unmolested original center console with the car.
Once I got all of the seats out of the car, I realized that the fronts are a completely different color than the rears! It looks to be the result of sun fade, since you can see the headrests and some of the unexposed parts have retained the original silver color. I guess a new upholstery job is now on the to-do list:
Since the interior is already halfway apart, I sourced a crack-free dash and will be installing that in the next couple of weeks here. Looking forward to getting the interior cleaned up and back together so I can drive the car a bit while the weather is nice here!Leave a comment:


Leave a comment: