my German import touring project : S52 / z3M coupe 5 lug + full rust repair

Collapse
X
 
  • Time
  • Show
Clear All
new posts

  • ethirtydavid
    replied
    Moving along with the rust repair also and am closing that all down. There are now just several small areas left to address and then one last bigger area, which is the driver side rear rocker area just about 10" before the driver side rear wheel arch. I decided I would focus on what I have found to be the most difficult repair for me so far, which was the tray area in the engine bay that the battery used to sit on. The battery will be relocated to the trunk with wiring that was pulled from the donor e30. This area had some rust for sure and I had to cut a large section out like a cavity. The battery tray will no longer need to be there so I reconfigured it and this is what I came up with after just a handful of hours (if you count from the hands of a few different people.....)


    - -


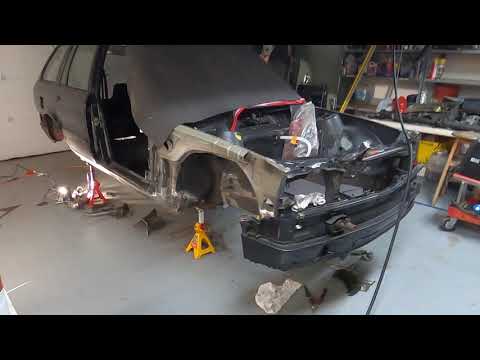
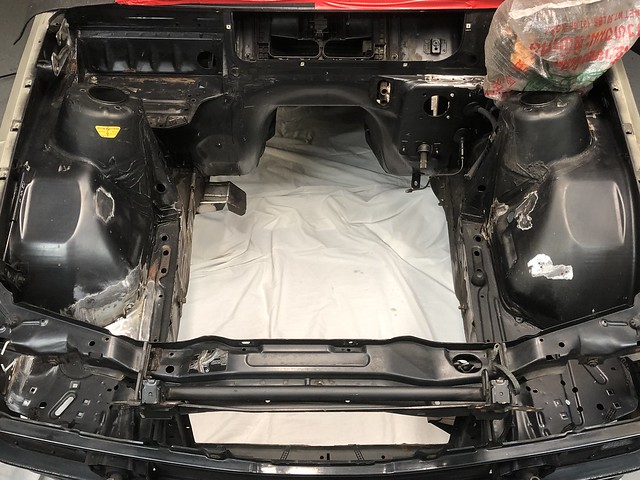
    I will be using a little lightweight body filler to smooth out the transitions in this area and maybe a few other spots in the bay.

    The good news is that this is the last of the motor bay repair areas and I am all set with two part primer/hardener which I will spray via HVLP. This will mean I can begin the motor/ accessory install while I finish the remaining rust repair. looking forward to that ~

    Leave a comment:


  • ethirtydavid
    replied
    I caught wind on the r3v FB page that there was a guy that you can send wiring harness to and he can strip all the unnecessary e36 specific wires, as well as flash the ECU.
    This guy is named Blake Minson, and if you are doing a swap I highly encourage you to seek him out. The harness came back wrapped tidy in high heat tesa tape, labeled and the entire process was very quick. He has a good bit of experience with 24v swaps and is a great resource for questions also, which he is happy to answer.


    The harness was adjusted and ECU was flashed to
    • remove EWS ignition security,
    • rev limiter reset to 7,100 rpm,
    • added e30 coolant temp connector for brown top sensor,
    • fused 16 pin OBD2 connector port,
    • new c101 engine harness connector,
    • hard wired and extended the round diagnostic port to drivers side e30 harness cover slot,
    • secondary airpump turned off,
    • rear 02 sensors turned off,
    • evap/leak detection removed-
    • then finally flashed for m50 manifold and lightweight flywheel.
    I also sent him a custom oil temp wire which he routed and combined in the harness which will connect to the blue rallyroad oil distribution gauge photo'd in the post above. The end is left near the fuse box and I will be able to bring that through the firewall and connect to the gauge cluster.

    I’d thought a lot about the wiring aspect of this project and was stoked to have someone take care of this who has done dozens and is past the curve ~
    Last edited by ethirtydavid; 03-26-2021, 07:36 PM.

    Leave a comment:


  • ethirtydavid
    replied
    Still cruising through the rust. I would say at this point that 75-80% is finished and there are just a couple areas left -

    Of course there is still motor work, and putting all the pieces together but I have a tendency on large projects to be stuck in the end with bags full of " the small stuff" so I am focusing on getting many of these small projects done along the way.

    I was very happy that a buddy came over for beer and tacos and we spent a good several hours to get the motor all sealed up with new o rings / gaskets / seals on everything above the head gasket. I also ordered and installed a rethreaded brown top sensor as well as a RallyRoad oil distribution gauge block which allows me to run signal to an M gauge cluster oil temp.


    Leave a comment:


  • ethirtydavid
    replied
    Originally posted by moatilliatta
    Noice!

    I've herd it's hard to get camber with Z3M arms. I'm still suspect Z3M trailing arm pick up points are slightly different.

    Also I forgot to mention, I really like the way .023 wire does patch panels. Makes clean up work easier and less pain blowing though. Tough getting an arch started sometimes the wire likes to kink, got to play around with angles if you haven't ventured down to that size wire yet. I keep .023 in for about everything unless things are getting bigger than .100 -. 125 materials.
    I was recommended to use .023 but had .030 loaded up already from the beginning of the project and it’s been working out really well. So far no issues gaining initial spark. 25/75 gas set at 20 and it’s been working well. I’ve been watching a lot of tube videos and I think it’s given me some pointers to think about during the sessions.

    You mentioned you rerouted your fuel line vent tubes ? photo ?
    Last edited by ethirtydavid; 02-18-2021, 10:50 PM.

    Leave a comment:


  • moatilliatta
    replied
    Noice!

    I've herd it's hard to get camber with Z3M arms. I'm still suspect Z3M trailing arm pick up points are slightly different.

    Also I forgot to mention, I really like the way .023 wire does patch panels. Makes clean up work easier and less pain blowing though. Tough getting an arch started sometimes the wire likes to kink, got to play around with angles if you haven't ventured down to that size wire yet. I keep .023 in for about everything unless things are getting bigger than .100 -. 125 materials.

    Leave a comment:


  • ethirtydavid
    replied
    Originally posted by moatilliatta
    Welcome!
    I use this wurth copper weld thru primer .No way I’d want to be around the zinc stuff.. fumes..

    https://www.wurthusa.com/Chemical-Pr...r/p/8868000016

    Maybe eBay or a local wurth dealer might have it. It’s the good stuff! I use it in any lap or behind any panel.

    On the camber, was your eccentric maxed out for negative?

    You can peak at the heater core with the center console out from the driver side. No need for dash removal to replace heater core! :)

    I ordered up some copper weld primer and will be picking that up today and continuing the project with it.

    Unconfirmed, but I believe the eccentric bolt was maxed out, yeah.

    It's funny of all things I never did a heater core with e30 before. I thought I always heard people needed to remove the dash to gain access, but yeah- it's all right there.. hmm.

    Leave a comment:


  • moatilliatta
    replied
    Welcome!
    I use this wurth copper weld thru primer .No way I’d want to be around the zinc stuff.. fumes..

    https://www.wurthusa.com/Chemical-Pr...r/p/8868000016

    Maybe eBay or a local wurth dealer might have it. It’s the good stuff! I use it in any lap or behind any panel.

    On the camber, was your eccentric maxed out for negative?

    You can peak at the heater core with the center console out from the driver side. No need for dash removal to replace heater core! :)


    Leave a comment:


  • ethirtydavid
    replied
    Originally posted by moatilliatta
    Rear toe numbers are impressive, did you have a hard time getting rear camber in?

    Booster - I think comes down to preference. 944 old school pedal feel, E90 more assisted modern feel.

    As far as doing patch panel, check out this primer - https://www.summitracing.com/parts/sym-3680033
    3m seam sealer - fast and firm is pretty good product. So many off brands that don't quite cut it. Makes the primer you use even that more important.

    I wouldn't JB weld for filler. And would limit the use and thickness of bondo as it flakes overtime, especially in structural / high vibration areas.

    I would just replace the heater core with a new unit as they are prone to leaking.

    I ran my vent tube inside on a race car and did something similar on my street car because of the rear coil over. I am now running it over the wheel well to clean up the trunk area. I'm at that location in my build thread in my Sig.

    I'm actually about to seam seal my new vent tube right after I hit post reply. But the way the factory does it really isn't that bad, and would prefer it if I had the space.
    Hey thanks for taking the time to reply,

    The silver parts car belonged to a good friend of mine, he worked at a shop and did all the alignment tuning. The rear camber adjustment is a pinch but there is a special 17mm wrench we always used on our cars that was shaved down and helped gain access.

    I've driven an e30 with the 944 booster, it really would be great to feel out an e90 booster for brake pedal feel- but I think I'm just gonna roll with it blind and see how it goes.

    I'll look into that primer for patch panels, there is a welding primer here at the auto store that's been on my mind also.. and yeah, I had to special order it but am sitting on two tubes of the 3m seam sealer. I plan to open and use all at once when all the patches are complete.

    The only JB weld that's been used so far is covering 1/8" spot welds in that bay area, as shown, and then a couple small areas ~ but not on any large surface areas- good call. Have not tapped into the bondo yet, and really only am likely to use that on the exterior rock guard area where the two body pieces come together, although they are already quite smooth after grinding down the weld seam.

    Replacing the heater core is on my mind but I hesitate to remove the dash... I'll have to take a peek but I thought I remember there being evidence that the core had been replaced before.

    As for the fuel line vent tubes, I'm still considering if I will run the factory location or keep it inside and back out. I do not anticipate rust or corrosion issues from that fender area now that the car is in Oregon and not on European roads.

    Have a photo of how you are routing your vent tube?

    Leave a comment:


  • moatilliatta
    replied
    Rear toe numbers are impressive, did you have a hard time getting rear camber in?

    Booster - I think comes down to preference. 944 old school pedal feel, E90 more assisted modern feel.

    As far as doing patch panel, check out this primer - https://www.summitracing.com/parts/sym-3680033
    3m seam sealer - fast and firm is pretty good product. So many off brands that don't quite cut it. Makes the primer you use even that more important.

    I wouldn't JB weld for filler. And would limit the use and thickness of bondo as it flakes overtime, especially in structural / high vibration areas.

    I would just replace the heater core with a new unit as they are prone to leaking.

    I ran my vent tube inside on a race car and did something similar on my street car because of the rear coil over. I am now running it over the wheel well to clean up the trunk area. I'm at that location in my build thread in my Sig.

    I'm actually about to seam seal my new vent tube right after I hit post reply. But the way the factory does it really isn't that bad, and would prefer it if I had the space.
    Last edited by moatilliatta; 02-17-2021, 05:46 AM.

    Leave a comment:


  • ethirtydavid
    replied
    I have this plan to finish rust repair in this short month of February, so been working toward that mostly in the evenings when my schedule opens up.

    * Rather than a series of photos, at the bottom of this post is a video update of some of the areas that have been worked on.


    here are also a few photos of some other areas not from that video, which include kind of the rough in stuff.


    Final reinforcement for subframe


    Boosters:
    porsche 944, e28 or e90 - which would you use?


    ....

    Driver side outer perimeter area removed just like the symptom from the pass side, new piece tack welded in place.


    / / / /

    some gnarly stuff happening in the fuel tank vent line which moves through the pass rear wheel well / inside upper fuel tank area- it's a lot. will plan to have that all corrected next.
    Last edited by ethirtydavid; 02-16-2021, 09:04 PM.

    Leave a comment:


  • ethirtydavid
    replied
    Originally posted by moatilliatta
    Going to weld in coolant tank brackets while in there?
    Maybe Vert reinforcements?
    I usually just remove the front battery tray, Makes servicing the valve cover so much easier.

    Excited to see if you find those alignment numbers! :)

    Looking at that wire gives me a feeling of finding wire bristles for months in my clothes.
    Hey. yeah I looked into the vert front shock tower reinforcement mounts - am considering the IE set available.
    And yes, going to try and plan where things will be fitted with the swap. if anyone has photos or suggestions of good mounting locations for airbox / coolant / accessories I would love to see that. I can make an arm to hold things later but would ideally weld in the receiving end before install.

    I found the alignment report and will include that here.

    ah, the wire.. yes. actually this bound and twisted style wire wheel does wear down but doesn't really start actually losing pieces until it's already so far gone. I'm also wearing kind of shop overalls when I'm out there to help keep my 'regular' clothes from turning into the grungy mess they always seem to become. ask me how that's working out ............


    here are alignment numbers from when the suspension was installed on the previous car.

    Leave a comment:


  • moatilliatta
    replied
    Going to weld in coolant tank brackets while in there?
    Maybe Vert reinforcements?
    I usually just remove the front battery tray, Makes servicing the valve cover so much easier.


    Excited to see if you find those alignment numbers! :)


    Looking at that wire gives me a feeling of finding wire bristles for months in my clothes.

    Leave a comment:


  • Glaede
    replied
    Good job on the rust repairs!

    Leave a comment:


  • ethirtydavid
    replied
    Starting to get this motor bay stripped down.
    Probably not going to go all sexy smooth like some of you guys have done, but looking to remove all the brackets for m40 equipment / and of course rust patches (which are almost all the way done in the front portion of the car now.) I will have to do some minor body paint touchups and thinking I may as well paint the engine bay also, so there will be a little more work to do to get there.


    I removed the fuel tank and inspected that - thought there was rust at the fuel inlet but that's not the case. which is a relief. I also remove all the hard fuel lines and brake lines - I wanted to keep them but some of the welding is right over that area and is semi extensive so it's going to be best to remove inspect and replace or reinstall, depending.

    here are two rust areas on the pass side footwell, each were silver dollar size, but the rust from the bottom spread just a little past.
    It's a good idea to expose the rust from the bottom and then make the cuts outline there (that's likely going to be a larger visible area then from top down)


    Leave a comment:


  • mike.bmw
    replied
    Thanks for fixing the photos. Looks like you're making good progress!

    Leave a comment:

Working...