My New Guitar

Collapse
X
 
  • Time
  • Show
Clear All
new posts

  • shiftbmw
    replied
    So I got some good work done this weekend.

    Transferred template to body blank with pencil. Used forstner bits to do some of the dirty work to spare the router bit. The neck pocket is by far the most critical feature, as a loose pocket means the neck position must rely entirely on the clamping force of its screws. There are also two sharp and delicate corners in this area. Since some of this area around the pocket will be visible with the pickguard and hardware installed, I masked everything to help prevent chipping.


    I got lucky because the set screw came out of my bearing clamp on my bit when I was routing the control cavity. Fortunately gravity was enough to keep it down and keep me from making a mistake, but I didn't notice until after I finished routing the cavity and saw my set screw laying in the bottom. Oops...


    I finished the neck pocket and set my neck in to measure scale length, and for some reason it didn't look right so I am yet to route the bridge pickup. I need to do some double checking before committing. You'll notice some small holes in the bottom of the pockets...this is because I don't have a plunge router so I drill to depth with forstner bits and have to drill slightly deeper than my routing depth. Won't make a damn bit of difference in terms of tone or appearance once everything is installed though.


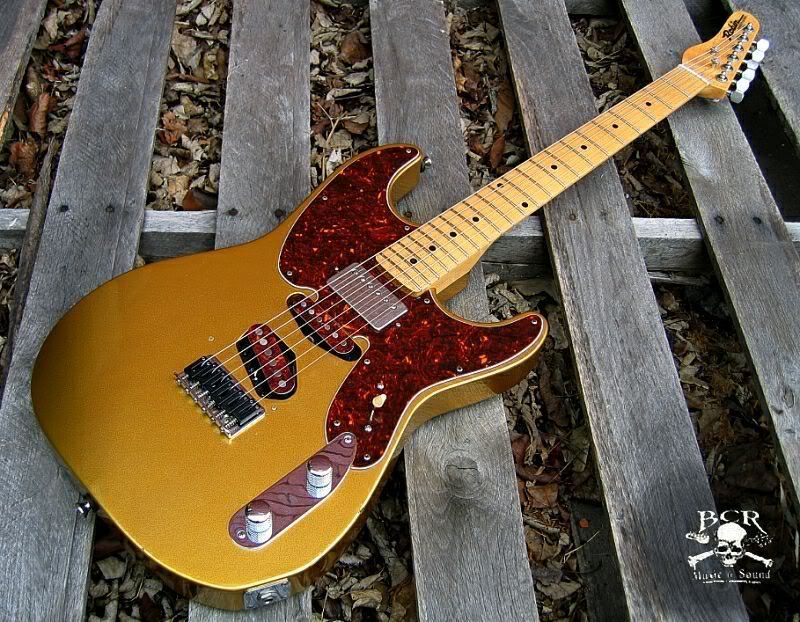
    Body meets neck for the first time:

    Leave a comment:


  • F34R
    replied
    I also do work work for a hobby, so I am sub'd =)

    Leave a comment:


  • FunfGan
    replied
    Sweet! As a guitarist and just a handyman this is incredibly interesting. Glad to see you following through!

    Leave a comment:


  • jimjim69
    replied
    Im plug in to this theard.

    James

    Leave a comment:


  • shiftbmw
    replied
    After a two year delay, I'm back on this project, and since there was a little interest, I'll keep this thread up.

    Anyways, ordered the neck. Flame maple with an ebony fretboard, jumbo frets.

    Today I routed my neck pocket in my template, got it basically line to line perfect fit. Tomorrow I'll route the neck pocket in the body with the help of some new forstner bits I picked up.

    Apartment sized "drill press" so I can drill straight and to depth.


    Neck fit in template:


    Flame maple:

    Leave a comment:


  • quickervicar
    replied
    You won't be disappointed with Tommy's stuff. From what I've seen it is some of the best out there.

    If you're unsure about pickups, I'll throw in my bump for Rio Grandes. They offer a P90 in a Tele bridge format. It's what I have in my Robin Ranger and it is full of nasally gnarliness.

    Leave a comment:


  • RobE30
    replied
    When I build my thinline, I think the back will be made out of ash and the top will be made out of quilted maple or something hard w/ a nice grain. The biggest concern I have is making the top and back mate together perfectly. Heres that website I told you about earlier. The guy makes it look easy.
    http://www.projectguitar.com/tut/tutorial9.htm

    Leave a comment:


  • shiftbmw
    replied
    Originally posted by Bimmersmith
    where are you getting your neck from? Ever heard of Warmoth?

    http://www.warmoth.com/Default.aspx


    I will most likely be getting it from USACG. Warmoth makes some nice stuff, but from what I understand they can be a bit distant. You also have to buy their "cookie cutter" standard option stuff...not much room to tweak to suit particular needs beyond what they advertise on the site. I've been in contact with Tommy from USACG and he is willing to make me exactly what I want and comes just as highly recommended as warmoth for roughly the same price.

    Leave a comment:


  • Bimmersmith
    replied
    where are you getting your neck from? Ever heard of Warmoth?

    Leave a comment:


  • shiftbmw
    replied
    Originally posted by RobE30
    Nice man! I'm gathering pieces to make my own tele, except I want to try to make a thinline. Have you made your own neck before? There is an excellent UK site about guitar building and the guy makes his own neck w/ hand tools. Glad to hear you have all 10 fingers. Keep up the good work and progress!

    Cool. Haven't made my own neck before...that's a whole other set of tools and skills. I figure I'll take it one step at a time.

    Will you be cutting the wood on the thinline or just piecing it together?

    Leave a comment:


  • RobE30
    replied
    Nice man! I'm gathering pieces to make my own tele, except I want to try to make a thinline. Have you made your own neck before? There is an excellent UK site about guitar building and the guy makes his own neck w/ hand tools. Glad to hear you have all 10 fingers. Keep up the good work and progress!

    Leave a comment:


  • shiftbmw
    replied
    Well, after a long lull I've gotten back on it. Just as I finished my templates I decided that the direction I originally was going was not the direction I wanted. I decided that if I fulfilled my vision, my guitar would look a little too "murdered out," and upon realizing this, I needed to redirect course.

    When you can have anything at all that you want, it's really hard to decide, hence my delay.

    In any case, the guitar will be transparent orange(think Porsche GT3 RS), maple neck, ebony fretboard, black hardware, black pickguard.

    Without further adieu, an update:

    Today I went ahead and cut the outline of the actual body. I still have all 10 fingers, so I suppose I have to consider it a success. I went into this project knowing I was going to make some mistakes, and really it's dealing with the mistakes you make during the build that really make the guitar yours. I wasn't concentrating hard enough I guess and took too large a rip a couple of times when routing. As a result I experienced some tearout.

    One place where it tore out was on the lower horn, right on the front of the body. This will be the hardest to mask. I also got a little on the side, although I lucked out since it's right where my jack goes.


    I started by mounting the template i had made to the body, again using my sticky tape things. I then took a standard saw and started cutting blocks out of the body. I chose the standard saw because a coping saw blade is a bit flimsy and unpredictable sometimes. Since I'm cutting through almost two inches thick of ash, I didn't want the blade to wander. There were a couple places I did carefully cleanup with the coping saw however. I tried to leave roughly .125" around the border.

    Be careful when sawing, as the bottom of these chunks likes to sliver off and take chunks out of your body(ask me how I know). Take pains to avoid this.


    One important thing to note is to SAVE YOUR SCRAPS. The larger the better. Remember, all wood is different(different grain, moisture content etc). You will have to finish this wood at some point, so nothing better to practice on than scraps from the same board. Should you F something up, you can also use it for various purposes to help mask errors.

    Next, lay her down on your routing table and take your time.


    If you move too quickly or lose focus for even a second, this can happen. This pic makes it look a little worse than it is, but it's definately not going to buff out. If I radius the corner, I'm hoping that plus some sanding will solve most of it, but I may need to find a way to fill it.


    After I'm done, I test fit the pickguard and a spare control plate I had laying around.


    Leave a comment:


  • lennon
    replied
    this is a great thread! i work with wood by trade and play guitar. one day ill build one. its not the body im worried about being difficult though...

    ill be glad to see more updates to this sir

    Leave a comment:


  • bejbis
    replied
    any updates?

    Leave a comment:


  • movementality
    replied
    subbing looks awesome

    Leave a comment:

Working...