

Your friend sounds gullible...nice work, keep it up!
-
-
-
Love these type of threads. People learning then doing. Making mistakes and fixing. Keep on keepin on.Comment
-
-
Damn i miss brisket breakfast tacos and atx in general
Sent from my SM-N920T using TapatalkComment
-
Comment
-
Water, Muff, Pizza, and Protection
Updates!
Austin has been getting slammed with some torrential down poors lately, which did a great job of identifying water leaks in the car. I noticed my passenger side floor board was pretty damp, so upon pulling the carpet up a nice puddle greeted me. I dried as much as I could and propped the carpet up for the next day or two until it was dry. This paired with driving with the windows down proved to be pretty effective at drying everything out. I was very happy to see no rust when I yanked the carpet, I know this is typically a problem area. Thank you Texas :bow:
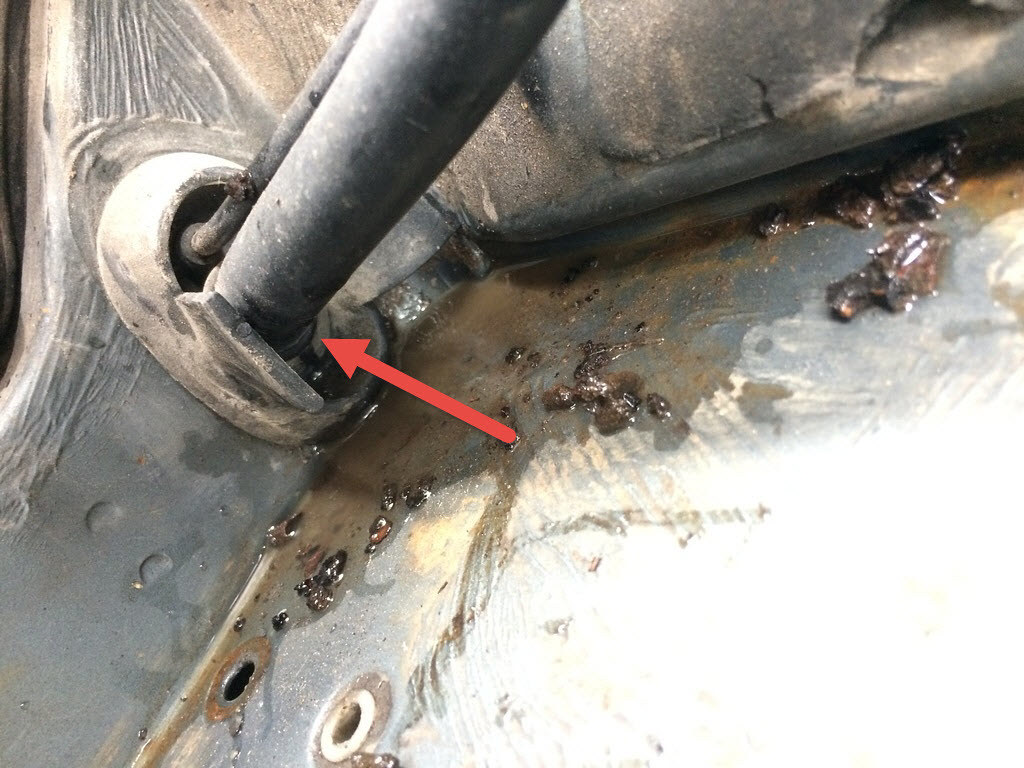
The leak actually wasn't where I was expecting, I thought for sure the sunroof drain was to blame but it turned out a drain plug was clogged on my battery tray. This resulted in water pooling up on top of the tray and draining into the cabin through the rubber grommet that the battery power wire is routed through. I found this out later, but everything in my glove box was also soaked...
To remedy this I unclogged the small drain, and I am planning on buying a new hood seal. There is really no reason to have water getting to the battery tray to begin with, so a new seal should do the trick. My current seal is definitely toast.

This is the grommet I was referring to, it is located right in the corner of the battery tray:
Once I got my leaks squared away, I moved onto something a bit more exciting - installing my "new" used catback. It is a Scorpion exhaust which turns out to be pretty pricey new, I got this one at an excellent price and it only had a claimed 100 miles on it. I believe it too, it's in like new condition. The older gentleman that I purchased it from had it advertised as "muffler parts" on craigslist so I think most didn't realize what it was.
Anyway, the only downside with the purchase is that it didn't come with straps. I decided to make my own "extensions" from a bracket I had lying around... it might be a little ghetto, but hey, they work well and the exhaust is very secure.
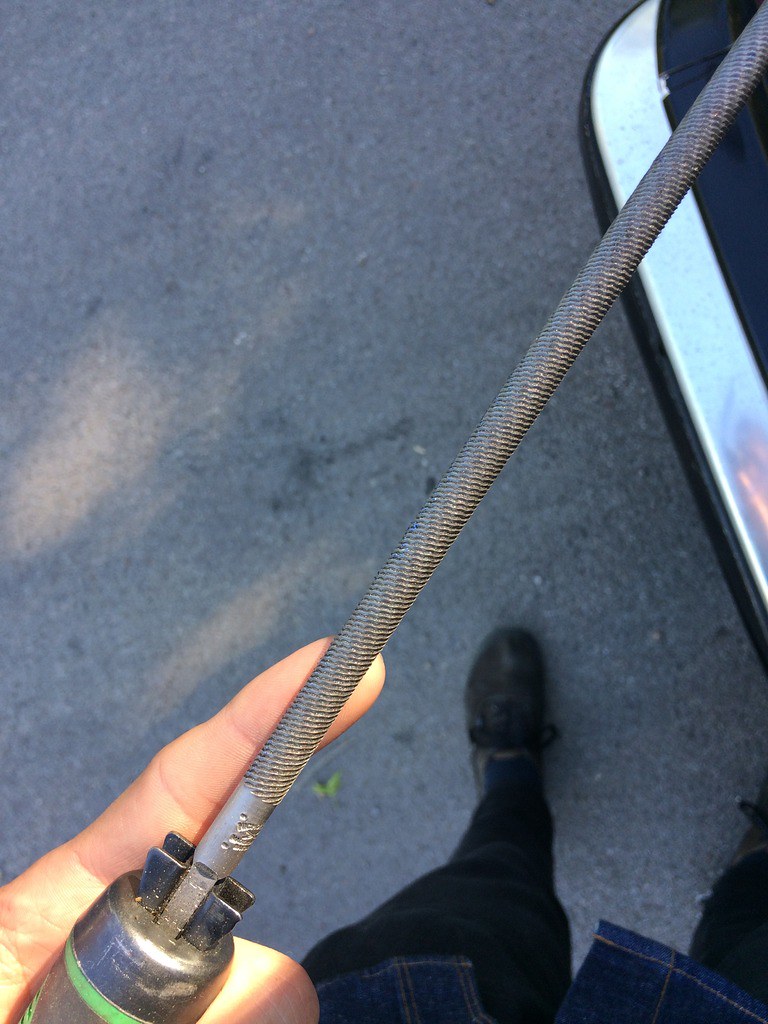
Making some measurements for the bracket:
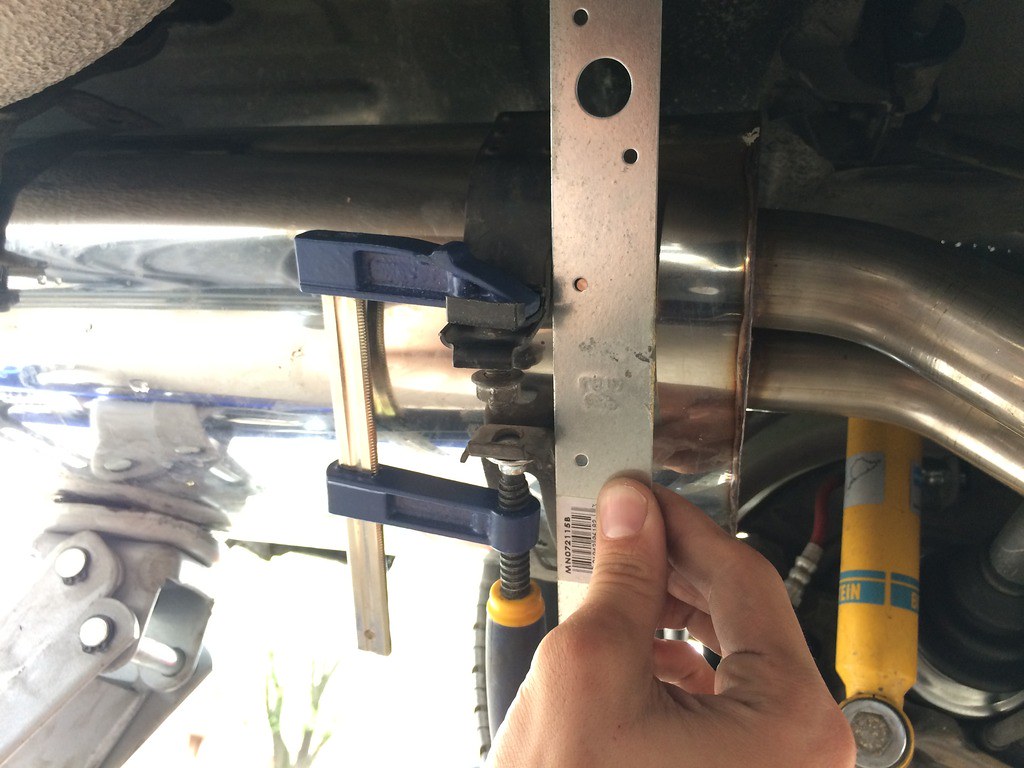
Strap extensions and catback installed. The straps don't completely hug the muffler, but it's not going anywhere. I'll likely address this in the future, but I didn't see the point in purchasing "scorpion" muffler straps when I could get creative and reuse some parts I had lying around.

Fitment turned out well too, the look is pretty subtle which I'm happy about :)
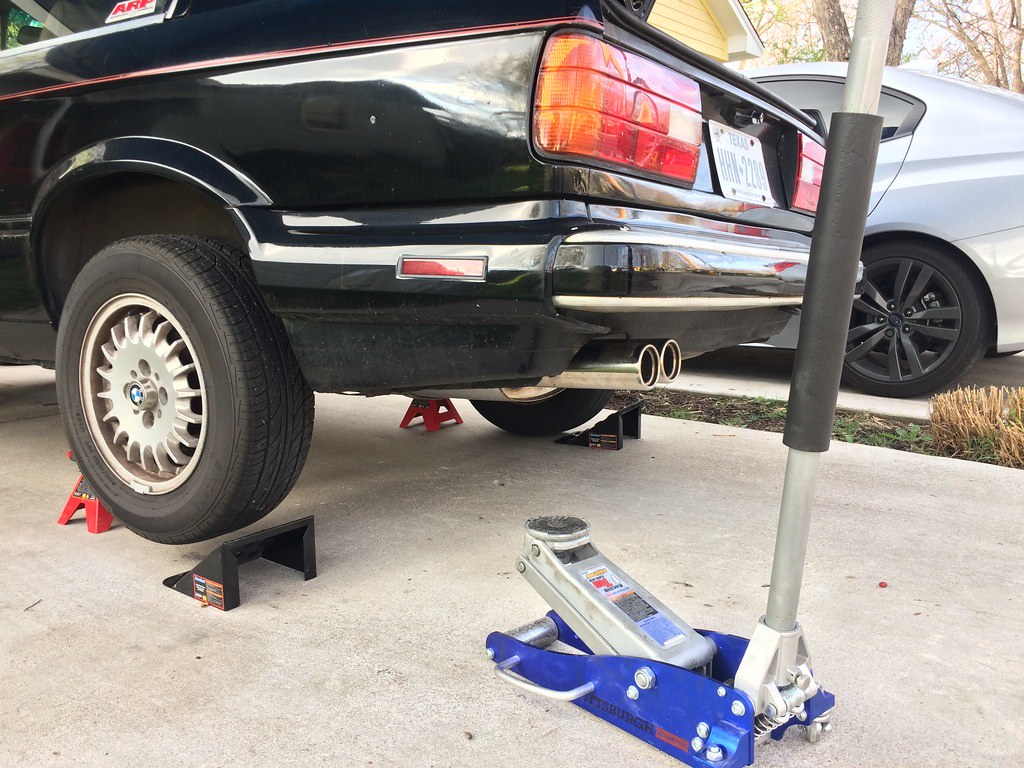
Here is my review of the Scorpion exhaust:
It is extremely quiet, like stock quiet. When I am winding the car out past 4k rpms I notice a bit more of a rasp, but that is really it. Idle and cruising noise are identical to stock. If you want an exhaust that is going to turn some heads when you jump on the throttle, this is not the one for you. That being said, I'm really happy with it. At this stage of my build I am still ironing out the kinks, so I am constantly listening for bumps, squeeks, and rattles and I can hear everything just fine with this exhaust. Other benefits that I've noticed are a smoother acceleration and the car pulling right up to redline. Previously, it seemed to get sluggish past 5k rpms, I'm thinking my stock muffler may have been a bit clogged and worn out. There was a mild power gain, but I think this is more a benefit of replacing the old worn out unit.
Update 11/22/17: The exhaust has grown a bit louder now that the muffler has broken in, it is by no means overwhelming but it sings the straight six tune well. The signature M20 rasp sounds great while shifting at high rpms, and it provides a nice warble at idle and low in the rev range. Winding the car out while going through a tunnel or alongside a jersey barrier sounds fantastic :devil: My only qualm with it is that I think it can sound a little whiny, maybe even a little civic like, at WOT around 6-7k rpms.
With my catback officially installed, naturally it was time for pizza. For anyone who plans to visit Austin, Homeslice has some of the best pizza in the city!
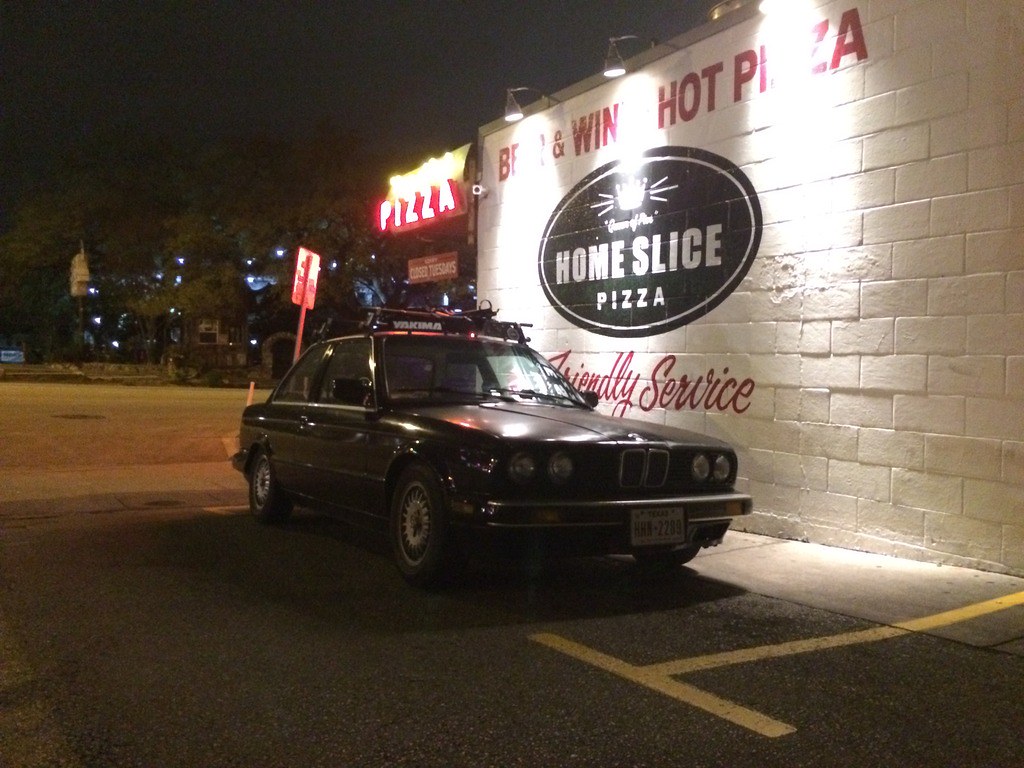
Don't be fooled... this place is usually mobbed. Took this in the dead of night.

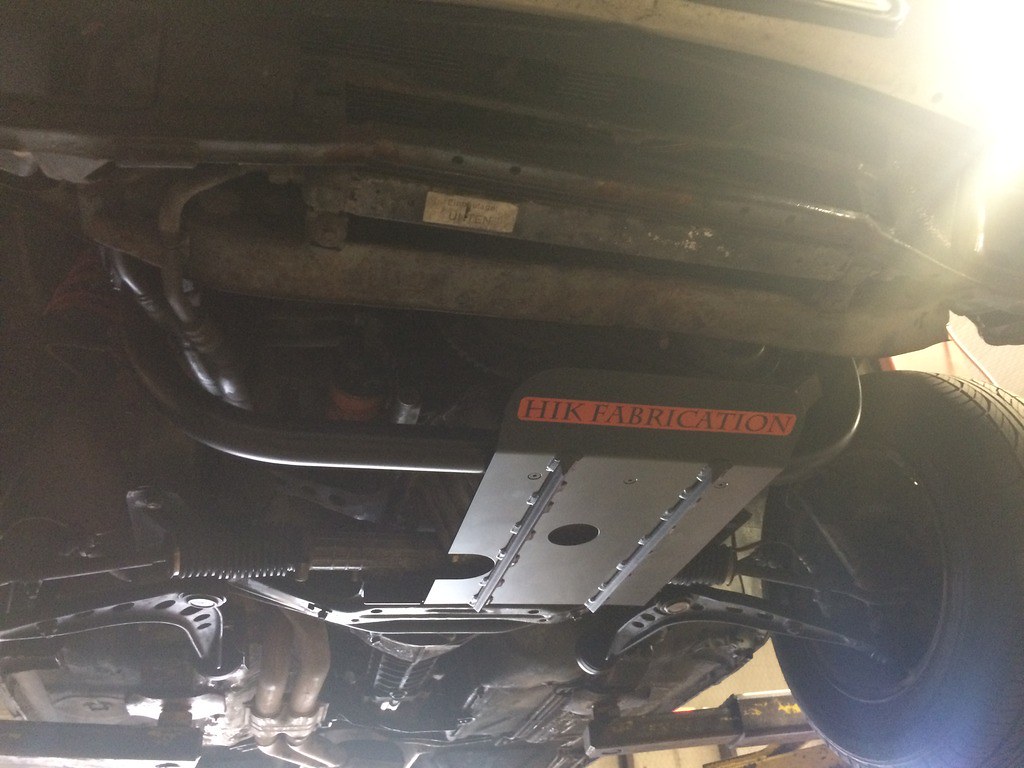
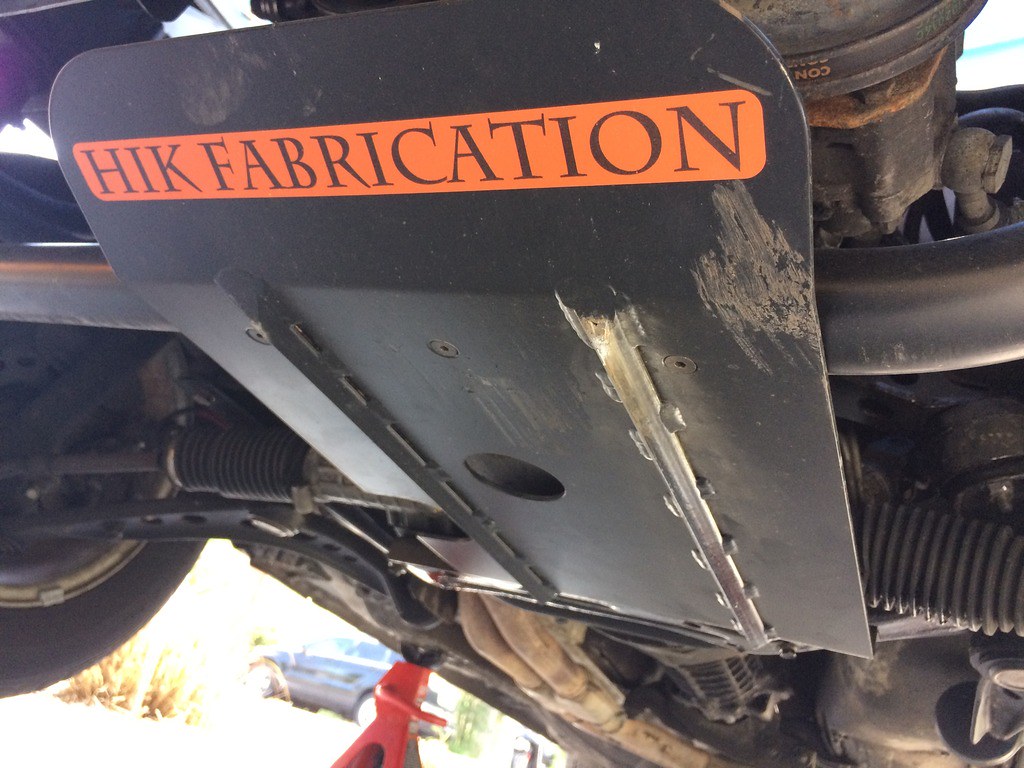
Severe Duty Skidplate Install:
Onto the most exciting update (for me) - I had my HIK Fabrication "Severe Duty" skid plate installed over the weekend. I'm thrilled with the installation and the build quality of the plate. Many others have said this, but if you're serious about protecting your M20 oil pan, spend the extra cash for this plate. I smashed through my race skids skid plate like it was paper. The HIK fab plate will set your airbag off (if you have one) before you smash an oil pan, as other members have proved.
My buddy owns McGinnis Racing in Taylor, Texas and he hooked me up on the install. He specializes in custom fabrication, drift cars, LS swaps, etc. and really goes above and beyond with his work. Very happy to give him some business.
McGinnis Racing:

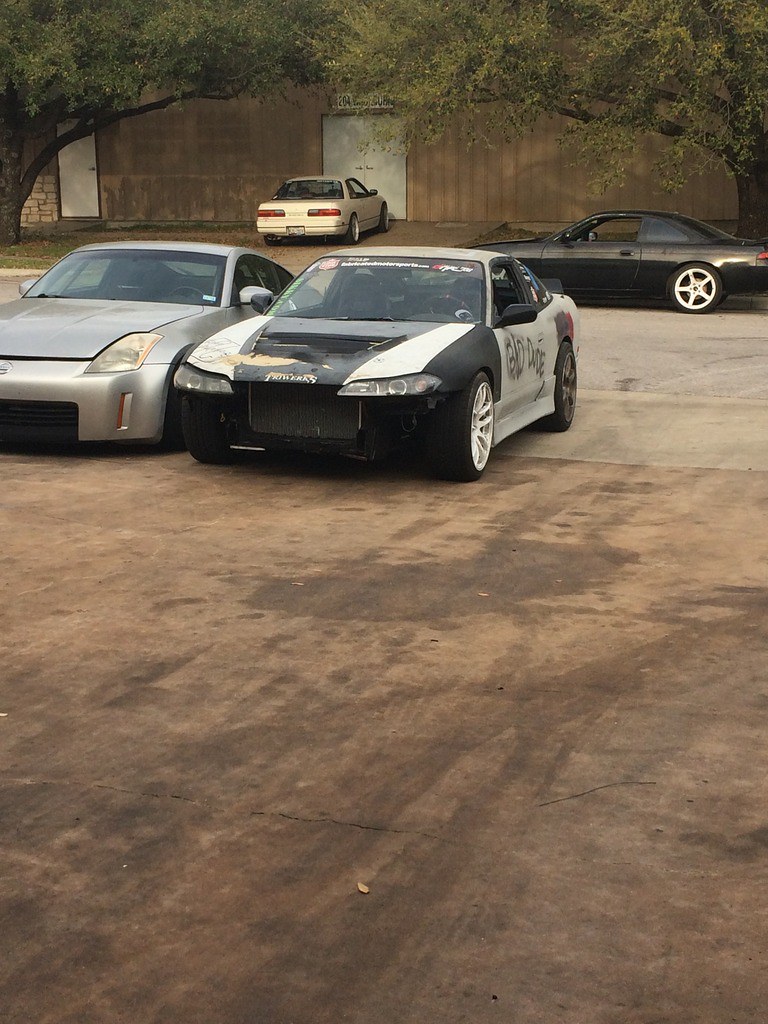
Drift cars errrywhere:
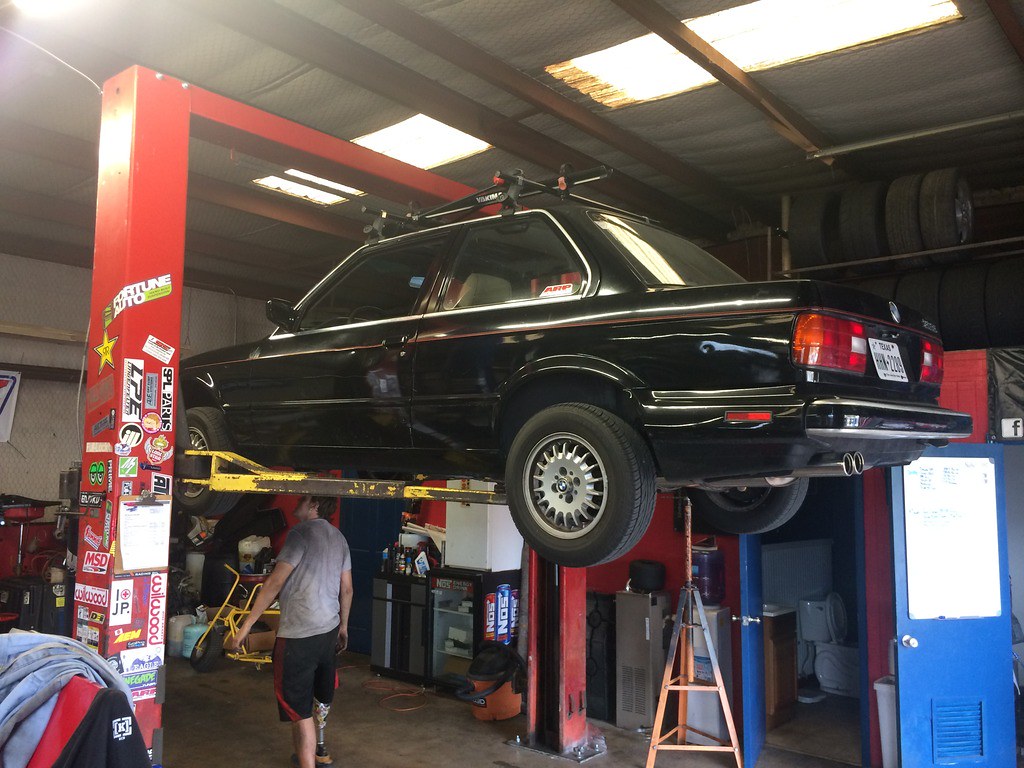
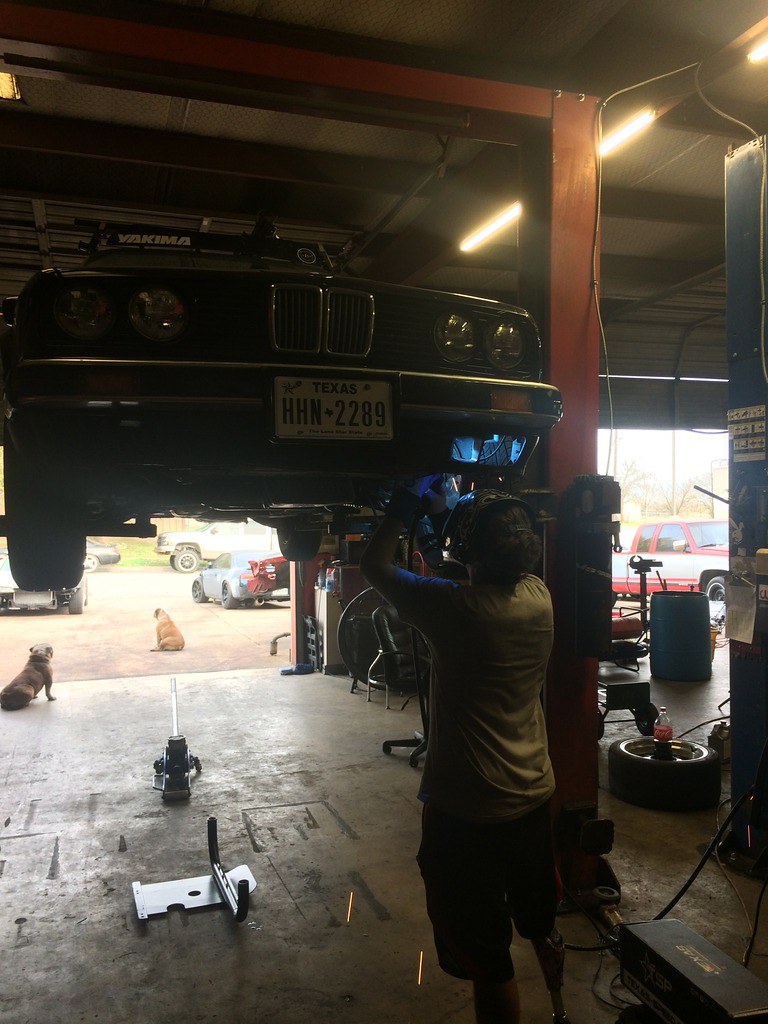
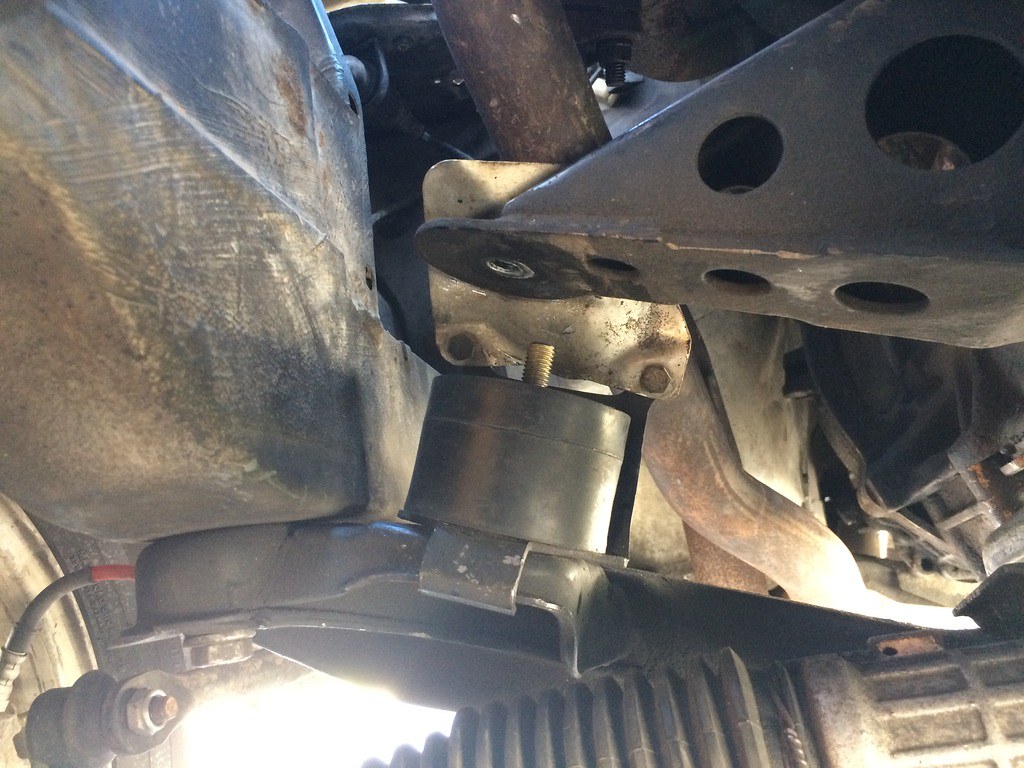
It was awesome to have my car up on a lift for the first time, did a bit of inspection while I had the chance:
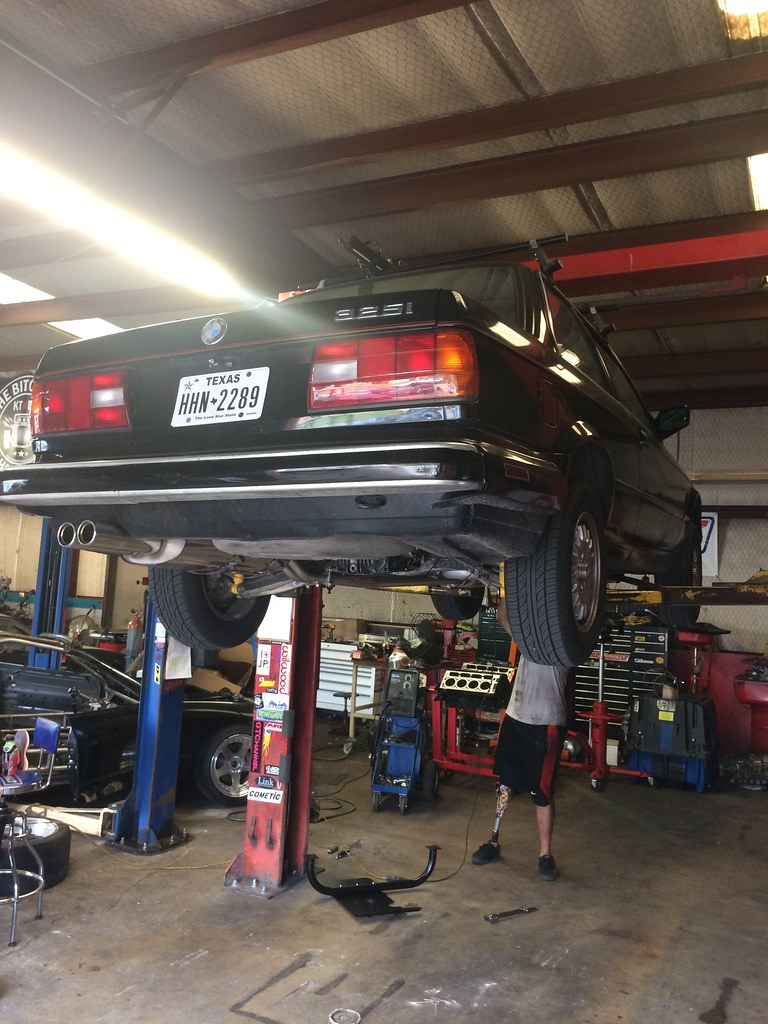
I've put about 500 miles on the diff and new axles, no leaks and everything looked tight

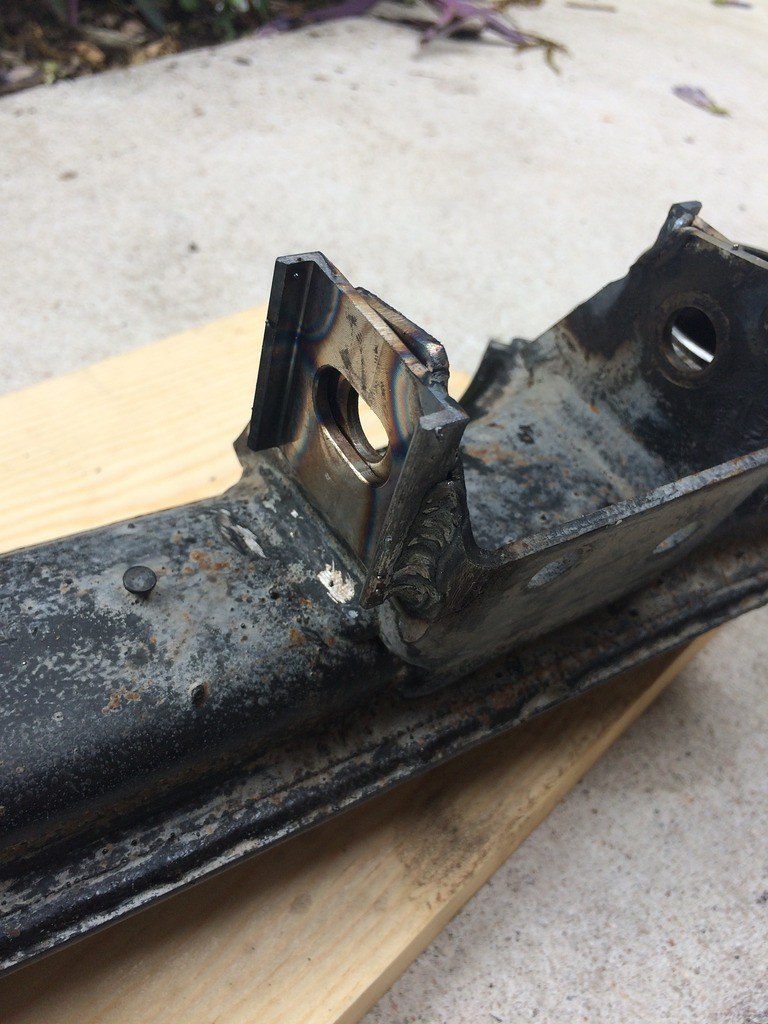
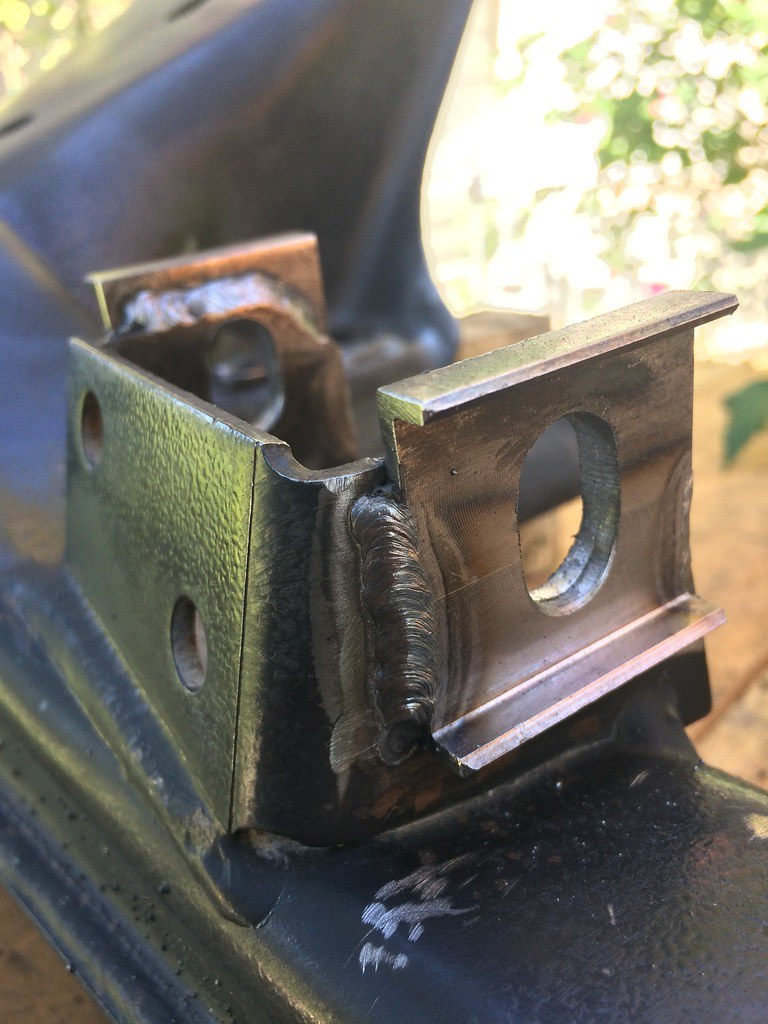
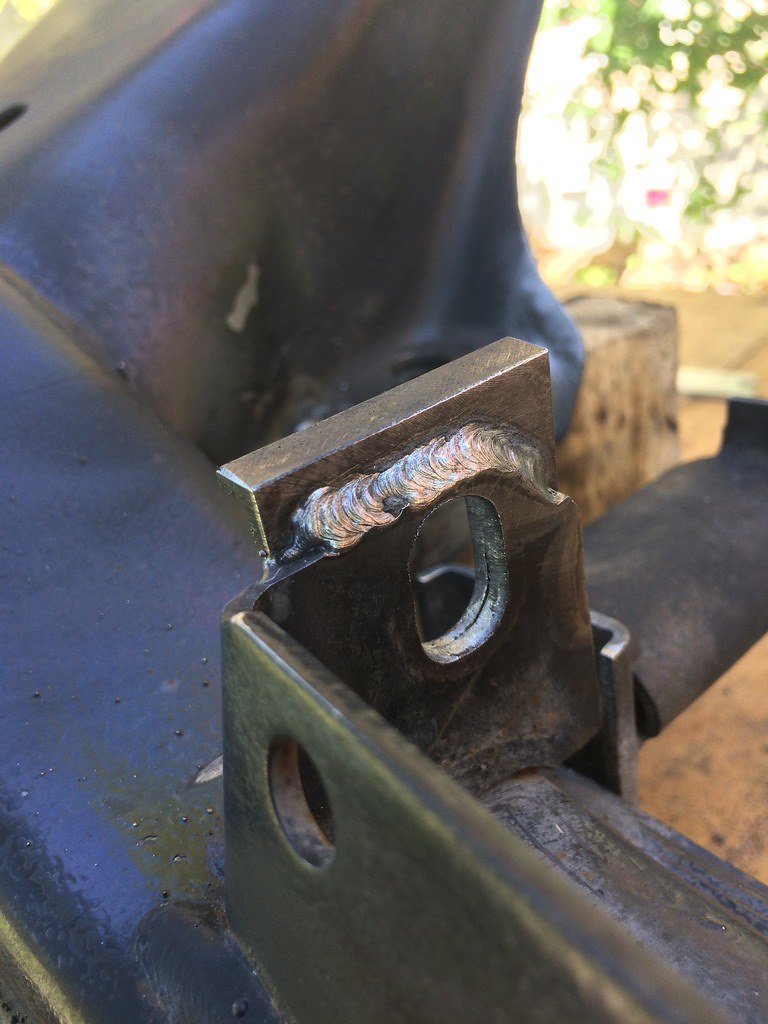
To get the plate installed, first we removed the undercoating and paint from the frame and skid plate "feet." Then the plate was temporarily installed to line up the feet and tack weld them in place:
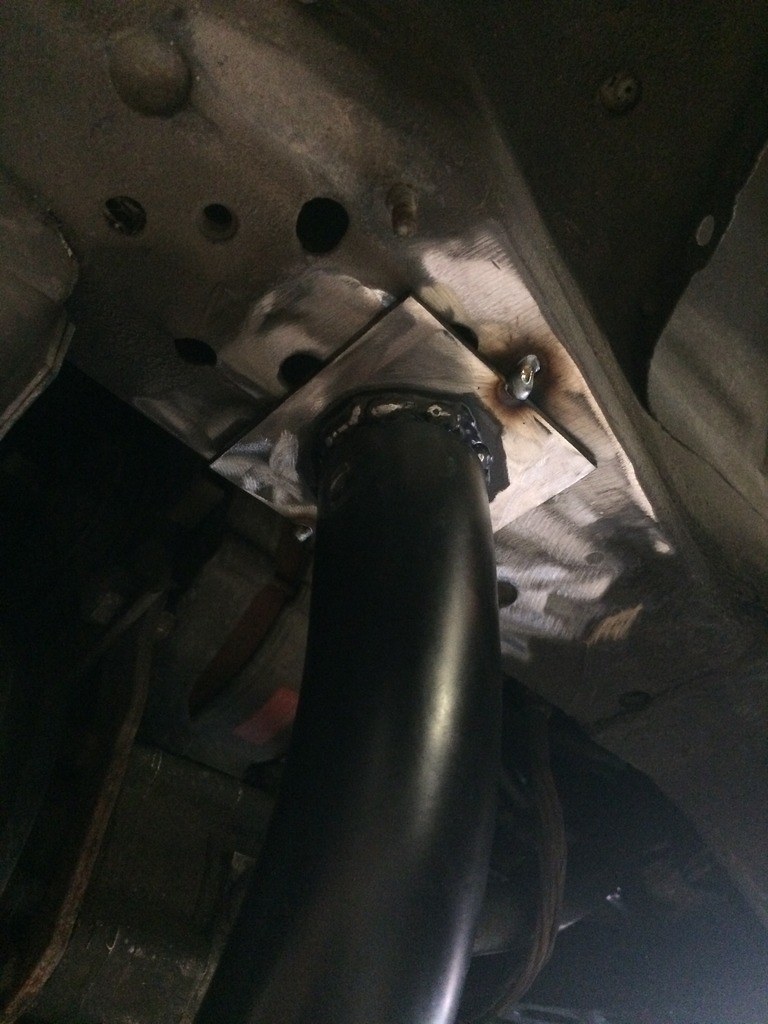
While the shop dogs stood watch, the plate was then removed and the feet were left tacked so that there was enough clearance to finish the welds:
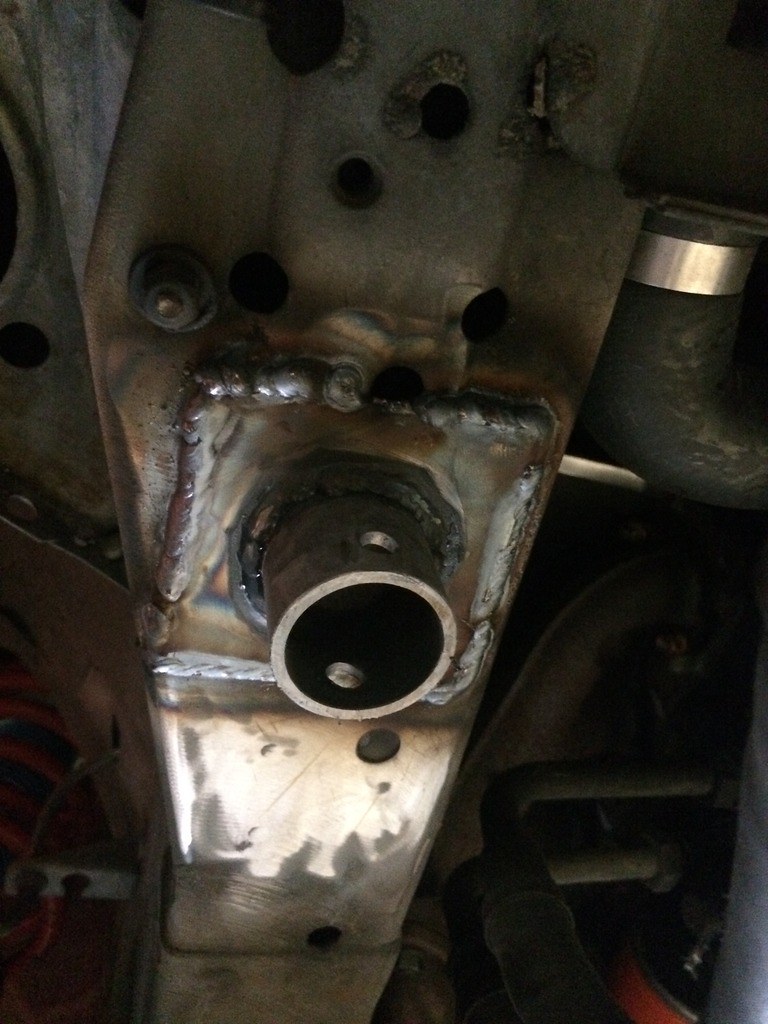
Finally, I threw a coat of paint over the fresh welds and reinstalled the skid plate. Peace of mind at last... :pimp:
With the plate installed I've gone on a couple back country spirited drives and nicked the plate once, so looks like I'm already putting it to good use :devil:
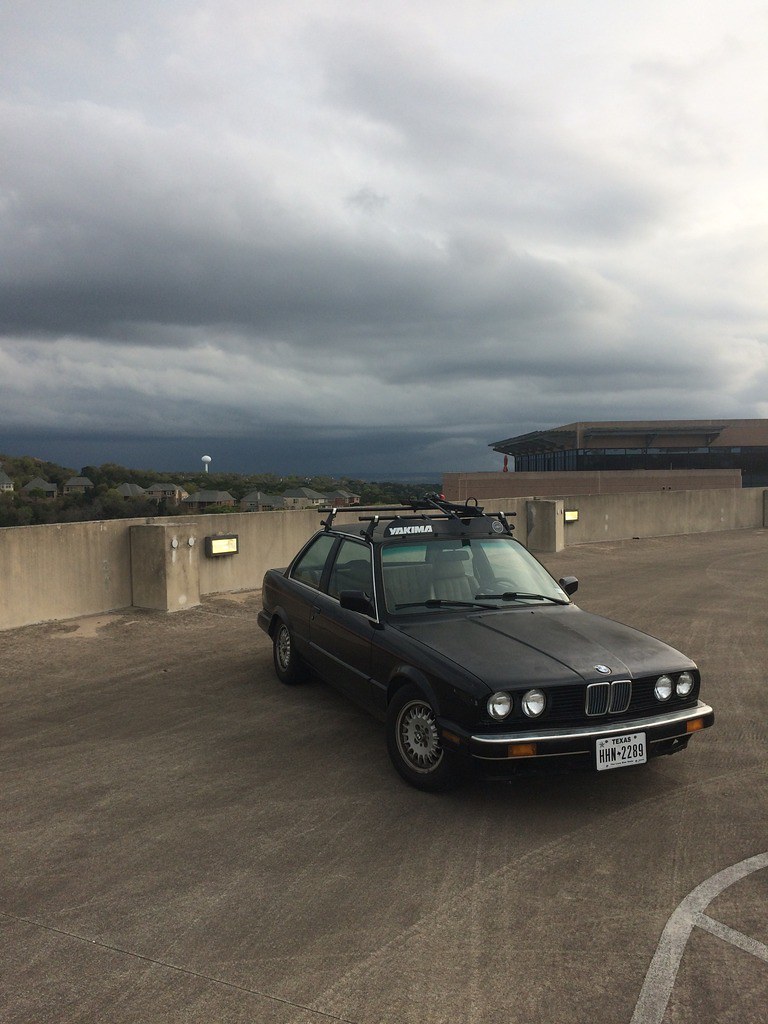
Calm before the storm:
Car is getting better and better every day. Next on the to do list:- Install a better set of engine mounts
- New brake pads and rotors
- Send injectors out for flow testing and/or order a new fuel pressure regulator (cold start problems)
- Address clunk on rear passenger side
- Figure out the squeeking in the rear suspension, the car sounds like I have a dozen mice running around the trunk.
Starting to see the light at the end of the tunnel... thinking I'll be able to attend my first autocross soon!Comment
-
Forever Wrenching
Another small update, been wrenching non-stop lately in an attempt to solidify the car before the Texas heat sets in.
So I learned my lesson regarding engine mounts... buy OEM. I purchased some cheap Meyle units and they added a very noticeable vibration at around 1500-2000rpms, cruised around like this for a month or two until it drove me insane, especially since the vibration set in at cruising speed. Fortunately, Kid8 hooked up me with some OEM E24 engine mounts that provided a bit more stiffness, but the quality of OEM. They bolt right up, they just need to have a pin ground off on one side.
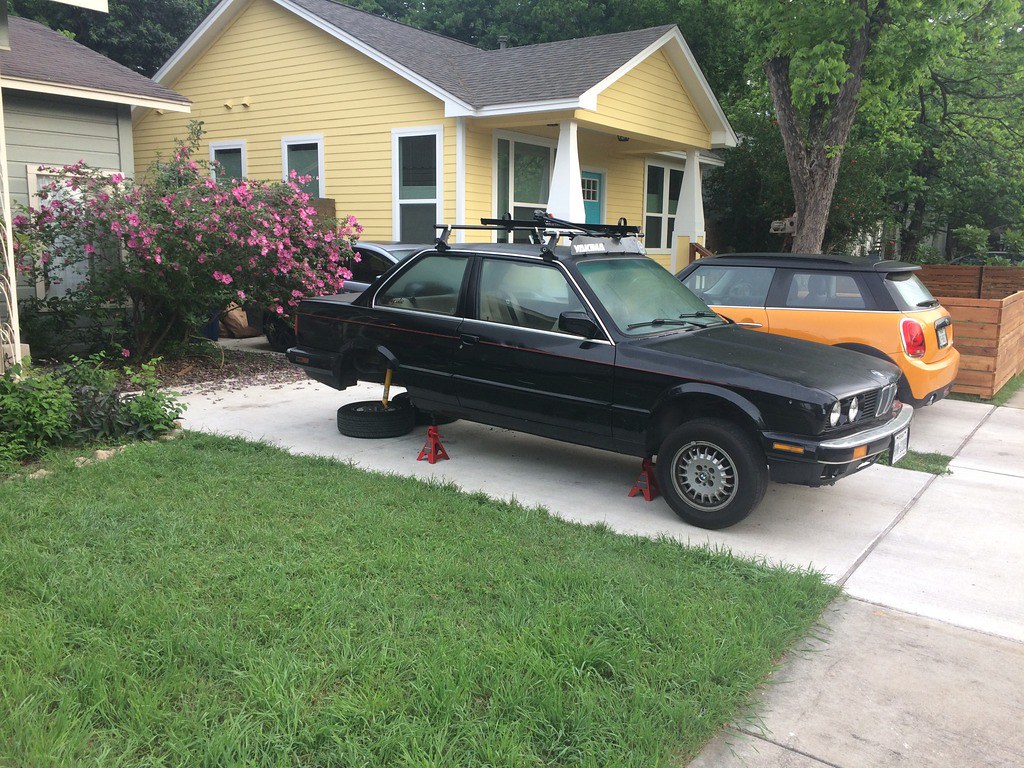
Jacking the car up is pretty convenient now with the jack point up front:

Been borrowing this engine support bar for way too long... but I may just buy one for myself. Love this thing:

Side by side comparison of the Meyle units vs E24 engine mounts, you can see where the pin has been ground off on the E24 mounts:

Lifted the engine 5" or so to get the mounts in. I loosened the transmission mounting bracket and tapped it along the track while I lifted the engine.
Passenger side:
Drivers side:

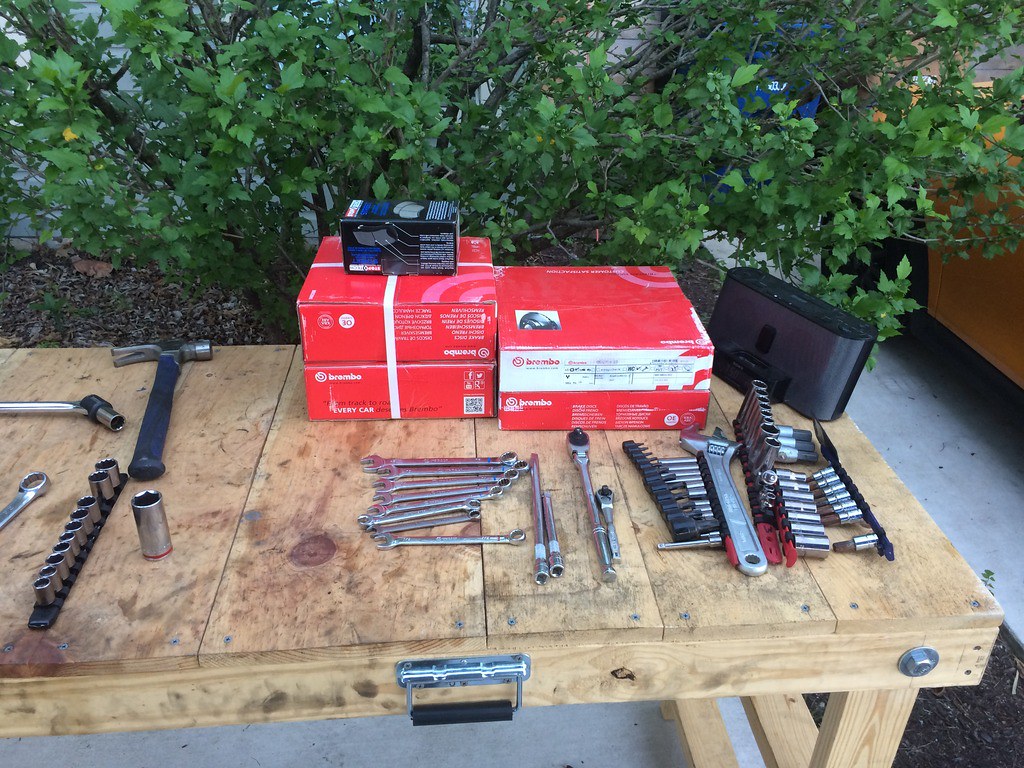
Next it was time for some MUCH needed maintenance. Last time I wrenched with Kid8 he noticed one of my rear rotors was cracked. No bueno. So I bought his used Stoptech blank rotors and pads, along with Brembo blanks and a fresh set of stoptech pads for the rear. I wanted to go with Brembo blanks and hawk pads all around, but funds have been tight lately. This is still a big upgrade over the 10 year old rotors / pads that the car originally came with.
Goodies:
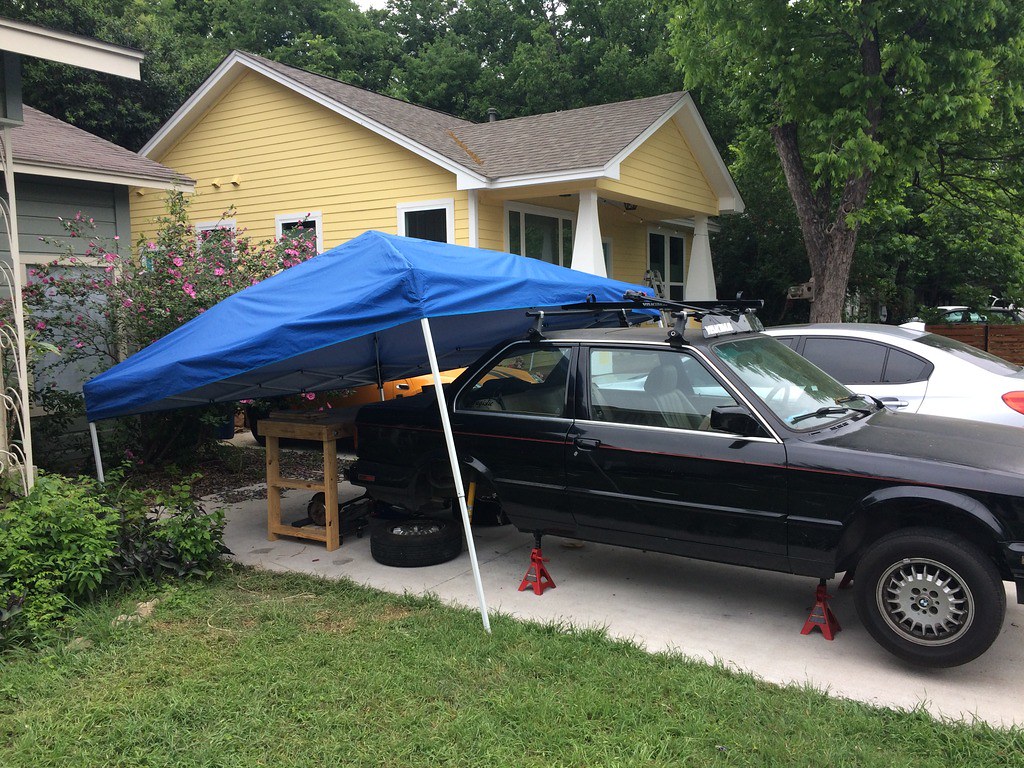
The usual setup, been making quiet a name for myself around the neighborhood... the kid who is forever wrenching on his seemingly always broken BMW. Been asked, "How did you learn to do all this?" a lot lately

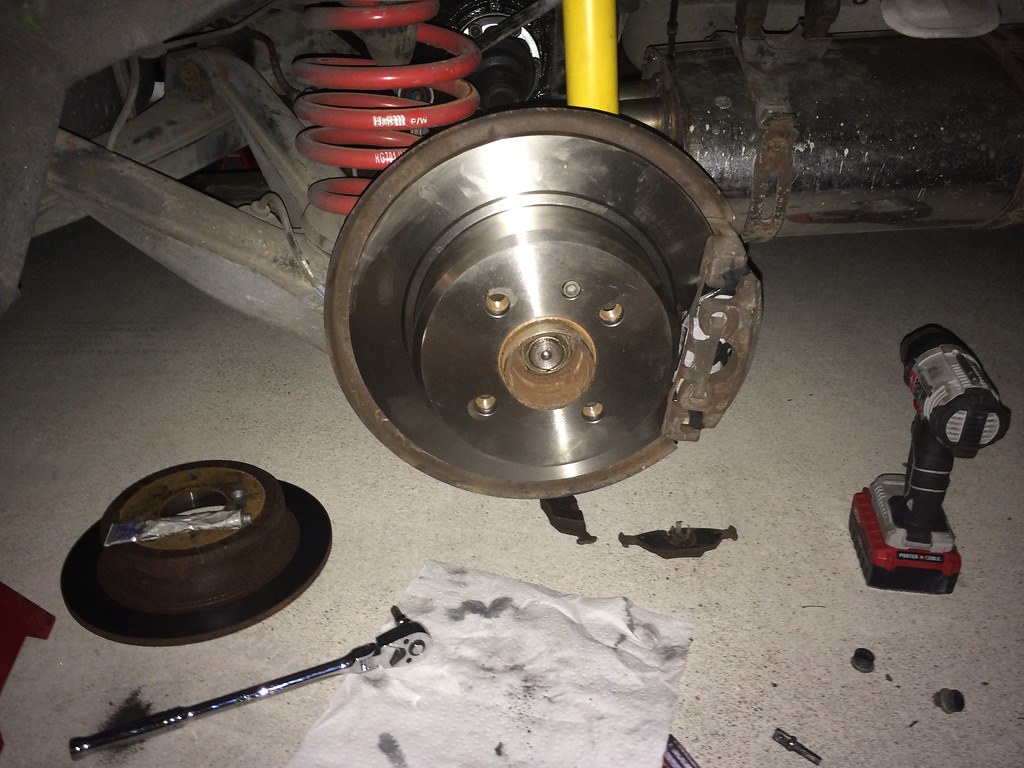
Yikes :puppy:

Doh... note to self: My ebrake shoes are awful...

Installed, got dark and I sped through the rest of it, so no pics. Just your standard brake job:
Next up was eliminating the mice in my trunk. I purchased some Ireland engineering poly rear shock mounts to remedy this. I briefly considered E46 mounts and the bimmerworld poly mounts, but I liked how the IE poly mounts had a reinforcement bracket up top. Bit more expensive, but decided the added rigidity was worth it.
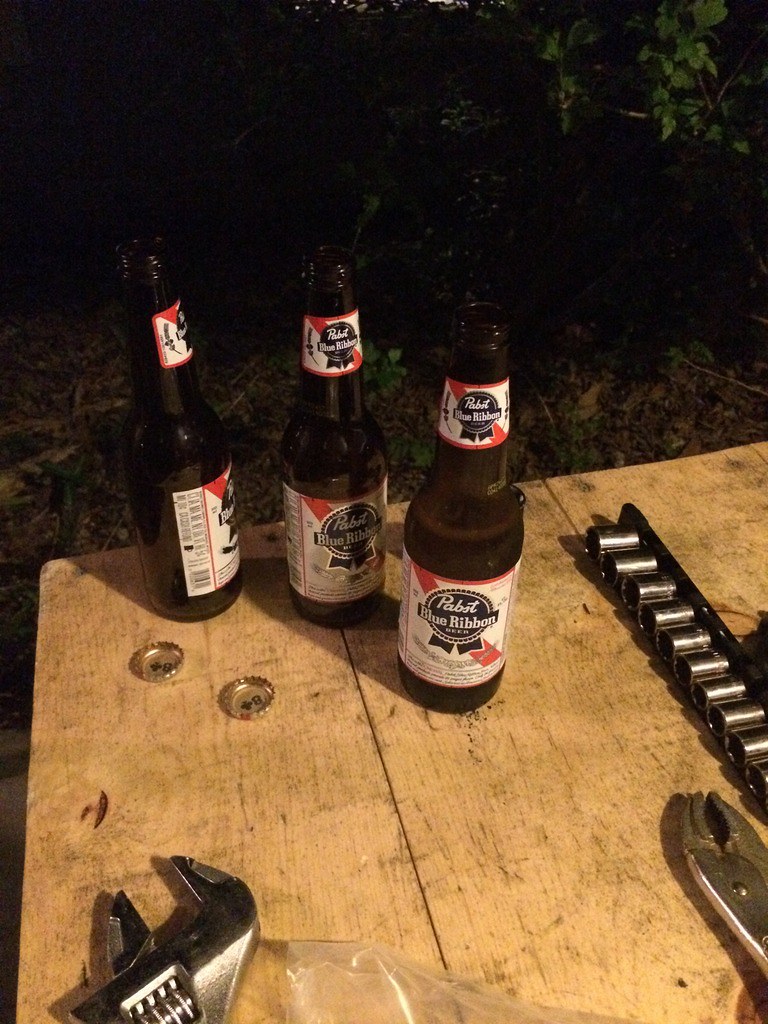
Late night wrenching session
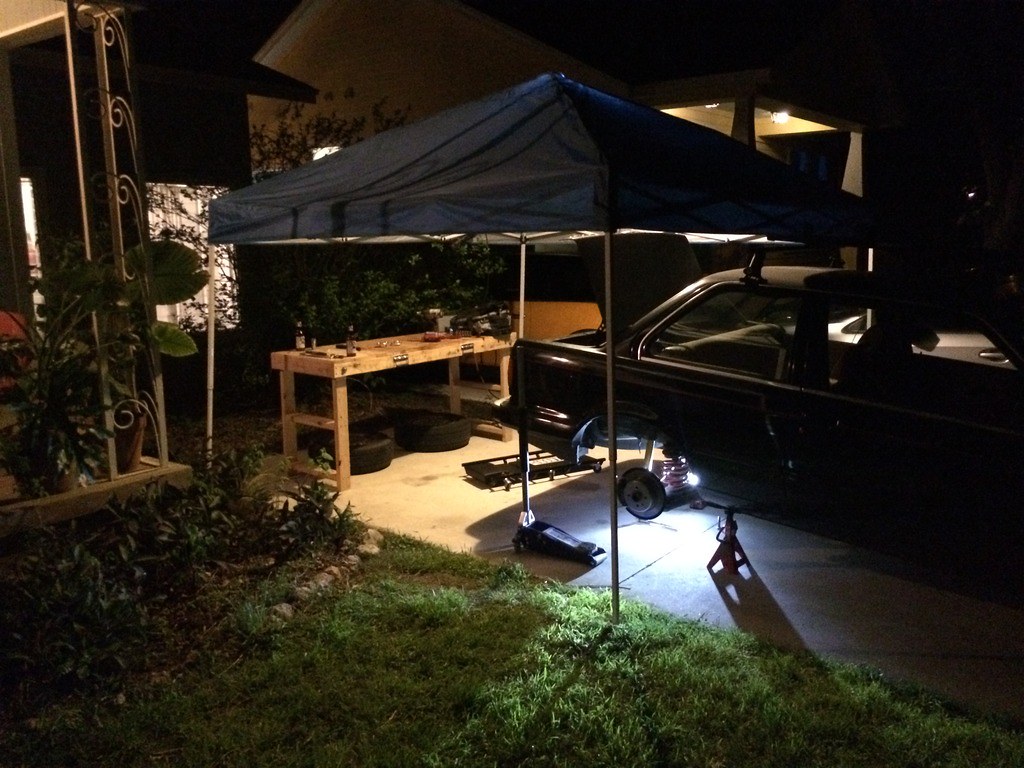
Say what you want about PBR... but they make for some damn good wrenching beers.
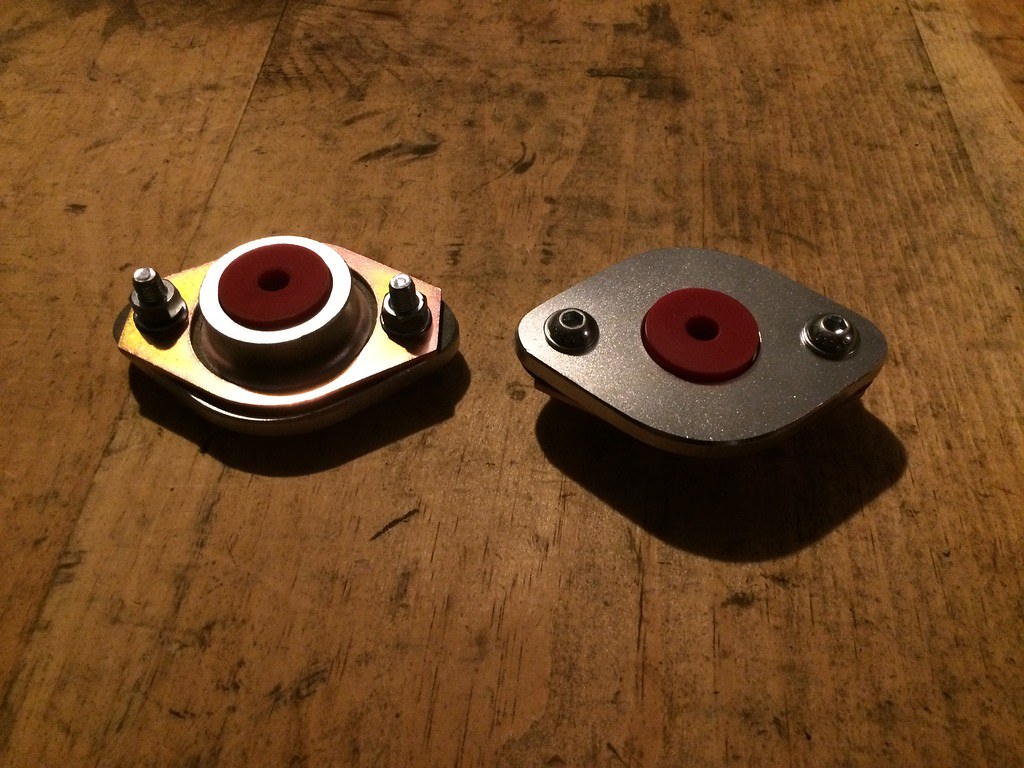
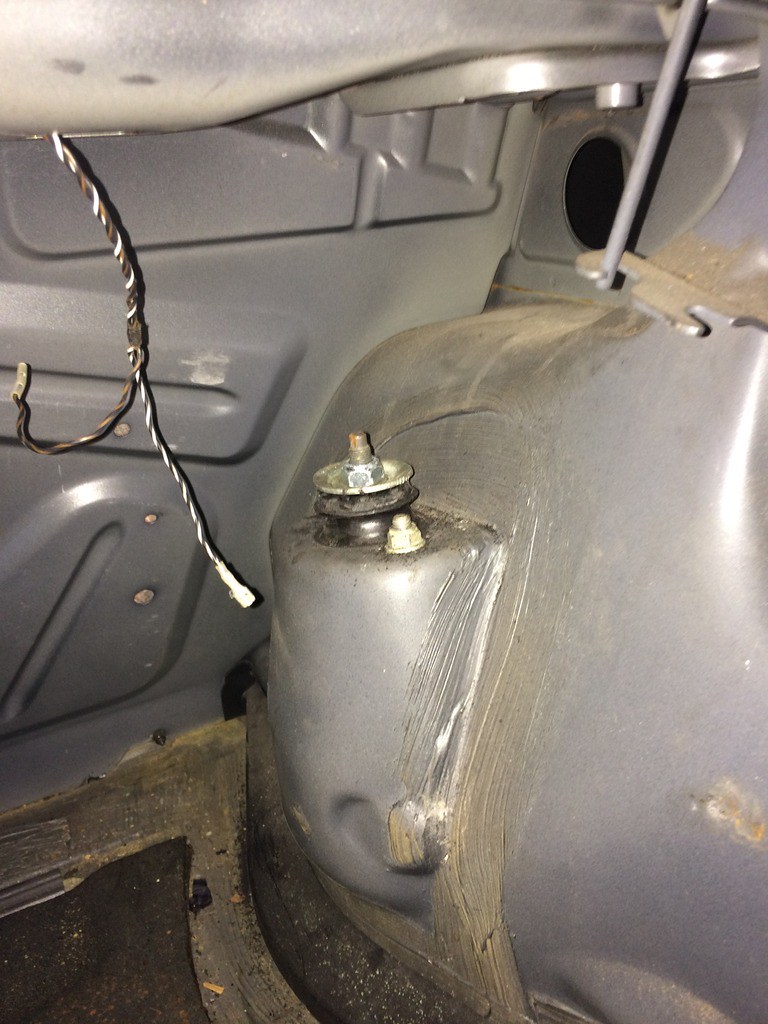
Old mount, hard to see but notice all the rubber bits from the mount deteriorating:
Tightened up on my Bilsteins:

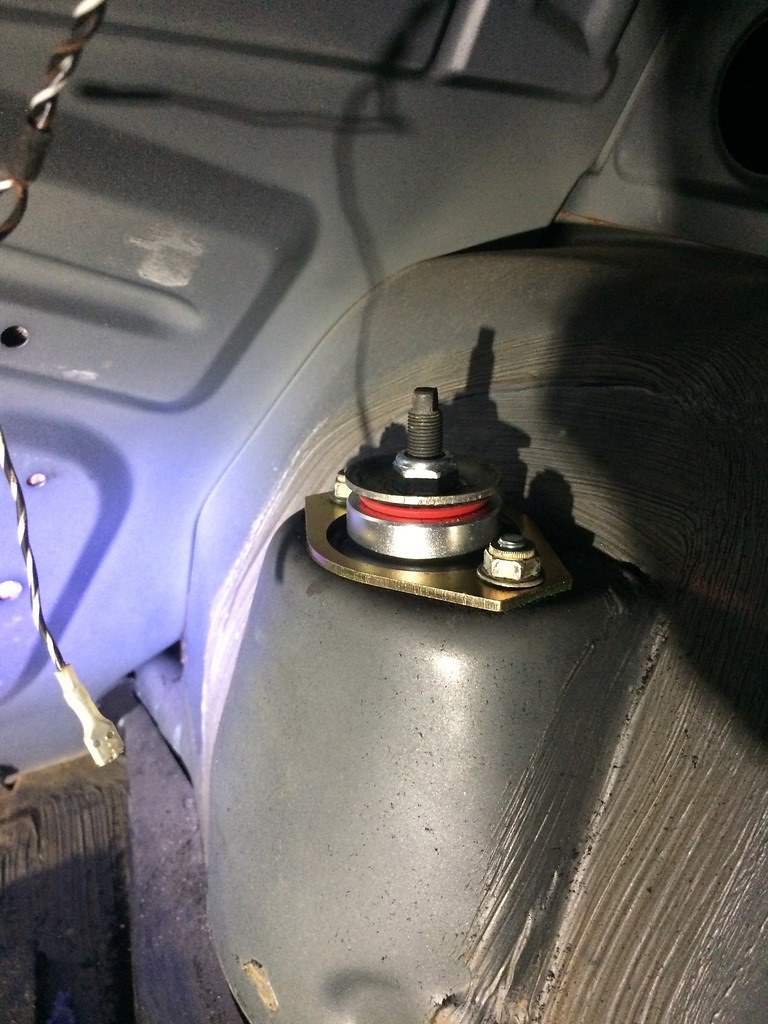
New:
That's not a shadow... that's the shock mount pin working its way out. It was only a matter of time before my shock blew through the top of this one...

Donzo. Finally, no more squeaky rear-end ;)

Took the car out for a celebratory rip and some donuts in the dirt... happy to see the skidplate's been doing werk :devil:
Can't believe "creature comforts" are next on my To Do list...Last edited by zwill23; 07-18-2017, 10:40 AM.Comment
-
You've been busy. Nice work man, lets get some tacos!Comment
-
Great progress! I'm going to check my battery tray this weekend while I'm under the hood. Living in the PNW means everything gets wet if it can...Comment
-
We eat tacos too much... I think we need to change it up ;)
Thanks! And seriously... when I was there it rained from the minute I got off the plane, until the minute I got back on. The E30's up there must turn into mobile swimming pools with all the damn leaks these cars have.
Comment
-
My Rearend and Sloppy Knob
Whelp, last post I claimed I would be moving onto "creature comforts" next... I lied. I'm going to blame this solely on not having a radio because puttering around hearing clunk.....clunk..clunk, was slowly driving me insane. So of course this meant the subframe needed to be dropped, which gave me a chance to address several other problems the car had. Here is what I planned to accomplish:
To Do List:- Add camber and toe adjustment to the subframe
- Reinforce subframe
- Reinforce sway bar mounts
- Replace all subframe bushings
- Replace shift shaft seal
- Replace shifter bushings and boot
- Install DSSR
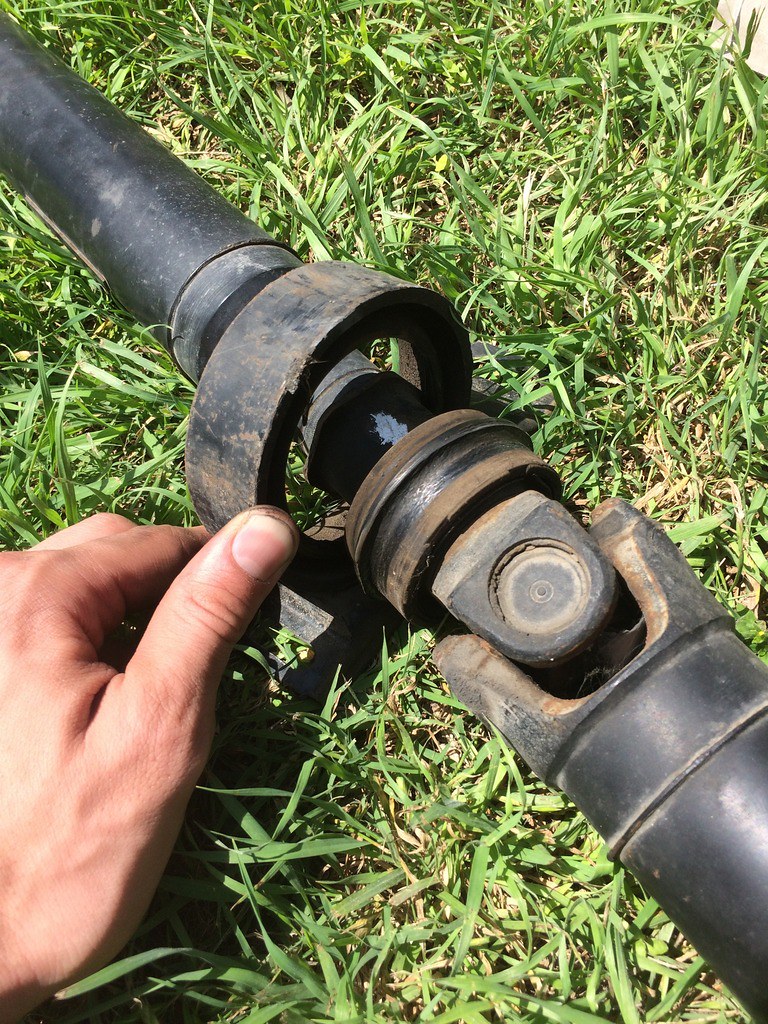
- Install new drive shaft center support bearing (discovered during job)
- Repair driver seat tilt
- Replace tail light seals
This was a fairly long list to be honest, especially for driveway wrenching, but I made a two week schedule and grinded through it. Enjoy the photo dump!
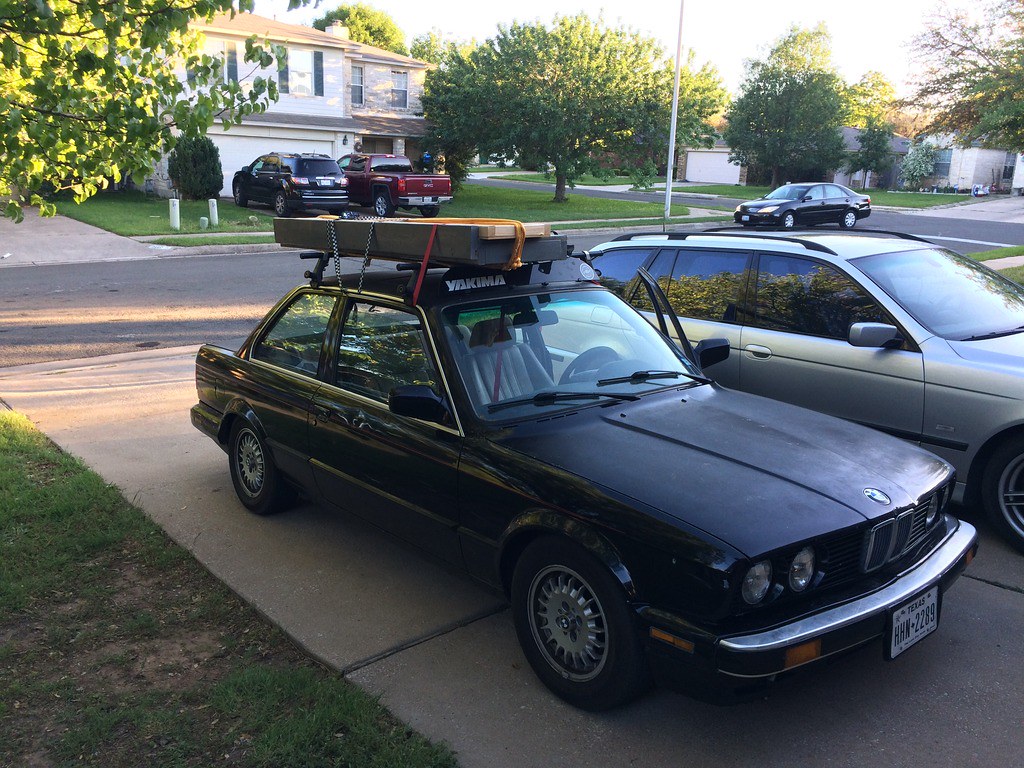
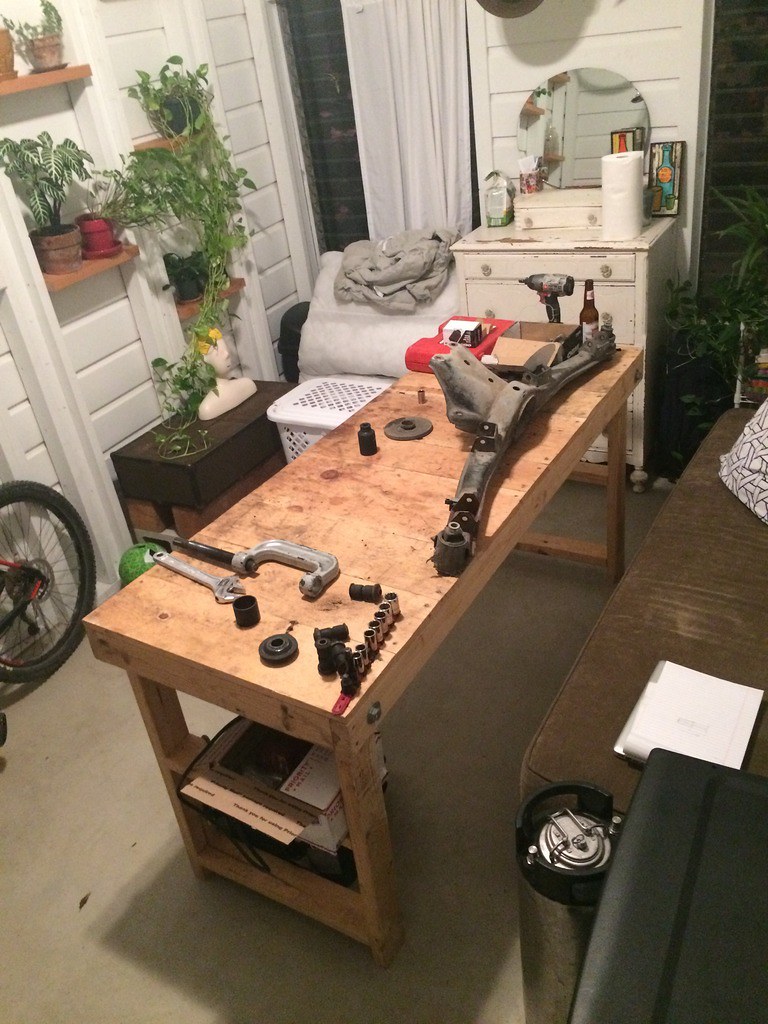
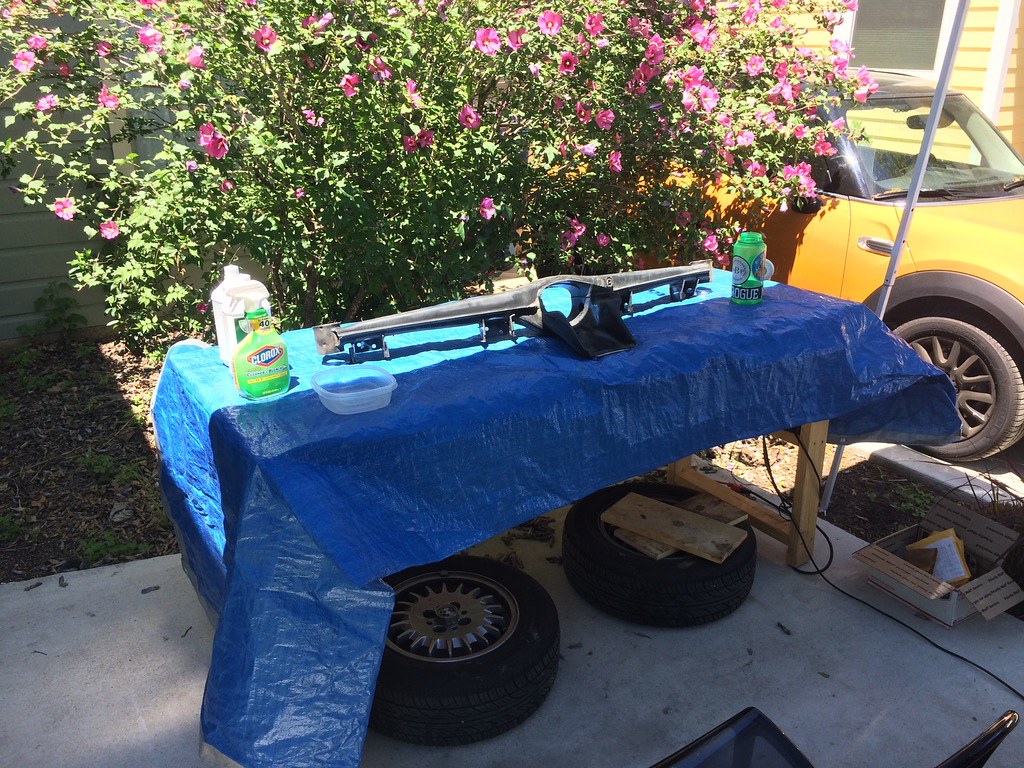
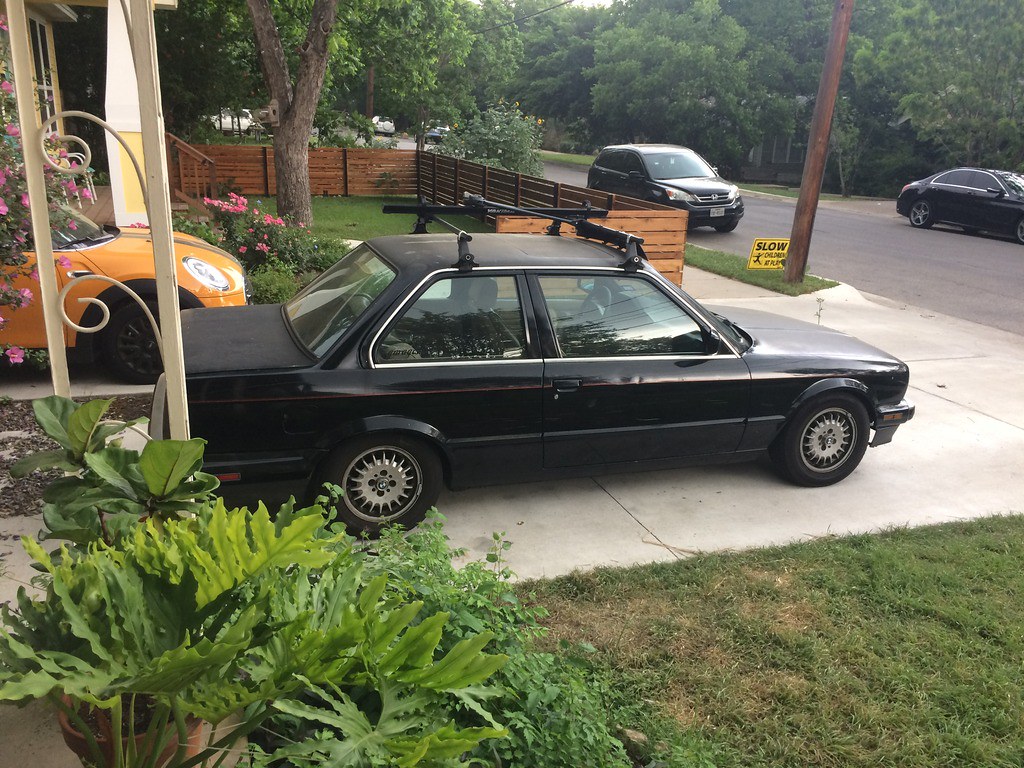
But first... more roofrack pics! Because I love using this thing as a work horse.
Workbench Transporter:
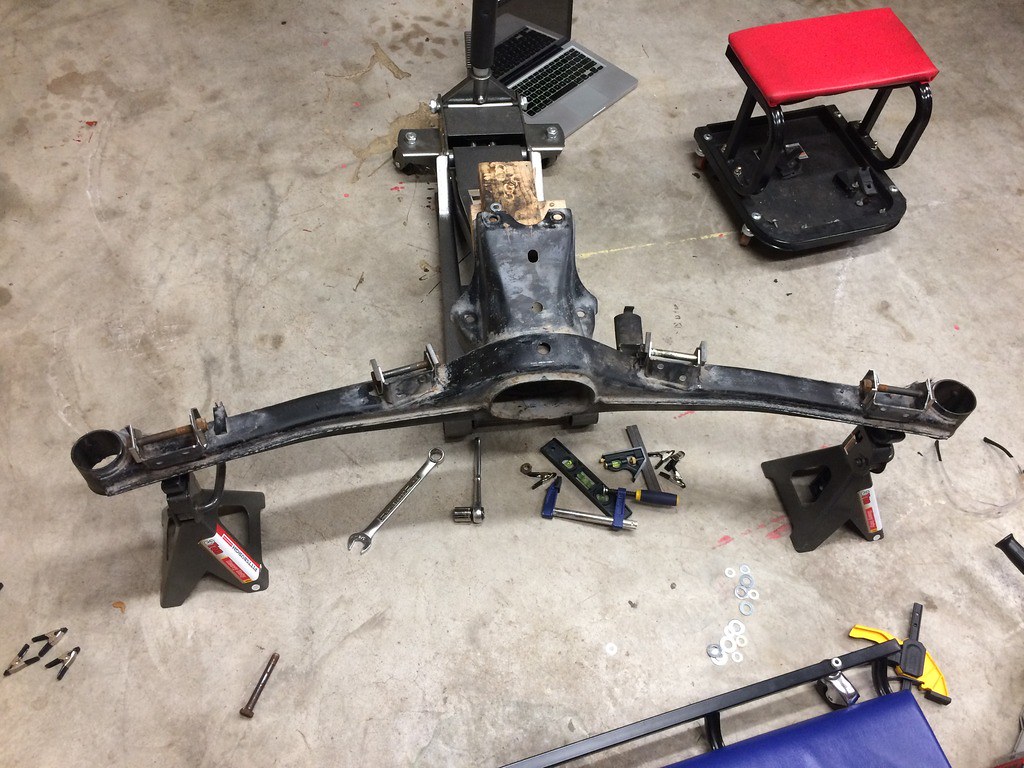
Reinforcing Rear Subframe and Adding Camber / Toe Adjustment:
Getting ready to drop the subframe, gotta stay organized ;)

I didn't take many pictures of the actual subframe removal, I was in the zone for most of job but off the top of my head, here was my procedure to drop the subframe:
- Remove exhaust system
- Remove driveshaft
- Unbolt shocks from trailing arms
- Disassemble center console and disconnect the ebrake lines and yank them through from the underside of the car
- Disconnect sway bar links from trailing arms
- Disconnect brake lines (place something on the brake pedal to mitigate the amount of brake fluid loss)
- Disconnect speed sensor from diff
- Disconnect brake wear sensors
- Unbolt subframe bolts, and remove allen-head bolts to remove the subframe bushing tabs
I'm sure this can be done without completely unbolting the entire exhaust system and driveshaft, but it made sense for me to remove it all at once since I was also going to be addressing my sloppy shifter. Regardless, completely removing both made it much easier to get the subframe out of the car.
I would also like to say that I feel fortunate to have an E30 that lived in Texas its whole life... the subframe practically fell out of the car as soon as the subframe nuts were removed. Bashing the bolts out from the bottom wasn't necessary.


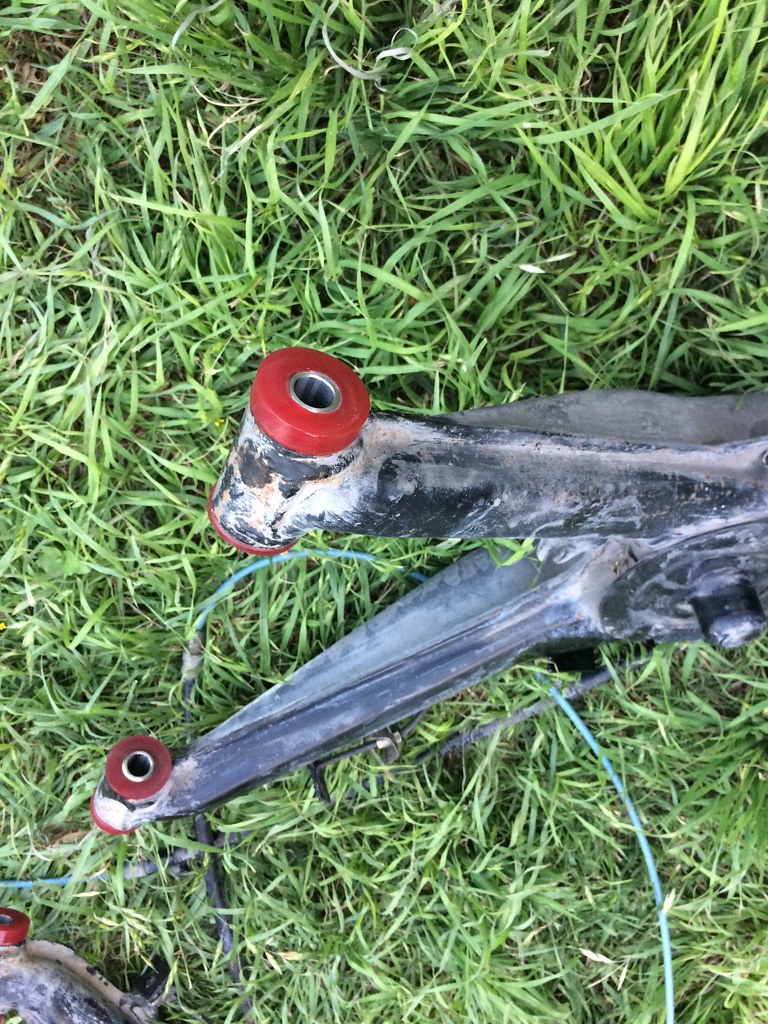
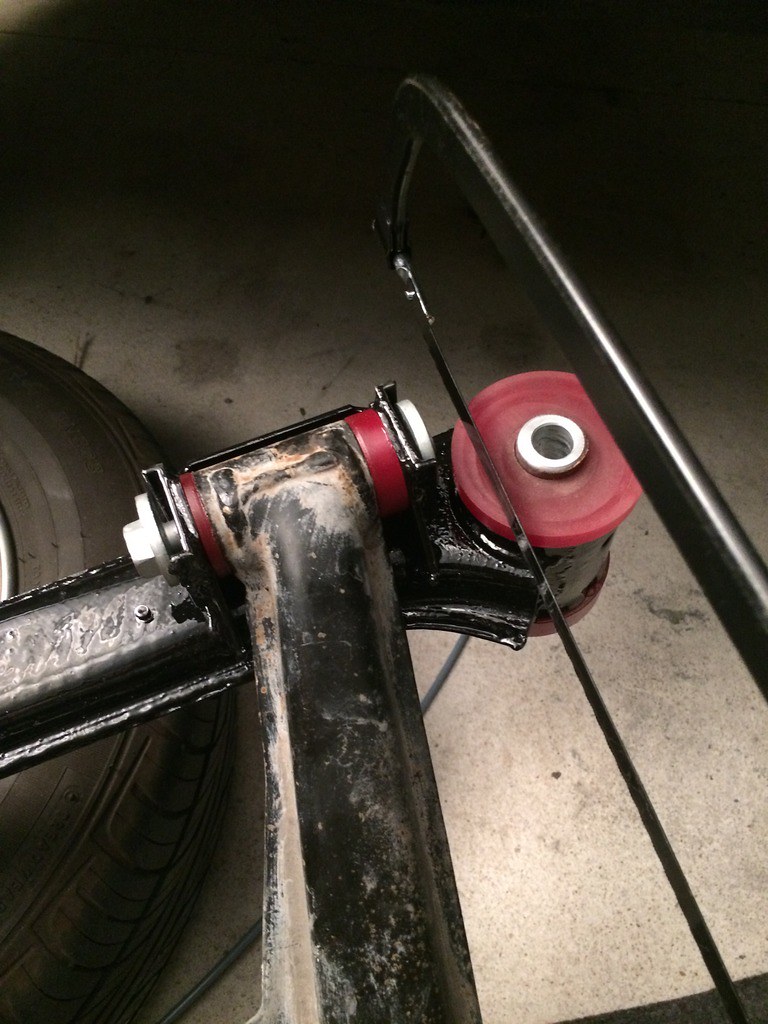
The state of my bushings explains the clunking... the inner sleeve of the bushing nearly pulled itself out:
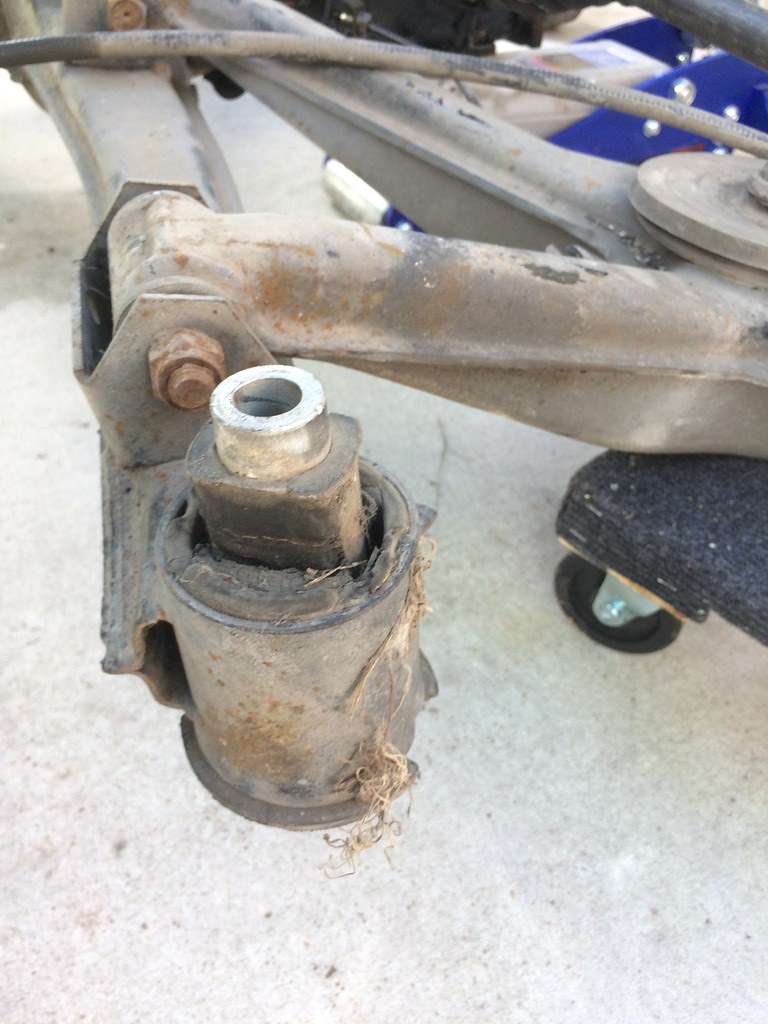
Upon disassembly, I noticed the trailing arm bolts were covered in red Texas dirt... this hints a bit at the cars past which I'll get to at the end of the post.

Impact pulled everything apart no problem:

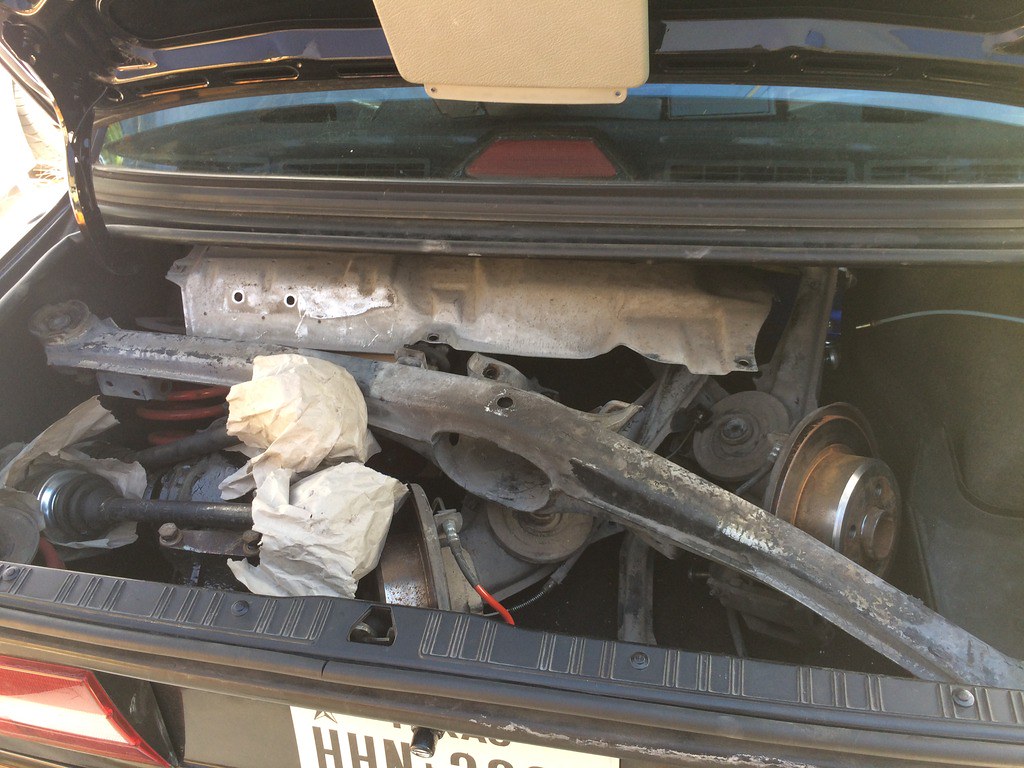
Called it a day, and stuffed the entire subframe assembly in the trunk. Blows my mind how much you can squeeze in there.
Oh, and also found out my center support bearing was toast:
Car lookin' like an amputee:
We had some storms coming the next day, so I moved my workbench inside to remove the bushings:
Rented a bearing press kit from autozone and a 36mm socket to push the trailing arm bushings out:
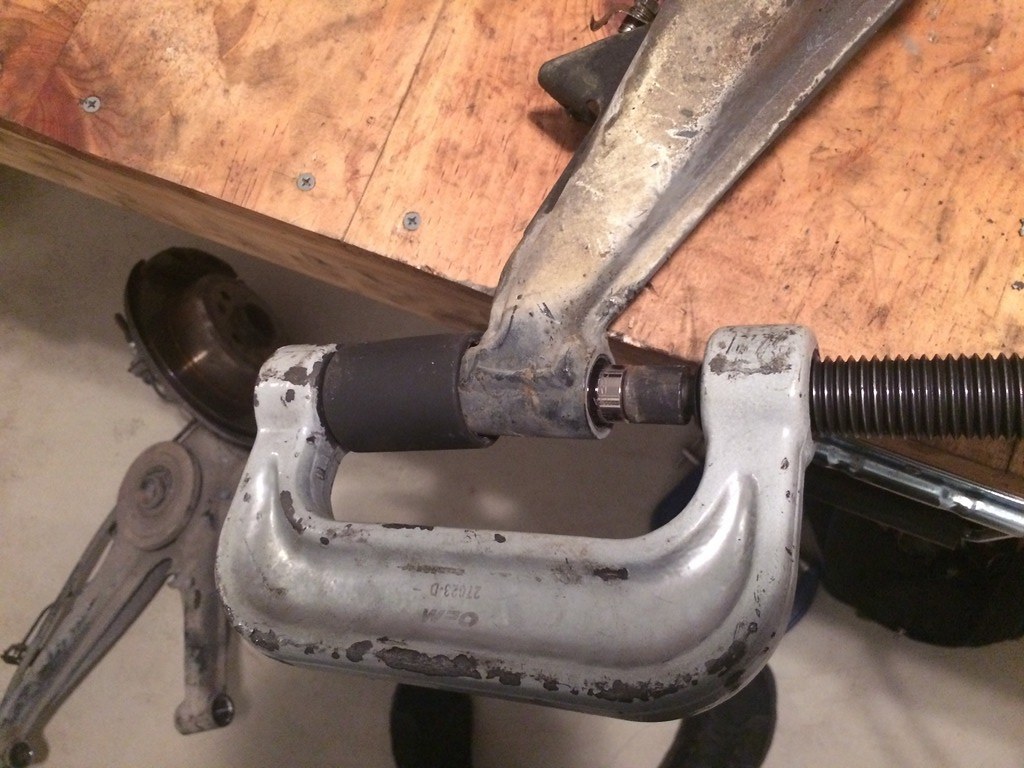
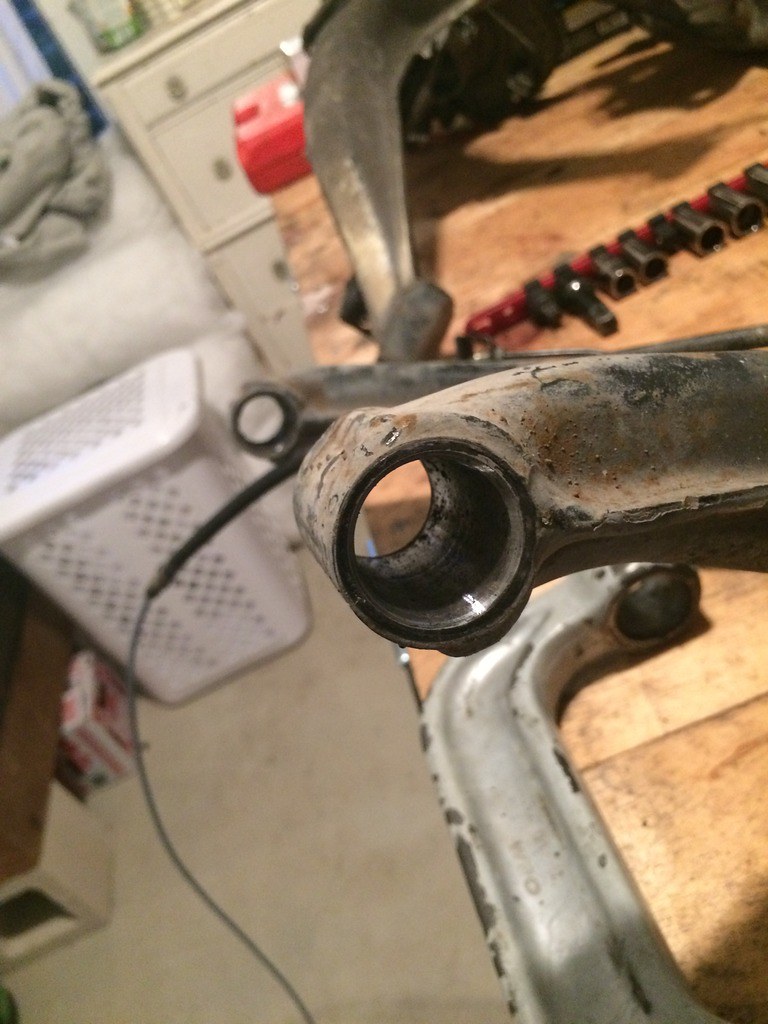
Next day, I moved my bench back outside and got started on the subframe bushings. I fiddled with trying to press these out for a while until I decided to hit it with some heat. I was a bit apprehensive about burning them out because I didn't want to clean up the mess, so I only hit the outside of the subframe with my butane torch. Once the bushing started to crackle and smoke, I reused the 36mm socket and a mallet to whack the bushing out.
That all seemed like a good idea... the flower pot filled with water to catch the bushing, maybe not so much.
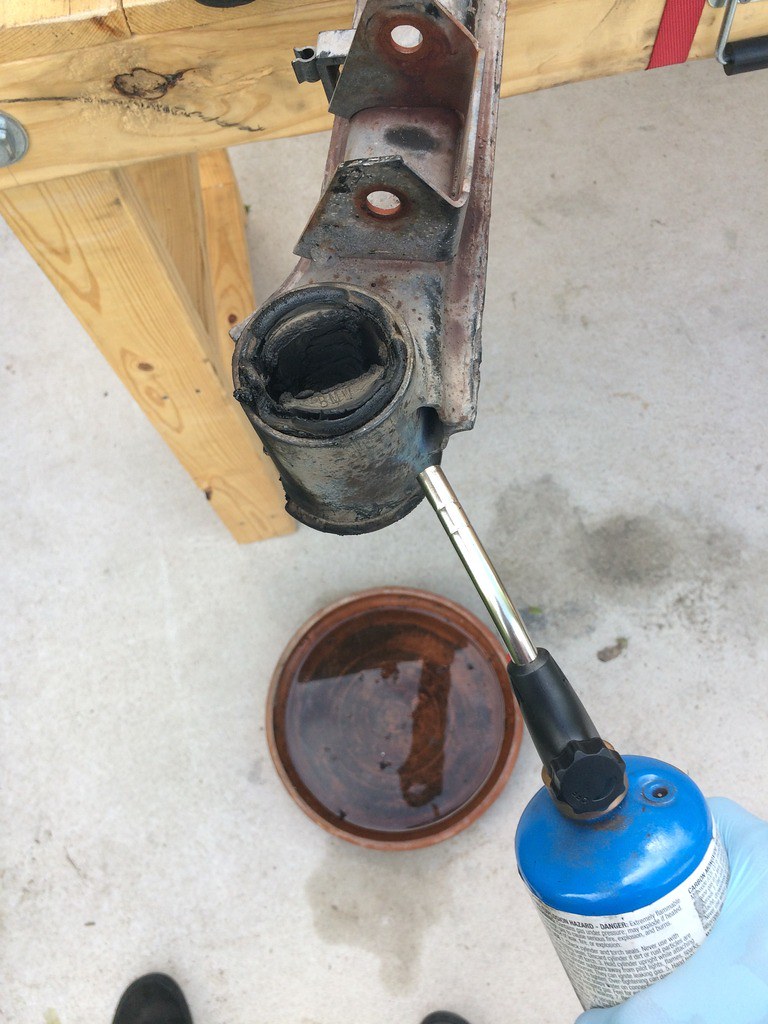
Oops...

But, overall it came out pretty damn clean:

Once the bushings were out, I moved on to aligning the camber and toe plates. I probably spent way more time than I needed to trying to make sure they were lined up properly, but couldn't really afford to fuck this one up so I say time well spent.
First I ground the paint off the tabs for welding them up:

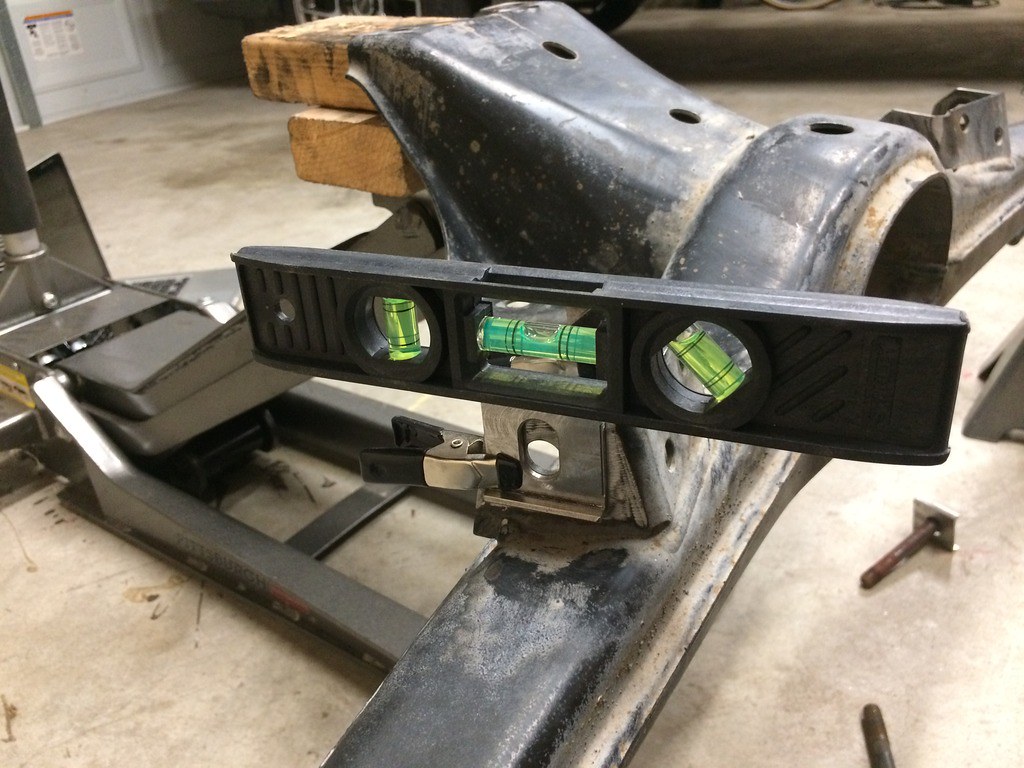
Then I made sure the subframe was level at the top of the bushing, and parallel to the trailing arm attachment points:

With the help of some clips, I made sure the toe plates were level and I centered the plate as best I could measuring roughly ~5mm from the edge of the subframe through hole to the edge of the toe plate slot on either side:
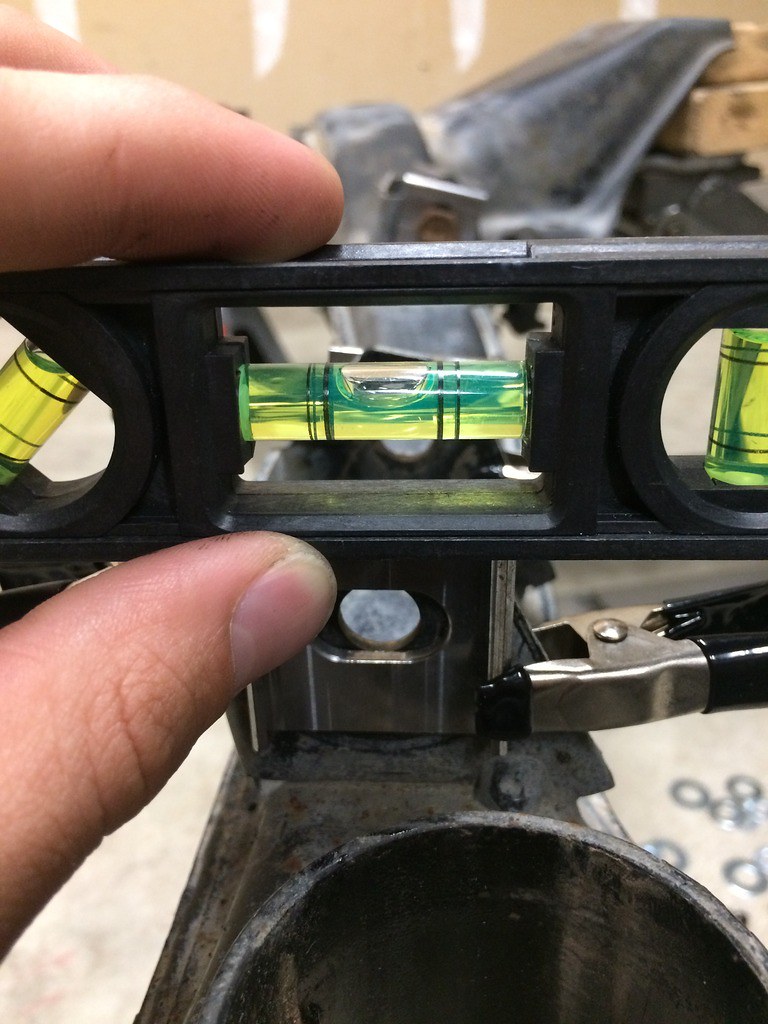
Similarly, I made sure the camber plates were level and positioned at the bottom most edge of the slot with the subframe tab through hole:
I wasn't able to have my subframe welded up until the weekend, so I reused my trailing arm attachment bolts to hold the position of the plates until they could be tacked in place:

All lined up, note that the inner most tabs are used to adjust camber, and outer most tabs adjust toe:
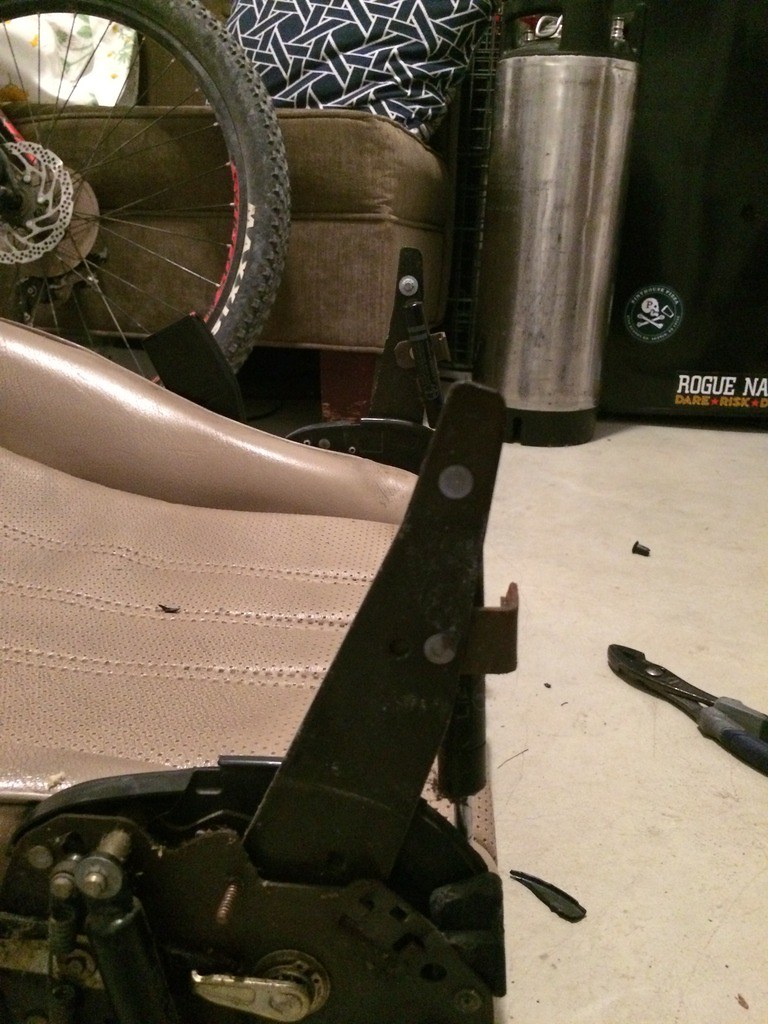
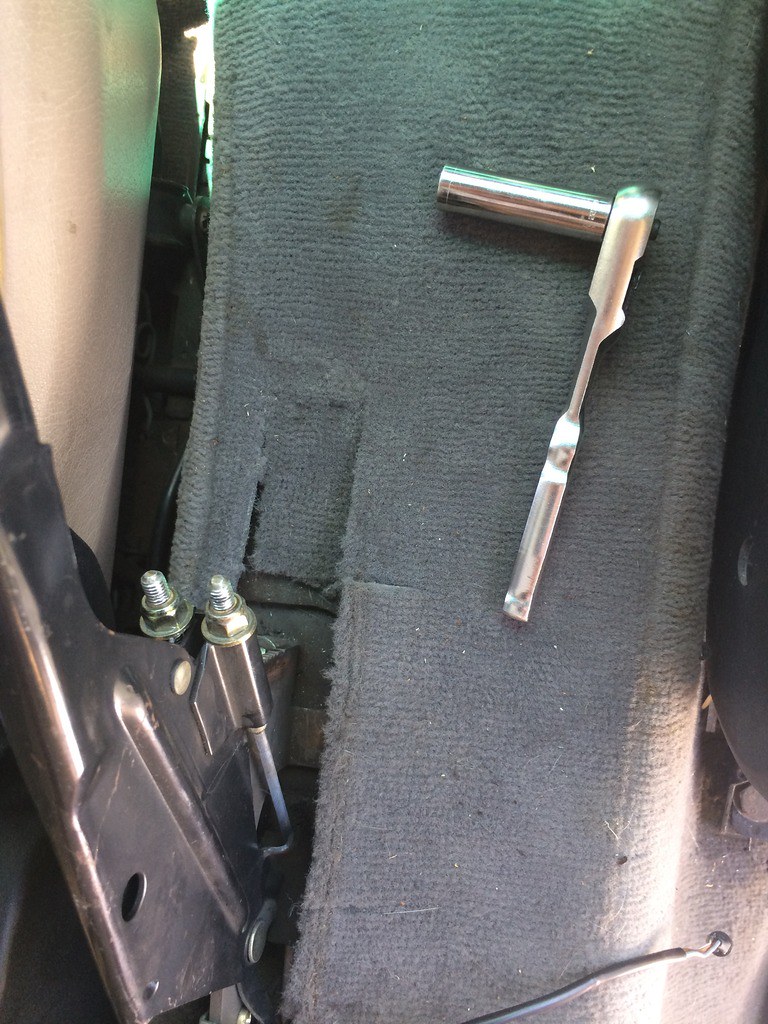
Next, I had a bit of downtime so I decided to address the gangsta lean in my drivers seat:


Uhhh, well that will do it. Looks like the tabs that tilt the seat back and forth were no longer at the same position. All I needed to do was pull the tilt lever and it pulled the tabs back into place. Easy fix, but I think I permanently bent the seat a bit by driving with it how it was.
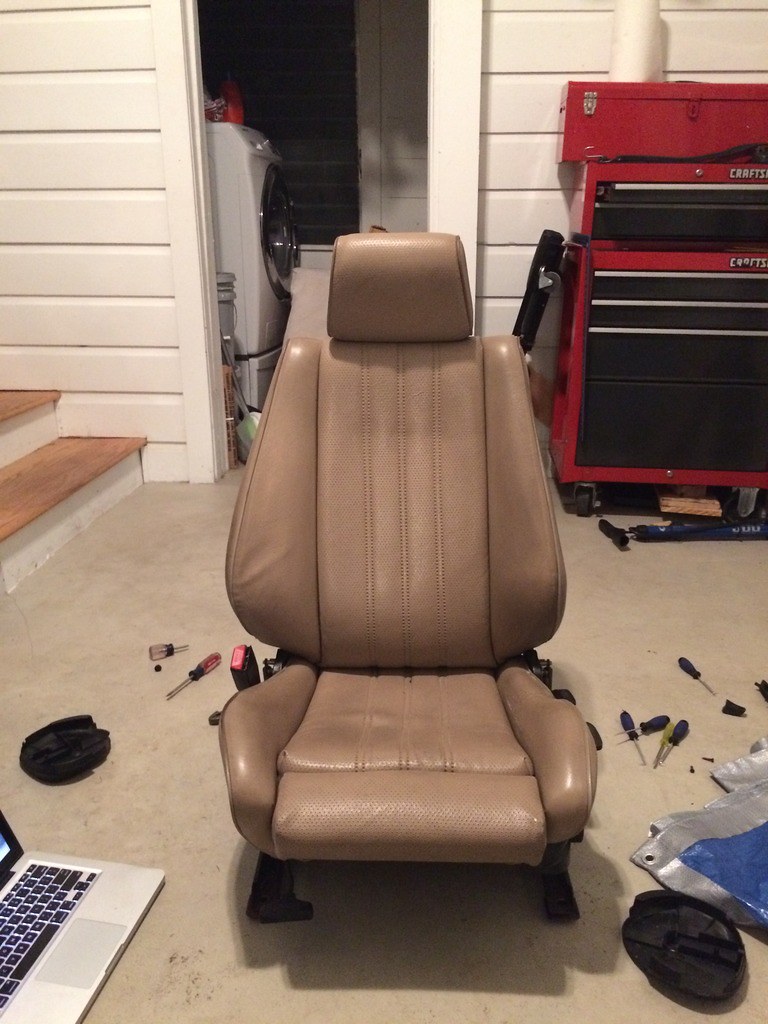
Not perfect, but I'm happy with it. Don't let perfect get in the way of good enough.
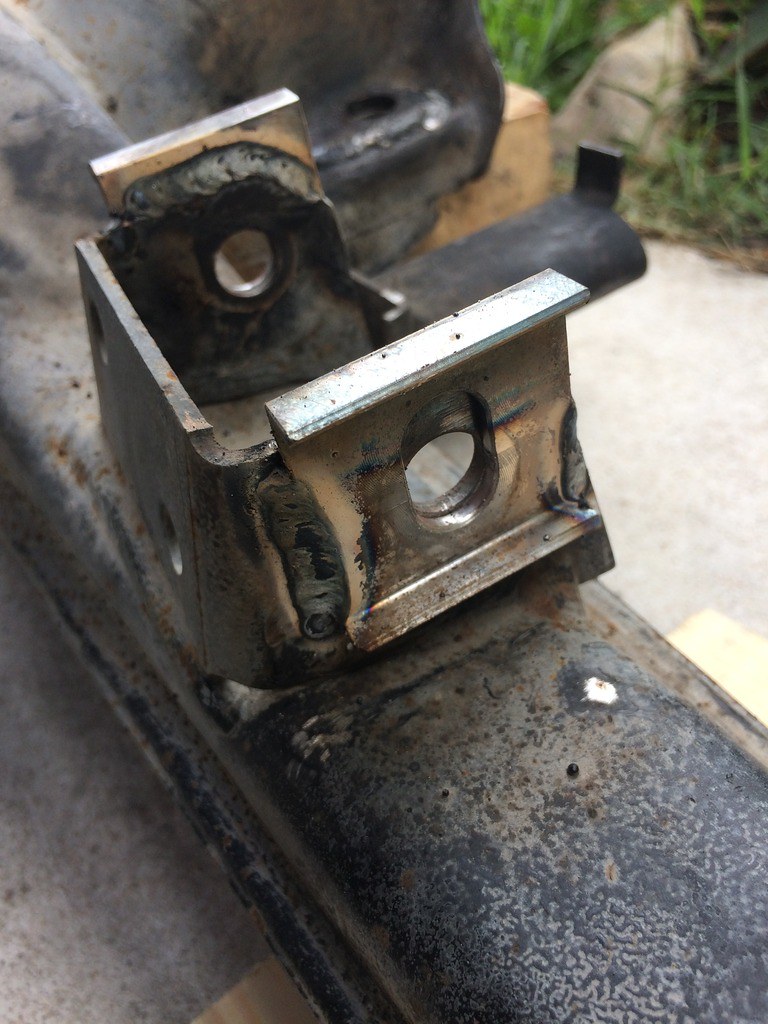
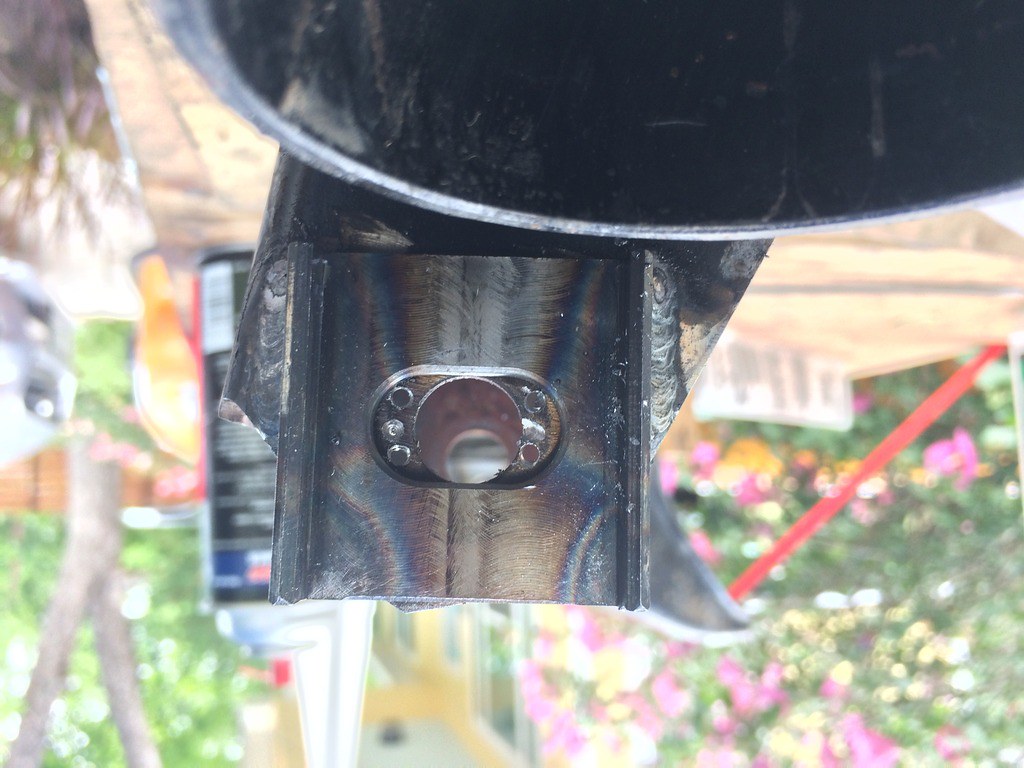
Saturday morning my buddy came over to weld everything up:

For someone who claims to only be a hobby welder I was pretty impressed with his welds, especially for a MIG. I needed to clean up a bit of leftover weld slag, but a chisel took the slag off no problem.
This was the only pic I took of the diff reinforcements... it doesn't look that great here, but it cleaned up really well.

Here was the worst part of the entire process.
I used this:
To grind out this:
I used a drill where I could to remove at least a little material, but this job was pretty awful. I think I spent about 4 hours just grinding the slots for the tabs out by hand... bleh.
But I was very happy with the final product, after some clean up:
Once that was finished I cleaned and used metal etching solution on the subframe per POR15 instructions. I didn't fully follow this procedure when I painted the diff and I’ve noticed its started to peal in a few locations. Soooo, follow the damn instructions!
Converted the work bench into a cleaning station:
Converted the work bench into a painting station:


Got mildly lazy with my trailing arms, I really didn't feel like disconnecting everything so I just applied POR15 to the trailing arm reinforcements, after cleaning / etching:
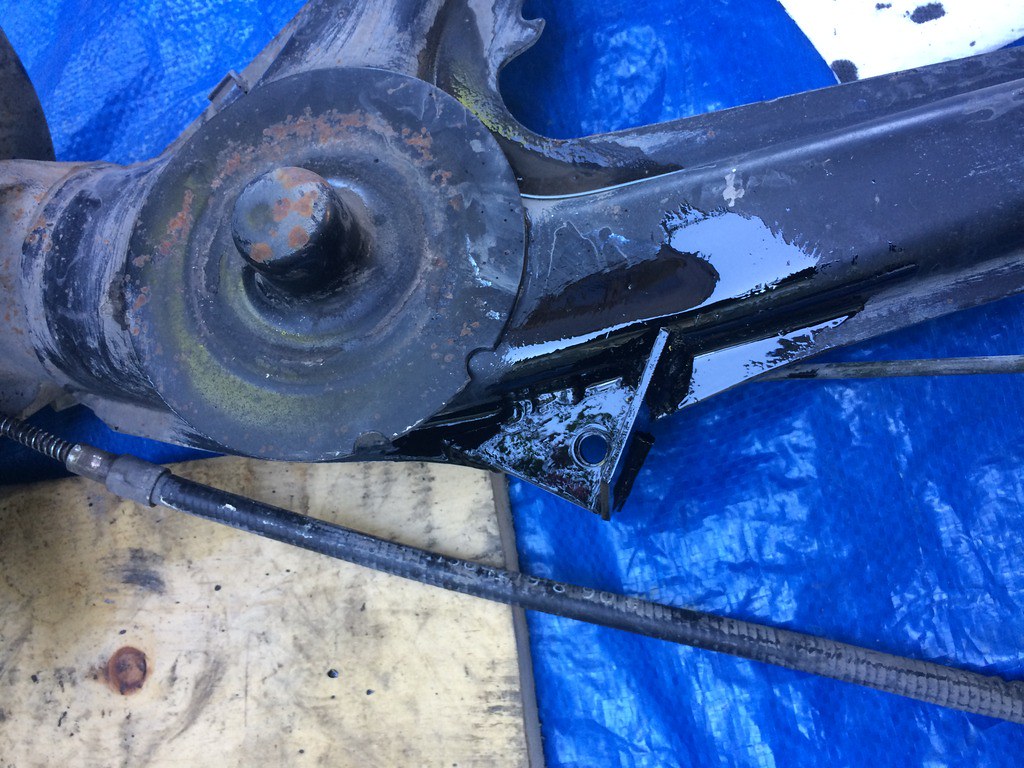
I laid two coats of POR15 on the subframe and the trailing arms, extremely happy with how they turned out. The pictures of the subframe don't really do it justice:
After a bit of research, it seemed like people had success applying copper anti-seize on the bushings to prevent squeaking. All lathered up and ready to go in:

Pressed in trailing arm bushings:
Reassembled the subframe and cut the poly bushing (NOTE: Thick side goes on top for non-riser bushings, I initially pressed these bushings in wrong):
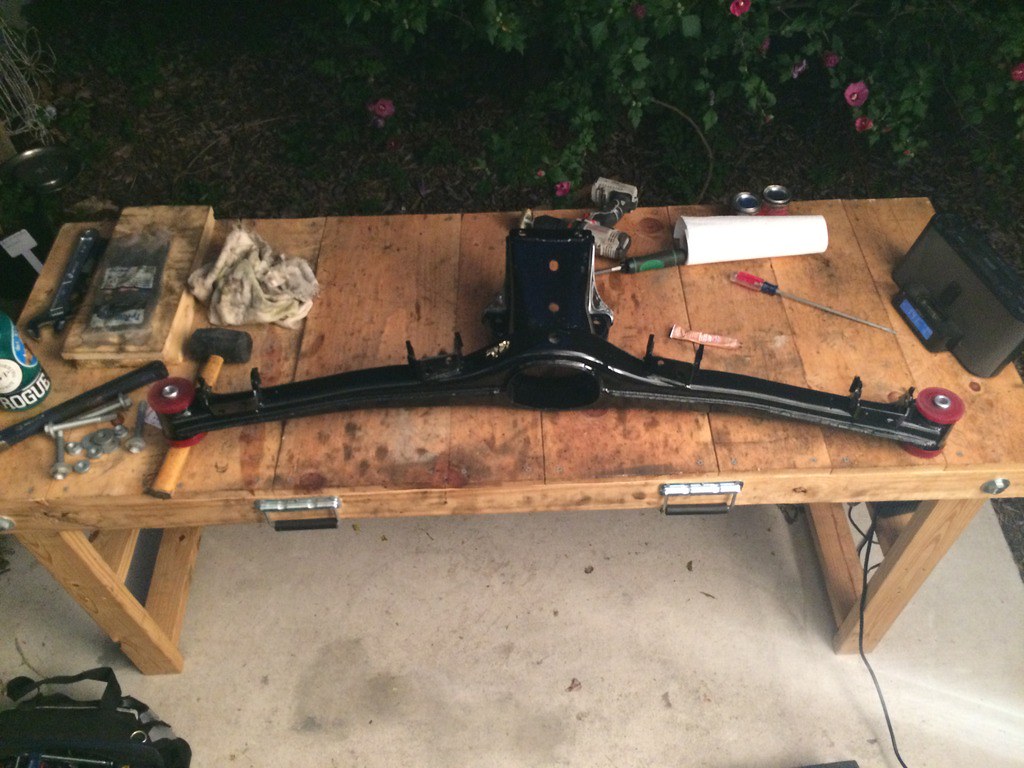
Ready to go back in. I installed the trailing arms at the "stock" position settings. So the eccentric bolts currently sit at the center of the toe plates, and the very bottom of the camber plates. I plan on taking advantage of the adjustability once I have a set of rims and tires.
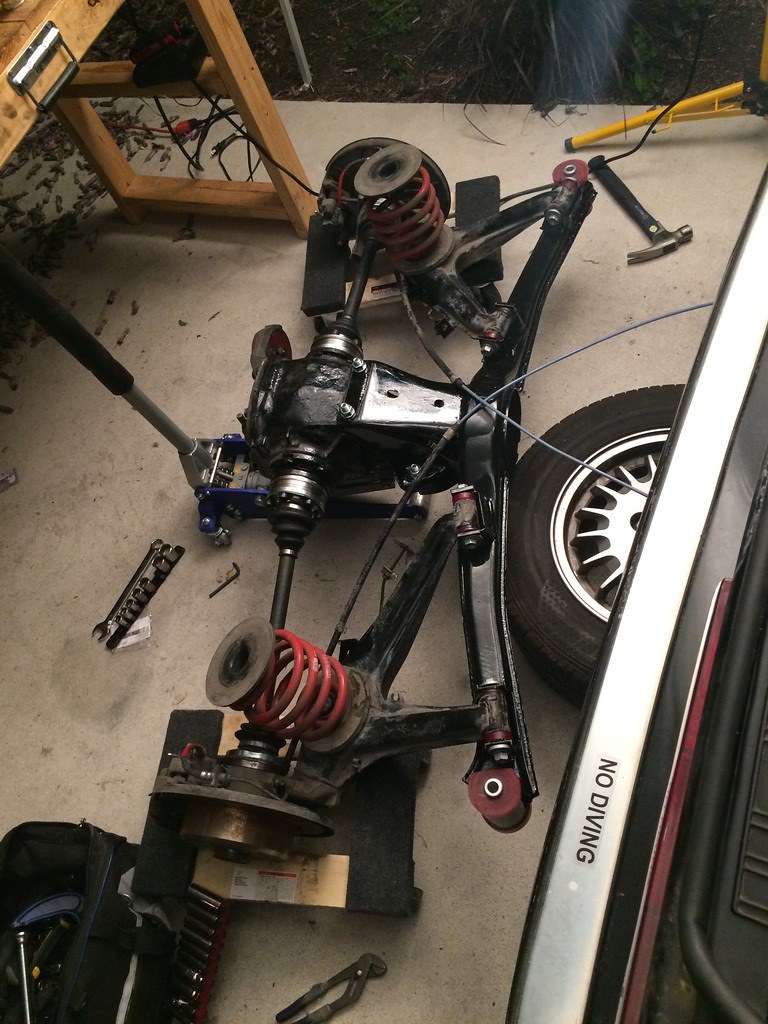

Shhhh, she is sleeping. Dormant setup:
The subframe went in pretty smoothly with the help of two jacks - one under the diff and another centered under subframe. Readjusting the ebrake was the last item on the list for this job, I realized after the fact that it needed to be adjusted for a while now. I don’t have to hulk the ebrake up anymore to hold the car on hills:
DSSR and Delrin Shifter Bushing Install:
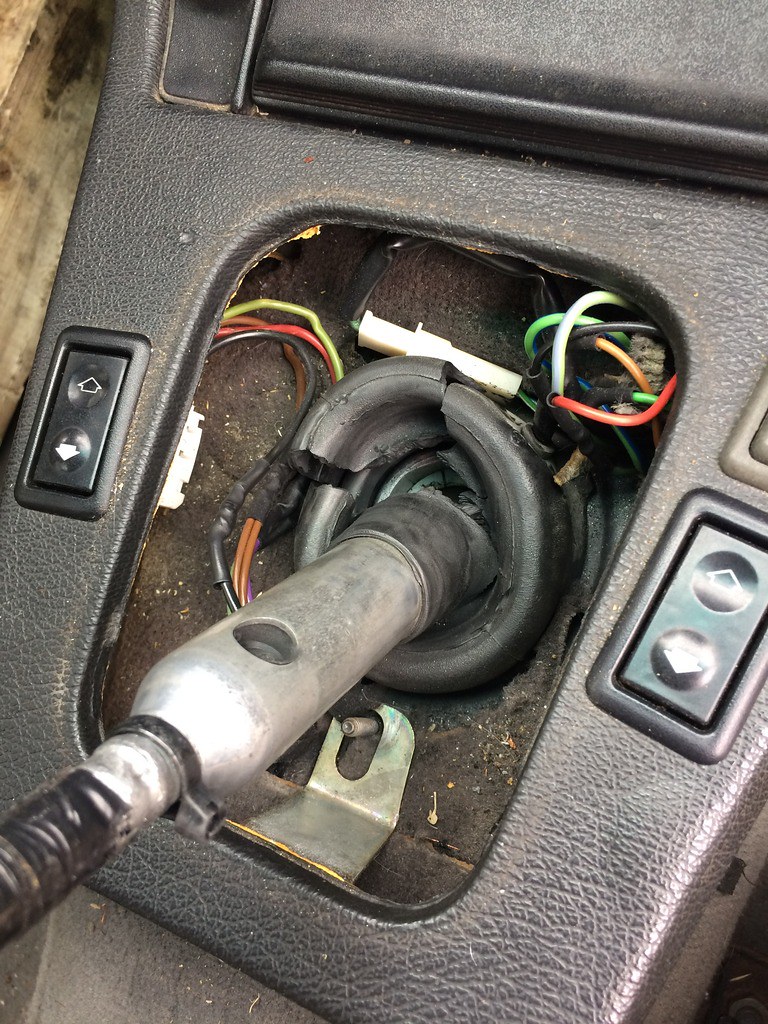
I felt pretty good about finishing the subframe install, but unfortunately no time for a break. Moved right along to my shifter, which is when I happened to discover a busted shift boot:
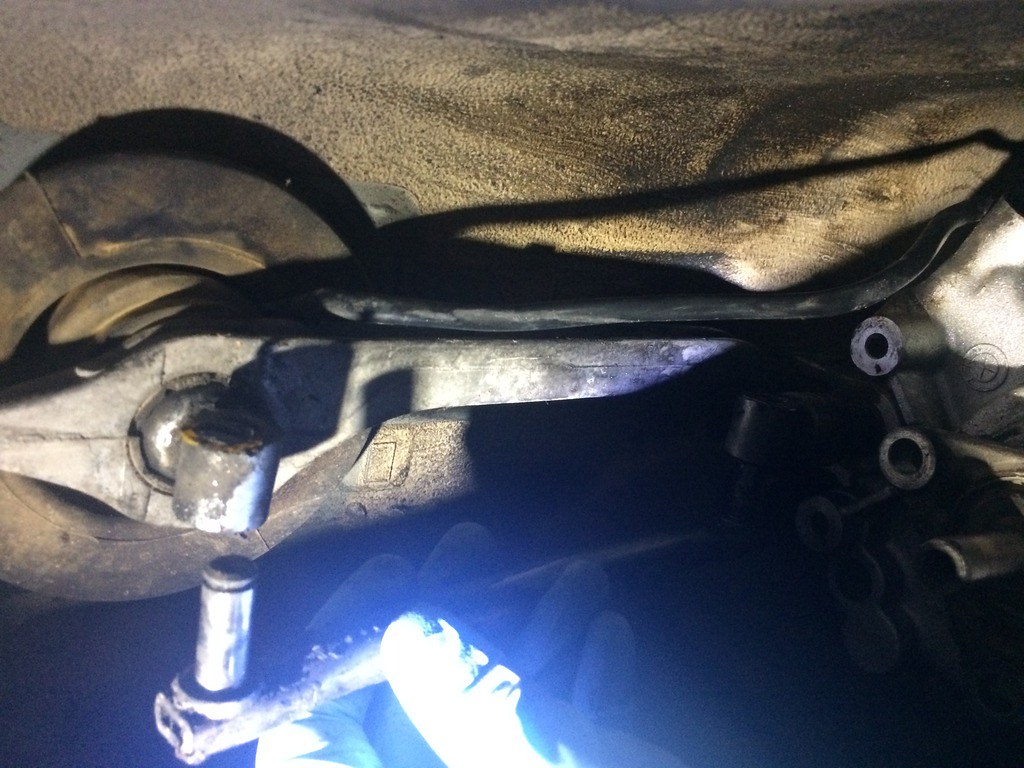
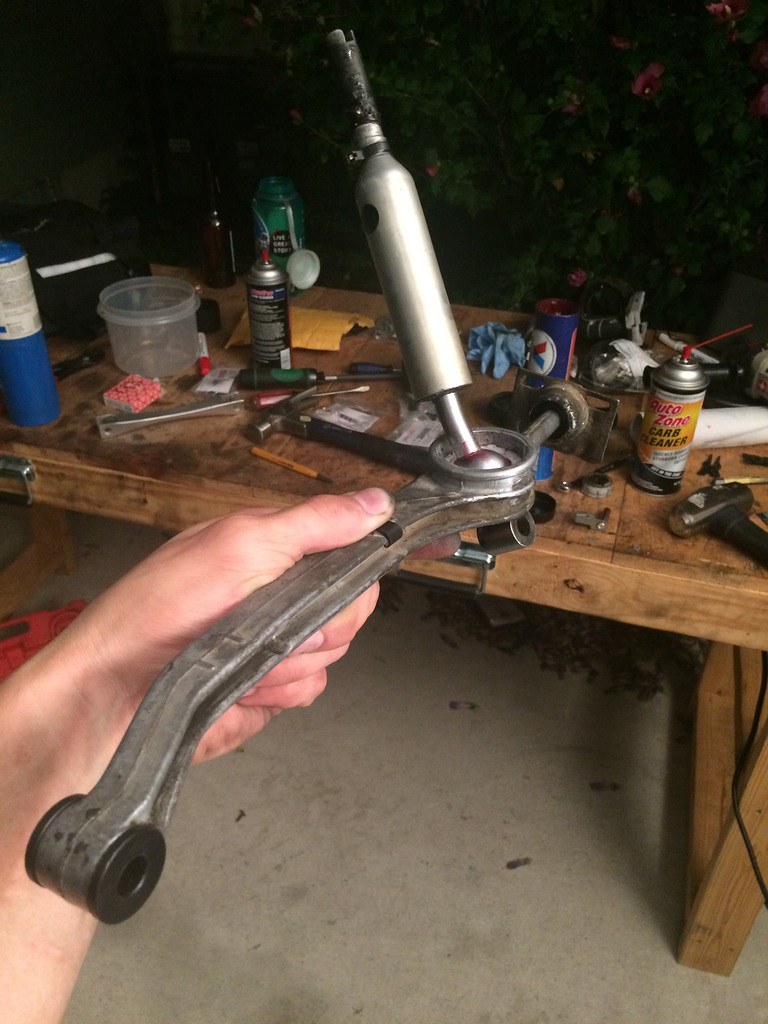
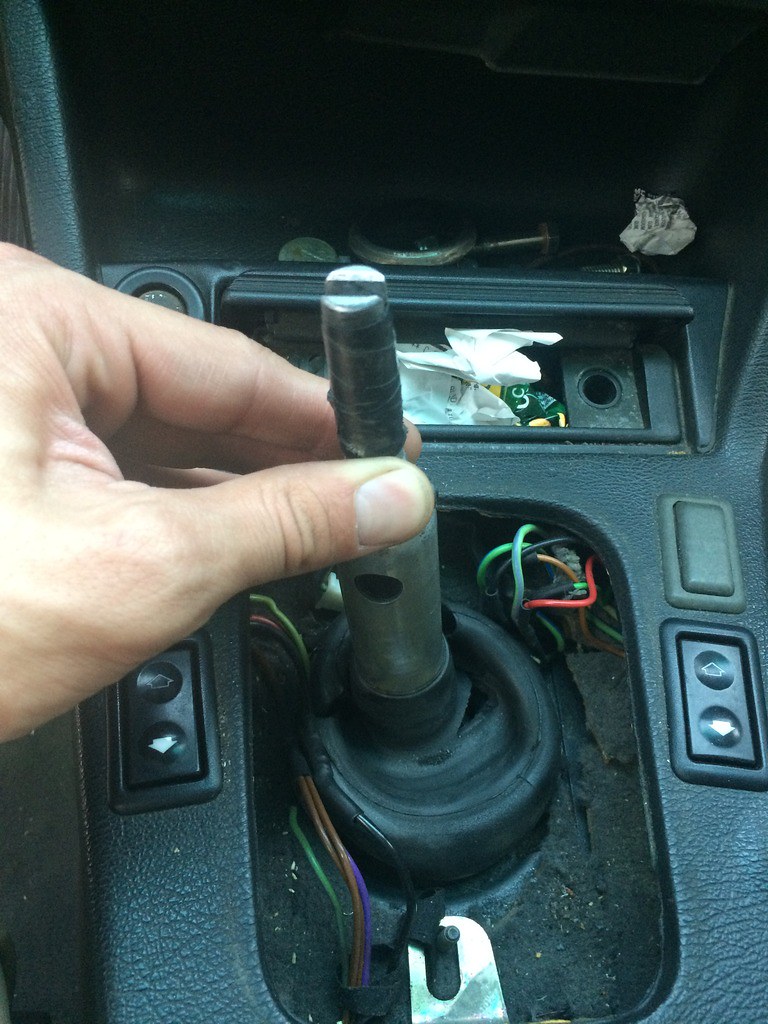
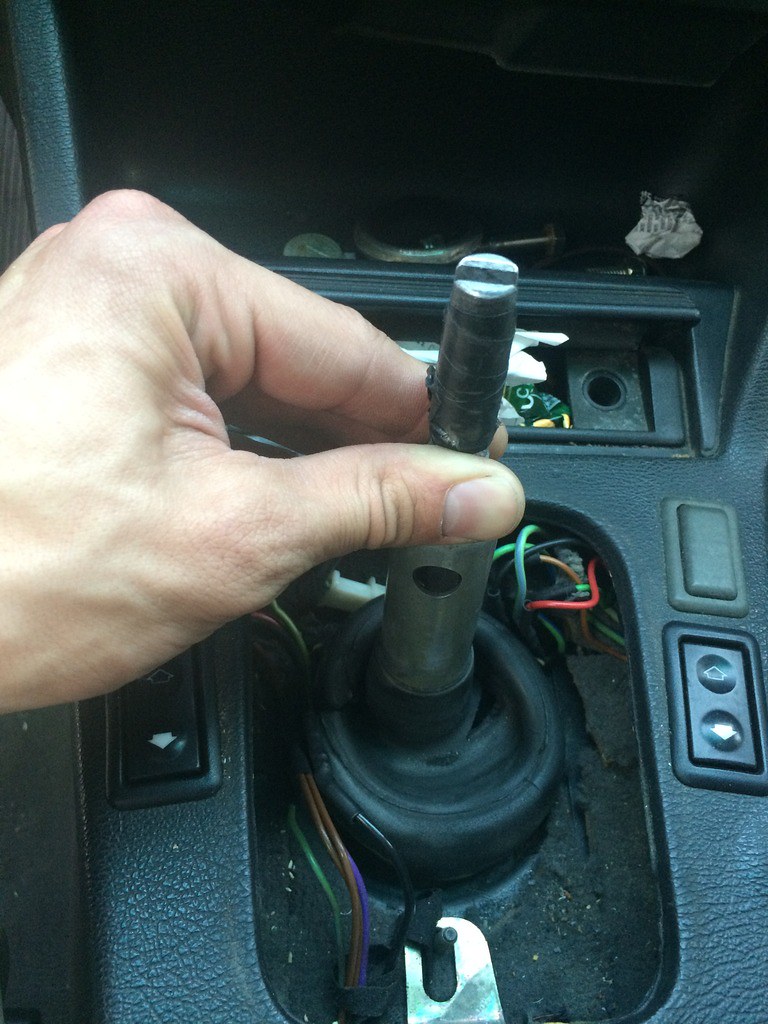
Removing the stock selector rod:
The "bitch clip" surprisingly wasn't too bad. I used a long flat-tip screw driver and a set of picks to get it out:
Burned the rear carrier bushing out:

Pressed in the delrin bushing and punched the carrier a few times to hold it in place:
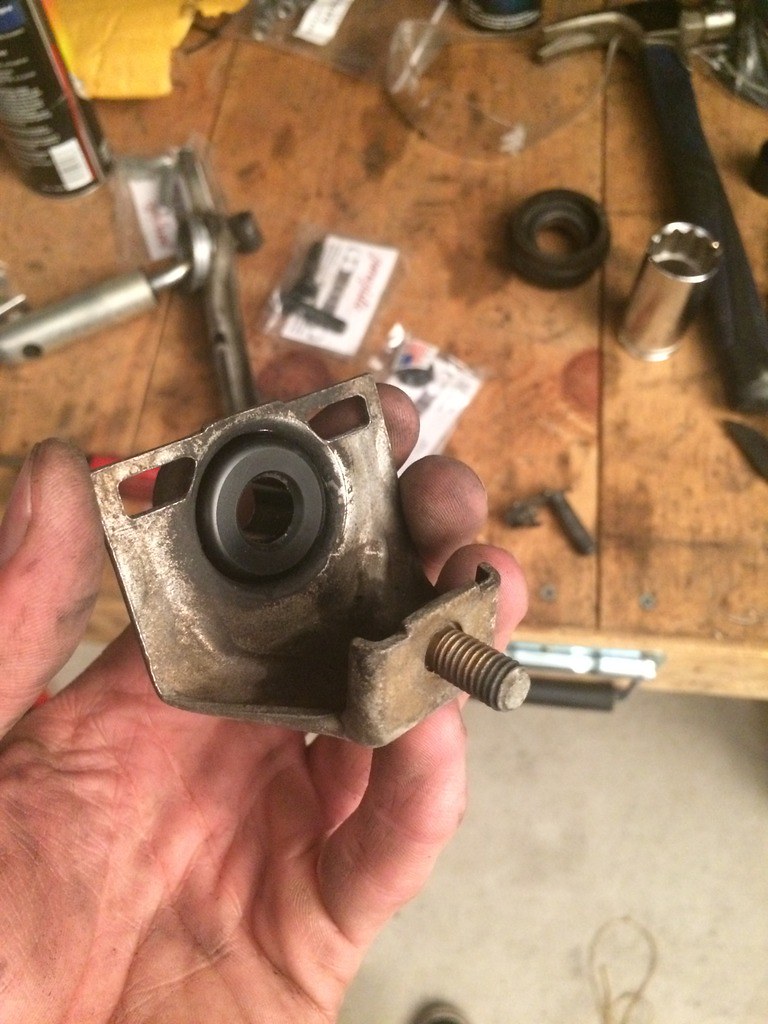
I installed a new shift cup, and pressed in some new delrin shifter bushings for the front of the carrier. Lubed the ball of the shifter up and it was ready to go back in:
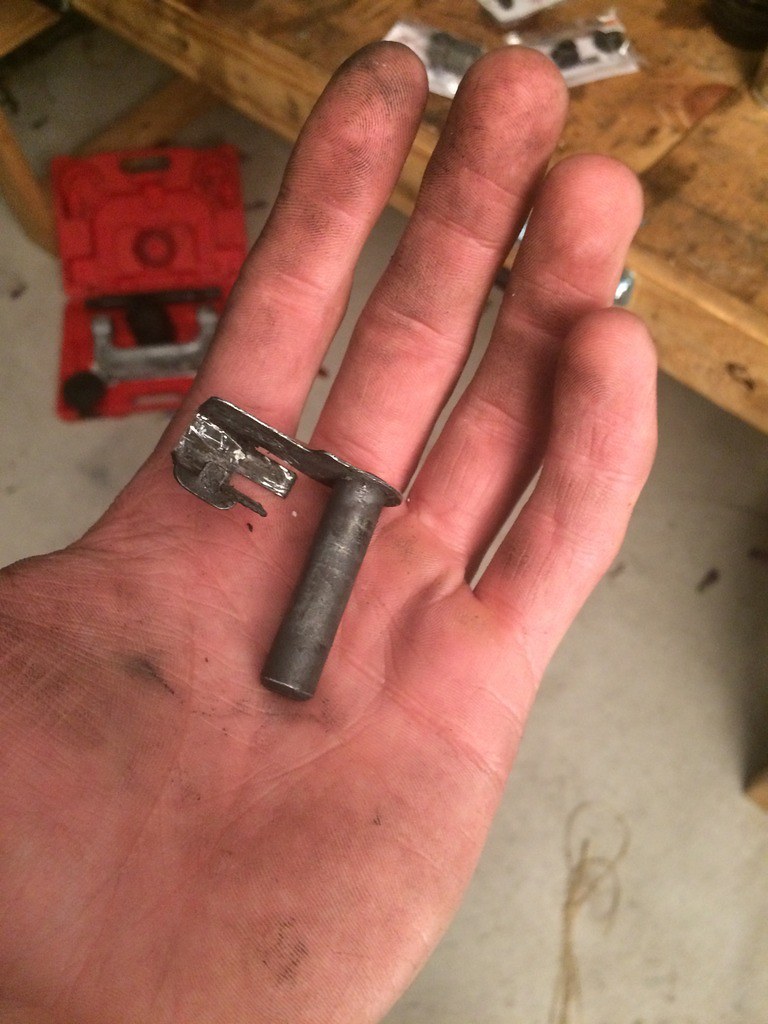
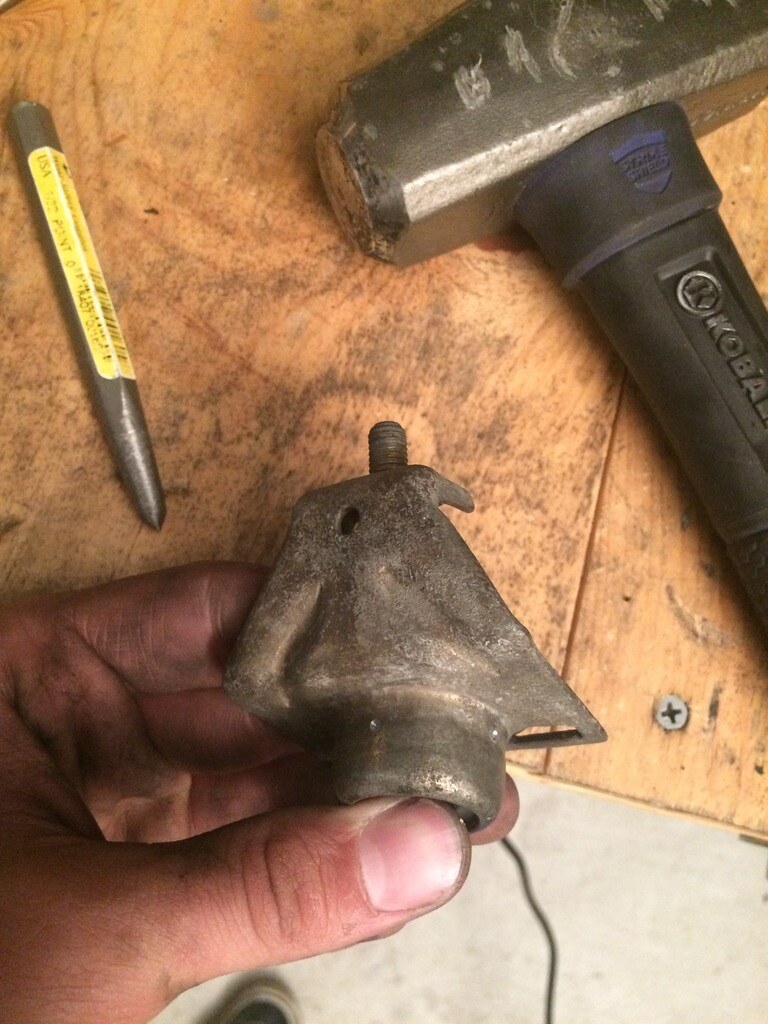
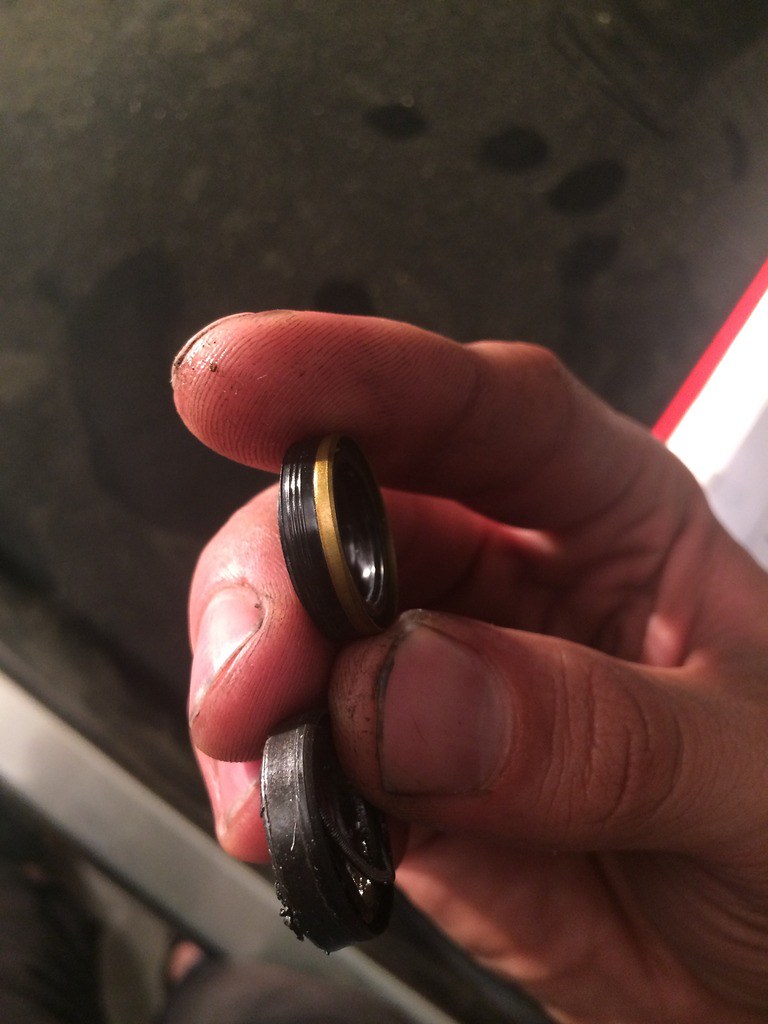
I've had a leaky shift-shaft seal for a while now, so I took advantage of replacing it while I had everything apart. The thing was so god damn stubborn, but it eventually came out:

New vs. old, hopefully the new design works a bit better. Notice the ridges that are on the new seal and absent on the old one:
Had a bit of trouble getting the bitch clip back in because the delrin front carrier bushings didn't provide much room for alignment error. I ended up grinding down edge of the bitch clip a bit and that seemed to do the trick:

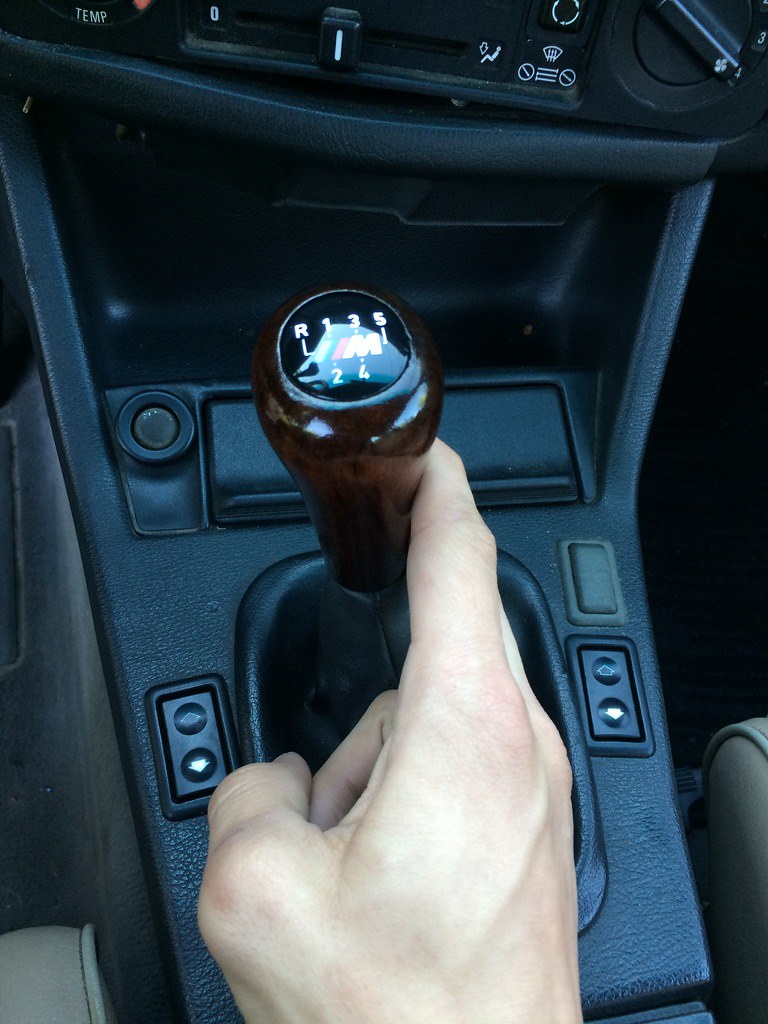
All back together:
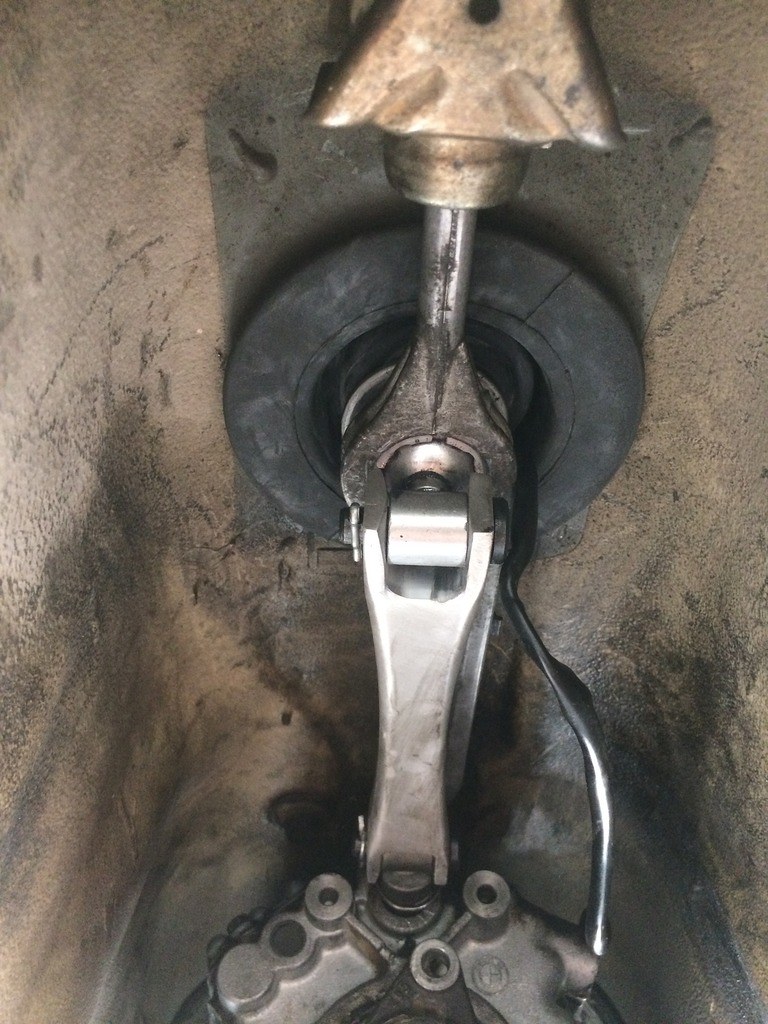
It's a bit hard to convey the shift slop that it used to have, but these pics were taken in first gear:
Also in first gear after installation of the DSSR and new bushings:

Andddd finally, replaced the tail light seals to prevent anymore water in the trunk:

Sittin' around actin' like nothing even happened:
Oh, and in a strange series of events I met the person who used to own my car. I found out it was handed down among three brothers as their first car and as you can imagine, was beat on for most of its life. The eldest was apparently frustrated he hadn't gotten a Bronco instead, so he tried killing the car by mudding and off-roading it, which explains a lot of the dents and dings I found on the original gas tank and some of the undercarriage as well as the red dirt caked onto the trailing arm bolts. I was told of racing kids at every stop light, drunk driving, and just generally beating on the car. Eventually, the timing belt snapped on the youngest son and they sold it for $200. To say this car has had a hard life is an understatement. :rofl:
10 years later, I came along and stumbled across this trailer park queen wasting away in Seguin, TX.
A few other interesting things I've found out:- Currently on its third engine, and fourth cylinder head
- Three oil pans have been smashed (one of which was my own doing)
- The car was previously Delphin Metallic, but was repainted black and had metal bumpers from an '88 grafted on after rear-ending someone
After learning all this it’s hard to believe I managed to get this thing back on the road... I’ve officially put on 5k miles since I got the car running again (started at 108,703 miles), and hopefully will put on many, many more. Last edited by zwill23; 03-14-2018, 10:16 AM.
Comment
-
wow, good read and you are super thorough. I wish I did this extensive documenting when my buddy and I put my E30 back alive.
Gonna keep up on this thread.Comment
-
Excellent read.
I like your determination to get the job done, outside, under a pop up tent. Reminds me of my times with my E30 wrenching in a parking lot.
My DD also had the same very very nasty previous life that your E30 had. I kind of like that it was abused back in the day, because now I get to take excellent care of it. Plus, its cool knowing that it wasn't babied, and that it is still plugging along without much issue.
Good luck on your adventure.My previous build (currently E30-less)
http://www.r3vlimited.com/board/showthread.php?t=170390
A 2016 Toyota Tacoma TRD 4x4 Offroad in Inferno is my newest obsessionComment
-
Thanks!
Funny, I actually felt the same way when I first got the car and decided to make a build thread. I wish I would have taken more pictures to capture the "starting point" of it all, but I've definitely gotten better about it as things have progressed. It's also a great way to know if you screwed something up (thanks R3v), because someone will ultimately let you know hahah.
I appreciate it, I actually remember reading your build thread back when I had a garage and being shocked at the amount of work you got done in a parking lot. Fast forward a year, and now my situation isn't much different. There have been some hard times, but overall it's been confidence building.
I have to agree with you, the stories irked me at first after the work I've put into it, but I now look at it as a badge of honor. Plus, I wouldn't have picked the car up as cheap as I did had it been taken care of.
Comment


Comment