

Hey everyone I have been creeping the forum for a while now and now have some time to upload some pictures of my progress over the year.
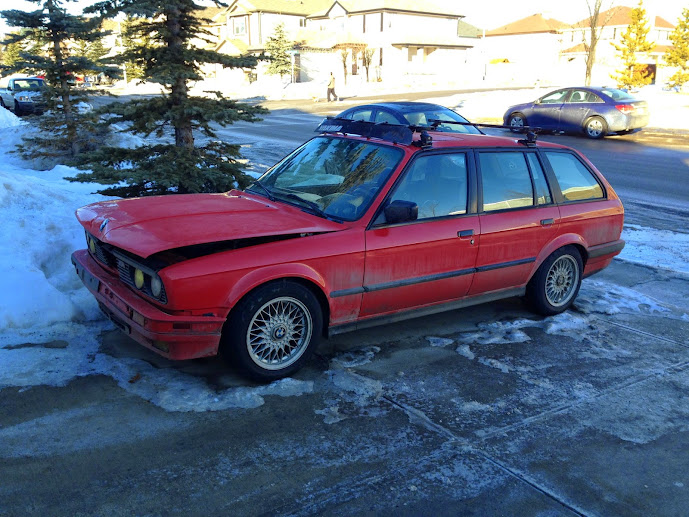
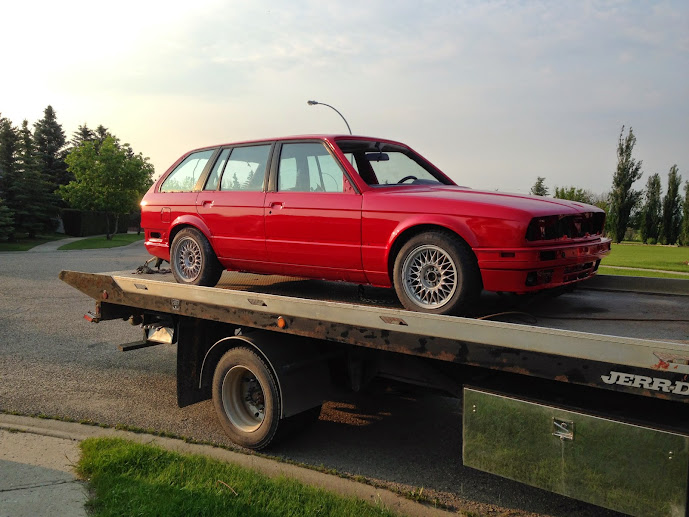
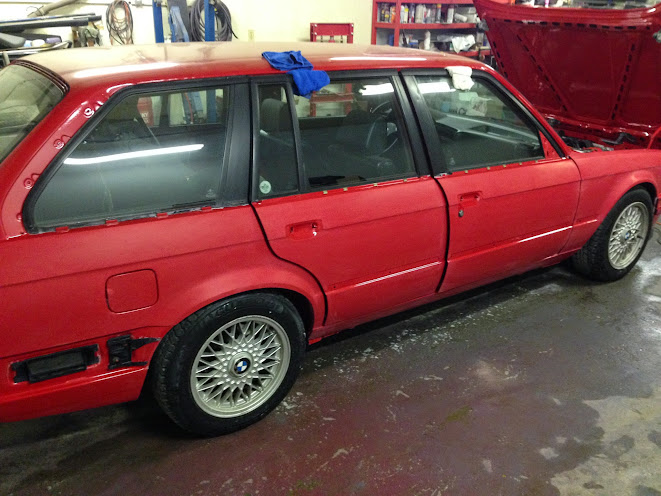
Originally I found the car in Victoria Canada on craigslist as I was searching for a good shape coupe but stumbled on this Touring imported from Germany, original 5 speed manual 325i.
After talking to the owner and some bargaining we agreed on a price and I flew out to pick it up. For an old car I found the condition to be pretty good but not exactly what I expected a BC car to be but Long story short I drove it 11 hours home through the mountains and fell in love with it.
Originally I started off by cleaning it up making sure it was serviced and running top notch to take to the ski hill and sure enough I never stopped.
Here are some pictures from the day I picked it up in Victoria. October 2013.

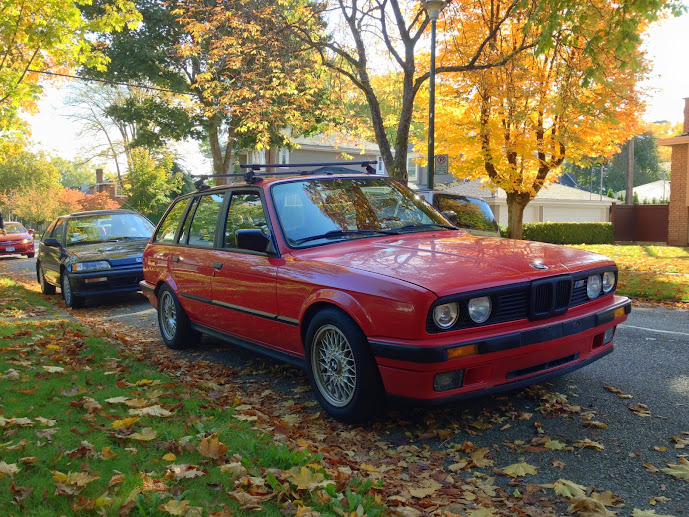

After getting it home I started fooling around with it and added the thule wind screen and 3m to the original hella headlights to give it some character.

Shortly after getting it home. very very shortly, I was having a lot of issues with misfires and hesitation so I ended up doing a complete ignition system on it which included
Bosch igniter
BMW performance wires
Bosch Distributor and cap
Bosch Spark plugs
Bosch Coolant temp sensor
Crank Sensor
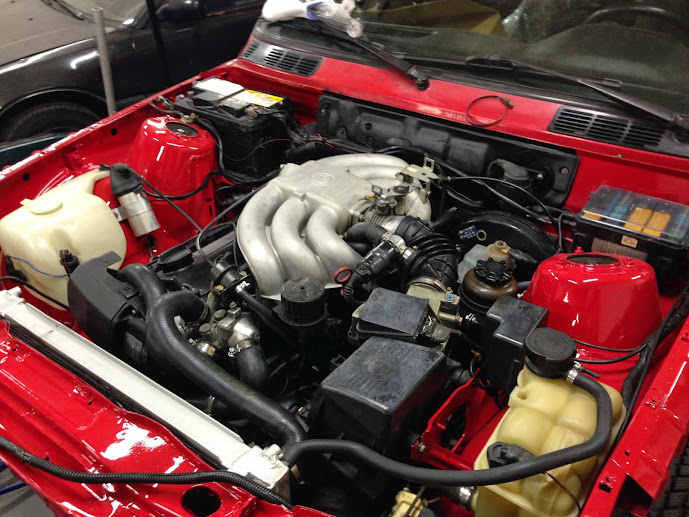
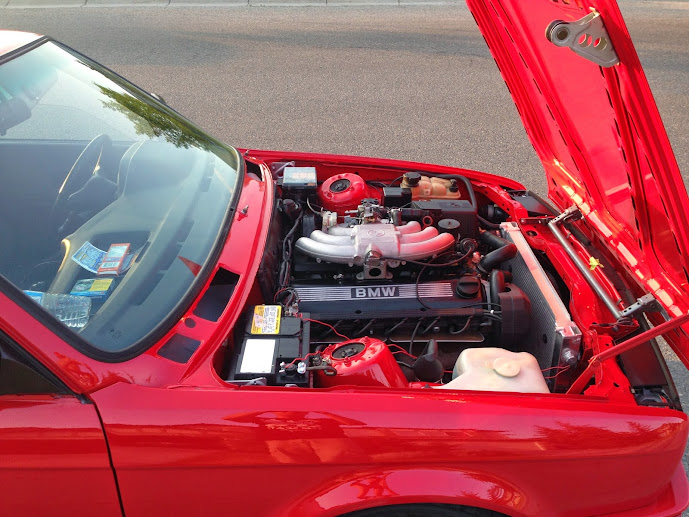
Cleaned up the engine bay with some degreaser and steam washer.

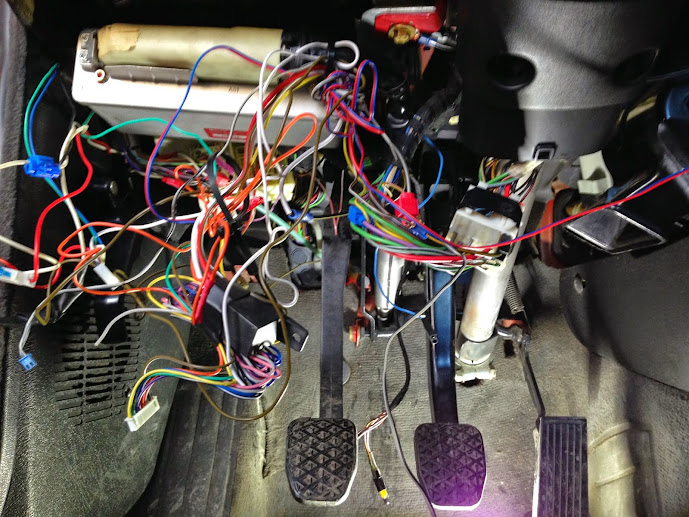
After that was all said and done it was running great for a week, my key stopped working in the ignition which ended up being the ignition switch. So I ordered a new one and replaced it.
While I was under the dash I found this mess with the wires and ended up fixing it up a bit along with the switch to hopefully eliminate any future problems. Further on I located more issues that I am working on resolving, which includes removing the entire keyless system and alarm and fitting it with the original door actuators.

Slightly better.
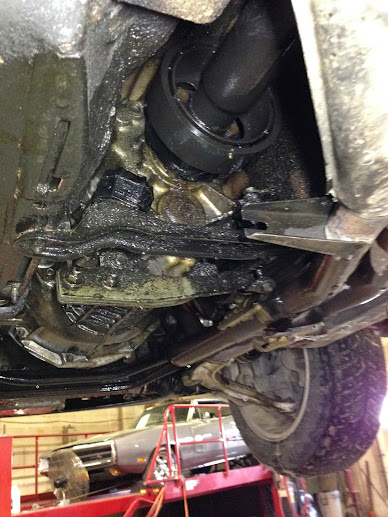
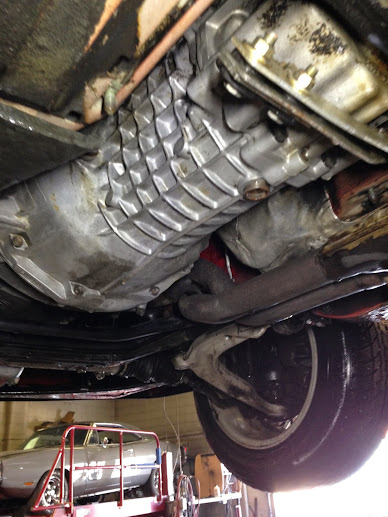
After that was all said and done I drove it for about 3 weeks before I had time to put it up on a lift at work. As expected I found multiple leaks that possibly date back to the original owner. For the time being I degreased the entire underside and steam washed the piss out of it so I can inspect how bad the leaks are after a few days.


So at this point I had all the bugs and quirks worked out. Drove It for about 4 days....
And as my luck would have it my wagon had an encounter with a truck as I was stopped at a stop sign.
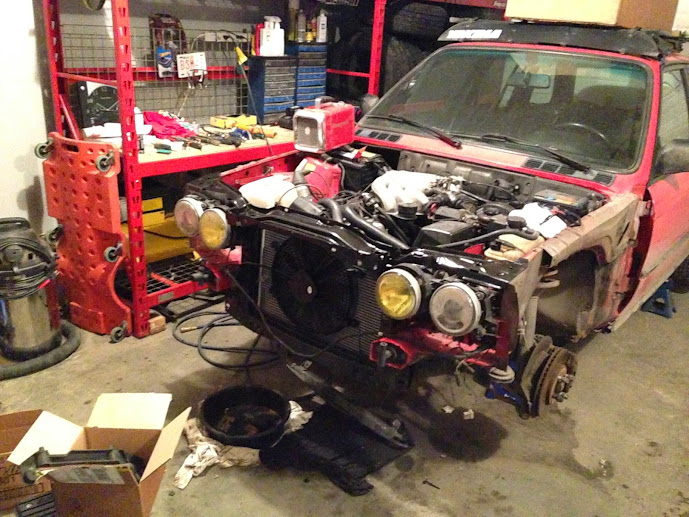
As you can see the damage was very minor with the exception of the top of the radiator support, after a long wait with the insurance company they sent out an adjuster to handle my claim. The agent was very nice and understood the situation I was in with this car as I had purchased it 2 months prior and spent a fair bit of money repairing and legalizing it.
He was also very familiar with older bmw's so he opted that the car remain active status and be repaired.
After a few quotes I ended up getting a decent settlement based on a quote from a repair shop and began ordering replacement parts for the front end.
I started by removing all the damaged parts including the radiator support and making a list of everything I was replacing.

As u can see the damage was mostly cosmetic with the exception of the top of the radiator support

New Rad support and aluminum radiator arrived so I mounted it temporarily
So at this point I made it drivable to move to a warmer location to work on it which ended up being my friends house outside of town where I really started to get to work.

First I started by removing the engine and fixing all the leaks. Making it as reliable and clean as possible.
This is when my addiction for perfection started. I went from only fixing the damaged front end to a full restoration.
I will let the pictures do the talking for a bit.


Pressure washed

Input shaft seal leaking

cleaned and replaced

output shaft and shifter seal replaced cleaned up
along with new transmission mount bushings

Engine cleaned with new rear main seal

Degreased and wire brushed

Timing belt water pump replaced, all covers bead blasted

Painted the block

Cleaned with resurfaced flywheel new clutch

Engine bay cleaned for prep all seam sealer removed, the entire bay was cleaned thoroughly with wax and grease remover before any sanding was done, as a tip to others the stuff is amazing at cleaning and can be used on factory paint carefully to remove stains or really dirty areas.

Some rust repair in engine bay

Engine bay prepped ready for primer

Primed and prepped


Custom rad support brackets making the support completely removable from the car

Rad support and rad fitted

Fitted with new seam sealer
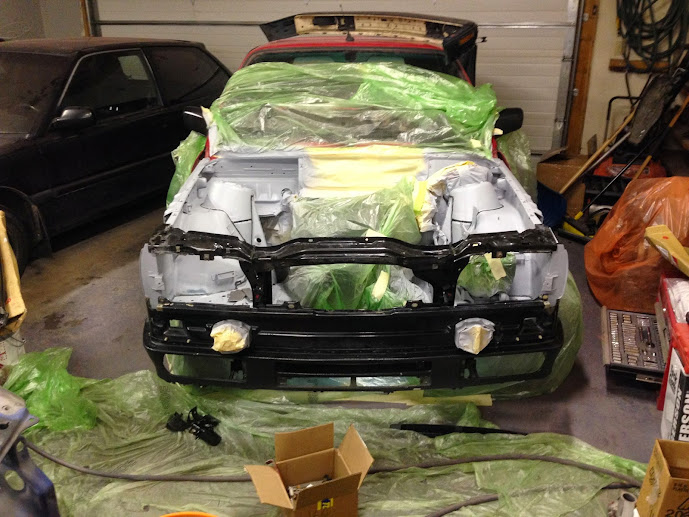
Final prep of the engine bay and support
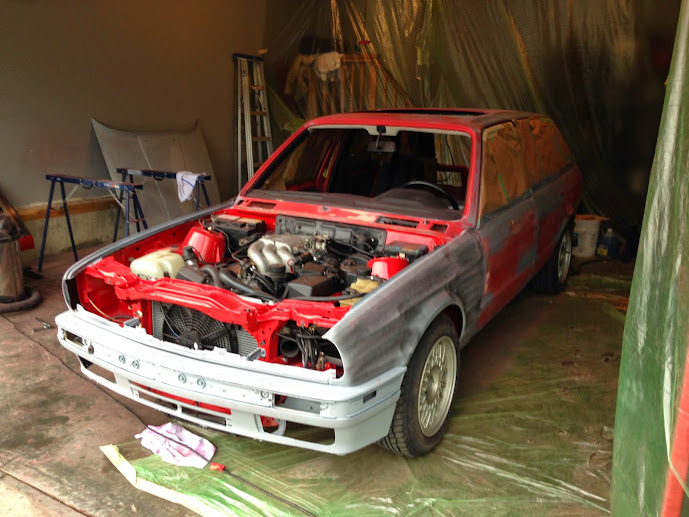
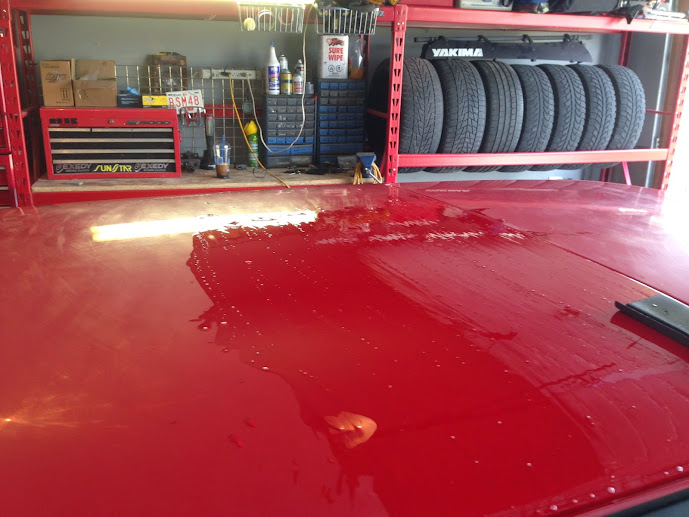
Hellrott red


Engine Install


Radiator support mounted


Fitment, new fenders headlights grille hood valance

Spring just arrived so I brought it home to work on
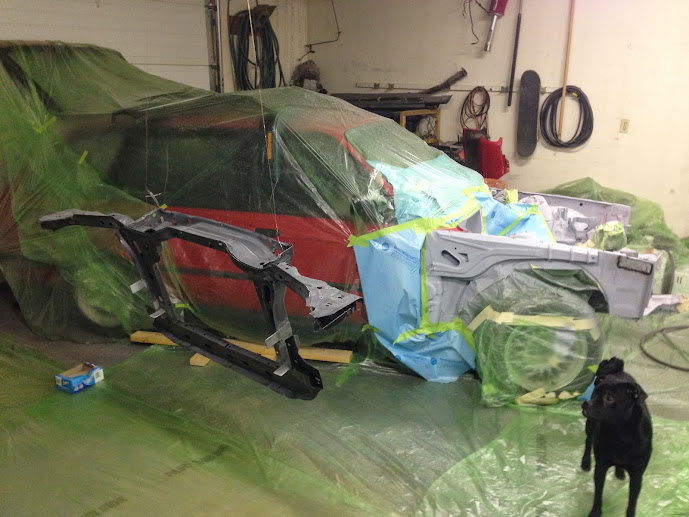
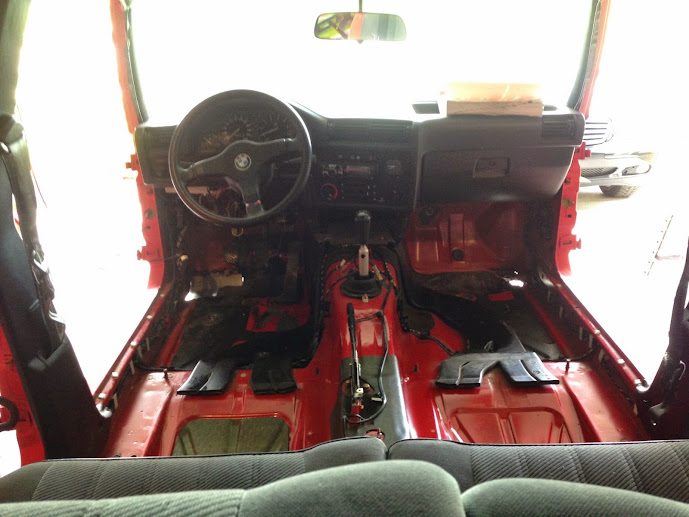
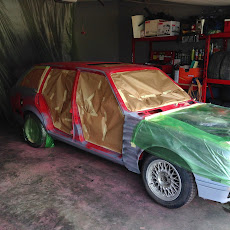
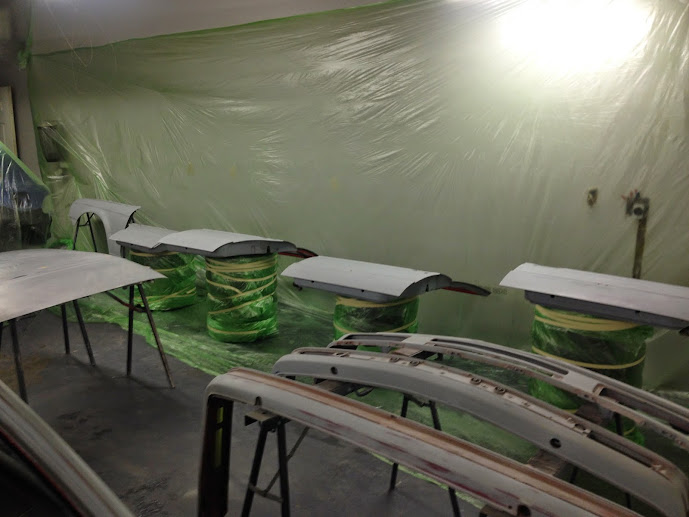
Masked off interior

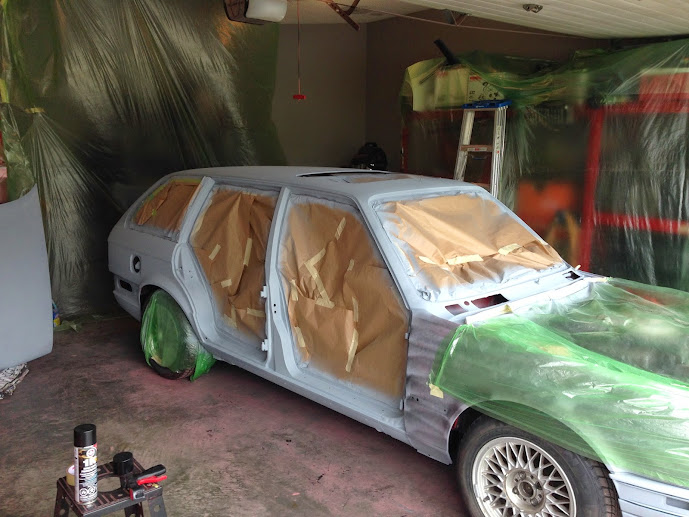
Prepped door jams

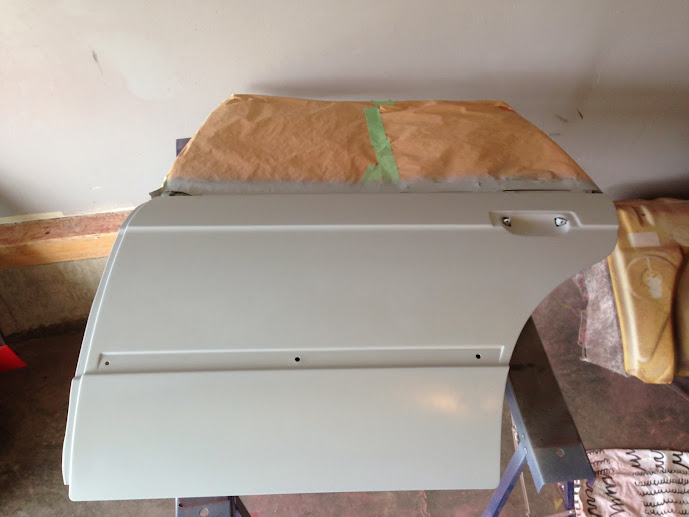
Prepping the doors
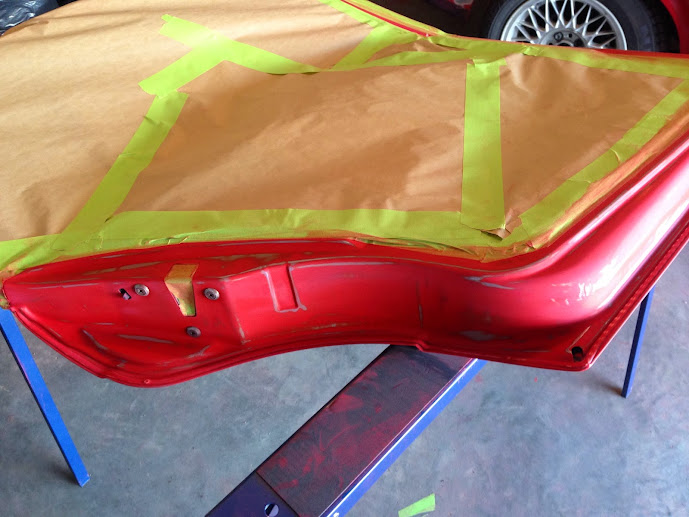
Doors and door jam

So just a rundown
the engine and engine bay took about 3 weeks of work I was on vacation so I worked from about 12-1am every night casually to get the engine bay done from start to finish.
As for the doors and door jams it took about roughly 3 hours to prep each door for primer and the door jams took about 8 hours a side to prep. The steps were to clean the area, wax and degrease the area thoroughly, you half ass any of these steps you will be wasting your time, then finally sanding down to 400 for the primer to mate with the car properly.
Stripped all the texture coating off the valances
used a wire wheel to remove it then sanded the steal to 400


At this point I am repairing all the rust I can find on the car I didn't take very many pictures because I was dirty in awkward positions.
Steps were too wire wheel as much off followed by sand blast the area cut away all infected spots weld new parts in, sand blast the welds self etch the metal, the rockers I used rocker guard on the inside and yadayadayada it should never come back


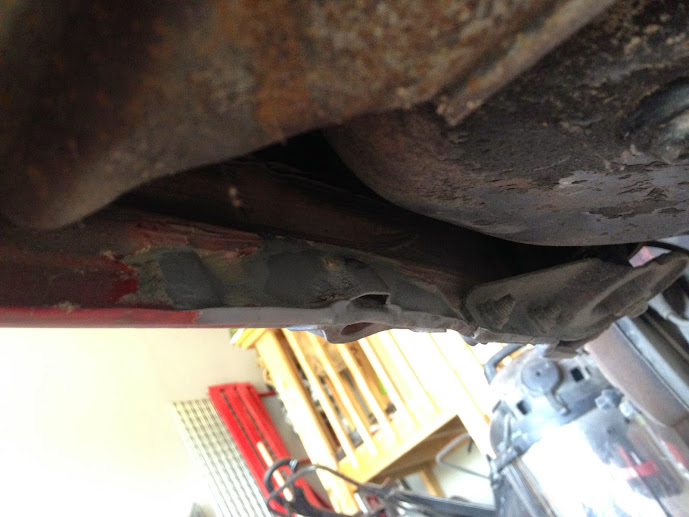
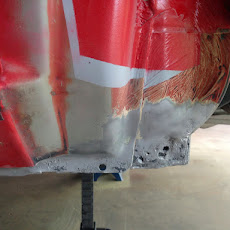

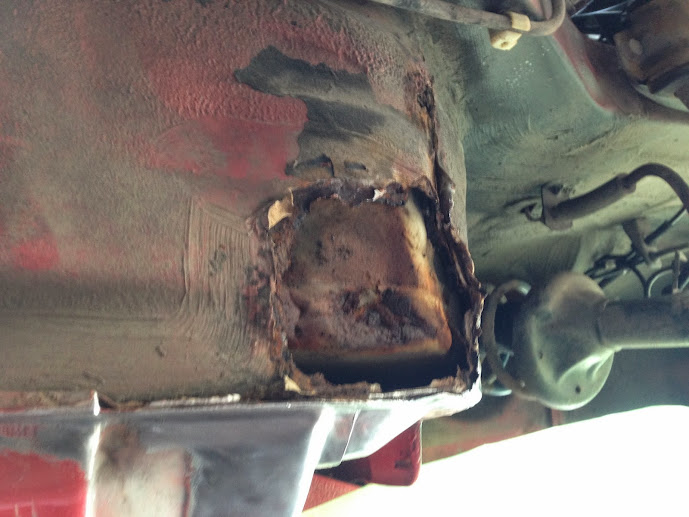

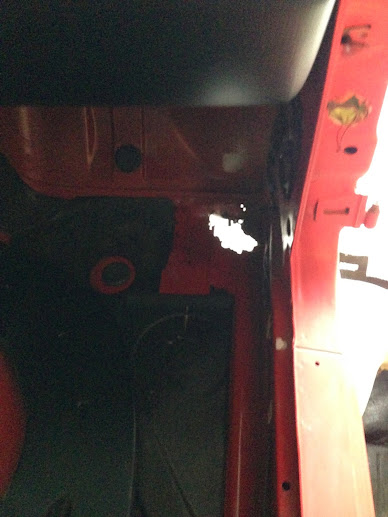
I found every spec of rust and fixed all of it, including the floor pans on both driver and passenger side
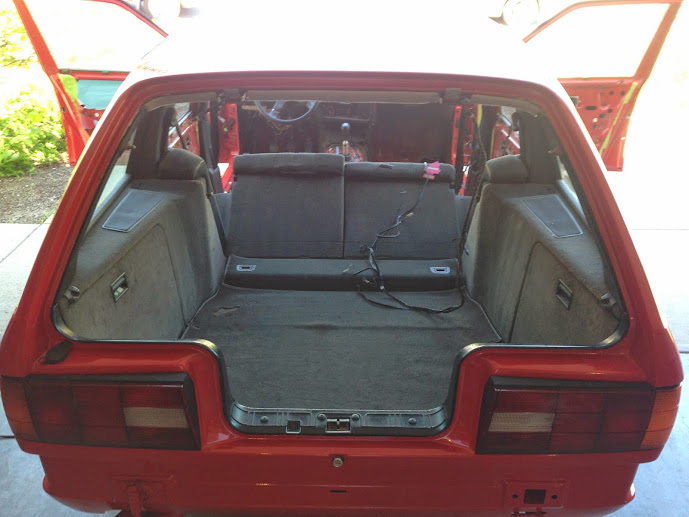
I ended up removing all the carpet and tossing it in the garbage and now searching for new replacement.


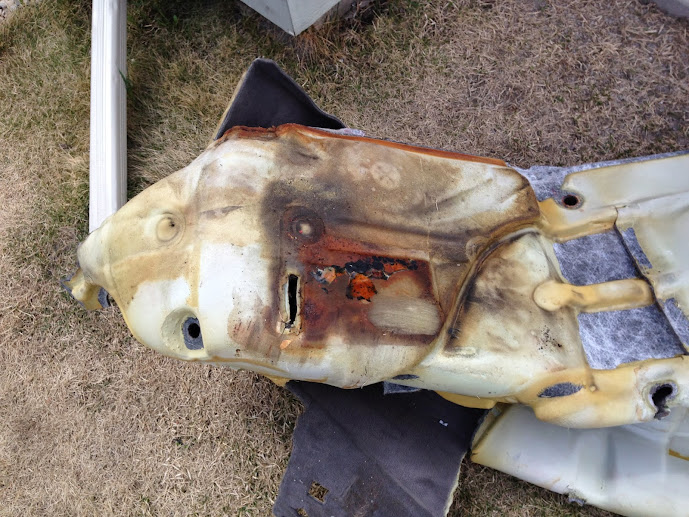
I didn't drive the car for 3 months and the carpet was still soggy and gross. garbage it went
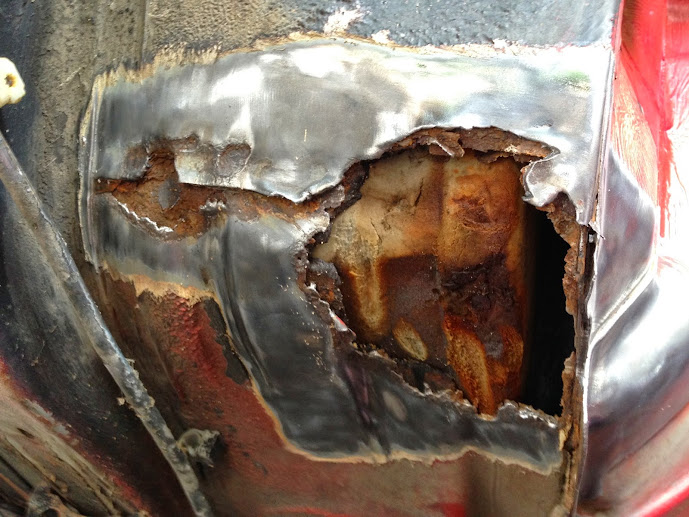
this is why the car rusts, drenched carpet and a giant dirt sponge that builds up behind the fender liner

Rear wheel well


Should never rust again


Re prime seam seal make sure there are no leaks

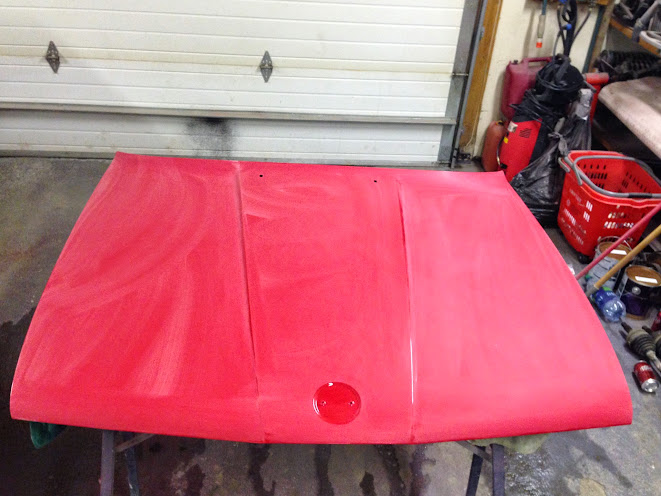
Exterior prep


Guide coat


More blocking


Final guide coat wet sanding


Every nook and cranny


Temporary interior

The hatch had severe rust that was not repairable so until I can find a new one to paint I decided I would leave some rust on the car and got alittle creative on the hatch

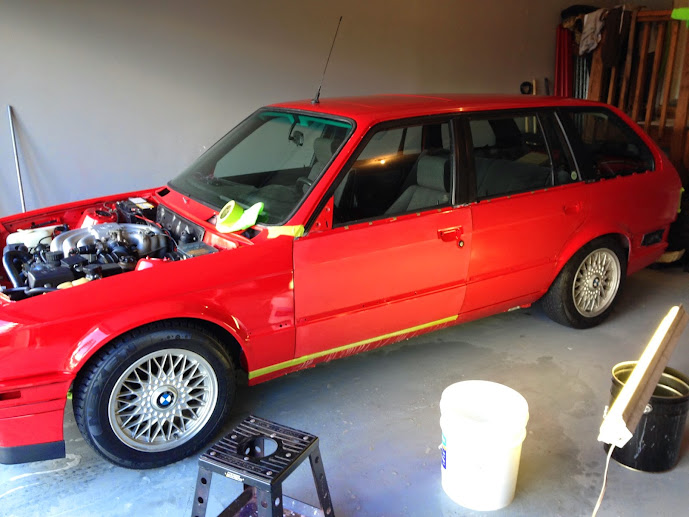
Starting to look like a car again

coat the underside

Muffler was rusted out so I didn't worry about any of the paint on it,
eventually I cut back and replaced the piping, used stainless 2.5' to make a nice straight pipe

After all the mess and cleaning in the garage It was pretty rough so I cleaned it up a bit for my car to sit in


I let the car sit for about 3 weeks for the paint to gas out before I started wet sanding and polishing.
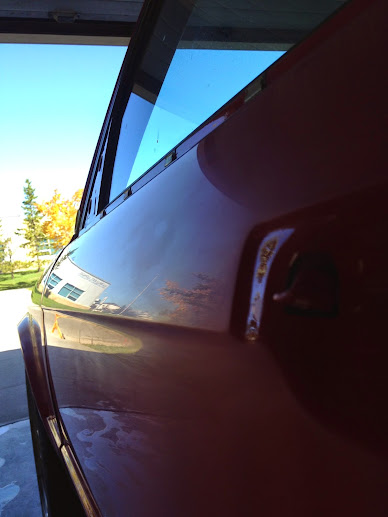
At the beginning it was very nerve racking and took a lot of patients but I managed to get the roof done in 16 hours
and an additional 14 to complete the drivers side. In total it took about 30 min to polish in the end. As for now it is too cold to be doing any wet sanding in my garage so it has been sitting around for the last 3 months as I take a break and replenish my bank account.


[B]Peel Free Finish
UPDATE!!!
Finished wetsanding and polishing, so happy to be done with it only took 28 hours with 2 people sanding from 800-2500
then 3 stage polish.

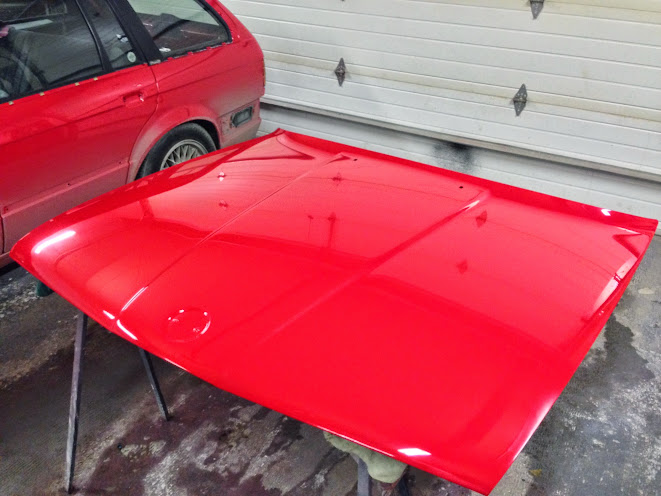
After the 3 stage polish

Thanks ECS was satisfied with my purchases and quick delivery. Will use again!


Installed a aftermarket oil cooler and electric fan, the fitting on the side of the rad was an oddball size and I couldn't find a CTS to fit so I ended up getting a external thermal switch and relay, now I can set the fan to turn on anywhere from 160-220.

Car would not look the right with old faded trim so I repainted everything in bumper coat which is satin black.

Trim installed with all new hardware

Crusty old suspension

Front Removed and wheel arches undercoated
Don't mind the floating parts they will be replaced

Rear removed, didn't snap pics but I cleaned it up and undercoated those areas to match

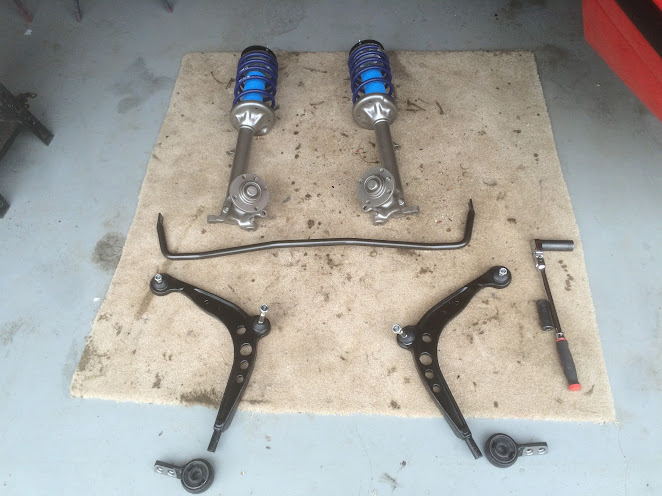
All parts to replace.
Front knuckles and rear subframe with trailing arms will be powder coated with new bushings and bearings. updates later

now to foot the bill to replace it all.
In the mail
koni yellow
h&r super sport springs
st sway bar kit 22mm front 19mm rear
new bushings and wheel bearings
stud conversion
new calipers rotors pads
front control arms
front and rear top hats
as for the subframe and control arms they are all being sandblasted and powder coated silver.
spent some time on the interior
Started off with suede in one hand and fleece liner in the other and bonded the two as wrinkle free as possible with 3m spray glue
then glued it directly to the panel over the edges, trimmed then stapled


Worked on matching the trunk with the rest of the car so for durability I dyed the fabric in the rear.

For the spare tire area I am currently working on a piece of 3/4 maple that I will trim to fit and stain to give a classic wood finish in the rear.
For carpet I ordered matching black carpet kit and will have it sometime this week, I will keep u updated on the quality and fit. To match I have oem bmw floor mats that are more of a dark grey then black for a nice contrast. Matching suede shift boot and m sport knob.
Thanks for the feedback and I will try and update more frequently as work gets done.
For now this is a link to a video my friend made of the wetsand and polish
UPDATE MAY 27 2015
So long story short my parts arrived and so did my powder coating
along with my sway bars and parts :)


I cant stand rust so I did some refurbishing
strip all the rust of with wire wheel then rust proof


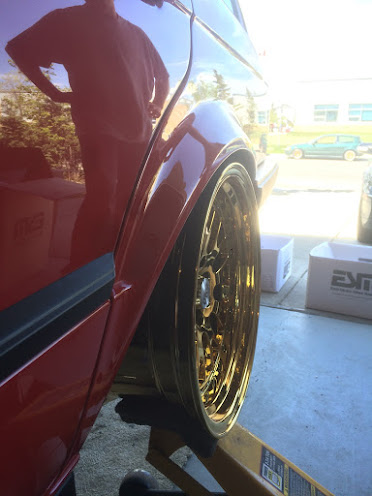
My wheels showed up


Now im still waiting for parts, also going to clean up the axels.
some fresh rebuilt calipers by Friday then hopefully get some rubbers on it Monday and I should be cruising by next weekend, the excitement is killing me.
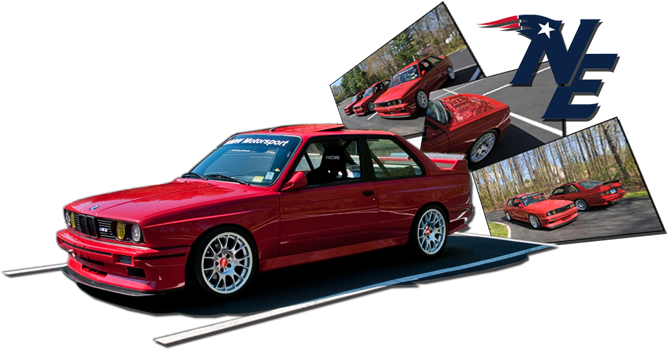
UPDATE SHE IS DONE! for now


gotta make sure the accessories go back in


Hey so a small update, just in the process of uploading pictures, but new for 2016 I had the entire car wrapped in 3m rock guard, a new set of wheels to make it look more old school and a fresh built motor along with much much more. I'll be updating the remainder of pictures but from now on I will be documenting everything in video with other projects!
Please follow the mod squad on Instagram and YouTube, give me some feedback and tell your friends!
Thanks and enjoy
So her we have my built motor, bottom end was decked honed o ringed, fitted with new pistons and rings and bearings. The cylinder head is a bimmerheads race cylinder head with dual valve springs heavy duty rockers, ported polished fitted with a dual pattern turbo cam.

everything is sandblasted and powder coated


Heres a video of the motor being assembled
<iframe width="560" height="315" src="https://www.youtube.com/embed/9_cj9bM4we4" frameborder="0" allowfullscreen></iframe>
<iframe width="560" height="315" src="https://www.youtube.com/embed/IS1KHZ1McFs" frameborder="0" allowfullscreen></iframe>
While the engine was out I deleted the abs pump, never worked and I wanted the clean look and extra space.

also while the motor was out I had the front subframe blasted and coated. I also didn't really like the rack in the car so bought a new z3 rack


installed the motor as I wanted to break it in without a turbo, so I also put in my msd wasted spark ignition and meagasquirt management.

Put some more classic looking wheels.


Took the car for alittle road trip


I didn't like the amount of engine and road noise as this new carpet didn't come with nearly as much insulation so I did the firewall and transmission tunnel in dynamat.
along with those I did the lower half of the door cards.


New vapor barrier

After lots and lots of waiting and searching I finally found a rust free hatch.

Which I had repainted

finally the day came to install my turbo which I have been looking forward too a long time.

really wanted to keep my oil cooler so I got creative and made a bracket for the intercooler that also holds the oil cooler in a v format. also gave me lots of space for my oil filter relocation and easy non kinked lines


lots of welds to keep it ridged


mounted the radiator back to fit my electric fan between the intercooler and radiator with an adjustable temp range


Spent a lot of time rwrapping the manifold tightly and tied it all with stainless wire all fancy


Time to fabricate a downpipe


minimal trimming required to fit it all behind the valance


finished product


VIDEO OF THE CAR ON DYNO!!! CHECK IT OUT!!
AND ANOTHER OF IT SPOOLING UP ON A MODDED EVO
thanks for looking everyone!!
Originally I found the car in Victoria Canada on craigslist as I was searching for a good shape coupe but stumbled on this Touring imported from Germany, original 5 speed manual 325i.
After talking to the owner and some bargaining we agreed on a price and I flew out to pick it up. For an old car I found the condition to be pretty good but not exactly what I expected a BC car to be but Long story short I drove it 11 hours home through the mountains and fell in love with it.
Originally I started off by cleaning it up making sure it was serviced and running top notch to take to the ski hill and sure enough I never stopped.
Here are some pictures from the day I picked it up in Victoria. October 2013.
After getting it home I started fooling around with it and added the thule wind screen and 3m to the original hella headlights to give it some character.
Shortly after getting it home. very very shortly, I was having a lot of issues with misfires and hesitation so I ended up doing a complete ignition system on it which included
Bosch igniter
BMW performance wires
Bosch Distributor and cap
Bosch Spark plugs
Bosch Coolant temp sensor
Crank Sensor
Cleaned up the engine bay with some degreaser and steam washer.
After that was all said and done it was running great for a week, my key stopped working in the ignition which ended up being the ignition switch. So I ordered a new one and replaced it.
While I was under the dash I found this mess with the wires and ended up fixing it up a bit along with the switch to hopefully eliminate any future problems. Further on I located more issues that I am working on resolving, which includes removing the entire keyless system and alarm and fitting it with the original door actuators.
Slightly better.
After that was all said and done I drove it for about 3 weeks before I had time to put it up on a lift at work. As expected I found multiple leaks that possibly date back to the original owner. For the time being I degreased the entire underside and steam washed the piss out of it so I can inspect how bad the leaks are after a few days.
So at this point I had all the bugs and quirks worked out. Drove It for about 4 days....
And as my luck would have it my wagon had an encounter with a truck as I was stopped at a stop sign.
As you can see the damage was very minor with the exception of the top of the radiator support, after a long wait with the insurance company they sent out an adjuster to handle my claim. The agent was very nice and understood the situation I was in with this car as I had purchased it 2 months prior and spent a fair bit of money repairing and legalizing it.
He was also very familiar with older bmw's so he opted that the car remain active status and be repaired.
After a few quotes I ended up getting a decent settlement based on a quote from a repair shop and began ordering replacement parts for the front end.
I started by removing all the damaged parts including the radiator support and making a list of everything I was replacing.
As u can see the damage was mostly cosmetic with the exception of the top of the radiator support
New Rad support and aluminum radiator arrived so I mounted it temporarily
So at this point I made it drivable to move to a warmer location to work on it which ended up being my friends house outside of town where I really started to get to work.
First I started by removing the engine and fixing all the leaks. Making it as reliable and clean as possible.
This is when my addiction for perfection started. I went from only fixing the damaged front end to a full restoration.
I will let the pictures do the talking for a bit.
Pressure washed
Input shaft seal leaking
cleaned and replaced
output shaft and shifter seal replaced cleaned up
along with new transmission mount bushings
Engine cleaned with new rear main seal
Degreased and wire brushed
Timing belt water pump replaced, all covers bead blasted
Painted the block
Cleaned with resurfaced flywheel new clutch
Engine bay cleaned for prep all seam sealer removed, the entire bay was cleaned thoroughly with wax and grease remover before any sanding was done, as a tip to others the stuff is amazing at cleaning and can be used on factory paint carefully to remove stains or really dirty areas.
Some rust repair in engine bay
Engine bay prepped ready for primer
Primed and prepped
Custom rad support brackets making the support completely removable from the car
Rad support and rad fitted
Fitted with new seam sealer
Final prep of the engine bay and support
Hellrott red
Engine Install
Radiator support mounted
Fitment, new fenders headlights grille hood valance
Spring just arrived so I brought it home to work on
Masked off interior
Prepped door jams
Prepping the doors
Doors and door jam
So just a rundown
the engine and engine bay took about 3 weeks of work I was on vacation so I worked from about 12-1am every night casually to get the engine bay done from start to finish.
As for the doors and door jams it took about roughly 3 hours to prep each door for primer and the door jams took about 8 hours a side to prep. The steps were to clean the area, wax and degrease the area thoroughly, you half ass any of these steps you will be wasting your time, then finally sanding down to 400 for the primer to mate with the car properly.
Stripped all the texture coating off the valances
used a wire wheel to remove it then sanded the steal to 400
At this point I am repairing all the rust I can find on the car I didn't take very many pictures because I was dirty in awkward positions.
Steps were too wire wheel as much off followed by sand blast the area cut away all infected spots weld new parts in, sand blast the welds self etch the metal, the rockers I used rocker guard on the inside and yadayadayada it should never come back
I found every spec of rust and fixed all of it, including the floor pans on both driver and passenger side
I ended up removing all the carpet and tossing it in the garbage and now searching for new replacement.
I didn't drive the car for 3 months and the carpet was still soggy and gross. garbage it went
this is why the car rusts, drenched carpet and a giant dirt sponge that builds up behind the fender liner
Rear wheel well
Should never rust again
Re prime seam seal make sure there are no leaks
Exterior prep
Guide coat
More blocking
Final guide coat wet sanding
Every nook and cranny
Temporary interior
The hatch had severe rust that was not repairable so until I can find a new one to paint I decided I would leave some rust on the car and got alittle creative on the hatch
Starting to look like a car again
coat the underside
Muffler was rusted out so I didn't worry about any of the paint on it,
eventually I cut back and replaced the piping, used stainless 2.5' to make a nice straight pipe
After all the mess and cleaning in the garage It was pretty rough so I cleaned it up a bit for my car to sit in
I let the car sit for about 3 weeks for the paint to gas out before I started wet sanding and polishing.
At the beginning it was very nerve racking and took a lot of patients but I managed to get the roof done in 16 hours
and an additional 14 to complete the drivers side. In total it took about 30 min to polish in the end. As for now it is too cold to be doing any wet sanding in my garage so it has been sitting around for the last 3 months as I take a break and replenish my bank account.
[B]Peel Free Finish
UPDATE!!!
Finished wetsanding and polishing, so happy to be done with it only took 28 hours with 2 people sanding from 800-2500
then 3 stage polish.
After the 3 stage polish
Thanks ECS was satisfied with my purchases and quick delivery. Will use again!
Installed a aftermarket oil cooler and electric fan, the fitting on the side of the rad was an oddball size and I couldn't find a CTS to fit so I ended up getting a external thermal switch and relay, now I can set the fan to turn on anywhere from 160-220.
Car would not look the right with old faded trim so I repainted everything in bumper coat which is satin black.
Trim installed with all new hardware
Crusty old suspension
Front Removed and wheel arches undercoated
Don't mind the floating parts they will be replaced
Rear removed, didn't snap pics but I cleaned it up and undercoated those areas to match
All parts to replace.
Front knuckles and rear subframe with trailing arms will be powder coated with new bushings and bearings. updates later
now to foot the bill to replace it all.
In the mail
koni yellow
h&r super sport springs
st sway bar kit 22mm front 19mm rear
new bushings and wheel bearings
stud conversion
new calipers rotors pads
front control arms
front and rear top hats
as for the subframe and control arms they are all being sandblasted and powder coated silver.
spent some time on the interior
Started off with suede in one hand and fleece liner in the other and bonded the two as wrinkle free as possible with 3m spray glue
then glued it directly to the panel over the edges, trimmed then stapled
Worked on matching the trunk with the rest of the car so for durability I dyed the fabric in the rear.
For the spare tire area I am currently working on a piece of 3/4 maple that I will trim to fit and stain to give a classic wood finish in the rear.
For carpet I ordered matching black carpet kit and will have it sometime this week, I will keep u updated on the quality and fit. To match I have oem bmw floor mats that are more of a dark grey then black for a nice contrast. Matching suede shift boot and m sport knob.
Thanks for the feedback and I will try and update more frequently as work gets done.
For now this is a link to a video my friend made of the wetsand and polish

UPDATE MAY 27 2015
So long story short my parts arrived and so did my powder coating
along with my sway bars and parts :)
I cant stand rust so I did some refurbishing
strip all the rust of with wire wheel then rust proof
My wheels showed up
Now im still waiting for parts, also going to clean up the axels.
some fresh rebuilt calipers by Friday then hopefully get some rubbers on it Monday and I should be cruising by next weekend, the excitement is killing me.
UPDATE SHE IS DONE! for now
gotta make sure the accessories go back in
Hey so a small update, just in the process of uploading pictures, but new for 2016 I had the entire car wrapped in 3m rock guard, a new set of wheels to make it look more old school and a fresh built motor along with much much more. I'll be updating the remainder of pictures but from now on I will be documenting everything in video with other projects!
Please follow the mod squad on Instagram and YouTube, give me some feedback and tell your friends!
Thanks and enjoy
So her we have my built motor, bottom end was decked honed o ringed, fitted with new pistons and rings and bearings. The cylinder head is a bimmerheads race cylinder head with dual valve springs heavy duty rockers, ported polished fitted with a dual pattern turbo cam.
everything is sandblasted and powder coated
Heres a video of the motor being assembled
<iframe width="560" height="315" src="https://www.youtube.com/embed/9_cj9bM4we4" frameborder="0" allowfullscreen></iframe>
<iframe width="560" height="315" src="https://www.youtube.com/embed/IS1KHZ1McFs" frameborder="0" allowfullscreen></iframe>
While the engine was out I deleted the abs pump, never worked and I wanted the clean look and extra space.
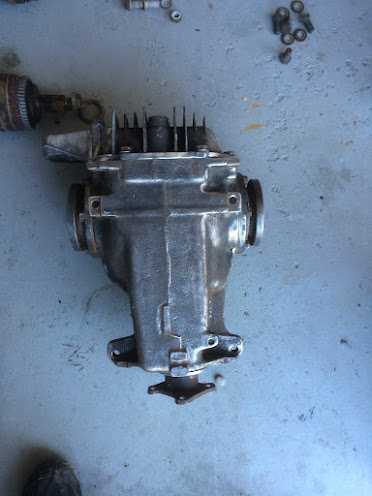
also while the motor was out I had the front subframe blasted and coated. I also didn't really like the rack in the car so bought a new z3 rack
installed the motor as I wanted to break it in without a turbo, so I also put in my msd wasted spark ignition and meagasquirt management.
Put some more classic looking wheels.
Took the car for alittle road trip
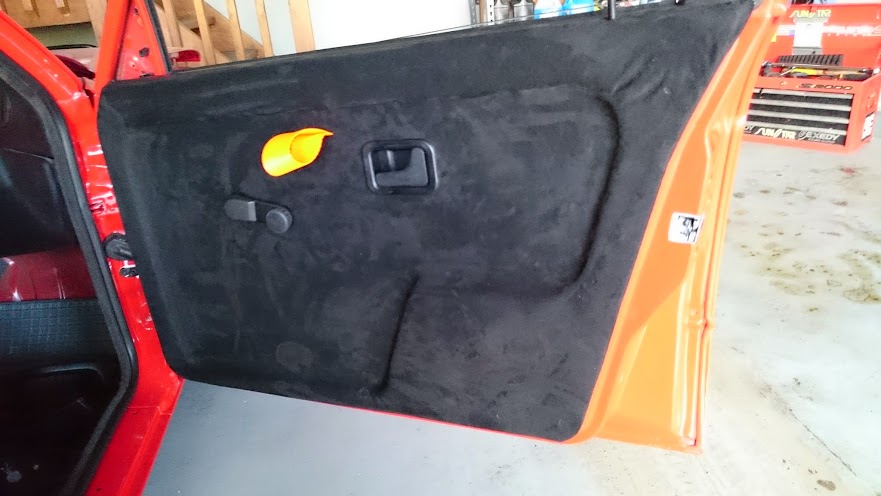
I didn't like the amount of engine and road noise as this new carpet didn't come with nearly as much insulation so I did the firewall and transmission tunnel in dynamat.
along with those I did the lower half of the door cards.
New vapor barrier
After lots and lots of waiting and searching I finally found a rust free hatch.
Which I had repainted
finally the day came to install my turbo which I have been looking forward too a long time.
really wanted to keep my oil cooler so I got creative and made a bracket for the intercooler that also holds the oil cooler in a v format. also gave me lots of space for my oil filter relocation and easy non kinked lines
lots of welds to keep it ridged
mounted the radiator back to fit my electric fan between the intercooler and radiator with an adjustable temp range
Spent a lot of time rwrapping the manifold tightly and tied it all with stainless wire all fancy
Time to fabricate a downpipe
minimal trimming required to fit it all behind the valance
finished product
VIDEO OF THE CAR ON DYNO!!! CHECK IT OUT!!
AND ANOTHER OF IT SPOOLING UP ON A MODDED EVO
thanks for looking everyone!!


Comment