-
-
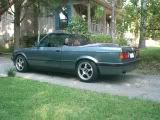
So that looks just like the MTech rep from Eurostop. Did it fit niecly, or was fiberglass work involved before paint? Prep I expect, but actual reforming is my question. Did you do it yourself, or pay a pro?
Looks terrific, BTW.
I am going to be doing one on an early coupe, so I am sure I get to mod the arches, or where the valence meets the body, or some shit.
Luke
Closing SOON!"LAST CHANCE FOR G.A.S." DEAL IS ON NOW
Luke AT germanaudiospecialties DOT com or text 425-761-6450, or for quickest answers, call me at the shop 360-669-0398
Thanks for 10 years of fun!Comment
-
Up up and away! :up:Comment
-
:up:Comment
-
:)Comment
-
BUmp!!! Anyone?Comment
-
I want to see more input here too, but I got nothing.
Closing SOON!"LAST CHANCE FOR G.A.S." DEAL IS ON NOW
Luke AT germanaudiospecialties DOT com or text 425-761-6450, or for quickest answers, call me at the shop 360-669-0398
Thanks for 10 years of fun!Comment
-
help me and luke out! :up:Comment
-
Ttt!Comment
-
:up:Comment
-
Considering you have access to a body shop you maybe able to make this work. Its not in great shape but could clean up nice.
PM me if interested. Im not using it and its just taking up room in the garage.Attached Filessigpic
New website releasing soon www.gutenparts.com Guten Parts + Service | Facebook | Twitter
____________________________________
Levent
%20levent@gutenparts.com
____________________________________
Ladies:
1998 E36 m3/4/5 1988 325i 1989 325iTComment
-
-
Is that the zender levent?Comment
-
yup, thats the zender.sigpic
New website releasing soon www.gutenparts.com Guten Parts + Service | Facebook | Twitter
____________________________________
Levent
%20levent@gutenparts.com
____________________________________
Ladies:
1998 E36 m3/4/5 1988 325i 1989 325iTComment
-
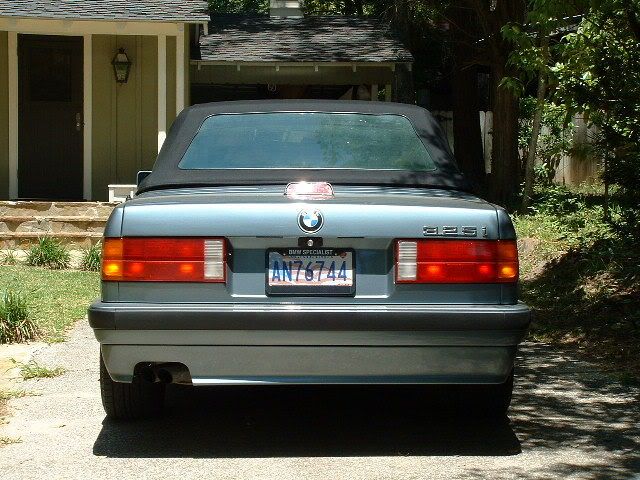
Thanks for the offer levent, but I think the rd or mtech 2 would suite better for the plastic rear. I sort of like how it extends lower and give the rear a little more curves.
Just got the car home, I'll get some pics up in a little. ;)
Having problem with the fuel gauge, going to do quick search and see if I can fixt that! :up:Comment
-
Luke,
Sorry I haven't checked this thread until today. You should have PM'd me! Thanks for the kind works, I did prep, paint and install it myself. With your experience building your woofer boxes, this will be a no brainer.
I chose eurostyle due to some of the feedback from others on this forum. I believe your buddy Jordan S. thought highly of Filip's work. If he liked it, then it must be ok.
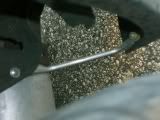
Yes, you will need to do some prep work: apron will need some plastic putty and sanding. The bumper cover will need to have the bottom edge shaved to make a seamless fit to the apron.
I wouldn't call it "reforming" but "adjusting" to make sure everything lines up correctly. This did require some adjusting/stretching but this apron is flexible to accept a bend to match your bumper cover.
Prep, paint and then let cure for at least a week to prevent any damage to the fresh paint while you are messing about fitting the two together.
I started by making sure the apron and bumper cover was even at the wheel area. I then clamped and drilled holes(there is a dremel attachment that will work in this tight area) and used self-tapping screws for the sides and worked my way back and used a bolt/washer/nut combination for the back section. When finished, attach the bumper cover/apron to the fiberglass bumper using those plastic grommets.
I also fashioned a strut to secure the bottom edge of the apron by the wheel well to the body. I didn't want my apron flapping about at speed like some ricer's bodykit. I will attach a photo. I simply used round aluminum stock from HD or Lowes. I bent the aluminum bar and used a torch to heat up the ends. While still hot(use gloves) pound the ends flat. This is to create a flat area to drill through and attach to the apron(see where on the apron lip) and body. I used self-tapping screws to the body and a bolt/washer/rubber washer/bolt to the apron.
I hope this helps.
Doug
Comment


Comment