

Hey guys here's a little update on my experience with the ie race camber plates. FYI, I'm running bilstein sports. Aside from having to machine the spherical bearing bushing to make it work with my struts they had been working great. But after a couple weeks i started getting popping noises coming from both sides while turning the wheels when not moving. The noise sounded a lot like springs binding. Turns out the spring hats were binding on the top of the strut shaft while turning causing the springs to load up then pop.
When i originally installed the plates i put 2 of the provided washers under the plate and 1 on top (under IE's recommendation). This didn't give enough clearance between the strut shaft and the spring hats causing the binding. Now i have 3 washers under the plate and 0 on top and no more popping or binding noises.
Please note I believe the assembly diagram IE provides with the plates say to put 1 on top and 1 under, but that would make my situation even worse.
These are my experiences with the ie race plates and i hope this post can save other members running them some head scratching.
-
-
With no offense, the problem isn't the design, but you're on the right track.
First, the plate can be flipped 180 degrees depending on where you need the adjustment.
Second, as you guessed, all four bolts are NOT needed. We simply include four just because, if not, I'd get calls asking why there are extra holes drilled in the top plate.
Preemptively, there are no degree markings on top, that is false security since the actual degree positions will vary depending on the rest of the setup. I use a paint marker while doing an alignment to use for future reference.
.
.
.
.
.
.
Pictures,
Here's a picture from the top with the adjustment near the middle, notice that you can rotate the plate so the offset drilled holes can be on either side, this is important to factor in if you are looking for maximum adjustments.

For example, here's a plate set at the maximum amount of positive camber. Notice that the top of the shock and the fender hole becomes the limiting factor. That's a lot of adjustment.

Leave a comment:
-
^^^ that sure doesn't leave a lot of room for adjustment! You would think you could use the whole range?Leave a comment:
-
I see how this would put it more in a "stock" location but why are these designed with very limited adjustability?
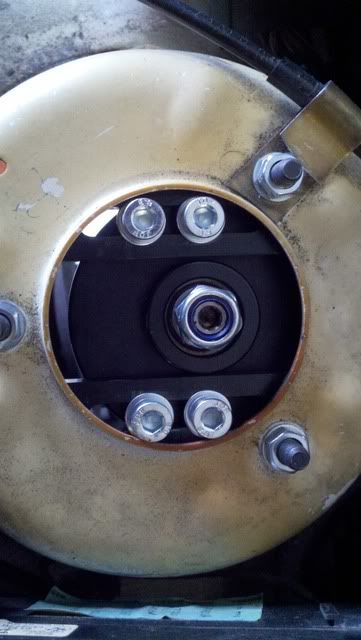
Here is the pic of mine before finally tightening. Its sitting at about -2.25 degrees camber and there is no way to get that back out of it. It's a bit too much for me as a daily. Maybe just run one set of bolts?
Leave a comment:
-
I tried putting the other set of bushings on my shocks and they still didnt fit. Machine shop i go i guess.Leave a comment:
-
Ok, problem solved. The additional bushings included with the plates fit perfectly on the Bilsteins. Push the old bushings out with a ~10mm socket in a vice, push the other ones in. To get them started straight, put the bushing on the Bilstein, put the plate one top, tighten the nut a bit. Then put it in the vice with the socket and finish pushing it in.
That's how I did it, anyway.Leave a comment:
-
Might need to un-do all the allens bolts and do a 180 with the top plates.Leave a comment:
-
What am I missing with the IE plates? With all 4 retaining bolts in, there is no room to adjust? Anyone have pics of these installed?Leave a comment:
-
-
-
-
Brought my IE plates to work today to check them out before I tear into my whole front end tonight. One plate does in fact have a proper 14mm through hole for bilsteins in the spherical bearing while the other has a 13.75 hole. Whats the deal with this? I will fix mine here at work but these really shouldnt be going out to people like this.Leave a comment:
-
My coilover and camber plate setup arrived today, looks good and I'm going to throw the rears in tonight, fronts in next week when I've got some time off work.
I'll get some photos up when its all in but really happy with the product on sight.Leave a comment:
-
I had to press out the spacers that were in my plates and pressed in the extra set of spacers in order to use with my bilstein sports. The ones on the plates were too small.Leave a comment:

Leave a comment: