
Previous thread - http://www.r3vlimited.com/board/showthread.php?t=144105
So I thought I may as well make a new build thread for those people interested in such things :)
Little background on why I had to rebuild. Throughout the time of being boosted, I was having recurring issues with knock and pressurizing the cooling system. I wasted a .140 MLS, and two stock gaskets in about 9 months time.
After replacing the gasket again I began having major blow-by issues. It was so bad that my valve cover breather would leak a good amount and I'd waste through 2 quarts every 600 miles. I figured my rings were just toast, and because of school, I had to wait a couple months to fix the issue.
Well, to my dismay it wasn't the rings...it was the ring lands! 5/6 pistons had broken ring lands and my cylinder walls had little evidence of any cross-hatching left. Not sure here if that's a direct product of the ring lands being broken.
SO, considering the specs of my bore and knowing I'd have to re-hone, I decided to get over-bore pistons and refresh the bottom end.


The pistons are Wisecos spec'd by TRM and drop the CR to about 8.5:1. One of the interesting physical features of these pistons are how their skirts are unsymmetrical on the intake side.
Here's a pic that shows it best. Still not sure what it's for.

I also took some rubbing compound to the tops to make them close to mirror finish. They came highly matte from factory, so might as well right? :)
The no-brainer was to get the block O-ringed while it was at the machine shop. For where the rings have to meet at their tangents I used a manual piston ring filer to chamfer the ends to make them fit up better. Came out a really well if I do say so myself.
I originally planned to re-use my stock rods, but I stumbled upon a cheap "used" set of Eagle's from someone's spare race motor on Ebay. I think they're one of the old original sets before the company went sour (from what I've read) as they spec'd out correctly for clearances.
Not sure if it was the o-rings or what, but my ARP studs had to be re-torqued 3 times to 32#'s over a 48 hour period before they held Also, that new lube ARP has is awesome! No binding AT ALL. Definitely not the case with the previous lube.


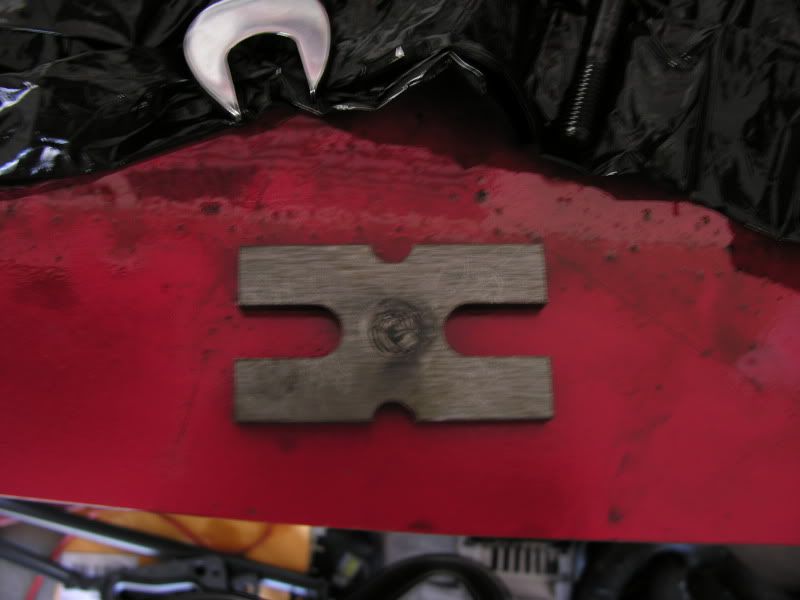
For the build I laser cut me some tools to make things easy. Made a new base plate for my valve removing tool to make it easier to remove the keepers (pic'd below) and a cam locking tool (have dimensions if anyone needs it).
Also, while waiting for the pistons (WHICH TOOK A LONG TIME :eyecrazy) I gathered up the motivation to paint my cosmoline-infected engine bay satin black. I used the Krylon paint that muscle car guys seem to like. Seems fairly durable so far and very easy to touch-up. ;)
I also shaved off all the brackets I didn't need...which was 90% of them :D

I also got happy with the wrinkle paint. WHICH IS AWESOME LOOKING! Stay tuned for pics of the pieces I attacked. Also stay tuned to see if it can handle valve cover temp's :lol

That's about it for now! Engine is already in the car and need to finish putting everything else back together.
BTW, this S50 will be juiced on E85 :pimp:
So I thought I may as well make a new build thread for those people interested in such things :)
Little background on why I had to rebuild. Throughout the time of being boosted, I was having recurring issues with knock and pressurizing the cooling system. I wasted a .140 MLS, and two stock gaskets in about 9 months time.
After replacing the gasket again I began having major blow-by issues. It was so bad that my valve cover breather would leak a good amount and I'd waste through 2 quarts every 600 miles. I figured my rings were just toast, and because of school, I had to wait a couple months to fix the issue.
Well, to my dismay it wasn't the rings...it was the ring lands!
5/6 pistons had broken ring lands and my cylinder walls had little evidence of any cross-hatching left. Not sure here if that's a direct product of the ring lands being broken.SO, considering the specs of my bore and knowing I'd have to re-hone, I decided to get over-bore pistons and refresh the bottom end.
The pistons are Wisecos spec'd by TRM and drop the CR to about 8.5:1. One of the interesting physical features of these pistons are how their skirts are unsymmetrical on the intake side.
Here's a pic that shows it best. Still not sure what it's for.
I also took some rubbing compound to the tops to make them close to mirror finish. They came highly matte from factory, so might as well right? :)
The no-brainer was to get the block O-ringed while it was at the machine shop. For where the rings have to meet at their tangents I used a manual piston ring filer to chamfer the ends to make them fit up better. Came out a really well if I do say so myself.
I originally planned to re-use my stock rods, but I stumbled upon a cheap "used" set of Eagle's from someone's spare race motor on Ebay. I think they're one of the old original sets before the company went sour (from what I've read) as they spec'd out correctly for clearances.
Not sure if it was the o-rings or what, but my ARP studs had to be re-torqued 3 times to 32#'s over a 48 hour period before they held
Also, that new lube ARP has is awesome! No binding AT ALL. Definitely not the case with the previous lube.For the build I laser cut me some tools to make things easy. Made a new base plate for my valve removing tool to make it easier to remove the keepers (pic'd below) and a cam locking tool (have dimensions if anyone needs it).
Also, while waiting for the pistons (WHICH TOOK A LONG TIME :eyecrazy) I gathered up the motivation to paint my cosmoline-infected engine bay satin black. I used the Krylon paint that muscle car guys seem to like. Seems fairly durable so far and very easy to touch-up. ;)
I also shaved off all the brackets I didn't need...which was 90% of them :D
I also got happy with the wrinkle paint. WHICH IS AWESOME LOOKING! Stay tuned for pics of the pieces I attacked. Also stay tuned to see if it can handle valve cover temp's :lol
That's about it for now! Engine is already in the car and need to finish putting everything else back together.
BTW, this S50 will be juiced on E85 :pimp:
Comment