
-
nice! makes me miss my eta. It wasnt a ES but came with a 293 lsd , tan houndstooth int. power everything and prem sound. was also Zinno. GL bro!
-
You may have some interference between the parts on your upper steering knuckle. Might want to make sure there's a little extra room with a DremelLeave a comment:
-
Tried to get pics up sooner, but a buddy rolled by and needed me to help him with replacing an evap sensor in his car.


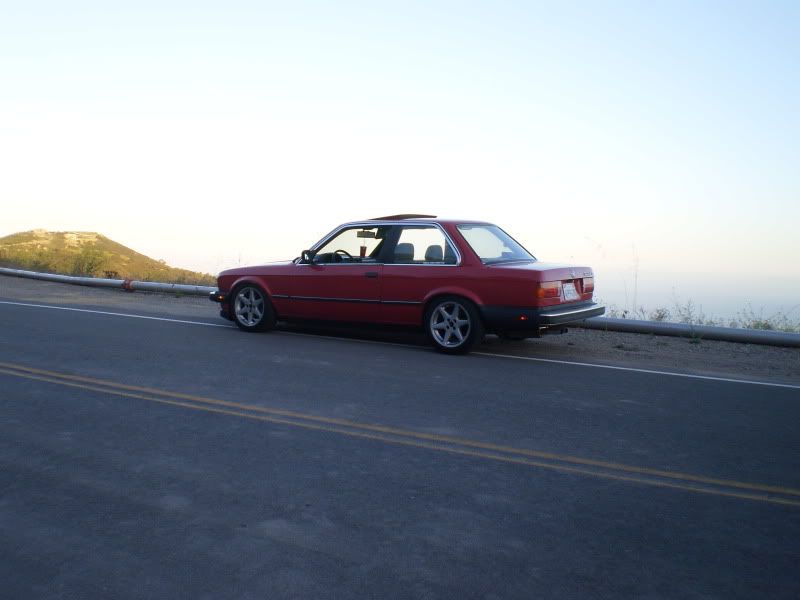
Here are pics of the E36 steering rack in the car. I didn't take any "in-process" pics.

Kingston, here are the spacers I used to bolt the rack to the cross-member. I bought the $30 kit off E30Tech.com


Used the E36 tie-rod ends as well.

Leave a comment:
-
SkorcherX,
Great to see your progress! Just (mostly) finished my M50 swap as well.
What did you use for spacers for the steering rack mounting and spacing out the parts of the steering knuckle? Be aware that you may need to very slightly Dremel off some of the metal by the swivel joint, as it may rub slightly.
Keep up the good work!Leave a comment:
-
Yeah I have been going off the wiring diagram that covers the 1987 E30 with the 2.7 motor.
Small update... I got the E36 steering rack swapped into the car. Really glad I did this while the motor was out of the car, cause getting the steering knuckle back on was difficult to say the least.
I plan on snapping a few pics tonight to update the post with.Leave a comment:
-
What is your year and model?
Pins outs change between year and model. For this reason, only refer to pinouts corresponding to your specific year and model.
Observably, the primary functions pins are usually the same while ancillary features such as tach or oil level change. I have my 1991 318i (M42) pinout and you have listed the same Alternator, Coolant Temp, Ignition, Fuel Pump, Starter thin and Start thick locations. But certainly check your specific Electical Technical Manual (ETM) or with someone with a working harness on a car exact model as yours to insure these are correct for you.
Oh and best of luck!Last edited by rightcoastbias; 10-26-2011, 09:47 AM.Leave a comment:
-
Working on the wiring... This is what I came up with. I know I'm missing stuff... Please if you know that I am missing a value for a pin please chime in.

Leave a comment:
-
-
Nice work. I'll be tackling this exact project once I get it back from the engine builder (3.0L stroker FTW!).
ChrisLeave a comment:
-
boy this all looks pretty familiar. May want to check out my build thread for some help if you need it.Leave a comment:
-
So I finally ordered more parts!
Picked up a clutch kit, got my flywheel back from my buddy and got all new stuff for the shift linkage.


Here are some pics of what I have done so far with the wiring. Still have to figure out where the rest of these wires go... Some just get deleted.


I installed most of the linkage parts to confirm that everything was going to work. Yes thats a Z3 shift lever, I read that its supposed to reduce the throw by almost 30%!

The shift joint that I got was a different size. I had to use some extra washers I had to take up the gap.

Leave a comment:
-
Been working on the wiring. Got all the easy stuff wired up. Need to get the old E30 temp sensor re-threaded to fit the M50 head. Also need to make the plug for the Oil Level sender, since that is non-existent in the M50 harness.
Here is a crappy iPhone pic

I have not gotten my flywheel back from being resurfaced yet. When I get that done then I will have to get it re-balanced, and I got about $400 more in parts I need to order. This it will just nickel and dime me for vacuum lines, fuel lines, and little things to bring it all together.Leave a comment:
-
I was finally able to get those nubs on the valve cover unscrewed so I could screw in the coil pack cover rubber mounts. After i got past that obstacle I spent an hour or two getting all that gold flaky coating shit off the cover. That was a pain in the ass. I hit it with some GUNK and then hosed it off in the drive way. Then I used the wife's hair dryer to dry it all off. Finally I hit it with a few coats of hi-temp wrinkle black. It came out "Okay".
I didn't take any process pictures. Here it is all back on the motor.


Time to move on to cleaning up the intake manifold and throttle body. Simple Green for the win!Leave a comment:

Leave a comment: