
For those of you who are planning on passing the CA BAR for a 100% legal OBD2 swap:
First of all, credit for this project goes to Archangel; he helped me with how to do this. Some of the text is literally copied from him.
The M52/S52 has a the charcoal can located in the trunk and has a fuel pressure sensor connected to the evaporation tank. These are 2 of the 3 needed evap sensors needed for OBD2. Both of them connect on the e36 body harness (other one is in the engine bay connected to the engine harness). I had Markert Motor works customize my engine harness to include these two plugs on my engine harness (since, like I said, they are normally on the body harness in the e36) with extra long wire so both plugs could pass from the engine bay through the cabin (buried under the carpet and through the back seats) into the trunk.
You will need:
-M52/S52 Charcoal Canister (16131183509)
-M52/S52 Fuel Pressure Sensor (16141182581)
-~12' 8mm fuel hose (16121180409)
-~2' 6mm fuel hose (21220411)
-hose clamps (07129952104)
-6mm T connector (13111254083)
First thing you must do is jack up the back and take off the right rear tire to access the plastic cover leading to the evap tank.
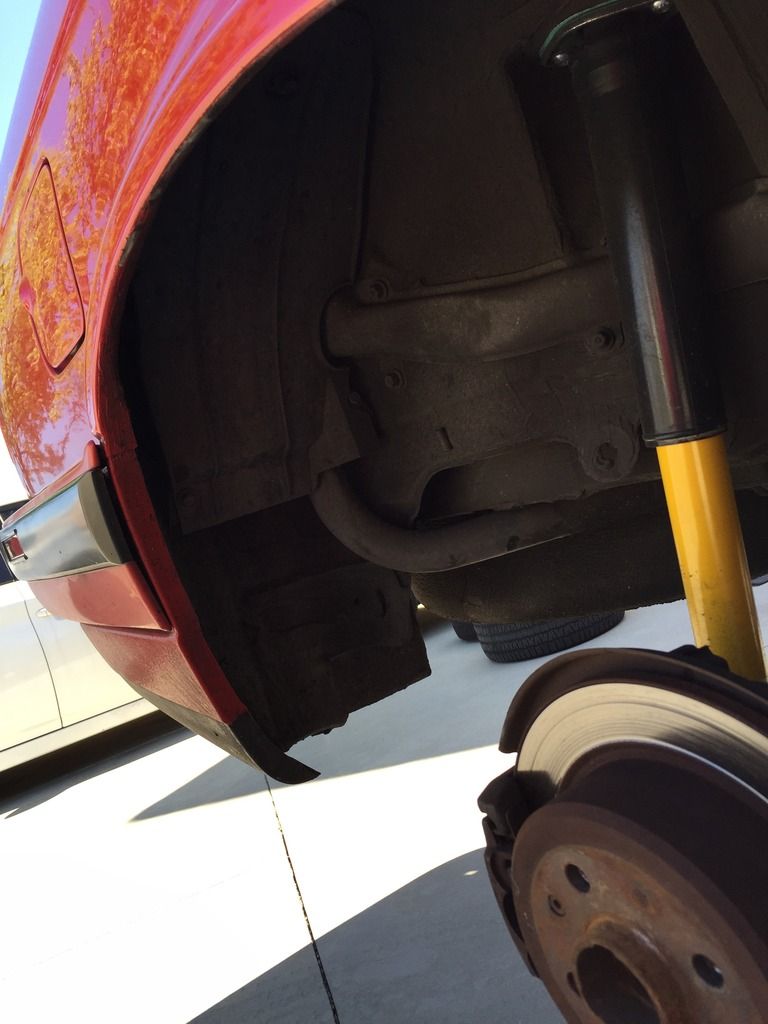
There are two 10mm screws for the cover and 1 holding the top of evap tank to the top of the wheel well.
Then, take off the metal cover to the braided fuel hose. I didn't bother replacing this, but needed the room to maneuver.
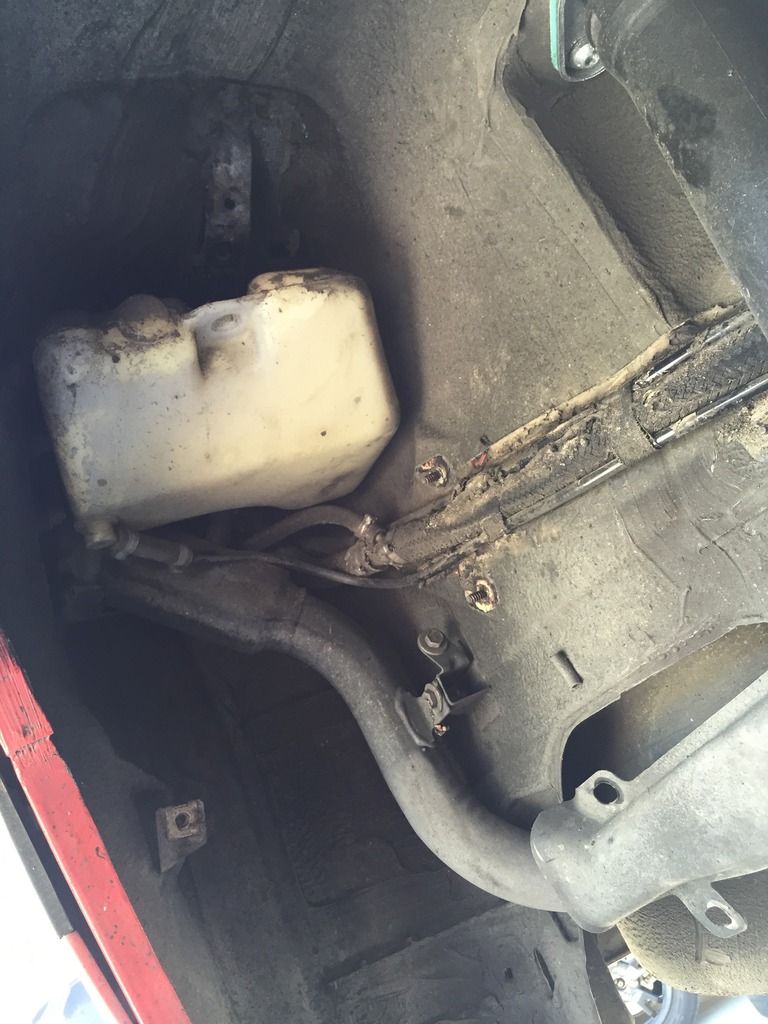
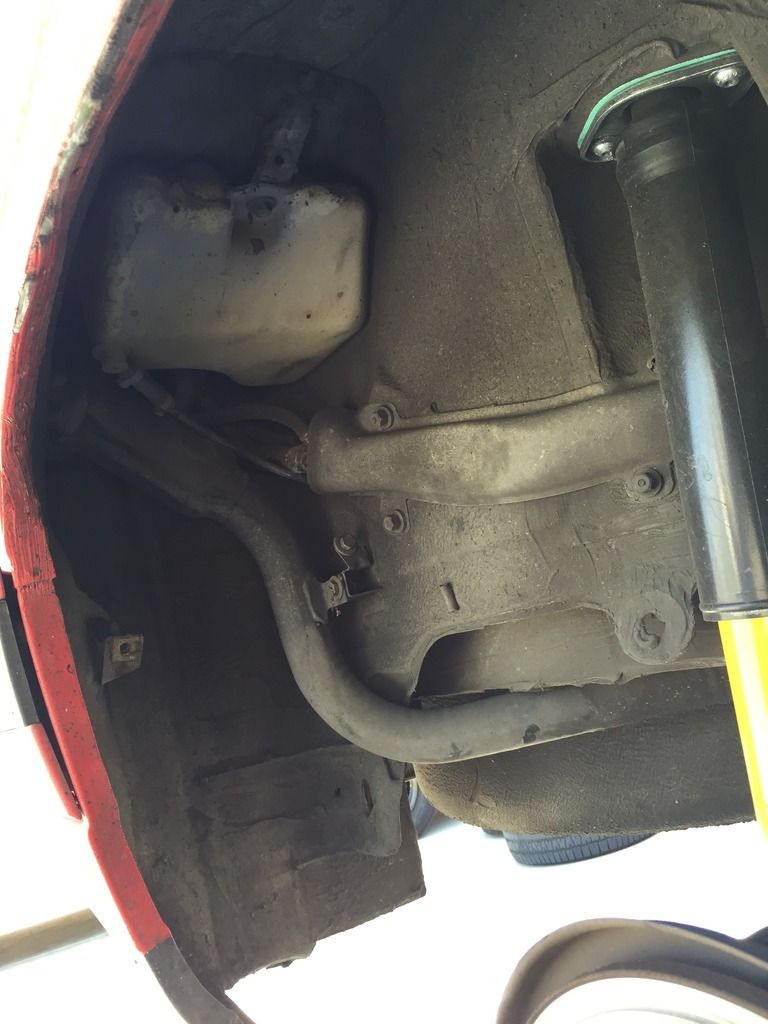
Then cut the three hoses connected to the evap tank and remove the tank:
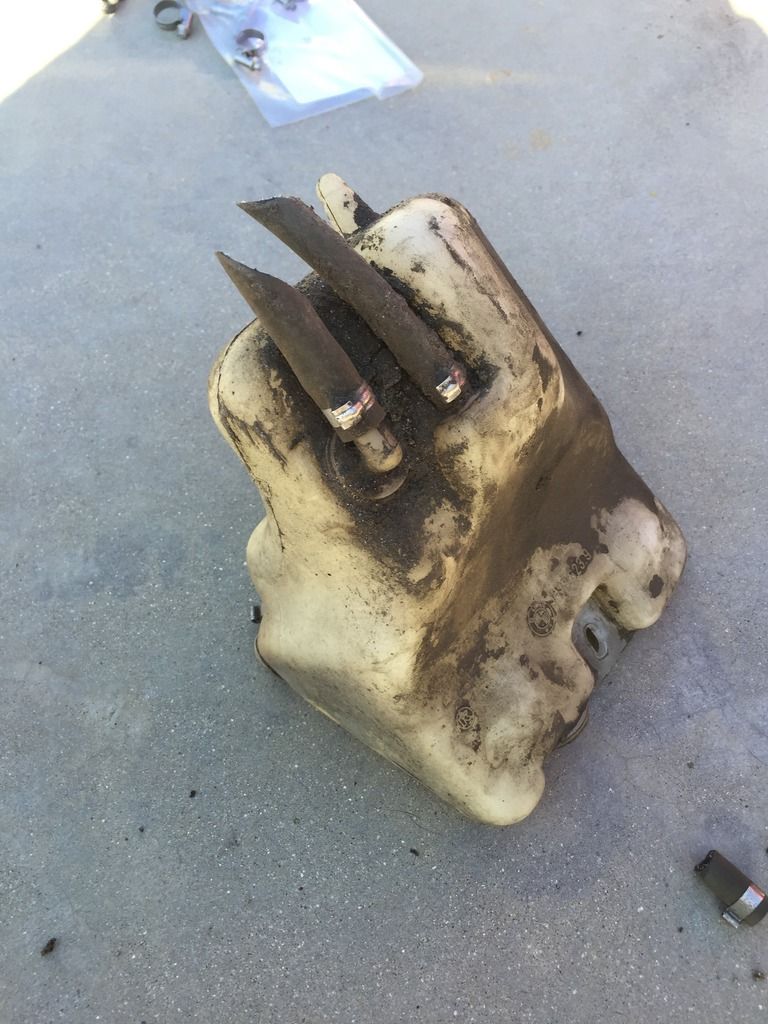
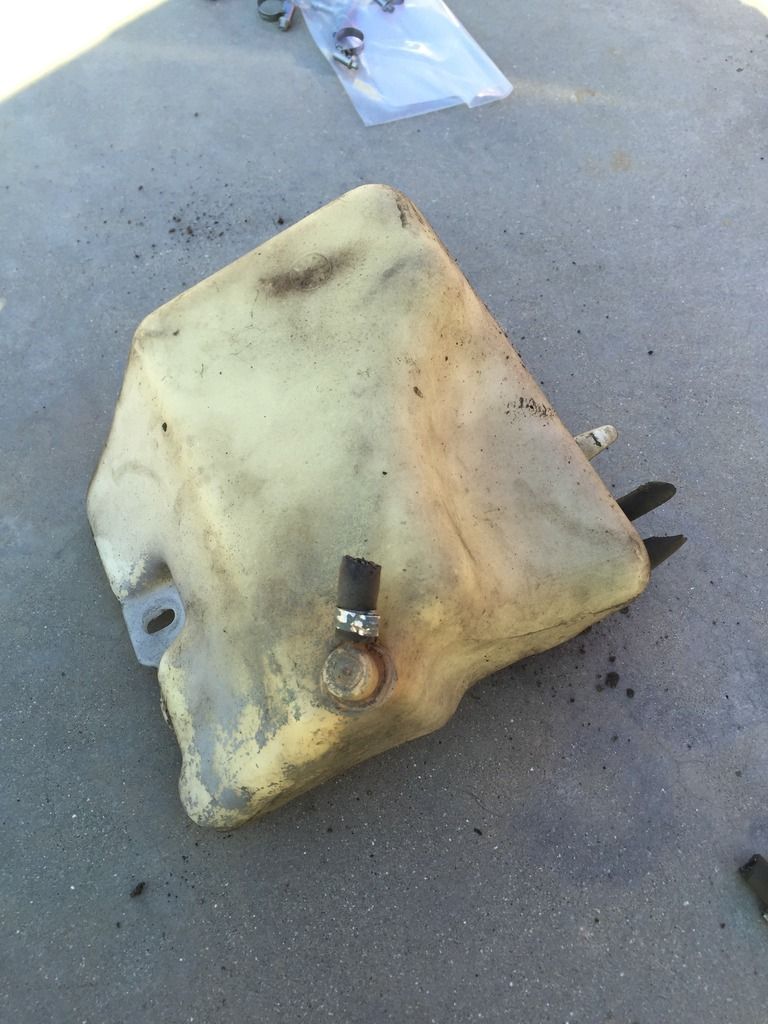
The tank was pretty dirty so I took the opportunity to clean it up.
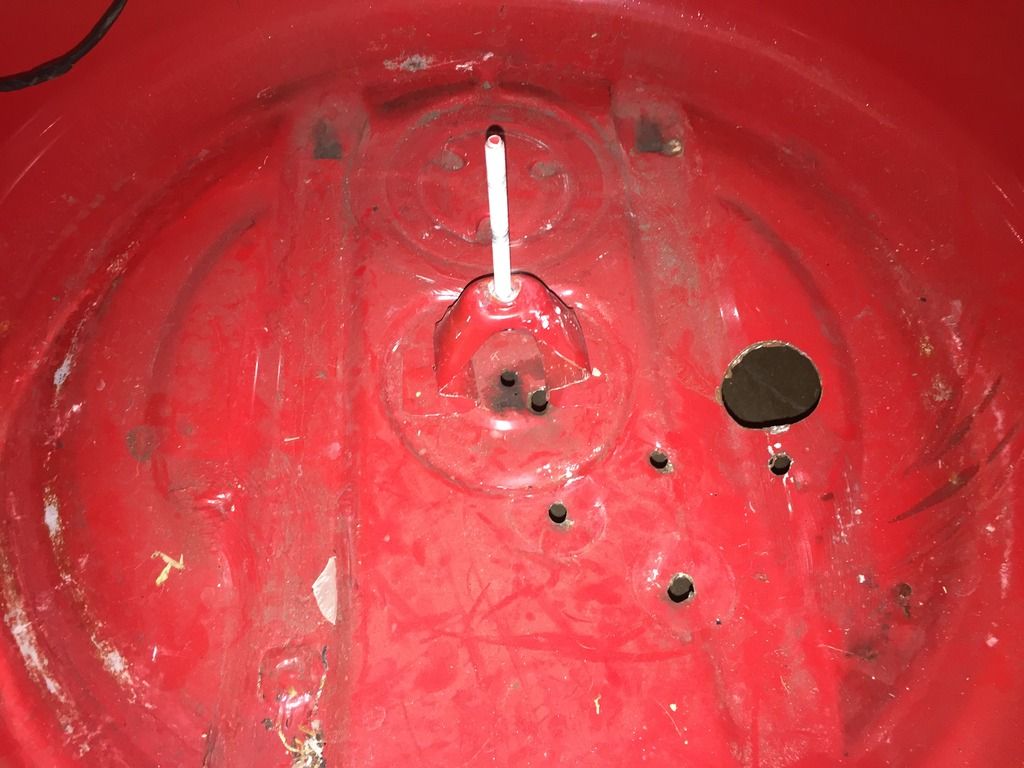
Now its time to put in the charcoal can. Open your trunk and remove the right side carpet and bottom carpet. Take out the spare. never mind the holes in the spare cavity (po had a trailer hitch on the car when I bought it... a trailer hitch on an e30... convertible... Arg... anyway, I digress).
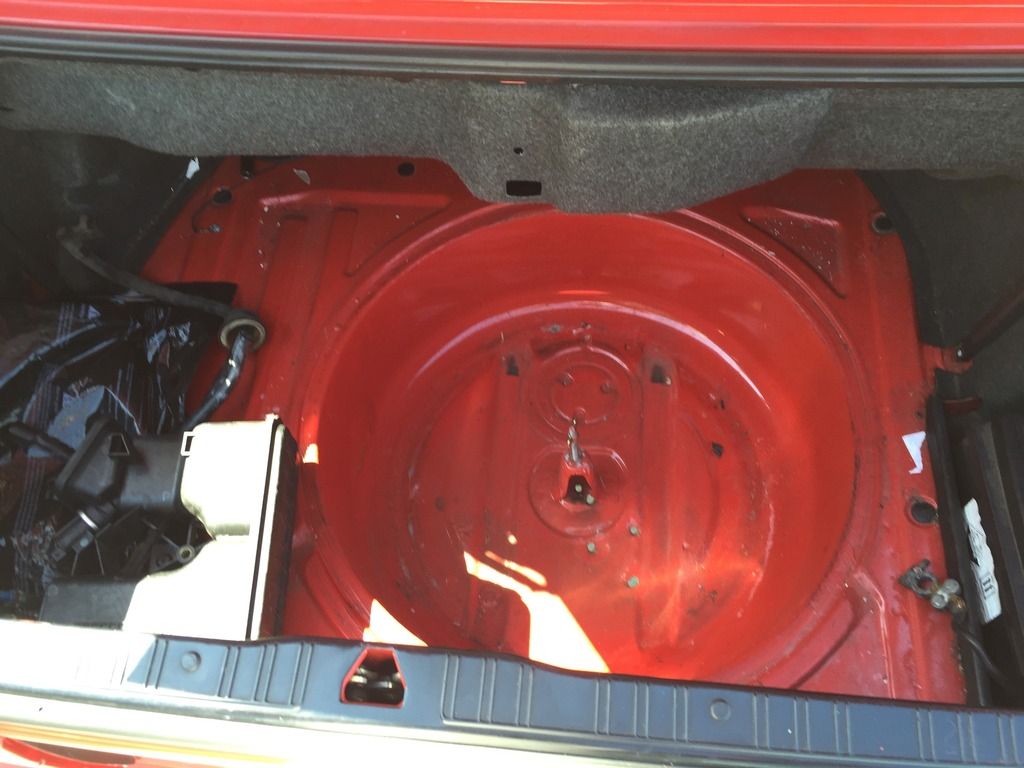
I had to modify (ahem, hammer) the bolt/rod for the spare down a bit to get the charcoal can to sit at the bottom of the wheel well. I also drilled a hole for the air vent and think I overdid it (whoops )
)
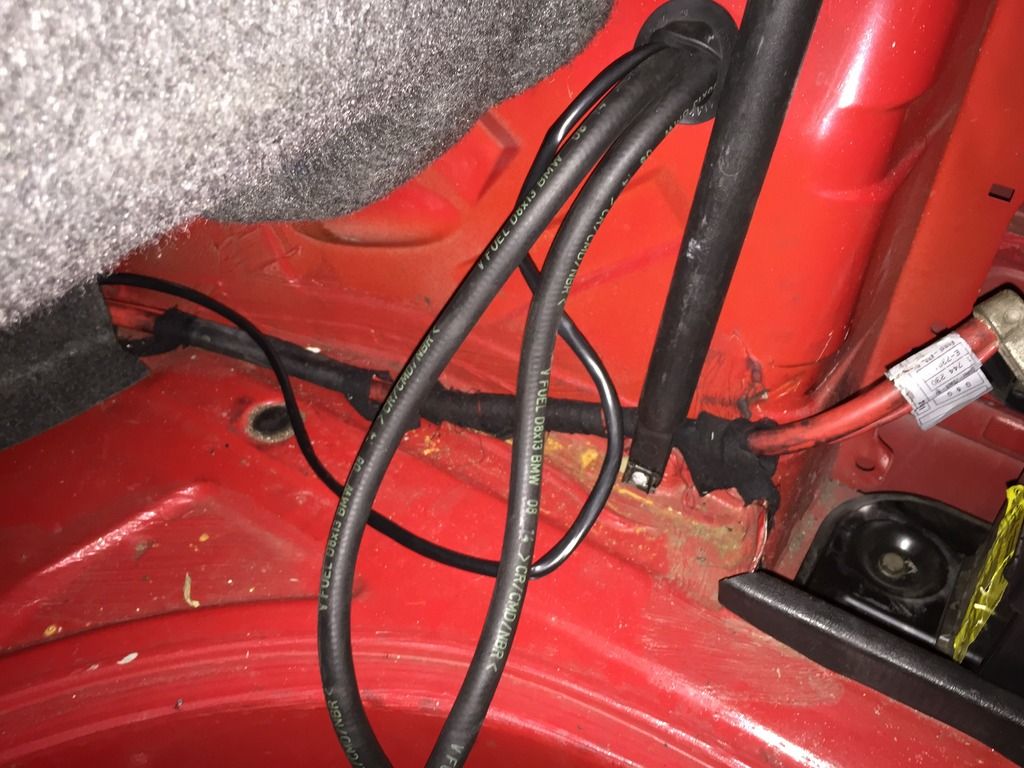
Drill into the area by the battery so you can run the two 8mm hoses into the area above the rear passenger side wheel well.
I found this nifty seal out of the donor car that I used (even though its used for the thin blue hard lines, I made it work):

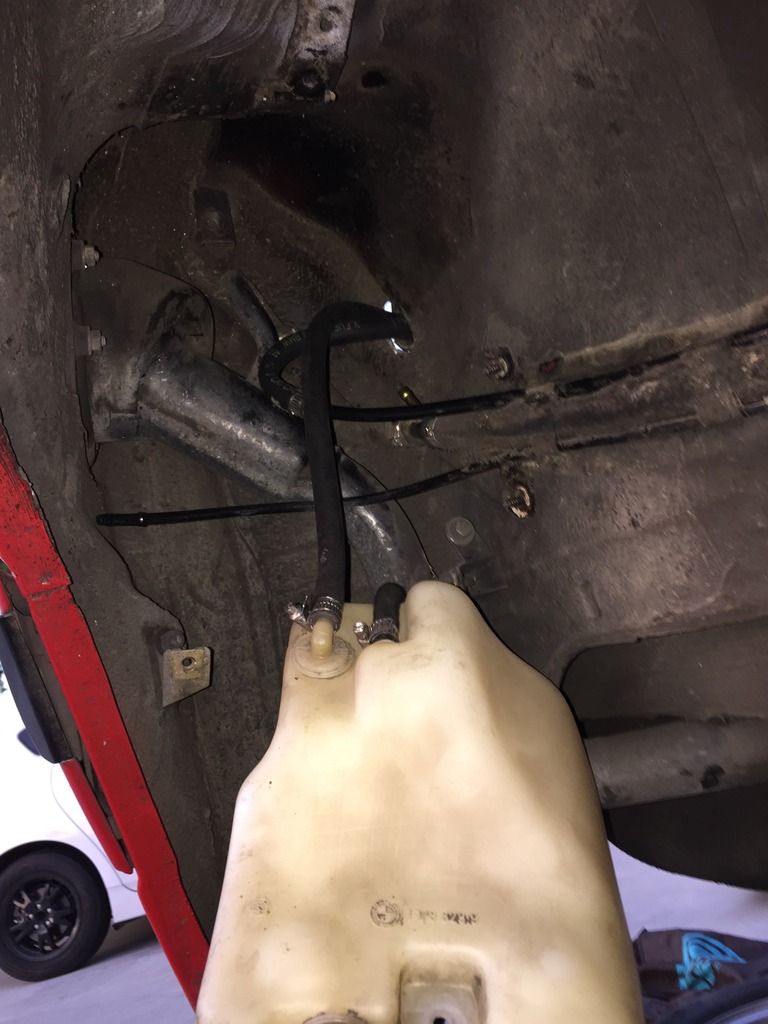
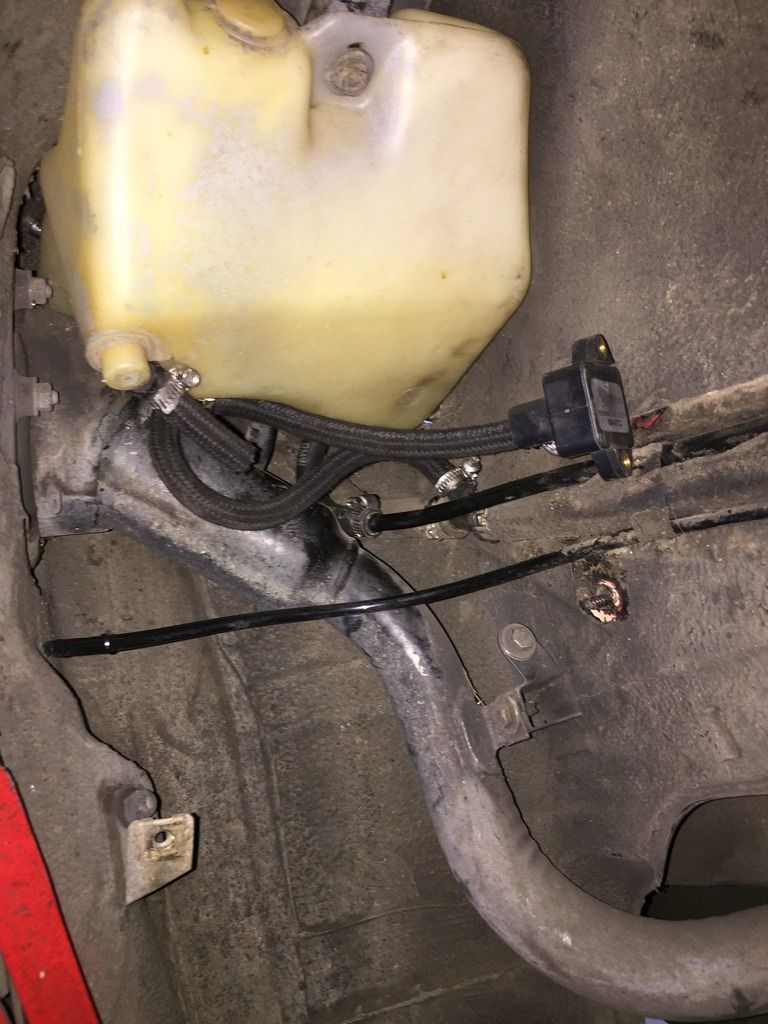
The 8mm hose at the top of the evap tank is the line you are looking for. The 'outer' hose goes to the evap tank. The 'inner' hose goes to away from the evap tank to the plastic line. This line goes straight to then engine bay into the pcv valve. Get rid of all the old hoses and start replacing.
T into the 6mm connector on the top of the Evap Tank with 13111254083
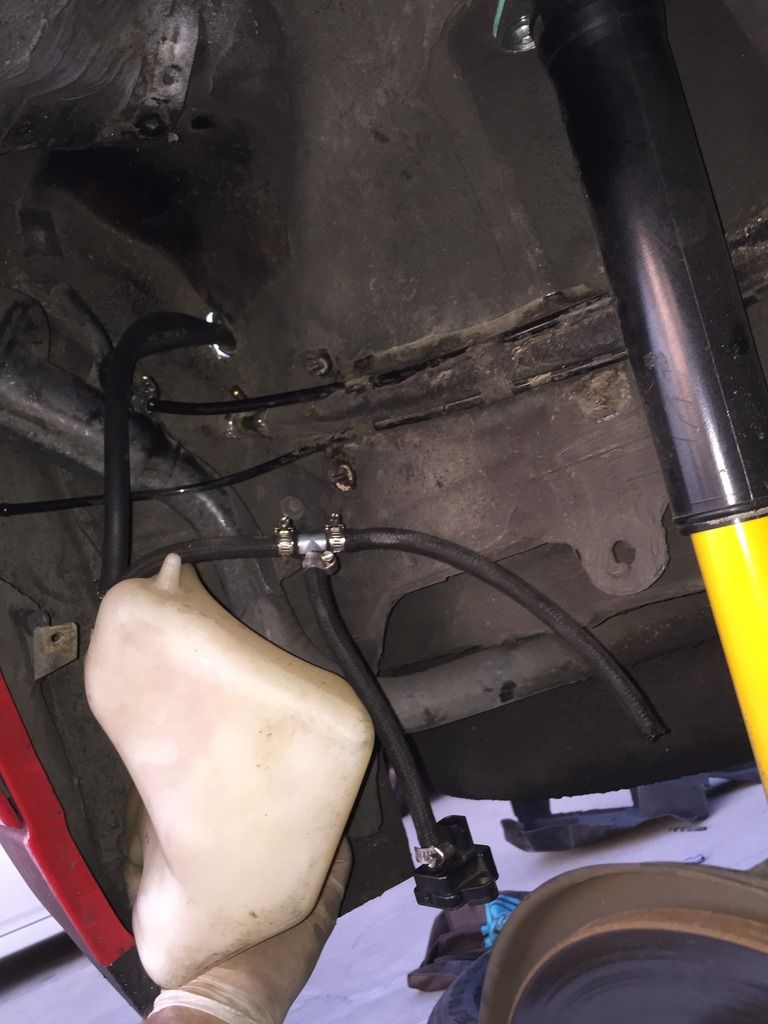
Screw the tank back in its place. Theres a male on the tank and female in the back of the wheel well to lock it back into place. The other side of the T goes into the top 6mm hose hard line.
The bottom of the tank (6mm) goes into bottom the hard plastic line in the wheel well.
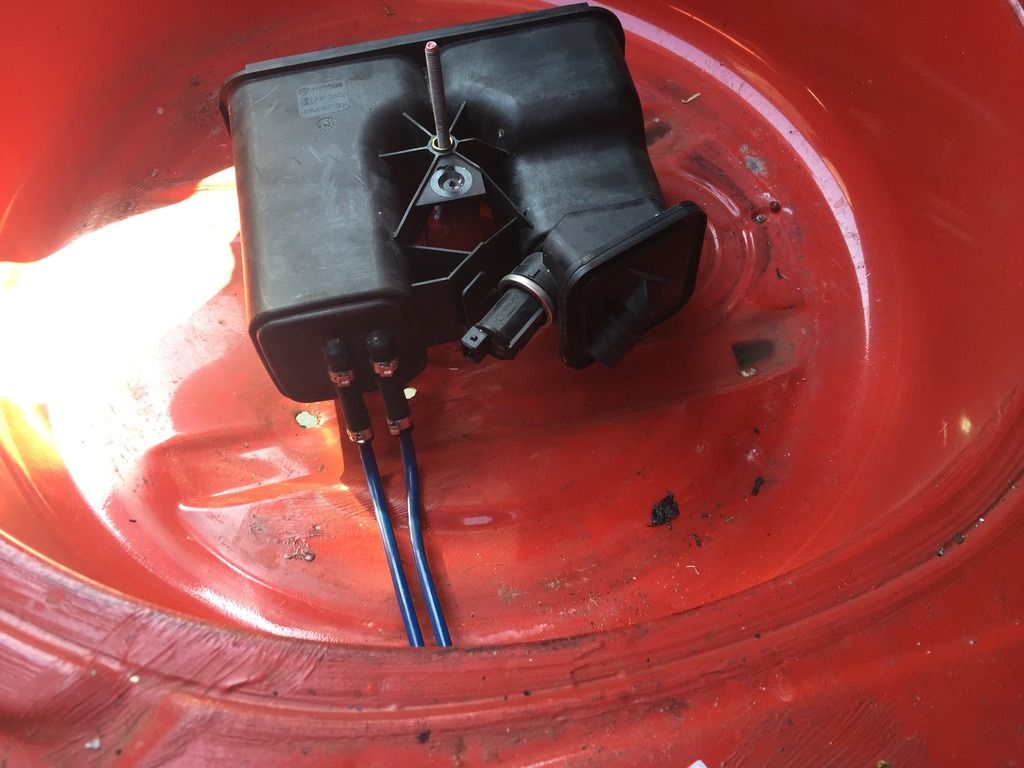
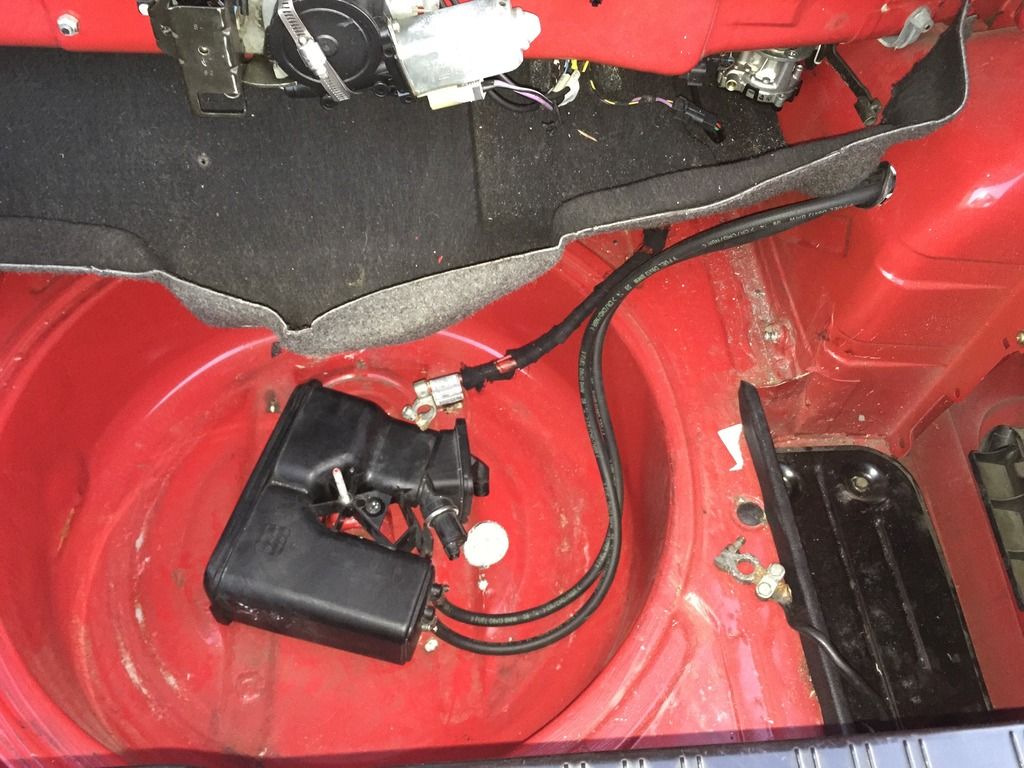
Here's the trunk with the wires in:
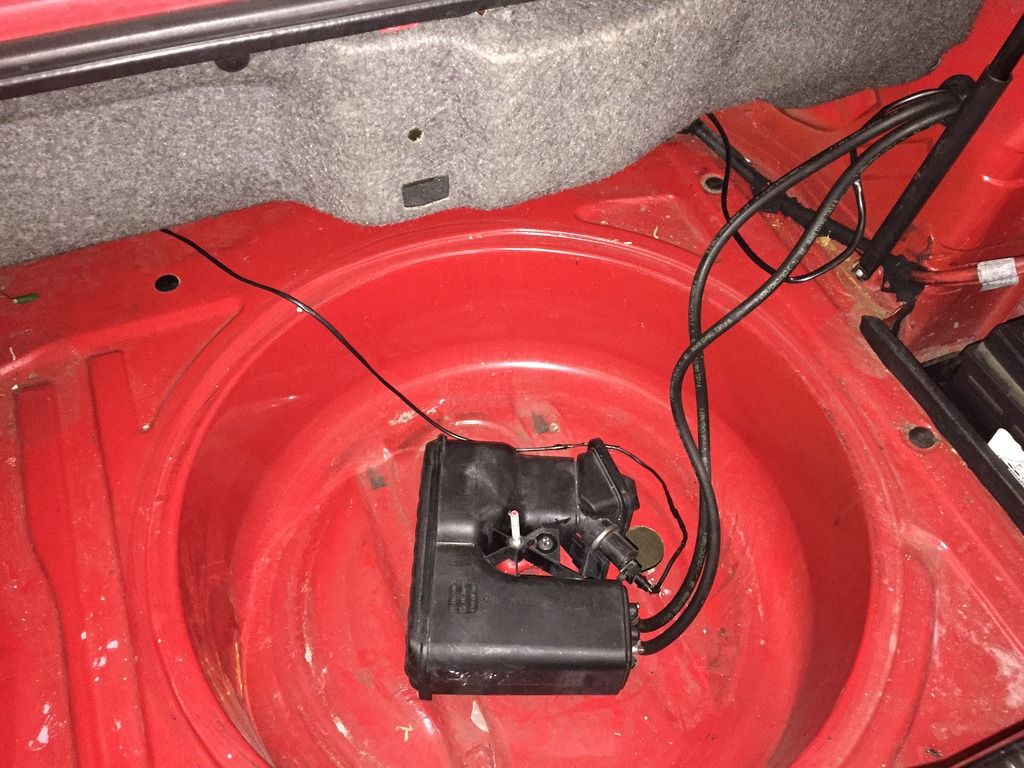
Put the cover back on and your good to go. Your spare can now go on top of the charcoal can in the back. I am still trying to figure out how to protect the 8mm hoses and the wire to the engine harness from the tire rubbing.
First of all, credit for this project goes to Archangel; he helped me with how to do this. Some of the text is literally copied from him.
The M52/S52 has a the charcoal can located in the trunk and has a fuel pressure sensor connected to the evaporation tank. These are 2 of the 3 needed evap sensors needed for OBD2. Both of them connect on the e36 body harness (other one is in the engine bay connected to the engine harness). I had Markert Motor works customize my engine harness to include these two plugs on my engine harness (since, like I said, they are normally on the body harness in the e36) with extra long wire so both plugs could pass from the engine bay through the cabin (buried under the carpet and through the back seats) into the trunk.
You will need:
-M52/S52 Charcoal Canister (16131183509)
-M52/S52 Fuel Pressure Sensor (16141182581)
-~12' 8mm fuel hose (16121180409)
-~2' 6mm fuel hose (21220411)
-hose clamps (07129952104)
-6mm T connector (13111254083)
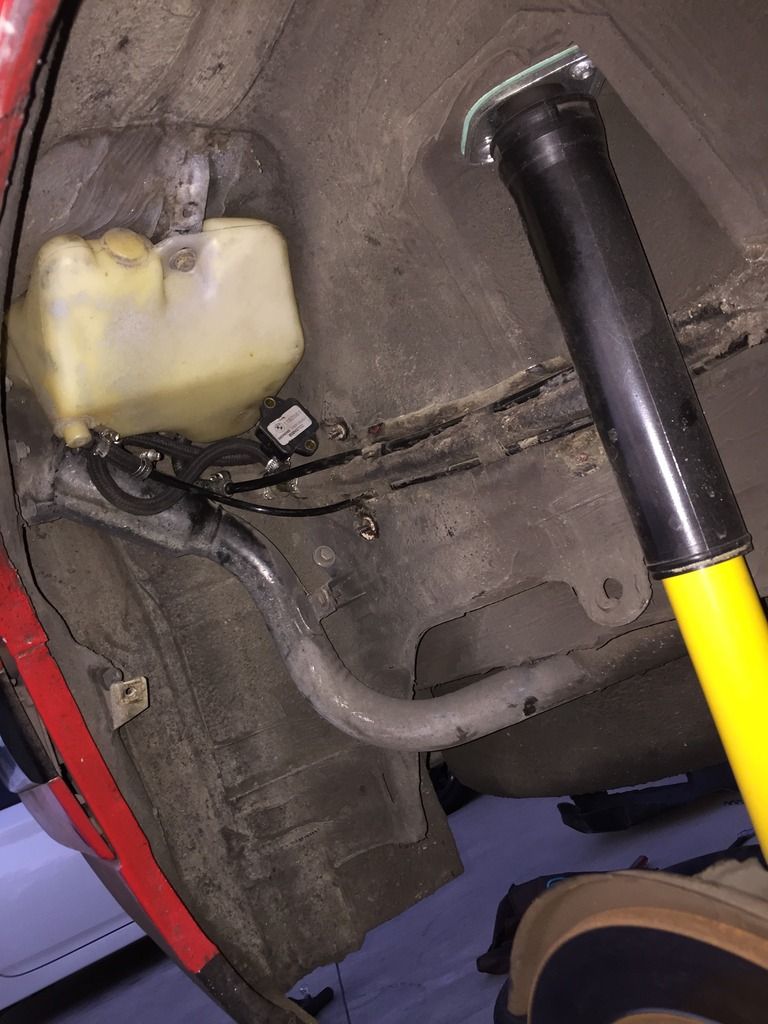
First thing you must do is jack up the back and take off the right rear tire to access the plastic cover leading to the evap tank.

There are two 10mm screws for the cover and 1 holding the top of evap tank to the top of the wheel well.

Then, take off the metal cover to the braided fuel hose. I didn't bother replacing this, but needed the room to maneuver.

Then cut the three hoses connected to the evap tank and remove the tank:


The tank was pretty dirty so I took the opportunity to clean it up.
Now its time to put in the charcoal can. Open your trunk and remove the right side carpet and bottom carpet. Take out the spare. never mind the holes in the spare cavity (po had a trailer hitch on the car when I bought it... a trailer hitch on an e30... convertible... Arg... anyway, I digress).

I had to modify (ahem, hammer) the bolt/rod for the spare down a bit to get the charcoal can to sit at the bottom of the wheel well. I also drilled a hole for the air vent and think I overdid it (whoops
)

Drill into the area by the battery so you can run the two 8mm hoses into the area above the rear passenger side wheel well.
I found this nifty seal out of the donor car that I used (even though its used for the thin blue hard lines, I made it work):

The 8mm hose at the top of the evap tank is the line you are looking for. The 'outer' hose goes to the evap tank. The 'inner' hose goes to away from the evap tank to the plastic line. This line goes straight to then engine bay into the pcv valve. Get rid of all the old hoses and start replacing.


T into the 6mm connector on the top of the Evap Tank with 13111254083

Screw the tank back in its place. Theres a male on the tank and female in the back of the wheel well to lock it back into place. The other side of the T goes into the top 6mm hose hard line.

The bottom of the tank (6mm) goes into bottom the hard plastic line in the wheel well.

Here's the trunk with the wires in:


Put the cover back on and your good to go. Your spare can now go on top of the charcoal can in the back. I am still trying to figure out how to protect the 8mm hoses and the wire to the engine harness from the tire rubbing.


Comment