
Well i am contemplating two things right now and need suggestions.
First I am talking about my 1986 325iX. The good news is I got it running stock, but there are a couple set backs.
1. The car will not go into gear when running. I can find gears when off though and I bled the slave of some black brake fluid but it did not improve.
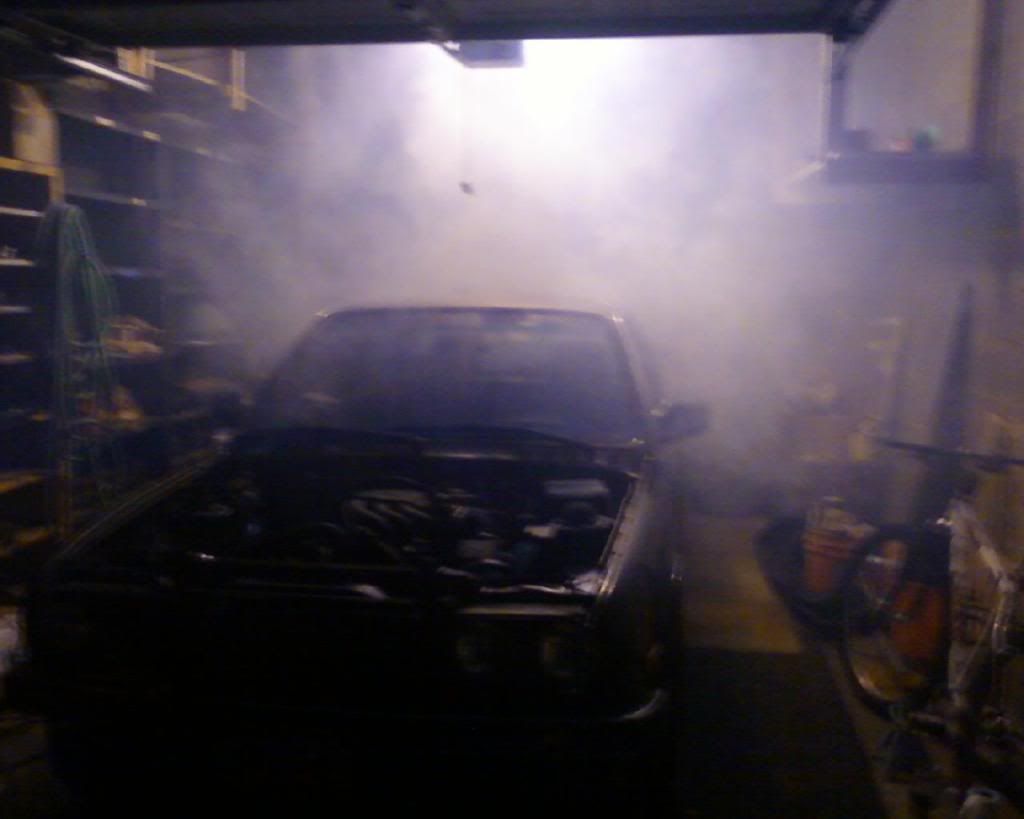
2. The car is smoking profusely and based on the hole in the exhaust I know it is burning lots of oil. So much that it is even dripping black dirty oil out of the exhaust. The pistons were replaced so that explains why.
I have never rebuilt a motor but would not expect new rings to smoke this much. The top end has been seated and has new seals and the timing is spot on. That leaves the rings. I found a write up to remove the whole clutch on the iX which is a pita but will be my last option to get it going. Otherwise I could drop the subframe to get at the engine and clutch at the same time.
My question is more of an advice type of thing. I am working in a single car garage with basic tools and jack stands. Which method would you use to get to the clutch? I am guessing something is wrong with the linkage or clutch assembly (throw out bearing, clutch fork, etc) because I bled the hydraulic system and there appears to be no signs of leaks. My second question is about the rings. What is common on a new engine? I am positive the rings have not seated as they have not had a load on them and are blowing by lots of oil.
Should I replace the rings while I have the clutch out and just make sure its a bulletproof engine and double check all of the work of the PO while I am in there or get the clutch figured out, running and try to seat the rings after a few hundred miles. I have not run the thing much more than about 10 minutes because of the smoke in my garage (or BBQ whatever you want to call it.)
Any other suggestions?
Car in question:
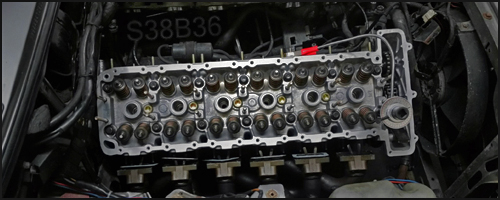
And here is the write up for the clutch taken out of the iX registry Newsletter. I guess i could either drop the engine and tranny together or just remove the transmission?
First I am talking about my 1986 325iX. The good news is I got it running stock, but there are a couple set backs.
1. The car will not go into gear when running. I can find gears when off though and I bled the slave of some black brake fluid but it did not improve.
2. The car is smoking profusely and based on the hole in the exhaust I know it is burning lots of oil. So much that it is even dripping black dirty oil out of the exhaust. The pistons were replaced so that explains why.
I have never rebuilt a motor but would not expect new rings to smoke this much. The top end has been seated and has new seals and the timing is spot on. That leaves the rings. I found a write up to remove the whole clutch on the iX which is a pita but will be my last option to get it going. Otherwise I could drop the subframe to get at the engine and clutch at the same time.
My question is more of an advice type of thing. I am working in a single car garage with basic tools and jack stands. Which method would you use to get to the clutch? I am guessing something is wrong with the linkage or clutch assembly (throw out bearing, clutch fork, etc) because I bled the hydraulic system and there appears to be no signs of leaks. My second question is about the rings. What is common on a new engine? I am positive the rings have not seated as they have not had a load on them and are blowing by lots of oil.
Should I replace the rings while I have the clutch out and just make sure its a bulletproof engine and double check all of the work of the PO while I am in there or get the clutch figured out, running and try to seat the rings after a few hundred miles. I have not run the thing much more than about 10 minutes because of the smoke in my garage (or BBQ whatever you want to call it.)
Any other suggestions?
Car in question:
And here is the write up for the clutch taken out of the iX registry Newsletter. I guess i could either drop the engine and tranny together or just remove the transmission?
All information Courtesy of Gordon Haines and the BMW 325iX Registry
Page 176
Jack up the car: Past transmission work on a 318i and a healthy sense of respect for my
own skin made me set up the jack stands carefully: large, 6-ton models ratcheted up to
their maximum height to make as much room as possible. (two stages of lifting are
required with the floor jack: be careful that the stands are properly supported and that the
car is stable at all times.) At this point, remove the battery negative cable, get ready with
the air tools, and get a good stretch in before crawling under.
Drain fluids: While the floor is still clean, drain any fluids from underneath the car that
you're planning to change. With the ix, you've got a lot of places to hit, including the
diffs, engine oil, trans oil, and transfer case oil. (Ed. note: loosen the fill plug to be sure
you can remove it before removing the drain plug.) Watch out for splashes with the car
up so high! Note to self: While it's OK to replace the diff fluids and engine oil after
draining, leave the transmission and transfer case empty- you'll see why later.
Removing Exhaust: Begin by finding, cleaning, and wearing your safety goggles before
the rust showers begin. Both the catalytic converter and rear exhaust have to go, so I
removed them in one piece and separated them outside the car. This saves fighting the
bolts at the rear flange of the converter while it's up against the bottom of the car. Don't
forget to unplug the O2 sensor, and be careful lowering the heavy assembly once the last
nuts come off.
Remove rear driveshaft covers: With the exhaust out, pull these covers off and set them
aside. You'll probably end up with a bit of gravel in your hair unless you keep out from
under the shields while removing them.
Mark all guibos: At this point, you've got the chance to view the 4wd system in its full
mechanical glory. Take some whiteout, a centerpunch, or what-have-you and mark the
alignment of the flanges on the front driveshaft guibo, transfer case input shaft guibo, rear
driveshaft guibo, and rear driveshaft u-joint to diff flanges. Mark the guibos with an
arrow pointing forward, as well, if you plan on reusing any. This ensures that you can
bolt everything together the way it came apart, and at least make sure that the car doesn't
vibrate worse than when you started. While you're there, loosen all the nuts on the front
and rear driveshaft guibos.
Remove rear driveshaft: Not for the fainthearted (or wristed). By applying and
releasing the parking brake in between rotations of the rear driveshaft, remove all four of
the nuts holding the u-joint to the rear diff flange. (a 17mm box-end wrench and a cheater
pipe helped me.) At this point, it's time to loosen the slip joint on the rear driveshaft,
collapse the driveshaft, and remove it along with the rear guibo. I took a piece of 1-1/2"
angle iron X 4' long, drilled a hole big enough for a guibo bolt at one end, and fastened
this rig to the flange on the front of the driveshaft to keep it from rotating. Then, using a
pair of water pump pliers or a monkey wrench (BMW special tool ??? will also do, but I
didn't have one.) thread the nut on the slip coupling towards the back of the car until the
driveshaft can collapse. Remove the driveshaft, and stretch your fingers.
Remove bellhousing bolts: All of the torx bolts on the bellhousing now have to be
removed to free up the transmission. Leave the rear transmission mount in place while
removing the bellhousing bolts, as it stabilizes the transmission and prevents it from
dropping free when you're lucky enough to get all of the bolts undone. The photo shows a
rough layout of the bolts, all of which require a Torx socket.
(*Note on removing the transfer case first: While this may be possible on an automatic,
on my manual the transfer case was fastened with two hex head bolts (17mm or 18mm)
on top and two on bottom. The bottom two can be loosened with an open end wrench, but
the top two looked like could not be reached without a crowfoot wrench due to the tight
fit in the tunnel. The bolts also only have about 3" axial clearance beyond the head,
making it impossible for me to get a socket on them. See photos for bolt locations)
If at all possible, get a set of Torx sockets with built-in universals. I wasn't able to get my
hands on a set, and had to rely on (2) 3/8" drive universals and several 6" extensions to
get at some bolts. Start removing bolts from the bottom, and note different length bolts
and where they come from.
The two bolts noted on the photo that hold the starter do not thread into the block, but are
through bolts that fasten with nuts on the front side of the starter flange. The two nuts on
my car required a 16mm open end wrench (unusual size), along with someone to hold the
wrench while I loosened the bolt head from under the car.
The top two bolts have become famous in BMW fix-it lore for the headaches they can
cause. The one slightly to the passenger side can be "sort of" reached with the universals
and several extensions (pass the in from the front driveshaft side of the transmission), but
the top one is awful . Unlike on other 325's, I could not reach the top bolt on the iX by
going over the transmission with the two recommended universals and about 3' of
extensions. The transfer case and shifter got in the way, and I only succeeded in stripping
the tip of the torx head on the
bolt.
At this point, I realized that I was experiencing further proof of Warnock's Revised
Pareto Principle For Auto Repair; "5% of the fasteners are responsible for 95% of the
time spent." This bolt ranks in the top 1% of that 5%. 4 hours and several Sawzall blades
later (BRRRRRM!! BRRRRM!!!! BRRRM!!!!!!! GRRRRR!!!!!!!!!!!!
GRRRRR!!!!!!!!!!!!! ping! ... oops.) I succeeded in cutting the head from the top bolt.
Needless to say, don't strip the head on your bolt, but if you do, remove the heater core
hoses by the firewall and go in from the engine compartment.
Other suggested methods for getting at this top bolt include:
Use the proper tool: a torx socket with built-in universal, and be careful when cranking.
Remove the rear crossmember, and jam the trans up into the tunnel with a floor jack. This
gives enough room to get a 12-point box end wrench on the torx head (it kind'a fits), or to
use a flex handle ratchet from the engine compartment side of things.
Substitute a heat wrench (acetylene torch) for the Sawzall, but watch out for the fuel
lines!
Before taking a break, remove the 10mm hex bolt that holds a dust cover to the
transmission, located under and behind the exhaust manifold. Remove the two nuts that
hold the clutch slave cylinder to the transmission, and suspend the slave cylinder from the
car with a piece of wire.
Removing the transmission: Once the bolts start loosening, support the transmission
with a tranny jack and remove the rear crossmember. From inside the car, remove the
shift knob, shift boot, and unplug the reverse light switch. Remove the two 13mm nuts
directly behind the shift lever that fasten the shift console to the car, and push the rubber
boot around the shaft out the bottom of the car. Put the car in first to keep the shift lever
from catching on the hole as you lower the transmission out the bottom.
At this point, begin lowering the transmission and pulling it back at the same time. You
may need to carefully pry the transmission flange from the engine until the locating
bushings in the flange separate. There is just enough room to get the transmission and
transfer case out (watch out for the shifter!) by lowering a little, pulling back a little, and
repeating. Be sure that the triangular flange on the front driveshaft doesn't catch on the
engine block when pulling the transmission back. Catch the metal plate between the
block and tranny once the tranny separates from the block.
Once the transmission is free and clear, carefully pull the front driveshaft from the
transfer case and look at the splines on the shaft. The splines should be in good shape and
the lubrication on the shaft clean and free of grit. Before putting the shaft away, protect
the splined end from damage with rags or a plastic bag, and clean up the plastic
protective cap that snaps over the splines.
Extricating the Clutch: The easy part: Block the flywheel in place and remove the metric
Allen head bolts holding the pressure plate (a.k.a. clutch cover) in place. An metric Allen
head socket is useful here, or use a regular "L" Allen wrench and about a 1' long X 1/2"
ID pipe.
Remove the Flywheel: Now, using an impact wrench if possible, remove the flywheel
bolts and carefully remove the flywheel (it's heavy). You should now see the pilot
bearing in the end of the crankshaft, and the rear main seal housing. Check that the pilot
bearing spins freely and doesn't have any slop; if it does, remove and replace.
To remove, either use a pilot bearing puller (Bavarian Auto has one specifically for this-
about $30), or pack behind the bearing with grease, and drive a rod into the center to
"hydraulic" it out. (wrapping the rod/dowel with electrical tape allows you to adjust the
diameter for a good seal in the bore.)
Rear Main Seal: At this point, you're ready to remove the rear main seal after cleaning
some of the clutch mung from the back of the engine. Bentley has a good, clear
description of this process, but my version goes as follows:
Loosen the two bolts that fix the rear main seal carrier to the oil pan (go in from the
bottom).
Remove the bolts that fasten the carrier to the back face of the block.
Remove the two bottom bolts, tap the carrier a few times to break the seal, and pull it
away from the block and off the end of the crankshaft.
Clean any remnants of the carrier-block gasket away from the mating surfaces with a
razor blade, and wipe the surfaces clean of oil. Note how far into the bore the present seal
is seated.
I used a few blocks of wood to drive out the old rear main seal and drive in the new. Be
careful that the seal seats square in the bore, and that you've driven it in a few mm deeper
than where it used to be (if possible) so that the seal rides on a clean, unworn area on the
crank. Oil the inside of the seal and the crank. Add the new gasket that seals against the
block, and lay a bead of silicone gasket maker to make a new seal between the oil pan
and the carrier. Replace the carrier carefully, finger tighten the bolts, and retorque the
bolts.
Transmission Servicing: The Transmission Monster: Isn't it a big thing? With the
transfer case attached, the transmission looked so big and bad that I took a few photos to
show the boys with the Buick (they of the 12-quart variety). Once you've got the whole
mess out and cleaned off, you'll see why leaving the gearboxes empty is critical- there are
vents under all that goo! The first time I pulled a manual transmission, I kept wondering
why it had a slow leak when stood on end- duh!
With a clean transmission, you can get at the tough parts that might need fixing. There
are three relatively simple seals on the transmission that tend to wear, and cost less than
$20 total to replace: the shifter shaft seal, the input shaft seal, and the output shaft seal.
To get to them, take the leap and loosen the center guibo bolts completely with the
transfer case attached. Break and remove the bolts fastening the transfer case on with the
transmission bellhousing face down, then lift the case up and away. The shifter shaft seal
is now facing you and can be replaced after pulling the shift linkage off. Remember to oil
the new seal before it goes in!
To get at the transmission output shaft seal and the rear transfer case output shaft seal,
you'll need a deep, thinwall 30mm socket, a brace to hold the output flange while
loosening the nut, and a BIG 3-jaw puller to get the flange off. Pry the locking washer
from around the output shaft nut with a screwdriver, attach your brace (similar to the
driveshaft brace mentioned earlier), and get the nut off. Pull the flange off, and voila! The
output shaft seal! (I didn't replace any of the transfer case seals, since they weren't
leaking and I was feeling wimpy.)
The transmission input shaft seal is far simpler, but requires a lot of work with a 10mm
socket and extensions. Mark the position of the input seal housing relative to the
transmission case, and pull the bolts while carefully keeping them in order by position
and length. Tap the seal housing back and forth to break the seal to the case, and pull
away. Voila, again! The input shaft seal! After replacing all needed seals, use new flange
lock washers on the output shafts and tighten the nuts in the approved two-step sequence
in the Bentley manual. When replacing the input shaft seal housing, lay a bead of gasket
maker under the flange before remounting.
Over the Hump: Half Done! In the immortal words of Mr. Chilton, "Installation is the
reverse of removal." That does cover most of what's left, and I'll add following cautions:
1. Use the appropriate threadlocker/Neverseez where needed, and TORQUE THE
BOLTS WITH A TORQUE WRENCH. Nothing wrecks your day more than redoing a
repair job to tighten one loose but critical bolt. By the same token, you don't want to be
drilling out broken, over torqued bolts either. Take it slow and finish it right.
2. Check that all parts are in place before moving on. I've once replaced a transmission
with the clutch throwout arm missing. Thankfully, it fell out of the toolbox as I was
searching for a wrench to reattach the driveshaft.
The Clutch: Grand Finale Time Reattach the flywheel with new, threadlock-ered bolts
that you torque in the right sequence to the right values. Get the clutch disc facing the
right way, and start a few of the pressure plate bolts with your clutch pilot tool in place.
Work back-and forth clamping the pressure plate tighter, then torque the bolts properly.
Go to the transmission now, reassemble it to the transfer case, and place the throwout arm
on with a new throwout bearing in place. Put some moly paste on the arm pivot, and the
splines of the input shaft.
Reattaching the transmission: Straightforward. Place the metal shield over the roll pins
in the block, and get the tranny in place on the jack. Re-lube the front driveshaft to
transfer case splines with moly lube (or see what happens if you don't- Bruce Monk's
letter in iXchange #15), and replace the plastic dust cap. Also, check that the shift linkage
is properly put back together, and remount the front driveshaft guibo loosely to the
driveshaft flange.
The next step is a bit like walking, chewing gum, rubbing your head and patting your
stomach all at the same time. The transmission has to go up and forward, while aligning
the input shaft splines with the clutch disc. At the same time, the front driveshaft goes
together, and the shift linkage goes up through the floor of the car. Start the bellhousing
bolts, and replace the 10mm hex head bolt that holds the metal shield between the block
and bellhousing in place. If you haven't done so already, you may need to pull the heater
core hoses from under the hood in order to get to the nuts on the end of the two starter
bolts.
Once together, look for spare parts, and torque your way through all of the bolts,
including the rear crossmember bolts. Get the shift linkage mount attached with the two
nuts (make sure the support with the two studs goes in properly- if you took it off, it
could have been replaced on the shift rod backwards.)
Remount the clutch slave cylinder, and replace the rear driveshaft. Whatever you do,
DON'T try to bleed the clutch slave if it isn't mounted in place- it'll blow the rubber seal
boot up like a balloon (ask me how I know...) Put the U-joint back together, get the rear
guibo and U-joint tightened up, and get the water pump pliers out. Reclamp the slip joint
on the driveshaft, and give the unit a few spins before putting the driveshaft back on.
Going Out: Fill up any fluids that you've neglected so far (including engine oil- I forgot
until the low oil pressure light reminded me.) The driveshaft covers go up next, and then
the exhaust bits starting with the catalytic converter. Fish out the oxygen sensor and plug
it in NOW before you forget.


Comment