
They got the wrong seal so I'm still waiting on parts
-
Seat Shocks....I have passed the baton to John Christy from Ninestitch. Email John or Garrett at ninestitch1@gmail.com
https://www.r3vlimited.com/board/sho...86#post4944786
Alice the Time Capsule
http://www.r3vlimited.com/board/showthread.php?t=360504
87 Zinno Cabrio barn find 98k and still smells like a barn. Build thread http://www.r3vlimited.com/board/show...20#post3455220 -
there really is no easy way to go about it...and if you bend the weatherstrip, its impossible to straighten it out again. Just start near the rear view mirror and work out. Push it in with your hands.Renting my rear wheel bearing tool kit. SIR
http://i25.photobucket.com/albums/c5...ps6debf0b0.jpg
Your signature picture has been removed since it contained the Photobucket "upgrade your account" image.Comment
-
The problem is there is maybe a 4mm gap between the door frame and the gasket for that small front window. The strip just doesn't want to go in, and its also got to sit in the retaining clip on the inside edge. I am curious...have you replaced this part on your 'vert?
As soon as you get past that area its cake. I'm ashamed to say this is the most difficult thing I've had to do on this car so far (and I've done control arms, timing belt, crank breather tube, and all the other bitch parts on this car).
This is the alpha bitch part!
Oh...and Saturday bumpage! Spending some time on other parts of the door. Had some leftover Dynamat and Dynaliner so am in the process of installing that.Turns out 1/8" Dynaliner makes for nice insulation/vapor barrier between the door card and door!1988 Alpineweiß 325iC
2003 Audi A4 Avant 1.8TComment
-
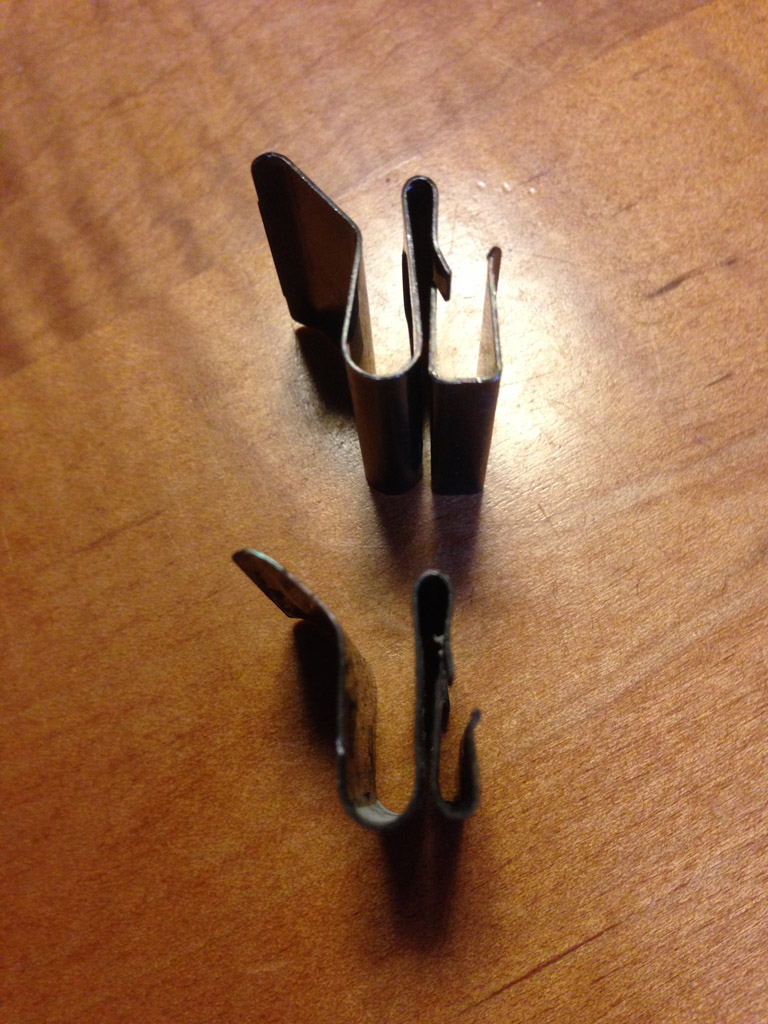
So here's something interesting. One of the retaining clips for the door card was missing so I ordered up new ones since they all looked kind of sad.
On the new ones the inner part of the clip (which is what holds the inner weatherstripping to the door frame) is a LOT wider than the original ones...and I was almost able to get the inner window trim completely seated. Its not perfect but I can almost live with it as is.
Here is a shot showing the original clip (bottom) and the new one (top):
 1988 Alpineweiß 325iC
2003 Audi A4 Avant 1.8TComment
-
Yeah I replaced it before. I mayb have done it with the door card out. Its been awhileRenting my rear wheel bearing tool kit. SIR
http://i25.photobucket.com/albums/c5...ps6debf0b0.jpg
Your signature picture has been removed since it contained the Photobucket "upgrade your account" image.Comment
-
Not sure if your still struggling with this but I just replaced mine again. Easiest way is to remove door card, remove the metal clips and attach them onto the weatherstrip. Then just work the clips back onto the doorRenting my rear wheel bearing tool kit. SIR
http://i25.photobucket.com/albums/c5...ps6debf0b0.jpg
Your signature picture has been removed since it contained the Photobucket "upgrade your account" image.Comment
-
Yes, I had thought to try that technique but the problem is the same. Lack of clearance between that window gasket and the door frame.
With the new clips (shown in post 20) I think I might try sliding the strip into that end of the door. I had tried this with the old clips but they were so tight that I wasn't able to get very far with this technique.
Like I said, it looks "OK" now but the weatherstripping got a little misshapen after all the trial and error. I want to pull it out again and replace it with a new part. Because I'm going to all the trouble and everything. :)
Thanks for the post Mr. M42. I appreciate the input.1988 Alpineweiß 325iC
2003 Audi A4 Avant 1.8TComment
-
Yea it's still a tight fit but just need to use flathead to work the trim in. Also a blunt object to hammer it down. Worked for me at least. I found putting the clips on the trim avoids damaging the rubber when trying to get it to fitRenting my rear wheel bearing tool kit. SIR
http://i25.photobucket.com/albums/c5...ps6debf0b0.jpg
Your signature picture has been removed since it contained the Photobucket "upgrade your account" image.Comment
-
I would try different ways with your old stripRenting my rear wheel bearing tool kit. SIR
http://i25.photobucket.com/albums/c5...ps6debf0b0.jpg
Your signature picture has been removed since it contained the Photobucket "upgrade your account" image.Comment
-
I have my new strip so am feeling guilty that I am not taking pics to post. Lol
I was looking at it yesterday and I'm 99.736% sure that the process is:
1. Puts clips on weather strip
2 attach strip,to door
3 THEN put door panel in to clips.
For this last step I'd suggest a little soapy water to help get the rubber lip over the door panel and also to allow you to slide the panel fore and aft to adjust.
I'll verify all this when I do mine but I'm quite sure this was how I did the last one.Seat Shocks....I have passed the baton to John Christy from Ninestitch. Email John or Garrett at ninestitch1@gmail.com
https://www.r3vlimited.com/board/sho...86#post4944786
Alice the Time Capsule
http://www.r3vlimited.com/board/showthread.php?t=360504
87 Zinno Cabrio barn find 98k and still smells like a barn. Build thread http://www.r3vlimited.com/board/show...20#post3455220Comment
-
Thats a good idea ///M42. Thankfully this strip isn't too expensive but definitely better to test on the old one before beating up another new one.
Jeff if you were to document this install next time you do it that would be AWESOME. :up:1988 Alpineweiß 325iC
2003 Audi A4 Avant 1.8TComment

Comment