The "CD43 Face on a JVC HU" Thread - Work in Progress

Collapse
X
 
  • Time
  • Show
Clear All
new posts

  • bmwman91
    replied
    Alright, as promised, here are some pictures.

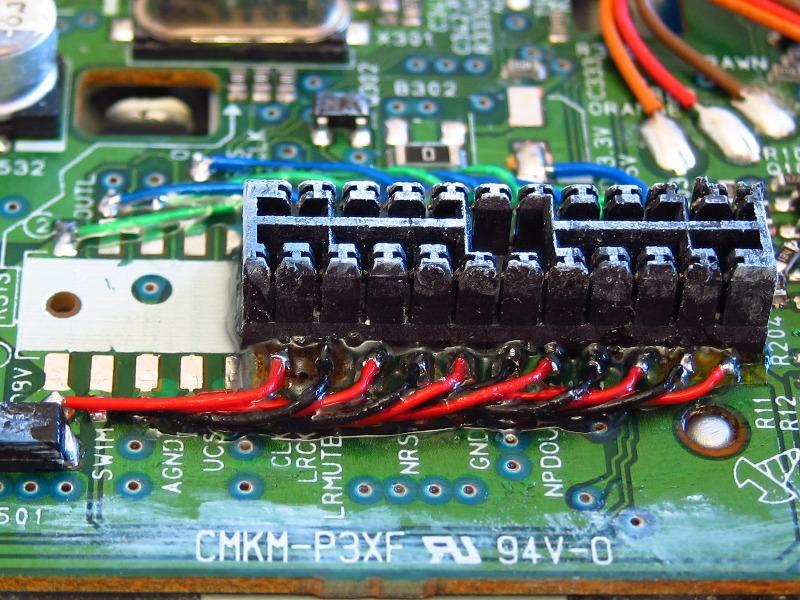
    The biggest pain was figuring out how to move the board-board connector that connects the CD transport to the motherboard. I ended up lifting it and setting the ends on Kapton tape, and then filling the middle gap with super glue. From there, I ran 30ga wire from the original pads to the terminals.
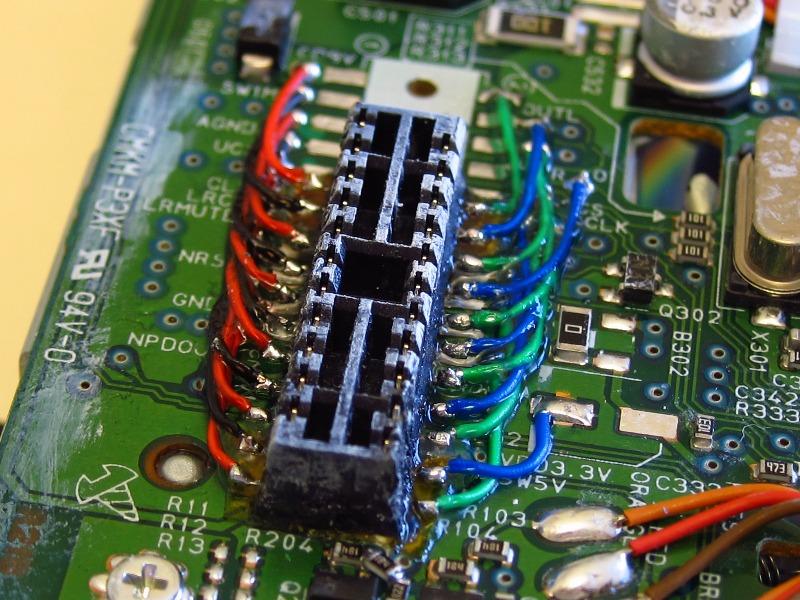

    Here is another angle. Once the wires were on, I filled everything in with more super glue. The last thing I need is this sucker breaking off if/when I need to take the unit apart in the future.

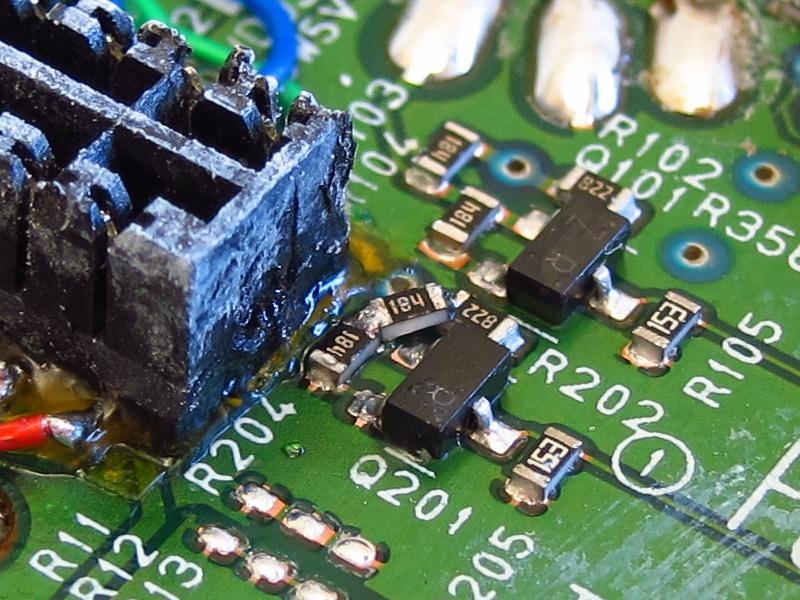
    Although I had to leave a couple of components in place & buried under the connector, I was able to move this resistor out of the way, just in case I ever need to service it.

    Now, to get the CD transport moved over, I needed to move its mount holes 1cm to the side. I used some calipers and a drill press to do this.
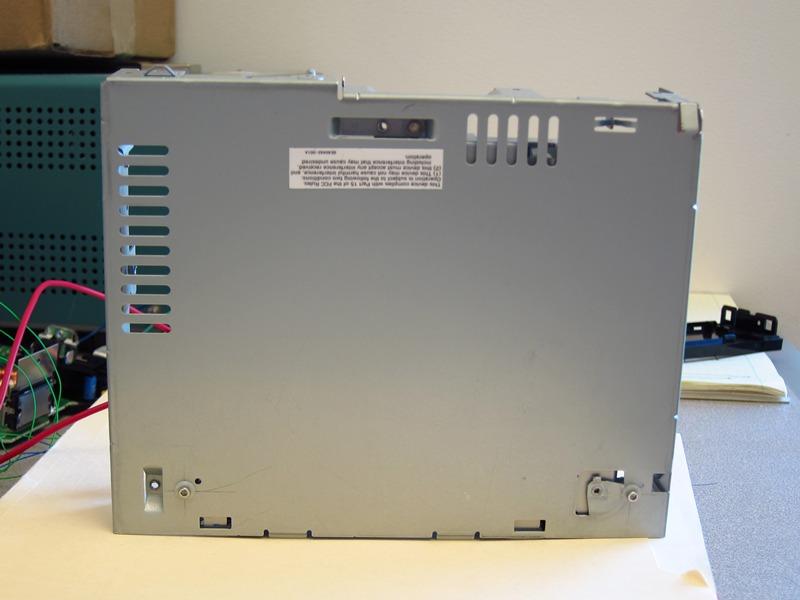

    The only real mods I needed to make were to grind off an alignment post, and as seen in this picture, flatten the old stamped mounting boss. A bench vise & some aluminum blocks were all that I needed.
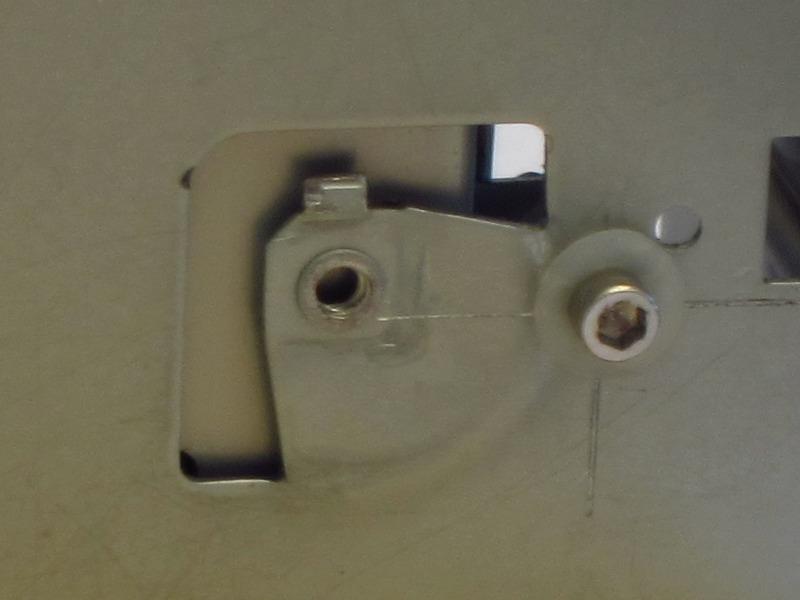

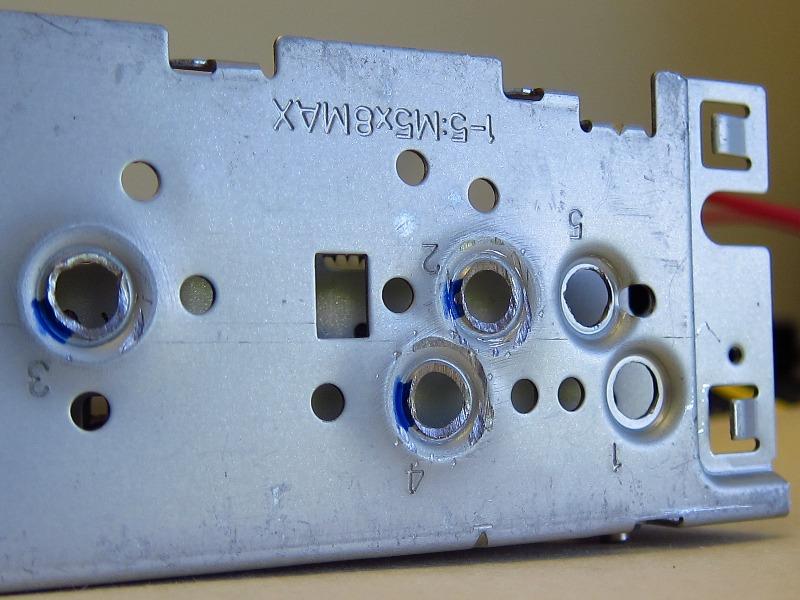
    I also needed to press out some of the stamped screw holes in the side that the HD Radio module sat. The module had to be moved, and the screw bosses were interfering. Again, I used a bench vise & aluminum blocks.

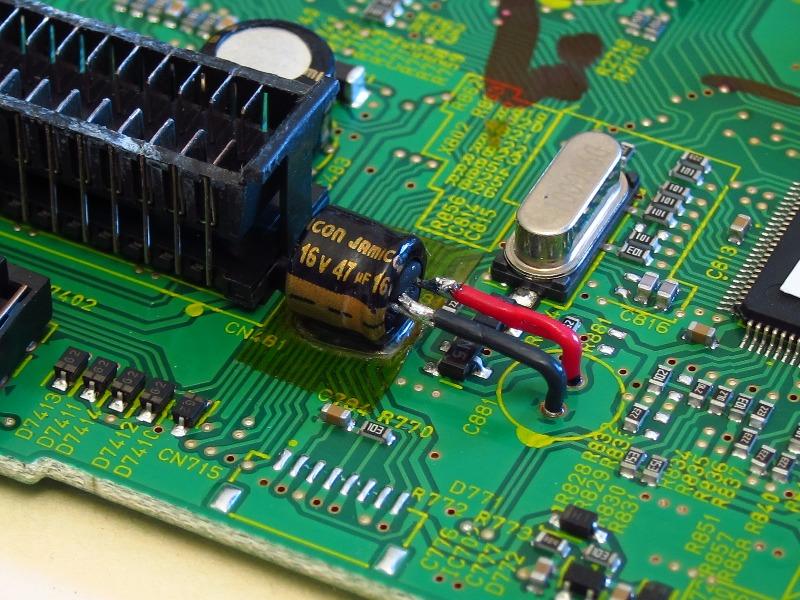
    This capacitor was interfering with a big one on the CD transport board, so I moved it over. It is a decoupling cap for the USB 3.3V supply. Although a setup like this isn't exactly ideal since I bet it adds some noise to the supply rail, I doubt it will be an issue. Long-term, I plan to find a big surface mount cap & replace this with that.

    Here is the HD Radio module.I moved it as far to the side as I could. Remounting the EMI shield firmly to the board was a little tricky, and it is not quite as secure as before, but I think it will be OK.
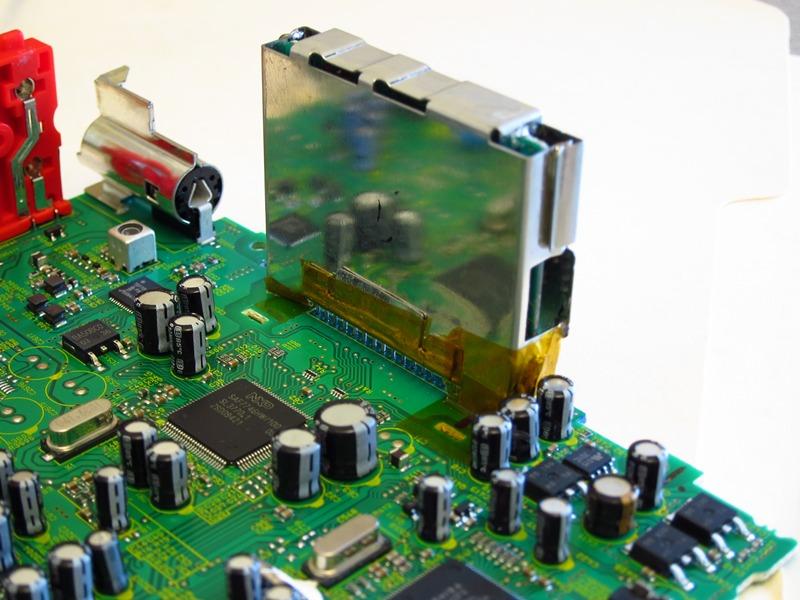

    I was able to move it over by flipping the pin header at the bottom. Originally, it was mounted through the side you see in the picture. Being a simple single-row through-hole header, it was a simple matter of de-soldering it from the RF board & mounting it on the opposing side.
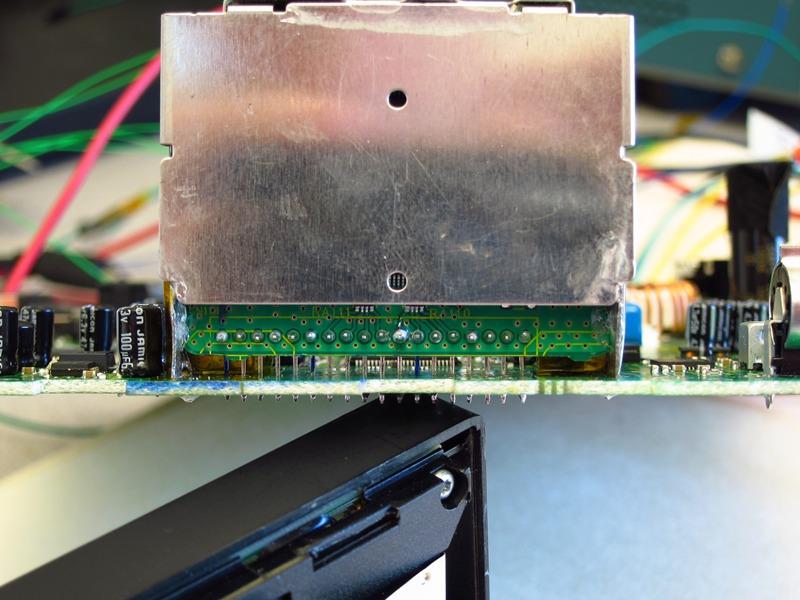

    It all worked out perfectly!
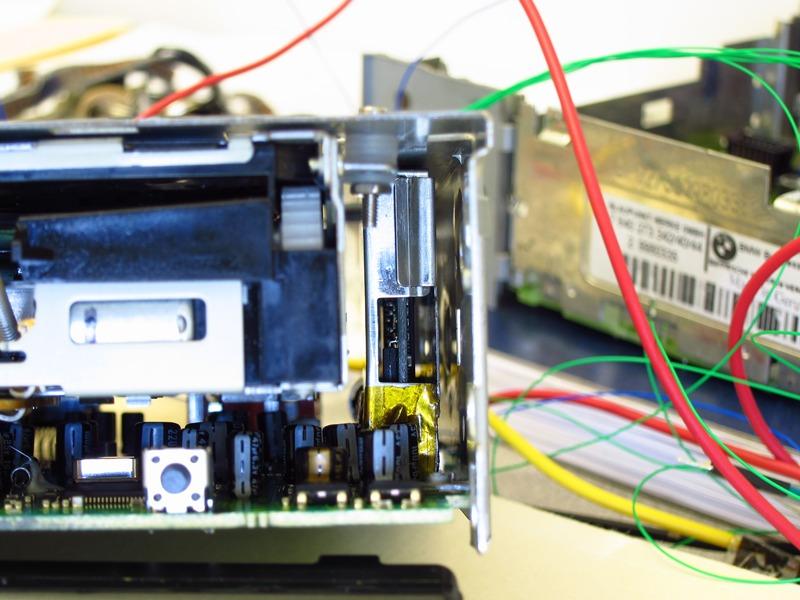

    This also leaves ample room on the other side for my control circuitry. I don't think that there will (physically) be too much stuff to jam in there, but there will need to be room for a small PCB with the microcontroller & various control / power electronics.
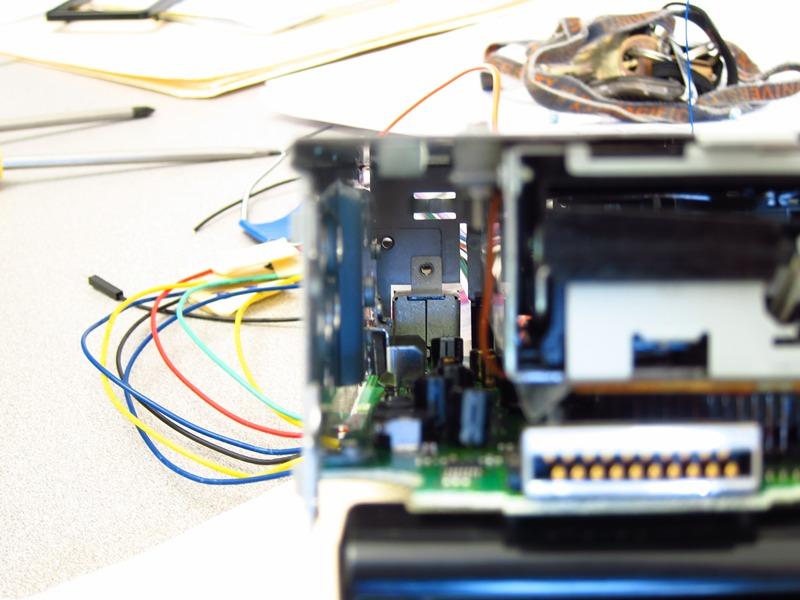

    I tested the JVC HU and the CD player + HD radio seem to be working fine. Phew!

    Leave a comment:


  • bloodshot-e30
    replied
    im down to see the progress on this! lol

    Leave a comment:


  • dogsbark26
    replied
    Amen.

    Thanks for the tips.

    Leave a comment:


  • bmwman91
    replied
    Thanks for the complements & encouragement. I am going to need them! Realistically, this project may take me a year or two (I have other hobbies that I sort of switch-off between, depending on the season).

    bernzspeed & dogsbark, a CD43 isn't as bad as it seems (if you are coming from more feature rich modern HUs). I believe that the crappy radio reception can be resolved by using a 318ti antenna + amplifier base, both of which are readily available at online wreckers. Just ask them to toss in the rubber grommet on the antenna & I believe it is a straight bolt-in (maybe a little finagling to get the base mounted in the trunk). Check around here. Aside from the radio part, using CDs isn't so bad. I ran with a Pioneer MP3 deck for years, and while it seemed convenient, I actually like being confined to using regular CDs. A lot of songs I disliked (you know, "I only like 2 or 3 songs from this CD") turn out to be fine or even likable if listened to in order on the actual album. I think that artists actually order things pretty deliberately so it all works together. That's probably part of the reason that a lot of songs seem like crap on their own.

    To get the CD43 to stay in place, you can try locking two thin nuts onto the stud on the back & then reaching around through the glove box to zip tie the HU onto that metal bracket on the heater core. The nuts help to keep the zip ties in place on the stud. I modded the HVAC panel to have tabs for the CD43 screw clamps, but that was a lot of work. I also use the zip ties in the back, as described, and I think it might be enough to keep it in place. I also put some 1/8" foam sheeting on the rear bracket to make it a little more "sticky." Good luck!

    ------------------------------

    Well, I am going to put this out there right now since I would feel bad if I got expectations aroused at this point: I am not going to even consider selling some sort of conversion kit. The costs involved would be astronomical due to the amount of hand-rework required. I COULD make some little PCB adapters for some things that would cut the rework requirements way down, but the chassis mods & stuff would still be many hours. To make it worth my while would probably amount costs that most would consider unreasonable.

    I think I hinted at doing kits somewhere earlier in this thread, but that is entirely off of the table for now. Maybe in the future I could do a couple one-off duplicates, but I would probably charge a good $1000 for it (labor only). So, as I said, most people would consider that unreasonable lol. Since I try to be a reasonable guy, it seems best to just not offer. MAYBE once it is 100% done I'll have some better insight into making more.

    ------------------------------
    Last edited by bmwman91; 09-27-2011, 11:26 PM.

    Leave a comment:


  • dogsbark26
    replied
    You and me both bernzpeed.

    bmwman91 I am forever amazed by your inventiveness and perseverance. I feel that Woot Woot is a vast understatement.

    I'm still trying to get the CD43 affixed in my dash so it doesn't slide out when I drive.

    Leave a comment:


  • bernzpeed
    replied
    photos at least? i've been wanting a cd43 to make my dash look stock. so if this thing works out, i might be interested.

    Leave a comment:


  • bmwman91
    replied
    Well, it has been a long time since I worked on this project (haven't touched it since my last post). I am finishing up moving the CD transport unit 10mm to the right so that it will align with the CD43 faceplate.

    - This required some pretty heavy rework of the board-board interconnect between the CDT & motherboard. I "floated" it over some of the existing pads & components with a base made from Kapton tape and it is super-glued in place. The connections were rebuilt using 30ga wire. This allows me to disassemble the unit when needed, using the stock interconnects.

    - The chassis had new mount holes for the CDT unit drilled at a 10mm offset, and for the moment I am stacking washers to replace the stamped bosses.

    - The HD Radio module on the motherboard had to be moved as far as possible, and I needed to press out some of the stamped screw bosses in the chassis to give it room. The HDR module had its soldered SIP header flipped to the opposing side of its little board to buy me an extra 7mm.

    - A 47uF electrolytic capacitor is in the way of a capacitor on the CDT unit. I am going to replace it with a large, but shorter chip capacitor, or maybe just another electrolytic with long leads so I can move it out of the way. My only concern with the long leads is noise getting onto a 3.3V rail from high frequency parts nearby, but I am probably just being anal retentive.

    The next order of business will be to find a really crude & simple way to mount the CD43 faceplate to the HU so I can make darn sure that discs won't be scratched inserting/ejecting them. Once I make sure that it all physically works, I will start the true challenge...the controls to translate display data & voltage levels for button presses. So, I am excited to be moving along with this again.

    I will try to get some pictures up tomorrow.

    Leave a comment:


  • bmwman91
    replied
    I wish it was that simple. The layout of the PCB is the real show-stopper here. Even with a new chassis, I would need to relocate the motherboard-CD transport interconnect. There are also a few inconveniently placed electrolytic capacitors (the big can-type ones) that will make moving the CD transport difficult.

    It is OK though, these things are what make projects...PROJECTS!

    Leave a comment:


  • peter08
    replied
    I have been working on physically fitting it all together. Much to my dismay, the CD loading slots are in very different positions. Without modifying the HDR60, it would stick out ~9mm past the right edge of the faceplate. I haven't measured yet, but it looks like I have maybe 5mm to work with before hitting the OBC, probably more like 4mm. The only thing I can do is to move the CD transport assembly as far to the right as possible inside the HDR60 chassis, but I only get about 5mm before I hit the radio module. On top of that, there are some capacitors that are in my way, and the board-board interconnect will need to be modded. Maybe I should have measured FIRST lol. Worst-case, I just find someone with sheet metal tools & make a chassis!

    Leave a comment:


  • bmwman91
    replied
    Thanks! It is a pretty fun project, and I am sort of itching to work on it again. Once my "other" E30 electronic gizmo is out, I'll return to this.

    Leave a comment:


  • airkhin
    replied
    ^^ im excited as hell. i always keep checking back on this thread to see if any updates. if a kit ever does come about i'd deff be interested... ;)

    Leave a comment:


  • bmwman91
    replied
    Sorry, I have been busy. This is on hold for the moment. It isn't something that would likely ever be a sellable product (low demand = low volume = more $ than anyone would be willing to pay = vicious circle back to "low demand"). I do want to finish it just for my own sake though, and then if there is interest I'd consider a kit.

    Anyway, I have been busy with my job and working on another, much more in-demand E30 electronic device. Eventually it will get mentioned in r3v, but the automotive aftermarket is a very competitive place so it'll remain without details until it is ready! I also want to avoid advertising for now since I am not a forum sponsor. All I will say is that it involves a MAF sensor. I've been running one for many years, and I finally have the time & expertise to build something worth selling that anyone can install & use for a lot less than a new/rebuilt AFM. That's all I have to say about THAT.

    Leave a comment:


  • J3M93
    replied
    any updates on this thing?, it's a really cool project!!

    Leave a comment:


  • blalor
    replied
    Heh. Had the same thing happen with my MINI CD53. Electronics almost done, then "ooooh, that's not gonna fit." I'm impressed with your work so far, tho!

    Leave a comment:


  • bmwman91
    replied
    Brief update...

    I have been working on physically fitting it all together. Much to my dismay, the CD loading slots are in very different positions. Without modifying the HDR60, it would stick out ~9mm past the right edge of the faceplate. I haven't measured yet, but it looks like I have maybe 5mm to work with before hitting the OBC, probably more like 4mm. The only thing I can do is to move the CD transport assembly as far to the right as possible inside the HDR60 chassis, but I only get about 5mm before I hit the radio module. On top of that, there are some capacitors that are in my way, and the board-board interconnect will need to be modded. Maybe I should have measured FIRST lol. Worst-case, I just find someone with sheet metal tools & make a chassis!

    Leave a comment:

Working...