
i am building a 2.7i motor for my 1991 325i:
my goal was to go as far as i could with stock or stock modified parts.
first thing i am doing is lightening the connecting rods so i though i would do a step by step DIY with pics and results.
*disclaimer* this does not mean you should go attack your engine parts with a bench grinder. if you do that is your own stupidity, don't blame me.
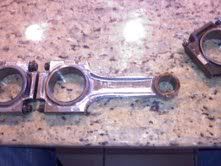
first some side by side shots
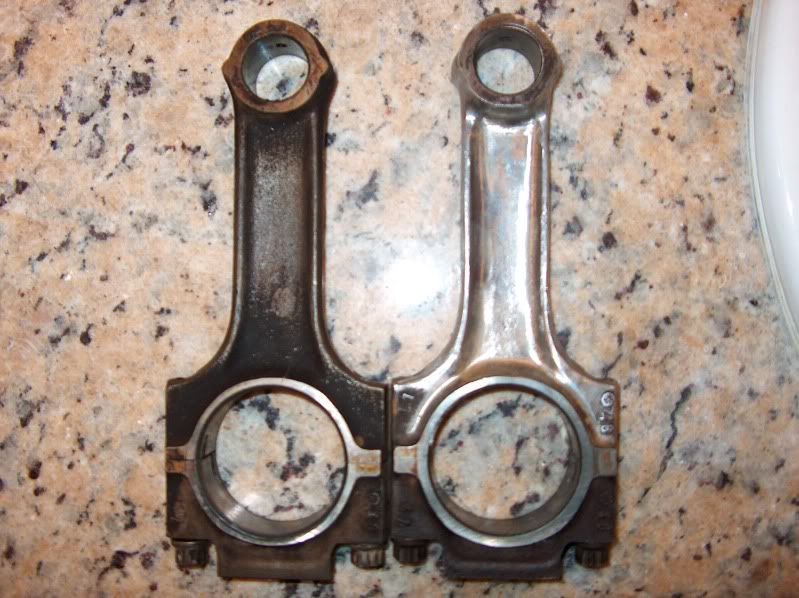
stock ETA rod on the left, semi modded on the right

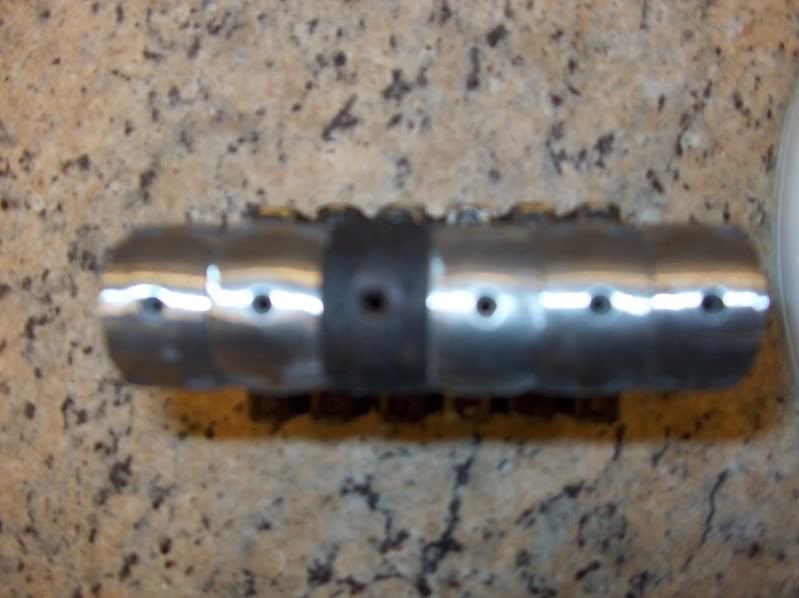
stock in the middle of the roughed in rods. you can get an idea how much is being removed from the top and sides of the rod

after roughing the rods in with a belt sander (which i forgot to to take pics of) i started hand finishing them with a fordom ( a cable driven die grinder)
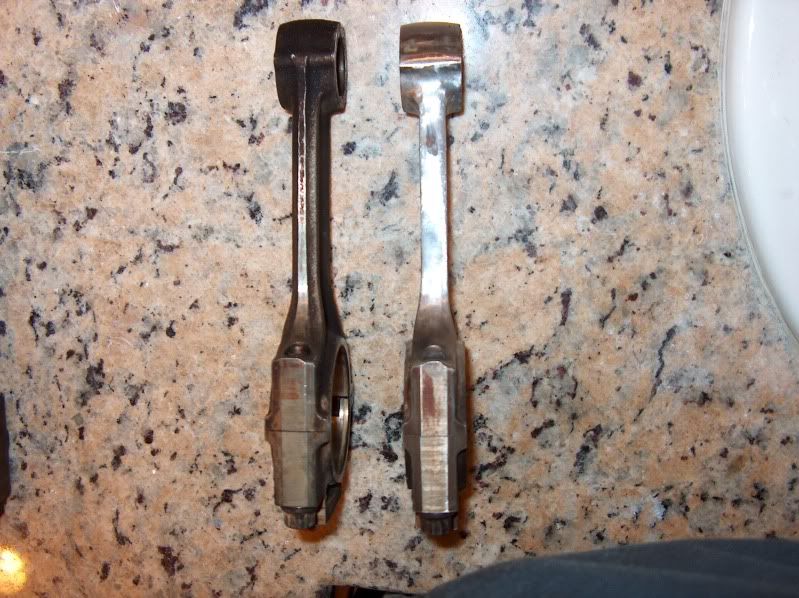
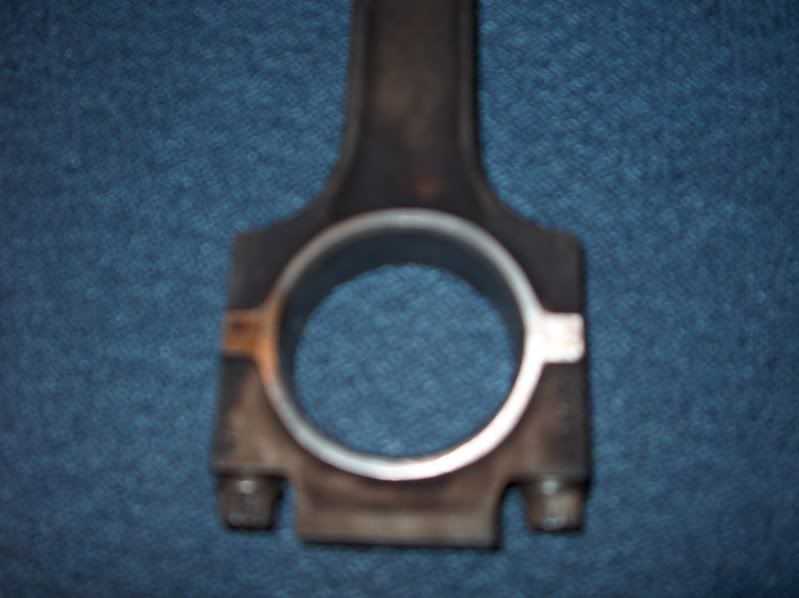
 mostly finished upper con rod. all of the texture has been polished away with a sanding rood as well as all the edges chamfered. the side forging "flash" is also removed along the sides of the beam of the rod as well as the top of the small end. the protrusions on the sides of the small end have been ground and profiled and blended, but not totally removed. all this will make the con rod lighter and "cut" through the air easier inside the crank case as well as shed the oil splash sooner as well with help with windage.
NEXT off to be machined
now i went over to my friend and fellow burn buddy, Greg's house (what are the odds same name friends and both on fire????) to machine the "tangs" flush on the big end of the rods. we were going to use the lathe, but the arbor would not go down small enough for the ID of the rods...so we used the mill which worked out better in the end
the "tang" we are flushing is located between the 2 halves of the rod. by removing this you make the rod lighter, but are not sacrificing any stregnth.
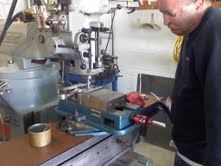
here's Greg machining the extra material away in the mill.
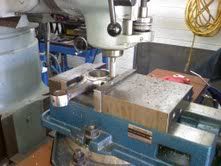
another shot of the mill going to town.
here is some pics of the rods after machining:
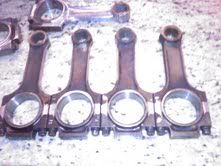
you can see the part that was machined away on the unfinished rods
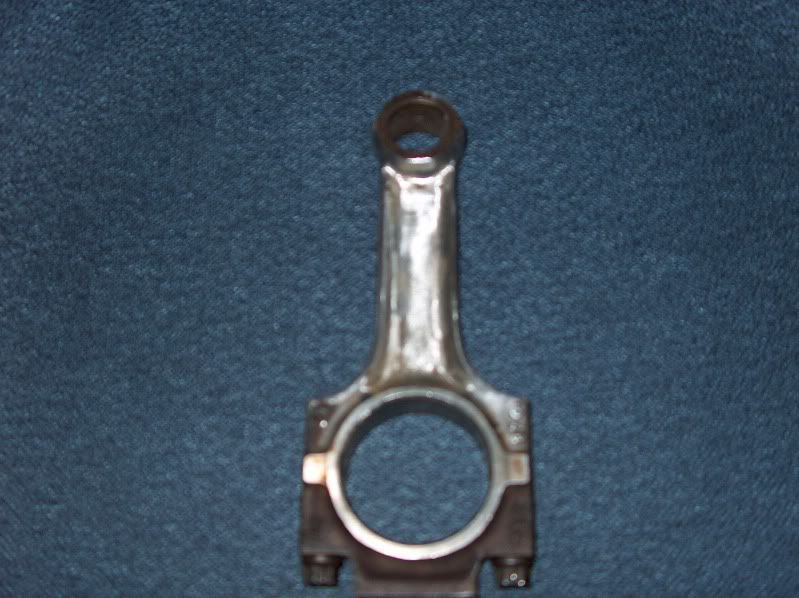
 side shot of a mostly finished rod, just a little more hand finishing to do. my drive cable on the fordom broke so i have to wait until monday to pick up a new on to finish.
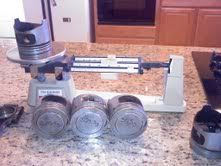
the final weights:
STOCK ETA:601.4 grams
ROUGHED IN:596.3 grams
SEMI FINISHED TOP:590.3 grams
MACHINED AND JUST NEEDING HAND FINISHING:563.7
now once all the rods are finished i will then batch weigh them so the are are the same overall weight, then take them to be shot peined/stress relieved (this will also bring back some of the texture to the rod's surface), have them resized on the big end, rebushed on the small end, then also balanced end to end. when you balance rods end to end you make sure that the weight of both the small end and big ends match the other rods in the set not just the over all weight. this just makes for a better balance job.
i will post up completly finished pics tomarrow after i finish them along with weights.
NEXT.... balancing and oil grooving pistons.
since my fordom took a crap i decided to drive out the wrist pins and weigh the pistons and wrist pins seperately.
here is some pics and results.
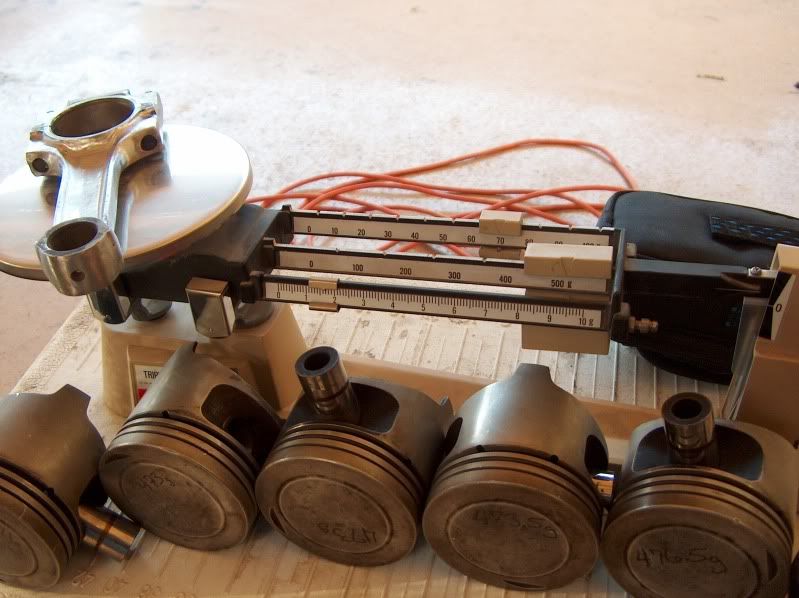
weights with the wrist pins installed
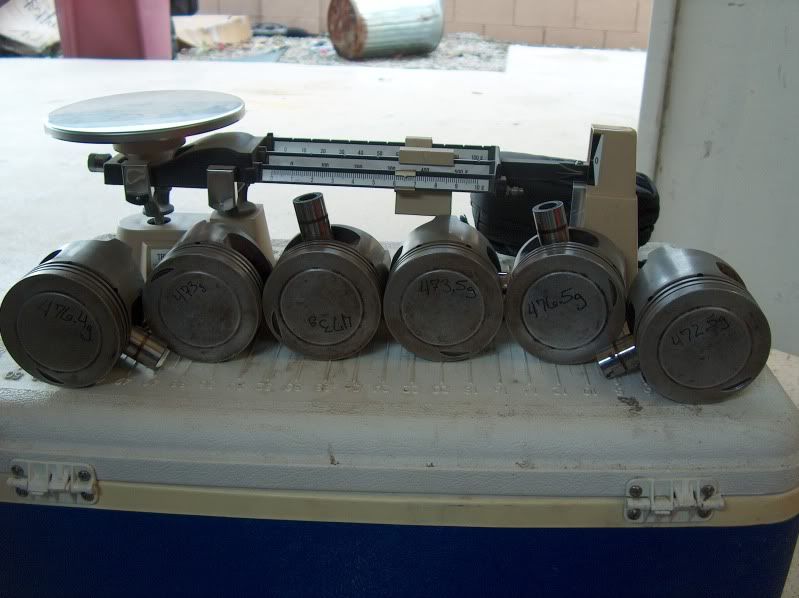
pistons without the wrist pins installed with the weights marked.
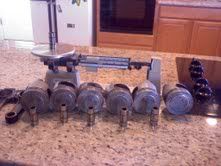
pistons and wristpins weighed
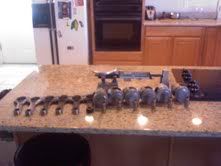
the results of about 5 hours work
next weekend i will oil grove them on the lathe and then balance them and the wrist pins so they all match in weight. if there is time, i will also be knife edging and polishing the ETA crankshaft
my goal was to go as far as i could with stock or stock modified parts.
first thing i am doing is lightening the connecting rods so i though i would do a step by step DIY with pics and results.
*disclaimer* this does not mean you should go attack your engine parts with a bench grinder. if you do that is your own stupidity, don't blame me.
first some side by side shots
stock ETA rod on the left, semi modded on the right
stock in the middle of the roughed in rods. you can get an idea how much is being removed from the top and sides of the rod
after roughing the rods in with a belt sander (which i forgot to to take pics of) i started hand finishing them with a fordom ( a cable driven die grinder)
mostly finished upper con rod. all of the texture has been polished away with a sanding rood as well as all the edges chamfered. the side forging "flash" is also removed along the sides of the beam of the rod as well as the top of the small end. the protrusions on the sides of the small end have been ground and profiled and blended, but not totally removed. all this will make the con rod lighter and "cut" through the air easier inside the crank case as well as shed the oil splash sooner as well with help with windage.NEXT off to be machined
now i went over to my friend and fellow burn buddy, Greg's house (what are the odds same name friends and both on fire????) to machine the "tangs" flush on the big end of the rods. we were going to use the lathe, but the arbor would not go down small enough for the ID of the rods...so we used the mill which worked out better in the end
the "tang" we are flushing is located between the 2 halves of the rod. by removing this you make the rod lighter, but are not sacrificing any stregnth.
here's Greg machining the extra material away in the mill.
another shot of the mill going to town.
here is some pics of the rods after machining:
you can see the part that was machined away on the unfinished rods
side shot of a mostly finished rod, just a little more hand finishing to do. my drive cable on the fordom broke so i have to wait until monday to pick up a new on to finish.the final weights:
STOCK ETA:601.4 grams
ROUGHED IN:596.3 grams
SEMI FINISHED TOP:590.3 grams
MACHINED AND JUST NEEDING HAND FINISHING:563.7
now once all the rods are finished i will then batch weigh them so the are are the same overall weight, then take them to be shot peined/stress relieved (this will also bring back some of the texture to the rod's surface), have them resized on the big end, rebushed on the small end, then also balanced end to end. when you balance rods end to end you make sure that the weight of both the small end and big ends match the other rods in the set not just the over all weight. this just makes for a better balance job.
i will post up completly finished pics tomarrow after i finish them along with weights.
NEXT.... balancing and oil grooving pistons.
since my fordom took a crap i decided to drive out the wrist pins and weigh the pistons and wrist pins seperately.
here is some pics and results.
weights with the wrist pins installed
pistons without the wrist pins installed with the weights marked.
pistons and wristpins weighed
the results of about 5 hours work
next weekend i will oil grove them on the lathe and then balance them and the wrist pins so they all match in weight. if there is time, i will also be knife edging and polishing the ETA crankshaft


Comment