
How to replace ‘double lock’ driver door lock with older or passenger side locks while retaining central locking.
Symptoms of a broken double locking system:
- Tumbler turns to horizontal (double) position only
- Car will lock from drivers side but not unlock
- Driver door will not lock, but will lock from passenger side and/or trunk
- Driver door lock does not work
Tools needed:
- Phillips head screw driver
- Small flat head screw driver
- Medium size pry bar
- Pick set (or a small finishing nail)
- Hammer
- Dremel with cutting wheel or a small file
Additional tools recommended:
- 300 grit sand paper/Emery cloth
- Brake Clean
- Silglyde or white lithium grease
Process:
1. Remove the door panel. Unscrew the door lock pull, remove the handle frame (red), and remove the 3 phillips head screws (green).

2. Remove the liner from the door frame, you do not need to pull it all the way off, just the back half of the door. In the back of the door you will find the door latch assembly. Roll up the window to gain access to the latch assembly.

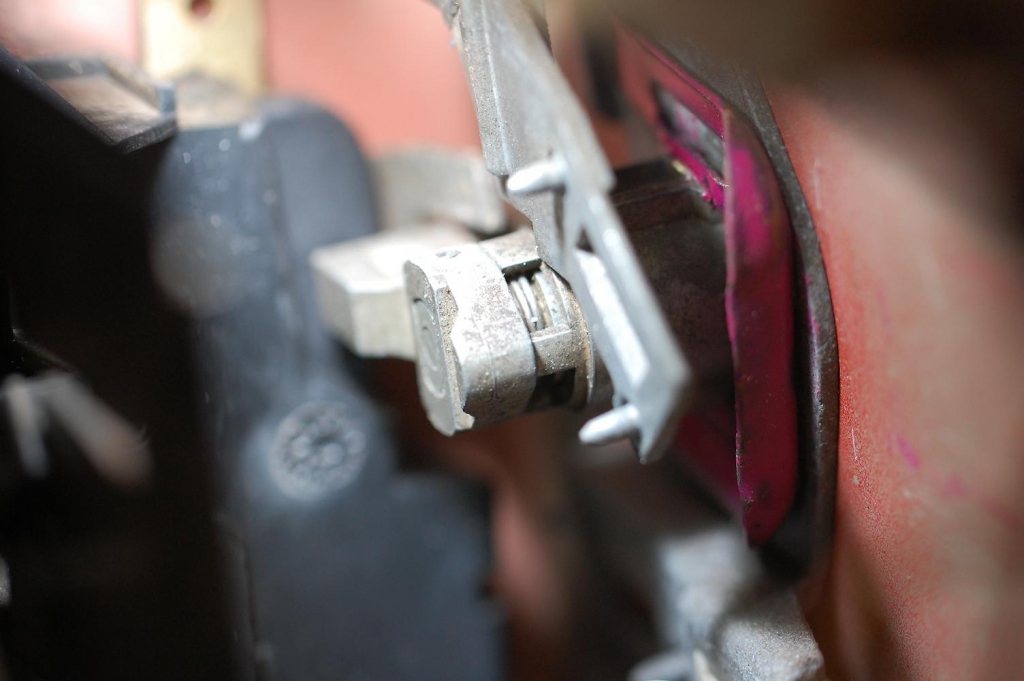
3. Located in the assembly is the central locking switch, black box with a chromate metal clip.

4. To removed the clip place a small flathead screw driver under the clip.
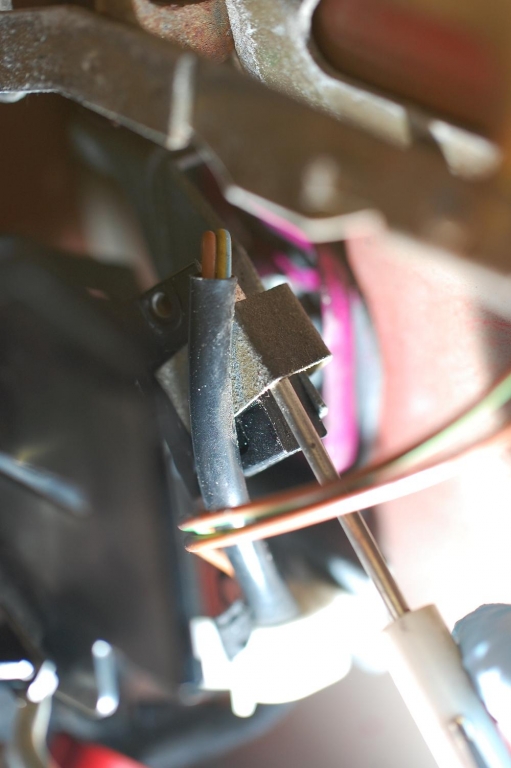
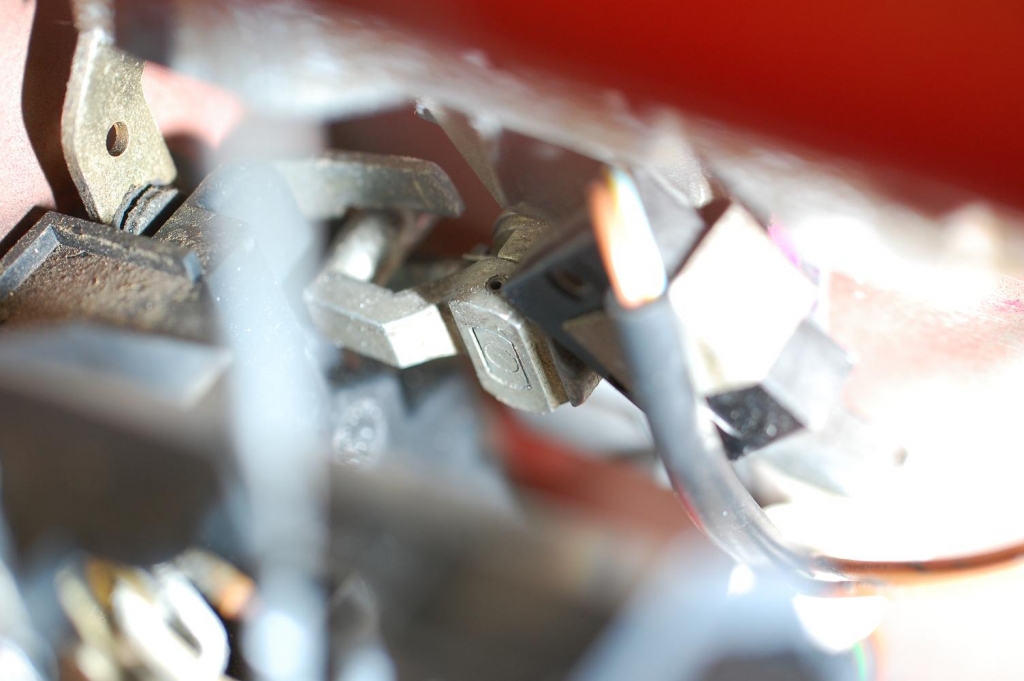
5. Behind the switch there is a metal arm, be sure to keep track of this arm the central locking will not work without it.

7. This is the central locking switch and metal arm removed from the door, it is not necessary to remove the picture is just for reference.

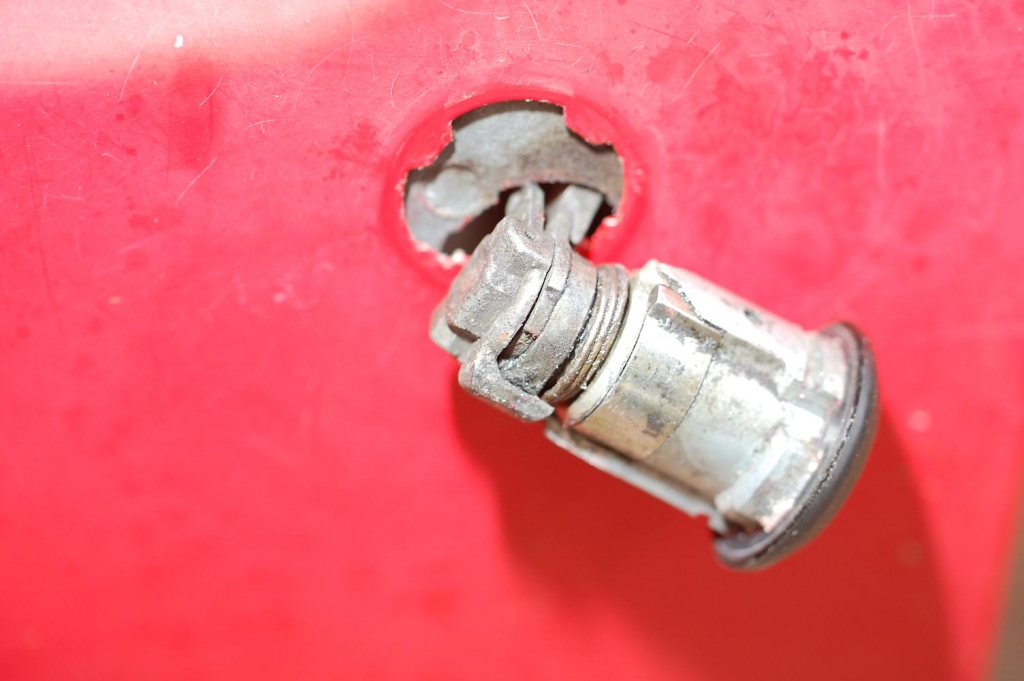
8. Once the central locking switch and arm are disconnected, pry the lock clip (pink) away from the lock cylinder. Be sure not to press against the central locking switch bracket as it tends to break. It is best to brace the arm against part of the inner skin of the door.
9. Once removed, the lock assembly will come out.
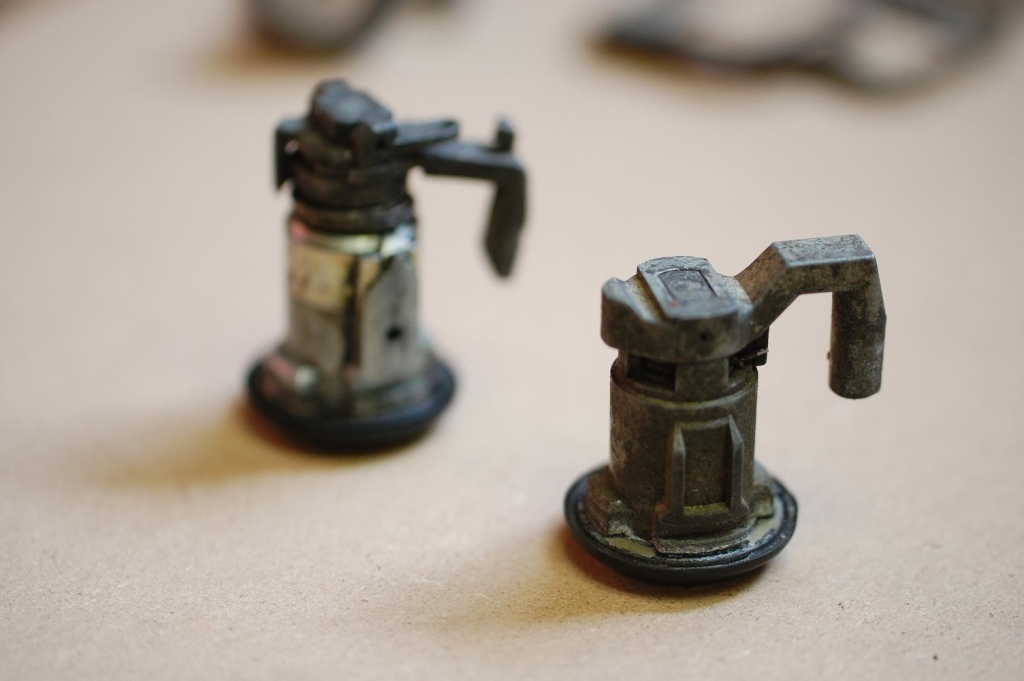
10. Once removed it is clear to see why this double lock was not working.

11. The replacement lock, on the right, will not break as there are less parts.
12. Use a pick, or small nail, to remove the roll pin holding the lock cylinder together.

13. Before removing the lock tumbler from the assembly, be sure to have the key insterted as the key pins need to stay in order. (in this case the key was broken inside the lock)

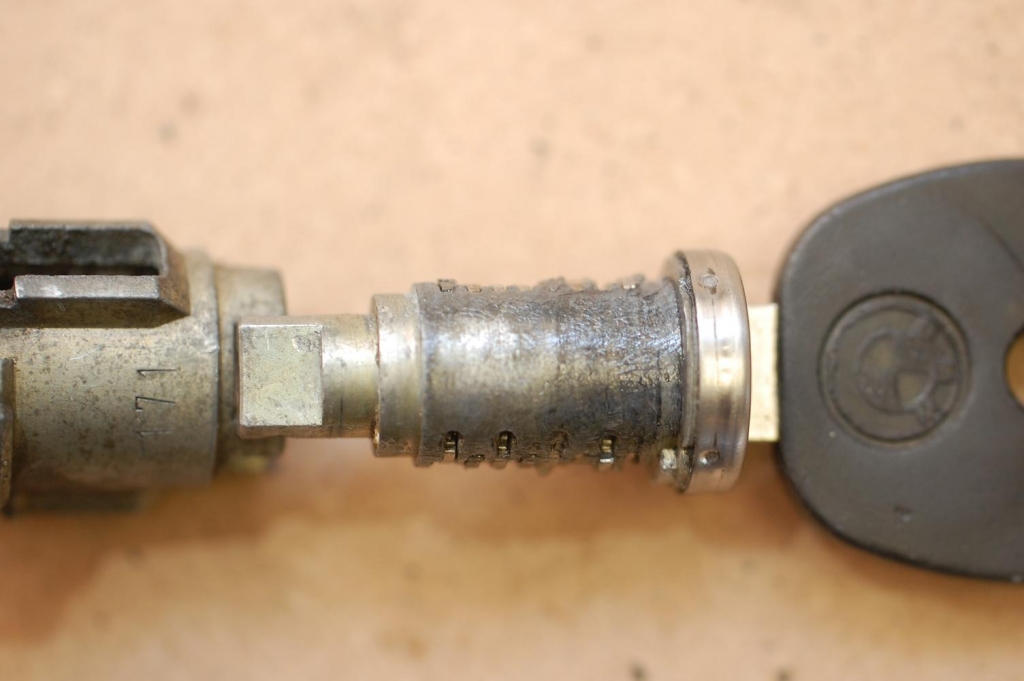
14. On the left is a double lock assembly, on the right a passenger side key.
You may note that there are more pins (12) in the double lock tumbler than the passenger lock (8 ). This is not a problem. Only the first 8 pins are needed to retro the replacement lock.

15. In this project, since the key was broken, a new key was used and the tumbler was rekeyed to match. The green marks note where the pin is not correct.

16. There are only 4 different pins, note that the distance from the slot to the bottom of the pin (where the number is stamped) is different for each pin. This makes it very easy to rekey the lock. If the pin is too high replace it with a larger number, if the pin is too low (meaning high on the backside) replace it with a smaller number pin.
In a case where the key will be reused, rekeying the new tumbler is as easy as removing the pins from one lock and replacing the pins in the new lock.

17. Now is a good time to clean and lube the tumbler. I have found that it is best to sand each pin with 300grit sand paper to remove old dry lubrication. It is also helpful to remove the springs from the tumble, they are very small, and spray the tumbler with brake clean to remove any grit. Place a small amount of grease on each pin, I have found that Sylglide works best. Sylglide is used to lubricate brake caliper sliders.
Before reassembling the lock, make sure the pins are flush with the outside of the tumbler. Try to turn the tumbler several times inside the lock cylinder to make sure all the pins are correct. It may be difficult at first but this is only temporary.
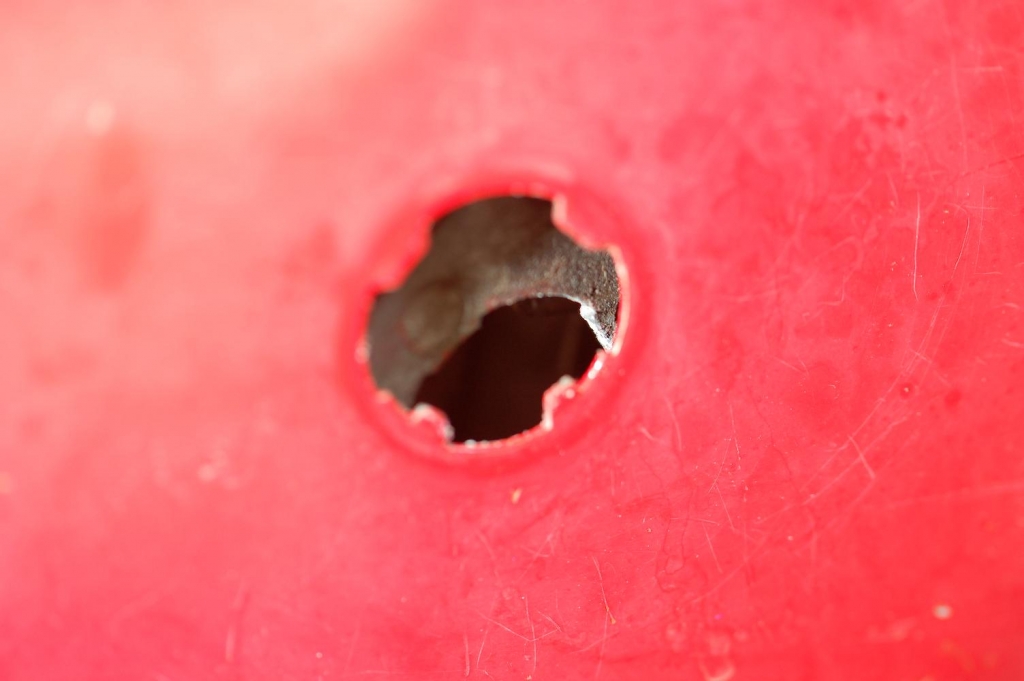
18. The hole in the door only allows the assembly to orient in one direction. To this, you will need to make sure the lever is on correctly.
As a short cut, it is easiest to remove the pass lock (given that it matches the set) turn the arm 180 degrees and use it as the drivers door lock. To do this, the remaining steps will need to be followed.


19. To return the lock to center, there is a clock spring that will need to be placed correctly, with either tab of the spring located as pictured

20. The final step is needed to hold the lock assembly in place. The distance from the back face of the lock assembly is different from the double lock to the replacement lock.
Double lock:
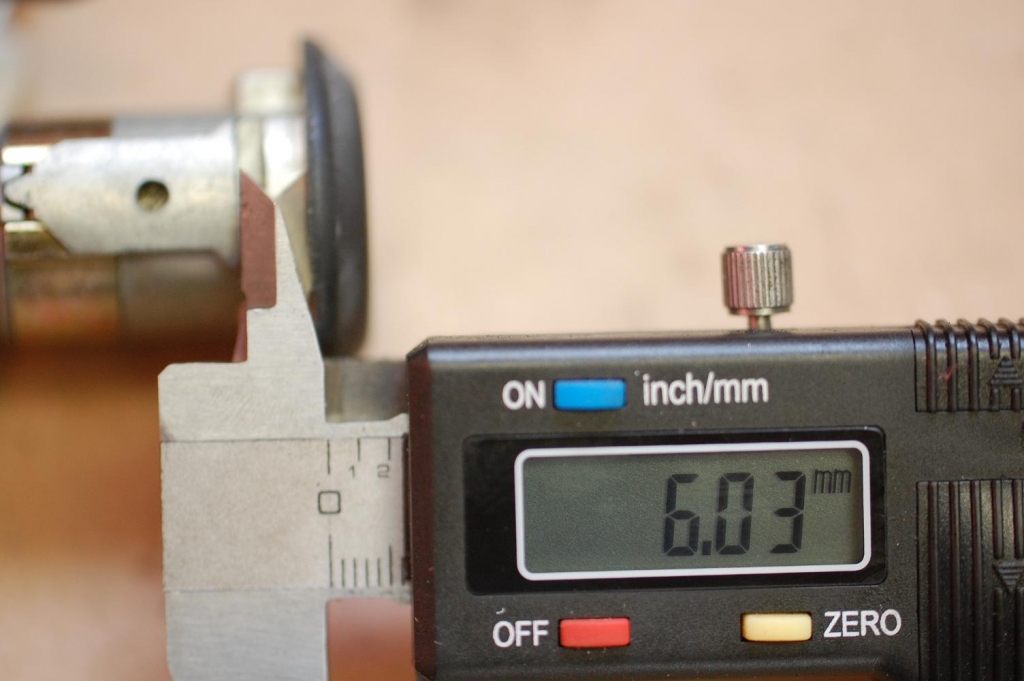
Passenger Lock:

21. Remove the excess material using a Dremel and a cutting wheel.

22. The spacing does not need to be perfect. If the slot is cut too big you may be able to bend the tabs of the lock clip with a flat head screw driver

23. Reinstall the lock, make sure the central locking bracket is in between the door and the lock clip. Install the lock clip with the butt end of the hammer. Be careful of the central locking switch bracket
24. Reinstall the central locking metal arm and switch. Clip the switch in place. This is tricky, it takes some time to get it all in place, but be patient.
25. Roll down your windows before trying the lock. It’s better to be safe than sorry. It is also a good time to check that the wiring is not in the way of the window mechanism. If the window seems to be stuck, stop and check the wiring.
26. Reinstall the door panel and the project is done.
Good luck!
Symptoms of a broken double locking system:
- Tumbler turns to horizontal (double) position only
- Car will lock from drivers side but not unlock
- Driver door will not lock, but will lock from passenger side and/or trunk
- Driver door lock does not work
Tools needed:
- Phillips head screw driver
- Small flat head screw driver
- Medium size pry bar
- Pick set (or a small finishing nail)
- Hammer
- Dremel with cutting wheel or a small file
Additional tools recommended:
- 300 grit sand paper/Emery cloth
- Brake Clean
- Silglyde or white lithium grease
Process:
1. Remove the door panel. Unscrew the door lock pull, remove the handle frame (red), and remove the 3 phillips head screws (green).
2. Remove the liner from the door frame, you do not need to pull it all the way off, just the back half of the door. In the back of the door you will find the door latch assembly. Roll up the window to gain access to the latch assembly.
3. Located in the assembly is the central locking switch, black box with a chromate metal clip.
4. To removed the clip place a small flathead screw driver under the clip.
5. Behind the switch there is a metal arm, be sure to keep track of this arm the central locking will not work without it.
7. This is the central locking switch and metal arm removed from the door, it is not necessary to remove the picture is just for reference.
8. Once the central locking switch and arm are disconnected, pry the lock clip (pink) away from the lock cylinder. Be sure not to press against the central locking switch bracket as it tends to break. It is best to brace the arm against part of the inner skin of the door.
9. Once removed, the lock assembly will come out.
10. Once removed it is clear to see why this double lock was not working.
11. The replacement lock, on the right, will not break as there are less parts.
12. Use a pick, or small nail, to remove the roll pin holding the lock cylinder together.
13. Before removing the lock tumbler from the assembly, be sure to have the key insterted as the key pins need to stay in order. (in this case the key was broken inside the lock)
14. On the left is a double lock assembly, on the right a passenger side key.
You may note that there are more pins (12) in the double lock tumbler than the passenger lock (8 ). This is not a problem. Only the first 8 pins are needed to retro the replacement lock.
15. In this project, since the key was broken, a new key was used and the tumbler was rekeyed to match. The green marks note where the pin is not correct.
16. There are only 4 different pins, note that the distance from the slot to the bottom of the pin (where the number is stamped) is different for each pin. This makes it very easy to rekey the lock. If the pin is too high replace it with a larger number, if the pin is too low (meaning high on the backside) replace it with a smaller number pin.
In a case where the key will be reused, rekeying the new tumbler is as easy as removing the pins from one lock and replacing the pins in the new lock.
17. Now is a good time to clean and lube the tumbler. I have found that it is best to sand each pin with 300grit sand paper to remove old dry lubrication. It is also helpful to remove the springs from the tumble, they are very small, and spray the tumbler with brake clean to remove any grit. Place a small amount of grease on each pin, I have found that Sylglide works best. Sylglide is used to lubricate brake caliper sliders.
Before reassembling the lock, make sure the pins are flush with the outside of the tumbler. Try to turn the tumbler several times inside the lock cylinder to make sure all the pins are correct. It may be difficult at first but this is only temporary.
18. The hole in the door only allows the assembly to orient in one direction. To this, you will need to make sure the lever is on correctly.
As a short cut, it is easiest to remove the pass lock (given that it matches the set) turn the arm 180 degrees and use it as the drivers door lock. To do this, the remaining steps will need to be followed.
19. To return the lock to center, there is a clock spring that will need to be placed correctly, with either tab of the spring located as pictured
20. The final step is needed to hold the lock assembly in place. The distance from the back face of the lock assembly is different from the double lock to the replacement lock.
Double lock:
Passenger Lock:
21. Remove the excess material using a Dremel and a cutting wheel.
22. The spacing does not need to be perfect. If the slot is cut too big you may be able to bend the tabs of the lock clip with a flat head screw driver
23. Reinstall the lock, make sure the central locking bracket is in between the door and the lock clip. Install the lock clip with the butt end of the hammer. Be careful of the central locking switch bracket
24. Reinstall the central locking metal arm and switch. Clip the switch in place. This is tricky, it takes some time to get it all in place, but be patient.
25. Roll down your windows before trying the lock. It’s better to be safe than sorry. It is also a good time to check that the wiring is not in the way of the window mechanism. If the window seems to be stuck, stop and check the wiring.
26. Reinstall the door panel and the project is done.
Good luck!


 [/IMG]


Comment