-
-
I think there is one on top and two on the bottom or something like that. Push the rivets through with these small tools: http://www.harborfreight.com/4-piece...set-66836.html
Thanks a lot!
Leave a comment:
-
-
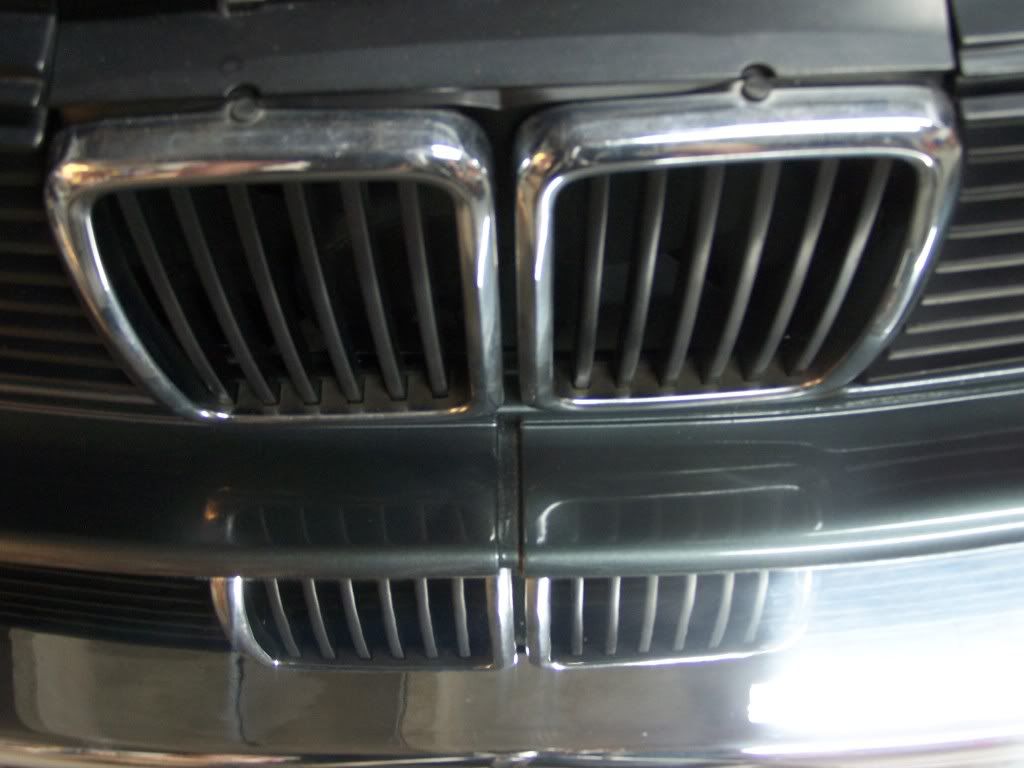
Here are a few pics from when I did some. Also, a little "headlight restore" pad with a drill works wonders for kidneys and other parts. Just use a little polish!
The bumpers are a friggin bitch. I only recommend doing them if you are prepared for a lot of work.
In my pics you can see the anodized part of the bumper coming off when sanding. Hopefully this clears up (omg pun) the confusion for some. There is no scrubbing that will get this off, only sanding IMO.
Leave a comment:
-
Mine? They were OE on that car, painted - they were black plastic when I originally bought the car. The whole car was painted 4 base 3 clear coats, color sanded and polished.Leave a comment:
-
Did you grab your bumper surrounds off a vert or get yours painted?Leave a comment:
-
As mentioned, aluminum polish doesn't work so well because of the clear anodize, I find clay bar and/or a buffer works the best to make it shine again.
Originally posted by 88BlackS-ETA
For mine, I used a 7" variable speed polisher/sander with a 220 grit sanding pad. Took about 20min per bumper to strip them of the anodizing. Then 320 in a DA and then just brought them to a polishing place to finish up.
Pain to keep clean, but occasional rub with Mother's aluminum polish and a good coat of wax made them stay decent.
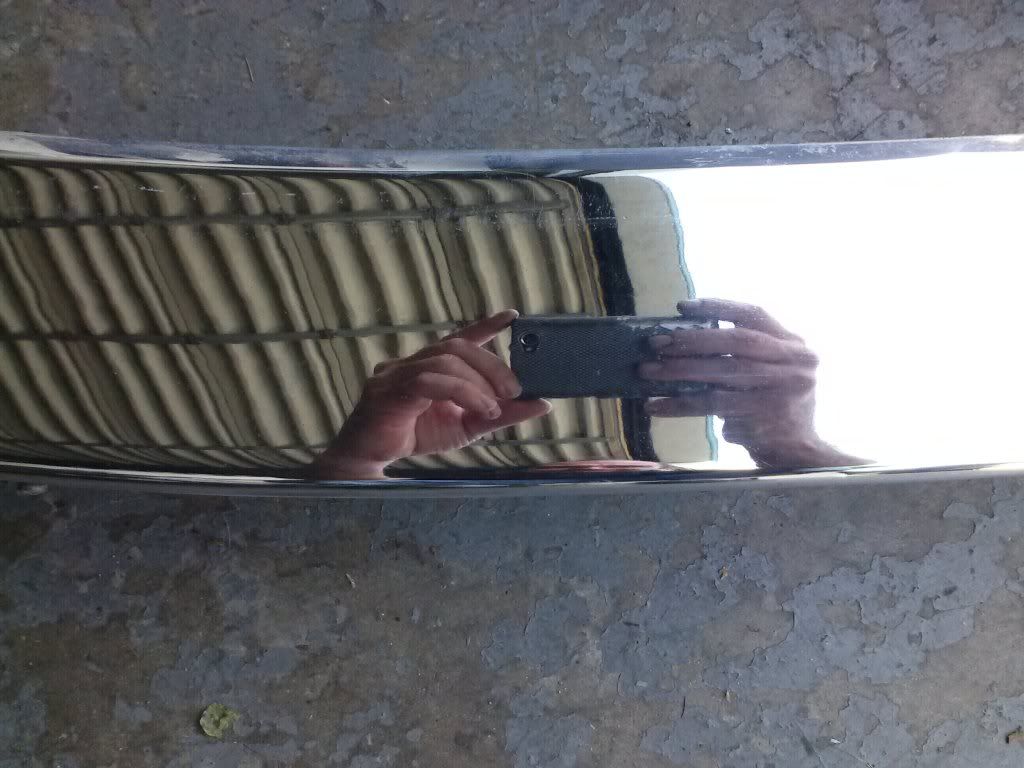
My results...

Leave a comment:
-
Shit that is amazing. I wonder if it wouldn't be easier to get a shop to chrome them?Leave a comment:
-
I've always hated how much time it takes to do something perfectly, but that is a beautiful bumper!Leave a comment:
-
I believe you are correct about this. The rear bumper on my vert was all scratched up, so I used a polish wheel on a drill with mother's mag and aluminum polish. It worked great once I worked through the layer of gunk that covered the bumpers, but it took forever and was really frustrating.
In the future i may try aircraft stripper followed by fine sand paper and lots of buffing.Leave a comment:
-
A quick trick to get your trim and bumper looking better is to just use back to black. It just basically fills in the imperfections and makes your trim look a lot better. Very temporary though as it's just a silicone or similar film. Good for cleaning your car up for a meet or photoshoot imo.Leave a comment:


Leave a comment: