

Disclaimer: I am not a professional, I learned this on my own and have learned how to do a lot of what is mentioned below from professionals. That being said, it's very straight forward. Vinyl wraps are just like putting on a giant sticker, and it'll take a lot of patience.
I've gotten a lot of responses and messages about the wrap I did on my car. After a few people suggesting a full writeup, I finally got around to it. :up:
So the original plan was to have it painted, but with the cold winters in Utah (and this being my daily driver) I was afraid of what the temperature might do to the fresh paint. Also, for those who live in Utah or nearby, you may know that Utah roads have been under construction for about as long as I can remember. Rough roads and gravel didn't sound like a good idea on a new paint job. So I wrapped it.
Materials list:
Prep:
This is a good opportunity to do any bodywork before you wrap it. Some people will do the whole filling and sanding dents which is a good way to go. Personally, my car was in really great shape structurally. The paint was just really bad and the clear coat had almost faded completely on the roof and trunk. So I had the entire car PDR'd (paintless dent removal), and sanded the rough areas where the clear coat was peeling with 1500 grit sand paper.

The key to a good looking and long lasting wrap is making sure the car and your work area are 110% clean and warm (I can't stress these two enough). I would recommend that the surface of the car be between 60-80 degrees and out of direct sunlight. (I would hope that it's self explanatory to not wrap your car outside.)
A good start will be to wash the entire car with a standard dish soap (I used Dawn). You'll want to remove any contaminants, dirt, and any wax coats that are still on the car. Even though it's being wrapped, I used a couple new microfiber wash mitts and the two bucket wash method to keep all the panels in the best possible condition. Make sure to REALLY focus on washing areas you normally wouldn't:
-Door jams
-Gas tank cover door and all around the gas cap
-Pop the hood and get every crack and crevice around the fenders
-Scrub under the fenders
And anything else you find along the way...

Next, get the car as dry as you possibly can. Wipe everything down and double check that you didn't leave any dirt anywhere. I did this, which isn't completely necessary, but then letting the car air dry for 24 hours before you begin wrapping (parked inside).

Now depending on how crazy you want to get, you can remove most of the panels to make sure they are wrapped correctly. I didn't want to do that, so I only pulled off the front and rear bumpers and the rear spoiler.
Application:
I picked up 40 feet of 3M 1080 Series, color is Gloss Anthracite. I messed up on one door and ended up having to redo it, in all reality I used more like 50 feet total. So make sure you get extra material to account for mess ups.
Right before you're about to start wrapping the car, give it a good wipe down with the denatured alcohol. Do it just as you would clean a window or mirror with it. Make sure it's dry and you can start laying the vinyl down!
This could be a whole separate DIY just on how to apply/install vinyl on your car. This will require a little extra research on your end, Youtube videos are a great resource to see the best techniques. But basically you'll want to cut the piece for the panel you are wrapping and leave about 2" extra on each side to make sure the panel is completely covered. Lay the piece down straight and with the least amount of wrinkles you possibly can, then start in the middle and squeegee all the wrinkles and bubbles out.
I wish I got more pictures during the process of wrapping, but this is all I ended up with.

After it's all laid down, make sure you go back over every panel to reheat and squeegee it again. The 3M 1080 series has an adhesive that is activated by pressure, so make sure to really seal it down. DO NOT wash the car for about a week immediately following the application.
Washing/maintenance:
DO NOT use a pressure washer on the wrap, I made that mistake and I had to re-wrap an entire door because a piece came off. Other than that, washing it it pretty straight forward. Remember that vinyl can scratch, similar to paint, so take care of it just like you would a new paint job.
Keep it out of the sun as often as you can. Just as the sun fades any other material/finish, it will fade the color of the wrap much faster.
You will also start to get some little corners and pieces that come up and won't stick back down. DO NOT try to make them stick back down. Once a corner or edge lifts, it will never stick back down the same and will continue to lift the rest of that panel up. Lifting is generally very normal, just make sure to cut those pieces off with the razor blade. It's better to have a small seam if you need to recover that edge rather than have to re-wrap an entire panel.
Other than that, a good wrap will last you 3-5 years and still look rad. It's a great investment and awesome for the price and reversibility. People are constantly amazed when I tell them the car is wrapped because it looks like paint. So I highly suggest going with a high quality material like 3M, Oracal, Hexis, etc.
Thanks for reading! If any pros out there have more suggestions or see something I missed, please leave a response and I'll do my best to keep this updated.
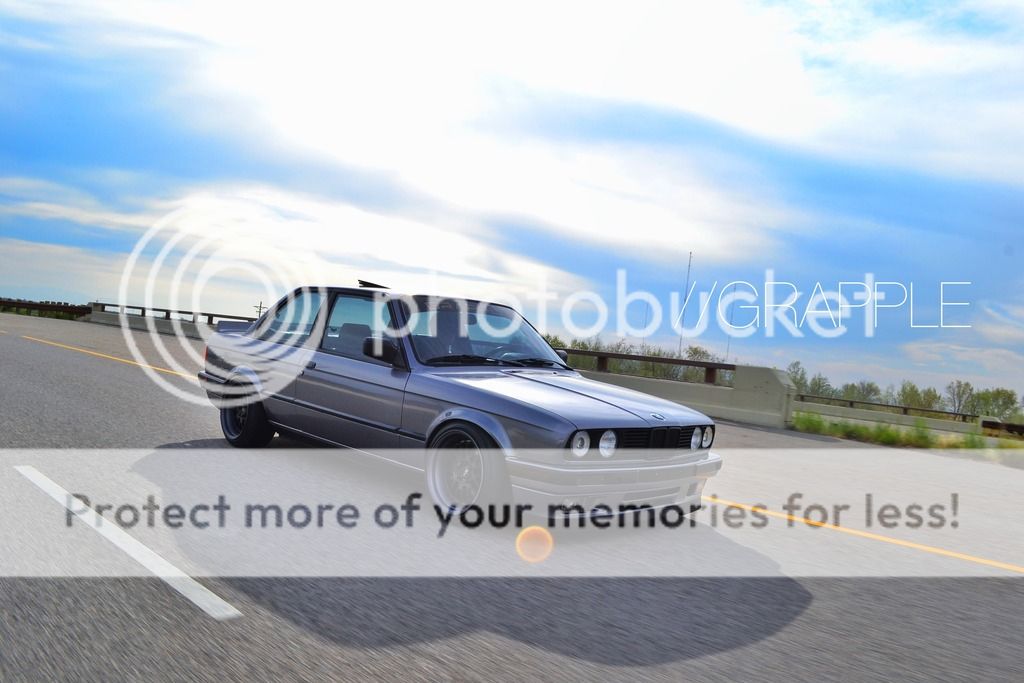
Finally, some finished shots:
Quick before and after of the roof-


I've gotten a lot of responses and messages about the wrap I did on my car. After a few people suggesting a full writeup, I finally got around to it. :up:
So the original plan was to have it painted, but with the cold winters in Utah (and this being my daily driver) I was afraid of what the temperature might do to the fresh paint. Also, for those who live in Utah or nearby, you may know that Utah roads have been under construction for about as long as I can remember. Rough roads and gravel didn't sound like a good idea on a new paint job. So I wrapped it.
Materials list:
- New microfiber wash mitt and drying towels
- Dawn dish soap
- 40-50 ft. of vinyl wrap (for details, please read below)
- Two squeegee's
- Sticky back felt or soft material to wrap around the squeegee (reduces friction)
- Denatured alcohol (in a spray bottle)
- Windex
- Heat gun
- Razor blades
- Friend (optional, but makes the job WAYYYYY easier)
Prep:
This is a good opportunity to do any bodywork before you wrap it. Some people will do the whole filling and sanding dents which is a good way to go. Personally, my car was in really great shape structurally. The paint was just really bad and the clear coat had almost faded completely on the roof and trunk. So I had the entire car PDR'd (paintless dent removal), and sanded the rough areas where the clear coat was peeling with 1500 grit sand paper.
The key to a good looking and long lasting wrap is making sure the car and your work area are 110% clean and warm (I can't stress these two enough). I would recommend that the surface of the car be between 60-80 degrees and out of direct sunlight. (I would hope that it's self explanatory to not wrap your car outside.)
A good start will be to wash the entire car with a standard dish soap (I used Dawn). You'll want to remove any contaminants, dirt, and any wax coats that are still on the car. Even though it's being wrapped, I used a couple new microfiber wash mitts and the two bucket wash method to keep all the panels in the best possible condition. Make sure to REALLY focus on washing areas you normally wouldn't:
-Door jams
-Gas tank cover door and all around the gas cap
-Pop the hood and get every crack and crevice around the fenders
-Scrub under the fenders
And anything else you find along the way...
Next, get the car as dry as you possibly can. Wipe everything down and double check that you didn't leave any dirt anywhere. I did this, which isn't completely necessary, but then letting the car air dry for 24 hours before you begin wrapping (parked inside).
Now depending on how crazy you want to get, you can remove most of the panels to make sure they are wrapped correctly. I didn't want to do that, so I only pulled off the front and rear bumpers and the rear spoiler.
Application:
I picked up 40 feet of 3M 1080 Series, color is Gloss Anthracite. I messed up on one door and ended up having to redo it, in all reality I used more like 50 feet total. So make sure you get extra material to account for mess ups.
Right before you're about to start wrapping the car, give it a good wipe down with the denatured alcohol. Do it just as you would clean a window or mirror with it. Make sure it's dry and you can start laying the vinyl down!
This could be a whole separate DIY just on how to apply/install vinyl on your car. This will require a little extra research on your end, Youtube videos are a great resource to see the best techniques. But basically you'll want to cut the piece for the panel you are wrapping and leave about 2" extra on each side to make sure the panel is completely covered. Lay the piece down straight and with the least amount of wrinkles you possibly can, then start in the middle and squeegee all the wrinkles and bubbles out.
I wish I got more pictures during the process of wrapping, but this is all I ended up with.
After it's all laid down, make sure you go back over every panel to reheat and squeegee it again. The 3M 1080 series has an adhesive that is activated by pressure, so make sure to really seal it down. DO NOT wash the car for about a week immediately following the application.
Washing/maintenance:
DO NOT use a pressure washer on the wrap, I made that mistake and I had to re-wrap an entire door because a piece came off. Other than that, washing it it pretty straight forward. Remember that vinyl can scratch, similar to paint, so take care of it just like you would a new paint job.
Keep it out of the sun as often as you can. Just as the sun fades any other material/finish, it will fade the color of the wrap much faster.
You will also start to get some little corners and pieces that come up and won't stick back down. DO NOT try to make them stick back down. Once a corner or edge lifts, it will never stick back down the same and will continue to lift the rest of that panel up. Lifting is generally very normal, just make sure to cut those pieces off with the razor blade. It's better to have a small seam if you need to recover that edge rather than have to re-wrap an entire panel.
Other than that, a good wrap will last you 3-5 years and still look rad. It's a great investment and awesome for the price and reversibility. People are constantly amazed when I tell them the car is wrapped because it looks like paint. So I highly suggest going with a high quality material like 3M, Oracal, Hexis, etc.
Thanks for reading! If any pros out there have more suggestions or see something I missed, please leave a response and I'll do my best to keep this updated.
Finally, some finished shots:
Quick before and after of the roof-


Comment