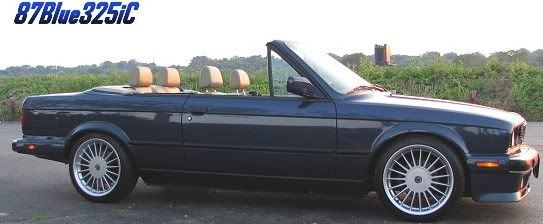
Since the recent (or not so recent) discovery that Ford Taurus side skirts fit almost directly onto the E30, more and more people are getting the idea to try this out. Since I'm SUPER picky about body kit parts, I've been holding out until I could find something I really liked, and who would have thought they'd come from a Ford? The great thing about these is they're cheap, plentiful, easy to remove and install, and they take VERY little modification to fit.
So I picked up a set myself, and decided I would do a kind of a photo album procedure on how I did it. Keep in mind, this may not be the exact method you choose to install them, simply the route I'll be going.
Firstly, getting a set should be pretty easy. Tauruses are everywhere in junkyards. Ford made a shitload of them, and damn near all of them of the 92-95 vintage have probably kicked the bucket by now. There were 10 of them in my local junkyard. The skirts are held on on most of the ones I saw by about 8-10 plastic expanding screws. Bring a few different tools, I found a flathead screwdriver and a pair of dykes were the fastest way. Pry the plastic screw down, and cut the head off with the dykes. Some were held on by small bolts (not sure what size), so maybe bring an adjustable wrench, too. Remove all the hardware, and they slip right off. And make sure you get the finish caps at the back of them!
So when you get them home, wash them, mine were FILLED with dirt and road grime. Pretty nasty. After that, lay them out, and pull a measurement down one side of the car. Mine came out at 72 5/8", so I went about an 1/8th of an inch past that, and cut the end off with a coping saw. Make sure you are cutting off the right end, you want the part of the skirt with the large "block" part at the front, and the shorter block at the rear, you'll actually be cutting it off. Also, pull a separate measurement for the other side. You never know.
To get a straight cut, line the length of the skirt up with a straight edge, and cut a shallow line as straight as possible for your cut.
Since I made the cut about 1/8th in. long, I didn't worry about getting it perfectly straight, I can sand it later.

Now since you're cutting off the end part, you're cutting off the channel that the endcap actually sits in. So what you have to do now is modify the shape of the cap to still fit inside the skirt. As you can see in the above image, after the end part, the skirt wraps to the underside, preventing the endcap from fitting inside.
Next, take the end cap and put it on the end of the skirt on the outside, rather than on the inside where it will actually go. This will allow you to mark a guide line of what section of the endcap you need to trim out to make it fit back inside. Once you've removed enough material and trimmed it up a little, it should fit back inside the skirt.


So now that your end cap is trimmed, it should fit inside the skirt cleanly. To fasten the skirt to the car, I'll be using double stick tape at the top, and screws along the bottom. I'll be epoxying the endcap onto the inside of the skirt, since it now actually won't be supporting the skirt at all, it will just be cosmetic, and I won't have to worry about screws coming through the other side. So now what I did it cut off the tab that sticks off the inside of the endcap, and made it flush with the rest of the material. The added benefit of this is now I've left a nice little wall for epoxy to dam up against, making for a better seal.

You can see in that picture and the first few that I cut a little bit too much out of one area and left a gap, but it won't matter. For one, it won't be seen, and I'm also thinking of attaching a piece of black rubber at each end, kind of like a mud flap to reduce chips. We'll see.
Anyway, more to come when I get some more work done on them, but this pretty much covers the modifications needed to make them fit.
So I picked up a set myself, and decided I would do a kind of a photo album procedure on how I did it. Keep in mind, this may not be the exact method you choose to install them, simply the route I'll be going.
Firstly, getting a set should be pretty easy. Tauruses are everywhere in junkyards. Ford made a shitload of them, and damn near all of them of the 92-95 vintage have probably kicked the bucket by now. There were 10 of them in my local junkyard. The skirts are held on on most of the ones I saw by about 8-10 plastic expanding screws. Bring a few different tools, I found a flathead screwdriver and a pair of dykes were the fastest way. Pry the plastic screw down, and cut the head off with the dykes. Some were held on by small bolts (not sure what size), so maybe bring an adjustable wrench, too. Remove all the hardware, and they slip right off. And make sure you get the finish caps at the back of them!
So when you get them home, wash them, mine were FILLED with dirt and road grime. Pretty nasty. After that, lay them out, and pull a measurement down one side of the car. Mine came out at 72 5/8", so I went about an 1/8th of an inch past that, and cut the end off with a coping saw. Make sure you are cutting off the right end, you want the part of the skirt with the large "block" part at the front, and the shorter block at the rear, you'll actually be cutting it off. Also, pull a separate measurement for the other side. You never know.
To get a straight cut, line the length of the skirt up with a straight edge, and cut a shallow line as straight as possible for your cut.
Since I made the cut about 1/8th in. long, I didn't worry about getting it perfectly straight, I can sand it later.
Now since you're cutting off the end part, you're cutting off the channel that the endcap actually sits in. So what you have to do now is modify the shape of the cap to still fit inside the skirt. As you can see in the above image, after the end part, the skirt wraps to the underside, preventing the endcap from fitting inside.
Next, take the end cap and put it on the end of the skirt on the outside, rather than on the inside where it will actually go. This will allow you to mark a guide line of what section of the endcap you need to trim out to make it fit back inside. Once you've removed enough material and trimmed it up a little, it should fit back inside the skirt.
So now that your end cap is trimmed, it should fit inside the skirt cleanly. To fasten the skirt to the car, I'll be using double stick tape at the top, and screws along the bottom. I'll be epoxying the endcap onto the inside of the skirt, since it now actually won't be supporting the skirt at all, it will just be cosmetic, and I won't have to worry about screws coming through the other side. So now what I did it cut off the tab that sticks off the inside of the endcap, and made it flush with the rest of the material. The added benefit of this is now I've left a nice little wall for epoxy to dam up against, making for a better seal.
You can see in that picture and the first few that I cut a little bit too much out of one area and left a gap, but it won't matter. For one, it won't be seen, and I'm also thinking of attaching a piece of black rubber at each end, kind of like a mud flap to reduce chips. We'll see.
Anyway, more to come when I get some more work done on them, but this pretty much covers the modifications needed to make them fit.


Comment