
Excellent DIY thread, scabzzzz. It saved me plenty of "WTF?" moments over the past few days. To add to your points about US -> Euro issues, there will be six holes where the old center shroud would have been bolted in, when you do the euro swap keep the rubber washers and use some leftover screws/nuts to keep those holes sealed up. I'll add to all of that and provide some pictures shortly, but it's important to do this to ensure no water gets in the trunk.
Thanks again for the thread.
-
Originally posted by aworthybrother View Post
#3 http://www.realoem.com/bmw/showparts...93&hg=63&fg=20
#2 http://www.realoem.com/bmw/showparts...87&hg=41&fg=60Leave a comment:
-
Got it! Any suggestions on how to seal those "little flappy flap"?Originally posted by scabzzzz View Post
Do you have the part numbers for the trunk seals & tail light gaskets?
Thank you!Leave a comment:
-
Those big squares on the sides of your car. They have a little flappy flap. Water goes in that flappy flap.
Also the seals on the trunk lid go bad on all of them. Like Jean said the tail light gaskets. Numerous things. E30's are not sound when it comes to gaskets and 20 years.Leave a comment:
-
The vents? They are on each side "behind" the bumpers. You water might also be coming in from the tail light gaskets needing replacement.....Leave a comment:
-
I need help on my rear bumper for the water drain vents, i just noticed that there's water coming in... does anybody has pics on where exactly these vents are located? (i know, im stupid i dont know where it is)....
...need to seal them soon!
- Rear drain vents are going to be another problem. I believe the best thing to do is to use some of that sealing foam stuff, and spray it in there. I left mine untouched, and then realized a shit load of water was suddenly entering my trunk and building up in the sides of the trunk area where the battery and jack go. Not a good thing. Use your imagination there to fix it. Anything works.Leave a comment:
-
I dont think you can with out running a new module(thats not the right word...), this way it will turn off parking and the turn on for blinking...Originally posted by flawdaboi407 View PostLeave a comment:
-
I wired it to where I can blink but the parking light doesnt stay on. How do you wire it to have the parking lights on all the time and so you can also blink?Leave a comment:
-
sorry I guess I should have clarified. They are parking light. They are on when parked like the side lights on the us cars and the city lights on the euro headlights.Originally posted by whowhatwhere View PostLeave a comment:
-
Ok here is what I am doing... Not sure if its been done before but today at the shop as I was explaining the dilemma to my mechanic at first he said "thats the way it is..." meaning US has the 3 wires euro has 2 since the parking is in the headlight.
So after a bit of pushing here is what we came up with.
The 3 wire plug will get split into 2, 2 wires will go to the front signal. This will also feed the repeater which Im going to install on the side fender.
The 3rd wire(the parking) along with ground will go into the US elips. Yes US Elips, how you say? Here are some quick pictures as we tested the idea on a broken US Elips(and yes if I havent told you already, please pack all light, ie headlights and tail lights extremely carefully as they will break since most delivery guys love the openning scene of Ace Ventura Pet detective.)
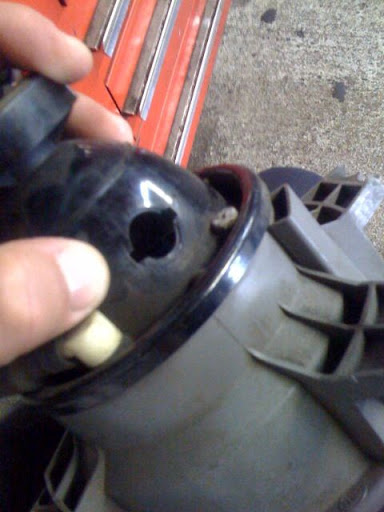
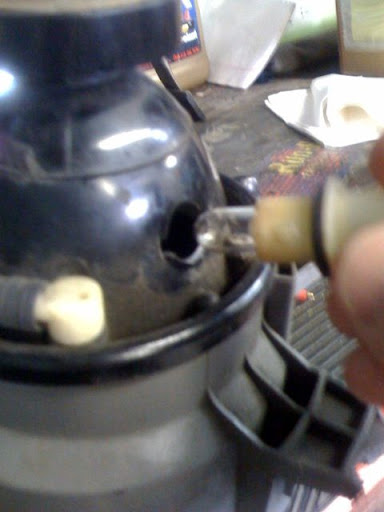
Remove the bulb base from the US side bumper parking light. You know the 2 yellows up front and the 2 reds in the back located on the bumper trim...
Now drill a hole in the back of the Elips and dremel the 2 square tabs. Just like the turns.
Here is what it should look like.
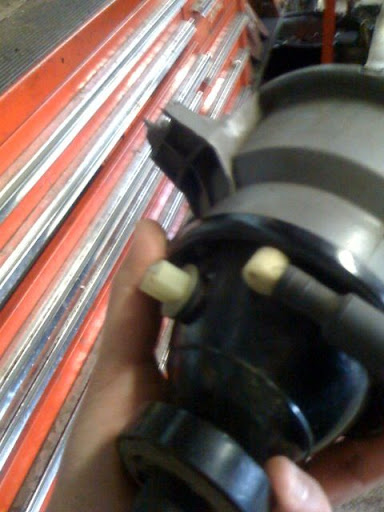
The Plastic on the Elips is a bit thinner then the turn housing so you will need an extra gasket so it fits tight and is sealed.
When installed it will look like this. It "clicks" in just like the parking light housing.
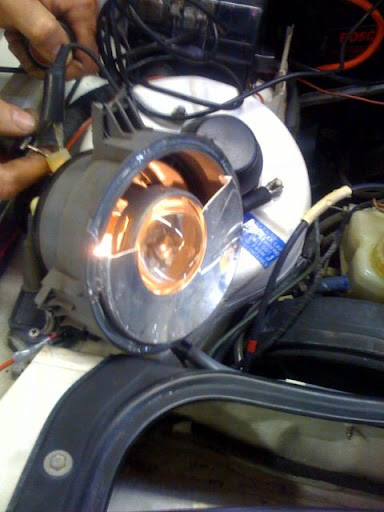
And a quick test on a battery and this is what they will look like, will most likely use a lower voltage bulb.(the top of elips is broken... if you want to know why see my above paragraph)
So whatch you think??? I will post pics next week when done. Obviously if you have euro elips, with city lights you can wire those instead of drilling into your headlights...Leave a comment:
-
I'm quite good with electronics, but apparently I dont read MS Paint very well..Leave a comment:
-
Yep. When parking lights are ON, circuit is complete through the normally closed relay contact.
If you blink while parking lights are OFF, bulb is powered directly through the blinker wire, but relay is activated still but that doesn't matter.
If you blink while while parking lights are ON, the bulb is powered through the blinker wire and the diodes in the correct orientation will not short circuit the Parking "constant on" and blinker "on/off" wires.Attached FilesLeave a comment:
-
Leave a comment: