-
Some X5 tall shifter content including part number: http://www.r3vlimited.com/board/showthread.php?t=106556 -
No.
A 'short shifter' is not a shifter that's short. A 'short shifter' is one where you have to throw the shifter less overall distance to switch gears. The height of the shifter above the ball cup does not matter. Hodge's metal phallus just makes shifting faster and easier when you're frantically searching for 2nd while flipping the steering wheel around from lock to lock.Last edited by kronus; 08-21-2008, 06:36 AM.Leave a comment:
-
^^Yeah, people that are better than me at searching for the part number.. I looked forever for a manual X5 shifter P#.Leave a comment:
-
the whole point of a race shifter is to have the entire mechanism raised. The ball cup is raised then the lever is higher so you would still have a short shifter, just comfortably higher by steering wheel.
I call this a failure.Leave a comment:
-
Good idea, I've seen race shifters like this.
The only problem I see is that with more than twice the lever length, you're doubling the force applied to all the shifter components. If you ever get eccentric with a shifter of this length, it's twice as easy to break something in the shift mechanism. So, be careful.Leave a comment:
-
Looks promising, did you just slide it onto the existing shifter?
How does it work so far?Leave a comment:
-
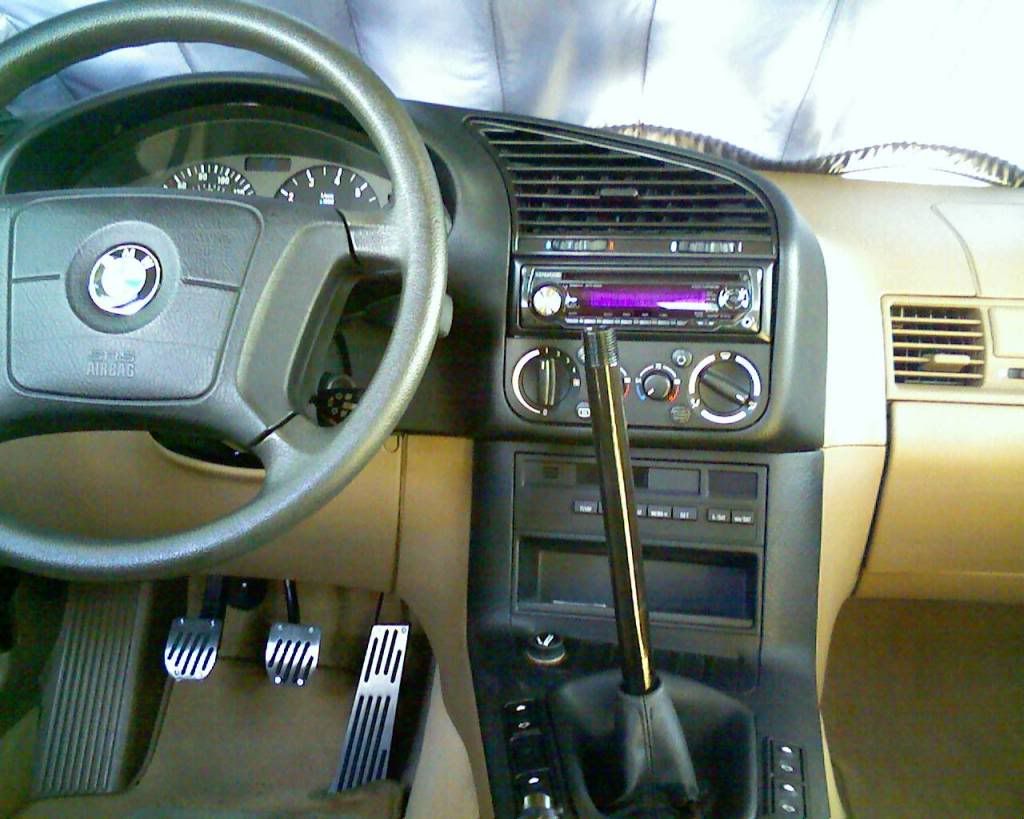
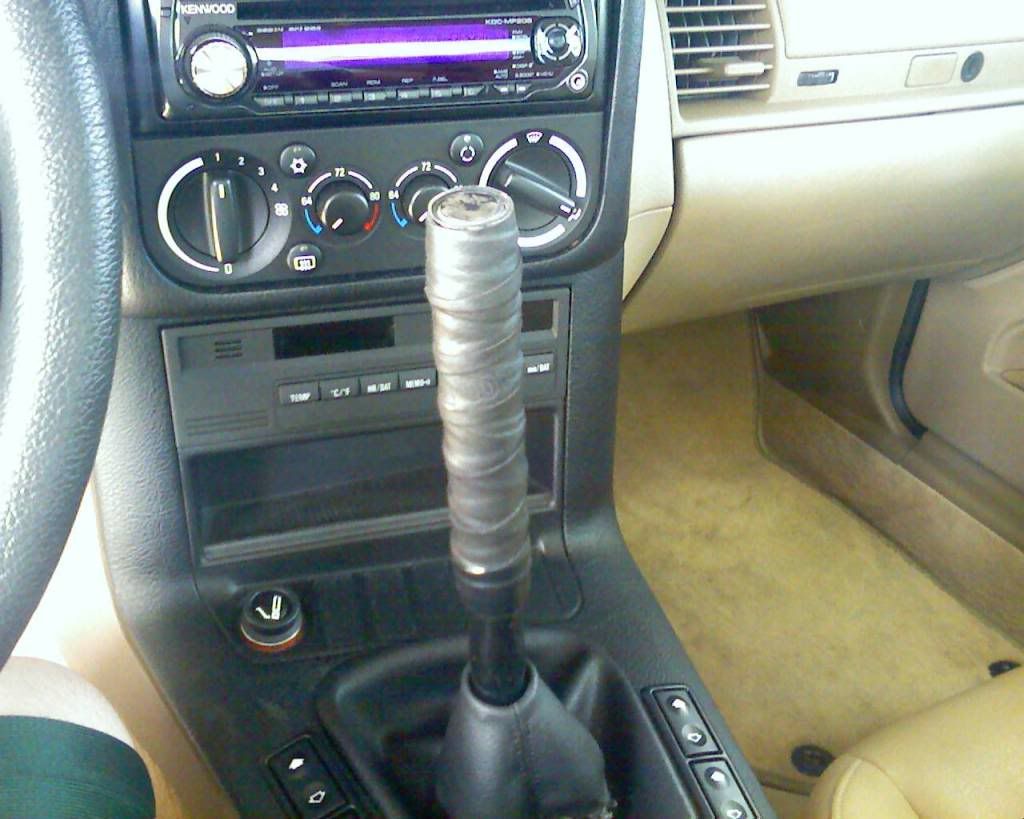
Tall Gear Shift Lever DIY
This is my first written DIY.
This is a very easy and cheap mod that should help aid in shifting accuracy, and allow your hand to keep from traveling as far to reach your knob.
I first thought about doing this after the last Auto-Cross, because coupled with my SSK, my DDM knob is both very low and quite slippery. I feel that even with gloves, I would still be fumbling around.
NOTE: I will only be using this lever for Auto-Cross/Track days, seeing as I don't need the use of the lever for daily driving purposes.
Let's get started!
What you need:
-1/2"x10" (or your desired length) iron pipe from Lowes/Home Depot or other hardware stores. Mine was $3.58
-Wilson UltraWrap Tennis Racket tape, 1 pack of 3 rolls (Wal-Mart)
-Electrical Tape
-Spray Paint (Optional)
-Electric Drill (Optional)
-Screws (Optional)
-Expanding Rivet (Optional)
DIY:
As I said before, this is a very easy mod to do.
It is, for the most part quite self explanatory.
1) I was debating whether to buy a 3/8" or 1/2" pipe, but ultimately found that the 3/8 would not have fit over my lever, so the 1/2" works perfectly.
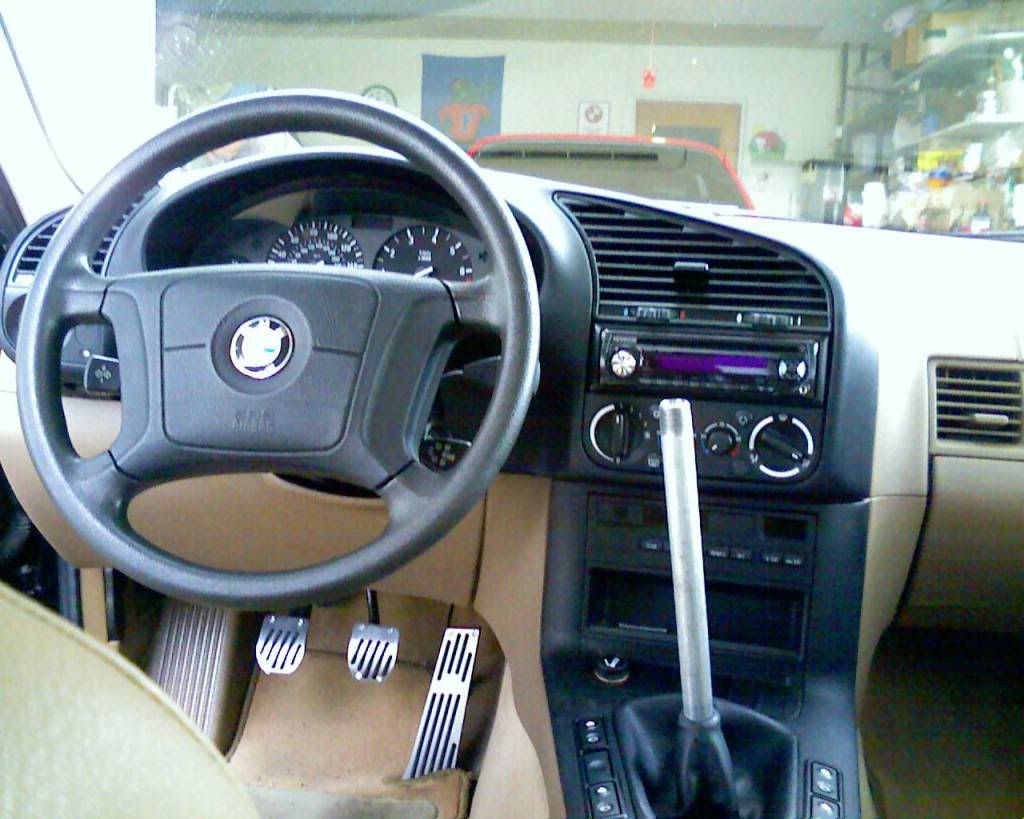
I initially got the 12" long pipe but after putting it in the car, felt that is was far too long and it also would NOT clear my steering wheel when trying to shift into Reverse. So I exchanged it for the 10" pipe and when I got home, went to work.
2) The next step is easy: Just spray paint the pipe if you want to (I wanted black so it wouldn't stand out as much and also make it look a little better). Let dry.
3) I then bought some Wilson UltraWrap Tennis Racket Tape from Wal-Mart. I went with this because it has alot of grip, which is what you want when you need to shift quickly.
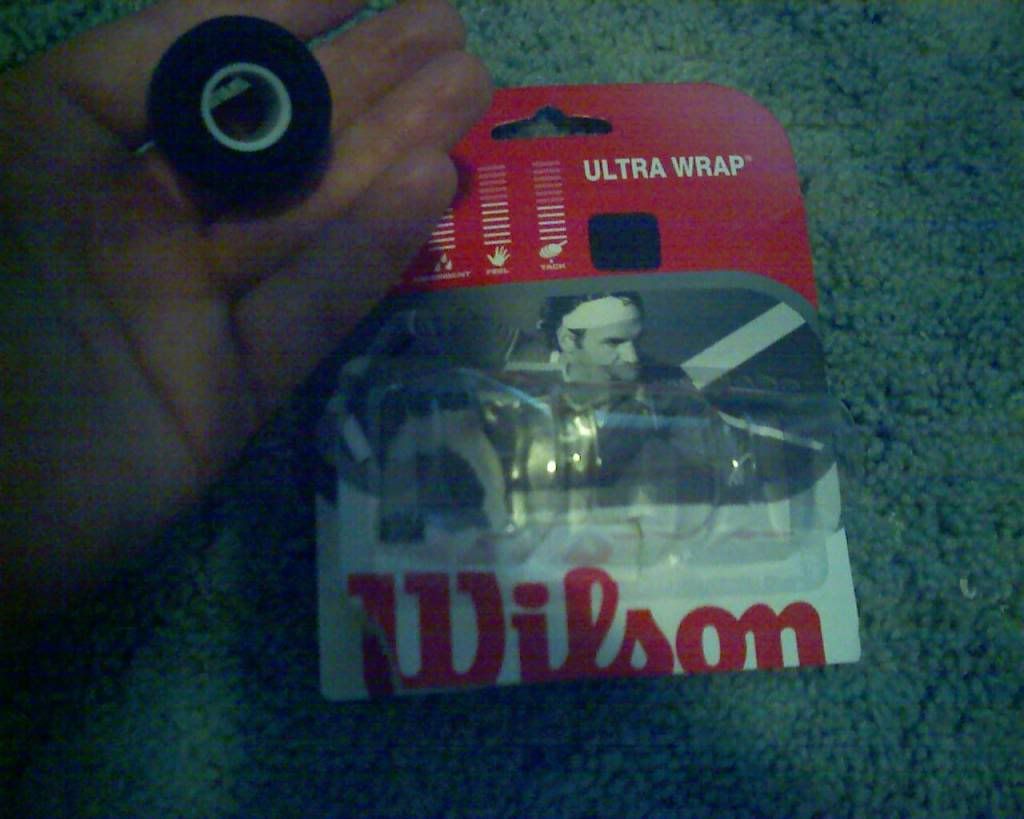
4) I began wrapping via the "top" of the pipe and worked my way down, overlapping each wrap about 1-2cm for extra strength in wrapping tighness, until about 1/4 of the pipe was left uncovered. The rolls are long enough to wrap back up the length of the pipe. I then secured the end with the supplied Wilson tape, and then again with Electrical tape.
NOTE: The starting end of the wrap is beveled, and has a small patch of adhesive so it makes wrapping that much easier
This is where it gets tricky...
I then began a second roll, but this time I started at the bottom of the first roll's wrap! I wrapped in the same manor as the first roll, overlapping each consecutive layer by about 1-2cm. And once again, the roll is long enough to go back down to the starting point. This time, I opted to only use Electrical tape as a means of securing the final layer of wrapping. At this point, you should have FOUR layers by using TWO rolls of Wilson UltraWrap. You may opt to use the third roll, depending on how thick you want your handle to be.
Congratulations! You just made your first Tall Gear Shift Lever!
5) OPTIONAL: You may also opt to drill a few holes along the "bottom" of the handle, and use a few small screws to firmly attach the handle to the Shift lever. However, I decided (as of now) to not do this step, since the lever has no real way of sliding off during shifting unless I pulled up. I have not used this for an Auto-Cross yet, and I may change my mind, but I did use it on the streets, and have yet to have the handle come off of the lever.
6) OPTIONAL: You may also find some kind of expanding rivet to fit inside of the "top" hole, for a more clean look. I found a small rubber disc that was a tight fit, but makes the "top" look a bit nicer (as seen in the picture above).
Enjoy!

-Hodge


Leave a comment: