Announcement

Collapse
No announcement yet.

Bottom's up M20B27 e2i Build

Collapse
X
 
  • Filter
  • Time
  • Show
Clear All
new posts

  • cek
    replied
    This is not the first time I've heard this: "The Super Eta exhaust manifolds are bigger/better than Eta". I don't think they are any bigger. They are certainly shaped differently and may flow differently but the ID of the pipe is exactly the same. Top picture is the flange that connects the 1987 Eta downpipe to the manifold. The bottom picture is the flange for a 1988 SuperEta.

    Eta:


    SuperEta:


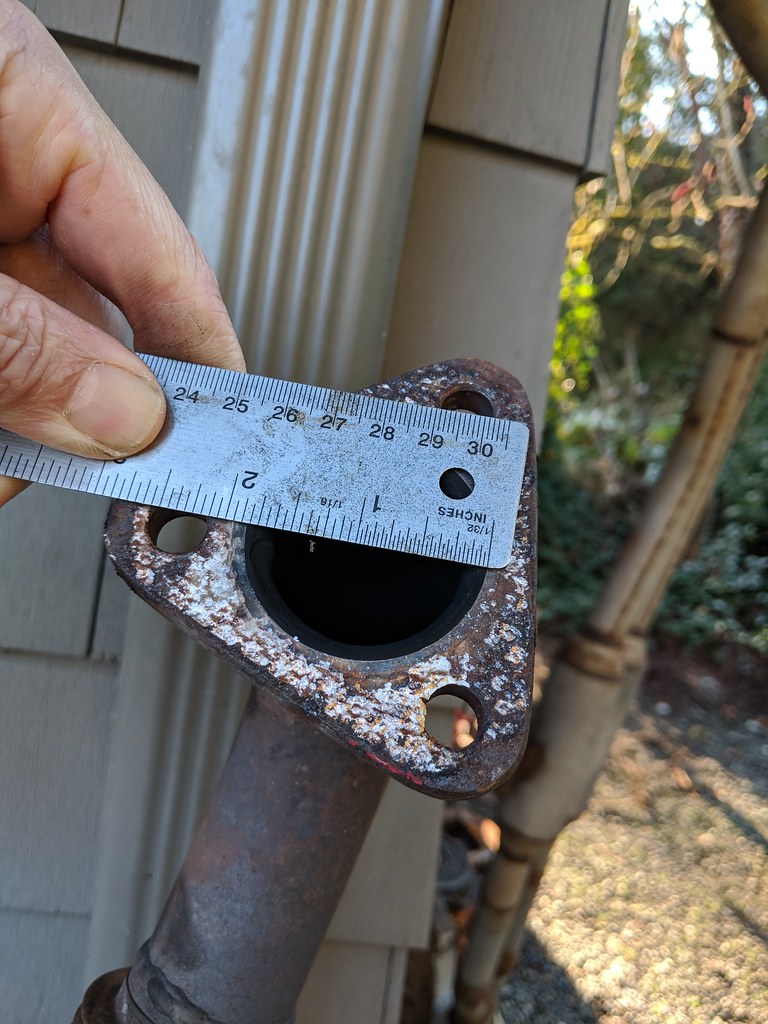
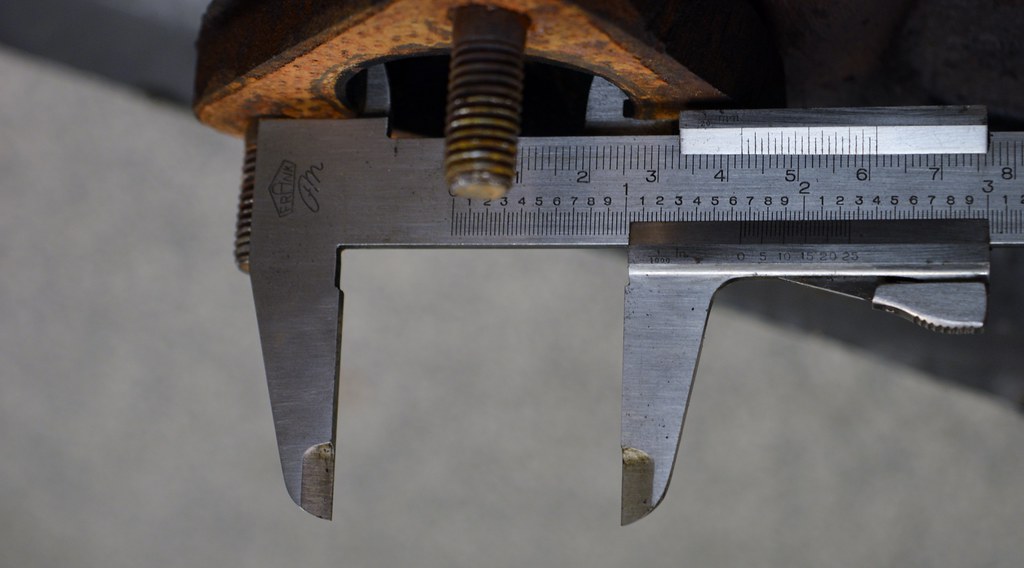
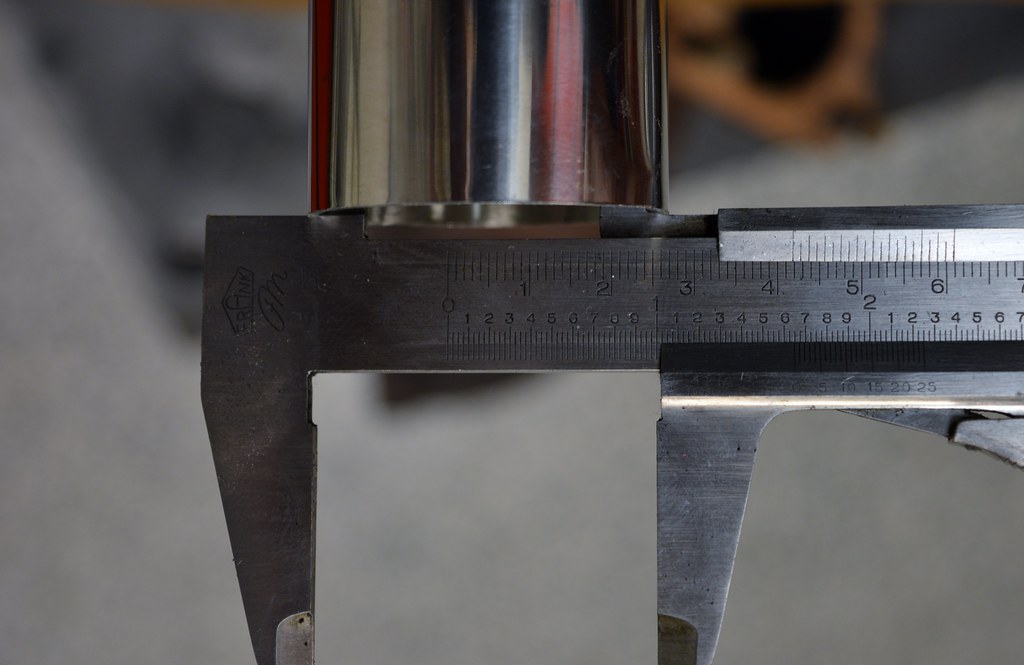
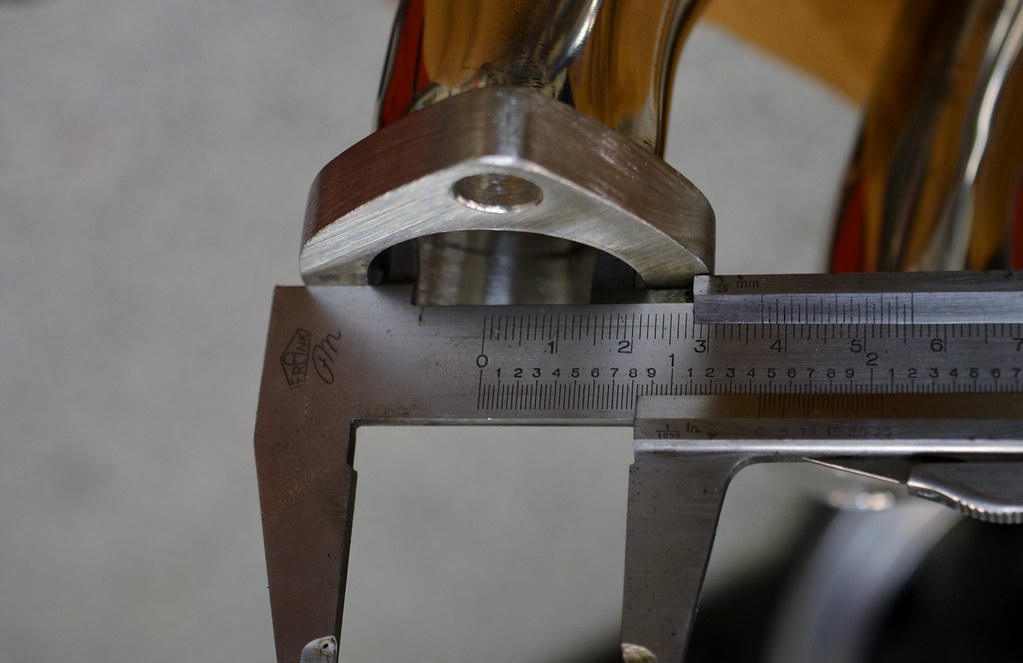
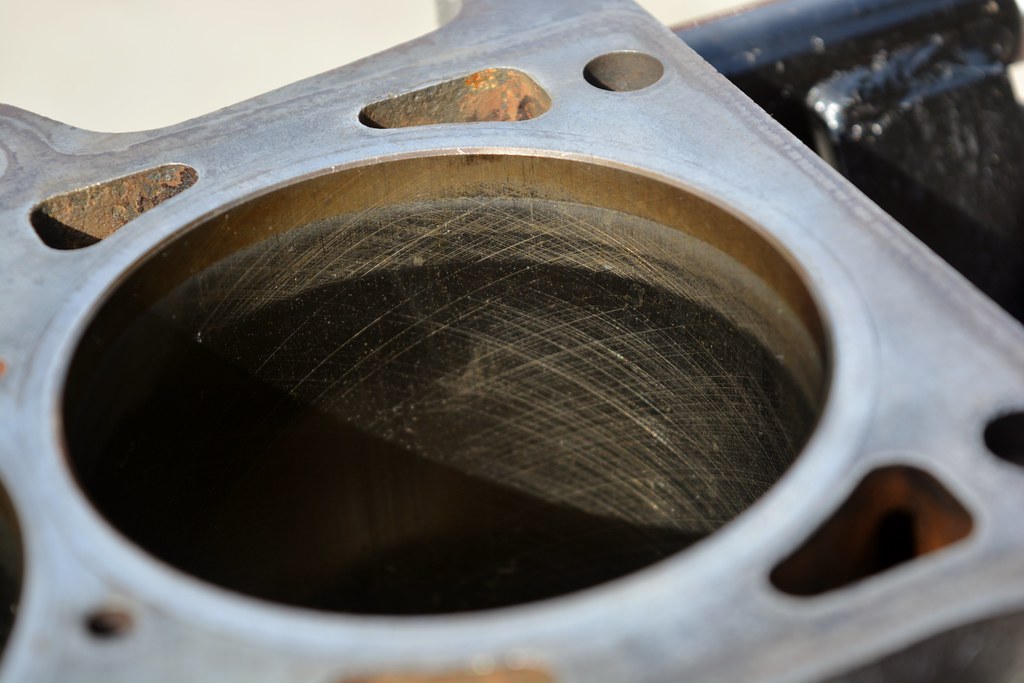
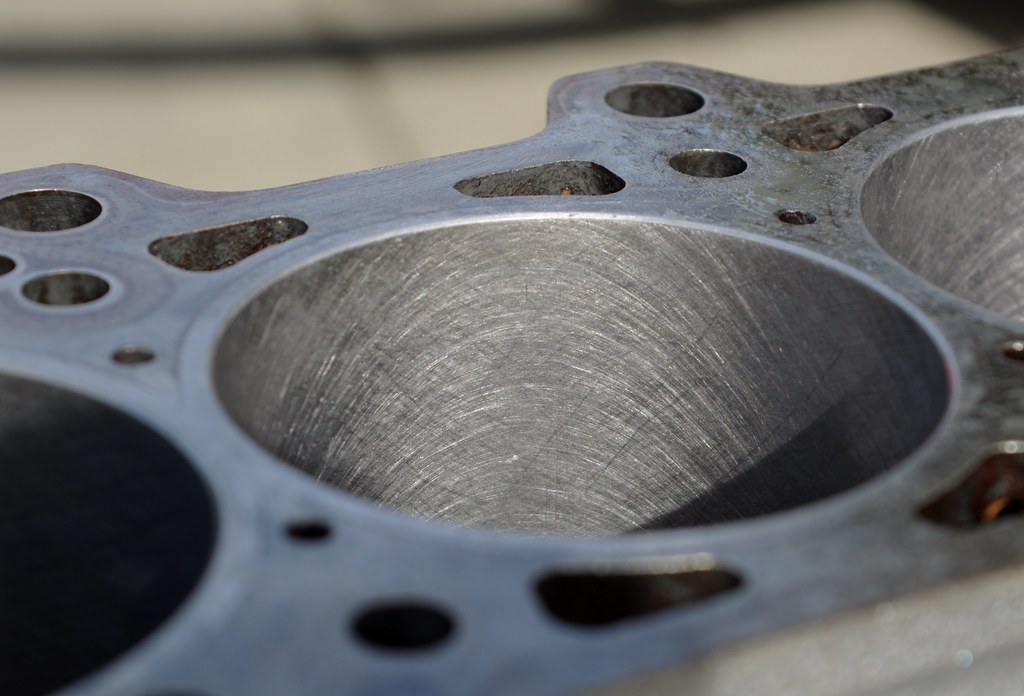
    I should use a caliper, but it looks like ~1.75 *ID*.

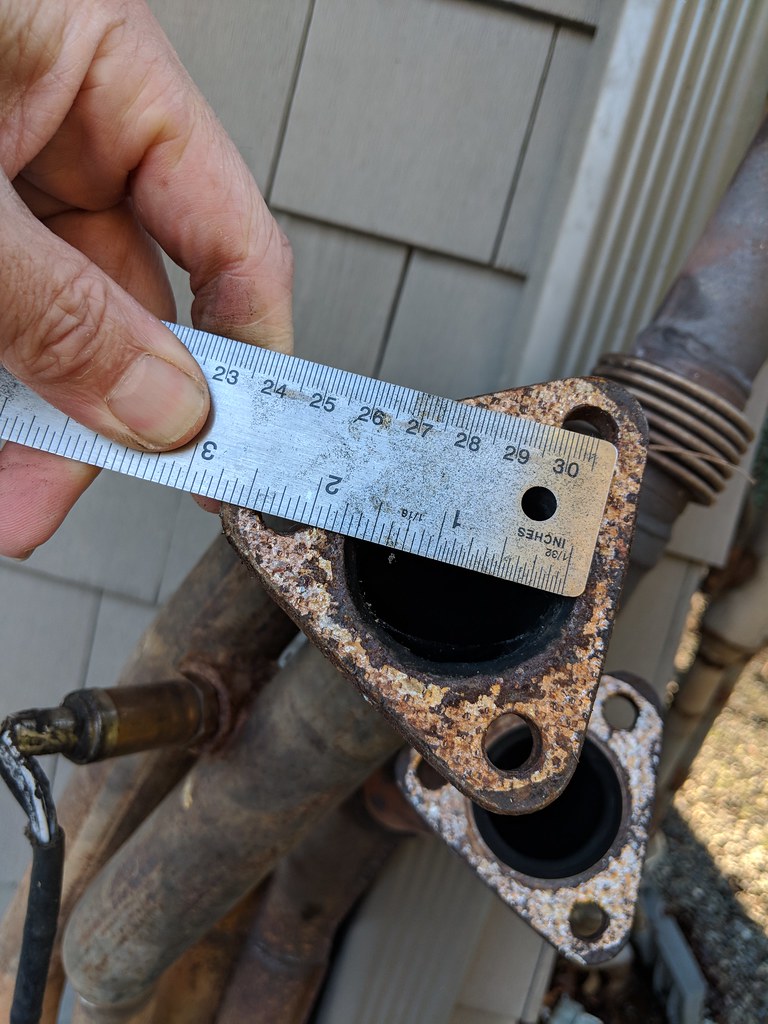
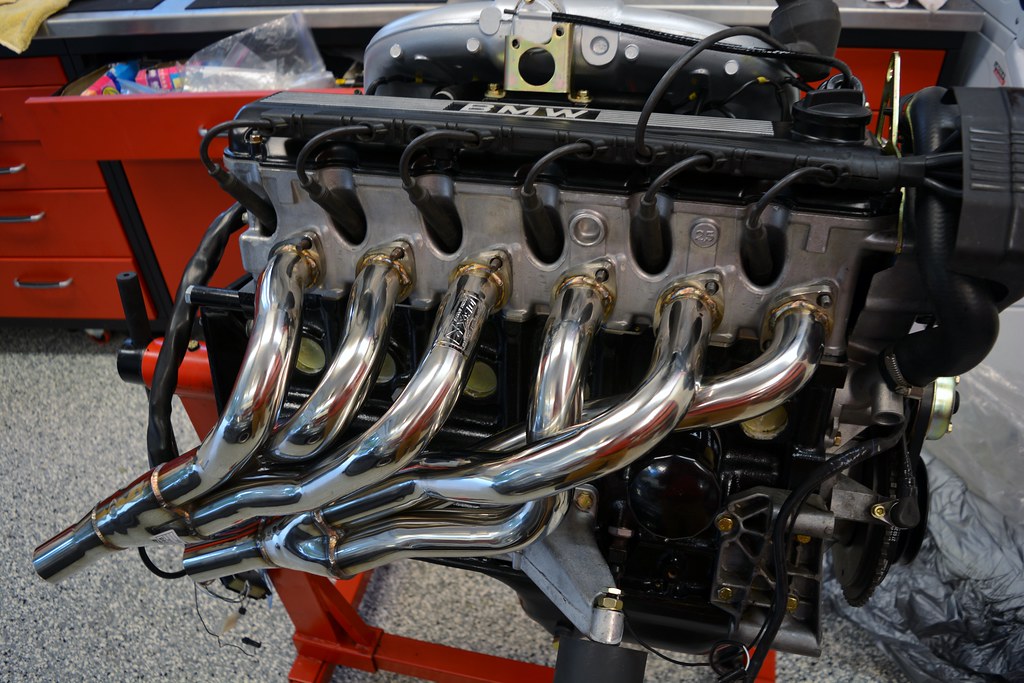
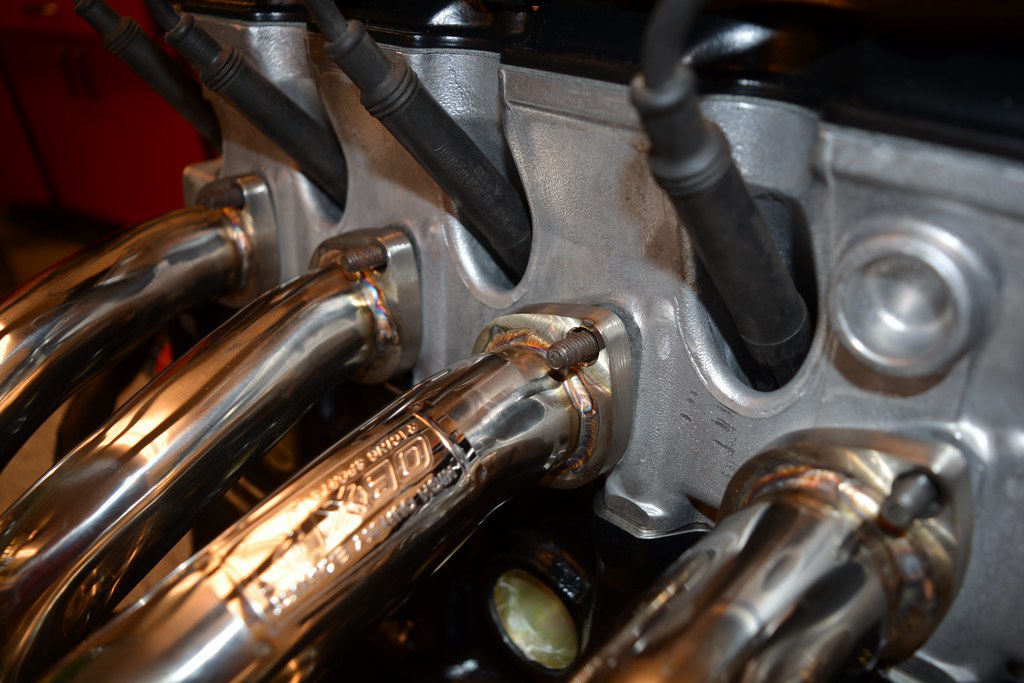
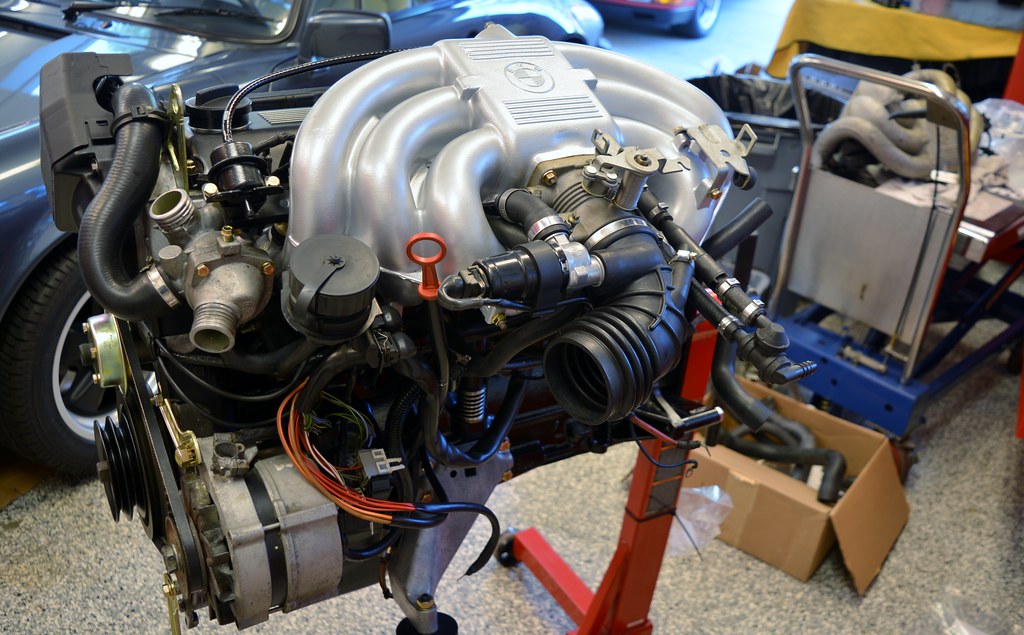
    I've been working through the design of the exhaust and decided to measure the OBX header down pipes. Internet description says "2.5 OD" but that would be insane for an M20. I measured. 1.75" OD. Actually SMALLER than both the down pipes above:


    Right now I'm thinking I'll return the OBX Headers and just go with the 325i manifolds I have.


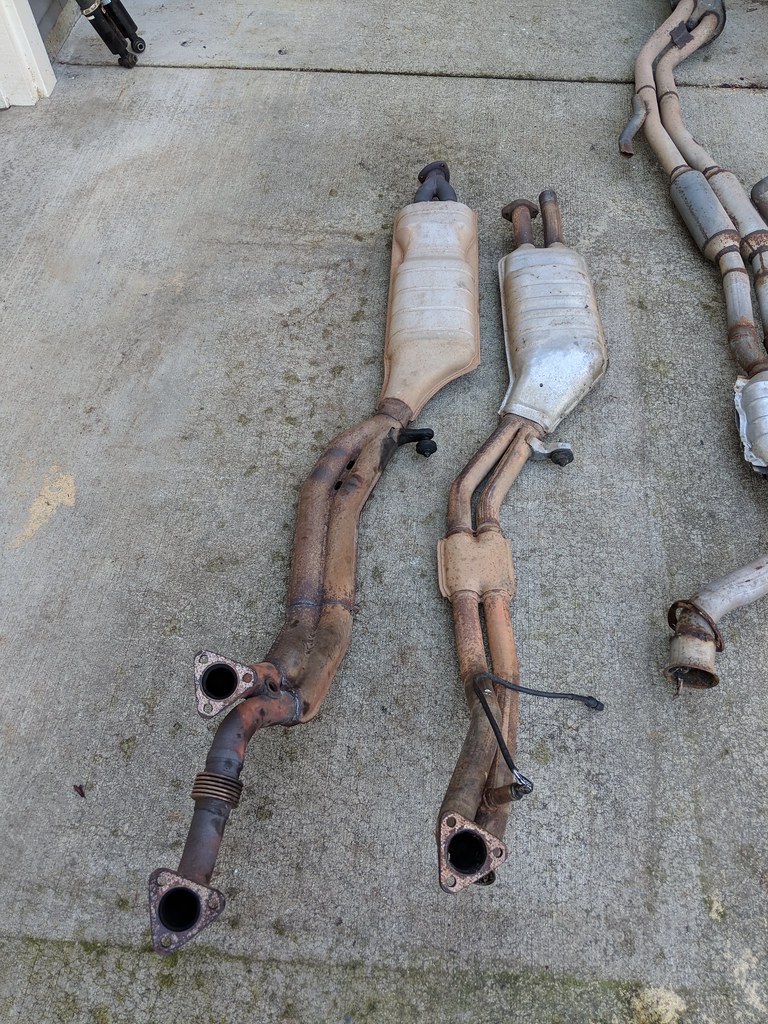
    The SuperEta exhaust is in the middle (the exhaust on the right is from the turbo M30 car I parted out; Stromug). Note I'm missing the front down pipe to manifold connector piece. Anyone got a Seta exhaust lying around with this piece on it you'd be willing to give up?


    The thinking is I'll use the Seta downpipe to the cat (where the hanger is) putting in a 45 degree mandrel to a Mangaflow 12268 (5x8x18 24" OAL) or 12368 (5x8x24" 30" OAL) as a 'resonator'. I like the idea of a little more sound suppression from the larger muffler, but not sure of what the cons might be (or if it'll be too long; haven't measured yet).

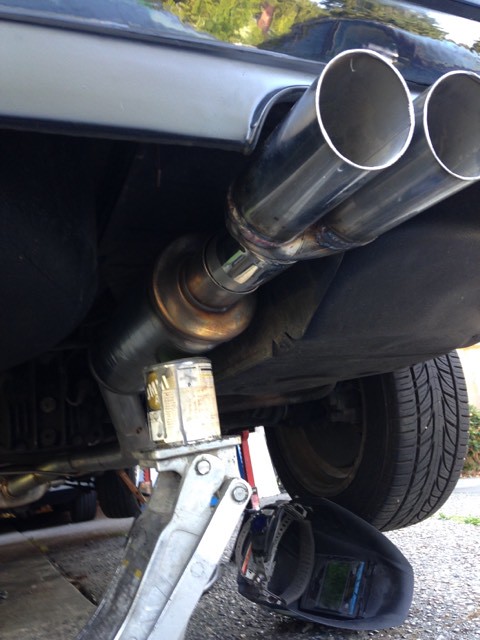
    Then from there I'll use some 2.5" pipe and 2 45 degree mandrel to a Magnaflow 12866 (5x5x14" 20" OAL) and weld on dual tips (this is what @Joel323 did on @plndr's 533):


    The Super Eta exhaust is dual all the way back.

    The Eta exhaust is dual to just after the cat.

    I think I'm going to just use the downpipe from the Eta and fab up a dual (or single 2.5") from the resonator back.

    (I have not been able to source a Super Eta downpipe that isn't missing a part like mine is).


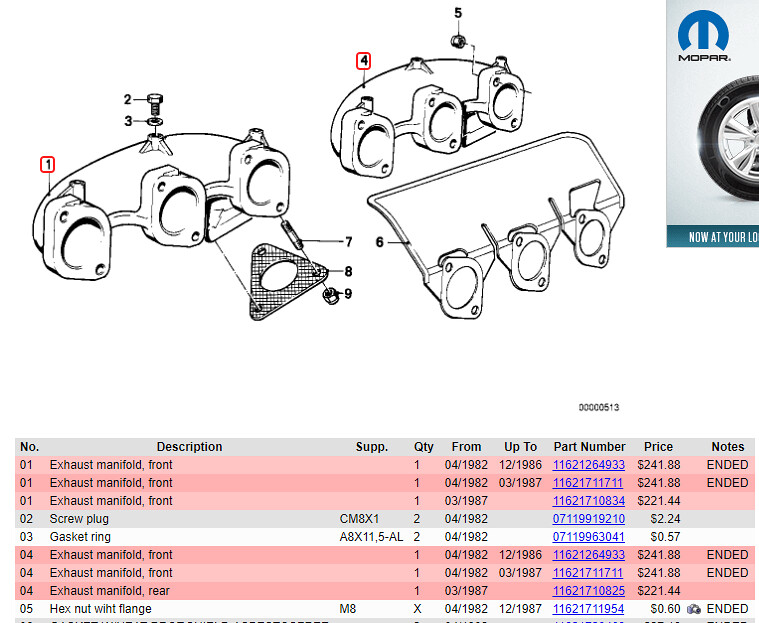
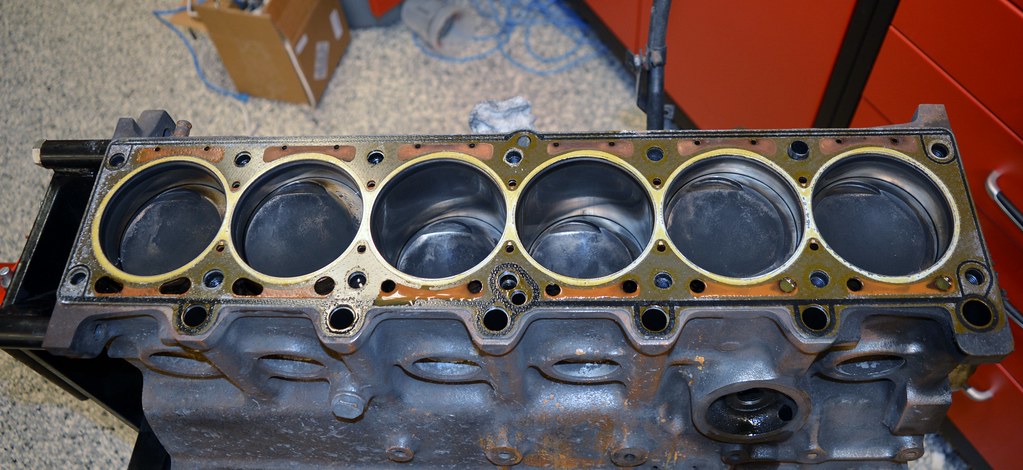
    Super Eta/Eta manifolds have an inlet ID of 42mm and an outlet ID of 33mm:


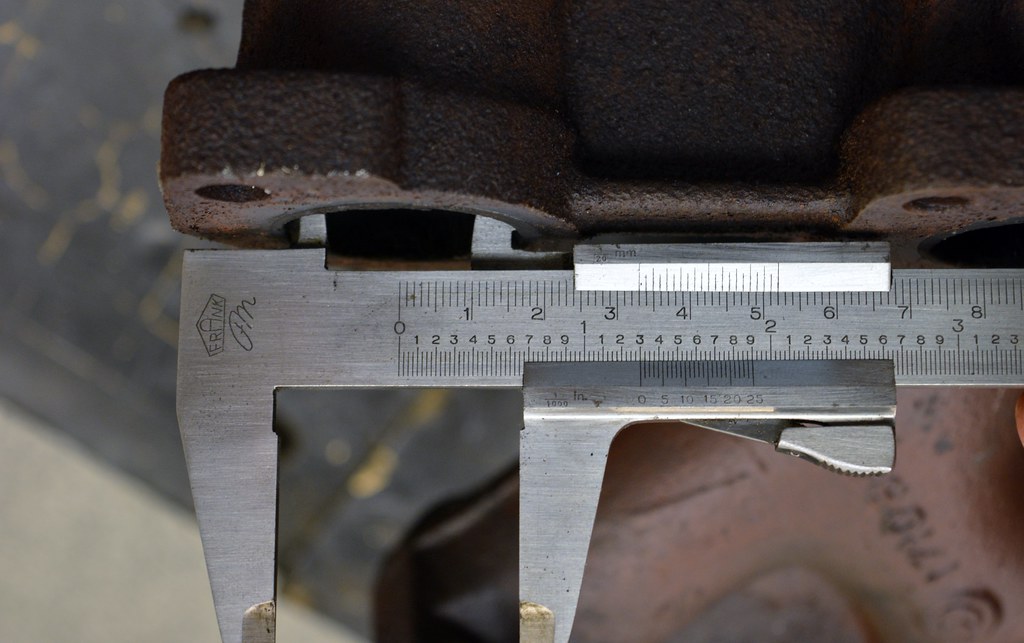
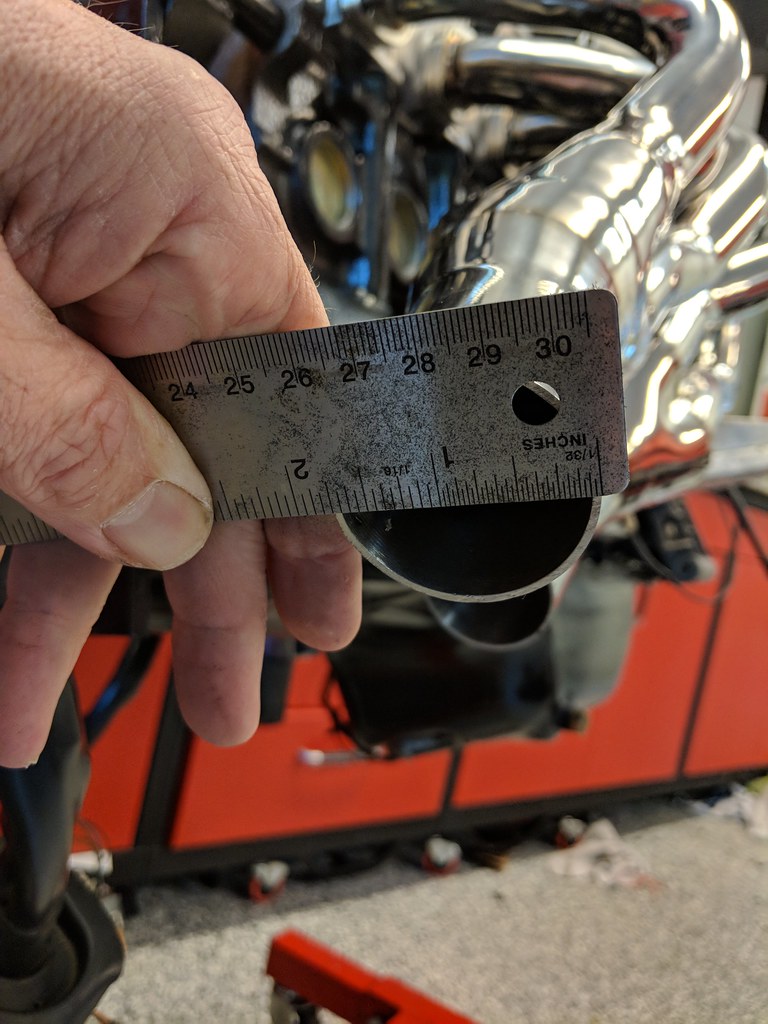
    Obx Inlet ID is 37mm.

    Obx Outlet ID is 42mm.


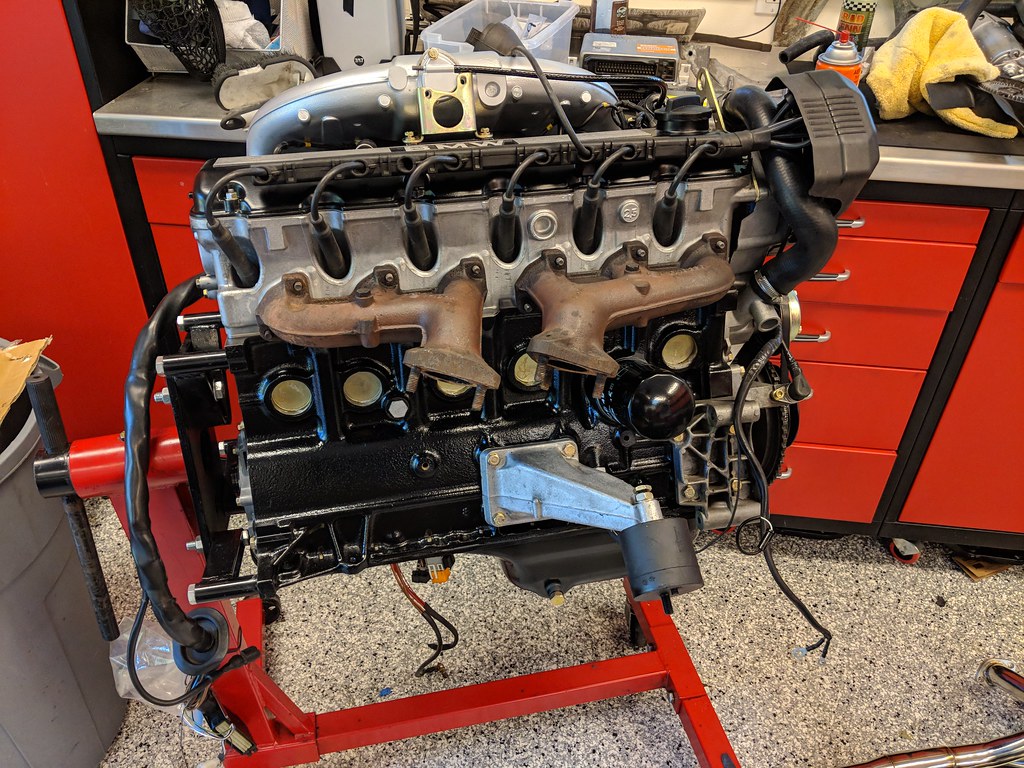
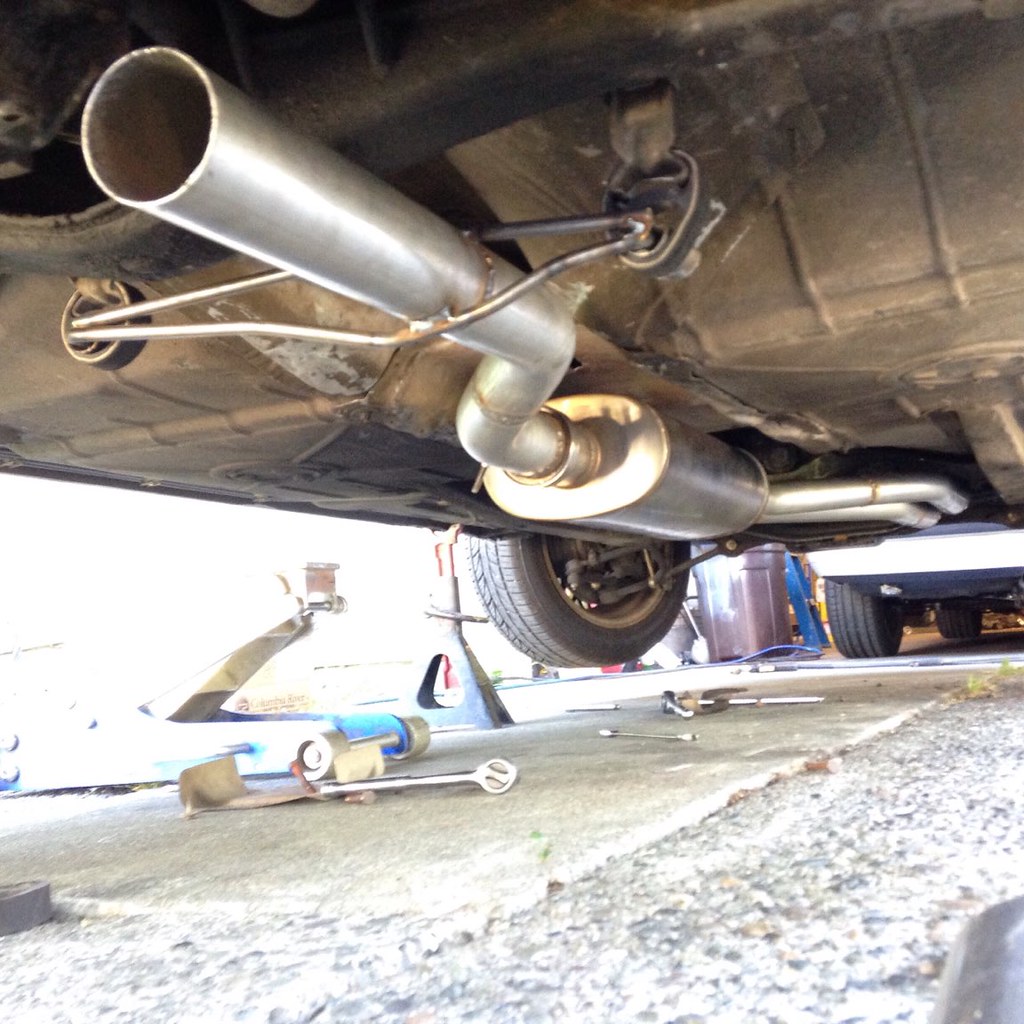
    Initially, so I can get the car off the lift as soon as possible, I'm just going to use the Eta exhaust as-is, as was the original plan.

    Leave a comment:


  • cek
    replied
    This happened. OBX M20 headers. We'll see how they fit in the car, but the quality isn't half bad.


    Then I got everything disconnected and was able to use my lift-cart and amazeballs cradle to drop the old motor out. Easiest engine extraction ever.


    Here's CJ playing with the stick.


    Left a big gaping hole that I now need to clean fastidiously:


    Leave a comment:


  • cek
    replied
    Now I'm truly committed.


    Part of this effort is to get rid of these awful things. Yes, I had to learn the lesson the hard way. BC Racing coil-overs suck.

    Billie Sports and Spax springs will be going in.


    I have this incredible feeling of deja vu.


    Totally lame the backsides of the new hubs I installed earlier this year are already so rusted they are throwing rust everywhere. Imma going to fix that this time.

    Leave a comment:


  • cek
    replied
    All done. At least until I get the old motor out of Maytag, and attempt to put this one in only to discovery I forgot something/screwed up.


    Leave a comment:


  • cek
    replied
    Son of a &#?!$&@ bitch!

    The water pump I bought, based on the realoem part number for an 88 528e is the wrong one.

    It does not have the second port for the overflow tank.

    Searching shows this is a common problem because the ETK is wrong.

    So much has to come back off again.

    Sure glad I decided to test fit all hoses before installing motor in car.

    Leave a comment:


  • cek
    replied
    Another topic: Exhaust manifolds.

    Note this from RealOEM for an 87 528e:


    Maytag came with two of the 11621711711 (up to 3/87; Maytag was built 7/86).

    It appears that a Super Eta (88 528e) and E30 325is had asymetric manifolds. In my engine collections I have one set with embossed part numbers that don't show up in search! (1710824 and 1710836).

    I assume the existing manifolds I have (711) will work fine with the e2i engine?

    Leave a comment:


  • cek
    replied
    This is frustrating.

    In starting this project I acquired the following:

    - An 88 528e that I parted out.
    - An engine from an E30 325e
    - An engine from an E30 325i

    In all this, I failed to notice that none of these engines came with a 325i intake boot and associated hoses. Both of the intake boots (including the one I dutifully cleaned) I have are from Seta motors (the 528e and 325e) and as a result only fit the SMALLER Seta throttle body, not the larger 325i body.

    The weird thing is I have THREE larger throttle bodies and only one smaller one. I simply don't remember how all this happened.

    The upshot is I'm missing a bunch of parts.

    For reference I took a picture of my buddy's 325ix engine bay. I'm missing everything circled.


    I think older 325i had a simpler setup without the dual check valve for the brake booster, but I've been unable to verify this. Most online diagrams are ambiguous.

    Leave a comment:


  • cek
    replied
    To most of you this must feel like you're watching paint dry. But trust me, I'm making progress. I'm trying to be super careful and meticulous.


    Head is on. Studs torqued. Valves adjusted.

    I spent a lot of time test fitting vacuum, fuel, etc... hoses and wires. Found more parts I'm missing. Not sure how that could be because I kept everything from 2+ motors. But alas...

    Leave a comment:


  • cek
    replied
    Got the oil pump in and pan on.


    Stated putting the timing components on then realized that I didn't really know what I was doing. :shock: Then I ran out of time.


    I gotta mount the timing belt sprocket to the head (I was missing the locating dowel; it came from Blunt) and turn the camshaft to get the head aligned for TDC. Right now I have it just sitting there in an orientation where all the pistons are out of the way.

    But it's looking more and more like an engine.

    Leave a comment:


  • cek
    replied
    A big gift box from Blunt:


    And a shipment from Cometic with an MLS head gasket that was specified by the machinist. With this, do believe I have all the parts required to finish assembly (and more).

    The machinist apparently didn't chase the threads for the head studs, so I took care of that. Given what I paid him, i'm a little disappointed he didn't do it.


    .86" thick, with .86mm bore. Easy to remember.


    Leave a comment:


  • cek
    replied
    Moar assembly. Plus some test fitting to see what parts I'm missing or forgot about. Discovered I'm missing the dowel pin for the camshaft timing belt sprocket and a locator dowel for the timing belt cover to head.


    Leave a comment:


  • cek
    replied
    I'm not sure I mentioned this above, but I changed plans on this motor. I'm no longer going to blow it (pun intended). Instead it's now 40-over and 9.5:1 compression.

    Assembly:.


    Leave a comment:


  • cek
    replied
    A bunch of updates incoming.... this project was moving very slowly with some back and forths, but is now ALMOST done.

    Using these instructions, I rebuilt some injectors.


    Purchased this kit: https://www.amazon.com/gp/product/B0...?ie=UTF8&psc=1


    Pretty clear how injectors can get clogged over time... Look at that grimy old filter...


    I *could* paint them, but nah.

    Leave a comment:


  • cek
    replied
    Recall my goal has been to build an e2i ‘stroker’ that COULD have FI added later. This build is really just an exercise in getting engine building experience, plus the oppt to dive into FI eventually.

    Recap:

    - M20B25 block
    - M20B27 Super-ETA Pistons (domed)
    - 130mm rods (“Max Speeding Pro I-beam”)
    - M20B27 crank
    - 885 Head
    - 8.5:1 comp

    I’m at the point of needing to select a head gasket. Should go for a high-end (MLS) HG, or is a standard one ok?

    Other than drilling/tapping for the oil return and putting engine bay insulation in, what else shoudl I do be prepared for future FI while there’s no engine in the car (without actually doing all that shit)?

    I decided to see if I could find ANOTHER block and came across a 325i motor & 5-speed on CL. Claimed 100k miles. Price was right AND the kid agreed to deliver it to my house (that's twice I've been surprised by CL sellers saying yes when I asked if they could deliver the item!).


    It certainly appears to be a low mileage M20B25 as advertised. Tons of cross hatching on cylinder walls and the 885 head looks super clean; no real wear visible/felt on the camshaft. Turns really smoothly.


    .0047" is the max cylinder to piston clearance. The other blocks were > .0030 to .0045". This one is .0026" at worst.


    Bore is supposed to be 3.3071". Side-to-side, mid way down bore #3 is 3.373". Nice.


    It'll almost be a shame to hone it.


    Last weekend I cleaned and prepped and painted the block. I had another can of silver engine paint, this time less sparkley, and used that. I also installed new freeze plugs.


    This week I dove into honing with the Flexhone tool I bought. Never done it before so was a bit nervous, but a few Youtube videos later I gained confidence. I did a trial run on the OTHER block just to get practice. It is a messy proceedure with oil flying everywhere, but super easy to do once you get started.

    Here's what the 'new' block looked like before:


    Here's after:


    All ready for bearings now...


    Achievement unlocked: Successfully used Plastigage.


    Crank to bearing clearance is tits.


    Bottom half of the bottom half is done! Turns super smooth. I'm not really sure what it's supposed to feel like, but I'm pretty sure it feels right.


    I took extra, extra care to make sure everything was surgically clean. I carefully inspected the crank and the bearings for any burs, scratches or foreign material. I also double checked the journals in the crank were clean.

    Got all the pistons and rods prepped. New rings. Sexy 130mm I-beam "MaxSpeed" rods.


    Cleaned up the 885 head.


    If you like watching paint dry, you can watch me do all of the above in this timelapse: https://youtu.be/QCqzonV3KXo

    Then I got the bottom-end all together. I have not torqued the rod bolts because the MaxSpeed rods didn't come with instructions and I can't find the torque specs anywhere for them on the 'net. I emailed customer support, but they are in #Brexit.


    I should have done this before, but since i'm eventually going to turbo this motor, I want to tap the block for the oil return now and cap it. I'm trying to determine the optimal location. Ideas?

    Leave a comment:


  • cek
    replied
    Can one use main bearing caps from one block in another?

    I just realized the block I bought didn't come with the caps.

    I have a set from my other block.

    In test fitting them, they don't appear to fit.


    Are they supposed to be a tight fit? I mean it looks like it will take quite some force to get them in.

    And, of course, because I was focused on the block, I bought "old style" bearings, and the caps I have are "new style".


    Blarg.

    Leave a comment:

Working...
X