Announcement

Collapse
No announcement yet.

Bottom's up M20B27 e2i Build

Collapse
X
 
  • Filter
  • Time
  • Show
Clear All
new posts

  • cek
    replied
    I can't even.

    How does a water pump/alternator belt end up like this? Did it get caught by the other belts and sucked through them? This is the first time I've ever had a belt fail in anger on me (lucky, inexperienced, you choose).

    Fortunately it happened right near home and I got home before it overheated.

    The pully on the alternator looked a little wobbly. It was from a donor motor. I *knew* I should have just sprung for a rebuilt alternator, and stopped when I saw it wasn't straight, but I was trying to be somewhat frugal. That'll teach me.


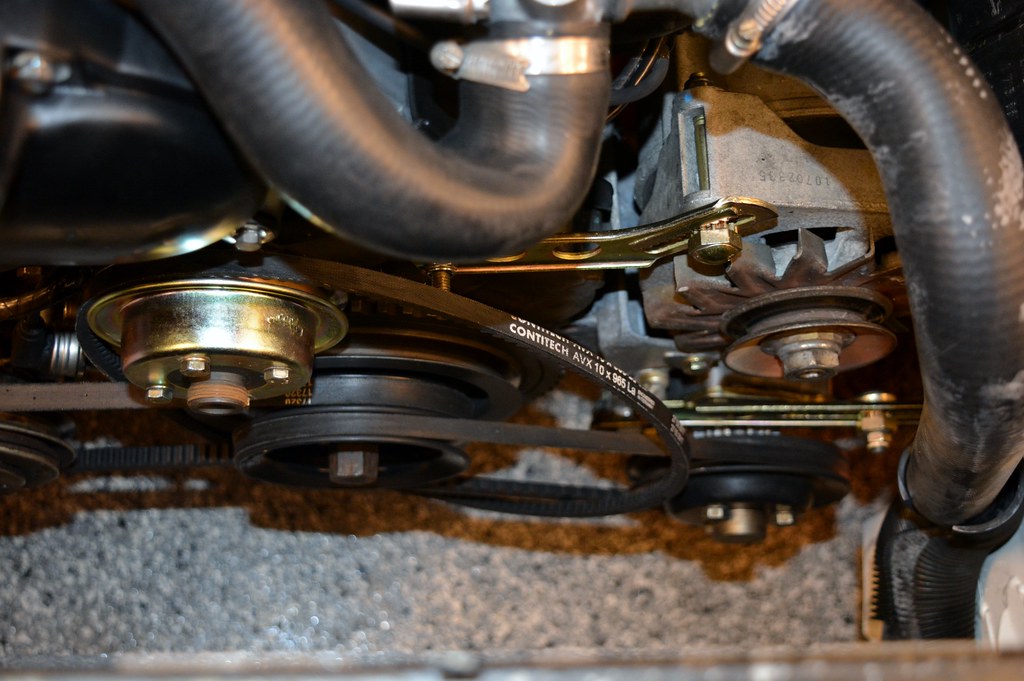
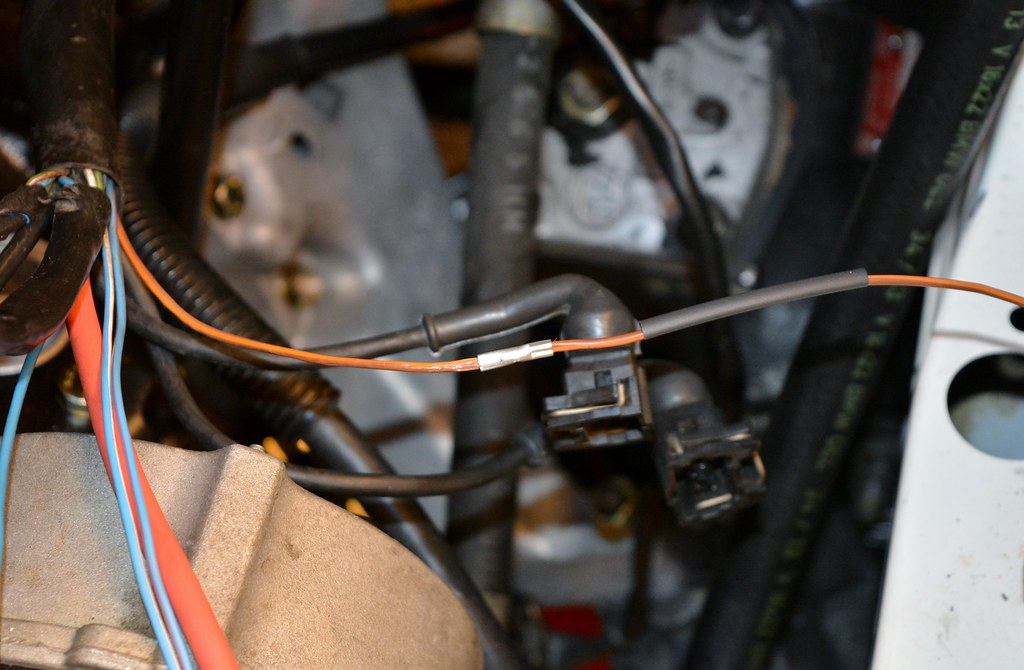
    Here's what that Escher belt looks like. You can see how it was damaged winding its way under the other two belts.


    I needed lunch and the Porsche needed some exercise as it's been sitting for a few weeks. So I drove to O'Riellys just to see if they had a reman'd 90A alternator. Sure enough they did. Only $83+core. I have three so giving up a core was no biggie. I pulled a straight pulley off one of the spares and installed the new/refubed unit.

    No wobbly and I dare say a bit less belt noise. Went for a spirited test drive (with all tools required to fix the belt if it came off again) and no issues.

    Leave a comment:


  • cek
    replied
    First Start Win!


    Runs awesome. Did an extended shake down drive this evening after changing out the break-in oil. Pulls nice and hard, definitely more peppy than the old motor. Ooth and quiet. Of course I'm limiting to < 5000 rpm and I don't have a > 5000 rpm tach in the car yet. I was going to adjust the valves when I changed the oil but the valve train is silent. No leaks.

    No idle issues. Perfect. I'm kinda blown away.


    New suspension is so much better. The Billies with Spax are a great combo.

    And the M5 steering box is TIGHT. LOVE.

    On the down side, the clutch engagement point isn't noticably different after going to the shorter TO bearing. AND this transmission has developed the death rumble... Far worse than Vlad. I wonder if I screwed something up in the install. Could it be the TO bearing moving around?

    And I broke my hood release handle. Dammit.

    Leave a comment:


  • cek
    replied
    Before I put the original Eta exhaust on (temporarily) I wanted to ensure I fully understand the OBX headers. I may still go with them. Pics:


    This is how they fit with the motor in the car.


    Does this look right? It doesn't to me. Why are the outlets pointed in such different directions? I find it quite odd that the rear header (on the right) is pointing right (directionally) while the front is pointing correct (not right or left). Is there a logical reasons for this, or are just seeing poorly designed/built headers? I have very limited experience with headers so what do I know? The Bav Auto M30 headers on Vlad are long-tube headers and thus are totally different?

    I don't think it will be particularly challenging to fabricate via mandrel pipe around this weirdness, but it just seems weird.

    The bolt on the idler arm ALMOST touches the headers. It's entirely likely that the motor moving around will impact steering. So if I DO go with the headers I'll have do to something about this.


    Progress.

    - Driveshaft hooked up
    - Heat shield in place
    - Cooling system all hooked up
    - Front suspension back together (sans anti-roll bar and cross-member which will go back on once the exhaust is in).
    - Front hubs back together


    Here's what's left:

    - Install exhaust
    - Fill with coolant (I don't have enough Blue coolant (barely) so need to head to the Stealer tomorrow)
    - Put rear tires on and drop rear end so I can tighten crank nut (I have a huge note on the dashboard so I don't make the same mistake I made with Vlad on this one).
    - Install fan
    - Do static break-in

    I got on the phone with the machinist/engine builder and got refreshed on his advised procedure:

    - Immediately run it at 2200 rpm for 10 minutes
    - Let it cool down (15-20 minutes)
    - Another 2200 rpm run for 10 minutes
    - Dump the break-in oil and put normal stuff in
    - Get on the road and drive hard, avoiding idle as much as possible. Lots of < 5000rpm pulls. Hills are good. For the first 100 miles.

    Question: What is the recommendation w.r.t. the ARP head bolts. When (at all?) should I pull the valve cover and re-torque?

    Leave a comment:


  • cek
    replied
    Originally posted by digger View Post
    Why custom Pistons but short rods ? 135mm has much more options
    Because I got the rods (basically) free, THEN screwed up the block requiring going 40-over.

    Leave a comment:


  • digger
    replied
    Why custom Pistons but short rods ? 135mm has much more options

    Leave a comment:


  • cek
    replied
    Originally posted by Porthos View Post
    I might be copying you.
    Not sure why you'd want to do that. This project is insane.

    Leave a comment:


  • Porthos
    replied
    Originally posted by cek View Post
    FWIW, here's the 'final' specs:

    Specs:
    • M20B27 block bored "40 over" (86mm)
    • Wisco custom pistons, based on C&D Performance's Pro3 design & tweaked for 9.5:1 compression
    • Max-speeding 130mm h-beam rods
    • 885 head with 3-sided valve grind
    • Stock camshaft
    • Cometic C4394-070 0.07" Thick MLS Head Gasket
    • Arp studs
    • 325i injectors
    • 380 ECU (stock for now; planning D'syliva tune)
    • Exhaust: TBD
    I might be copying you.

    Leave a comment:


  • cek
    replied
    FWIW, here's the 'final' specs:

    Specs:
    • M20B27 block bored "40 over" (86mm)
    • Wisco custom pistons, based on C&D Performance's Pro3 design & tweaked for 9.5:1 compression
    • Max-speeding 130mm h-beam rods
    • 885 head with 3-sided valve grind
    • Stock camshaft
    • Cometic C4394-070 0.07" Thick MLS Head Gasket
    • Arp studs
    • 325i injectors
    • 380 ECU (stock for now; planning D'syliva tune)
    • Exhaust: TBD

    Leave a comment:


  • sampayne
    replied
    Congrats on the first start. I love seeing a proper m20 build. Keep it up!

    Leave a comment:


  • cek
    replied
    Woot! Woot! Woot!

    After repairing the harness (and testing everything I could... see above), I got it all back together and realized there was nothing left but to try a start. No coolant or exhaust but if it started I'd run it only for a few seconds anyway...

    Wire repair (snipped connector from spare harness):


    I tried to start it. It cranked, but seemed like no spark. Tested fuel pump relay (ok), main relay (ok), coil (ok), but got no spark to a spare spark plug... Tried a backup ECU. No joy.

    Only thing left, really, is the reference sensor. I should have tested it before I put it in the car. Duh. Tested bad.

    Had a spare. Tested good.

    Put it in and tried again:

    First Start Video

    This makes me soooo happy! I have travel next week and won't be able to wrench again until the week after. If I had to wait all that time not knowing if I had destroyed something with my error, it would have ruined me.

    Oil pressure light went off almost immediately. Yay.

    Now all I gotta do is:

    - Get a 7K tach and get the cluster back in.
    - Final attach the driveshaft
    - Install the exhaust
    - Install coolant hoses
    - Reinstall radiator
    - Add coolant
    - Drive! (?)

    Leave a comment:


  • cek
    replied
    In studying the ETM I have identified all the components that connect to the BR wire going to G103 that might have been destroyed by having +12V with high amps going through them the wrong way. Many potential components were 'spared' (i think) because the ECU was not connected.

    This diagram shows some:


    Not-affected:
    - ECU (wasn't connected)
    - O2 sensor (wasn't connected)
    - Diagnostic connector (cap was off and nothing was connected)

    Affected:
    - Oil Level Sensor - for sure affected, as the ground wire completely melted and I heard it pop).
    - Coolant temp sensor - if it's not fried, then the .5br wire to it probably is. Is the coolant temp sensor normally open? If so it may be ok.

    More:


    Affected:
    - Coil - it's very possible the smoke I saw (lots of it) coming from the timing belt area was the 2.5 BK that goes to the coil, as it runs in front of the timing belt cover. This will be easy to verify. I have another coil so will swap in anyway.
    - Cylinder Identification Sensor - Like the coil wire, it's entirely possible this wire got fried (it is part of the spark plug wires, meaning I will need to replace them). Also runs in front of the timing belt cover.
    - Engine Speed Sensor - I bet this is toast for sure (or at least the wires leading to it).

    All the wires I can find that go to G103 for the 88 MY are BR. But you'll note in the picture I posted above there's both a BR and a BR/Y wire in that bundle. I can't find ANY BR/Y wires in the ETM. Does anyone have any idea where that wire might go?

    Replacing the harness with the other one I have will be a bear, but mostly time consuming. I'm hoping I can do it without taking the intake manifold off...

    I also don't think the CTS or loom wire sensor were impacted.

    Here's the oil level sensor ground wire. It melted pretty far up into the harness; I've now pulled insulation all the way off to where it goes into the big bundle. FWIW, there's oil in there so the static switch (pin 1, BU/VI) is closed and the dynamic switch is open (Pin 2, BU/VI) [Page 6212-2].


    The visible damage to the BR wire stops about where you see it in my hand.

    No damage can be seen in any of the wires that go across the timing belt (Oil temp, coil).

    If that were it, I'd actually think all I need to do was splice in a new ground wire for the oil level sensor...

    Leave a comment:


  • cek
    replied
    I seriously effed up.

    On the 88 528e Super-Eta harness, there is a ground wire that goes directly to the negative terminal on the battery. G103.

    I didn't notice this, or think it through, or something, because guess where I hooked it up to?

    I hooked it up with the positive wires on the positive terminal of the battery.

    I was going to spin the motor over using Pins 11/14 in the diagnostics port, to ensure the starter was working and verify I was getting oil pressure.

    I hooked up the battery (with a charger on it...) and I got smoke. Lots of it. Some from what looked like the timing belt area and some from the oil level sensor, where the ground wire melted all the way through. There was a little pop from down there and it was either that wire going, or the oil level sensor going bad.

    So now I'm wondering just how badly I damaged my wiring harness. I have been tracing through the ETM for an hour trying to see where G103 goes to and where in the harness I should look to see what I fried.

    I think, to be safe, I'm going to need to completely replace the SuperEta harness... I have another, but it's not in as good of shape.

    Heavy sigh.


    In good news, I was able to get the engine to turn over with the starter (after putting G103 on the negative terminal of the battery).

    Leave a comment:


  • cek
    replied
    Before:


    After:


    When I replaced the fuel lines I skipped these two because I was lazy. Always felt bad about that. Fixed.


    Two buddies came by today and helped me manoeuvre the engine and tranny into place as I used a combination of the lift and lift table. It took a bit of finagling, but in the end went smoothly...

    Ta-fucking-da!


    Put oil in and then went to lunch. When I got back there was a big puddle of oil on the floor.

    I put the wrong o-ring in for the oil level sensor. It was obvious once I pulled it and looked. I *knew* I had bought one, so I poked around and found this little baggie. Whew.


    Fuel lines, PS lines, and most electrics are connected. Then I ran out of time for the weekend. Glad I kept the fuse box from the Super Eta I parted out so that I could have this bracket.


    Specs:
    • M20B27 block bored "40 over" (86mm)
    • Custom pistons: (9.5:1 compression)
    • Max-speeding 130mm h-beam rods
    • 885 head with 3-sided valve grind
    • Stock camshaft
    • Cometic C4394-070 0.07" Thick MLS Head Gasket
    • Arp studs
    • 325i injectors
    • 173 ECU (stock for now)
    • Exhaust: TBD

    Leave a comment:


  • cek
    replied
    I am struggling with the fact the clutch pedal disengages clutch too high and how to resolve. I learned a bunch (and discovered there are two variants of getrag 260/5; one with a 5mm deeper bell-housing). But I am still unsure why my engagement point is wrong. I'm moving ahead with what I think will address it: Switching to the shorter variant of the throw out bearing.

    For future reference (for me when I forget and search this thread to remember), here's the specs on the transmission in this car:

    Transmission on Maytag
    PN on Bellhousing: 260.0.1270.90
    VIN: WBAAB5407H9696074
    Model: 1986-07-31 US 325E (not a 528e as I had previously thought)
    Housing PN from RealOEM: 23111222657
    T/O Bearing PN from RealOEM: 21517521471
    OAL (output shaft to bell-housing face): 55mm
    Bell-housing length (rear casing front to bell-housing face): 37.5mm
    Bell-housing depth (slave face to bell-housing face): 17mm


    Got the right flywheel bolts from blunt.


    Hooked transmission up. Used the right greases on the splines and TO bearing.


    Tried another test-fitting lifting the engine and transmission up through the bottom with the lift table. Realized everything would go much more smoothly if I modified my cradle to mount the assembly further forward; will give more clearance with the front of my 4-post lift.

    Always love a chance to get the welding table out!


    A bit of the grinding wheel and some fresh welds and I set the engine/tranny back on. Much better balance too.


    Got the starter installed and hooked up the PS hoses. Everything that needs to go together before it goes in the car is now done. But before I can put it in I need to do a few more things in the engine bay, including installing a new resistor pack. You'll recall my heater fan "races" to full speed at random times any time it is on. I expected the old resistor pack to look super rusty or destroyed. It actually looks fine. Hopefully this actually fixes the problem.


    Leave a comment:


  • cek
    replied
    Blunt sent me the wrong flywheel bolts. Dammit. I was hoping to have this all put together by tomorrow afternoon.


    I did discover my crank has the old school, felt-based pilot bearing. I also discovered that 12 grain bread with little seeds works fine getting pilot bearings out.

    Leave a comment:

Working...
X