-
Bodywork Update
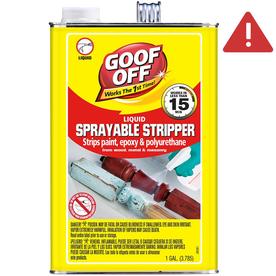
After doing some research, I decided to try the chemical route to strip the old weathered paint off the car. I saw OSPHO suggested many times, but since it was expensive and not readily available, I went down to Lowe's and gave this stuff a shot:
--FAIR WARNING-- Buy chemical gloves, and wear a long sleeve jacket and face protection. This stuff will burn you if it gets on you!
However, the results were pretty amazing. I went through the process of spraying, waiting, then using the putty knife to strip the paint off about three times per section, and that was it :D
Eventually this is what I was left with:
Engine Update
The very crusty B35 cylinder head has returned from the machine shop, disassembled and ready for me to try my hand at ceramic coating :o
It was good to see things moving along with the head, but a recent purchase has overshadowed and outshone everything else--at least for the moment....

Leave a comment:
-
You make a very good point, but I am not in Europe, so those rotors are not easily available. Believe me, I wish: you should see what rotors they are putting on the top-of-the-line Fiat Abarth Turbo over there!
My plan is to build this with components that are easily available at most any parts stores in America, so that repairs and replacements can be headache free =)
Bodywork Update
The welding and grinding work is finally done, and finished off with coats of etching primer and sealing primer. I decided to use the asphalt sealant (available at Lowes) to seal up all the work on the underside, and a heavy-duty paintable silicone to seal it up topside. Afterwards, the entire underbody was coated with 3M Professional Undercoating.
On to the rest! I decided to try my luck at bodywork, and chose the driver's rear quarter as my test bed. It suffered the same maladies as the rest of the paint on the car--severe fading and cracks due to sun damage. I ground down and feathered the pits, then tried to sand and fill the cracks with filler primer.
No dice.
So, after more research, it looks like I'm going to have to strip it back to the E-coat, and start from there :(
Does anyone know a better way to do that besides a coarse flap disc? I'd like to preserve the E-coat, if at all possible...
Braking Update
My brother and I have worked out some preliminary CAD drawings of the hub adapter for the front. It looks like we will be replacing the existing 10mm spacer with this, and the rotor will ride on top of it! It clears the rims, so there that...
Also, I may have stumbled across a better rotor for the rear, but I need more measurements. Behold the 1988 Isuzu Impulse Rear Rotor!

It has some very similar dimensions, and even the correct bolt pattern! I still need to figure out the inside diameter, to figure out if the parking brake shoes will work properly, but it looks very promising :)
Engine Update
I scored a complete cylinder head and intake manifold from a grungy, but serviceable M30B35 (thanks again, PullAPart!), so my B34 head is now up on eBay, along with the CarTech water-to-air intercooler and RotoMaster T04E. I dropped off the new head at my favorite machine shop today. Turns out their mill can do a 50 RA surfacing job, so I'm all set. I should get it back in a week, cleaned and disassembled so I can do the port work and ceramic coat the exhaust ports, valves, and combustion chambers. I will get pictures up when I can.Last edited by HappyPuppy; 04-07-2015, 07:11 PM.Leave a comment:
-
The Citroen C5 Break 2.0L has 283mm x 26mm discs too that might be worth checking out - had height is very close to the e30, and the centre bore is 66mm. You just need to redrill for 4 x 100 (I think Citroens are 4 x 10⁸).Leave a comment:
-
Thanks! I hope this will prove to be an adventure for all of us--if we're lucky, the kind with a happy ending ;)
FWIW, I've been editing the first post. It is an active list of all modifications, and I am adding links to the the parts I bought/will buy, and the various forum threads and websites that helped me consider these mods.
Bodywork Update
Main repair panel has finished being welded in and ground back down (mostly) flush, along with all the other spots underneath the car. Pictures will be up in the next few days, as I get back in there to do the battery tray and several nail/screw holes (don't ask!)
Braking Update
Pull-A-Part had both a '04 Hyundai Sonata, and its sister car, the '04 Kia Optima. I took one rotor from each. Preliminary fitting revealed the need for a ~5mm spacer under the rotor, so we will be machining out a prototype--one that will have the 66mm to 69mm hub bore adapter built in to it :DLeave a comment:
-
Here's a couple extra shots of the subframes:
And the diagrams of the E30 front and rear rotors, for reference:
Leave a comment:
-
Suspension Update
I snapped a couple quick shots of the front and rear subframe today, to show off the stuff I welded on from Garagastic. It is quite nerve wracking to grind out the slots--every tiny slip had me questioning if this car will ever drive straight again!
In addition to the rear adjusters, I also welded in reinforcements on the engine mounts, front sway bar mount, and the differential mount.
I honestly would not have thought of doing that if it wasn't for picking up a copy of FrankM E30's excellent guide on the M30 swap. I have no doubt I could have figured all this out (eventually), but that guide really cut down the time to do so!
Braking Update
Late last night, after hours of feverish research, I made a ridiculous (at the time) impulse buy:
This is a set of 1990 300zx (Z32) aluminum calipers. I was looking up DIY brake upgrades, switching back and forth between the Corrado G60/RX7 write up, the Aussie e30 braking thread, and randomly searching 4-piston calipers on eBay...it just kinda happened
I wish I could say I knew it would work, but I didn't--and I still don't. However, necessity is the mother of invention, and through a bit more research, I may have found a way :)
After poring through the Brembo catalog, and taking a few of my own measurements, it looks like I've found a few contenders for OEM brake rotors. The Z32 front calipers require a 280mm by 26mm disc, and the rear calipers require a 297mm by 18mm disc.
Turns out, the 2004 Hyundai Sonata has a 280x26 vented front rotor, and has a height of 34.2mm to the underside of the hat. It's hub bore is a little bigger (69mm to the E30's 66mm) and it's bolt pattern is 4x114.3, but that can be fixed with a spacer ring and a bit of slotting.
As for the rear, that was a bit trickier. It's not perfect, but the 85-87 Toyota Cressida vented rear rotor seems to be the best match. It's only 269mm, but it has the 18mm width, and has the ability to handle a pad up to 72mm tall. It's got a height of 55.1mm to the inside of the hat, compared to the E30's 53mm, but I believe a spacer could fix that. The inside diameter is 167mm, which is a little bigger than the E30's 161mm, but I think the parking brake should still work...I guess I'll find out soon enough! Other than that, it's 4x114.3 like the front rotor, but has a hub bore of 60mm, so it'll have to be slotted, and bored out 2mm.
Leave a comment:
-
I do make it up to Knoxville on a regular basis...and we might even have the blue drift rat vert up by then...I'll see what I can do :)
...we'll go with that, sure ;)
My brother found your wookie comments...disturbing
While I love to pretend I'm actually a highly-skilled race car driver slumming it with mere mortals, I think it would quickly become more useful to prevent people from knowing who murdered all the cones on Turn 6 :shock:
You are absolutely right: that's actually what we were mocking up in the picture with the cylinder head, exhaust manifold, and turbo in position. It's reasonably easy to clock the turbine and compressor housings in any position I need, so oiling can be remedied. However, after some prompting, I am selling off that turbo (RotoMaster T04B), in order to run the GT3782va. It's a fine turbo for a 250-350 HP build, but I want a little more adaptability.
Underbody Update:
I've been trying to teach myself stitch welding with flux core in my Lincoln 140, and it has been a pain in the ass. It amazes me how sheetmetal comes to life, and runs away from the bead faster than Usain Bolt :???: It finally gave me the push I needed to set my welder up for gas.
What a difference It was almost effortless to get it to stick, and I found myself bridging 1/2" gaps with ease. So, I got a chance today to snap a few shots of the work so far...
I just have the battery tray, and a few odd screw holes (don't ask!), and it will be ready for undercoating.
That brings me to a question: I have several cans of the 3M undercoating, but I'd like to figure out that thick stuff they brushed on underneath that. It kinda reminds me of Liquid Nails, or paintable silicone--any thoughts?Leave a comment:
-
So if I'm understanding you, the CarTech system doesn't fit the e30 bay in the standard guise, (bottom-mounted turbo between cyls 5-6), yes? If you flip the whole setup and run it top-mount near the front of the engine, you're going to have oiling issues since the feed will be on the bottom and the drain will be on the top. But you might be able to take off the exhaust housing and rotate it 180*Leave a comment:
-
The last pic shows his face. He's a wookie. No biggie OP. You're not the first wookie we've had on r3v…Leave a comment:
-


Leave a comment: