

I've had a few people ask me what parts I used on my boosterless brake setup for my M62 swap, so I figured I'd write something.
I've heard from a couple different people that the Massive Booster Delete will not work well. I haven't tried it myself, but even with this setup with dual brake masters, I can imagine why it wouldn't.
All of this information can be found on Garagistic's website at
For the people not looking to research, here is the parts list I used.
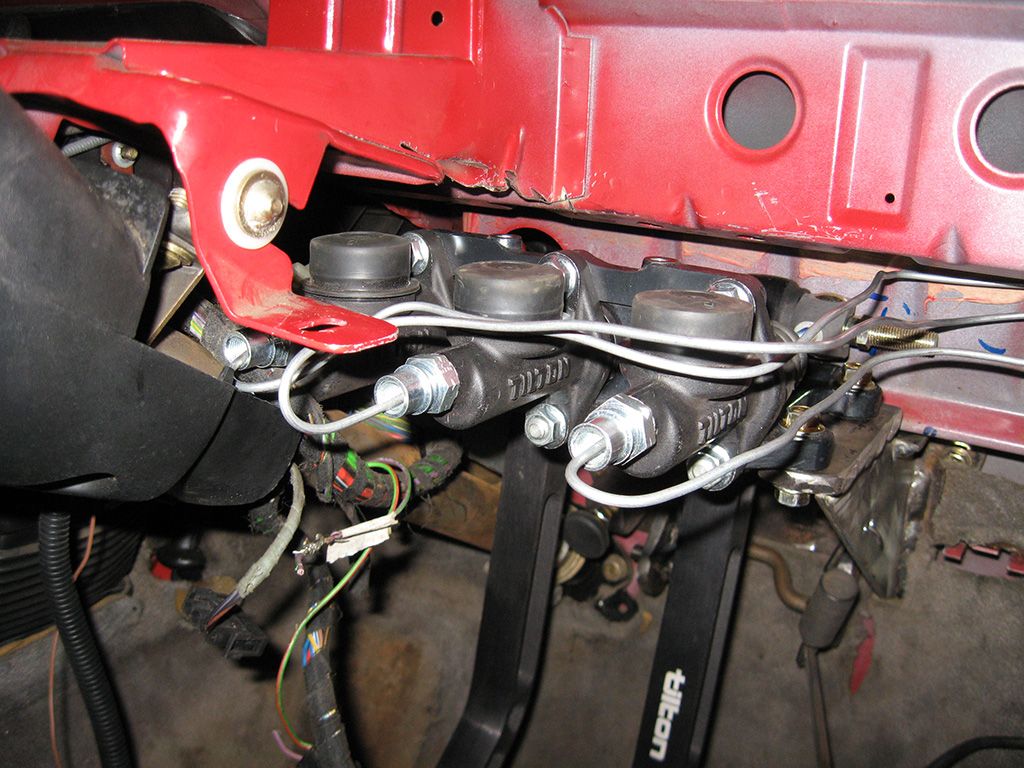
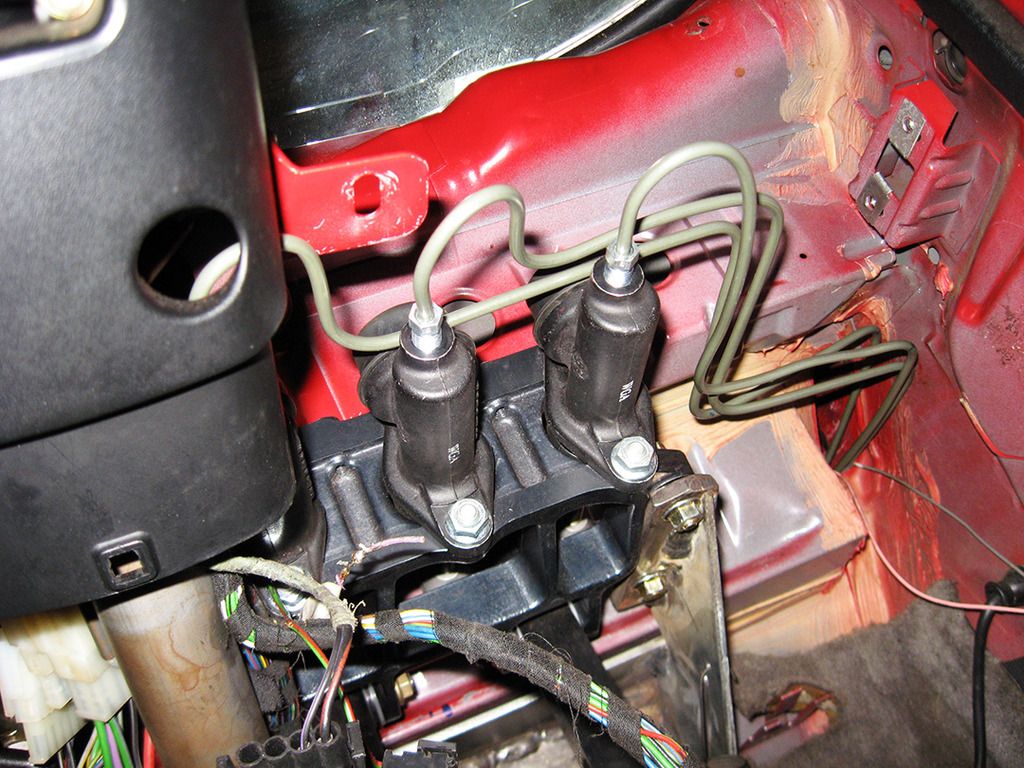
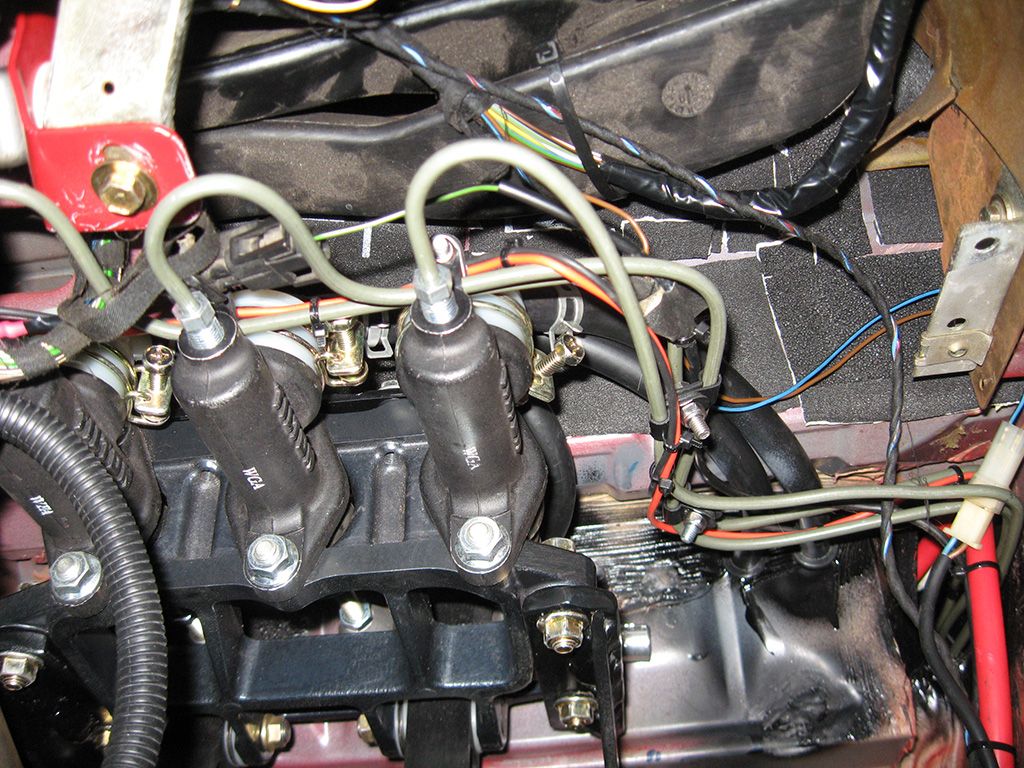
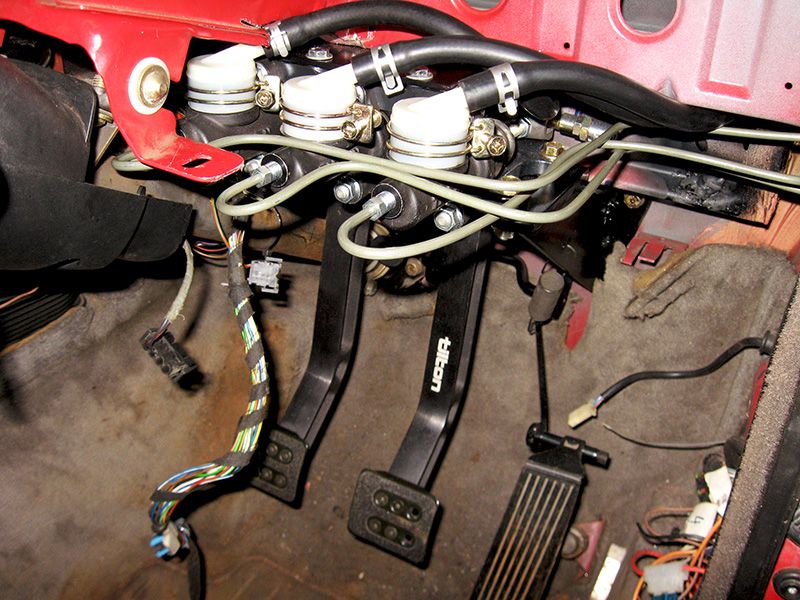
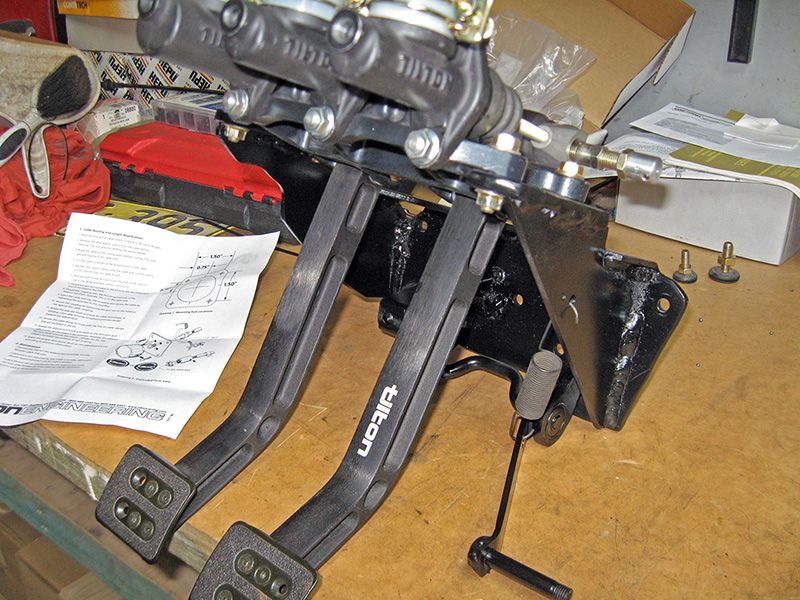
-Wilwood Pedal Box: Wilwood part number 340-11299
-Wilwood 5/8 Brake Master (need 2): Wilwood part number 260-3372
-Wilwood 3/4 Clutch Master: Wilwood part number 260-3374
-Garagistic Pedal Box Mount: Found on this link listed above.
-Braided steel brake lines: Use whatever ones you'd like
-Custom brake lines from the masters to the braided lines on the calipers
Things I've found:
-I ended up with a 5/8 master for the clutch with is TOO SMALL. The adjustable pedals on the box make it work, but there is A TON of travel and the clutch engages right off the floor. Garagistic now recommends a 3/4 master for the clutch. I feel like you could also run a 13/16 or a 7/8 if you want abrupt engagement with very little pedal travel. That's up to you. Just stay away from the 5/8.
-If you aren't using a stock slave cylinder like a Wilwood unit or something, just size it however they recommend.
-When I bought the pedal box mount almost 2 years ago, there was a slight fitment issue with the holes and they had to be moved a bit. I'm sure they've fixed it now. Install is not fun at all. It will be MUCH easier with the dash removed. However, I did it with the dash in. It's possible, but it sucks.
-When setting up the adjustable pedals, the brake will need to be farther out than you'd want or expect. Since the brake masters are small and you have no booster, hydraulics says you need to compensate with lots of travel if you want a decent force. The clutch is adjustable with your fingers and a skinny needle nose pliers, but the brake pedal is not. This is the worst part about the setup. You'll need to remove the box several times to get the adjustment right. The more the brake pedal sticks out, the better. You have quite a bit of travel before the brakes start to grab.
-Go with braided lines. Without a booster, you need all the help you can get. Regular rubber lines have some flex with just takes away from your already limited braking power. No rubber lines.
-Find a way to secure your adjustment bars. Over time, the nuts will start to back out slightly with vibrations and the pedals will get closer to the floor. Not good.
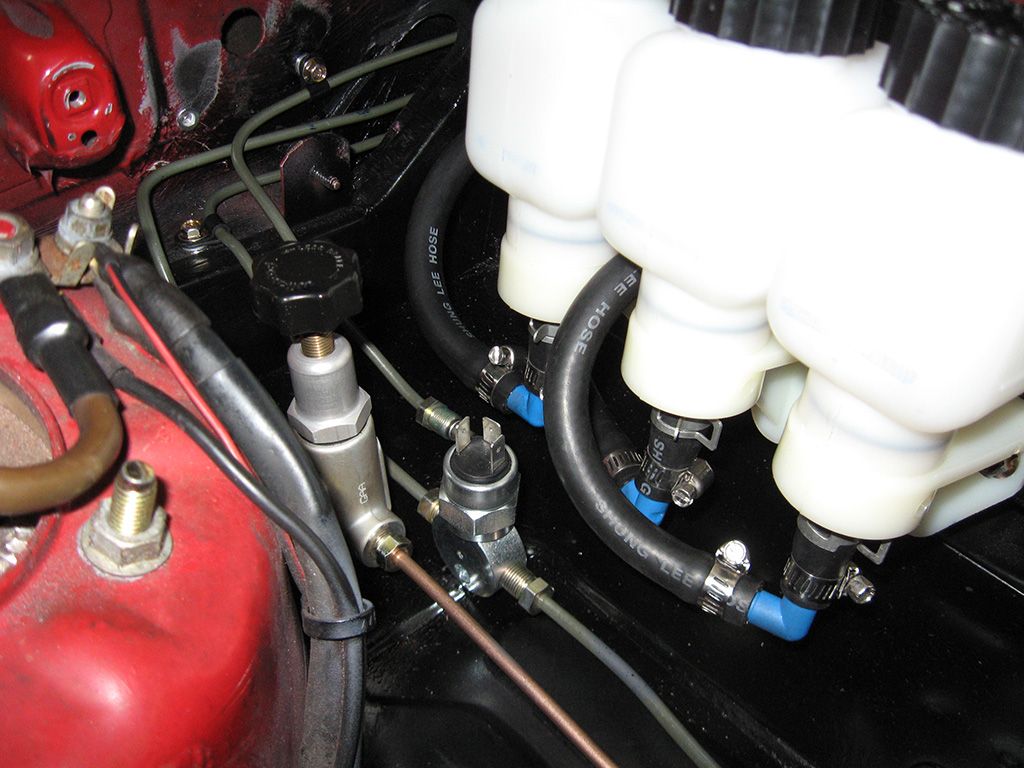
-I remotely mounted the 3 reservoirs in the engine bay and ran the rubber lines to the masters through the hole that the booster left. With this, you're going to want to find a way to fill the rest of that hole. Hot air blows past the header and warms your feet and legs very nicely.

-If you're using a cable throttle you have to cut the pedal linkage a bit. Garagistic gives you instructions for that. It's not hard.
-I'd recommend using large brakes and/or aggressive pads with this setup. I'm running stock brakes at the moment and emergency stops get dicey.
I'm sure there are many other ways that probably work, but this is what I'm running and this is what I've found.
I've heard from a couple different people that the Massive Booster Delete will not work well. I haven't tried it myself, but even with this setup with dual brake masters, I can imagine why it wouldn't.
All of this information can be found on Garagistic's website at
For the people not looking to research, here is the parts list I used.
-Wilwood Pedal Box: Wilwood part number 340-11299
-Wilwood 5/8 Brake Master (need 2): Wilwood part number 260-3372
-Wilwood 3/4 Clutch Master: Wilwood part number 260-3374
-Garagistic Pedal Box Mount: Found on this link listed above.
-Braided steel brake lines: Use whatever ones you'd like
-Custom brake lines from the masters to the braided lines on the calipers
Things I've found:
-I ended up with a 5/8 master for the clutch with is TOO SMALL. The adjustable pedals on the box make it work, but there is A TON of travel and the clutch engages right off the floor. Garagistic now recommends a 3/4 master for the clutch. I feel like you could also run a 13/16 or a 7/8 if you want abrupt engagement with very little pedal travel. That's up to you. Just stay away from the 5/8.
-If you aren't using a stock slave cylinder like a Wilwood unit or something, just size it however they recommend.
-When I bought the pedal box mount almost 2 years ago, there was a slight fitment issue with the holes and they had to be moved a bit. I'm sure they've fixed it now. Install is not fun at all. It will be MUCH easier with the dash removed. However, I did it with the dash in. It's possible, but it sucks.
-When setting up the adjustable pedals, the brake will need to be farther out than you'd want or expect. Since the brake masters are small and you have no booster, hydraulics says you need to compensate with lots of travel if you want a decent force. The clutch is adjustable with your fingers and a skinny needle nose pliers, but the brake pedal is not. This is the worst part about the setup. You'll need to remove the box several times to get the adjustment right. The more the brake pedal sticks out, the better. You have quite a bit of travel before the brakes start to grab.
-Go with braided lines. Without a booster, you need all the help you can get. Regular rubber lines have some flex with just takes away from your already limited braking power. No rubber lines.
-Find a way to secure your adjustment bars. Over time, the nuts will start to back out slightly with vibrations and the pedals will get closer to the floor. Not good.
-I remotely mounted the 3 reservoirs in the engine bay and ran the rubber lines to the masters through the hole that the booster left. With this, you're going to want to find a way to fill the rest of that hole. Hot air blows past the header and warms your feet and legs very nicely.
-If you're using a cable throttle you have to cut the pedal linkage a bit. Garagistic gives you instructions for that. It's not hard.
-I'd recommend using large brakes and/or aggressive pads with this setup. I'm running stock brakes at the moment and emergency stops get dicey.
I'm sure there are many other ways that probably work, but this is what I'm running and this is what I've found.


Comment